a chippy dresser and a clean floor.

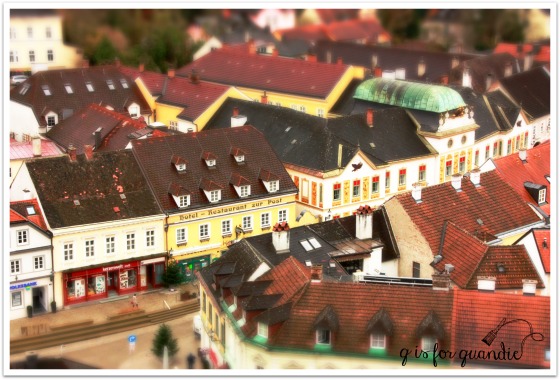
I mentioned a little bit ago that it has been nice enough to be back out in the photo cottage already this year.  When I said that, what I meant specifically was that I could be out there taking photos without freezing my face off.  But it wasn’t quite warm enough that I wanted to be out there scrubbing away the winter grime.  Until last week (before we had another cold snap) when I came home from work one evening and it was 62 degrees outside.  So I decided there was no time like the present to head out there with my bucket of water and my scrub brush.  And now I have a fresh clean floor.  I was so happy with it, that I tried to include a bunch of floor space in today’s photos.

chippy dresser 2

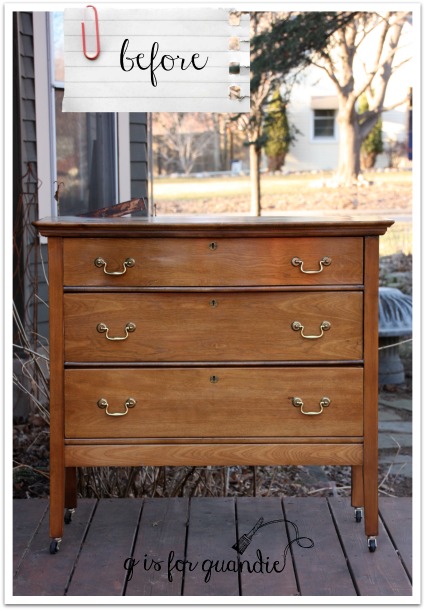
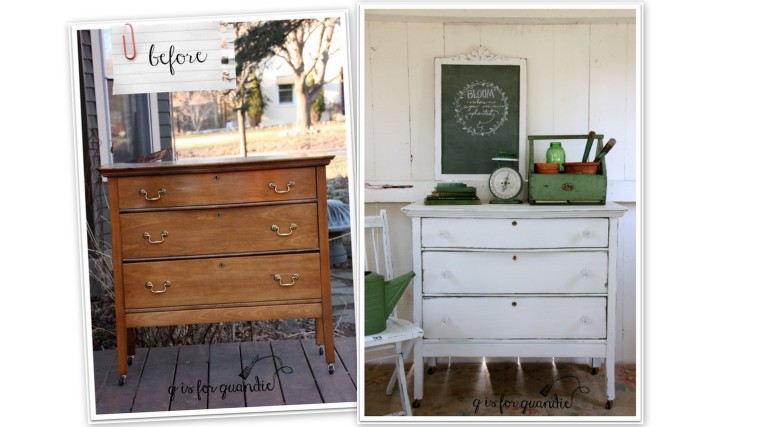
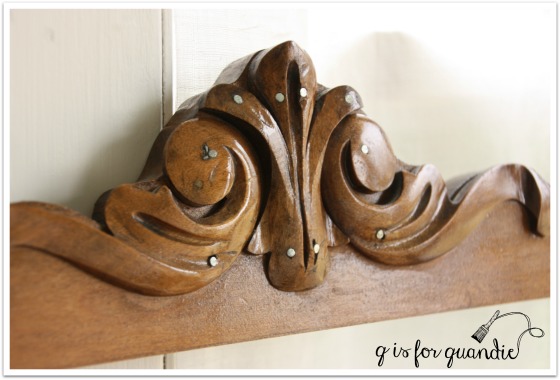
All this talk of a clean floor is meant to distract you from noticing that I don’t have a ‘before’ photo of this dresser.

Drat!

I thought I had taken one, but if I did it is lost in the sea of 100’s of photos that I take every week (thus the urge to organize my photos that I mentioned yesterday).  This dresser has been patiently awaiting its turn to be made over, so it is possible that I took one some time ago and I just can’t find it!

Oh well, moving on …

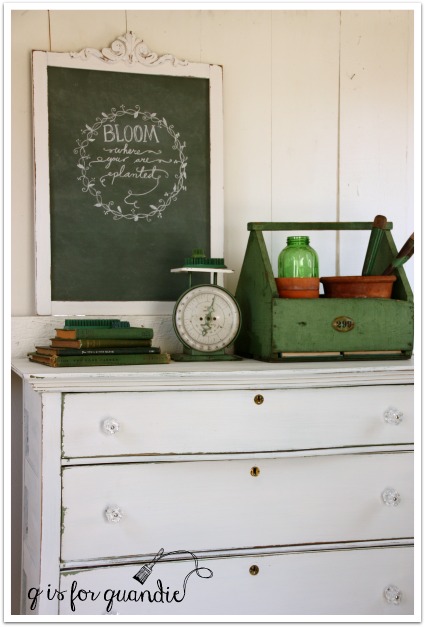
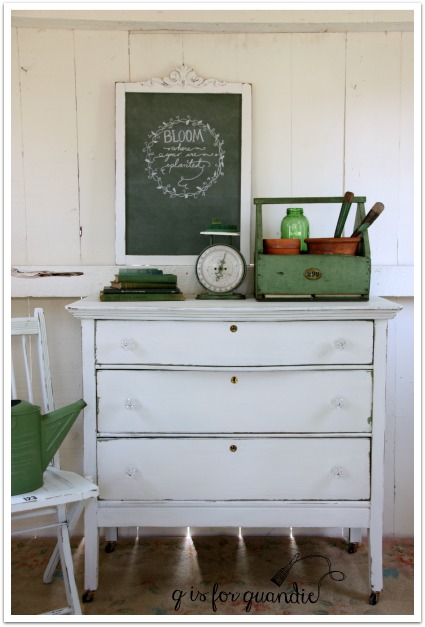
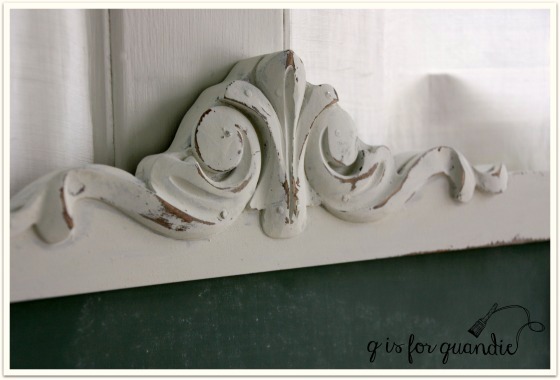
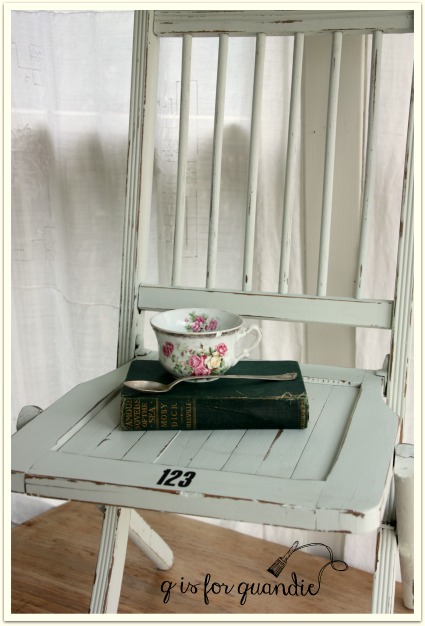
I went with MMS milk paint on this one because I had a feeling it would get chippy, and indeed it did.

robins egg close up

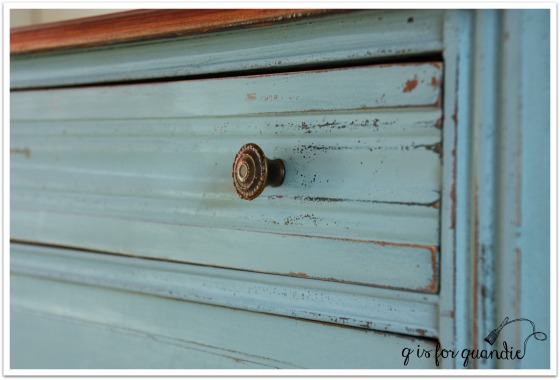
I mixed some French Enamel and some Lucketts Green together to make this color.  I’ll be honest, I was expecting a much lighter color based on seeing what was said to be this same combination on a piece on pinterest.  This is a good reminder to everyone that colors in photos often don’t translate to how they look in real life.

This photos of this dresser are a really good example of that.  I think the dresser looks a bit more blue in the photos than it really is.  If you are proficient in MMS milk paint colors, this color is a bit lighter and a tad warmer than Kitchen Scale.

chippy dresser 3

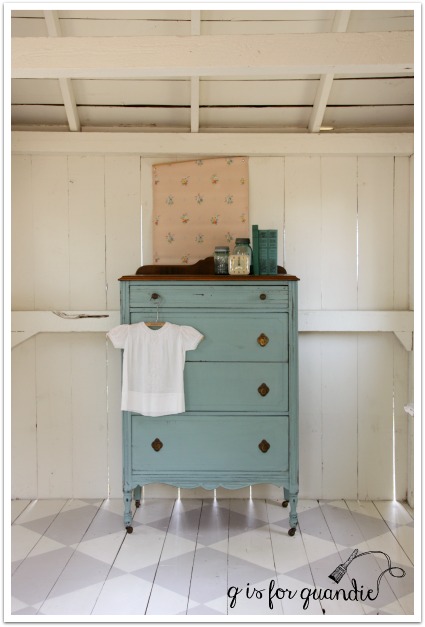
This dresser has the prettiest drawer pulls on the lower three drawers.

chippy closeup 2

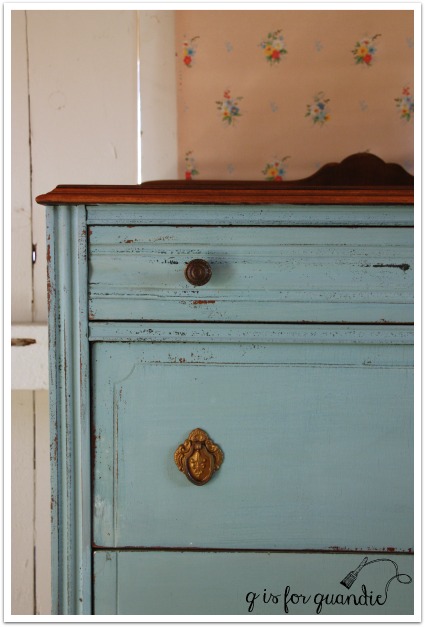
By the way, I did strip the top and then wax it with Cece Caldwell’s Aging Cream.

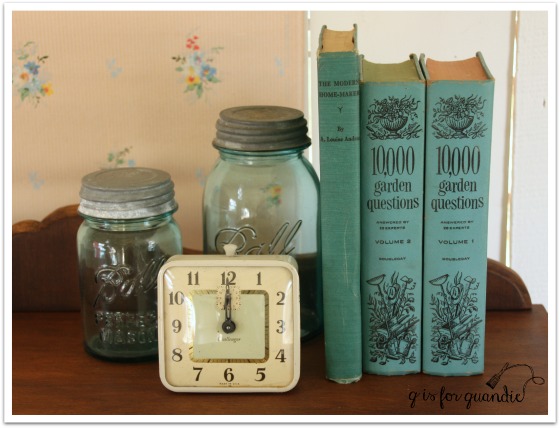
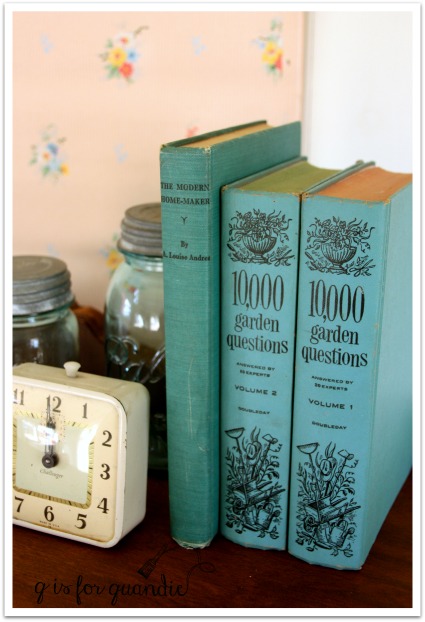
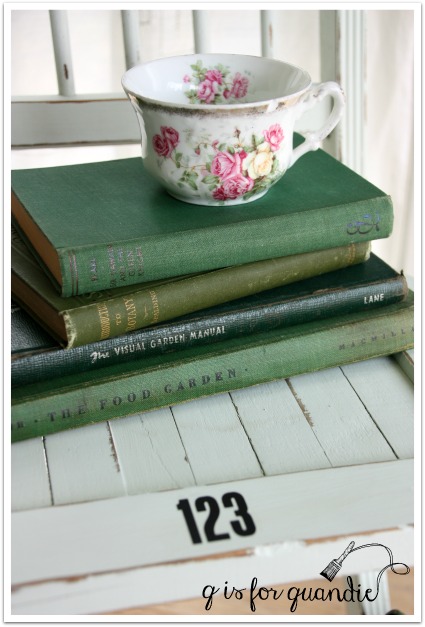
My vintage gardening books were the perfect color to use for staging.

chippy dresser staging 1

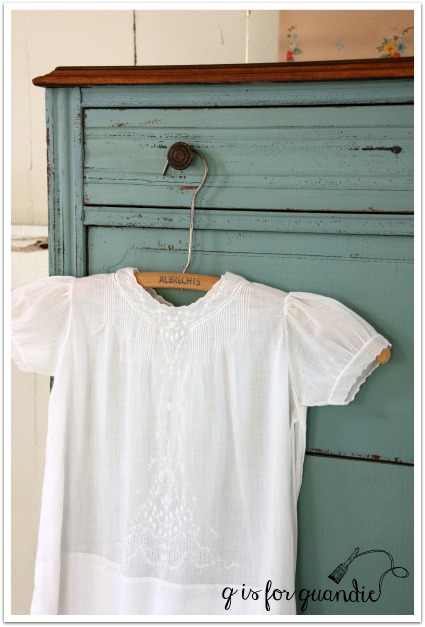
And I threw in one of those sweet hand sewn baby dresses that I keep just for staging furniture.

chippy dresser corner

This lovely dresser is for sale.  If interested, please feel free to leave a comment requesting the details or email me at qisforquandie@gmail.com.

garden questions


throwback thursday no. 1

I was in the process of doing some photo organization last weekend, and I decided that it might be fun to share some things with you guys from my pre-blogging days.  I started q is for quandie in November 2013, but I took lots of photos before that.  Lots.  So, I bring you … throwback thursdays!  Yeah, I totally stole that from Facebook, but hey, I can do it too, right?

  Our first throwback Thursday features the photo cottage before it became the photo cottage.  Oddly enough, I didn’t share much in the way of ‘before’ photos when I made it over, just one quick photo of the emptied out shell.

summer house before

Yikes!

So let’s back up just a tad and take a look at the place before it was emptied out.

potting shed sofa

These photos were taken in 2010, way before I ever thought I’d have a blog.  So yes, I had a ‘she-shed’ long before anyone even coined that term.  Just for the record, I kind of get the heebie jeebies over that name.  I don’t know why, there is just something about it that is like fingernails on a chalkboard for me, how about you?

I called it the ‘summer house’ (a much prettier name than ‘she-shed’), and it was very girly.

potting shed dishes

The walls were pink.  I remember the color was called Paris Pink, can it get any more perfect than that?  And I had scads of floral china everywhere.

potting shed window

Much of this china was later used for my ‘words on plates’ projects.

I had an awesome chandelier hanging from the ceiling, but it was just for looks.  I don’t actually have any power out there.  It’s a little hard to see in this photo, but I took photo copies of old black and white pictures and wrapped them around the ‘candle tubes’ which looked really cool.

potting shed chandelier

I still have the chandelier in storage.  I’m hoping that I’ll come up with the perfect spot for it again soon.

I had a green wicker chair in the corner next to a little metal garden table with a glass top.

potting shed green chair

See that wall sconce above the chair?  Does anyone remember those mirrored sconces?  I don’t know what the background story is on these, but they tend to be a dime a dozen at garage sales (were they from Home Interiors maybe?).  They are usually black.  I painted mine white and added the little green teacups to them.  After taking them down, I sold them along with the green chair at my Carriage House sale.

CH3 Summer 2014

I also recovered the cane back sofa and sold it.

cane sofa

This cupboard is the only piece that I kept in place out there.

potting shed cupboard

I’ve spruced it up just a little when I made over the cottage by adding some vintage wallpaper inside the drawers …

studio cabinet drawers 2

and repainting the inside …

studio cabinet empty

you can read more about that {here}.

As much as I enjoyed styling this little cottage back then, the sad reality was that I rarely used it.  I don’t have too much time to spend just relaxing, so when I do have time to just chill out I prefer to do so in maximum comfort.  None of the seating in my summer house was very comfortable.  It looked pretty, but didn’t function all that well.  So I really never just sat out there.  I have gotten a ton more use out of the photo cottage.  Two years after making that decision, I know it was the right one!

photo cottage exterior

So photo cottage it remains!

I hope you enjoyed throwback Thursday.  I’ve got lots of old photos to share, so next Thursday we’ll take another trip down memory lane, I hope you’ll check back.


nnk’s new kitchen.

nnk kitchen title

For those of you who don’t know the story, nnK is my neighbor straight across the street (and also my number one Craigslist spotter).  For a point of reference, you can see her bright blue front door in quite a few of my summertime outdoor furniture shoots …

In a Pickle farmhouse table

I call her nnK because when she moved in I already had a neighbor next door named Karen, so to tell them apart nnK became ‘new neighbor Karen’, then shortened to nnK.  Even though the other Karen passed away over five years ago, nnK is still nnK.

nnK’s house is your basic 50’s ranch.  It’s perfect for her because she loves mid-century modern.  When she moved in the kitchen was pretty outdated and drab though.  She made some cosmetic changes to tide her over until she could really remodel it.  A couple of years ago she asked me to take some photos of the kitchen that she could submit to one of those kitchen make-over shows.  She had her fingers crossed, but she was not chosen for the show.  But luckily I hung onto the photos, so now I can share some good ‘before’ shots with you.

nnk kitchen before 1

It was a classic 50’s kitchen.  You gotta love those cabinets with the big chrome knobs.  nnK added the black & white vinyl floor and the orange walls.  She also painted the cabinets white, they were originally that medium toned maple colored stain that you see on the window trim.  The window in the photo below looks out onto the breezeway that connects the house to the garage.

nnk kitchen before 2

That fridge was super tiny, but she couldn’t swap it out for a larger one without ripping out cabinets, so it stayed.

The dishwasher that is sitting next to the stove had to be wheeled over to the sink and connected up to the faucet to run.

nnk kitchen before 3

Now some people (like me) could get along just fine with an itty bitty kitchen like this.  My kitchen is just a glorified spot for storing dishes, keeping my lean cuisines frozen and making coffee.  But nnK actually likes to cook.  And when she cooks, she makes enough food for an army so she likes to share.  I gained 20 lbs in the first year after she moved in!

Honestly, I can’t believe that she lived with that kitchen as long as she did.  But finally last fall she bit the bullet and remodeled.  And this wasn’t any simple little remodel, this was a bump out the wall 6′ sort of remodel.

Basically everything from that wall this side of the fridge in this next photo is new space.

nnk kitchen 2

It’s truly amazing what 6′ can get you, isn’t it?

The oven is actually still in approximately the same spot where the old oven was … only now there are two ovens and a bank of cabinets.  One more thing about this next photo, see that round thing that looks like an over sized canned light fixture in the ceiling (just in front of the ovens)?   Yeah, that’s not a light fixture.  It’s a sky light that somehow magically amplifies the natural light coming in (I think it’s done with mirrors and a little pixie dust).    She has two of them, so even though this room faces north it is flooded with light during the day.  There are no ‘lights’ turned on in any of these photos.

nnk kitchen oven wall

The window into the breezeway has been replaced by two under-cabinet windows (only one pictured).

nnk kitchen breezeway window

Just beyond this row of cabinets is a new door out to the deck, which will be super handy for grilling.

nnk kitchen door

Gone is the dinky fridge, and just check out the wall mounted TV …

nnk kitchen fridge wall

No makeover in our ‘hood would be complete without something from Ken!  In this case, it’s that cabinet under the TV.  nnK wanted something that would just fit into that narrow spot so she and Ken came up with plans for a wine rack.  It wasn’t deep enough for the wine to face forward, so it goes in from the side.

nnk kitchen kens cabinet

Clever, right?  Ken was very proud of this plan!

My sister is positively drooling over this kitchen.  She would love to have one this size.

nnk kitchen 10

I’m still waiting for my next invite to dinner.  nnK seems to have just enough space at the counter to include me and Mr. Q now.

nnk kitchen 11

nnk kitchen 12

So what do you think?  Are you the kind of cook who would love to have this much space?  Do you have enough pots and pans to fill up all of those cupboards?

Or are you more like me?  You just need a microwave and a decent sized freezer?

a quick folding chair makeover.

Last year I purchased these painted folding chairs at one of my favorite neighborhood garage sales, Bryn Mawr.

bryn mawr chairs (2)

They are fairly small, not the typical size of today’s folding chairs.  I liked the colors, but I didn’t especially like the way the vinyl seats were painted.  I knew from experience how to re-cover these though, so I thought I’d share that process with you today.

blue metal chair before

Here’s a close up of the seat.

blue metal chair seat before

Since normally I’m a fan of crackly and chippy paint treatments, I can’t really explain why this seat wasn’t working for me.  It was a little too far gone maybe.

If you flip one of these chairs over, you’ll see that the seat ‘cushions’ (I put that in quotes because these are hardly cushion-y, but what else should I call them?) are held in place by little metal tabs that are folded over.

blue chair tabs

It’s easy to just pry those upwards using a screwdriver and then take the seat right off.

blue chair without seat

I had some pretty vintage tea towels on hand that I also purchased at a garage sale to use recovering these chairs.  So I pulled one out and cut it to fit.

blue chair supplies

Normally I would pull out a staple gun for recovering a chair seat, but in this case the seat was made out of cardboard!  So instead I pulled out some tape and I just used my gift wrapping skills to cover the seat.

blue chair seat tape

By the way, when you have a seat cushion that is curved in the front and only goes on one way, try to pay attention if your fabric also has a ‘top’ and a ‘bottom’.  I was reminded of that when I put the cushion back in place.

blue chair backwards

Ooops.  That doesn’t look right!

I took it all apart and switched it around.

blue chair seat close up

Ahhhh, better.

blue chair final

What do you think?  I haven’t done the pair of green chairs yet.  I’m debating, will they be more marketable with a paint job?  Do I leave them green and recover the seats with vintage fabric?  Or do I remove the seats entirely and turn them into chalkboards, like these …

chalkboard pair

What would you do if you were me?

miniature budapest.

Today I thought I would share with you a really special project I’ve been working on lately, a 1″ scale model of Budapest’s Castle Hill!

mini budapest street

Bwa ha ha ha … April Fools!  Did I have you going for maybe just a split second?

Of course that’s actually the real Budapest, but I’ve used a new ‘effect’ available on PicMonkey to make it look miniature.

I’ve mentioned before that I do most of my photo editing on PicMonkey (I am not affiliated with them in any way, and this post is not sponsored by them).  They have a free version, but I pay the extra $33 per year for the Royale version which gives me access to extra features such as this one.  It’s worth every. single. penny.

They frequently come out with new stuff.  Either new fonts, such as the Lato (budapest in) and Coffeebreak (miniature) that I used on this photo …

mini budapest

… or new effects that are just plain fun to play around with.

Recently they added the ‘miniature’ effect.  Maybe you’ve seen this effect on TV commercials, where they make something normal size look like a miniature scene.  Well, you know me and my uncontrollable attraction to anything miniature!  So I pulled up some of the photos from my trip to Budapest in 2014 and started experimenting.  I didn’t even save my first couple of attempts and I was ready to chuck it entirely, but then I read some of the tips (yes, when all else fails, read the instructions);  use a photo with good depth (one that has a foreground and background) and is taken from slightly above the scene.  As it turns out, I didn’t have very many photos that perfectly fit that description.  This train photo turned out pretty cool, but doesn’t quite look miniature to me.  If I had taken this from a little higher vantage point, it would have been awesome.

mini budapest train

But this one is pretty cool, right?  Those look like toy cars on a bridge.

mini budapest bridge

This is so much fun!

mini budapest at dusk

Here is Spitz in miniature …

mini spitz

How about mini Passau?

mini Passau

And mini Melk …

mini melk

Am I the only one who finds these highly entertaining?

If you find yourself with a little extra time on your hands this weekend, maybe you can make some mini-photos of your own!

a garden chair.

The fun continues with the freebies from my friend Terri’s uncle.  Today we have a sweet little garden chair.

garden chair 1

It didn’t start out as a sweet little garden chair though.

garden chair before

This poor thing was a little rough for the wear.  I suspect it was used in the garage as a workshop chair.  It had lots of oily looking stains.

garden chair seat before

Take a look at how dark those two front legs are.  They appeared to be almost saturated with some sort of oil.  Or maybe it’s just really greasy dirt.  I scrubbed the chair good with some TSP substitute (which is a de-greaser), and then I decided to just go for it.  Either I’d paint it and the paint would just all bubble off, or it would stick.  I was willing to take a chance on it sticking.  After all, the chair was a freebie.  It likely would have ended up in the trash if I didn’t take it.

I pulled out the second sample color of Shabby Chic paint I received from Bungalow 47, Green Fields, which is a lovely pale, pale green.  I painted it on straight from the can without watering it down.  I somehow felt like I’d need a good thick coat of paint to cover this thing.

I was super impressed when two coats did the trick.

garden chair close up

Even on those legs!

garden chair leg

I was worried that those greasy stains would bleed through the paint, but I only had trouble with that in one spot on the seat.  If you were being very particular about your finish, this wouldn’t be good enough (in which case I would have used the Shabby Chic Clear Primer first) …

garden chair stain

But since I was going for a distressed look on this chair, I decided it was OK to leave that as is.  I specifically choose not to use the Shabby Chic Clear Coat this time around because I didn’t want to draw any more of those stains through the paint.  Instead I waxed this with Miss Mustard Seed furniture wax.

garden chair distressed

I could have gone without a top coat of any kind, but when I am distressing heavily like this I prefer to use a wax.  The wax darkens up those bare wood edges and makes them look more ‘believable’, like they have worn away over time, not just been freshly sanded.

Did you notice that I applied some rub-on numbers to my chair?

garden chair books

I like the touch of whimsy that they add.

garden chair full

In the end, this chair is rather wobbly and most people would feel a bit insecure sitting on it.  It will have to be more for looks rather than function.  But I think it would be darling as a bedside perch for books.  Or use it in your potting shed to hold a stack of clay pots.  If you are local, this chair went to Reclaiming Beautiful last week!

french provincial.

I think there are three categories of blog readers.  First there are the ones who just look at the pictures, but don’t really read anything I write (come on, I know they are out there … but they probably aren’t reading this, so I’m safe).  Then there are those that read my text and look at the photos, hopefully finding both at least slightly entertaining.  The last category are those that also read the comments.  I know Mr. Q reads comments, as does my sister.  How about you?  If you don’t, you are missing out!  I have quite a few regulars that leave insightful and often funny comments.  By the way, if you don’t know how to read the comments, you just click on the little ‘conversation bubble’ that is to the right of the title of the post.  Hopefully there is a number in the bubble, because that is the number of comments.

You also might get a little sneak peek into my future projects by reading the comments.  In this case, I’m referring to a comment left a while back on one of my posts from Skip.  Skip was asking whether or not I’d be interested in some free furniture, all I had to do was drive to St. Cloud to pick it up (about 1.5 hours from here).  She later sent me some photos by email, and I was in!

Although originally Skip had offered me a buffet/sideboard and dining room table pair, when I got to St. Cloud she had a couple more pieces that she was parting with and one of them was this sweet little french provincial end table.

fp before

Of course I threw this in the truck!  I love those graceful legs and the pretty hardware.  I knew that some paint would help bring out its charm.

fp 1

See?

I knew exactly what colors I wanted on this one.  I painted the body of the table in Fusion’s Inglenook and the drawer front in Fusion’s Limestone.  French provincial, Inglenook and gold hardware make a great combo.  I figured this out last year when I painted this lovely french provincial piece …

french nightstand

I love the way this little table turned out.

fp 5

I distressed the edges just a little, because that’s the way I like ’em.  Plus I always feel like if your piece is purposely distressed, than a couple more unintentional distress marks will just blend right in.

fp 3

This table has a leather insert in the top.  I just painted right over it.  I’ve done this before using milk paint

fp top

Once the paint is cured (in about 21 days), I expect this to be quite durable.

I spruced up the hardware by adding a little gold rub ‘n buff.  You could get this same effect using the Gold Leaf Goat Stick (I just couldn’t find mine, I think it rolled under the cupboard in my Q Branch and I still need to dig it out).

fp 4

This little table is the perfect spot for your cup of tea.

fp cup of tea

Do you need a spot for your tea?  Check out my ‘available for local sale’ tab to find out if this piece is still available.

fp table collage

bloom where you are planted.

bloom where you are

I’m ending out the week with another garden themed post.  I have tulips, scilla and crocuses coming up in my garden.  Just you never mind that we got a snow storm on Wednesday!  It’s mostly melted now, so it’s safe to start thinking about what annuals to plant this year, what perennials need to be divided, which garden beds need to be revamped, and what new things can I use to ‘decorate’ my gardens.

Along those lines, I’ve dropped off a load of garden decor items at Reclaiming Beautiful, including a whole new crop of plates with words.

grow plate in box

I did a few of these last year and they were a big hit, so I’m doing more.  If you’d like more details about how I create these, check out {this post}.

 You can tuck these plates into a wooden crate with some vintage garden tools for display in your potting shed or on your porch.  Or you can add them to a planter, like this example.

grow plate

 I kept this plate in my boiler pot window box all summer and the vinyl letters held up just fine.  I’ll be putting it back out again this year.

I found some sweet plates at an antique shop in Buffalo, MN a week or so ago when we went out there to see my niece’s school play, The Wizard of Oz.  These were perfect for turning into garden plates.

bloom plate

But these plates that I purchased at the Macalester Groveland neighborhood garage sale last year are my absolute favorites.

grow close up

Isn’t the detail on these plates just gorgeous?  And I just love the colors.

grow plate detail

How about hanging this larger platter outside your front door?

welcome plate

I’ve also done up a couple of garden quotes on plates …

bloom plates 1

earth laughs

After I took these photos, I switched out the font I used for the “flowers” on that last plate.  I wasn’t loving how that one turned out.  I don’t have a photo to share though, I forgot to take another one before I sent them off to the shop.

In addition to the plates, I’ve also added ‘grow.’ to this old enamelware pot.  I used a large nail and a hammer to pound some holes into the bottom of it so that it has drainage.  You could plant some bright red geraniums right in the pot.  Or perhaps you’re more partial to petunias!

grow pot

And this enamelware plate is probably my favorite of all.  I really was thinking about keeping this one.

enamelware grow plate

There’s just something about the rustic, farmhouse style simplicity of this one that appeals to me.  I can picture it added to a planter made out of an old galvanized tub, can’t you?

Are you starting to think about spring gardening where you are?

the potting shed.

Back in the day long before it became the photo cottage, the summer house in my backyard was known as the potting shed.

photo cottage

I actually had it all decked out with a workbench for potting up plants.  In reality, it did not make a very efficient potting shed.  Potting plants is messy work, I’m better off doing it right outside where I can just brush the dirt away onto the lawn.  Still, it was fun to stage today’s piece out there as though it still were a potting shed.

the potting shed

If I didn’t get so much use out of the photo cottage as is, I’d be tempted to turn it back into a potting shed now.

green garden books
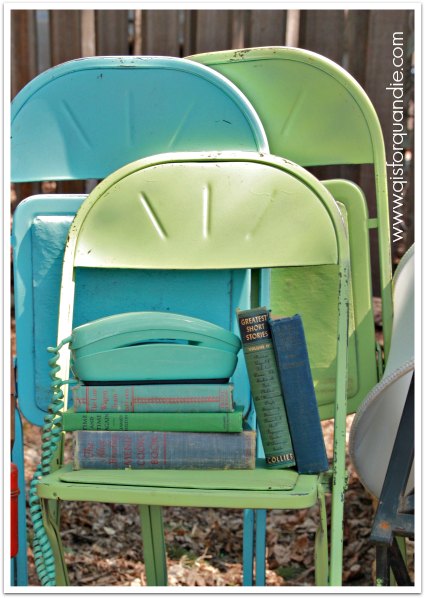
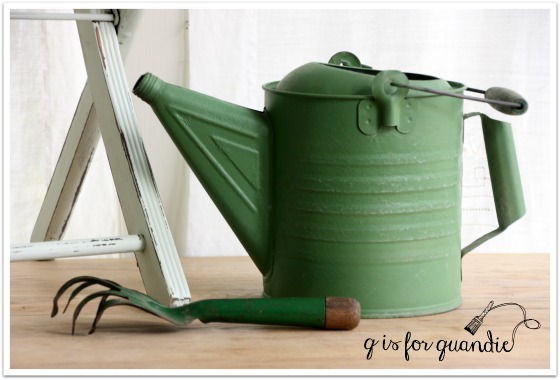
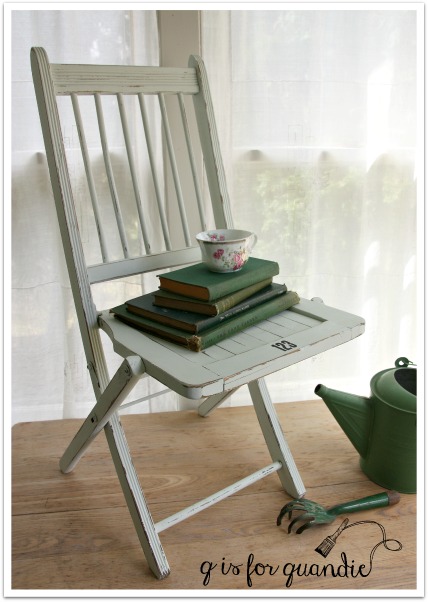
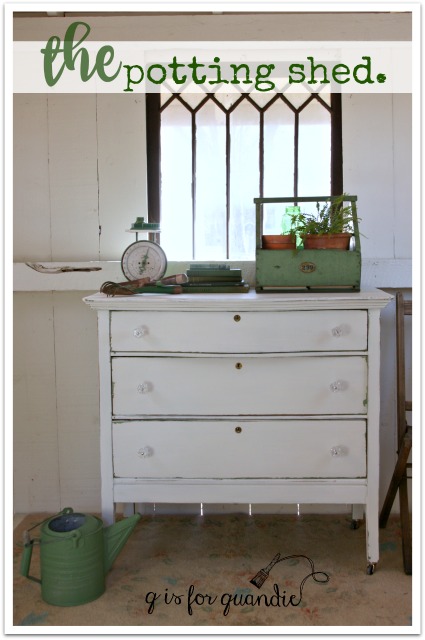
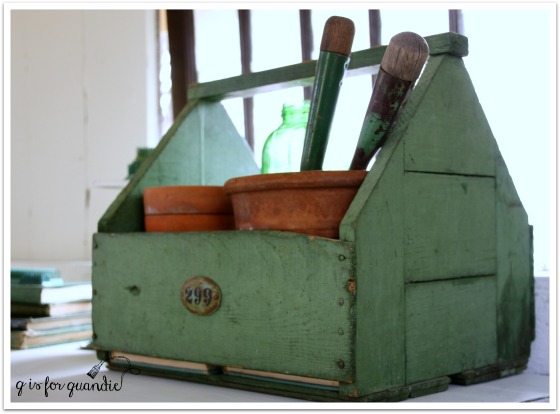
I have lots of fab garden-y props, all in lovely shades of green.

green scale
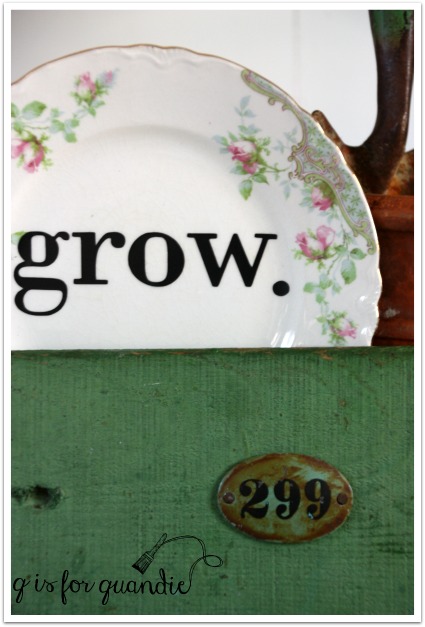
This green box usually resides in my pantry holding cleaning supplies.

green garden box 2

But the real reason for this post is the dresser.  This is another one that Mr. Q picked up for me via Craigslist.

porch swing before

This was an interesting piece.  The style says ‘old’, and inside it looks old, but there were some things that were throwing me off.  For one thing, the casters are new.  The drawers pulls are new too.  And the finish was very plastic-y and shiny, like new.  Someone worked really hard to take the “old” out of this piece, which I found to be a little bit sad.  Obviously it was up to me to put the ‘old’ back in!

I got off to a bit of a false start with this one.  I painted it with Little Billy Goat’s Porch Swing, which is a lovely green (in fact, a very similar green to the wood box with the handle in my photos).  But it did not work out.  I’m still doing some research into where I went wrong, and when I have some answers I’ll share that with you.  In the meantime, let’s just say I knew I had to go back to the drawing board.  I decided to paint over the green with white milk paint.  I purposely added some wax around the edges first so that some of the white would chip away to reveal the green.  This is the same mix of MMS whites that I used on the chalkboard frame from Monday, by the way.

potting shed dresser close up

Perfection!  In the end, maybe this was meant to be.  Just a hint of green rather than a sea of green.

potting shed dresser angle

As you may have noticed, I replaced the brass drawer pulls with some glass knobs.  These are the 1 1/2″ glass knobs from D Lawless Hardware.  They are the larger size glass knobs, and I think the scale of these was just right for this piece.

potting shed dresser 2

potting shed dresser 3

I took about six hundred photos of this thing.  Some with the window …

potting shed dresser 4

Some with my false wall in place.  If you don’t know about my false wall, you can read about that {here}.

potting shed dresser 1

I think this dresser would be perfect in a farmhouse style kitchen, or maybe on a covered porch.  Or perhaps beside the bed in place of a nightstand.

potting shed dresser collage

This one is for sale (local sales only, no shipping available), so if you’re interested in more details feel free to leave me a comment or shoot me an email at qisforquandie@gmail.com.

going green.

First things first, congrats to Cindy Brown who won the pair of Goat Sticks from last week’s giveaway.  I will be getting those out in the mail to her this week, but now, on with today’s post.

One thing that I have definitely learned in my 52 years of living is that tastes change.  Or at least mine do.  I hope yours do too.  I’ve written about this before, like back in October when I painted a chair gold after having said a year earlier that I didn’t think I’d ever like gold.

I’ll be so sure that I am never going like something, and then it grows on me and the next thing I know, I love it.

Such is the case with green chalkboards.

If you’ve read my blog for a while, then you know I love a good chalkboard.

chalkboard 2

Some people are starting to say that chalkboards are so over, but not me.

wall chair

Not only do I have a total of five at my house, but I often switch out mirrors for chalkboards and sell them to others who obviously still love chalkboards too.

Sometimes I make chalkboards out of foot boards …

chalkboard 1

Or out of doors …

q branch desk close

Or out of chairs …

q branch chalkboard chair

I like little chalkboards too …

plant a garden slate

But have you noticed something that all of my chalkboards have in common?  They are all black.  In fact, I’ve always thought green chalkboards just didn’t cut the mustard (pardon the pun that will be apparent shortly).  I even painted over a green one with black once.

Then a year or so ago I shared my friend Meggan’s house with you all, and she had a green chalkboard that looked pretty fab.

Meggan chalkboard

And that started me thinking that maybe green wasn’t so bad after all.

Recently Miss Mustard Seed posted the most amazing chalkboard.  Did you see it?  If not, check it out {here}.  And it’s green!  Apparently a green chalkboard does cut the mustard 😉

Her chalkboard is painted in MMS milk paint in a combination of Boxwood (green) and Artissimo (dark blue).  Wowza!  I love it!  Miss Mustard actually copied the recipe from Allison at The Golden Sycamore.  It’s 2 parts Artissimo to 3 parts Boxwood.  I just happened to have those colors on hand, so I knew I had to try this myself.

I started with a mirror that I had removed from a dresser.  The harp that held it in place had come apart, but even if it was still intact I probably wouldn’t have left it on the dresser.

garden chalkboard frame before

 I had taken the mirror glass out of the frame already, so all I needed to do was ask Ken to cut a piece of hardboard to fit the opening.

  Next I painted the mirror frame with MMS milk paint in a blend of whites (Linen, Grain Sack & Ironstone).  But wait, before we get that far, take a look a this …

green chalkboard frame before detail

Sometimes it’s just funny what people will do to ‘repair’ something.  Ken and I shake our heads over this sort of thing all the time.  Ken is always flabbergasted when people try to repair something with nails instead of glue.  I have to say that this example really takes the cake.

Anyway, I painted the frame in my mix of Mustard Seed whites (painting right over those nail heads).  I did not use bonding agent (would have been happy to get some chipping, but really didn’t) and I didn’t add a top coat of any kind.

green chalkboard detail

I also mixed up the ‘recipe’ for the chalkboard green and painted my hardboard.  I did three coats for extra good coverage.  Once dry, I sanded lightly to make it smooth and then I seasoned the chalk board by rubbing chalk all over it and then wiping it away.  And voila, I have a chalkboard!

green chalkboard

I used some of my new chalkboard skills to add a little spring-like message.

green chalkboard final

I’ve been in a green and garden-y mood lately, maybe since yesterday was the official first day of spring.

So stay tuned this week because there will be a few more garden themed goodies coming your way!