
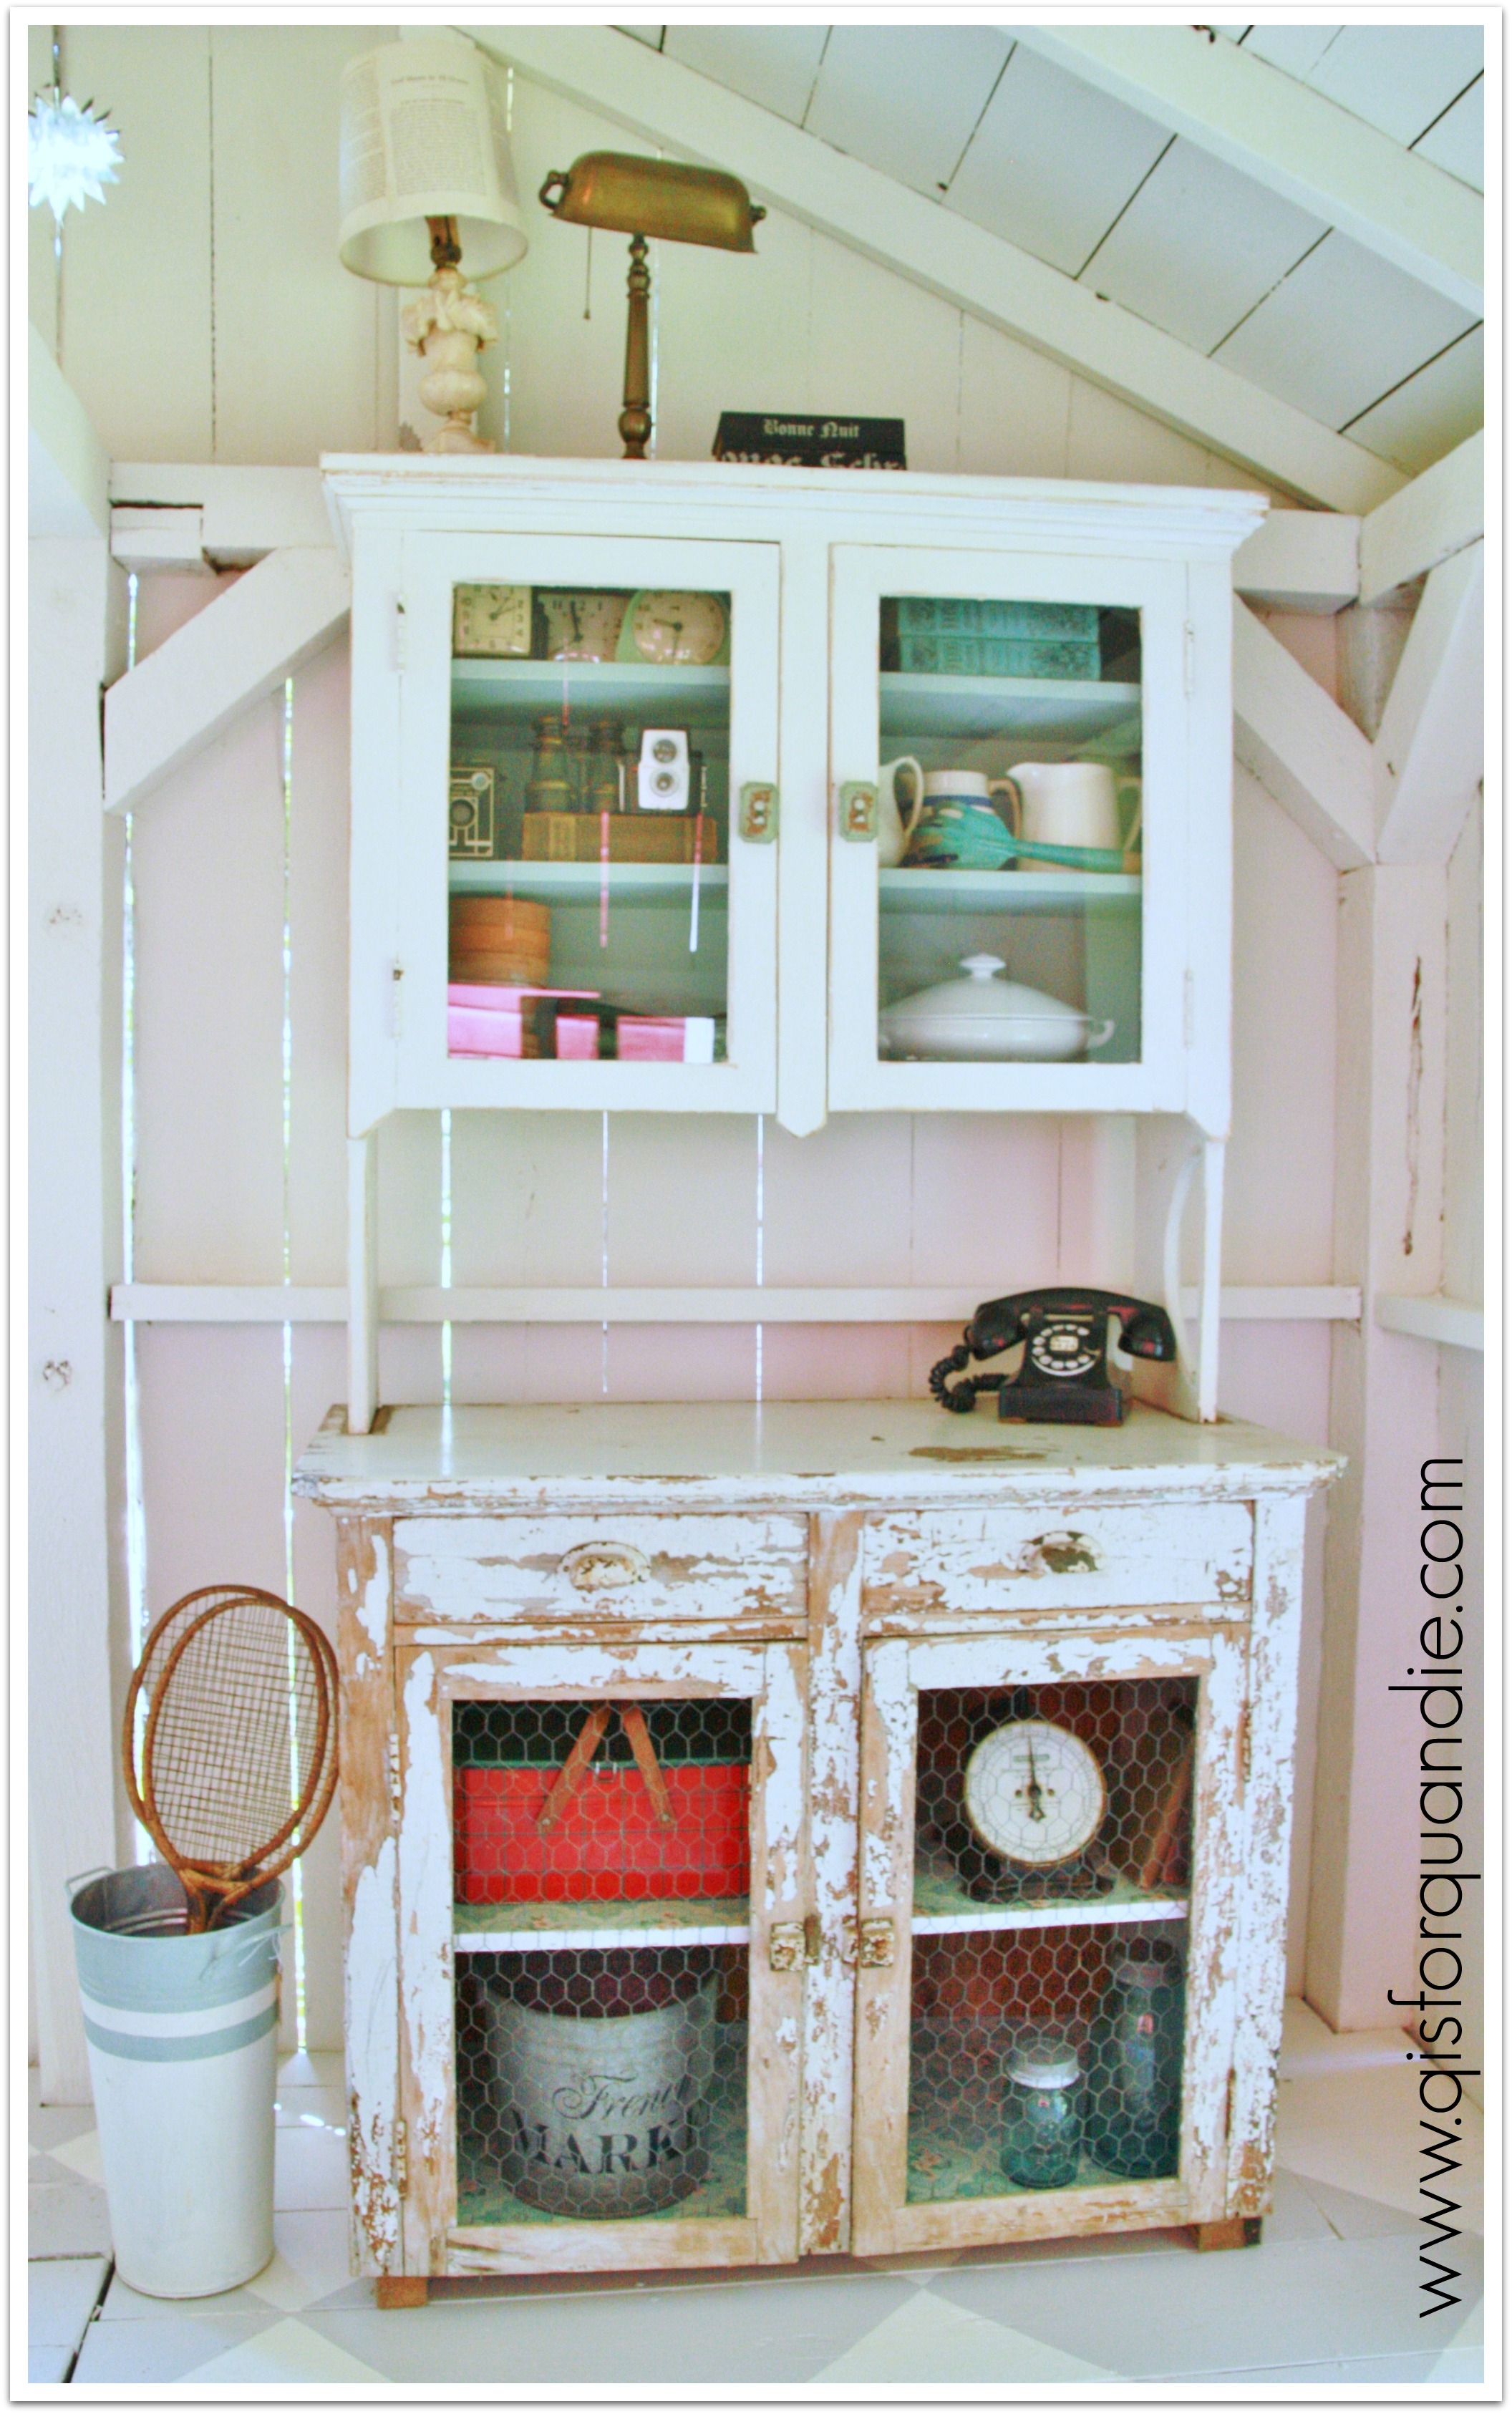
Remember the old cabinet that was in the summerhouse before I began transforming it into a photo studio?
 Well, there is a bit of history behind this cupboard. When we moved into our house, the bottom half of this was in the Carriage House and it was pretty filthy and beat up. Not that I mind beat up, but I can do without filthy.
The top half of it was in the kitchen. That’s why the top half is so freshly painted. It fit perfectly on top of the radiator, and the radiator itself was enclosed by a faux cabinet bottom that made it look somewhat like a piece of furniture. Except the bottom part was poorly constructed, and it had terrible doors with inserts that were meant to let the heat flow out. And a horrible formica top.
So, when we revamped the kitchen, we decided to remove it all and just add a small shelf to the top of the radiator, see …
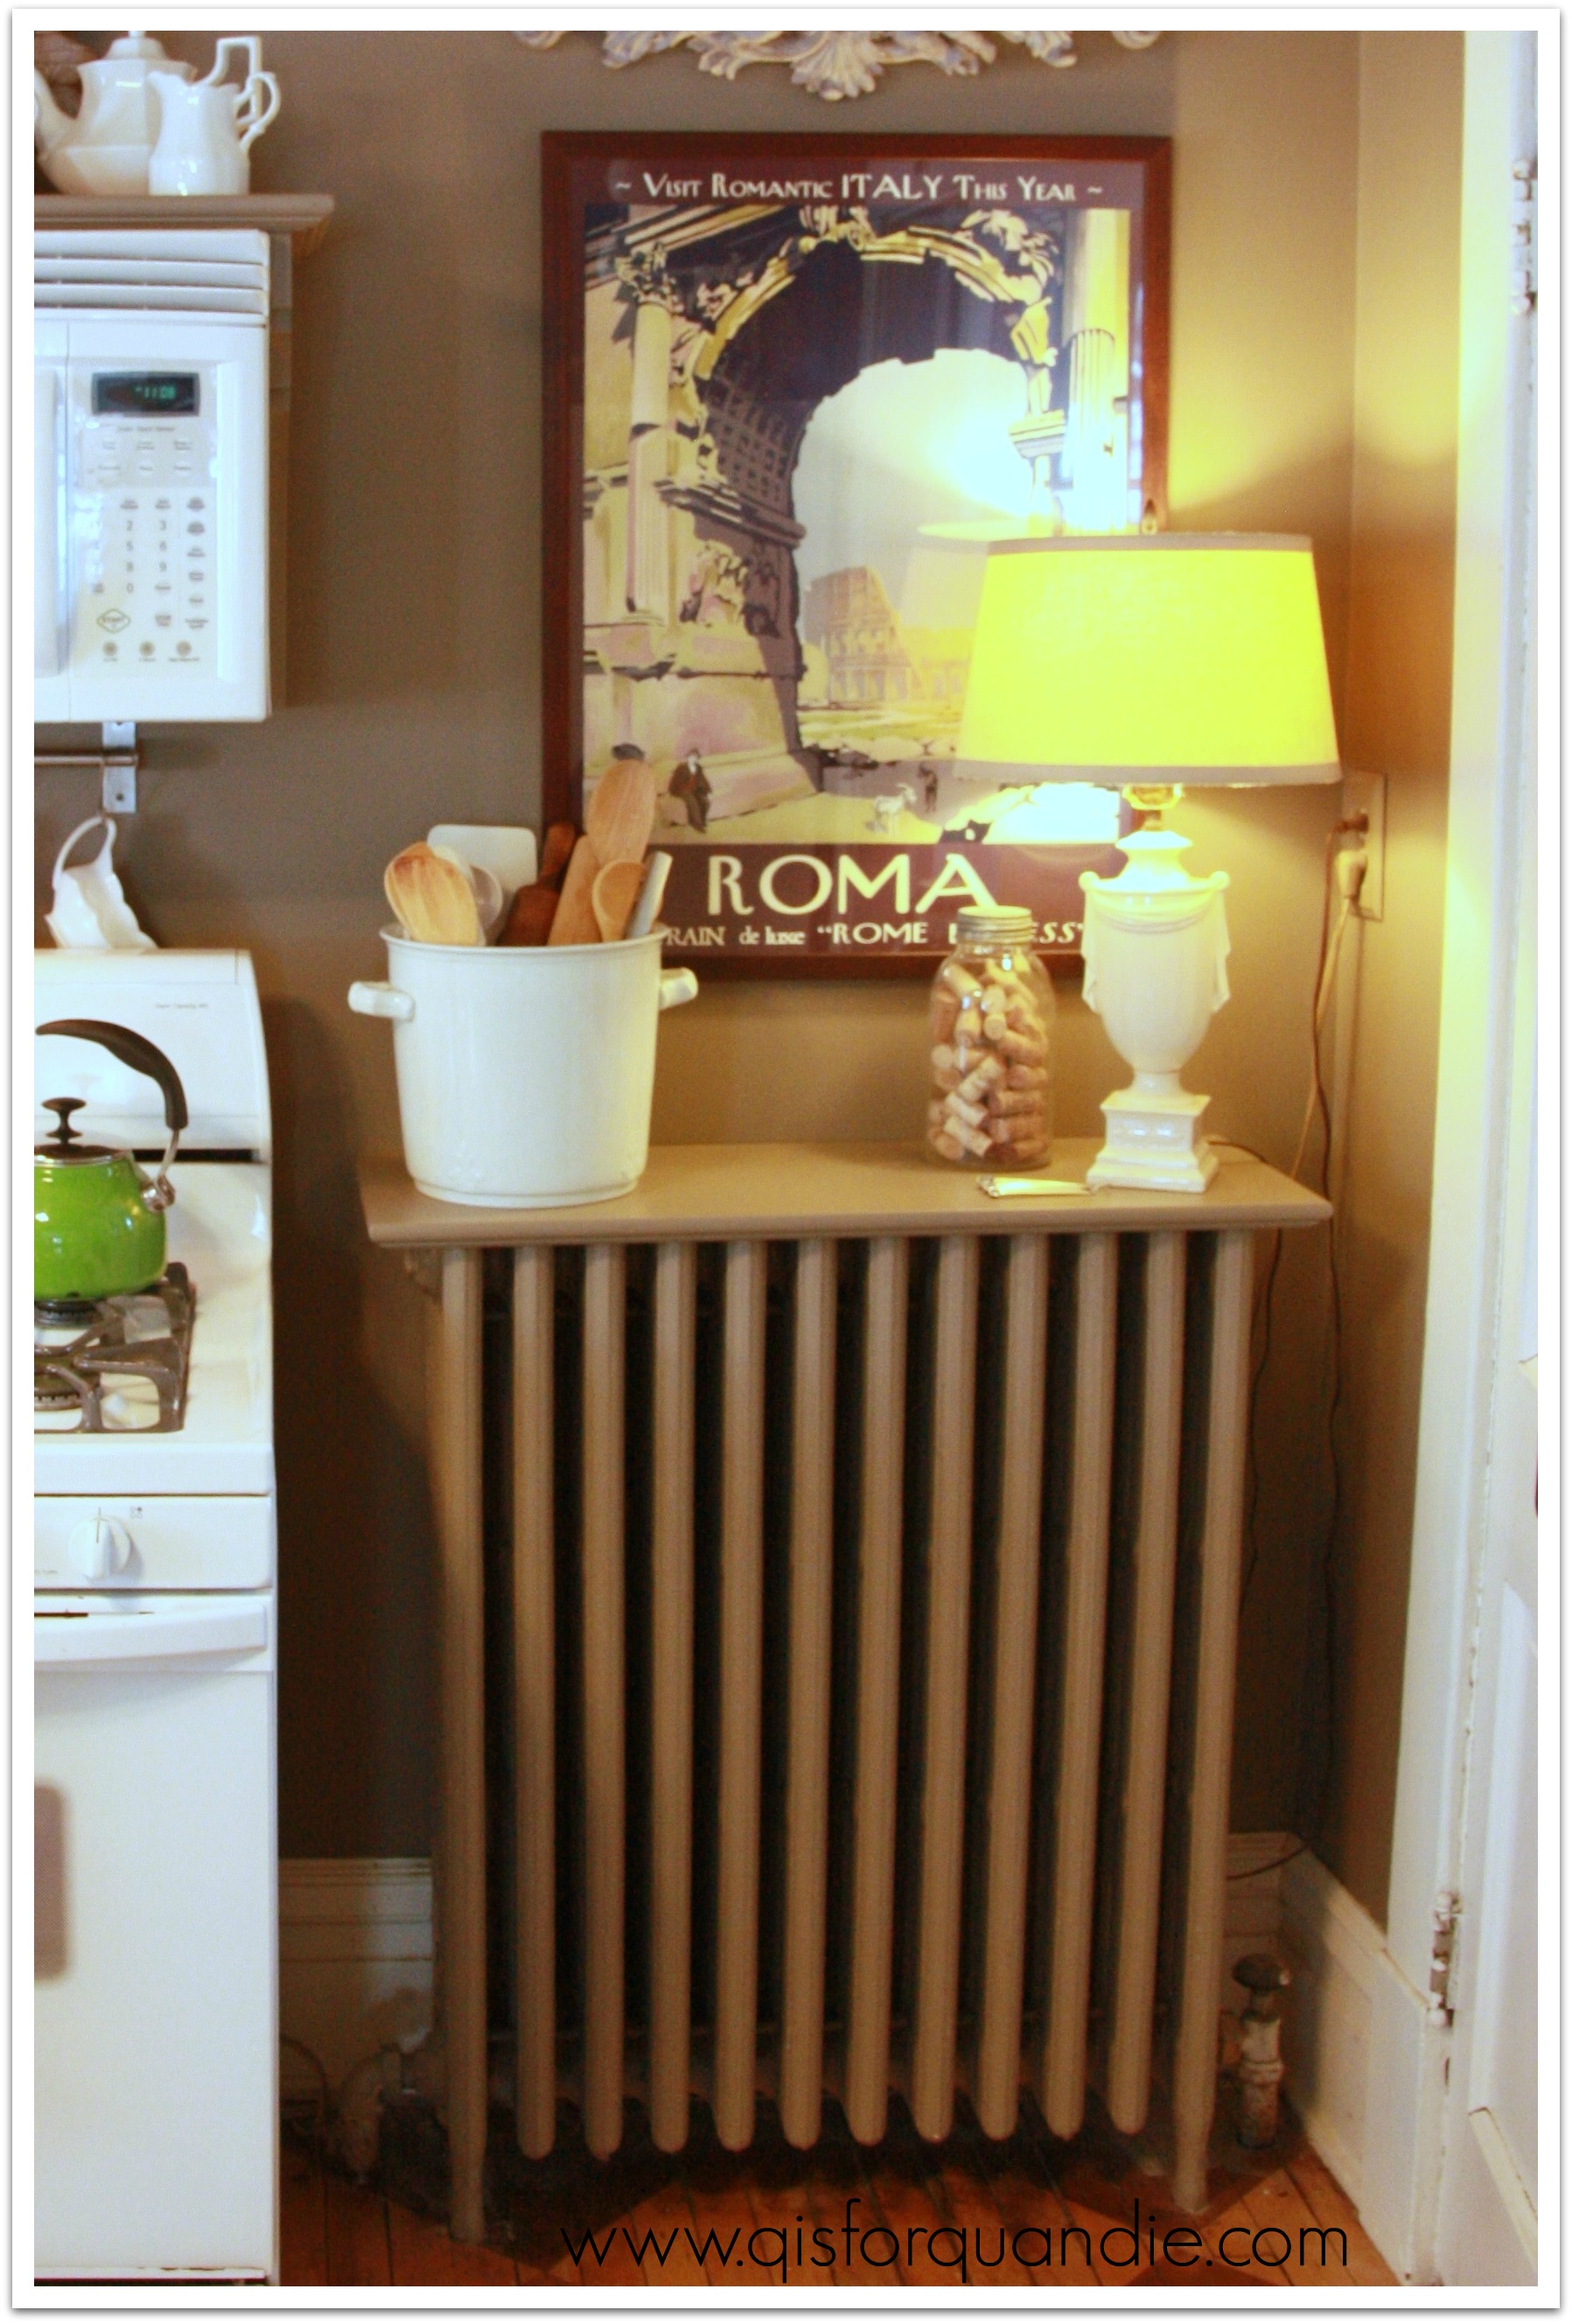 Much better.
Anyway, when we removed the upper cabinet, it occurred to me that maybe it would fit on the shabby cabinet that was out in the Carriage House. Not only did it fit, but it appeared to be original to the piece. There are grooves in the lower cabinet that perfectly match the upper cabinet. I was bringing them back together again!
I moved it into the summer house and it has been there ever since.
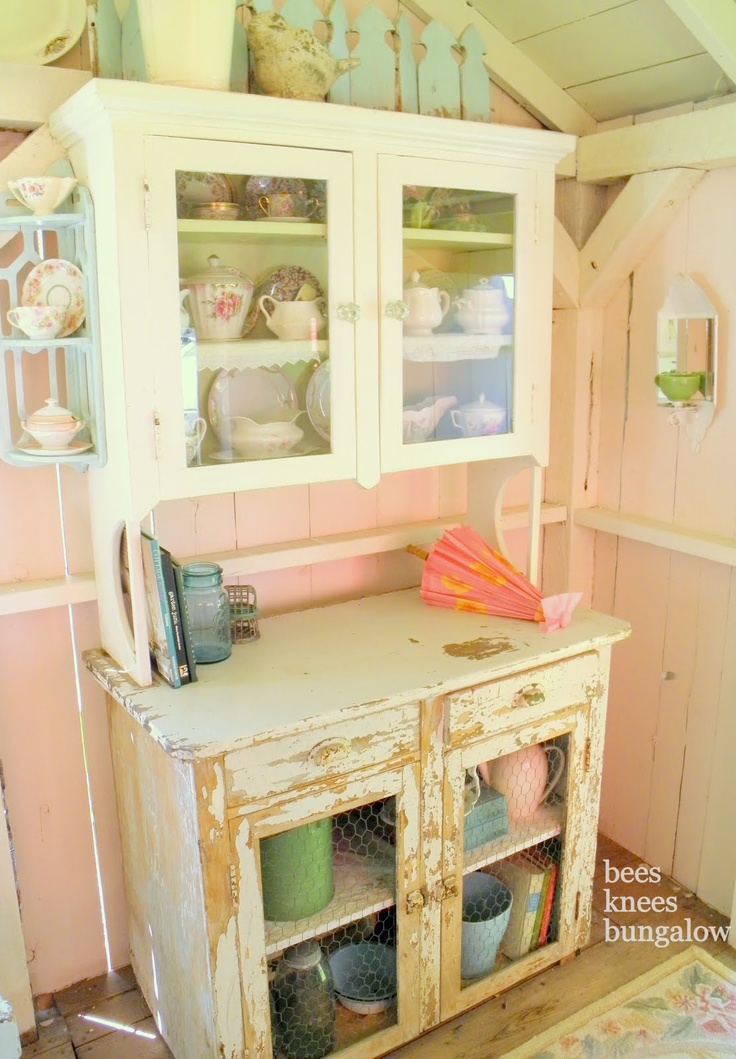
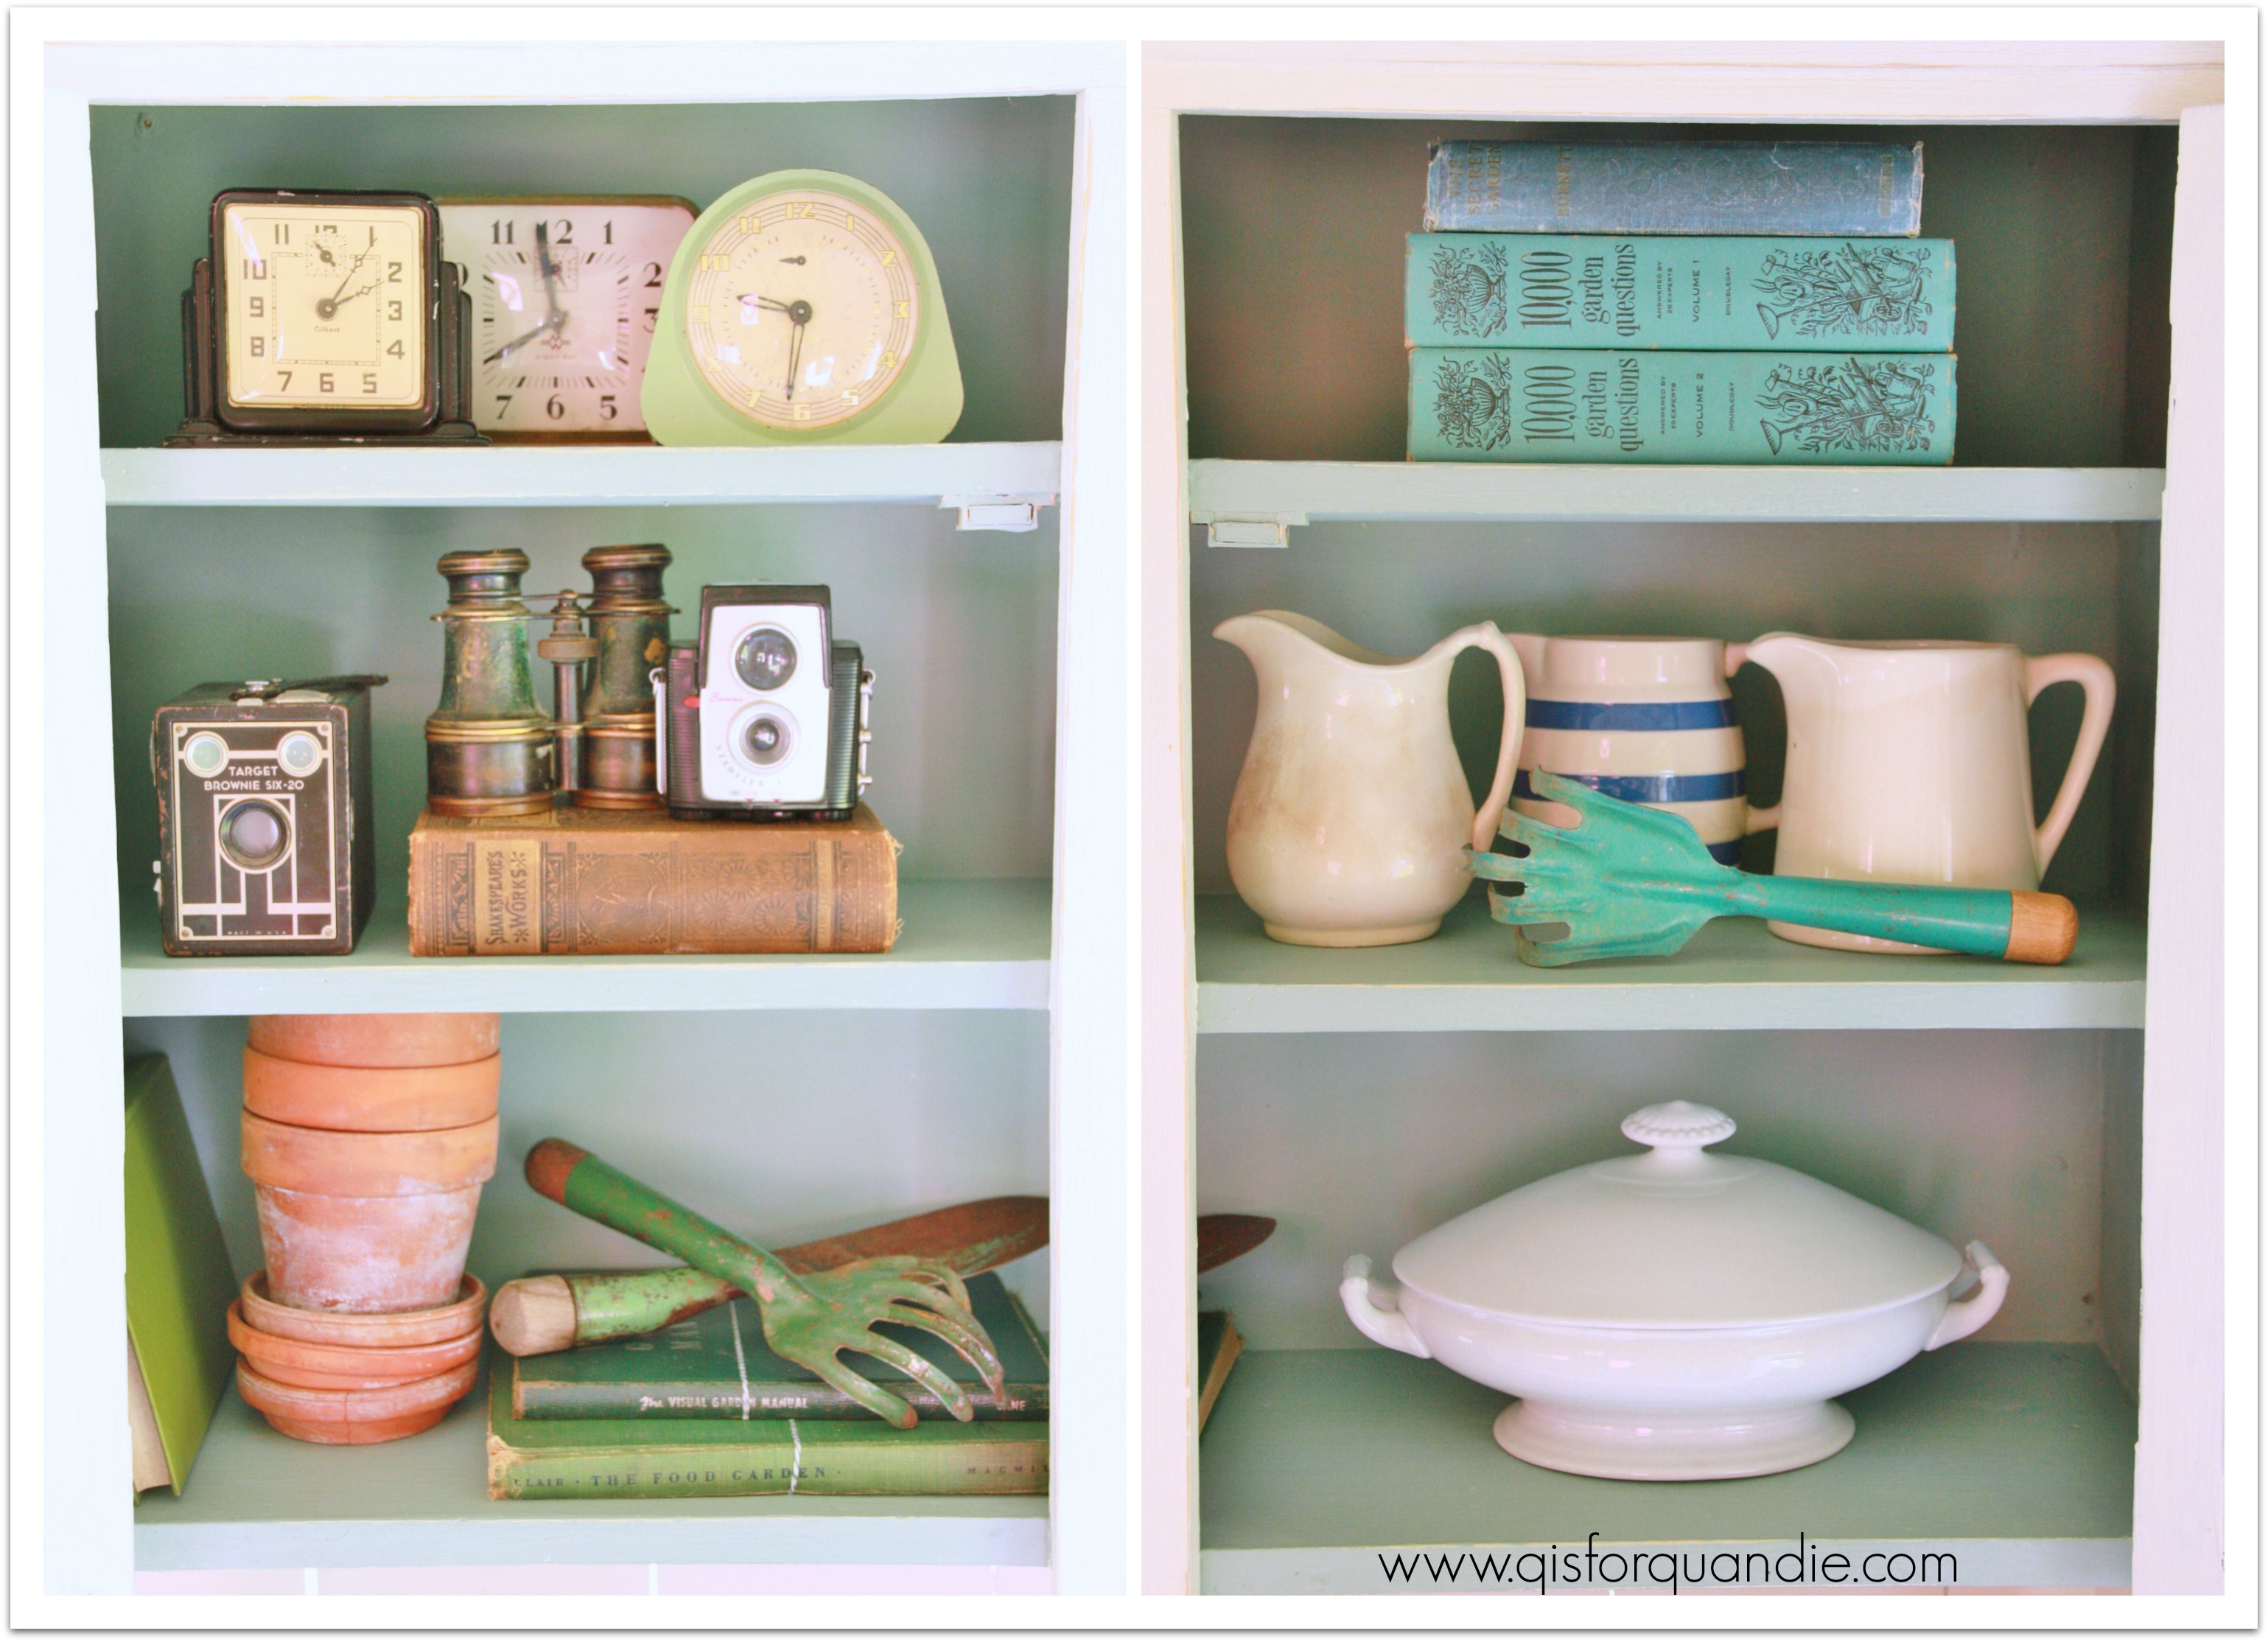
As part of my photo studio revamp, I decided to clean it up a bit and use it to store photo props.
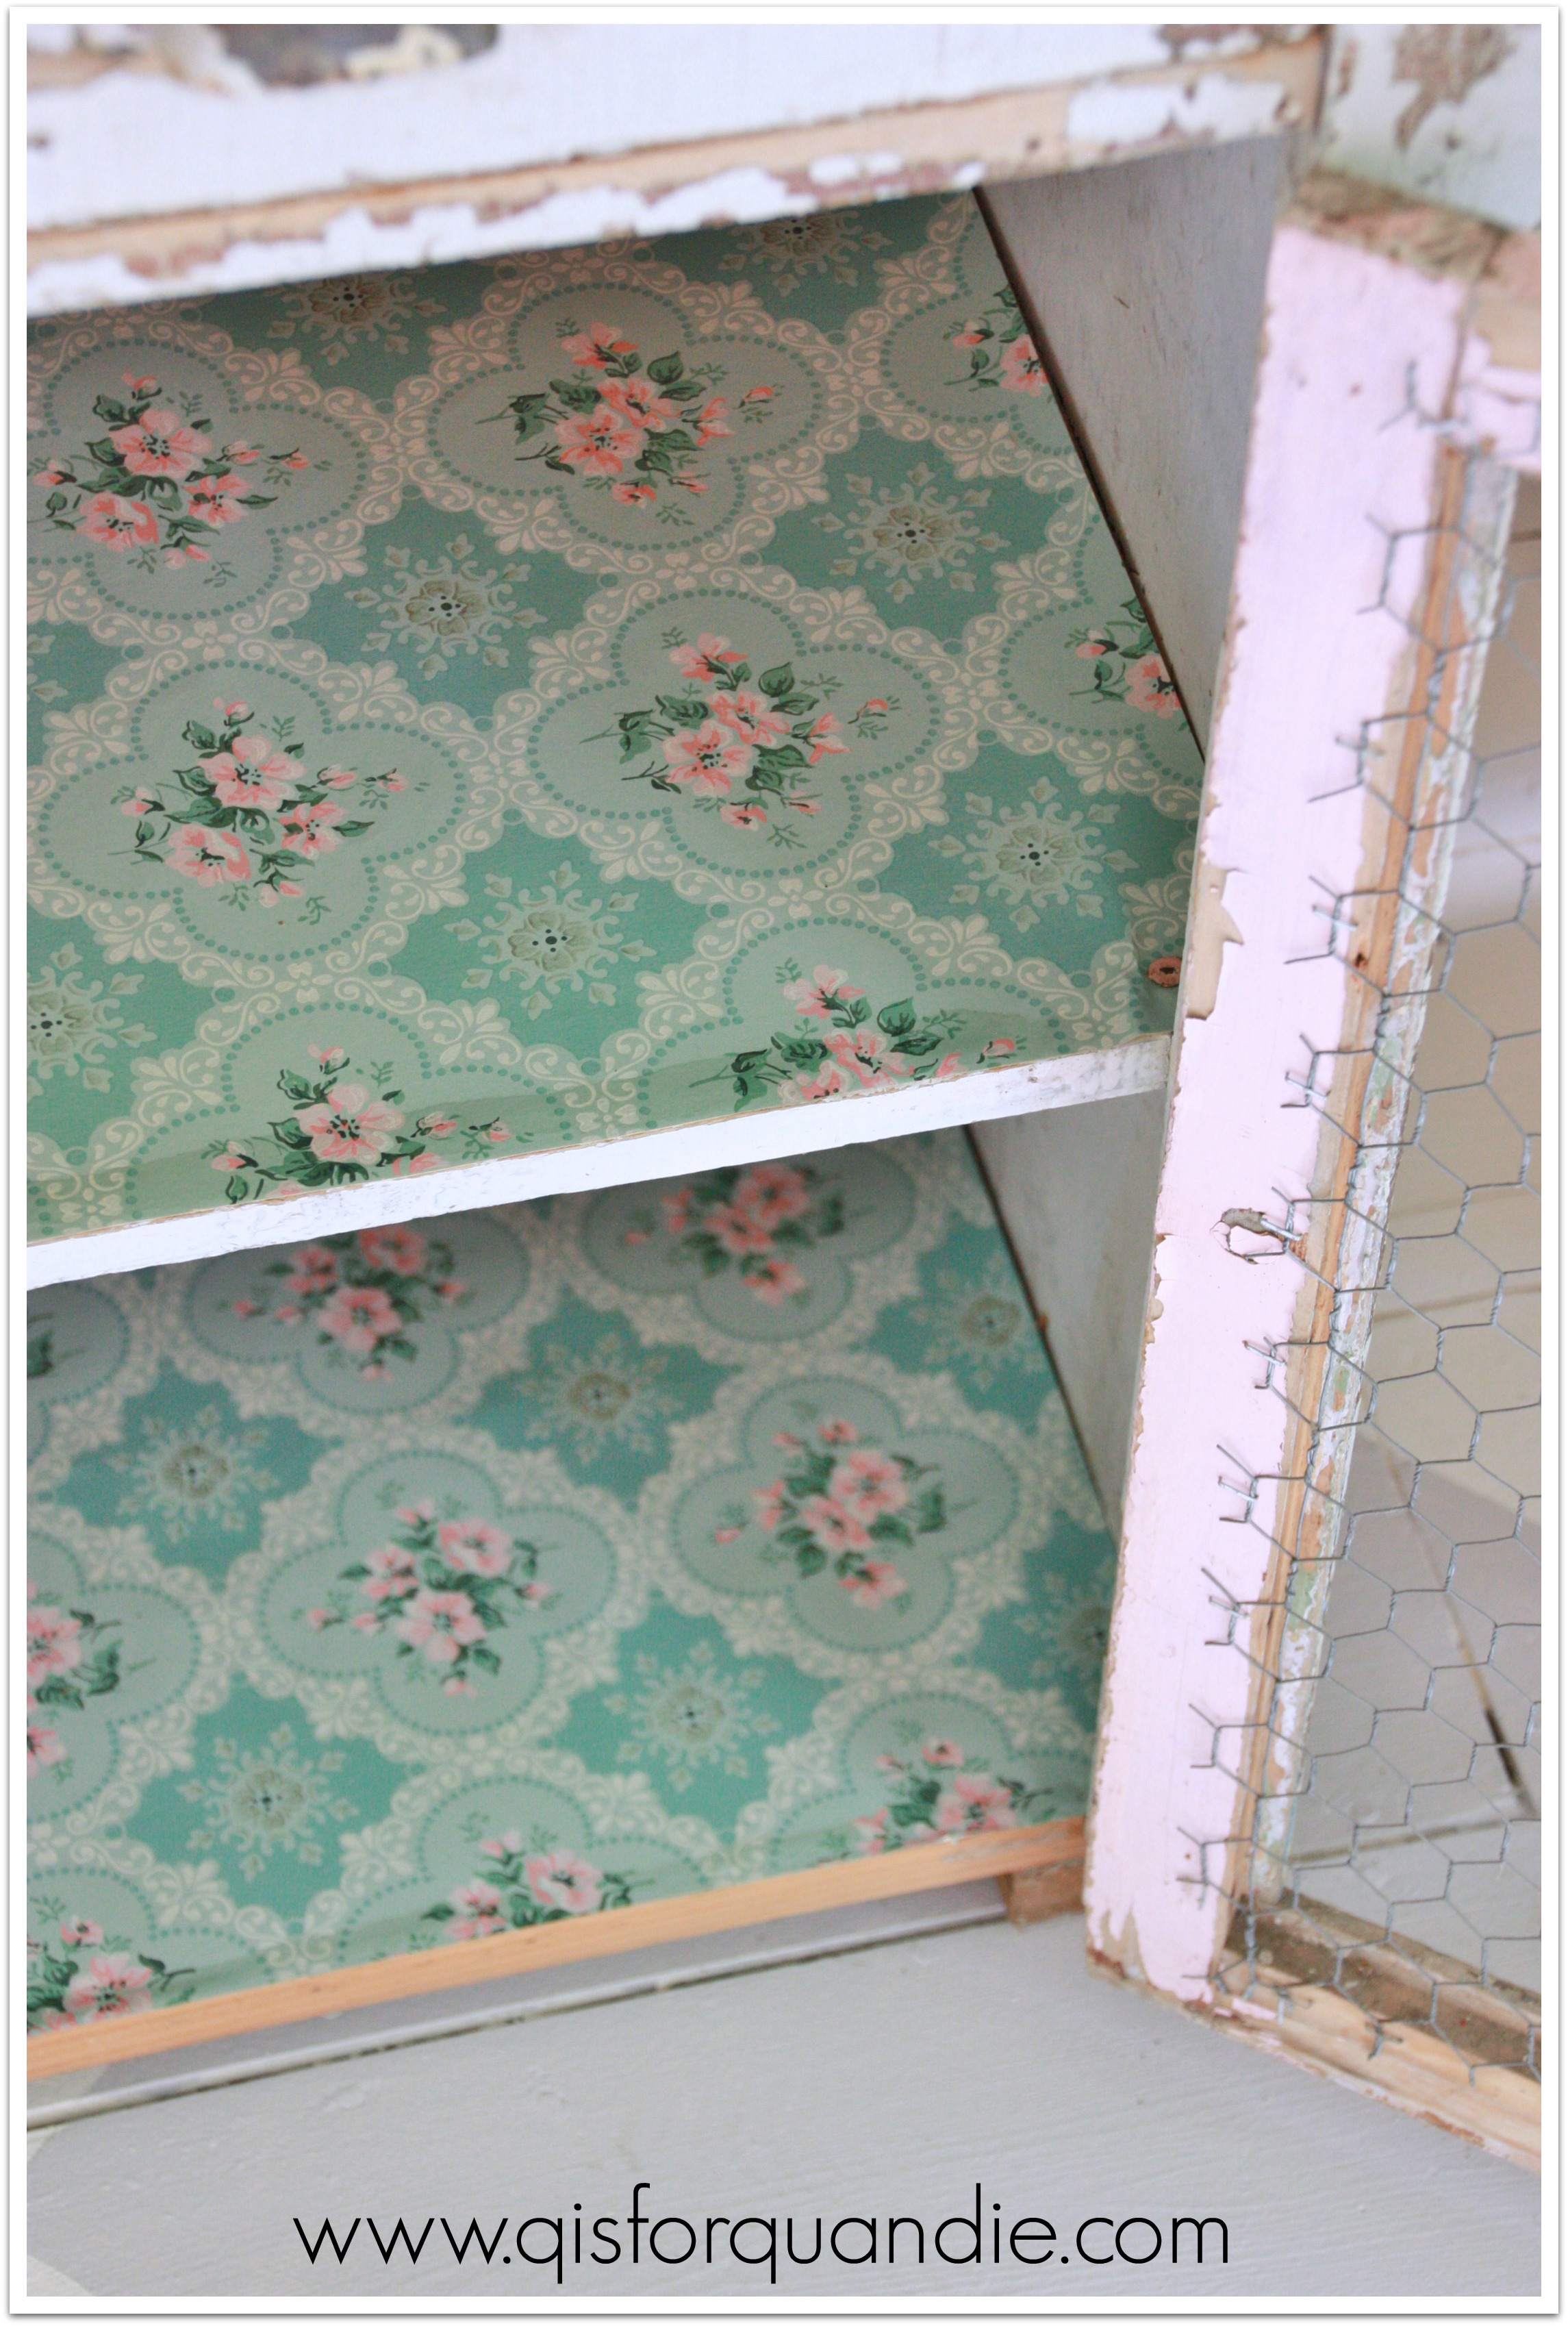
I knew that adding a little vintage wallpaper here and there would up the fab factor.

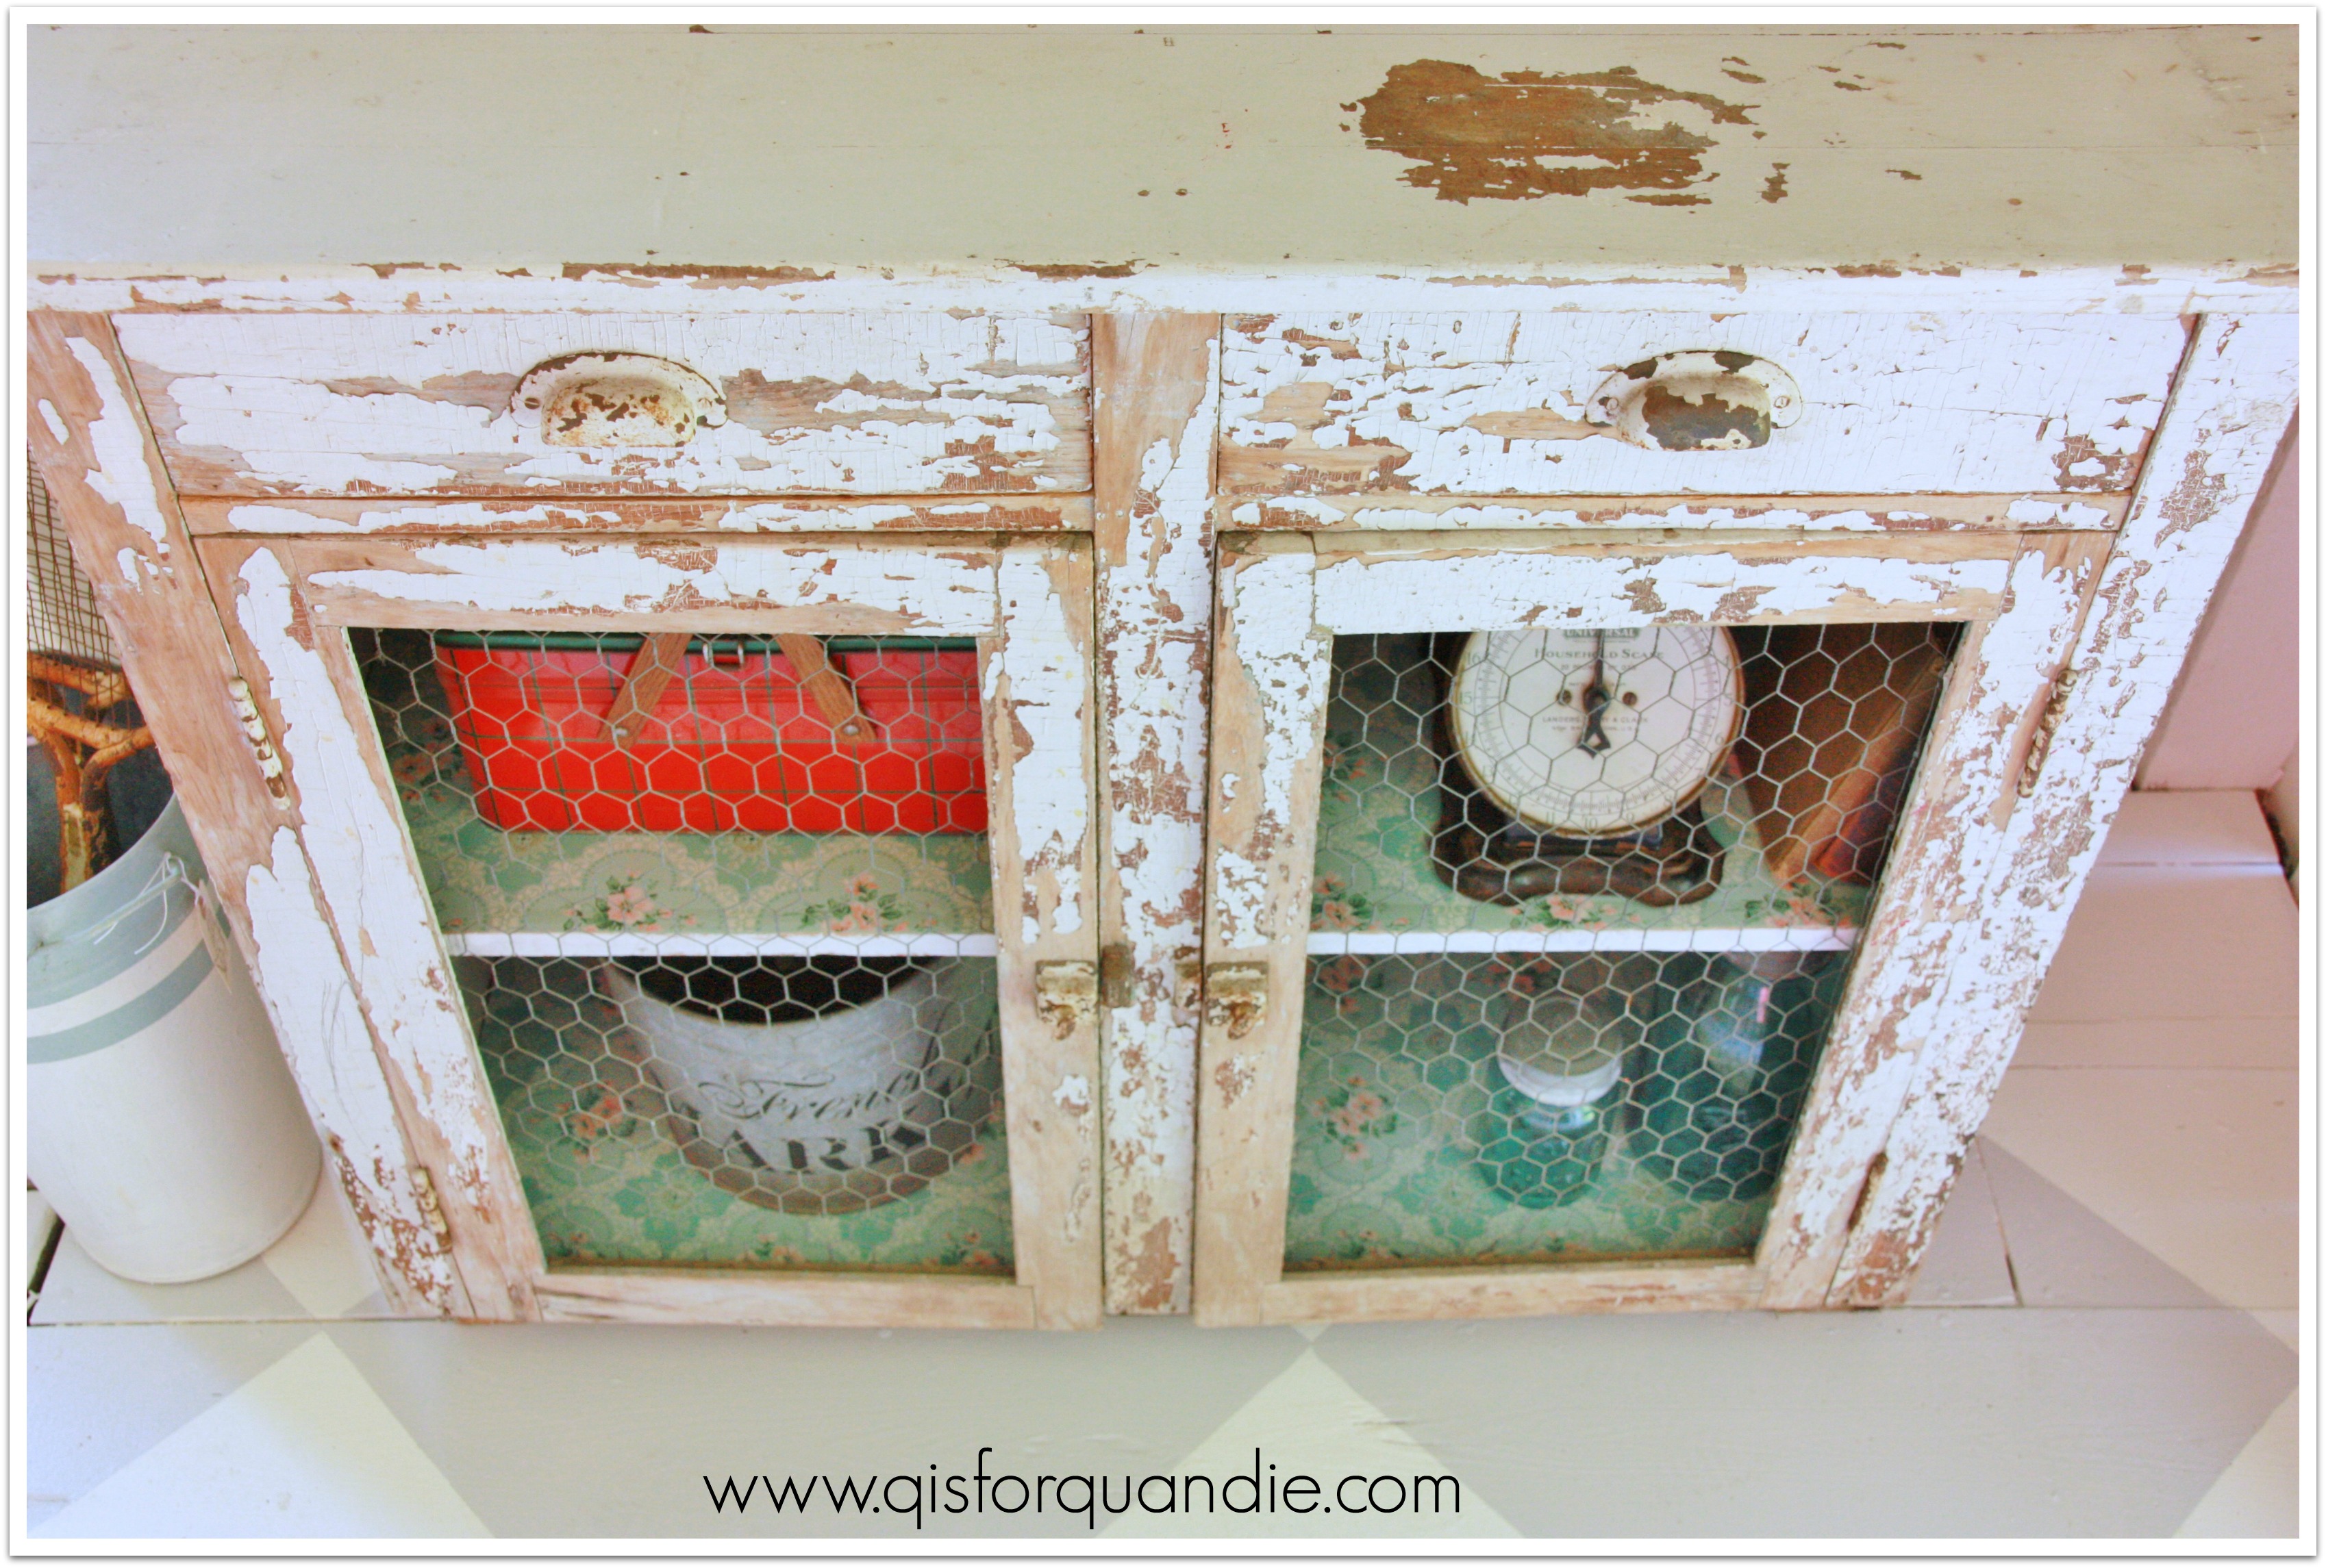
So I ordered some from Hannah’s Treasures on Etsy and then added it inside the drawers.

And I ordered some more from Rosies Wallpaper on Etsy and added it to the lower shelves.
If you’ve noticed that the glue along the front edge isn’t quite dry, please ignore that. I’m too impatient and it is so humid here today that it just isn’t drying on my time schedule.

You’ll notice that I used different wallpaper on the shelves from that in the drawers. Yeah, I know. I could have matched them, but what would be the fun in that? This way I get to enjoy two fabulous vintage patterns. Also, before I move on, I have to say that both of these Etsy shopkeepers were fab. I received both of my orders within days and they were packaged very nicely. The colors on their Etsy page were spot on, and the paper was in excellent condition. I was impressed (and I am in no way being compensated for this tidbit, just wanted to give them credit where credit is due).
As you can see below, I also repainted the interior of the top section with Annie Sloan’s Duck Egg. I knew it would work beautifully with the vintage wallpaper.

I also changed out the hardware on the upper cabinet. It did have some very nice glass knobs, but I wanted something a bit more rustic looking, so I switched them out for these.

Next came the fun part, filling it up with photo props! I’ve been accumulating a pile of photo props for a while. I’d like to not have to remove everything from my house each time I stage a piece of furniture.
At this point, you are probably thinking to yourself “hey, wait a minute, I thought those walls weren’t pink anymore?!” They aren’t. This is one of two things, either a reflection from the giant wall of my red Carriage House which is right behind me while I’m taking this photo, or a reflection off the red shirt I had on. I’m going to have to work on this problem. Do you think Mr. Q would be OK with a plan to paint just that one side of the Carriage House white?
But meanwhile, the cabinet is full of my photo props with room for more as I find them.
So there you have it. A slightly revamped cupboard full of vintage fabulousness.
Next up; how Ken and I deal with that back wall!

Looking good!
Sent from my iPhone
>
LikeLike
Thanks Victoria!
LikeLike
Absolutely gorgeous–love the wallpaper!
LikeLike
Thanks Darrielle. I’m really loving the wallpaper too. I think I’m going to use some on a dresser next.
LikeLike
Beautiful! Real gem! But I think the top should be shabby paint like bottom???
LikeLike
I wish I knew the secret to getting that chippy fabulous finish on the top, but the problem is there are at least 3 layers of paint on there. I know there is a mustard yellow, then a peach (egads, right?) then the white, and there are probably more colors under that. I sanded it down (which doesn’t really show clearly except maybe in the photo of the knobs), but the paint is seriously clinging for dear life on that thing. All the sanding did was reveal the not so fab colors underneath the white. The next step would be to strip it all down and start over with milk paint, but that just ain’t gonna happen. I suppose a second option would be to paint another layer of something in chalk paint, then add a layer of white milk paint over that and aim for chippy. Basically, I’m tired just typing all of this up! My point being, no easy way to achieve that fantastic authentic 100 year old chipping that is on the bottom.
LikeLike