a fairy garden update.

Good morning from the garden!

Today I thought I’d share how my new fairy garden held up over the summer.

You may remember that earlier in the season I moved my fairy garden from a cracked cement birdbath into an old wheelbarrow.  I needed more space to expand!

Here’s how it looked when it was newly planted in May.

And here is how it looks now!

Um, yeah.  It definitely filled in a bit.

The creeping thyme really went to town, filling in that entire front corner …

and nearly smothering the buddha.

The Golddust Mecardonia from Proven Winners also grew like crazy.

I’ve cut that one back several times as it wanted to take over the entire space.

I knew that the wire vine that I trained on the arbor would need some regular maintenance.

I grew this one in my old fairy garden too.  It has to be woven in and out of the arbor, and then cut back when it starts getting shaggy.

The various sedum that I planted were a little less rambunctious.  They filled in, but they didn’t need cutting back at all.

The dark green plant on the upper right side of that photo above is a dwarf betony, or stachys minima.  Unfortunately, it never bloomed for me.  But it is a perennial and I’m hoping that if I protect it over the winter it will come back next year and bloom.

In addition to the Feather Boa hosta that I saved from my previous fairy garden, I also planted a new miniature hosta after I’d already shared the fairy garden back in May.

That is a Mighty Mouse hosta and I tucked it in just next to the fairy’s mailbox.

So far both of the mini hostas look great!

In the past I have had mixed results overwintering these mini’s in my fairy gardens.  Sometimes they make it, sometimes they don’t.  I used to take the top of my cement bird bath fairy garden and place it on the ground up against the house where I would bury it in leaves for the winter.  This year I plan to move the entire wheelbarrow into the carriage house for the winter.  I’ll likely also cover it with leaves and maybe wrap it somehow.

I’m hoping to keep the Alberta spruce and the Golden Ruby barberry alive over winter as well.

So I’ll just cross my fingers on that.

Overall, I’d say the fairy garden was a huge success this year.

So the next time you see a crumbling old metal wheelbarrow in the free pile at a garage sale (I did see one this summer!), be sure to snatch it up and plant your own fairy garden!

a new home for the fairies.

If you’ve been following me for long, then you’ve seen my fairy garden bird bath.

This was basically a miniature garden planted in a cracked concrete birdbath that I purchased at a garage sale.  It didn’t hold water anymore, so that made it perfect for planting in.  I’ve shared it many times, even decorated for fall.

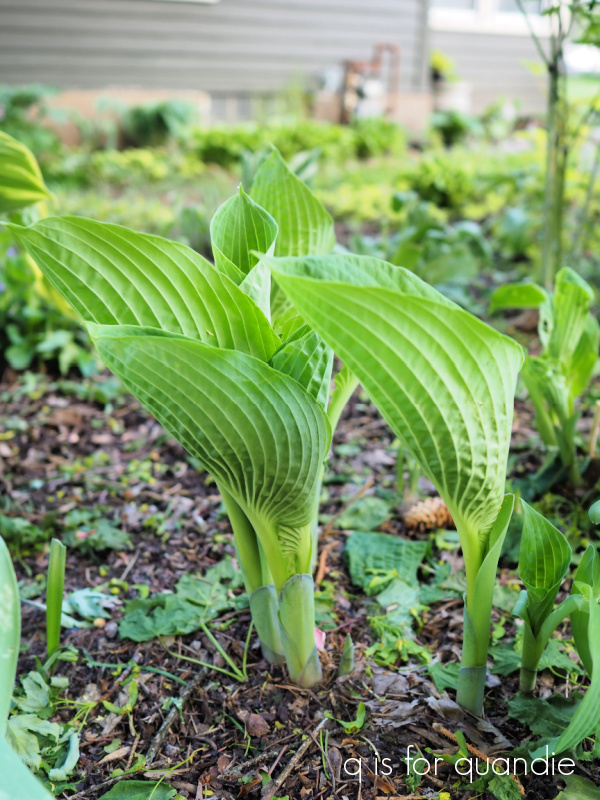
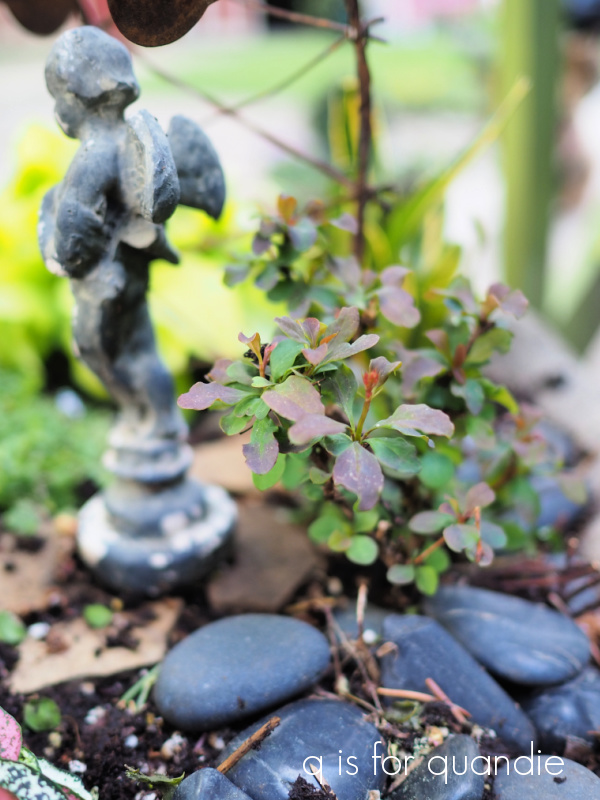
It had a few really nice miniature hostas and a miniature Barberry that reliably survived our Minnesota winters as long as we buried the birdbath top in a pile of leaves up against the house for the winter.

Unfortunately, I somehow missed doing that last year.  So here’s what survived …

Yep, that would be zilch.  As a sidebar, in order to survive the winter in a pot (rather than in the ground) a perennial needs to be zoned two zones colder than your normal zone.  In other words, since I’m in zone 4b, I’d need a plant zoned to 2 or lower.

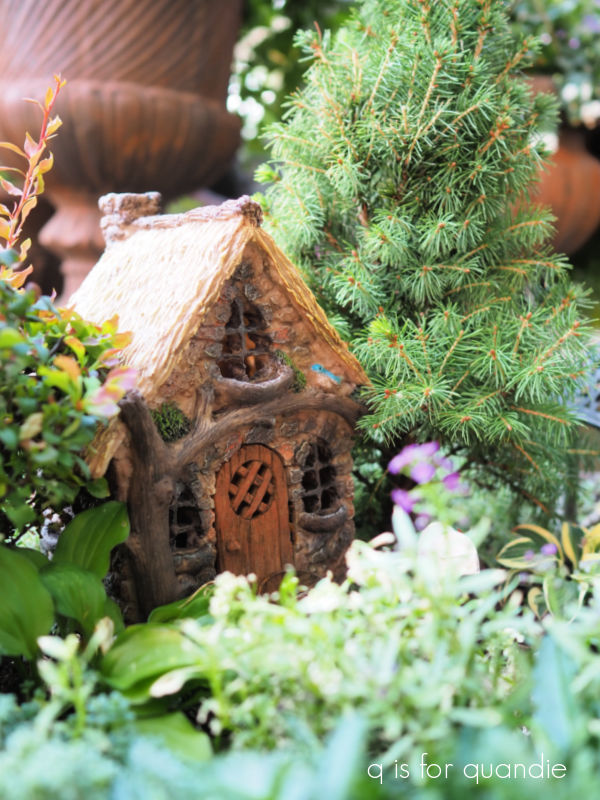
But you know what, that was all the motivation I needed to push me to expand the fairy garden.  Well, that plus the cute little fairy house that my sister gave me for Christmas.

I knew I didn’t have enough square footage in the birdbath to accommodate the house.

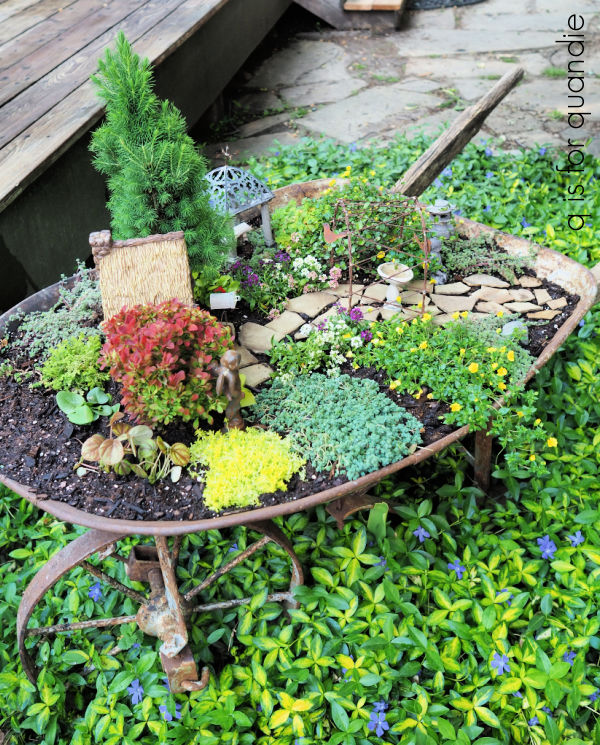
I’d been thinking about using a run down old wheelbarrow that we had in the garden for exactly this purpose, but it needed a little help first.

I asked my handyman neighbor Ken to help me shore it up.  It didn’t need to be functional as a wheelbarrow, just sturdy enough to sit upright.  So he basically used some screws to hold the wooden handles in the appropriate place, and then we drilled out some drainage holes in the bottom.

Today’s q tip; you ALWAYS need drainage holes in outdoor planters!  If you’re turning some sort of vintage vessel into a planter, be sure to drill some holes in the bottom if it’s going to be outside.

So once that was done, I placed the wheelbarrow in a patch of vinca and filled it up with potting soil.

Then came the fun part, planting the garden.

I’ve been to a bunch of nurseries around my area looking for just the right plants for my garden in miniature, so I can’t exactly remember where I got each individual plant.  But I can tell you the names of most of the plants in case you what to create your own fairy garden.

First up, I planted ‘Easter Bonnet Mix’ alyssum on either side of the path.

I got this idea from the model train garden in the Germany pavilion in Epcot.  I’ve never really been a fan of alyssum in the garden, but I’d never thought about how perfectly miniature it is until I saw it being used there.

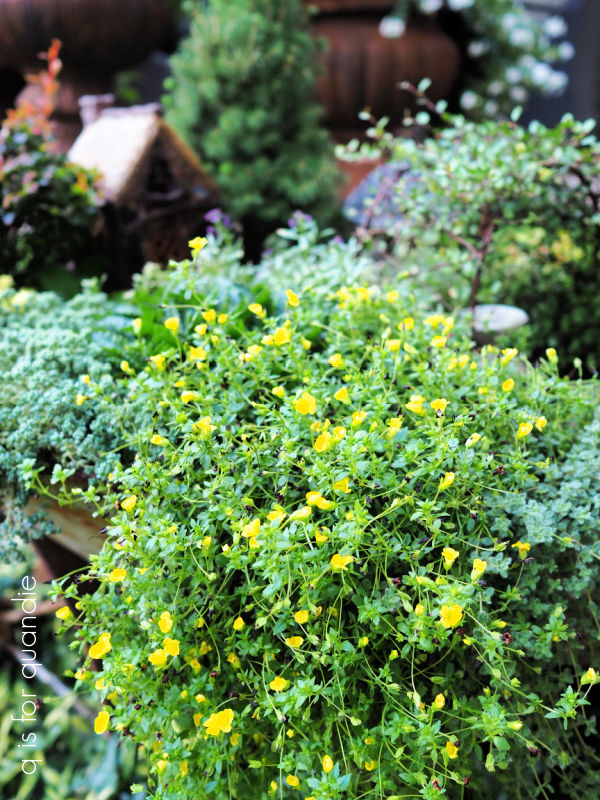
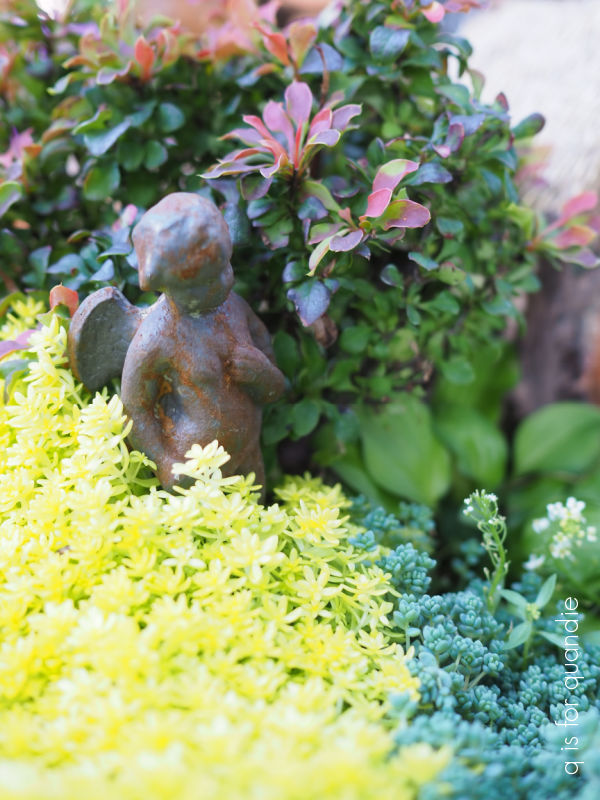
The plant with the tiny yellow flower is Golddust Mecardonia from Proven Winners.

It also has a tiny bloom that is perfect for a fairy sized garden.

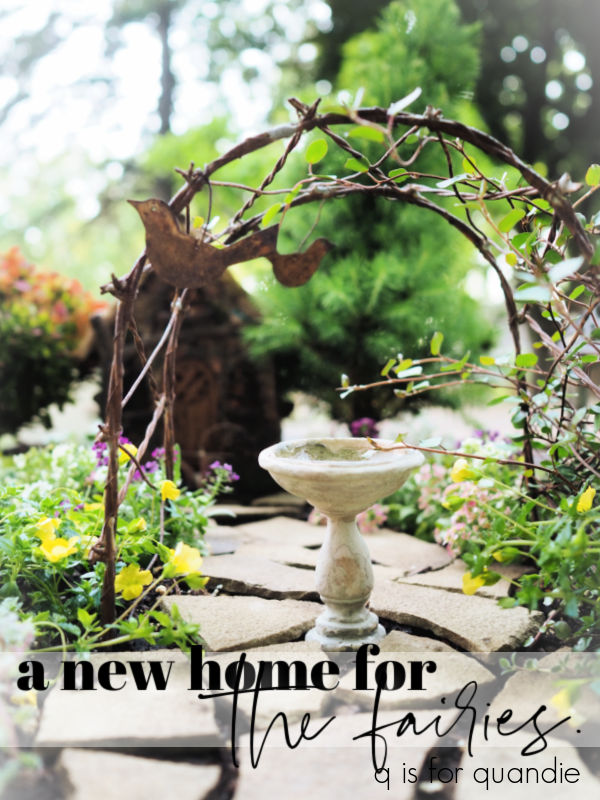
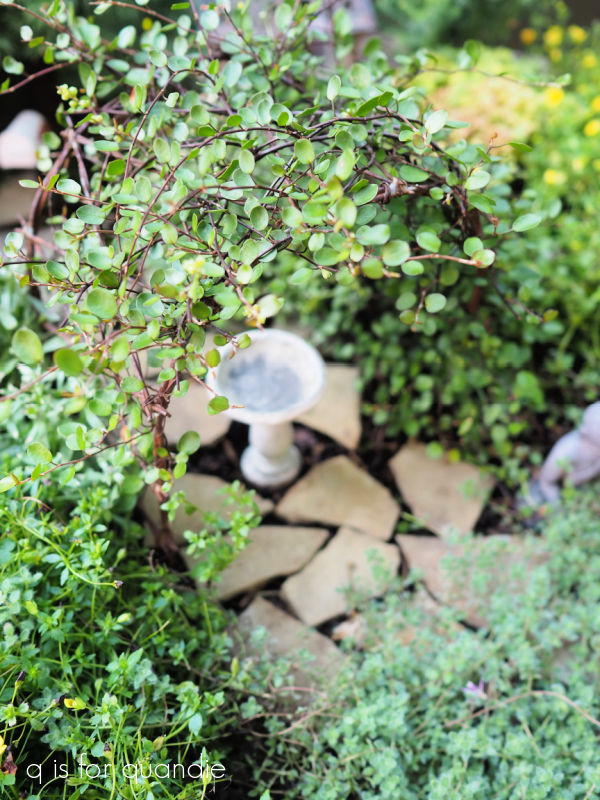
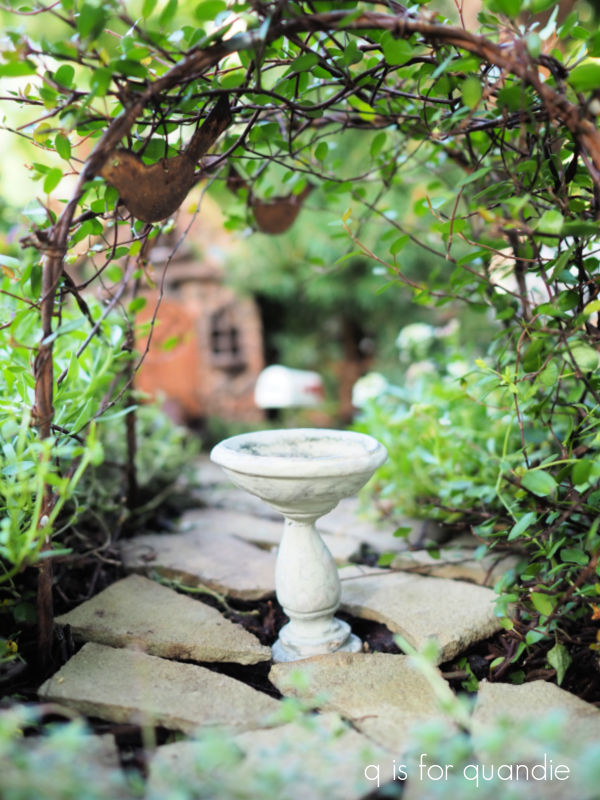
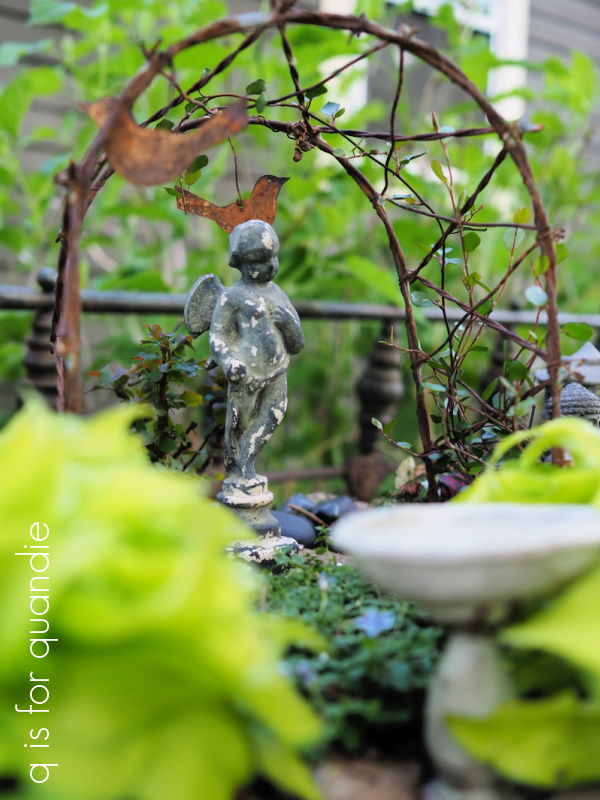
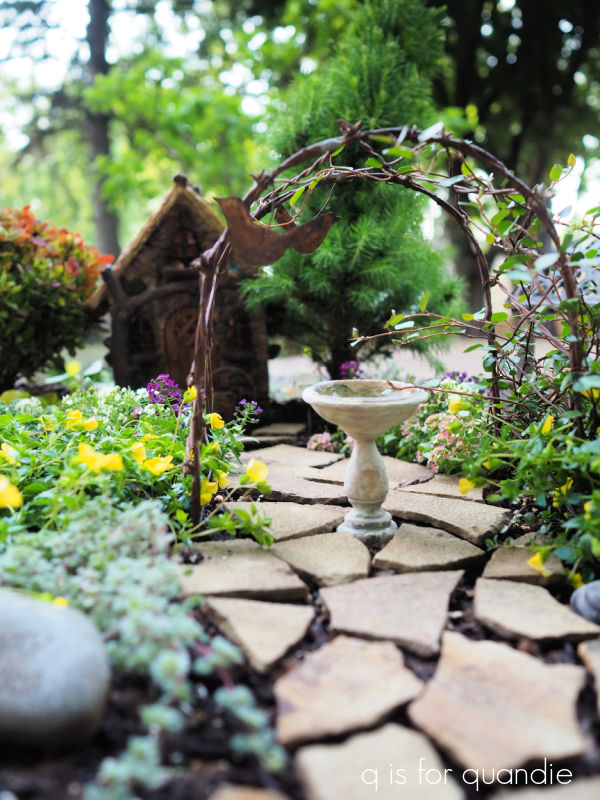
I’ve been planting a wire vine on the metal arbor for years.

It has tiny little leaves that are the perfect size.  I have to periodically weave it up and over the arbor though, it doesn’t climb by itself.

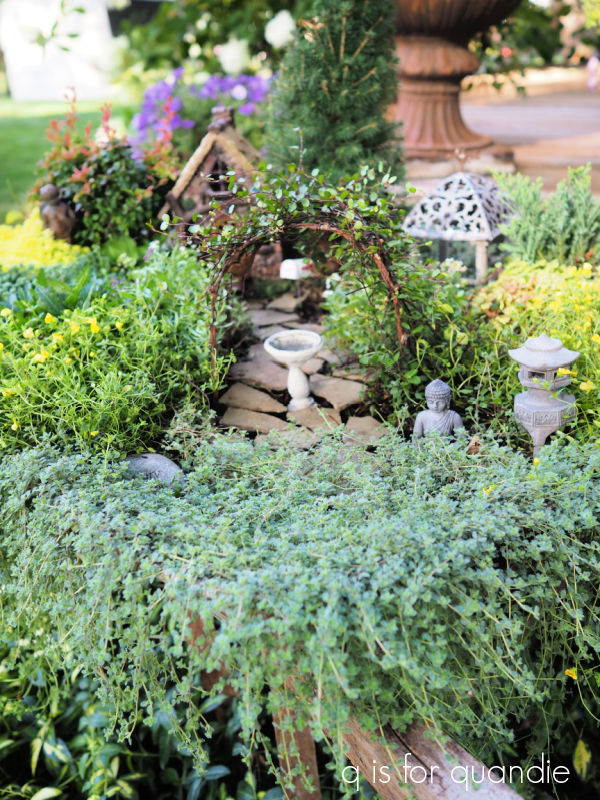
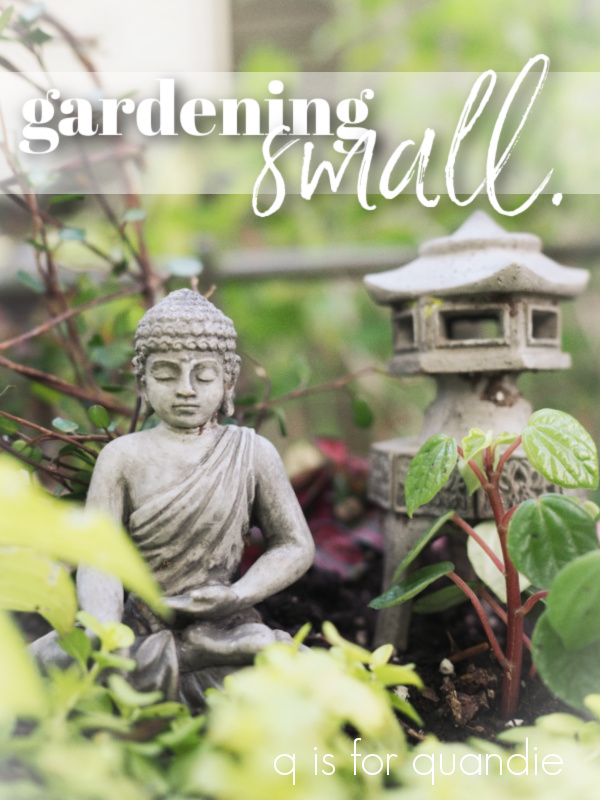
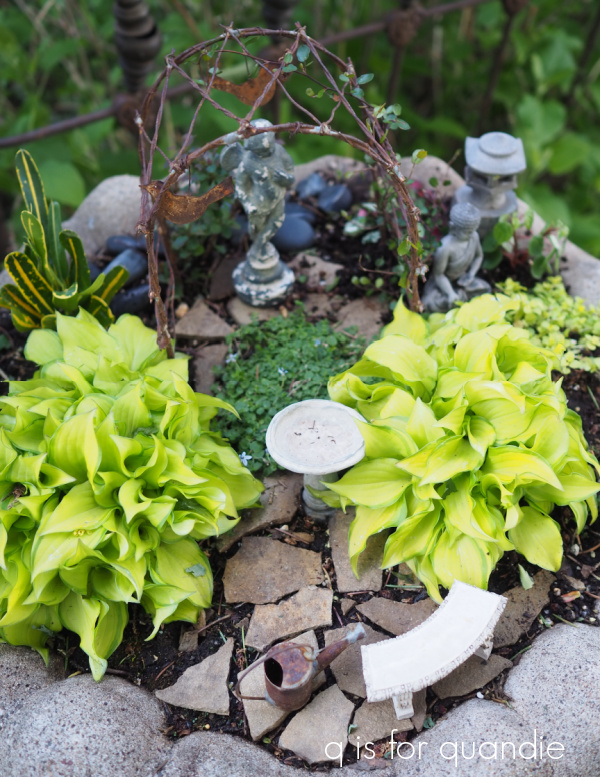
The buddha and his lantern are sitting in a patch of woolly thyme.

Some of the other small plants I’ve used include Sunset Velvet oxalis, Golden Oregano, some small sedums, and a couple of small unidentified plants from the fairy garden section at Bachmans.

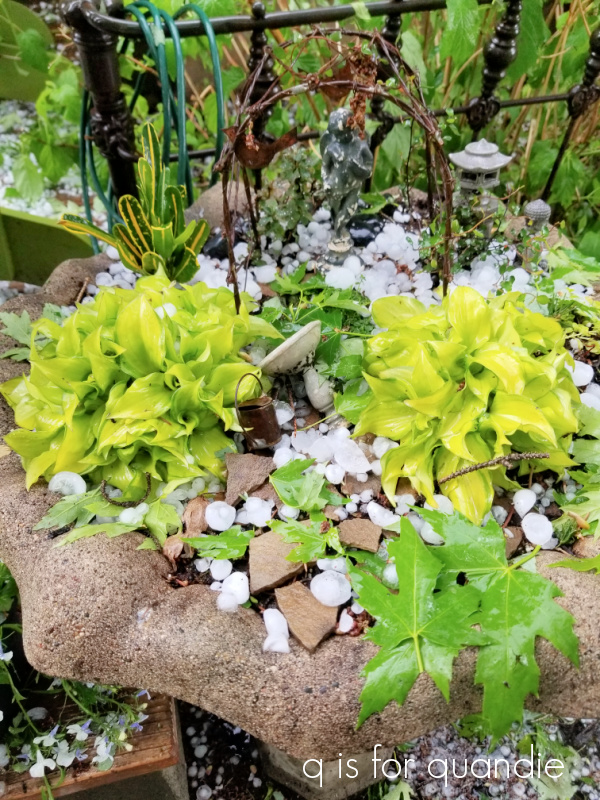
Also, thankfully, when I last divided the miniature ‘Feather Boa’ hosta in my old fairy garden, I put a few chunks of it in the ground near the potting shed.  So I was able to dig one back up to put in my new fairy garden.

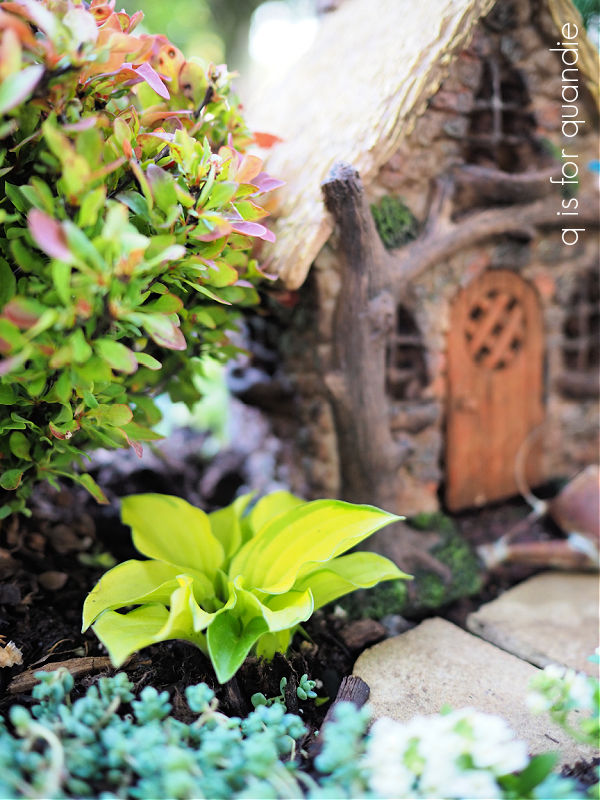
Since I’ve placed the wheelbarrow in the sunniest spot in my entire garden, I realized that I needed to provide some ‘shade’ for that hosta.  I looked high and low for fairy garden sized trees or shrubs and was totally striking out.  Two of my local nurseries, Bachmans and Rose Floral (in Stillwater, MN) always used to have them.  But I noticed that they disappeared during Covid and they haven’t come back at either place.  They still have other small plants, but no tiny evergreens or shrubs.

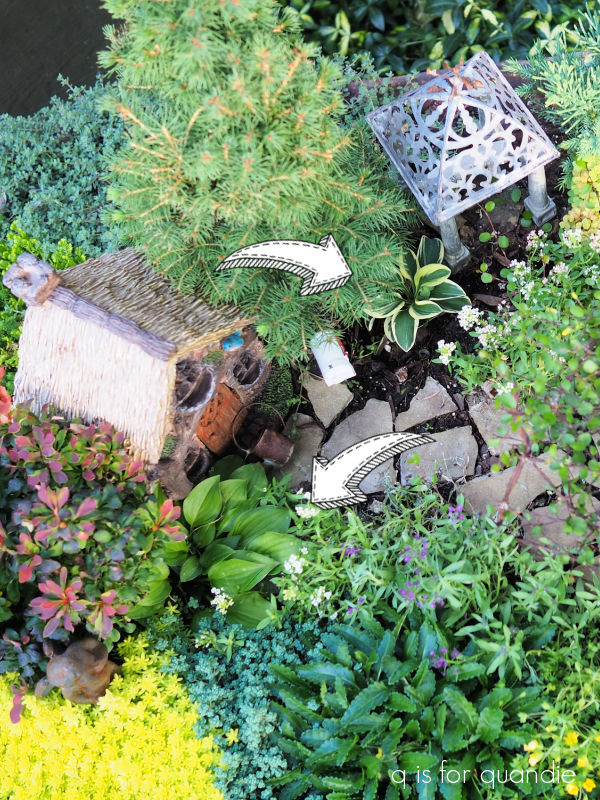
Oddly enough, I ended up finding some that would work at Lowe’s.  The evergreen tree is a Dwarf Alberta Spruce.

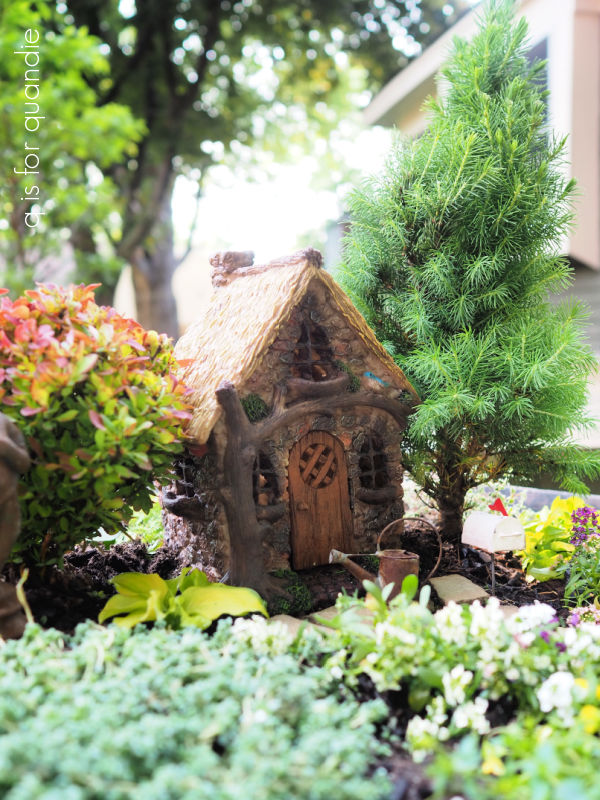
The average mature size is 3′ to 4′ tall and wide, but I’m hoping to keep it smaller with regular pruning.  I also trimmed off some of the root ball when I planted it to encourage it to stay small.  In addition, there isn’t a ton of room in that wheelbarrow for roots, so hopefully that will discourage too much growth, but not kill the tree.

It was only $11.98 though, so if it doesn’t survive I’m not out a lot of cash.

The bush on the other side of the house is another barberry, a Golden Ruby.

It’s potential full size is 2′ tall and wide, so I gave it the same treatment as the tree, pruning both the top and the roots.

Naturally, after I had the tree and bush planted, my neighbor nnK texted to let me know that the Abrahamson’s Nursery in St. Croix Falls has a big selections of fairy garden trees and shrubs.  So if any of you locals are also looking, check Abrahamson’s.  They have several locations in the St. Croix valley.

I wonder if any of you remember that I mentioned potentially trying the Dixie Belle patina paint rusty look on my little angel statue last year?  It was looking rather shabby, so I did rusty it up using the Iron paint and the green spray (for all of the details on using that product, check out this post).

I added the path using thin slices of flagstone that have broken off my full size flagstone patio.

I’ve had this little pavilion for several years now, but my old birdbath fairy garden wasn’t big enough for both the pavilion and the arbor, so I used to switch it up every other year or so.

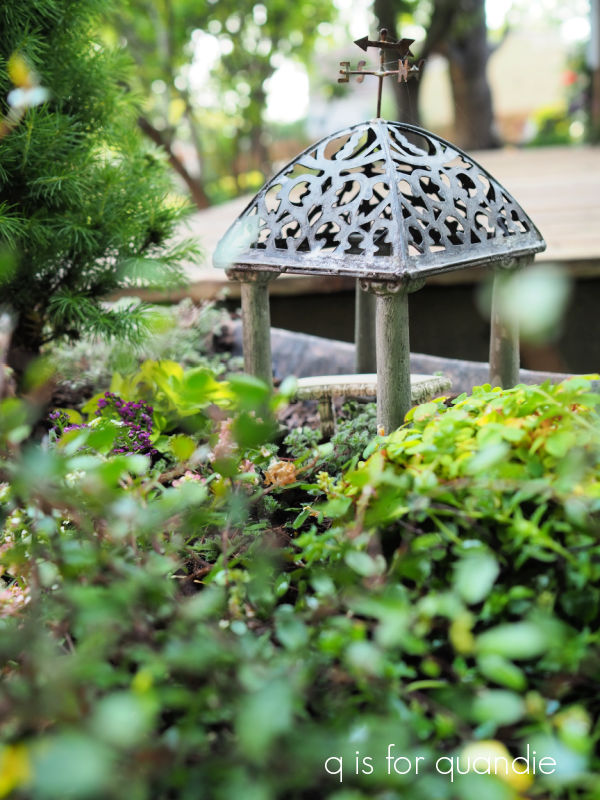
Now I can fit both of them in.

One fun thing about fairy gardens, you don’t need a drone to get good aerial shots.

I had lots of fun creating my garden in miniature.  It’s so much easier to plant a tree when you can just pick it up and move it with one hand, and weeding it takes no time at all.

It’s also much cheaper than it would be to create a full sized garden from scratch.  Although, that being said, I probably spent somewhere around $100 for all of those mini plants.

Now, as long as the squirrels don’t decide to start digging stuff up, I think the new fairy garden is good to go.  I’m looking forward to seeing it fill in over the summer.  And I have about 5 months to figure out how I’m going to protect it in winter.

Have any of you got a fairy garden?  Or perhaps I’ve inspired you to create one now?  It would be the perfect solution for those of you who only have a small space for gardening.  Leave a comment and let me know.

the top heavy cupboard fix.

I promised I’d share what I ended up doing with that top heavy mini-cupboard.

If you’ll remember, I found it while thrifting a week or two ago.  I almost put it back on the shelf because I wasn’t sure it would be worth the effort to save it.  It had such a wonky, top heavy look.

In addition, what I didn’t show when I mentioned it last was that it was filled with gross contact paper.

I think yucky old drawer liner might be near the top of my list of things I really don’t like to deal with.  Right after smoky smells and mouse pee.  I mostly try to avoid old contact paper, but I completely draw the line at the other two!

Fortunately, the adhesive on the contact paper had really deteriorated, so it came off rather easily.

Next I had to deal with that top heavy look.

I asked you guys for suggestions, and several of you had some really good ones including just removing the door, or maybe moving the door to the bottom, or even flipping the cupboard upside down turning the top into the bottom and then cutting off the old legs and adding new ones.  I did pop it upside down to see how it would look and that might have been an option that worked well.

However, after consulting with my handyman Ken, we decided to remove the door and then cut back the top half of the cupboard so that it was stepped back rather than flush with the front.  If you look closely at the photo below, you can see where I marked the new measurement for Ken.

Ken simply used a jig saw to cut everything off beyond that 5″ mark.  Then he did his best to recreate the curved sides below the upper shelves.

I wanted to possibly re-use the door on the bottom section, but Ken felt it was too warped to use.  I suppose we could have added a new door, but in the end, I think it’s fine without a door.

After sanding and cleaning the piece, I painted the inner bits with Dixie Belle’s Kudzu, and the outer bits with their Drop Cloth.

I just love this combination of white and green, especially in springtime.  OK, well, spring is definitely not here yet, we still had some single digit temps last week while I was working on this one.  But surely it’s just around the corner, right?

Next I lined the shelves with that pretty gingham scrapbook paper you’ve been seeing me use a lot of recently.

Once again, I am totally kicking myself for putting the majority of my garden themed props out in the potting shed, including my green flower frogs.  There is still a 3′ bank of snow in front of the door.  So for now, I have to make do with my basic uncolored frogs.

Finally, I added a Classic Vintage Label transfer from re.design with prima to the ‘work surface’ before giving everything a coat of clear wax.  Well … not the paper of course, but all of the painted parts.  The paper, by the way, is not adhered.  It’s loose, so if someone wanted to switch it out for something else they could easily do so.

In addition to those frogs, I also staged this one up with the itsy bitsy dresser that I painted up a while back and few other bits and bobs.

Isn’t it sweet?

This little cupboard would be the perfect addition to a craft room, potting shed, desk top, etc, etc.

I think Ken and I did a good job of eliminating that wonky top-heavy look and giving this little cupboard a fresh new look with some paint, paper and a small transfer.  Ultimately, I’m glad I didn’t put this one back on the shelf at the thrift store.

What do you think?

The cupboard is for sale, so if you are local be sure to check out my ‘available for local sale‘ page for all of the details.

Thank you to Dixie Belle Paint Co for providing the paint used in this project.

a growing village.

Well, I made it home from Mexico.  We had a great time, the weather was absolutely perfect.  I’ll be sharing a little bit about the trip later in the week, so stay tuned for that.  I’ll also be sharing who won my blogiversary giveaway later, as soon as I get to it.

In the meantime, today I thought I’d share my growing Department 56 Dickens Christmas Village.

For those of you who aren’t familiar with Department 56, it began in 1976 as part of Bachman’s and is still headquartered in Eden Prairie, Minnesota.

The Original Snow Village was the only village offered initially.  The Dickens Village came along in 1984.  These days they have six core villages, and 12 Licensed villages like the Disney village that my sister is collecting and the Harry Potter village (and I have to say, if you’re a Potter fan this one would be amazing to have).

I have to admit, although these villages were all the rage back in the 80’s and 90’s, I think maybe the Dickens one has fallen from favor.  Or maybe it’s just that the people who collected them back then are all downsizing as they age.  Whatever the reason, they seem to pop up at estate sales, garage sales and thrift stores on a fairly regular basis.

The new pieces are priced at $100 and up, with the most elaborate priced at $250 or more.  I do want to note here that the quality of these pieces is much higher than the cheaper, generic sort of ceramic pieces you can find out there, though.  So I’m not saying they aren’t worth those prices.  However, my pieces have all cost less than $20.  This past summer my sister and I came across a garage sale where they were selling dozens of pieces for $10 each.  So my Tower of London piece, which is selling for $249.99 on Amazon, cost me $10.

As did the Kings Road Post Office.

I certainly was never planning to collect (or should I say non-collect) a Christmas village.  I did not hop on board with this trend back in the day when it was immensely popular.  But back in 2016 I shared a tour of my friend Amy’s house and I fell in love with her little village vignette.

The juxtaposition of the giant books with the lighted village on top was perfect.  So when I saw a few pieces at the thrift store, I decided to pick them up.

And the rest, as they say, is history.

When I find pieces at prices like $10 each, I just can’t help myself.

Last year I displayed the village on the Welsh cupboard in our dining room …

But I needed to expand this year.

So I went back to the pine cupboard in the Q branch …

as well as the top of the rooster cupboard in the same room …

and finally I displayed Victoria Station on the stack of suitcases next to the pine cupboard.

Those of you who are Christmas Village pros are probably already savvy, but I thought I’d share a few q tips on displaying a village for those who are newbies like me.

My first tip is to layer your display.  Just like on a buffet table, use props to place things at different heights.  I achieve this using vintage suitcases and old books.

I set these up first to create a stage for my village.

Next up is electrical.  I just discovered that you can buy strings of multiple lights for the villages from Amazon last year.  You can light up three, five, or even nine buildings with just one string to plug in.

I also purchased a remote control outlet to plug them into.  Now with one touch of a button I can turn them all on and off.  Well, technically I have two buttons.  One for the group over the pine cupboard and one for the group over the rooster cupboard.

One more tip for today, on adding trees.  When I was at Gertens a few weeks back, they had some fabulous faux flocked pine trees in their village display.  Unfortunately, they were $49.99 each, yowza!  Granted, they were lit.  But I also thought they were just a tad too large for the village.  So I didn’t buy any.

Then later, while perusing the Christmas décor at Target I came across these trees.

They are very similar to the Gertens trees, but about half the size.  They aren’t lit, but they also were only $3 each.  So I was able to get 10 of them for less than just one of the Gerten trees.  And I’m OK with them not being lit, that allows the village to be the star of the show.

I think they make for a very realistic looking snowy looking background.

I get the most enjoyment out of my village at night.  I leave all the lights off in the room, and just light up the village.  It’s so pretty!

I suspect I’ll continue watching my village grow over the coming years.

How about you, do you have a Christmas village?  Leave a comment and let us know.

seriously, what are the chances?

My friend/picker Sue picked up this cute little toy dresser for me recently.

It’s not an antique, or a salesman sample, or anything like that.  But it is pretty darn cute.  If only it wasn’t missing the mirror.

Sue thought I could get a new one cut for it, and maybe so.  I do wonder how difficult it would be to cut that oval though.  So I decided to just paint it in and see what I could find in my transfer stash to fill that spot.

But first up, I removed the knobs.  They are OK, but I knew I could do better.  Especially since I already had some fabulous small glass knobs on hand (from D Lawless Hardware).

Next I gave the piece a good sanding, and then a good cleaning.  Then I followed that up with two coats of Dixie Belle’s Drop Cloth.  The existing finish was pretty dinged up, and I much prefer the warmer shade of the Drop Cloth over the original white on the dresser.

Then I added the top half or so of the small Petit Rosier transfer from I.O.D. to the front of the dresser.

The small (11″ x 14″) version of the transfer fit almost exactly across the width of the drawers, what luck.

FYI, this transfer has been retired.  You can still find it online, but supplies are limited.

Next I pulled out my Classic Vintage Labels transfers from re.design with prima.  I knew there was an oval shaped label in that set and I was hoping it would be the right size and shape to fill that spot where the mirror once was.  I will admit that I was thinking to myself, ‘what are the chances?  probably pretty slim, right?’

And look at that!  Pretty much the perfect fit.  Seriously, what are the chances?  Things like this rarely work out this well.

Once I’d also added the “les roses.” wording from the I.O.D. transfer to the top, I sanded the edges of everything and then added a coat of clear wax.

Then I popped on the glass knobs.

I think those knobs elevate this piece just a tad, don’t you?

Finally, I lined the drawers with some pretty floral scrapbook paper.

How sweet is that?

I staged it simply with a lovely little round floral dish that Sue also found for me, and some vintage jewelry.

This would make a fun jewelry box, you’d just have to come up with some little boxes or something to put inside the drawers to prevent everything from becoming a jumbled mess.

But really, this piece could be used anywhere to hold small items … like perhaps your large collection of reading glasses … or is that just me?

I already happen to have a mini with the Petit Rosier transfer on it of my own …

So today’s project is for sale (locals only, no shipping available).  Be sure to check out my ‘available for local sale‘ page for more details.

One last thought on this project; this is not the sort of thing that anyone is going to make their fortune on … or really even be able to pay the bills with.  I paid $12 for the dresser, $18 for the transfer and $9 for the knobs.  It didn’t take much paint or wax, so I’m not counting those things.  Plus I have a lifetime supply of scrapbook paper, so I’m just happy to be able to use that stuff up.  But, that means I have $39 into this piece, which would be perfectly fine if I was keeping it for myself.  However, I usually sell pieces like this for $48.  So, if it sells at that price, I’ve made about $4.50/hour for my two hours of labor.

Choosing to change out the hardware and add that expensive smaller I.O.D. transfer would not be wise choices if I was in this for the money. Instead I would recommend using pieces from the I.O.D. Label Ephemera transfer (also retired unfortunately), or the newer I.O.D. Brocante or Traditional Pots transfers.  Although those are more expensive at around $30 each, I can get 10 or more projects out of each one.

Luckily I’m not in this for the money, although I try not to lose money on any of my projects!  I really enjoy the process of creating, and in the end I’m happy that I can sell most of my pieces and I don’t have to become a hoarder.  Or, worse yet, take them to the Goodwill.  But I wanted to at least mention this for those of you who may be trying to make a buck.

If you sell your items, would you bother with a project like this?  Or do you stick to items with a higher profit margin?  Or maybe you think my price is too low and you could sell it for more?  Leave a comment and let me know.

itsy bitsy, teenie weenie.

It’s not a yellow polka dot bikini, but it’s definitely itsy bitsy, teenie weenie.

It might be difficult to judge the scale based on that photo, but I can tell you that this little guy is 2 3/4″ tall by 3 1/4″ wide.  The knobs appear to be beads that are just glued on.

Here, maybe this photo gives you a better idea of the size.

I believe this probably qualifies as 1″ scale, if you are familiar with such terms (as in 1′ is reduced to 1″).  Way smaller than yesterday’s mini.

Now you may have thought that I should just leave this one alone, but you know me better than that by now, right?  Of course I painted it!

And of course I found some itsy bitsy transfers to add to it.

This is a mash up of transfers from I.O.D. , re.design with prima, and Tim Holtz.

I had the little tool tote and the bucket in my stash of dollhouse décor from back in the day when I had a pretty fabulous dollhouse (you can see it here).  I ended up sending that dollhouse out to my in-law’s place because I didn’t have a good spot for it, but I hung onto a handful of little things.

The tool tote was in the attic in my dollhouse …

But clearly it needed a coat of paint and a transfer as well.

Both the dresser and the tote are painted in Dixie Belle’s Drop Cloth.

The bee transfer on the tote is part of a re.design with prima knob transfer with some bits trimmed away.

Naturally, I had to line the drawers with some pretty paper as well.

I had to dig to find some scrapbook paper with a small enough floral design to look appropriate in these drawers, and that floral paper was perfect.

Seriously you guys, how frickin’ adorable is this thing?  I can hardly stand it.

I’m definitely going to have to hang onto this one for now.

What do you think?

the historic styles mini.

You may remember that I picked up this little mini dresser while garage saling recently.

I knew it would be a fun one to restyle.

I started by sanding it lightly, cleaning it and then painting the outside in Dixie Belle’s Drop Cloth.  Then I added some bits and pieces from I.O.D.’s Label Ephemera transfer to the top and front.

I really wish someone would come out with another typography transfer.  I just love this one, but I am getting a little tired of re-using the same wording over and over.  And of course, it also is retired so eventually retailers are going to run out of their inventory.  It would be fun to have something new, wouldn’t it?

I gave it a pop of color on the inside by painting it with Fusion’s Laurentien.  I wanted to use an all in one style paint, like Fusion or Dixie Belle’s Silk for durability.  After choosing some October Afternoon scrapbook paper to line the drawers, I decided that the Laurentien was the perfect color to go with the paper.

Rather than flipping up on hinges, or having a top drawer, this little dresser has a lid that comes off.

This piece would be fantastic as a jewelry box, but I chose to style it with crafting supplies.

I mean seriously, how cute would this be for keeping some of your crafting supplies organized?

But using it as a jewelry box would be a valid option as well.

I definitely prefer the ‘after’ version, how about you?

This one is for sale, so if you’re local (I don’t ship) be sure to check out my ‘available for local sale‘ page for more details.

gardening small.

After taking some time to evaluate my garden after our recent hailstorm, I’ve realized that although some plants were quite damaged, some weren’t really impacted too much.  My large leaved hostas are toast.

At least the ones where the leaves were unfurled.  There were still a few varieties that weren’t up all the way yet, so that was an unexpected bonus to the cool spring we’re having.

My tulips all bit the dust as well.  Ironic, right?  They survived the winter, and then the deer, only to succumb to hail.

But for the most part, plants with small leaves, like the sweet woodruff …

and the brunnera were just fine.

Which brings me to my smallest plants of all, the ones in my fairy garden.

As you can see, the fairy garden fell victim to the hail much like the rest of my garden.  But it’s easy enough to fix a toppled birdbath when it’s only 3″ tall, and once the hail melted I could see that there wasn’t much damage done to the fairy garden at all.

This seems like a good opportunity for a fairy garden update.

My fairy garden lives in an old cracked bird bath that I purchased at a garage sale.  The crack meant that it would no longer hold water and function as a bird bath, so that made it perfect to plant in since it has drainage.

If you’ve been following me for long, you may remember that I gave it a refresh back in 2018.

Since then only two of the perennials have reliably returned each year.  One is the bright lime green mini hosta called Feather Boa, and actually it’s doing so well that it’s threatening to take over.  I’m going to have to pull it up and divide it again soon.

I keep trying other miniature hostas, but so far none of them have made it through a winter.  We bury the fairy garden in a big pile of leaves up against the house for winter to give it some extra protection from our ridiculously low temps.

The Berberis thunbergii ‘Concorde’, the dark purple ‘shrub’, has also come back each spring.  The Barberry has not retained that dark purple coloring though, now it looks like this …

I suspect this is because it doesn’t get enough sun.

I always add a few annuals to the fairy garden each year.  Unfortunately, I rarely know the names of them.  I buy most of them at Bachman’s (my local garden center) and they are just labeled as ‘pixie plants’.

I added a little vertical interest with this next one …

It will be interesting to see how that one performs.

I also added something from Stepables this year.  Are you familiar with them?  They are low growing ground cover plants that can handle some foot traffic.  They are supposed to be good for planting in the crevices of a flagstone walkway, for example.

This one is called Blue Star Creeper and I hope I can keep it blooming in my fairy garden this summer because those tiny blue flowers are super cute.

My little garden angel is getting pretty ratty looking …

I may have to do some experimenting with the Dixie Belle Patina Paint on him next!

If you like my fairy garden, you should see my in-law’s!  I’m going to make a point of getting some photos of it to share with you guys this summer.  But until then, do any of you have a fairy garden?  If not, I highly recommend it.  You can fit one in just about anywhere, it’s much cheaper, it’s much easier to take care of than a full sized garden, and apparently it won’t suffer much from hail damage.  So I say, garden small!


the café cupboard.

You guys know I just can’t help myself when it comes to mini furniture.  Today’s piece isn’t quite up to my usual standards.  I usually prefer more vintage pieces.  But when I saw this piece at the thrift store I thought ‘why not?’.

First up was removing the faux punched tin inserts.

I could have just painted them, which may have improved their look somewhat, but I didn’t care for the wheat theme.  So I tossed them.

I had a couple of ideas in mind for replacing them.  I considered using window screening like I did in this mini-cupboard of my own.

But then I couldn’t find my stash of old screening.  It’s out in the carriage house somewhere, but I wasn’t going to spend a lot of time digging for it in the sub-zero temps we had while I was working on this one.

Next I thought maybe I’d just use some drop cloth fabric.  But in the end, I couldn’t come up with a good way to install it that would look neat and tidy on the inside.  Hot glue, maybe?  But I know myself well enough to know that making hot glue look tidy is a bit beyond me.

And in the end, I really wanted to be able to use some transfers on the doors, so I decided to just cut some new inserts out of a very thin piece of wood.  But … that didn’t quite work out either.  I didn’t have any wood that was thin enough.  So Mr. Q came up with some heavy duty cardboard that he had in his bookbinding supplies, it’s meant for creating book covers.  I cut that to fit, and then painted it, which worked out quite well.  I was even able to add the transfers to the pieces before installing them.

Then I just glued them in place (with regular glue, not hot glue).

The outside of this little cupboard is painted in Dixie Belle’s Sawmill Gravy, and the inside is painted in French Linen.

I pretty much chose those colors simply because I already had them out for the barrister bookcase that I shared last Friday.

You may have noticed by now that I also added some ‘hardware’ to the front of the cupboard.

That’s not exactly meant to be ‘real’ hardware.  It’s a scrapbooking do-dad, made out of very thin metal (Hobby Lobby carries the Paper Studio brand).  The color it comes in originally is called ‘antique gold’.

These come with little brads to attach them to paper.  I used some little tack nails that I had on hand to attach mine to the cupboard doors.

I also tried to give them a new look with some of Dixie Belle’s Gilding Wax in Zinc.

The Gilding Wax had nothing to grip onto because the metal had a slick, shiny coating on it. The usual remedy is to scuff sand the surface in a case like this, but this little latch is very small.  I wasn’t really able to rough it up as much as I wanted to.  I ended up with a patchy sort of look.

Still, it looks pretty cute I think.  And by the way, in case you are looking for them, those transfers on the doors are from re.design with prima’s Classic Vintage Labels.

There is only one of that design in each set (I just happen to be addicted Classic Vintage Labels and have purchased several of them).  I cut out just the wording and didn’t include the laurel wreath that surrounded it.

I really haven’t decided whether or not to hang onto this one.  It does look good on the shelves in my living room though.

This was a fun little project to tackle on a cold January day.  And really, any of the changes I made to this piece could apply to a larger piece of furniture too.  Replace cupboard door inserts, add hardware, change the color of hardware with a gilding wax, add transfers, modify transfers by eliminating portions you don’t want to use, and of course paint.

What do you think?  Am I tempting you to go look for some mini furniture at your local thrift store?

the mini’s.

One of my readers recently gave me the idea of sharing a flashback post on all of my mini’s (thank you for that idea Connie).

Since I’m in the middle of working on a bunch of Christmas items, and my bench makeover isn’t quite finished, I thought this would be a great way to create some content that wasn’t hopelessly out of season for you guys today.

Plus, it doesn’t take much encouragement for me to share my favorites, starting with this one.

It’s the perfect spot to perch my mini camera.

That is actually the 2nd look for this piece.  I’d originally painted it in Miss Mustard Seed milk paint in Eulalie’s Sky.  In fact, it was the first thing I ever painted in milk paint.  Eventually I re-painted it in Homestead House milk paint in Limestone when I unified my mini non-collection by painting them all the same color.

Adding the IOD transfer on the front was definitely the icing on the cake though.

Another of the mini’s that I’ve kept for myself is this one …

I use it as a jewelry box.

The third piece in the photo of mini’s above is one that I actually parted with.  I’d had it tucked inside a cupboard for a couple of years and decided that I wasn’t enjoying it enough to keep it.

So I brought it into the shop where I sell on consignment and sold it.

Even though I didn’t paint this next one, it’s still a piece that I haven’t been able to part with.

It’s perfect for holding all of my washi tapes.

This next piece is another one that I haven’t painted.

I haven’t really come up with a purpose for this one, so for now it lives inside a birdcage out on my front three-season porch.

Don’t even ask what possessed me to put it in a cage.  Who knows?  But I like it.  I keep debating whether or not to sell it though.

I also can’t really explain why sometimes I want to paint over these original finishes, and sometimes I don’t.  With the piece that I shared last week, I painted over its original yellow paint color.

This next piece is another one where I painted over the original paint …

mainly because the inside was a dark red, and the outside a really dingy cream color.  I just didn’t love it.

It turned out super adorable in a new color scheme though, and it sold quickly.

Here’s another hutch that I painted up.

I really wasn’t in love with those colors on that vintage wallpaper liner, but it was so perfectly vintage that I left it along and just painted the rest of the piece.  This one sold quickly as well, so someone must have loved it.

I’m not quite sure that this next one really counts as a miniature piece of furniture, but it definitely has the same flavor so I thought I’d include it.  This is another one that sold quickly, and who can be surprised by that?  Anyone can use an adorable button box to contain all of their mending supplies.

I’m not sure that this next one counts as a mini-dresser either, it’s more of a little storage box-ish thing really.  But I’m including it anyway.

I guess I can include anything I want to here, right?  It’s my blog, and I’ll post what I want to 😉

Anyway, that’s another one that I sold so that someone else could enjoy it in their own non-collection!

So how about, which one of these was your favorite.  Be sure to let me know in a comment.