

I promised I’d share what I ended up doing with that top heavy mini-cupboard.
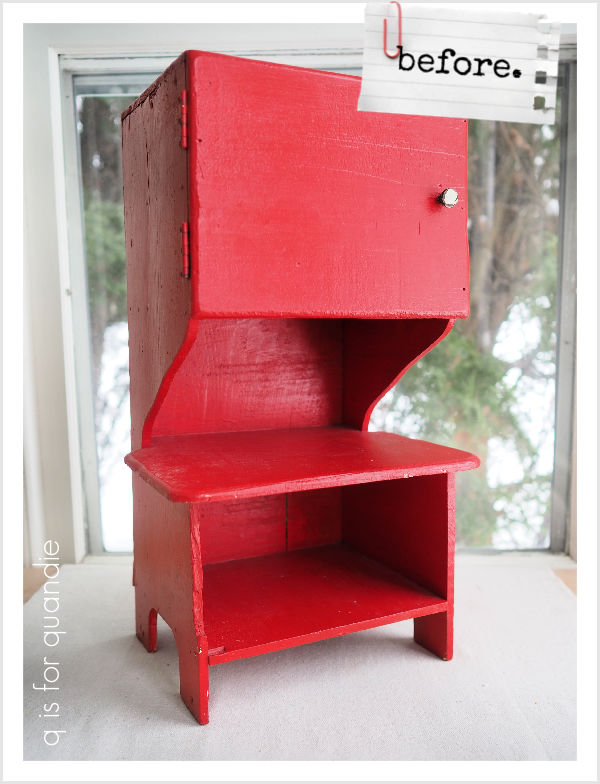
If you’ll remember, I found it while thrifting a week or two ago. I almost put it back on the shelf because I wasn’t sure it would be worth the effort to save it. It had such a wonky, top heavy look.
In addition, what I didn’t show when I mentioned it last was that it was filled with gross contact paper.
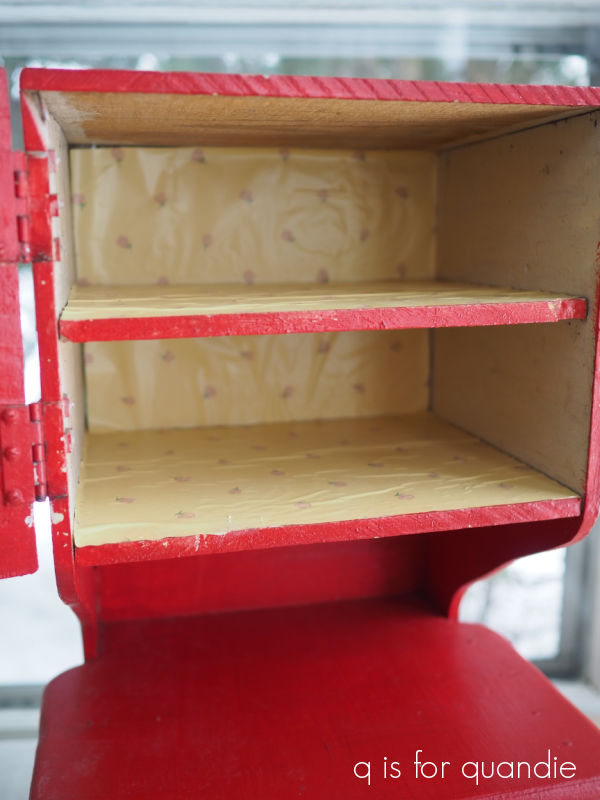
I think yucky old drawer liner might be near the top of my list of things I really don’t like to deal with. Right after smoky smells and mouse pee. I mostly try to avoid old contact paper, but I completely draw the line at the other two!
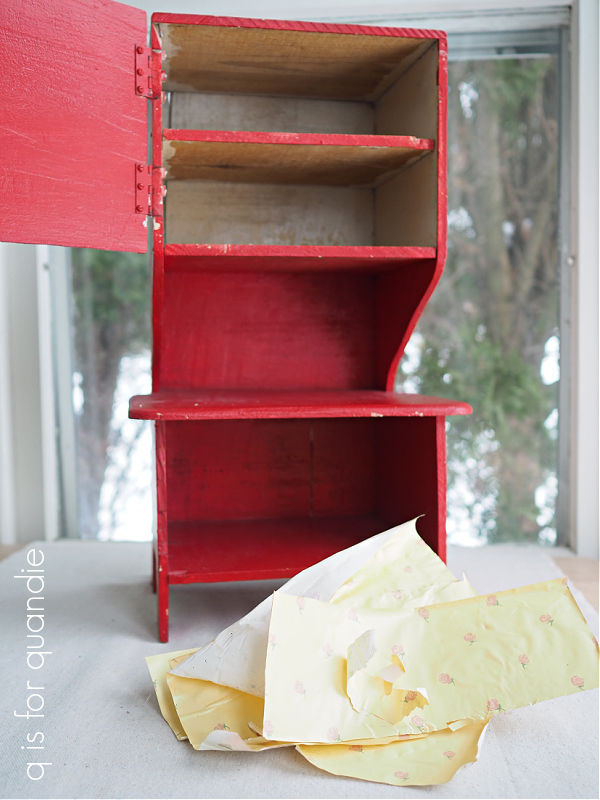
Fortunately, the adhesive on the contact paper had really deteriorated, so it came off rather easily.
Next I had to deal with that top heavy look.
I asked you guys for suggestions, and several of you had some really good ones including just removing the door, or maybe moving the door to the bottom, or even flipping the cupboard upside down turning the top into the bottom and then cutting off the old legs and adding new ones. I did pop it upside down to see how it would look and that might have been an option that worked well.
However, after consulting with my handyman Ken, we decided to remove the door and then cut back the top half of the cupboard so that it was stepped back rather than flush with the front. If you look closely at the photo below, you can see where I marked the new measurement for Ken.

Ken simply used a jig saw to cut everything off beyond that 5″ mark. Then he did his best to recreate the curved sides below the upper shelves.
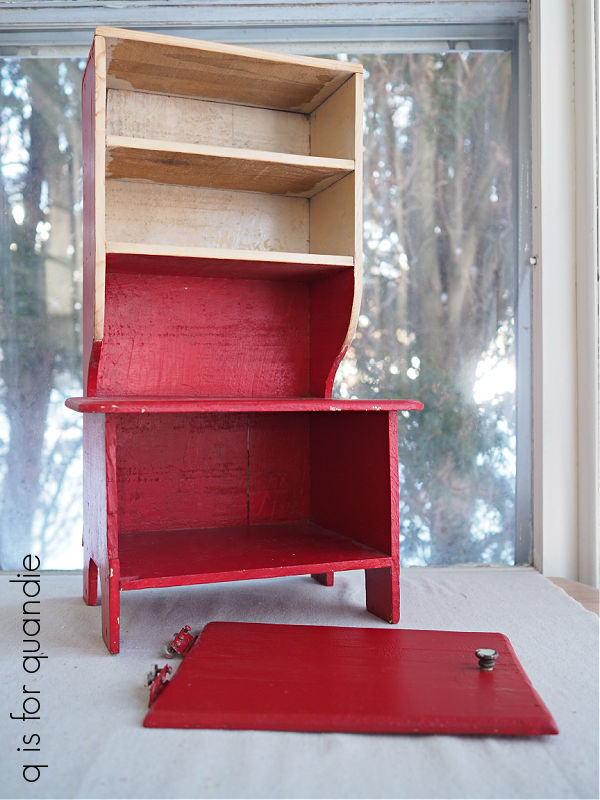
I wanted to possibly re-use the door on the bottom section, but Ken felt it was too warped to use. I suppose we could have added a new door, but in the end, I think it’s fine without a door.
After sanding and cleaning the piece, I painted the inner bits with Dixie Belle’s Kudzu, and the outer bits with their Drop Cloth.

I just love this combination of white and green, especially in springtime. OK, well, spring is definitely not here yet, we still had some single digit temps last week while I was working on this one. But surely it’s just around the corner, right?
Next I lined the shelves with that pretty gingham scrapbook paper you’ve been seeing me use a lot of recently.

Once again, I am totally kicking myself for putting the majority of my garden themed props out in the potting shed, including my green flower frogs. There is still a 3′ bank of snow in front of the door. So for now, I have to make do with my basic uncolored frogs.
Finally, I added a Classic Vintage Label transfer from re.design with prima to the ‘work surface’ before giving everything a coat of clear wax. Well … not the paper of course, but all of the painted parts. The paper, by the way, is not adhered. It’s loose, so if someone wanted to switch it out for something else they could easily do so.
![]()
In addition to those frogs, I also staged this one up with the itsy bitsy dresser that I painted up a while back and few other bits and bobs.
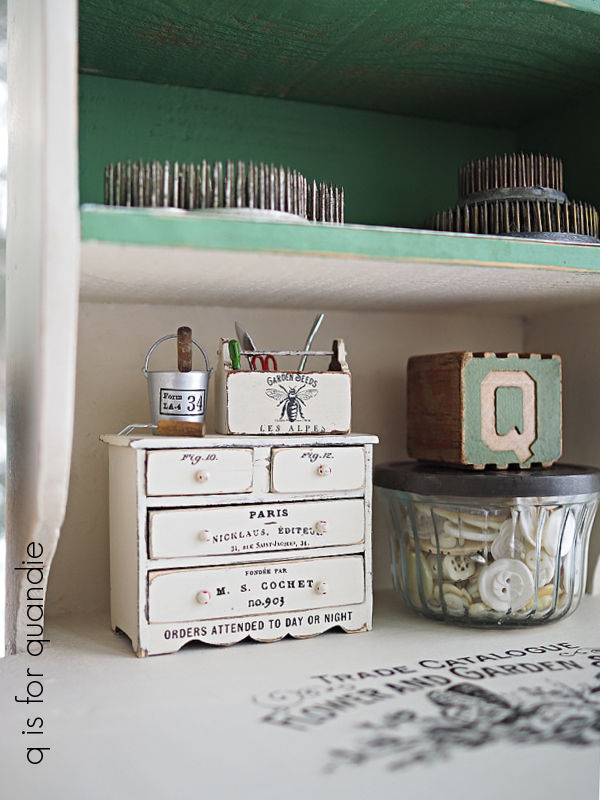
Isn’t it sweet?
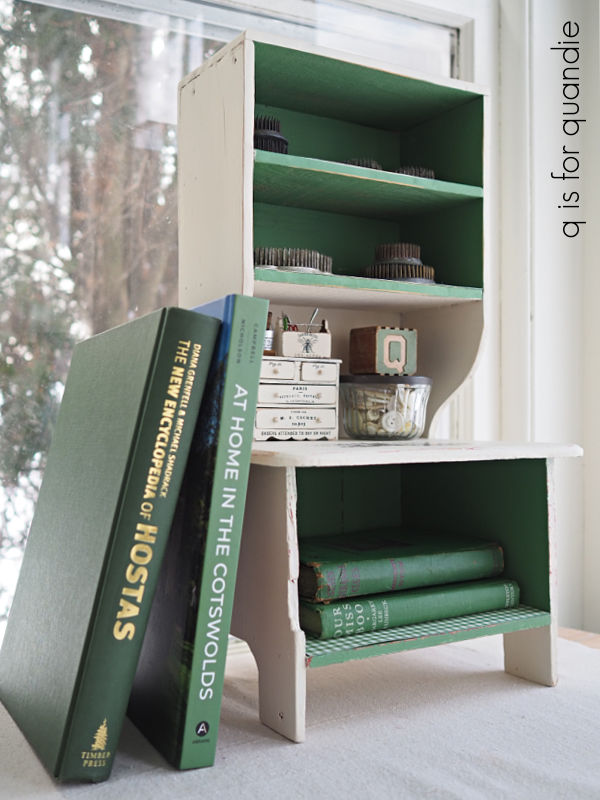
This little cupboard would be the perfect addition to a craft room, potting shed, desk top, etc, etc.

I think Ken and I did a good job of eliminating that wonky top-heavy look and giving this little cupboard a fresh new look with some paint, paper and a small transfer. Ultimately, I’m glad I didn’t put this one back on the shelf at the thrift store.
What do you think?
The cupboard is for sale, so if you are local be sure to check out my ‘available for local sale‘ page for all of the details.
Thank you to Dixie Belle Paint Co for providing the paint used in this project.

MUCH better! Very cute.
LikeLike
Thanks Doreen 🙂
LikeLike
This is an awesome transformation! Love it in the “after”!
LikeLike
That thing definitely needed a new look 😉
LikeLike
Thinking outside the box for sure. Looks more proportional and the colors are much better. Another nice save!
LikeLiked by 1 person
That is Soooo Stinking Cute. Your creativity and Kens skills work perfect together. ❤️
LikeLike
Thanks so much Joyce!
LikeLike
It’s always fascinating to see what you can do with an ugly duckling! Adorable!
LikeLike
It is fun to see such a night and day transformation, isn’t it?
LikeLike
The little cupboard is adorable ♡♡♡
LikeLike
Thanks Diane!
LikeLike
I think that this is an amazing and charming transformation! You and Ken work so well together to create beautiful pieces. Well done 😊
LikeLike
I am so lucky to have Ken next door!
LikeLike
Yes you are 👍
LikeLiked by 1 person
Freaking adorable! And I’m a sucker for vintage garden, especially flower frogs!!
LikeLike
This little cupboard would be perfect for displaying a non-collection of flower frogs. If it doesn’t sell, I may have to consider keeping it for that purpose!
LikeLike
Love this!
LikeLike
Thanks Cyndi 🙂
LikeLike
The new look is charming!
LikeLike
Thank you!
LikeLike
Love the new look! Definitely a total transformation! It looked like a hulking elephant before, now it’s a dainty and very cute cupboard! Good work!!
LikeLike
LOL, great description Amanda, it really did look like a hulking elephant before 🙂
LikeLike
Just love how this turned out! It is so cute after you and Ken worked your magic! Now the proportions look right, the paint colors are fresh and springy, and the paper liners top it off just right. Two thumbs up!!
LikeLike
Thanks Cheryl 🙂
LikeLike
Good save! It turned out wonderfully!
LikeLike
Thanks Fonda!
LikeLike
Boy howdy I’d be snatching that right up if I was close!( shipping 🫣😉)That is absolutely precious! Can you tell I really love it! Y’all did an outstanding job!
Big smiles,
Alice
LikeLike
Never say never, but I’m still not ready to consider shipping. Boxes, bubble wrap, drop off, payment, etc, etc, etc. Maybe one day …
LikeLike
Go Quandie and Ken! Looks great!!
LikeLike
Thanks Kaye!
LikeLike
This turned out so well!!Ken did a superb job. Made all the difference. Looks like it went on a diet. Charming.
LikeLike
LOL, I wish I could go on a diet that would work that quickly 😉
LikeLike
Amazing! You and Ken performed a miracle on that homely little desk? It’s now beautiful!
LikeLike
Thanks so much Laura!
LikeLike
Fabulous job…looks amazing! I’d buy it in a heartbeat if I didn’t live in CT.
LikeLike
Thanks Melissa!
LikeLike
it’s adorable! Great idea to cut back to top to create a better balance. I would use it for sure.
LikeLike
Thanks Suzi 🙂
LikeLike
Oh this is too cute! The perfect proportions now. We all need Ken the magic fixer!
LikeLike
There aren’t enough Ken’s to go around!
LikeLike
Wow 🤩 what a transformation! Well done to you both. We all need a Ken in our life!
LikeLike
That is for sure!
LikeLike
It turned out very cute. I really like the gingham paper with it. Cutting back the top was the way to go.
LikeLike
Thanks sis!
LikeLike
Hi Linda, I can’t believe that tiny tote! That is so cute. The tiny cabinet came out great!
LikeLike
Isn’t that tiny tote adorable? It’s only about 1.5″ wide! It was meant for a dollhouse, and in fact it was in my dollhouse back when I had one (you can see that here).
LikeLike
What they all said 😉…really cute
LikeLike
Thanks Mary!
LikeLike
It looks great and I love the green and white. It would be a cute spice rack or kitchen storage too.
LikeLike
Great idea Becky, it would make a great spice rack!
LikeLike