the clock case project.

Oh my gosh you guys, this one has been around for a long time.

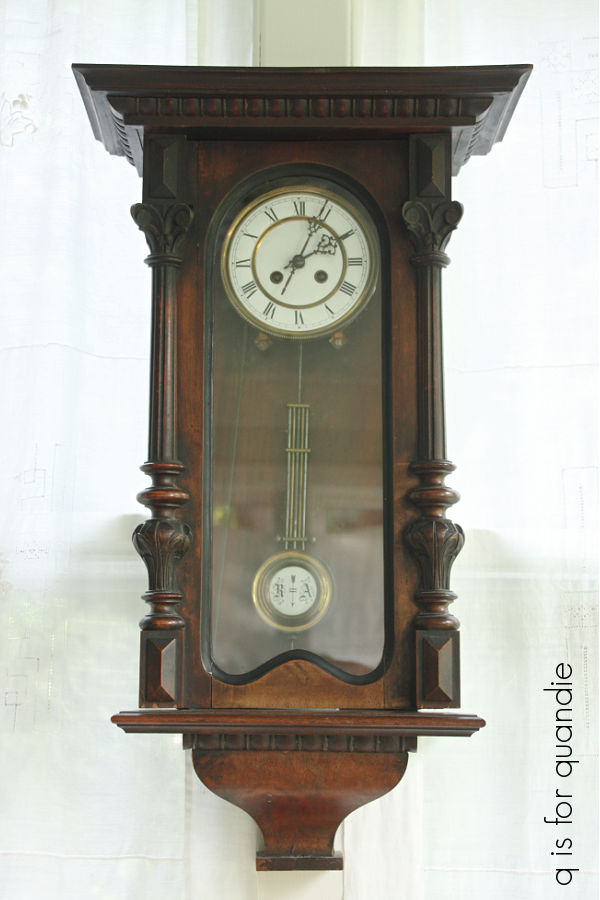
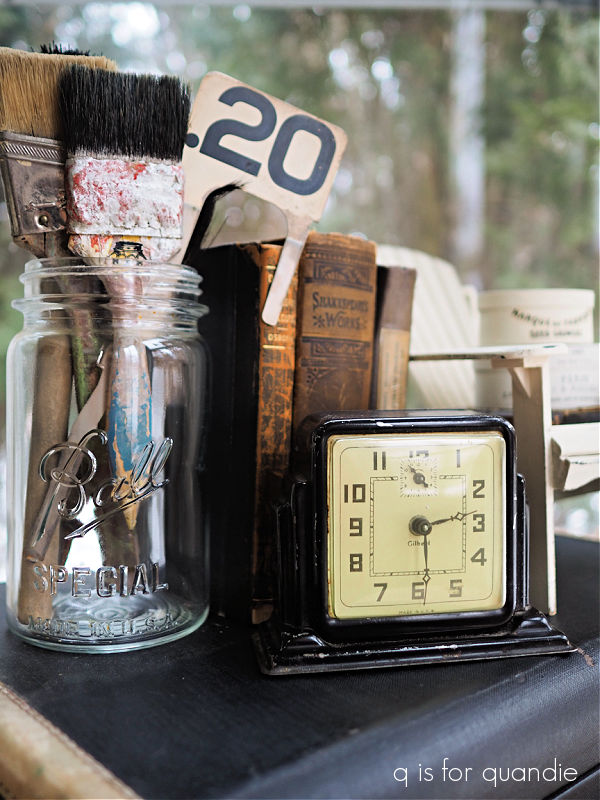
I purchased this clock more than 5 years ago.  I paid $5 for it at a garage sale.  It was going cheap because it didn’t work.

I mainly purchased it for the case.  I planned to gut it and turn it into a little hanging display case of some kind.

But for some reason it became one of those projects that I never quite got around to sharing here on the blog.  I did eventually remove the clock parts, and I sold some of them separately.

Then I asked Ken to add a little shelf inside the case.  Next up, I painted it in Fusion’s Little Black Dress milk paint.

I added some Eiffel Tower paper to the back and filled it up with some clocks and silver salt and pepper shakers.

But I didn’t love it.

I think I just wasn’t feeling the black, and I also really wanted this piece to be crackled and chippy.  But for some reason I didn’t get any chipping out of that black milk paint.  So I tucked the clock case away for another couple of years.  I finally decided to give it another go a few weeks ago.

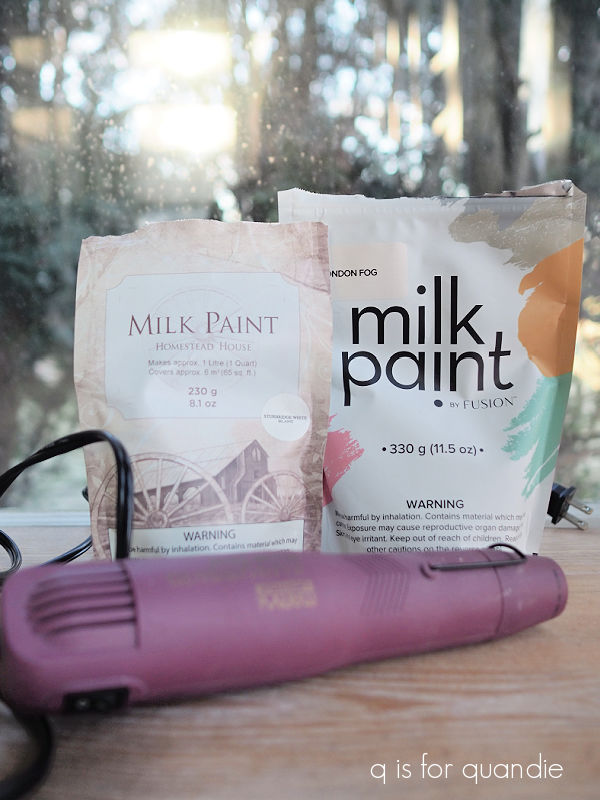
But this time I also decided to try adding some heat.  If you aren’t familiar with this technique, you can use a heat gun to dry your milk paint quickly which can promote crackling and/or chipping.

I had two shades of white on hand, Homestead House Sturbridge White and Fusion London Fog.  The Sturbridge White is too white for me, but the London Fog is too creamy, so I mixed them to create the perfect off-white.

I mixed my paint up on the thicker side (because that tends to aid in crackling as well) and tested it out on the bottom part of the clock case.  Once the paint was on, I hit it with the heat gun for a minute.

It started to crackle beautifully, so I turned off the heat gun and gave it a couple of minutes to dry.

And … well … you can see the results.  It started chipping.  A lot.  Too much.  Eventually almost all of the paint came off.

I suspect that’s because I had added a hemp oil topcoat over my black paint back when I first painted it (more than a year ago).  Theoretically you can paint over hemp oil once it is cured, which takes about 4 weeks.  That would probably work if I was using a chalk style paint, but not so much with a milk paint.  Fusion recommends that you give hemp oil several months to cure before painting over it with their acrylic paint.

So back to the drawing board.

I had a couple of options at this point.  I could remove the hemp oil using mineral spirits or rubbing alcohol.  I could paint over the hemp oil with a chalk or acrylic paint first, and then follow that up with the milk paint.  I could add bonding agent to my milk paint, but then I probably wouldn’t get the crackling that I do want.  I could also try scuff sanding the clock to rough up the surface, I’ve had that work fairly well in the past.  So I went with that approach.

Once I had it the clock case sanded down, I decided to thin out my milk paint a little too.  Just to hedge my bets.

I repainted with two coats of the milk paint, and I still got quite a lot of chipping.

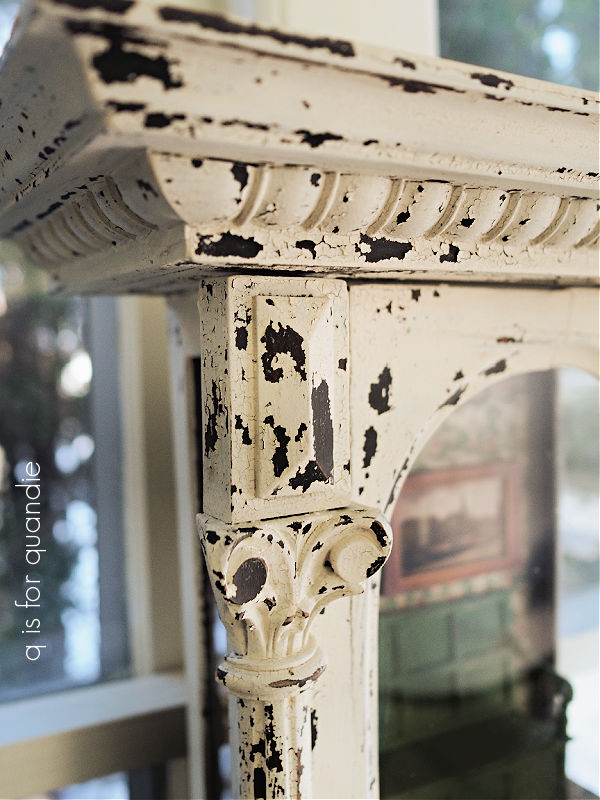
Too much chipping for you?  I get it.  This look isn’t for everyone, but I was creating this piece for myself and I still happen to love a chippy finish.  So I decided to just go with it.

Rather than sanding the final coat of paint (which definitely would have taken even more of the paint off), I brushed it lightly with a dry cloth and then vacuumed away any really loose paint.  Then I very gently brushed on three light coats of Dixie Belle’s Flat Clear Coat.  It will act as a sort of ‘glue’ to hold the rest of my chippy paint in place.  This will work on a piece that doesn’t get a lot of wear, but if it gets handled at all you’re still going to lose paint.  In addition, the surface is very rough to the touch, so that’s something to keep in mind.

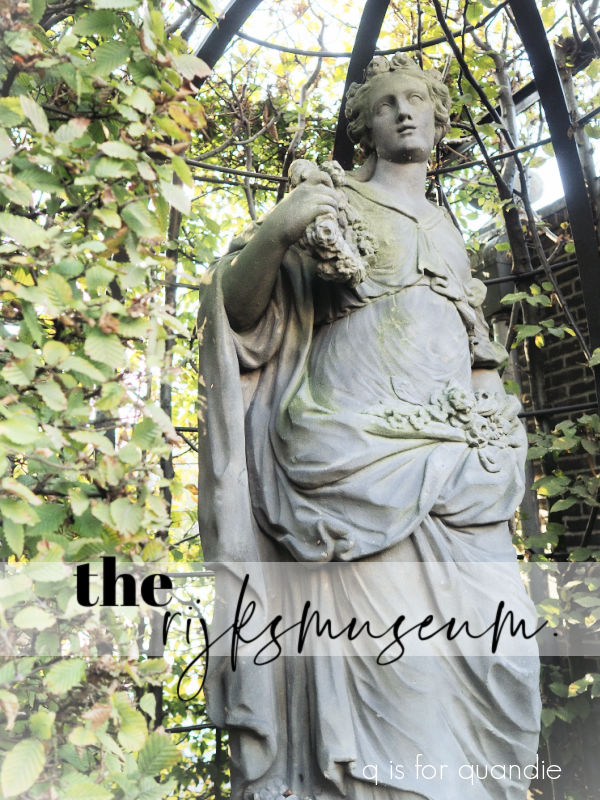
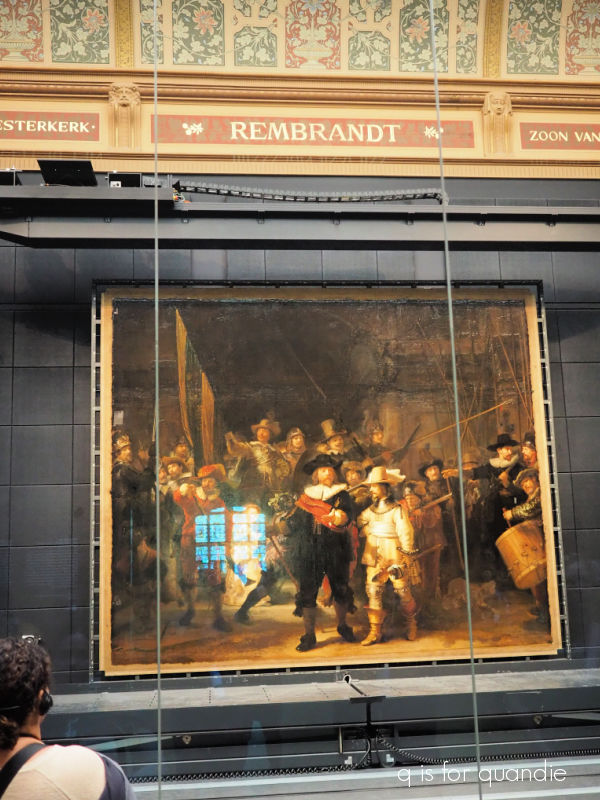
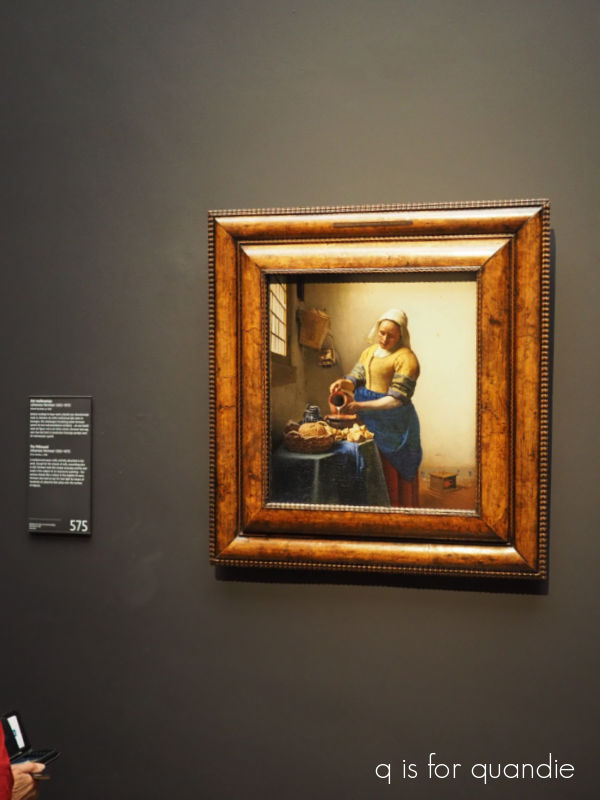
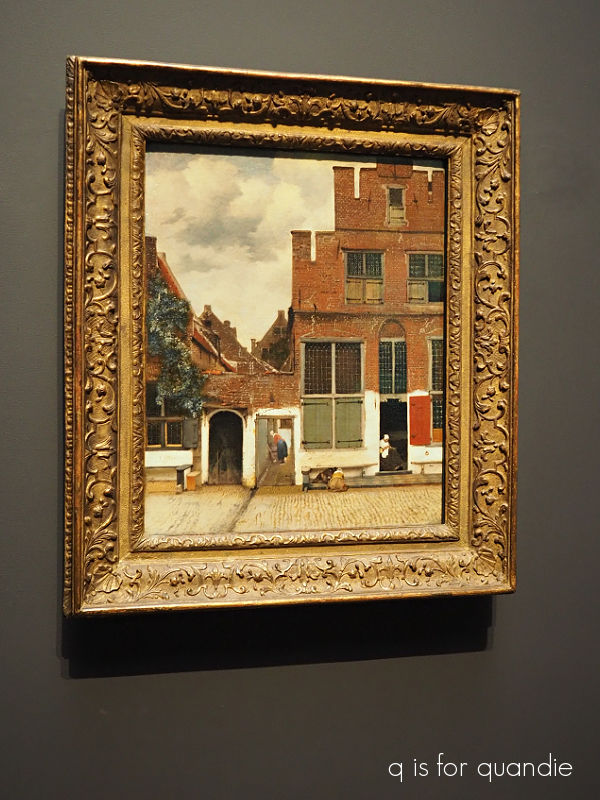
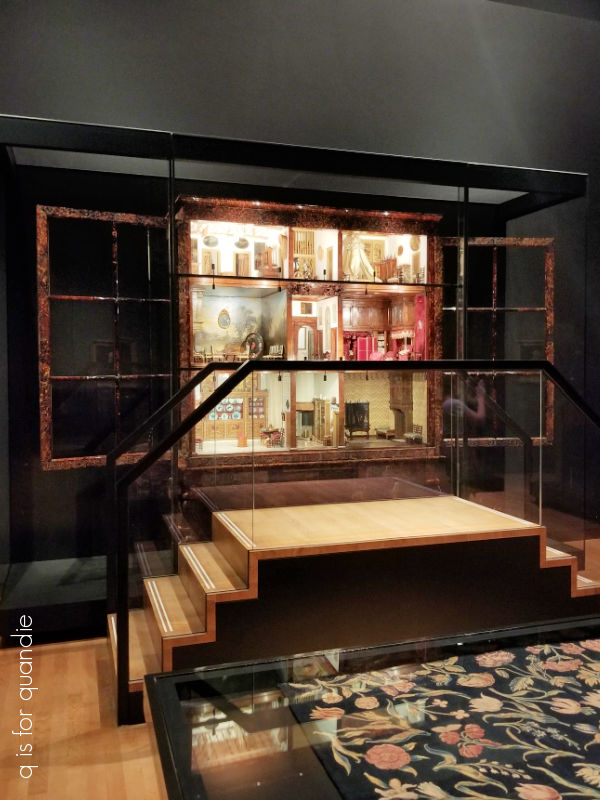
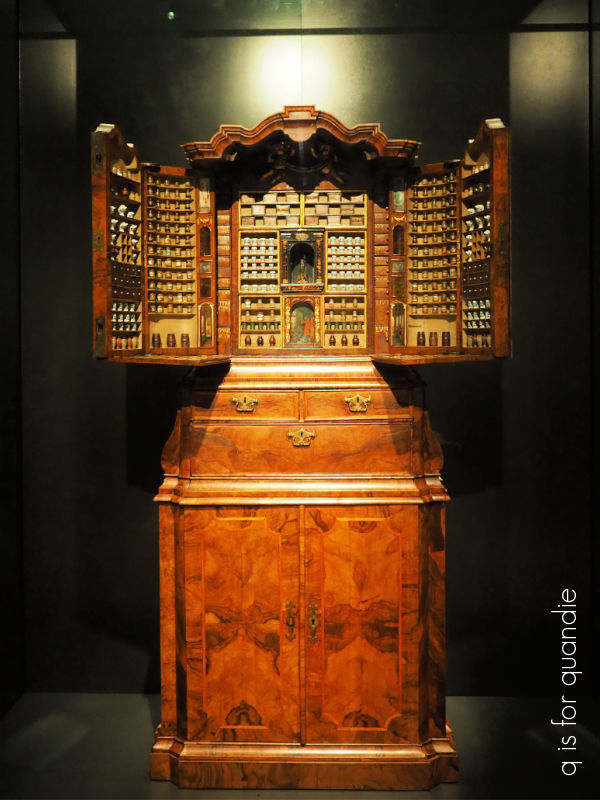
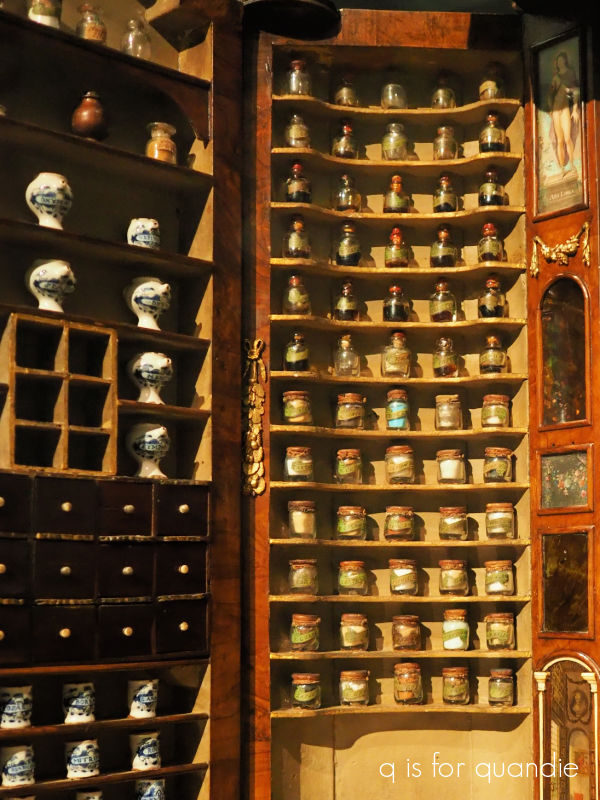
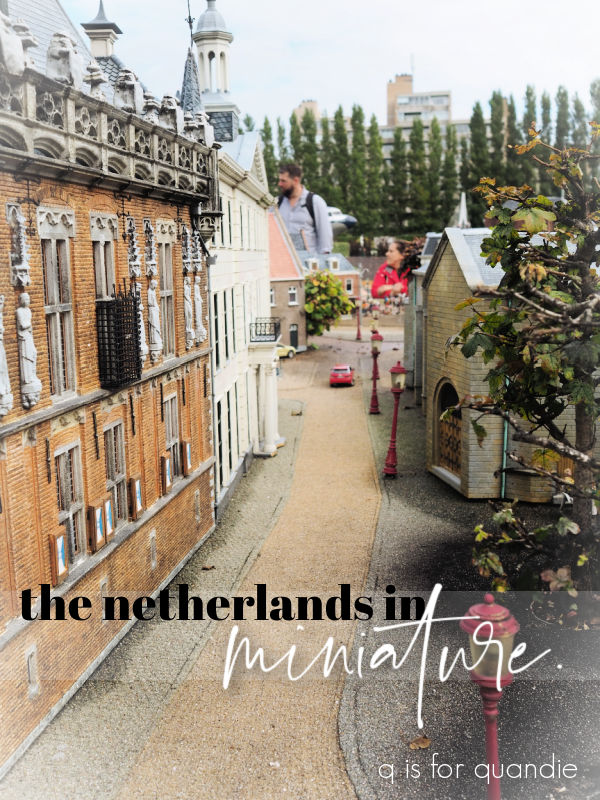
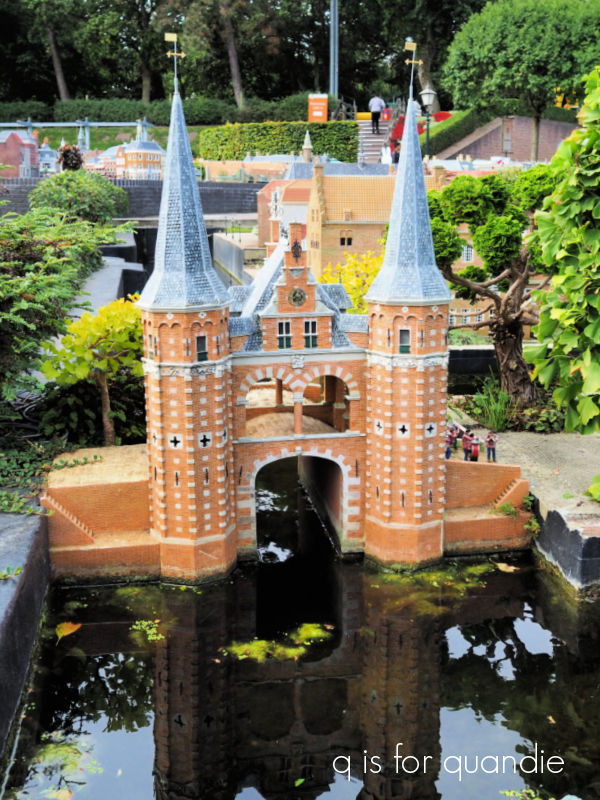
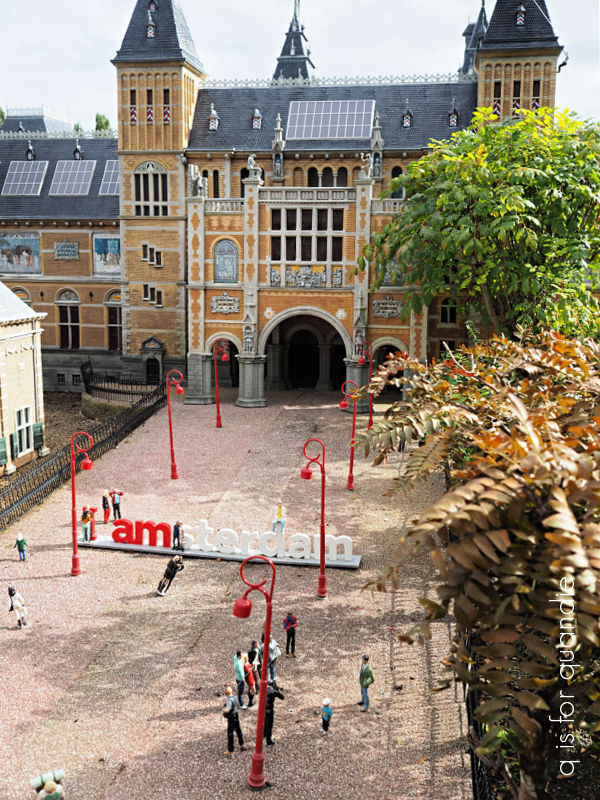
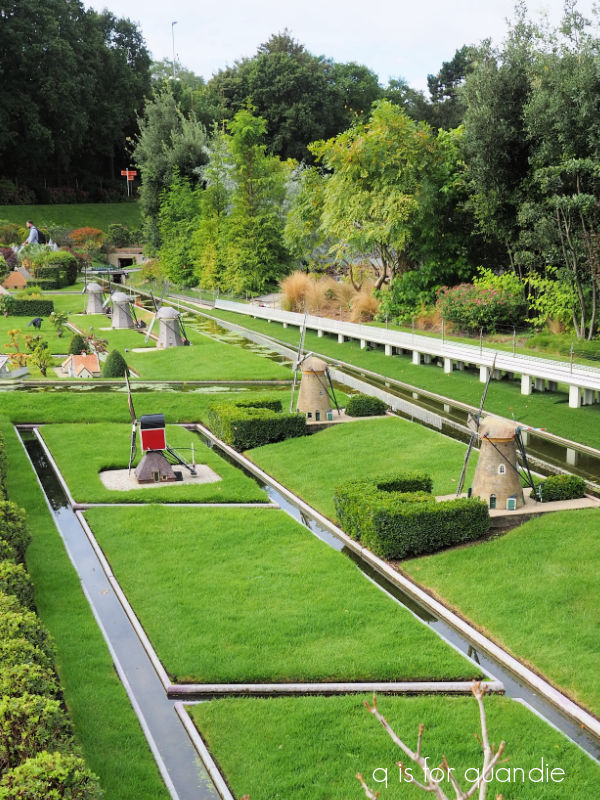
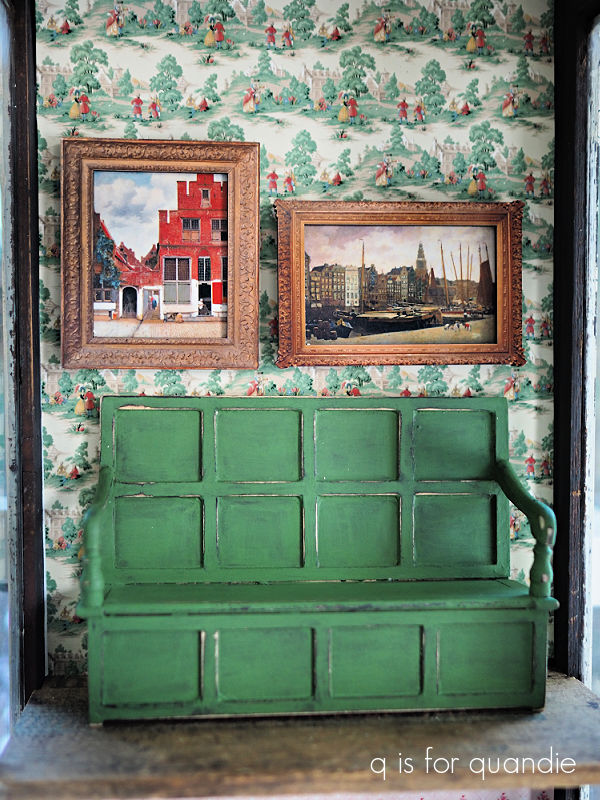
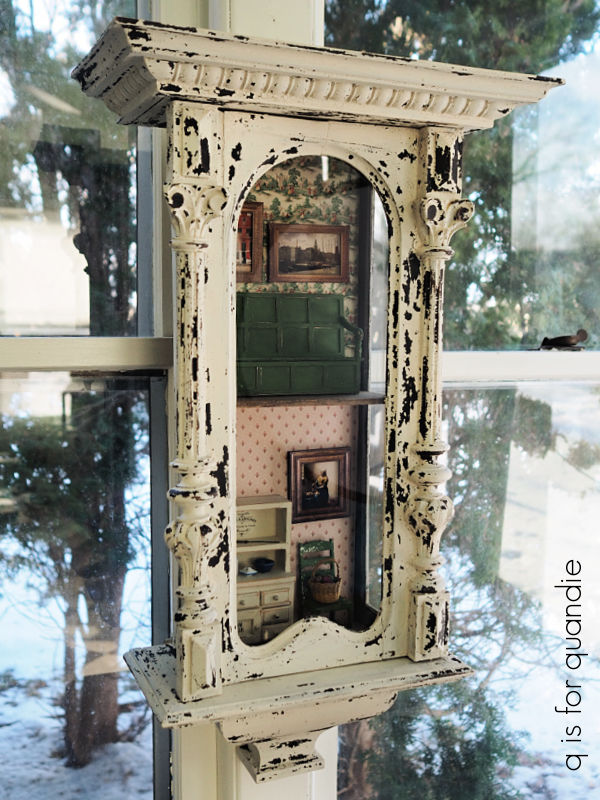
Now for the fun part!  As I mentioned in my last post, this project was inspired by my visit to the Rijksmuseum and all of the fabulous miniatures that I saw there.  I purchased three miniature ‘painting’ magnets in their gift shop including one of my favorite Vermeer, The Little Street.

And I needed somewhere to hang them.

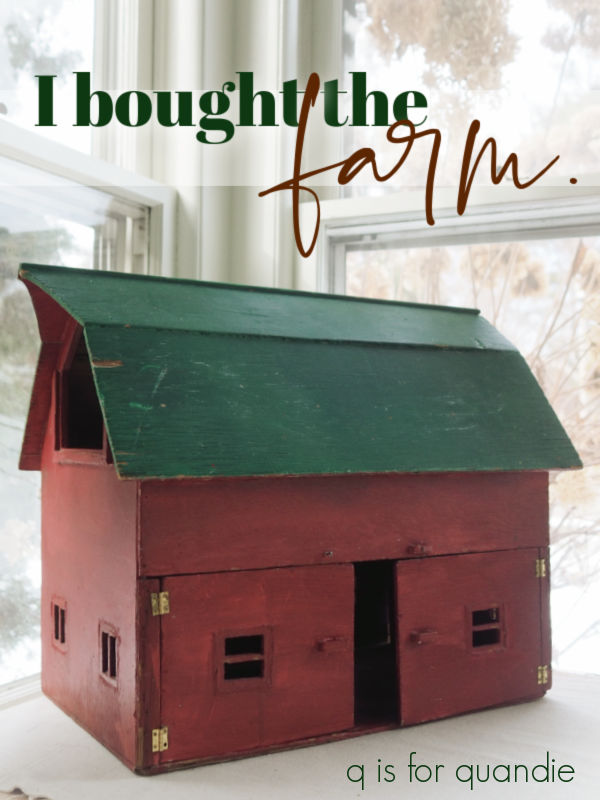
I ordered some miniature wallpaper from the same Etsy vendor where I purchased the barn lights for my miniature barn makeover.

There were so many pretty ones to pick from that I had a hard time deciding.  They were all less than $10 each, so I ordered three different ones to give myself options.  I have already cut up the two I ended up using in the photo above.  There is enough left of each that I could change my mind later and wallpaper both levels the same if I want to.

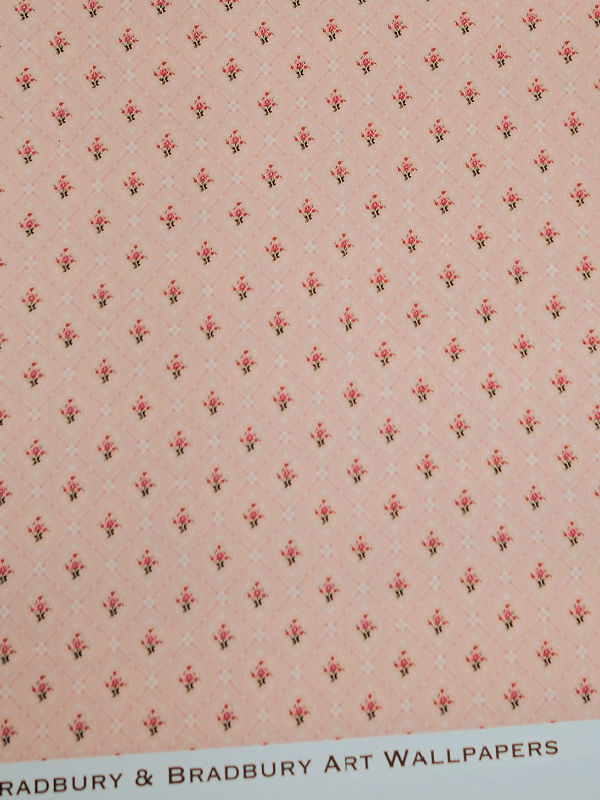
I used the Bradbury & Bradbury Wallflowers on the lower level

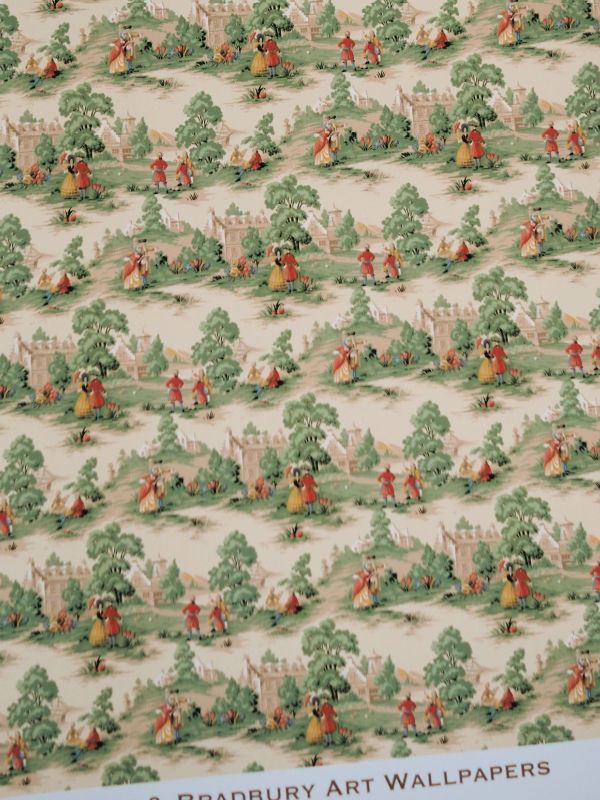
and the Bradbury & Bradbury Colonial Williamsburg on the top level.

Isn’t that fantastic?!

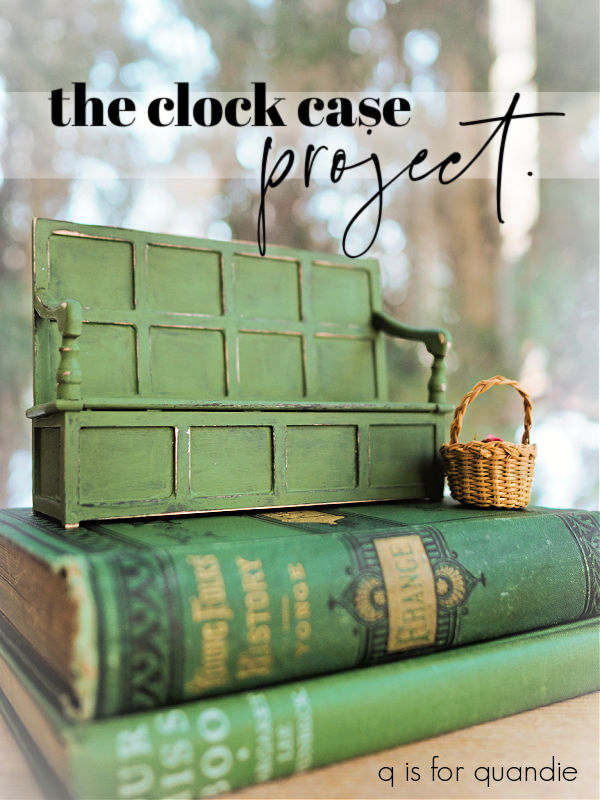
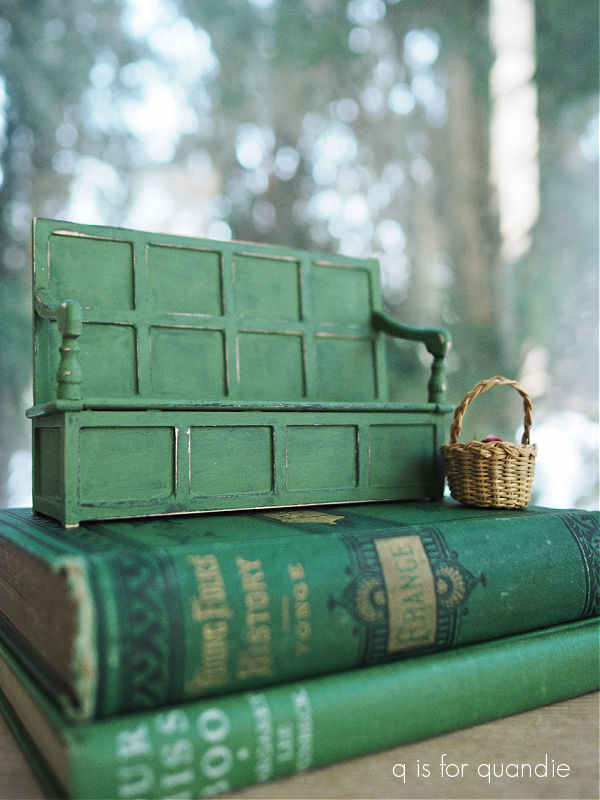
I also ordered an unpainted bench and chair from the same vendor.

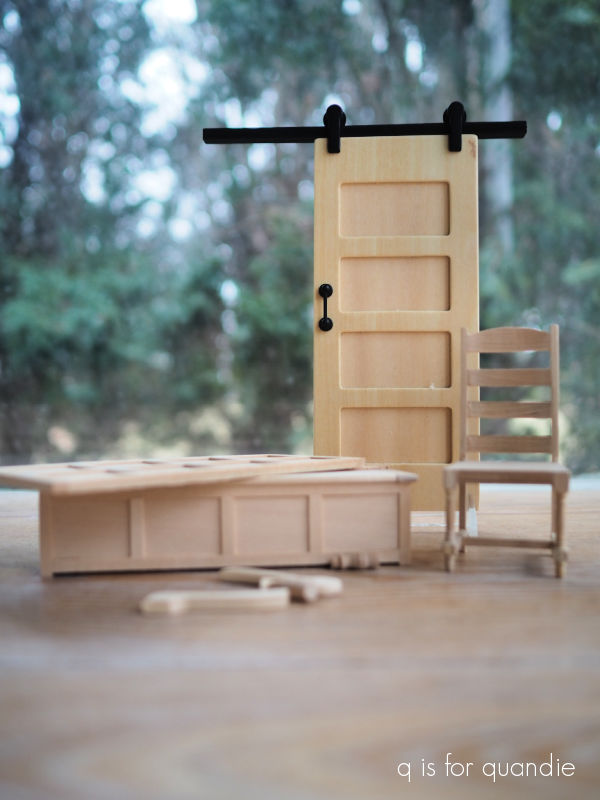
The sliding door was from Hobby Lobby, and I ended up not being able to use it for this project.  Also, I’m fairly sure the bench was not intended to arrive unassembled,  it was broken.  But it was fairly easy to glue it back together.

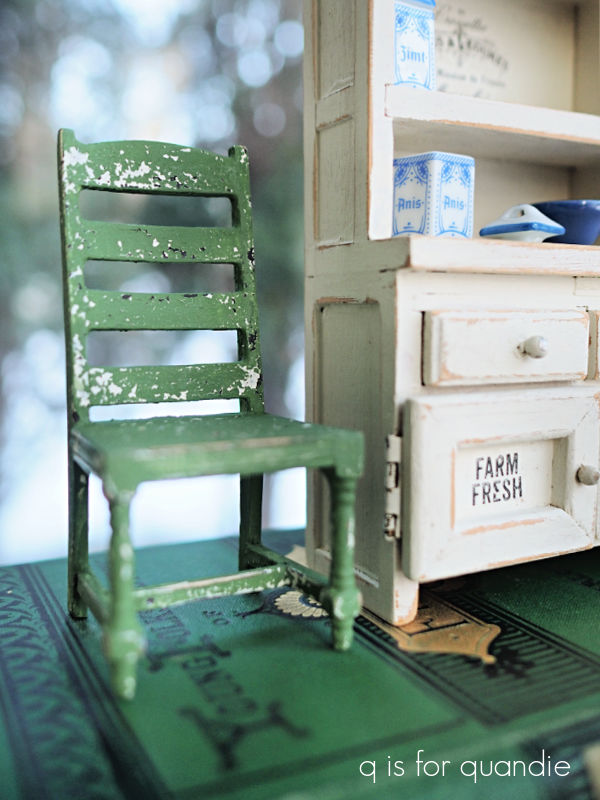
I painted the bench and the chair in Sweet Pickens’ In a Pickle milk paint.

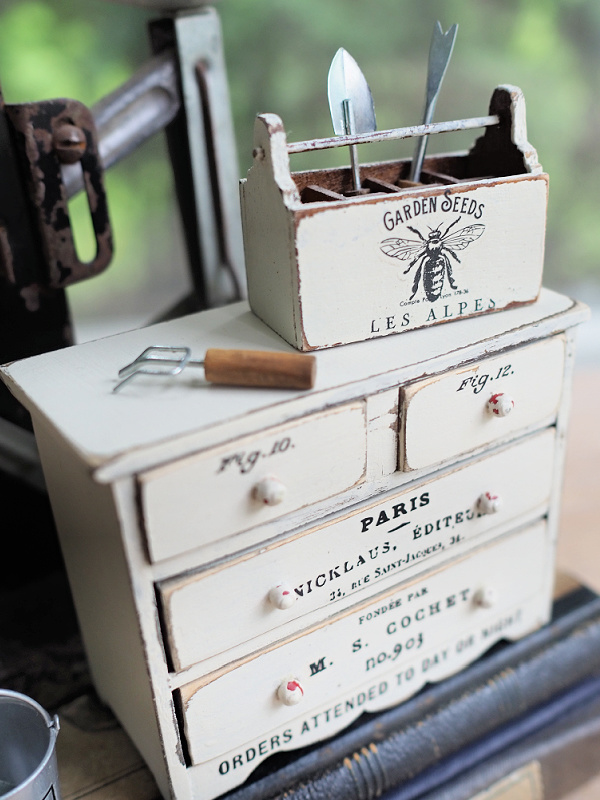
And you’ll remember the little cupboard that I painted a few weeks back, I told you I had a plan for it.

After ‘wallpapering’ the ‘rooms’ and ‘hanging’ my ‘paintings’ with some two-sided tape, I furnished the two levels of my clock case.

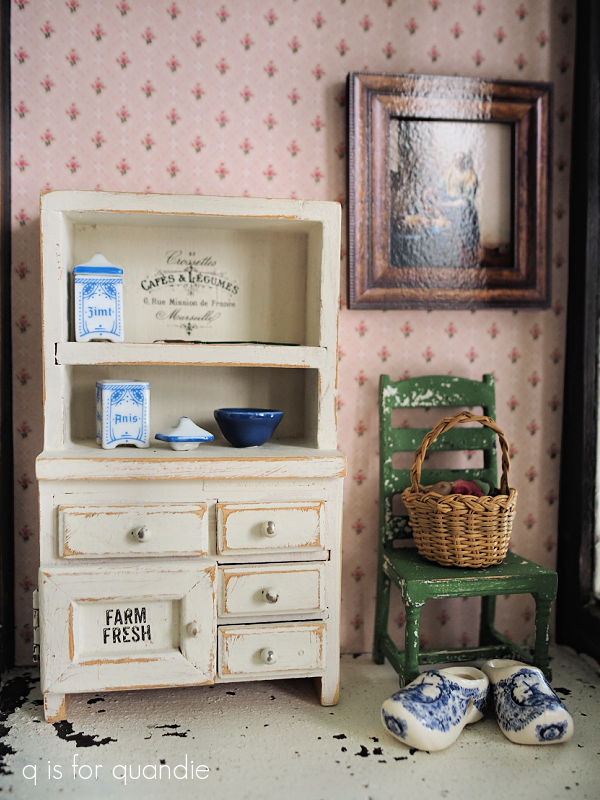
They are a little sparsely decorated at the moment, but I figure I can always add to them as I find more fabulous miniatures that I want to include.

I had to hang the clock case out on my front porch to get decent lighting for these photos.

But its real home is hanging in my q branch where it looks amazing on my Globe Artichoke colored walls.

But you’ll just have to take my word for that.

I think it was worth the over 5 year wait to see this project come to fruition, what do you think?

the rijksmuseum.

I was doing a little computer maintenance the other day, backing up photos and whatnot, and I realized that I never shared my visit to the Rijksmuseum in Amsterdam here on the blog.

So, I decided better late than never, right?  I also have additional motivation to share it with you because this visit inspired the project that I’m going to share later this week.

If you’re new here you may not know that I visited the Netherlands and Norway last September.  On one of our days in Amsterdam we headed to the Rijksmuseum.

The Rijksmuseum is the national museum of the Netherlands and is visited by over 1 million people each year.  It was founded in 1798, but the current building that houses it opened in 1885.  A ten year renovation was completed in 2013 to the tune of € 375 million (holy cow!).

Much like the Mona Lisa at the Louvre, the Rijksmuseum has a very famous painting behind glass called The Night Watch by Rembrandt.  However, at over 14′ wide, this one isn’t quite as small as the Mona Lisa.

It seems to be the main draw and the area around it can get very crowded, so we visited it right at opening time.

Personally I was more interested in seeing the Vermeer’s (which are pretty small) including The Milkmaid which was painted in 1658.

My favorite of the Vermeer paintings at the Rijksmuseum ended up being The Little Street.

My photo doesn’t really do it justice.  But it appealed to me because looking at it I felt like I could step right into 1650’s Delft (the town depicted).

As much as I enjoyed the various paintings and other artworks in the Rijksmuseum, my main goal was to see the poppenhuizen, or dollhouses.

Dollhouses in this period were typically cabinets that opened to reveal the miniature rooms.  The didn’t necessarily have the miniature exterior features of a house.  They also weren’t toys, but were a hobby of the very wealthy.

In the case of the dollhouse shown above, the cost of creating it was equivalent to the cost of buildng a full-sized canal house at the time.  The owner, Petronella Oortman,  custom ordered each piece to be made out of authentic materials and precisely to scale.  She hired basket weavers to make the baskets, and had linen woven to hang from the drying rack in the attic room shown below.

The china displayed in the kitchen was custom made for Petronella by the East Indies Company.

And isn’t the mural in this room gorgeous?

If you are as fascinated by miniatures as I am, you may also like to see this piece …

It’s an apothecary cabinet filled with miniature bottles and delft pots.

And they are all filled with samples of various medical ingredients, etc.

Isn’t that fantastic?  Check out this link to see a better photo and to listen to a fragment from the Rijksmuseum audio tour about this piece.

Also, if you are a miniatures enthusiast, you’ll definitely enjoy my post about our visit to Madurodam.

One could spend years trying to see everything in the Rijksmuseum and I’d love to go back someday to see more of it.  Before we headed out I did make a quick pit stop in the gift shop where I picked up some miniature souvenirs to take with me.  They partially inspired the project I’m going to share with you on Friday, so be sure to stay tuned!

the barn makeover.

You’ll remember the mini barn that I purchased at my local Goodwill.

It was missing a bit of trim, and a section of wall between the two doors, so I sent it over to Ken’s workshop for some repairs.

He replaced that section of wall, the trim on six of the windows, and one of the little door latches …

and he also added a little trim to the loft opening.

Next up I gave the entire barn a scuff sanding, and after wiping it down I gave it two coats of Dixie Belle’s B.O.S.S. in grey.  I didn’t really need to block any stains, but I thought it would be easier to cover that red and green if I had a grey primer down first.

In hindsight, I wish I had painted the entire barn in a dark color such as DB’s Coffee Bean first so that I could have distressed my final paint back to the darker color.  In the end, I could see both the grey B.O.S.S. and the green when I later attempted to distress the roof.  Rookie mistake.

Next up I painted the roof and the interior of the barn in Dixie Belle’s Dried Sage, and the exterior walls in their Drop Cloth.  It still took two coats of paint to cover the grey primer, so again, I would have been just as well off with a darker paint.  Once my paint was dry, I experimented with some different colors on the window trim.  I tried a bright white (DB’s Fluff) first, which was distinguishable from the Drop Cloth, but I didn’t like it.  I tried Coffee Bean, but I didn’t like that either.  I even considered just painting them with the Drop Cloth, but ultimately I decided to go with the Dried Sage.

After a bit of sanding to distress them, I think they look good.

Next up I pulled out Dixie Belle’s Farmhouse silkscreen stencils

I especially thought the Fresh Eggs one would be perfect on the side of the barn.

I cut up the one with the chicken and just used the typography on both the other side …

and the front of the barn.

Once all of my paint was dry, I gave everything a coat of Dixie Belle’s clear wax.

And that brings me to the lights.

As I was working on this project I kept thinking how fun it would be to have some barn lights over the doors.  So I went on Etsy just to see what was available out there.  I ended up finding the perfect lights at Miniature Crush (although I ordered them through Etsy, you can also order items directly from Miniature Crush, and as a bonus for me, they are also located in Minnesota).

They came in a matte black color that was rather one dimensional though.

I wanted them to look galvanized so I pulled out some of Dixie Belle’s Gilding Wax.  I started with the Zinc, but it was too dark and barely showed up over the black.  So then I tried the Silver, which looked pretty good but was maybe just a bit too bright.  I went back and added a bit of the Zinc over the Silver, and I still didn’t love it.

It doesn’t quite look authentic to me.

So then I pulled out the Dixie Belle Patina Paint in Copper, along with the Green activating spray.  I first removed as much of the Gilding Wax as I could with a q tip dipped in mineral spirits.  Then I painted over the lights with the Copper paint, and followed that up by dabbing the activating spray over the wet paint using a small brush.

Eureka!  So much better.  The totally look legit now.

One quick note about these lights.  They are battery operated, and they have a little switch on the side to turn them on and off.

To get to the battery (which is replaceable) you have to screw off the back part of the base.  So you can’t really glue these lights in place permanently.  Instead they come with a tiny adhesive magnet on the back.  You apply the adhesive side of the magnet to your item, then the light fixture hangs onto the magnet.  Here’s the thing, that means they come away pretty easily.  And that makes this item unsafe for small children who could pull them off and choke on them.  So they would have to be removed if you wanted this to be a child’s toy.

In addition, the lights were $19.99 each!  So now I have an additional $40 invested in this makeover.  I’m not sure that was a wise decision, especially since I plan to try and sell this one.

But all of that being said, I sure do love how they look!  And maybe someone else will as well.

I initially thought I would stop here, but then I was at Hobby Lobby and I came across a miniature weathervane.

And at only $2.99, it was so much cheaper than the lights!  So how could I resist?

I gave it the same treatment as the lights using the Copper patina paint.

The verdigris patina develops pretty quickly with the Copper paint.  And doesn’t the weathervane also look so much more authentic now?

I had to drill a hole in the roof of the barn to attach it, but that was fairly simple.

And with that, my barn makeover is complete.

How cute is that?  I much prefer my toned down neutrals to the red and green.

What do you think?

If any of you locals just can’t resist adding this adorable barn to your decor, check out my ‘available for local sale‘ page for more details.

another mini makeover.

Remember the dollhouse that I purchased for $5 at a garage sale last year?

I’m not sure I mentioned it at the time, but it came partially furnished.  LOL, well, it was mostly just tacky plastic stuff that I discarded, but I did hang on to these three pieces …

They were made out of wood, so I thought they might be fun to paint up.

But much like with full-size furniture, I had to send the larger cupboard over to Ken’s workshop for some repairs first.

It was missing what I presume was meant to be a pull-out cutting board, the opening for it has already been covered up by Ken in the photo below.

A couple of the drawers needed some glue, and like so many cast off pieces of furniture, it was missing just one knob.

After scuff sanding and cleaning it, I gave it a couple of coats of Dixie Belle’s Drop Cloth.  Then after sanding the edges to create a worn look, I added a couple of transfers.

You’ll note that I painted over the knobs.  That was partially to make them blend a bit more, and partially to disguise the fact that the original 4 knobs are metal while Ken carved a wooden replacement for the fifth one.

The transfers I used are knob transfers from re.design with prima.

They tend to be the perfect size for miniatures.

I lined the drawers with some pretty scrapbook paper.

Can we just take a moment to admire my miniature fly swatter?

I saved a handful of things from the dollhouse that my dad made, including that and the other props I used in these photos.

The remaining two pieces were pretty simple makeovers with more paint and transfers.

The transfer on top of the bookcase is from the Classic Vintage Labels from re.design with prima.

As is the ‘cafe’ transfer on the trunk.

These mini’s were so fun to work on, and so much easier than working on full-sized furniture, LOL.

I think they are much improved with a little quandification.

What do you think?

As far as what I’m going to do with them, I do have a bit of an idea percolating in the back of my mind.  We’ll just have to wait and see if it comes to fruition or not!

I bought the farm.

I’m not gonna lie people, my creative well has gone a bit dry lately.  I’m still struggling with tooth extraction pain, and it took a while to get over the cold I brought home from Florida.  OK, I haven’t exactly ‘bought the farm’, but I definitely haven’t felt very creative lately.

In addition, I’m heading out of town again tomorrow, this time on a solo trip to visit my mom.  So it seemed like a the wrong time to get started on any sort of more complicated project.

I did manage to get out for some thrifting with my friend opK earlier in the week though.  I didn’t find much, but I thought I’d share my very meager haul with you guys.

We started out at a Goodwill where I made just two purchases.  First up, this amber bottle.

I brought it home, gave it a good wash and then added that faux French apothecary label.

I did some similar amber apothecary bottles in February last year …

and I thought they turned out quite nicely, so I tried it again.  I shared the source for printing those labels back in that post, so you can find that there if you’re looking for it.

The labels are easy to apply with some Mod Podge.

Since I already had the Mod Podge out and some labels printed, I decided to add labels to a couple of other jars I already had on hand.

I’ve had that pair of jars for ages and they originally had a much more faux looking paper label on them.  I soaked those labels off to replace them, and these are so much better.

These jars have the cutest little galvanized lids.

I also found this dollhouse barn at the Goodwill.

It needs a little TLC, but I couldn’t help but be reminded of the dollhouse that I fixed up back in December.

That was such a fun project to work on, so I’m thinking this one will be more of the same.

Here’s the other side …

I had to laugh when I brought it up to the register and the clerk said “oh, I see you’ve bought the farm!”  LOL.

Anyway, the barn has already gone over to Ken’s workshop for a few repairs.  I’m looking forward to giving it a fresh look.

We headed to a spot that was new to me next, the St. Vincent de Paul Thrift Store in St. Paul.

By the way, can I just point out that it was a beautiful sunny day and the sidewalks were completely clear of snow and ice on the sunny side of the street.  This is not the norm for Minnesota in February, but I’m loving it!

Unfortunately, I think their sidewalk sign was a bit of false advertising.

I didn’t find any hot deals.  However, as we were waiting in line for opK to make some purchases I saw a shoebox full of old photos so I started flipping through them and this one caught my eye.

Just look at those stern faces!  These guys were very serious about their sport.

The basketball … wait … is that a basketball?  I guess I’m not 100% sure about that.  Is there some other sport played with a ball that looks like that?  Or is that what basketballs looked like in 1929?

Well, whatever it is, it says “E.F. HS 28 – 29” on the ball.  There are no markings on the back of the photo, so that’s my only clue.  So the age of the photo is obvious, but no idea where it was taken.

The photos were priced at a mere 15 cents each, so I thought I really should take it home with me.

I really have no plans for its ultimate fate, but for now I’ll just enjoy displaying it somewhere.

And that’s it.  I only purchased three things.  I’m really looking forward to garage sale season because I am not finding much at the thrift stores these days!

As I mentioned, I’m headed off to my mom’s tomorrow.  She has a to-do list all ready to go for me.  So far I’m doing her taxes, cleaning out her fridge and her closets, and replanting some of her pots on the patio.  I’m looking forward to just spending some time with her though, and maybe enjoying some sunshine and warm weather.  Once again I don’t have any blog posts planned during my absence, but hopefully I’ll be ready to get busy on some creative projects when I get back home again!

the mini adirondack.

As I’ve mentioned in the past, our next door neighbor Ken is also our ‘handyman’.

He has done so many projects for us over the years!

He custom built our pantry.

He helped me create the faux shiplap wall in our principle bedroom.

He also created the faux board and batten look in our piano room.

We also discovered, long after we moved in, that Ken had built the shelving in our living room for the previous owners of our house.

In addition to these larger projects, Ken has also helped out with innumerable smaller projects around our house.  He once saved us $6,000 by building custom screen inserts for the windows in our dining room (we thought we’d need to replace the windows and the quote for that was $6,000!).  This would become a really long post if I tried to list everything he’s done around here.

And of course, on top of all of that, Ken also does the bulk of my furniture repairs.  I think his favorite fix, or at least the one he still talks about, is the humpty dumpty dresser.  After accidentally knocking it off some sawhorses and having it completely fall apart, he put it back together again.

I’ve also mentioned here that Ken builds Adirondack chairs.

We have two of them on the front porch, and two of them on the deck out back.

The thing that makes these chairs special (besides the fact that Ken built them) is that they are super comfy.  They are all based on an Adirondack chair that nnK once had.  Ken took her chair apart and created a template for making more.  Since then he has made countless chairs.

A while back he decided to see if he could make a miniature version.  He scaled his template down and came up with a perfect mini replica of the chair.

He put it together with painstaking detail.

He used toothpicks as miniature dowel rods to attach the slats.

He made one of these mini’s for nnK first.  Then he made another for himself.  And then finally, he made one for me!

Of course, I gave mine a paint job.  I started by painting it with Dixie Belle’s Midnight Sky, which I then covered up with their Drop Cloth.  I wanted the dark base coat so that I could distress back to it along the edges, rather than just seeing that pale wood underneath.

Once the paint was dry, I added a simple, small Tim Holtz number transfer to the front of the seat.

After sanding lightly to distress, I finished it all off with a coat of clear wax.

I staged these photos using a few of my favorite things including the small boxes I painted up last fall.

They are sitting on a tiny new testament bible that belonged to my grandfather.

There is an inscription inside that says it was gifted to him as he went off to fight in WWI.  And yes, that’s WWI, and it was 1917.  I believe he would have been around 24 years old at the time.  If you’re trying to figure out the math and how I could have a grandfather that was born in 1893, I have to point out that he was 47 years old when my mother was born.

I grabbed a few other items to add to my photo …

Most of these things come from those shelves in my living room, which is the eventual home of the mini adirondack as well.  Unfortunately, it was far too gloomy here last week to get a good photo of the chair in its ultimate resting spot.  So you’ll just have to trust me when I say that it fits right in with some of my other mini’s on those shelves like this one

and this one

I don’t know why I find miniatures so darn appealing.  How about you?  Are you drawn to miniature versions of furniture?  Leave a comment and let me know.

94 aldersgate street.

You may remember that I purchased a dollhouse while out garage saling this summer.

It was a bargain at just $5.  It needed a few repairs, but nothing major.  I asked my handyman Ken to create a replacement shutter for the window next to the door, and he made quick work of that.

Ken also created a new window sash for the upper right window, and re-installed the glass in that lower window, which involved adding new stops to keep it in place.

I also needed to replace some of the ‘roof tiles’.  Conveniently enough, I found a pack of popsicle sticks that were the exact size I needed for $1.50 at another garage sale.

I cut them to size and glued them in place.

Easy peasy.

As I was working on those repairs, I noticed that there was a signature on the bottom of the dollhouse.

Looks like Al made this dollhouse back in 1978.  It’s held up pretty good for 45 years old, don’t you think?

Initially I decided to use the Dixie Belle Patina Paint to create an aged faux metal look to the roof.  I first gave it a base coat of black with their Caviar paint, and then painted the shingles with their Bronze patina paint.  Then while the 2nd coat of the Bronze was still wet, I spritzed on the green spray.

But that’s where things kind of fell apart.  I started painting the body of the dollhouse with Dixie Belle’s Drop Cloth, but that warm white just wasn’t working with the bronze roof.

So then I decided to paint the body of the house with DB’s Sea Glass.  And I sort of hated it.  Sea Glass is a very pretty color, and it worked nicely with that verdigris patina on the roof, but the whole combo just wasn’t what I was envisioning for this makeover.

Then I reminded myself that my original idea for this house was to paint it white.  All white.  So that’s what I did next.  I painted over everything with DB’s Drop Cloth.

But I wanted the shutters and front door to stand out just a bit more, so I mixed up a custom paint color using 50% Drop Cloth and 50% French Linen to create a nice, pale grey.

It’s just enough to let those features pop, without taking away from the monochromatic look I was going for.

I felt like the trim over the door was the ideal spot for typography of some kind, so I cobbled together an ‘address’ from the I.O.D. Label Ephemera transfer.

Perfect.  I love it!

Once everything was painted, I distressed the edges a bit to make it look a little bit worn.  I feel like distressing adds so much character to a piece, even a dollhouse.

I finished off the painted areas with some clear wax, then I used hot glue to affix some wreaths to the windows and door.  I attached the lights around the roofline with some Stick-Um candle adhesive, which is basically a super sticky wax.

All of that Christmas frippery could be easily removed after the holidays.  The Stick-Um residue can be removed with a hot soapy rag.

I didn’t do anything to the interior of the dollhouse except use a Magic Eraser to remove some pencil marks on one of the floors.

This way the future owner can dress it up with their own style.

To be honest, this ended up being one of those ‘what was I thinking?’ projects.  I don’t need a dollhouse.  I don’t have a spot for a dollhouse.  In fact, I got rid of my own pretty spectacular dollhouse six years ago (more about that here).

But this dollhouse was a mere $5 investment, so really, what do I have to lose other than the time it took to paint … and then re-paint … it?

And it ended up being a rather fun project to work on.

I had actually planned on doing this well ahead of Christmas, because I thought it might be the perfect time to sell it.  Wouldn’t it be adorable to find under the tree?  While it would make a fantastic gift for a child, it would also just be fun to have as Christmas decor.

But once again, time got away from me and here we are with just one week to spare.

I went on Facebook Marketplace and Craigslist to see what kind of competition there will be for selling it and there were tons of dollhouses for sale there!  I didn’t even take the time to count them all there were so many.  So clearly trying to sell a dollhouse around Christmas is not a unique idea.

The prices for those similar to this one ranged from around $150 to $250.  I’m going to price mine well below that though.  I really just want it to go to a good home.  If any of you locals are interested, be sure to check my ‘available for local sale‘ page for more details.

Meanwhile, I think I did right by this 1978 dollhouse.

What do you think?


the netherlands in miniature.

When people ask me what my favorite thing that we did during our recent trip to Amsterdam was, they always look a little confused by my answer.  But in all honesty, I think my favorite was Madurodam.

Madurodam is a miniature park in The Hague that is full of 1:25 scale model replicas of famous Dutch landmarks.

Well, you know me.  I love me some miniature stuff!

From the moment we rounded the corner and took in a view of the whole place I knew I was in heaven.

But first, some logistics.  The Hague is about an hour away from Amsterdam by train.  We took a train to The Hague, then a tram from the train station to Madurodam itself.

For me the train travel was part of the experience too.  We got to see a bit of the Dutch countryside including quite a few flower farms and some smaller towns like Haarlem.  I also saw quite a number of community gardens.  I love seeing those in Europe!  If you aren’t familiar, these are spaces where people who live in apartments without any outdoor space can rent a small ‘allotment’ and plant a garden.  Many of them include a small greenhouse or a cute little shed of some kind.  So fun to see!

But back to Madurodam.

You guys, I had some pretty high expectations for this place and I was not disappointed.

It was absolutely charming.

It was fun to spot places that we recognized from wandering around Amsterdam, like the National Maritime Museum …

the Magere Bridge …

and of course the Rijksmuseum.

By the way, that I amsterdam sign is no longer in front of the Rijksmuseum.  Apparently it drew too big of a crowd with everyone wanting the perfect selfie (read more about that here), so they opted to move it.

Madurodam even had a miniature de Wallen, or red light district, complete with ladies in the windows.

Not only were the miniature buildings fantastic, but so were the miniature gardens.

They had informal landscapes …

Their use of miniature trees in that little town just blew me away.  Isn’t it something?

They also had formal gardens.

That, by the way, is the back of Paleis Het Loo.  Here it is from the front.

Remember when I said I wish we’d had more time in Amsterdam?  This is one place that I would have loved to visit, but didn’t have the time.

Of course they also had some miniature windmills in Madurodam.

And some miniature tulip fields.

I’m a little embarrassed to admit that I was kind of delighted by some of the interactive elements, like the wooden shoe factory.

If you put a 1€ coin into the machine, a pair of Dutch shoes would fall down the shoot into the waiting truck, then the truck drove to you and you could take the shoes.

How frickin’ adorable is that?

And look how cute the little shoes are.

Not a bad souvenir for 1 € (or about $1.06), and this little pair of shoes will always remind me of the delightful day we spent at Madurodam.

If you ever find yourself in Amsterdam (or Rotterdam, or The Hague, or anywhere else nearby), and if you’re as enchanted by miniatures as I am, you absolutely should make the time to visit Madurodam!

a fairy garden update.

Good morning from the garden!

Today I thought I’d share how my new fairy garden held up over the summer.

You may remember that earlier in the season I moved my fairy garden from a cracked cement birdbath into an old wheelbarrow.  I needed more space to expand!

Here’s how it looked when it was newly planted in May.

And here is how it looks now!

Um, yeah.  It definitely filled in a bit.

The creeping thyme really went to town, filling in that entire front corner …

and nearly smothering the buddha.

The Golddust Mecardonia from Proven Winners also grew like crazy.

I’ve cut that one back several times as it wanted to take over the entire space.

I knew that the wire vine that I trained on the arbor would need some regular maintenance.

I grew this one in my old fairy garden too.  It has to be woven in and out of the arbor, and then cut back when it starts getting shaggy.

The various sedum that I planted were a little less rambunctious.  They filled in, but they didn’t need cutting back at all.

The dark green plant on the upper right side of that photo above is a dwarf betony, or stachys minima.  Unfortunately, it never bloomed for me.  But it is a perennial and I’m hoping that if I protect it over the winter it will come back next year and bloom.

In addition to the Feather Boa hosta that I saved from my previous fairy garden, I also planted a new miniature hosta after I’d already shared the fairy garden back in May.

That is a Mighty Mouse hosta and I tucked it in just next to the fairy’s mailbox.

So far both of the mini hostas look great!

In the past I have had mixed results overwintering these mini’s in my fairy gardens.  Sometimes they make it, sometimes they don’t.  I used to take the top of my cement bird bath fairy garden and place it on the ground up against the house where I would bury it in leaves for the winter.  This year I plan to move the entire wheelbarrow into the carriage house for the winter.  I’ll likely also cover it with leaves and maybe wrap it somehow.

I’m hoping to keep the Alberta spruce and the Golden Ruby barberry alive over winter as well.

So I’ll just cross my fingers on that.

Overall, I’d say the fairy garden was a huge success this year.

So the next time you see a crumbling old metal wheelbarrow in the free pile at a garage sale (I did see one this summer!), be sure to snatch it up and plant your own fairy garden!

a new home for the fairies.

If you’ve been following me for long, then you’ve seen my fairy garden bird bath.

This was basically a miniature garden planted in a cracked concrete birdbath that I purchased at a garage sale.  It didn’t hold water anymore, so that made it perfect for planting in.  I’ve shared it many times, even decorated for fall.

It had a few really nice miniature hostas and a miniature Barberry that reliably survived our Minnesota winters as long as we buried the birdbath top in a pile of leaves up against the house for the winter.

Unfortunately, I somehow missed doing that last year.  So here’s what survived …

Yep, that would be zilch.  As a sidebar, in order to survive the winter in a pot (rather than in the ground) a perennial needs to be zoned two zones colder than your normal zone.  In other words, since I’m in zone 4b, I’d need a plant zoned to 2 or lower.

But you know what, that was all the motivation I needed to push me to expand the fairy garden.  Well, that plus the cute little fairy house that my sister gave me for Christmas.

I knew I didn’t have enough square footage in the birdbath to accommodate the house.

I’d been thinking about using a run down old wheelbarrow that we had in the garden for exactly this purpose, but it needed a little help first.

I asked my handyman neighbor Ken to help me shore it up.  It didn’t need to be functional as a wheelbarrow, just sturdy enough to sit upright.  So he basically used some screws to hold the wooden handles in the appropriate place, and then we drilled out some drainage holes in the bottom.

Today’s q tip; you ALWAYS need drainage holes in outdoor planters!  If you’re turning some sort of vintage vessel into a planter, be sure to drill some holes in the bottom if it’s going to be outside.

So once that was done, I placed the wheelbarrow in a patch of vinca and filled it up with potting soil.

Then came the fun part, planting the garden.

I’ve been to a bunch of nurseries around my area looking for just the right plants for my garden in miniature, so I can’t exactly remember where I got each individual plant.  But I can tell you the names of most of the plants in case you what to create your own fairy garden.

First up, I planted ‘Easter Bonnet Mix’ alyssum on either side of the path.

I got this idea from the model train garden in the Germany pavilion in Epcot.  I’ve never really been a fan of alyssum in the garden, but I’d never thought about how perfectly miniature it is until I saw it being used there.

The plant with the tiny yellow flower is Golddust Mecardonia from Proven Winners.

It also has a tiny bloom that is perfect for a fairy sized garden.

I’ve been planting a wire vine on the metal arbor for years.

It has tiny little leaves that are the perfect size.  I have to periodically weave it up and over the arbor though, it doesn’t climb by itself.

The buddha and his lantern are sitting in a patch of woolly thyme.

Some of the other small plants I’ve used include Sunset Velvet oxalis, Golden Oregano, some small sedums, and a couple of small unidentified plants from the fairy garden section at Bachmans.

Also, thankfully, when I last divided the miniature ‘Feather Boa’ hosta in my old fairy garden, I put a few chunks of it in the ground near the potting shed.  So I was able to dig one back up to put in my new fairy garden.

Since I’ve placed the wheelbarrow in the sunniest spot in my entire garden, I realized that I needed to provide some ‘shade’ for that hosta.  I looked high and low for fairy garden sized trees or shrubs and was totally striking out.  Two of my local nurseries, Bachmans and Rose Floral (in Stillwater, MN) always used to have them.  But I noticed that they disappeared during Covid and they haven’t come back at either place.  They still have other small plants, but no tiny evergreens or shrubs.

Oddly enough, I ended up finding some that would work at Lowe’s.  The evergreen tree is a Dwarf Alberta Spruce.

The average mature size is 3′ to 4′ tall and wide, but I’m hoping to keep it smaller with regular pruning.  I also trimmed off some of the root ball when I planted it to encourage it to stay small.  In addition, there isn’t a ton of room in that wheelbarrow for roots, so hopefully that will discourage too much growth, but not kill the tree.

It was only $11.98 though, so if it doesn’t survive I’m not out a lot of cash.

The bush on the other side of the house is another barberry, a Golden Ruby.

It’s potential full size is 2′ tall and wide, so I gave it the same treatment as the tree, pruning both the top and the roots.

Naturally, after I had the tree and bush planted, my neighbor nnK texted to let me know that the Abrahamson’s Nursery in St. Croix Falls has a big selections of fairy garden trees and shrubs.  So if any of you locals are also looking, check Abrahamson’s.  They have several locations in the St. Croix valley.

I wonder if any of you remember that I mentioned potentially trying the Dixie Belle patina paint rusty look on my little angel statue last year?  It was looking rather shabby, so I did rusty it up using the Iron paint and the green spray (for all of the details on using that product, check out this post).

I added the path using thin slices of flagstone that have broken off my full size flagstone patio.

I’ve had this little pavilion for several years now, but my old birdbath fairy garden wasn’t big enough for both the pavilion and the arbor, so I used to switch it up every other year or so.

Now I can fit both of them in.

One fun thing about fairy gardens, you don’t need a drone to get good aerial shots.

I had lots of fun creating my garden in miniature.  It’s so much easier to plant a tree when you can just pick it up and move it with one hand, and weeding it takes no time at all.

It’s also much cheaper than it would be to create a full sized garden from scratch.  Although, that being said, I probably spent somewhere around $100 for all of those mini plants.

Now, as long as the squirrels don’t decide to start digging stuff up, I think the new fairy garden is good to go.  I’m looking forward to seeing it fill in over the summer.  And I have about 5 months to figure out how I’m going to protect it in winter.

Have any of you got a fairy garden?  Or perhaps I’ve inspired you to create one now?  It would be the perfect solution for those of you who only have a small space for gardening.  Leave a comment and let me know.