the tate modern credenza.

I know it was a while back, but do any of you remember when I reviewed Amy Howard’s book Rescue, Restore, Redecorate?

There was a chartreuse green credenza in her book that I absolutely loved.

At the time I mentioned that I’d love to copy that look.

Well, I haven’t quite been brave enough to attempt it on a full sized piece of furniture, but how about a miniature one?

I found this fun mid-mod dollhouse credenza called the Tate Modern Sideboard Dresser at The Modern Dollhouse.

It seemed like the perfect candidate for a bright pop of yellow-ish green, and I had just the color in my stash.

That is Dixie Belle’s Everglades.

It’s not exactly the same shade as that Amy Howard color, but it’s close enough for me.

I painted the outside, and also inside the doors on the left.

To add just a little bit more interest, I used a tiny brush to apply Dixie Belle’s Gilding Wax in Gold to the ‘handles’ and the feet.

Just for fun I decided to create a few miniature boxes of vintage ornaments to stage my credenza.

First up, I downloaded the printable designs from Easy Print & Cut on Etsy for $2.85.

Next I used the templates provided to cut a piece of foam core board to build my box around.  Then after a lot of teeny tiny cutting and folding, I glued the paper around my foam core ‘boxes’.

Yeah, I’m definitely going to need more practice for teeny tiny paper folding projects like this one.  But for my first attempt I don’t think they’re too bad.

FYI, the floor lamp is also from The Modern Dollhouse.

I have to laugh at myself because first of all, I forgot that it actually works.  So I took all of my photos without it on.

Then I thought, ‘wait, doesn’t this actually light up?’  I searched all over it trying to figure out where the switch was and I couldn’t find it.  Then I looked on the The Modern Dollhouse website to make sure I wasn’t imagining that it lit up.  Eventually I did find the little bitty switch at the base of the lamp.

Then I re-took all of my photos with the lamp on.

This piece will eventually find its way into my dollhouse renovation, most likely in the attic rec room.  Or possibly one of the upstairs hallways.

What do you think of a chartreuse credenza?  Would you be brave enough to use this color on a full-sized piece of furniture?  Leave a comment and let me know.

suzette and mimi.

An empty corner in the guest room of my dollhouse sent me scrolling through Etsy looking for something to put in that spot.  I started with chairs, and there were a few chairs out there with potential.  But ultimately the idea of adding a dress form to that corner popped into my head.

I started searching on Etsy and came across a miniature dress form that had been given a copper verdigris patina all over and thought “I can do that”.  In fact, I bet I can go one step further and create a miniature version of my full size dress form, Collette.

So I kept searching and ended up finding a pair of miniature dress forms for $10.

They are made of plastic, and require just a little bit of assembly with some superglue.

Once assembled I gave mine a quick coat of Dixie Belle’s Bonding Boss.  Since they are made out of a rather slick plastic, I wanted to hedge my bets on adhesion.

Once that dried I started on the base and the ‘cage’ at the bottom of the dress form.  Unfortunately my full-sized dress form doesn’t have a cage, I wish it did.  I think they are really cool.  The mini dress form has one, so I decided to give it a patina so that it would look like metal.

I started with a coat of the Dixie Belle Iron patina paint.  Then I added some dabs of the Bronze.  While the paint was still wet, I dabbed on some of the Green Spray.  I just kept playing around with those three products until I got the look that I wanted.

You can find a full tutorial on using the Patina Paint here.

Next I pulled out Dixie Belle paint in a color called Putty.  I’ve had this particular jar in my cupboard for a while, and it had been opened and used before (most recently on this dresser).  This chalk style paint will thicken up a little over time, but it’s easy to just add a little water to thin it back out again.  In this case I really didn’t want any big ol’ brush strokes, so I watered my paint down a little and applied it to the body of the dress form.

Once I had the Putty on I felt like it was a little bit one dimensional, so I went through my cupboard and found Dixie Belle’s Burlap.  Once again I watered it down a little, and then blended it with the Putty to create the perfect color.

Once that dried, I pulled out my re.design with prima knob transfers again (these are coming in so handy for miniature work!).  I found the perfect one to use on the dress form from the French Maison set.

Once the transfer was in place, I used clear wax over the body of the dress form.

I was going to call it good at that point, but I felt like it needed just a bit more dimension.  So I used a small brush to apply some of the Dixie Dirt in a brown color called Earth.

That’s an older photo, and clearly that brush was too big for this project.  I used a very small brush, and I applied the dirt to the crease down the center of the dress form body, and also around some of the edges.  It added the perfect touch of age.

I had so much fun creating these dress forms!

Since I’ve named both of my full-size dress forms, Collette and Lula, I decided I should go ahead and name the mini’s as well.  In honor of my recent trip to Disneyland, and one of my favorite attractions, the Enchanted Tiki Room, I’ve named them Suzette and Mimi (let’s all sing like the birdies sing, if you know, you know).

In case it wasn’t already apparent, I did paint both of the forms exactly the same.

Obviously I don’t need two identical dress forms for myself.  So I’m going to keep Suzette, but stash Mimi away and include her in my blogiversary giveaway next month.  Be sure to stay tuned for that!

But in the meantime, how do you like the dress forms?  And have you tried any of the Dixie Belle patina paints yet?  They continue to be one of my favorite mediums to play around with, on both miniature and full-sized items.  Leave a comment and let me know what you think.

Thank you to Dixie Belle Paint Co for providing their products used on the dress forms.

the secret path armoire.

Although I got sidetracked with the dining room set …

my original plan for the dollhouse interior makeover was to start with the guest room.  I thought this small room would be a good way to get my feet wet.

In its previous incarnation, this room was the ‘kid’s room’.  It was frilly, pink and baby blue.  It was all a bit much, and definitely not my style anymore.

I ordered a fabulous unfinished armoire from The Modern Dollhouse to get started (FYI:  if you are looking for this exact piece, I purchased it from them via Etsy.  I couldn’t find it on their own website).

I purposely ordered this armoire because I wanted to put one of the re.design with prima Vintage Labels II Middy Transfers on it.

One quick note about this transfer set.  The prima website describes the color as “soft, warm grey”, and you can see in the photo above that the color looks kind of like a pale reddish-brown in their photo.

But as you can see on this pumpkin that I decorated last year …

they are definitely more of a lavender.

But that’s perfect for this armoire.

To get started I painted it inside and out with one of Dixie Belle’s Cottage Collection colors called Secret Path.

This is definitely one of those ‘never say never’ moments for me.  When I first saw this color on the Dixie Belle website I thought nope, that color is not for me.  The website photos kinda make this color look like a sickly mauve (at least to me anyway).

Sorry Dixie Belle, but your photo just isn’t doing this color any favors.  But I think everyone struggles with getting the color right in photos.

I ended up ordering Secret Path anyway (albeit in the smallest size jar) and I’m so glad that I did because it is a much prettier color in real life.  It’s also the perfect match for the Vintage Labels II.

So, after painting the entire armoire in Secret Path, I went back over the exterior with two coats of Drop Cloth.  It’s a bit difficult to see, but I then sanded the edges of the armoire to distress it back to that base color.

Maybe that level of detail is overkill for dollhouse furniture, but I can’t really help myself.

After clearing away the sanding dust, I applied the transfer to the front of the armoire.

It was perfect!  How sweet is that?

Next up, I’m working on a bed to match.

So be sure to stay tuned for that.

But in the meantime, how do you like the armoire?  And what do you think of Secret Path?  I’m not much of a purple girl, but I do love it paired with that transfer!

under construction.

Tackling my dollhouse renovation is definitely going to require learning some new skills.

One of the first things I’ve learned is to pay attention when ordering from vendors on Etsy, because they might just be in Sweden!

Not that there’s anything wrong with that, it was just unexpected.

You see, the thing is, I had this clever idea that I would stage up a miniature room painting scene and then say that my dollhouse was ‘under construction’ while I was off on vacation.

I ordered a mini stepladder first.

That arrived very quickly.

But then I thought what I really needed to go with it was a can of paint, and maybe a paint tray and roller.  And I found just the thing on Etsy.

How adorable is that?

Now, I should have been clued in by the paint brand first.  If any of you have seen the Jeanne d’ Arc Living magazine, you may recognize the logo from their paint line.

So this is a Danish paint brand, and I did recognize it.  But it didn’t occur to me to question where it was coming from.

Next, I should have been clued in by the cost of the shipping, it was almost as much as the item itself.

But I still wasn’t paying attention.

It wasn’t until I started wondering why I hadn’t received it yet that I thought to check where it was coming from.

All of that being said, I did not get it in time for a blog post before I left town.  But even so, I ultimately received it pretty fast considering it came from Sweden.  I ordered it from Dear Josie Miniatures, in case you are wondering.  I would certainly order from her again, but next time I would make sure I wanted a few items and would order them all together to cut down on shipping costs per item.

Once I had everything on hand, I painted up the ladder.  I gave it a base coat of Dixie Belle’s Gravel Road, followed by two coats of Drop Cloth.  After sanding to distress the edges, I added a couple of tiny transfers next, some simple Tim Holtz numbers on the leg and another redesign with prima knob transfer on the top.

I also dressed up the paint can and roller by applying some Gravel Road to them.

The next skill I need to master is painting inside the lines on the dollhouse walls.

Seriously, have you ever seen such a sloppy paint job?  I’m definitely going to have to work on that.  I’m also going to have to figure out how in the world I’m going to get a brush inside that foyer (just beyond that arched opening) to paint the trim in there.  That’s going to be a tricky one.

And yet another skill I’ll be working on is getting good photos of the interior of the dollhouse.  I need to figure out the lighting, and the best f-stop and shutter speed.

I may not have gotten this post up before I left on vacation, but I guess it still applies.

The dollhouse is definitely going to be a work in progress for a while.  But it’s good to learn new things, and I’m quite excited about it.

So if any of you have some tips to share, be sure to leave a comment.  I’m all ears.

it was HOT.

I’m back from two weeks out west visiting my mom and taking a side trip to Disneyland in California.

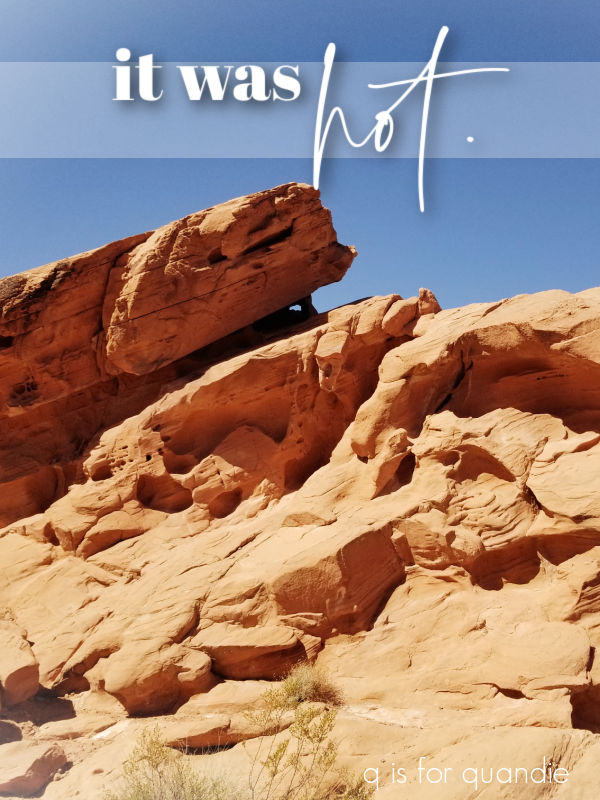
I can sum this trip up in one word … HOT.

They were experiencing above normal temps for the entire two weeks we were there.  The high was 99° or higher until our final day at my mom’s.  The hottest day was 106°.  Anaheim (a.k.a. Disneyland) temps were also well above normal in the upper 80’s to mid-90’s while we were there.  We were not expecting this kind of heat in October!

There were three distinct segments to this vacation.  For the first three days my sister, niece and I were at my mom’s.  These were the hottest three days, including that 106° day.  And for some crazy reason, we chose to head to the Lake Mead National Recreation Area for a picnic lunch one of those days.

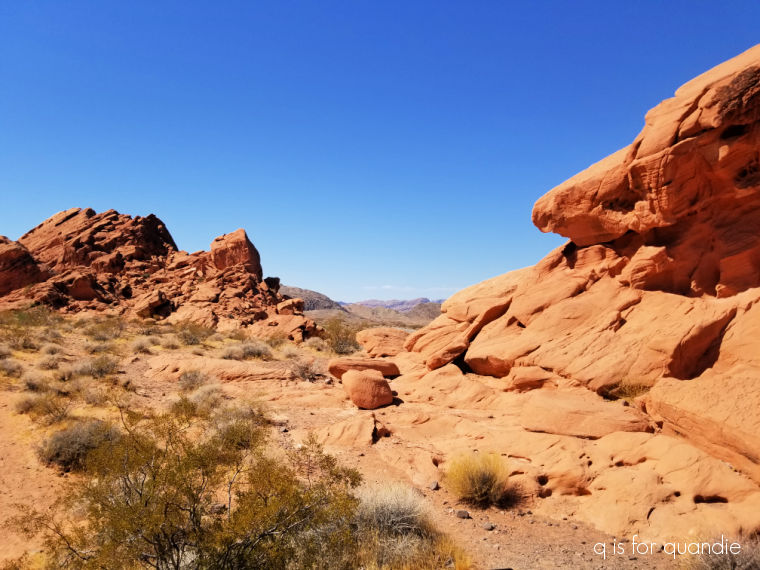
Normally we would have done some hiking, but obviously it was too hot for that.  So we enjoyed the scenic drive and made a very quick pitstop at a sheltered picnic area to eat our sandwiches.  We certainly had a lovely view while we ate, but we definitely didn’t linger.

The rest of those days were spent in the pool at my mom’s townhouse complex.

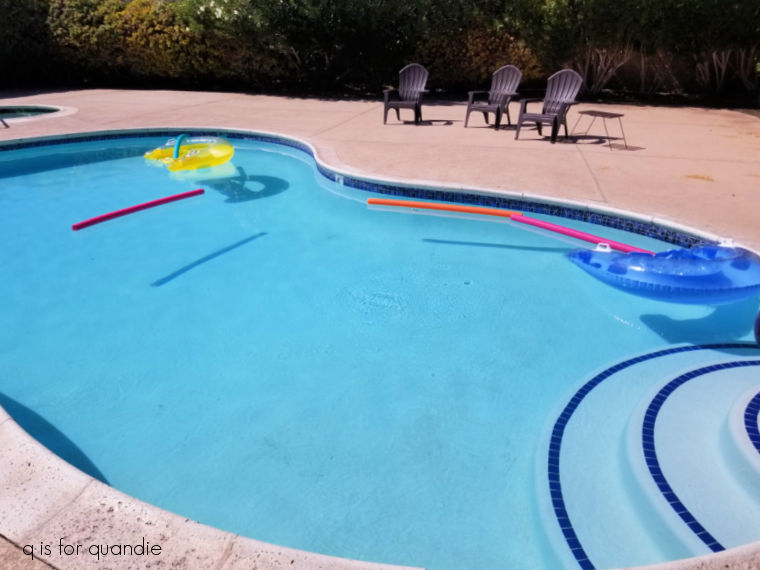
Usually when I visit my mom I head over to her local Goodwill which is only a block away from her place.  This trip was no exception, however the only thing I purchased there were the pool noodles you see floating in the photo above.

You know, 106° isn’t so bad when you’re floating in the pool with a Lemon Drop martini.

My niece, sister and I headed off to Disneyland next.  I didn’t take many photos there, but I will share a couple that I took on one of my favorite attractions, the Storybook Land Canal Boats.

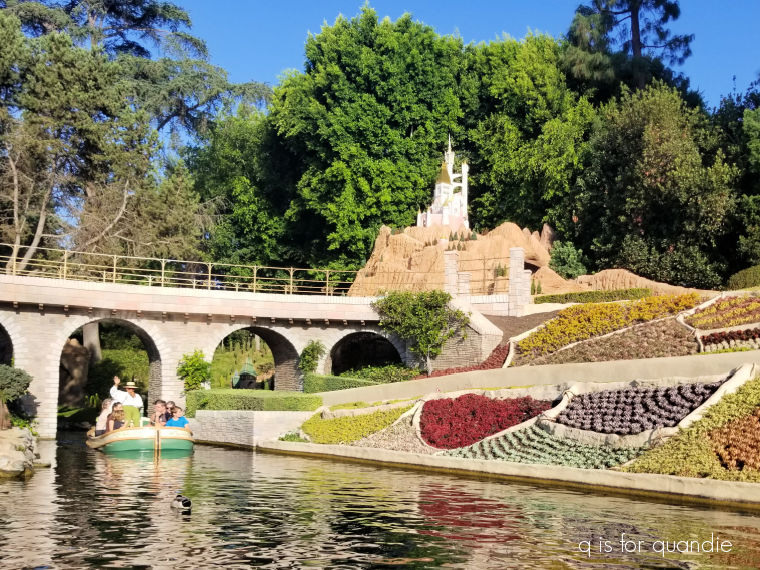
This particular attraction is one that they have in Disneyland (California), but not in Disney World (Florida).  So when I’m in Disneyland I make it a priority.

It’s also one of the original Disneyland attractions from 1955.  According to Wikipedia, Walt Disney was inspired to create this ride by a visit to Madurodam in the Netherlands.

Some of you may remember that I visited Madurodam last year, and I loved it!

The Disneyland attraction is a boat ride through Storybook Land with scenes from popular Disney movies like Pinocchio, Snow White and Alice in Wonderland in miniature along the banks of the canal.

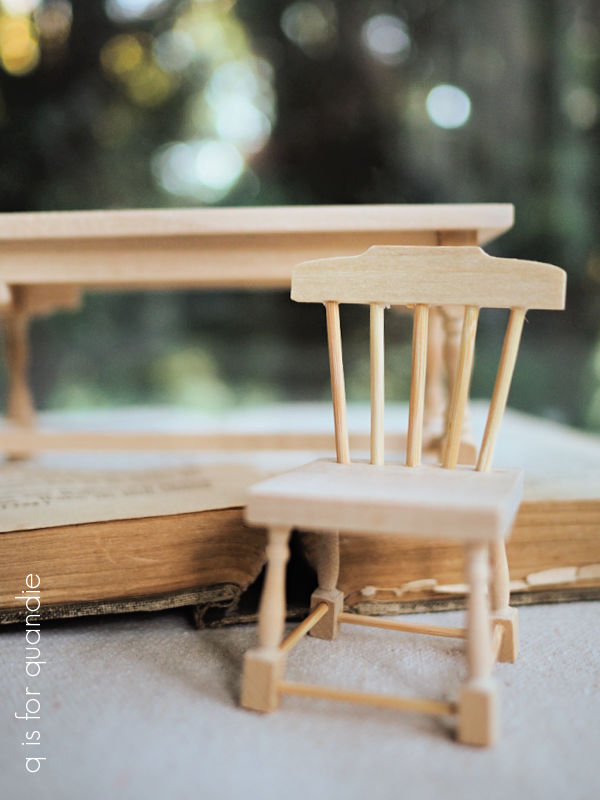
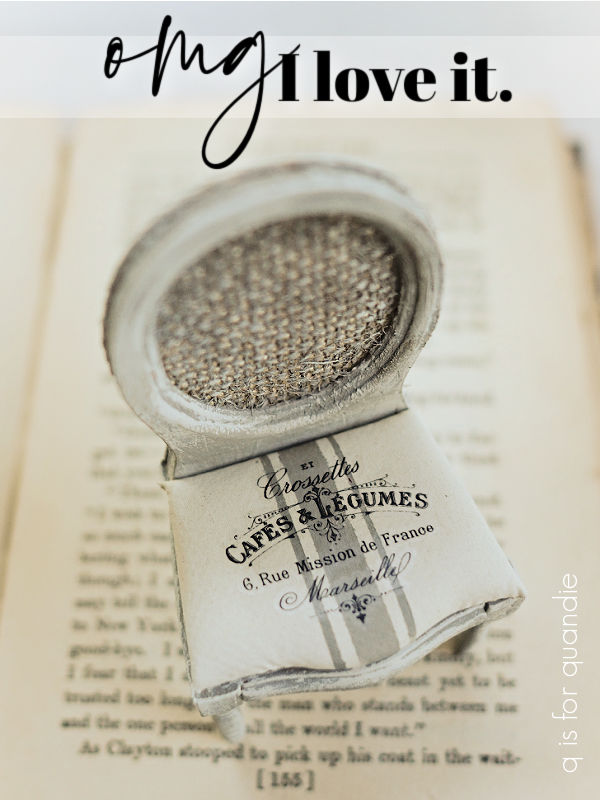
You know I love miniatures of any kind, so obviously this is right up my alley.

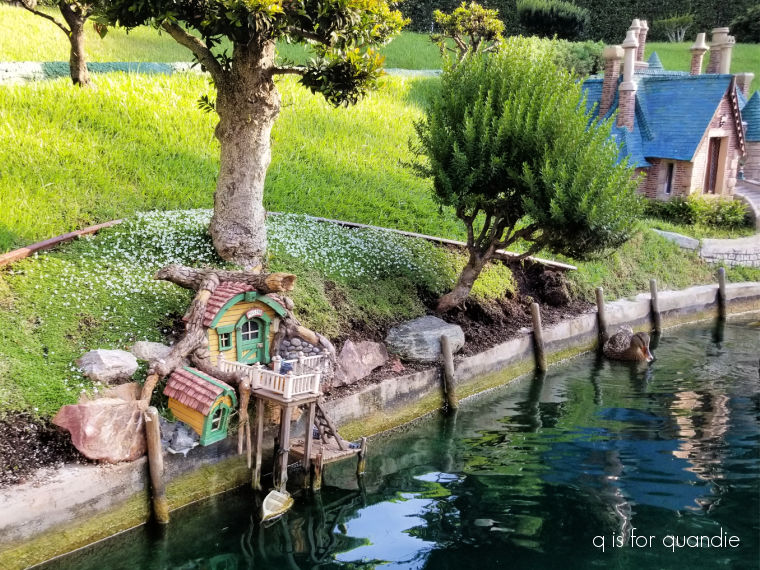
I try to get a good look at the landscaping to get ideas for my own fairy garden.  It includes lots of miniature bonsai sort of trees that are kept small through pruning.

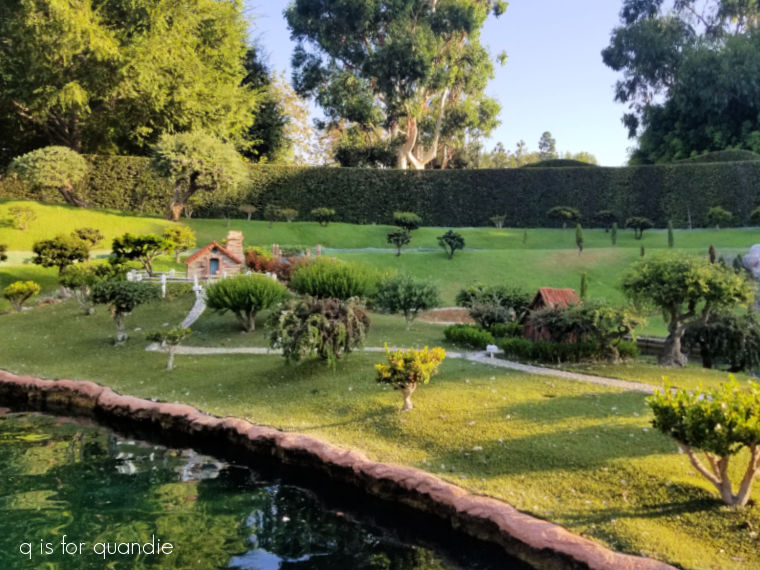
I definitely need to up my pruning game next year!

We had a great time in Disneyland just goofing off and having fun.

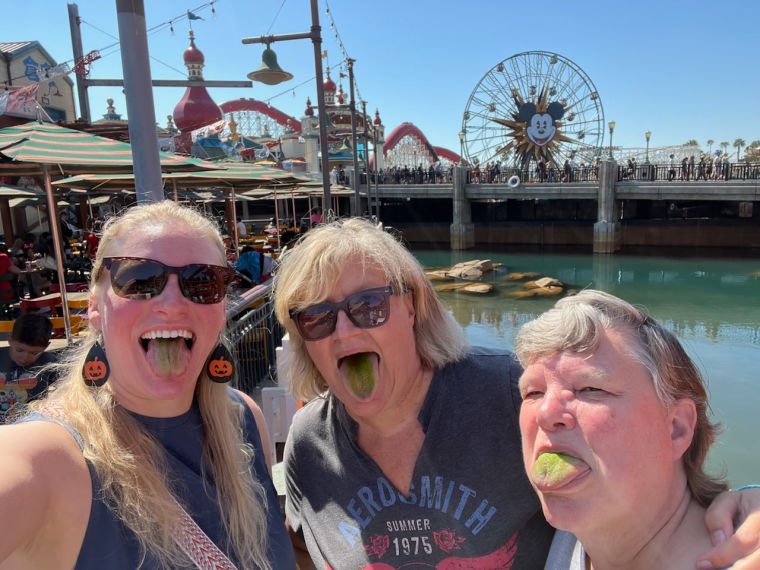
And enjoying a lemon and blue raspberry frozen concoction that turned our tongues green!

My niece had to return home to go back to work after Disneyland, but my sister (far right above) and I (middle) went back to our mom’s house for another week.

Unfortunately, mom’s townhome association doesn’t feel it’s worthwhile to keep the pool open for “the winter”, so the pool was closed at that point despite daytimes highs that were still over 100°.  Go figure.

We had to find other ways to keep ourselves occupied for this third segment of our vacation, so I opted to paint my mom’s headboard.

Now, I have to say, this is a case where the acorn did indeed fall really far from the tree.  My mom and I have very different taste when it comes to decorating.

You know how there those bloggers out there who say things like “I grew up visiting thrift shops with my mom”, or “my mom took me to flea markets as a kid”, well … that’s not me.  My mom prefers matched sets of furniture purchased new.  So I was a little surprised that she wanted me to paint her headboard.

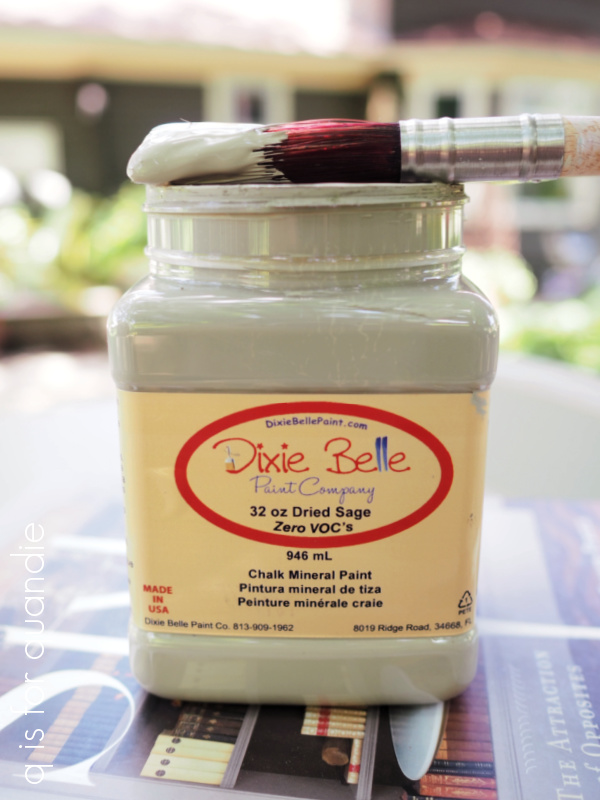
She wanted ‘green’, but not dark green, and not mint green, and not lime green.  So I ended up choosing one of Dixie Belle’s Cottage Collection colors called Weeping Willow.

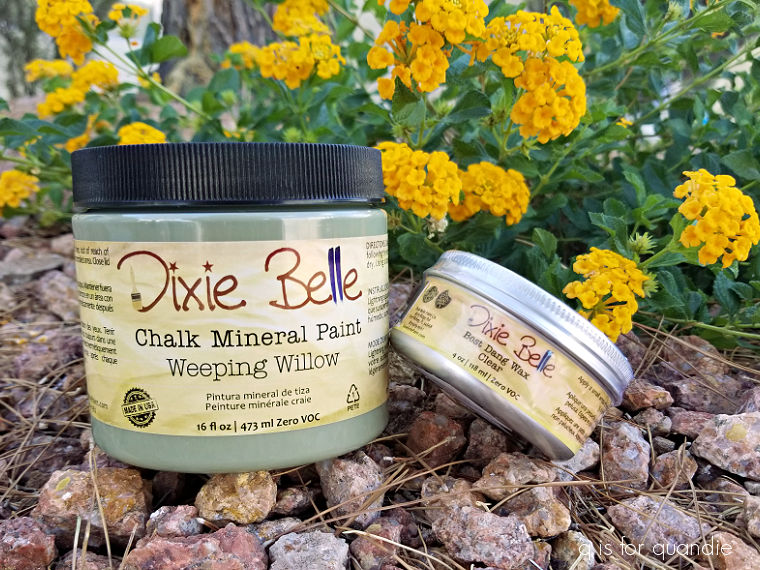
I didn’t want to get in trouble with the TSA people, so I had ordered a brand new unopened 16 oz. paint and a small 4 oz clear wax to pack in my suitcase.

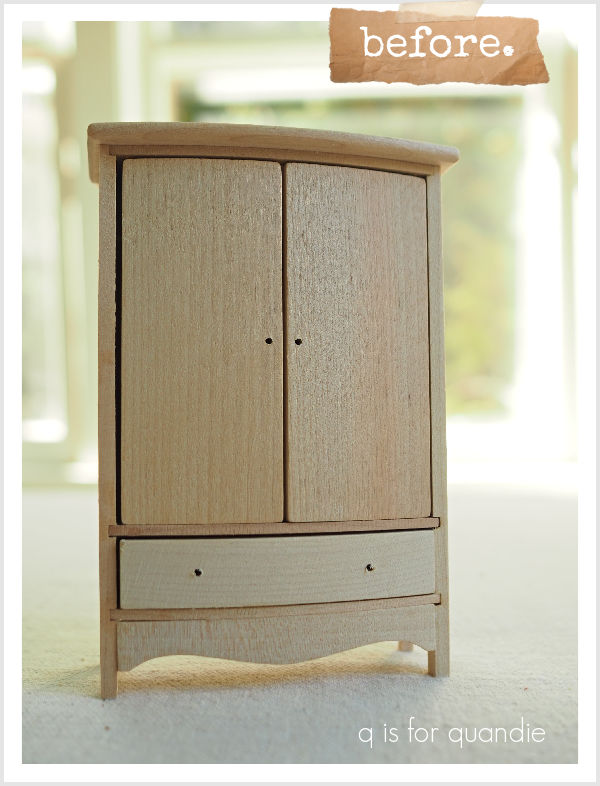
Now remember, my mom’s taste is quite unlike my own.  Keeping that in mind, here is her headboard.

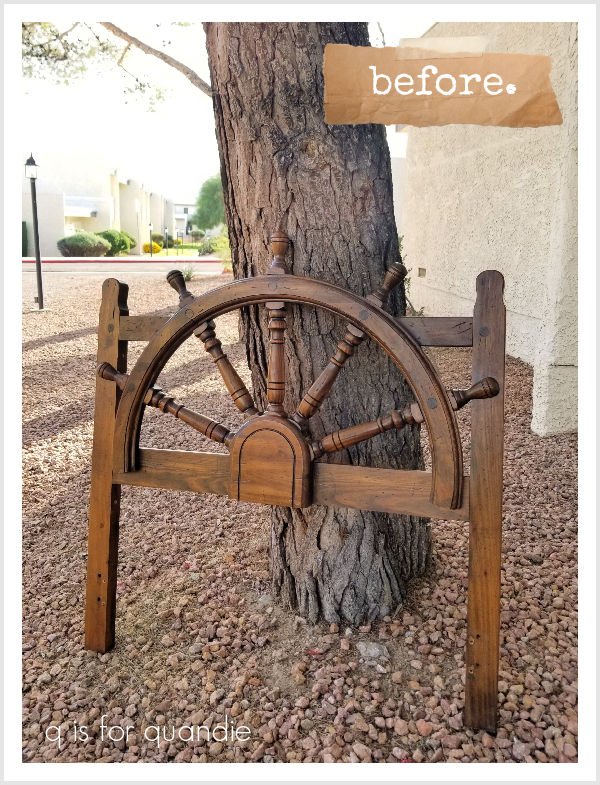
This is actually one half of the headboard that went with the king-sized bed she had when she lived in a much larger house.  She downsized everything when she turned 80, including her bed.  She still uses the matching dresser and nightstand, but she didn’t want those painted.

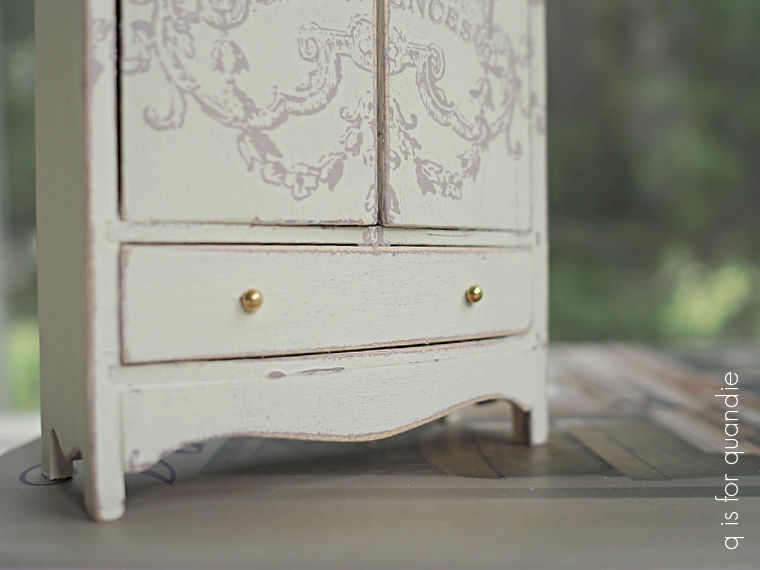
After cleaning the headboard, I applied two coats of the Weeping Willow.  As you can imagine, paint dries really quickly when it’s 85° (in the early morning) with about 10% humidity, so it was quick work to paint it.  However, I had to wait until the following morning to apply a coat of clear wax because the day was already heating up by the time I finished painting.  Dixie Belle recommends applying their wax when the temp is no higher than 85°.

Mom was very happy with how it turned out.

In addition to painting the headboard, my sister and I also visited the Clark County Museum, which is less than a mile away from my mom’s place.  I’m going to save that story for another post, so be sure to stay tuned for that one.

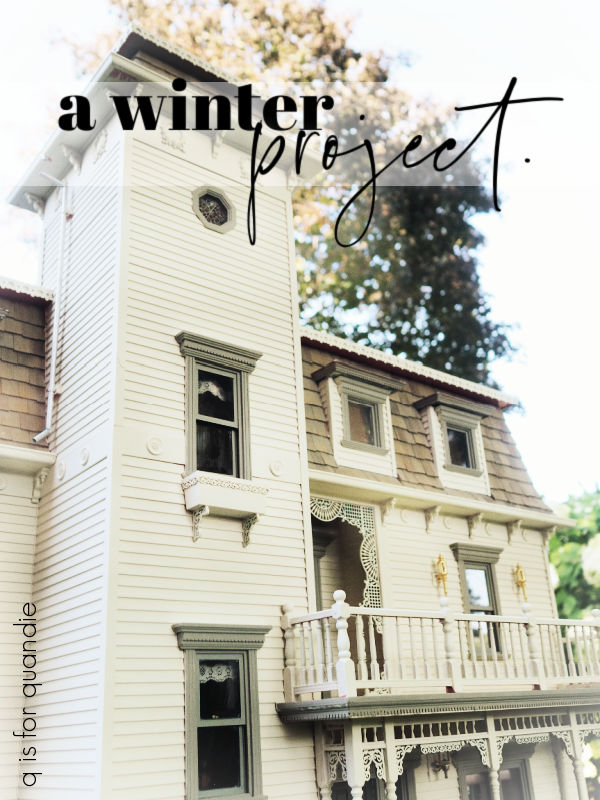
It was a bit disorienting to come back home to 50° and blustery!  Although this is typical October weather for us.  The low tonight is supposed to be below freezing, so it’s time to move my painting projects indoors, and start buttoning up the garden for winter.  I’ve got some fun mini projects to share later this week, and it’s also time to get cracking on some holiday items.  So be sure to stay tuned!

french country cottage style.

I’ve decided on a design style for my dollhouse, French Country Cottage.  With it’s muted color palette of creamy white and warm earthy neutrals, it’s right up my alley.  I may also throw in a few pale French blues, and maybe even a hint of gold here and there.

Of course I’ll be using my favorite warm white, Dixie Belle’s Drop Cloth, throughout.  But I also plan to throw in some French Linen, Dried Sage, and Gravel Road.  Maybe a little Sawmill Gravy too.

I’d like to use Miss Mustard Seed’s Aviary for the blue, but I don’t have any of that on hand so I may just try to mix something custom.  We’ll see.

With my style choice in mind, I’ve completed my first mini furniture makeover.

I purchased this dining set from Hobby Lobby for a mere $9.99.

After doing just a little bit of gentle hand sanding around the edges of the chair backs to clean them up a bit, I gave the chairs and the base of the table a coat of Dixie Belle’s Dried Sage.

This is one of my favorite neutral shades from Dixie Belle.  It’s a warm greenish gray, and it always dries a little darker than I think it will.

While the base coat of Dried Sage was drying, I created a wash using Dixie Belle’s Drop Cloth paint and some water.  I’m not sure of the precise ratios, maybe 75% water to 25% paint or so.  I then painted the upholstered seats that came with the set using that wash.

They were just a tad too white for my taste.

Once the fabric was dry, I taped off some grain sack lines and dried brushed them with the Dried Sage.  I didn’t get all fancy with measuring or anything, I just eye-balled them.  I painted the middle line first, then once dry, I taped off and painted the two outer lines.

Once that was dry I added the re-design with prima knob transfers from the French Maison set.  I followed that up with a light coat of Dixie Belle’s clear wax.

Before gluing the cushions onto the chairs, I gave the chairs a quick dry brush with the Drop Cloth paint to lighten them up a bit and add some depth.

I also added a dry brushed coat of Drop Cloth over the Dried Sage on the table base.

As for the table top, I went back to that watered down Drop Cloth and applied it as a wash by brushing it on, and then wiping most of it away with a rag before it dried.

I finished that off with a coat of clear wax as well.

Although I do think the table turned out quite nice, I’m not sure I want an oval table in the dining room of my dollhouse.  I also don’t think this table has the right ‘country’ feel.  So for that reason, I also purchased a 2nd dining room set at Hobby Lobby.

This one was only $7.99.  It came with the perfect farmhouse table,

but I don’t love the chairs.

But for less than $20 I could buy both sets, so I did.

I will likely find somewhere else to use those chairs, maybe in the kitchen.

In the meantime I’m going to paint up the farmhouse table following the same recipe I used on the oval table.  You’ll just have to stay tuned to find out which one I eventually use in the dining room.

As I’ve mentioned previously, this weekend my sister, niece and I are heading off to visit my mom.  We’re also throwing in a side trip to Disneyland in California.  I really thought we’d be safe going to Mom’s in early October, but last I checked, the high on Saturday is supposed to be 104°, I am not looking forward to that.  Fortunately the pool in her townhome complex will be open.

I decided to take a bit of a blog break and not schedule any posts while I’m gone.  But while I’m away, here’s a question for you.  Do you think there is a market for these hand-painted/styled dollhouse pieces?  They would be easier to ship most other items I paint.  What do you think?

Leave a comment and let me know, and then come back in a couple of weeks to see what I’m up to next!

omg, I love it.

I hope you all will enjoy seeing mini-furniture makeovers as much as the real thing, because I think there’s going to be a steady stream of them as I work on re-furnishing my dollhouse over the coming months.

Now that I’ve finished repainting the exterior, I’m ready to get cracking on the interior.

As I’m just getting started in the world of miniatures, I’m learning about it as I go.  I’m bound to make more than a few mistakes along the way.

There is one big change that has taken place since my dad and I furnished this dollhouse over 30 years ago.  There aren’t any brick and mortar shops dedicated to dollhouses anymore.  At least not any that I can find near me (if you locals know of any, please leave a comment).  Hobby Lobby has a small selection of dollhouse materials (more on that in a minute), but I didn’t find anything at Michaels.

So it looks like online shopping is going to be my main go-to.

I started out making a few purchases on Etsy, but what I like to do is find a shop on Etsy, and then go check out the shop’s independent website (if they have one).  I’d rather order directly from the shop, saving them the Etsy commission.

That’s how I found Miniature Crush, a vendor that ships out of Savage, MN.  I’ve ordered from her twice now and both times received my order really quickly.  I know I’m going to be ordering from her again.

One thing that I learned while scouring Etsy is that there are some very inspirational creators out there working in miniature.  That’s how I came across Cinderella Moments.

Although she doesn’t have a lot of stuff for sale on Etsy, she has some very interesting looking tutorials on her blog such as how to make that gorgeous day bed in the photo above.

But another thing I noticed while looking through her blog is that she often takes basic unfinished dollhouse furniture and embellishes it.  For example, I’m betting that this table and chairs …

started out looking like this …

I just purchased this set at Hobby Lobby for $9.99.

That was a bit of a eureka moment for me, realizing that I can find great raw materials fairly cheap, and then add my own flavor.  This set even came with some upholstered cushions for the seats.

While I’m probably never going to get quite as frou-frou as Cinderella Moments does, I did whip up a quick prototype for my dining chairs.

And omg!  I love it!

I haven’t yet glued down the cushion in that photo, so ignore how it looks a bit floppy.

But seriously, how fun is that?

Now I just need to finish the other three chairs and paint the table.  Stay tuned because later in the week I’ll share the completed set, and all of the details.

While I was at Hobby Lobby, I also picked up some unfinished patio furniture.

As well as a Welsh cupboard.

I also have a bed and an armoire on the way.

So I have lots of furniture painting lined up to keep me busy over the winter.

I hope you’ll enjoy seeing these makeovers as much as I enjoy doing them!

a winter project.

Do any of you remember back when I said that I was giving away my dollhouse?

That was way back in 2017.  Gosh time flies!  Seven years have flown by in the blink of an eye.

If you weren’t around back then, the story behind the dollhouse is this.  My dad retired early from I.B.M. on his 52nd birthday.  Not only did he have a pension, but I.B.M. also paid for health insurance for both my mom and dad until they were 65, and they gave him an early retirement bonus where they added the amount of social security he would be eligible for at 62 to his pension payment for the next 13 years.  Can you imagine any employer offering that kind of a deal now?  It was too good to pass up.

However, he had been fairly recently transferred to Lexington, KY, and he wasn’t finding much to keep him occupied there.

So when I suggested it might be fun to make a dollhouse, he jumped on the idea with gusto.  It was helpful that there was a really fantastic dollhouse supply store near him in Lexington with owners who quickly became his besties.

It took him about 9 months to finish it, and as you can see, he spared no expense and added every kind of detail imaginable.

He also took photos every step of the way.

I chose all of the colors (egads! what was I thinking?), wallpapers, furniture, etc.  But I was already living here in Minnesota then, so we did everything by phone and/or mail.  Remember when long-distance calls cost money?  And there was no such thing as email?  Or Amazon?  It was a different time for sure.

But anyway … back to giving the dollhouse away.  Flash forward to 2017 and it was just gathering dust out in the carriage house.  I felt like it should go to someone who would appreciate it and take care of it.  So I offered it to my in-laws. They love working with miniatures, so they were happy to have it and planned to refurbish it.

But that never happened.  Instead it ended up just gathering dust at their house too.

Meanwhile, after working on the toy barn makeover back in March …

And then my clock case project back in April …

I kinda got the bug to work in miniature.  So I decided to ask if I could have my dollhouse back.  The in-laws couldn’t have agreed more quickly.  They were clearly happy to see it go.

So last week Mr. Q and I drove out to their place in Wisconsin and brought the dollhouse back home.

I plan to give it a refresh.  It has a bit of a dated vibe, and not in a good way.  So why not give it an update?

I have to point out that the photo above was taken before the dollhouse went to the in-laws.  They subsequently stripped away all of the landscaping, and also repaired the upper level railing.

They had also boxed up all of the contents except for the bed in the master bedroom, and now aren’t sure exactly where that box is.  But that’s OK, I’m calling this a blank canvas.  I can start fresh from scratch with furnishing the interior.  Many of the furnishings were pretty dated, and no longer my style anyway.

But first, I had to get the exterior painted.  I thought it would be easiest to paint the outside while I could still work in my carriage house workshop.  It can get too cold to paint out there as early as October (it’s not heated).

So since I’m taking a two week trip out to visit my mom and go to Disneyland with my sister and niece in just a couple of short weeks, I needed to get cracking.

I’ll have to get all of my paints back into the house before I leave.

The pepto pink with seafoam green and teal trim just wasn’t cutting it for me anymore, even though they were my picks back in the day.

By the way, I had made all of the ‘plants’ using FIMO clay.  I’m not sure if I’ll attempt that again, or try something else in those window boxes this time around.  Stay tuned on that one.

But first, the exterior painting.  Naturally I pulled out my favorite warm white, Dixie Belle’s Drop Cloth, for the siding.

As I was painting I quickly realized that my dad had a bit of an advantage.  He was able to paint everything before installing it.  I was never going to be able to get the same level of detail while painting things in place.

So this …

Became this …

I also quickly realized that my dad had a lot more patience for detail work than I do, so I went with just two colors on the exterior rather than four.  Well, technically three if you include the doors which are painted in Dixie Belle’s Gravel Road.  The window trim is painted in Dixie Belle’s French Linen.

But the really fine details like the corbels along the roof line, or the railings on the porch are all just painted in Drop Cloth now.

I also added a French Linen wash to the roof shingles.

  If you’ve never done a wash, it’s super easy.  Just water down your paint until it’s quite thin (like the consistency of 2% milk maybe), brush it on, then immediately wipe it back with a rag.  I really love the subtle change that made to the roof.

I have to admit, this paint job took much longer than I anticipated.  There were so many nooks and crannies!  And so many things to paint around like the ‘galvanized’ downspouts.

By the way, the slate that is around the foundation of the dollhouse came from a field somewhere around my parent’s house.  My dad just went and picked it up from the ground.  The foyer floor is also made out of this slate.

This more subdued color palette is much more my speed now.

I’ll be working on redecorating one room of the dollhouse at a time over the winter.  Eventually I’ll also re-do the exterior landscaping.  We’ll just have to wait and see how that goes.  Will I get tired of it before I finish?  Will it take much longer than I anticipate?  Will it completely blow my budget?  All of the above probably.

In anticipation of the many blog posts that will come out of this, I’ve added a new category to my blog called “mini’s”.  If you’ve never explored the categories, when you’re on a computer you’ll find them over on the right hand side of the screen under “sorted.” .  If you are reading this on your phone you have to tap on a specific blog post (any post), then scroll all the way down to the bottom past any comments and then tap on “sorted.” and select a category.

I’ve already started accumulating some fun decor for the next step in this process.

So be sure to stay tuned to see what I do next.

a sweet little hutch.

Remember the mini hutch (sideboard?  buffet?  dresser?  what would you call it?) that was very generously gifted to me at my sale?

I’ve given it a bit of a makeover.

First, the prep.  I began by filling in those circle details on the door fronts using Dixie Belle’s white Mud.  I knew I wanted to use some transfers on those doors and the circles would just be in the way.  Once the Mud was dry, I sanded everything smooth and then, after taping off the mirror, I gave it a quick spray with Rust-Oleum matte sealer.  I could have brushed on the Dixie Belle Bonding Boss, but it was easier to just give it a quick spray.

Next I painted the piece with two coats of Dixie Belle’s Drop Cloth.  After distressing the paint job a bit by sanding the edges to give it some age, it was time for the fun part.

I started by adding some roses from the I.O.D. Rose Botanical transfer.

This set of transfers has roses in different sizes and the smallest ones were perfect for this little hutch.  I added them to that backsplash bit, and also on either side of the front.

Once the roses were in place, I pulled out the Vintage Post transfer from Dixie Belle.  I selected some of the typography from it and added it to the front of the hutch.

It fit perfectly.

Then I used some pretty scrapbook paper to line the drawer.

After finishing it all off with a coat of Dixie Belle’s clear wax on the outside, I staged it up with a miniature camera and a tiny little ironstone pitcher.

I think it turned out pretty sweet.

What do you think?

This sweet little hutch is for sale.  Check out my ‘available for local sale‘ page for more details.

Thank you to Dixie Belle Paint Co for providing their products used in this makeover.

the fairy garden, 2024.

 Good morning from the garden!

This morning I thought I would share my 2024 fairy garden.  But first, let’s take a look at its history.

My fairy garden started out in an old cracked concrete birdbath.  The crack allowed for drainage, so that made it perfect for planting in.

It was sweet, although a bit on the small side.

But back in late 2022 the crack became fatal, the bowl broke into 3 pieces.

I debated trying to somehow glue it back together, but ultimately decided that it probably wouldn’t hold up to the elements over time.

Later that year my sister gifted me with a fairy house for Christmas.

So I knew it was time to expand.

I happened to have an old rusted out wheelbarrow on hand, and that seemed like the perfect container for a fairy garden.

So after getting some help from my handyman Ken to shore it up a bit, I nestled it in a bed of variegated vinca and planted it up.

I have to admit, although it looked quite nice when first planted last year, quite a lot of the plants grew like gangbusters and everything became quite shaggy by the end of the season despite several pruning sessions.

Also, even though I protected it with a mound of leaves and a burlap covering for what was a relatively mild winter for us, the only plants that came back this spring were the Dwarf Alberta Spruce, one mini Feather Boa hosta, and the creeping thyme.

Sadly the mini barberry shrub, the mini betony and the Mighty Mouse hosta all died.  I was especially bummed about that dwarf betony, or stachys minima.  I was really hoping to see that bloom this year.

This year I decided to take a more minimalistic approach to the fairy garden.  I had traditionally planted a small wire vine on the arbor, but it always took over.  So this year I opted to not plant anything that would grow over it.  Instead I added a small evergreen to one side, and a mini caladium to the other.

Although the Golddust Mecardonia bloomed all summer last year, and the flowers were the perfect scale for a fairy garden, it was a bit too prolific for the space.  It totally took over.  So this year I opted to plant another variety of creeping thyme in those spots instead.

After pulling out the dead barberry shrub next to the fairy house, I replaced it with a miniature Japanese maple.

To be honest, I think there is little chance it will survive next winter in the wheelbarrow so I plan to pull it out in the fall, pot it up and then try to overwinter it on my unheated three-season porch.  We’ll see how that goes.

My neighbor, nnK, shared a couple of divisions from her miniature hostas with me.

I don’t know the name of that one, but it’s doing well under that pergola.  Hopefully it will survive the winter and return next year.

This year the fairies moved their meditation garden out back under the Japanese maple.

They also opted for a little gnome in the front of the garden instead of the angel statue they had last year.

My sister and I found these at a garage sale earlier this year and we each bought one.

The fairy garden is definitely requiring a little less maintenance this year, so I’m happy with the choices I’ve made.  I do wish I could find more miniature plants to include though.  I was really hoping to replace that dwarf betony, but I couldn’t find it this year.  If any of you have resources for mini plants be sure to leave a comment and let me know.