
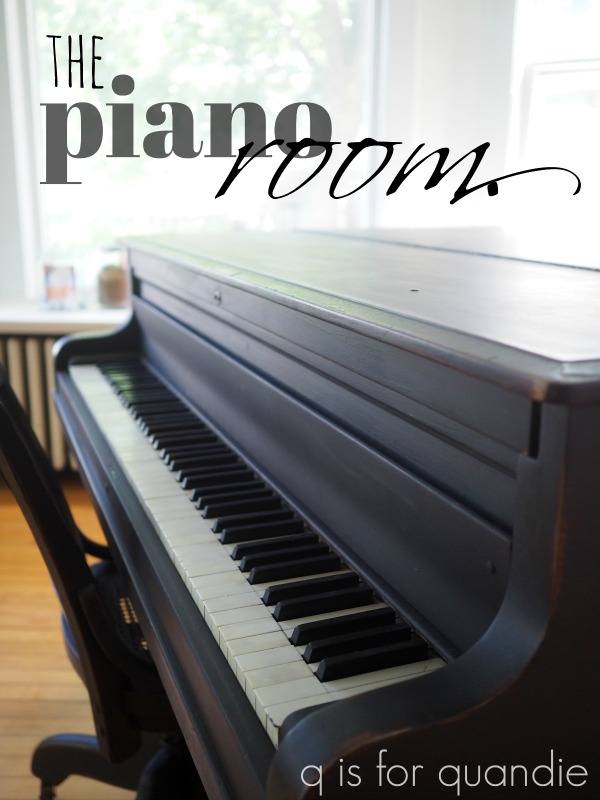
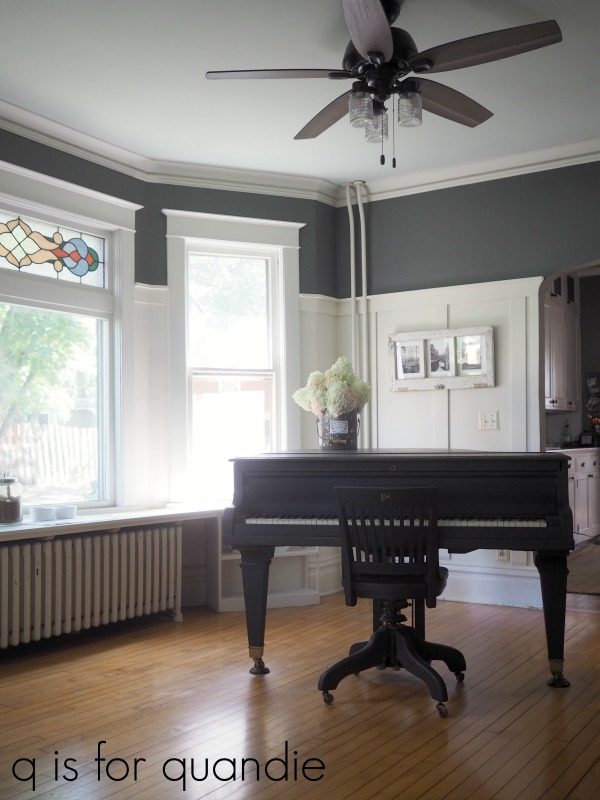
The room that we call the piano room was originally intended to be a formal dining room. In fact, we did use it that way for many years until we became the proud owners of a baby grand piano when one of my co-workers moved away and needed to get rid of it.
I had grandiose plans of learning how to play, assuming that naturally I would become some sort of jazz pianist in my spare time. You know, all of that spare time I have that isn’t spent working, gardening, garage saling or painting furniture.
Yeah, you get the idea, that never happened.
However, I did discover that this piano makes the perfect surface for things I do spend time on like painting stuff, or wrapping presents, or folding laundry, or even mixing drinks. So it has become a fixture in the room and I can’t imagine anything else that I could swap it out for that would be as functional and yet still attractive.
Over the years this room has seen quite a few looks. When we bought the house it was wallpapered in a very bland wallpaper. I’m pretty sure the previous owners felt that wallpaper was an easy way to cover up a flawed plaster wall, but they didn’t feel that it needed to be decorative. I replaced that wallpaper with a white on white damask patterned wallpaper that was very trendy at the time, but that was back in the early 90’s. Later that wallpaper came down and I tried a multitude of different colors on the walls; mustard yellow, red, and grey to name a few. I didn’t love any of them, and somehow despite its gorgeous trim, built in bookcases, and stained glass window, the room always managed to look rather boring.
I finally landed on horizontal stripes about 8 years ago and I painted them in shades of green the first time around.
I loved the stripes, but the colors weren’t good at all. Especially since this room contains the only blank wall in my entire house that is suitable for staging furniture photos. So I then exchanged the green stripes for grey and white stripes.

The colors were definitely better, and I loved the way they looked. But eventually I got tired of seeing that striped wall in the background of so many of my furniture photos.

So a while back I repainted just that wall white.
That brought me to last winter when I decided to tackle redecorating my living room and piano room. I broke the project down into what I thought would be manageable chunks.
- repaint the insides of the bookshelves in the living room
- repaint the living room walls
- replace the living room furniture
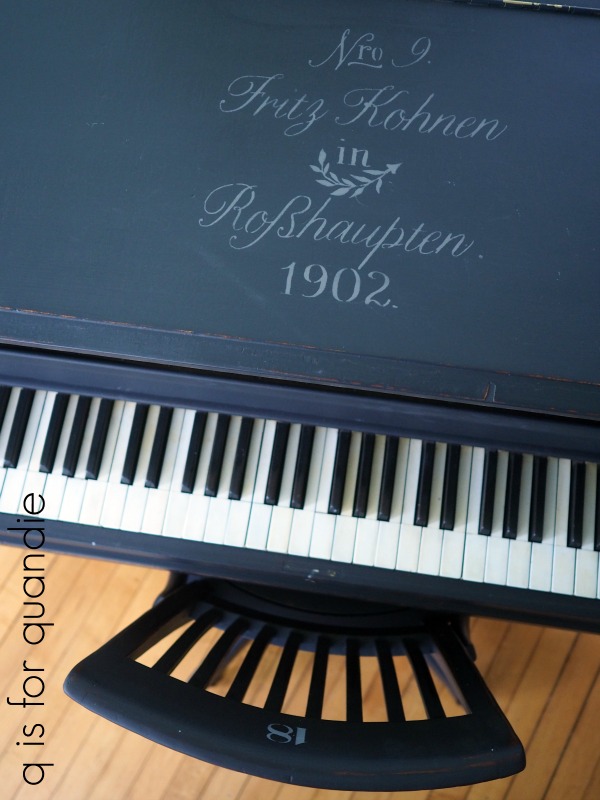
- paint the baby grand piano
- replace the ceiling fan over the piano
- repaint the piano room walls
And actually, I did pretty good right up until I got to item no. 6. That’s where I completely got stuck. Mainly because my original plan was to just finish painting out the stripes in the rest of the piano room with plain white walls. However, in the back of my mind I knew that wasn’t going to be enough. The room needed something more.
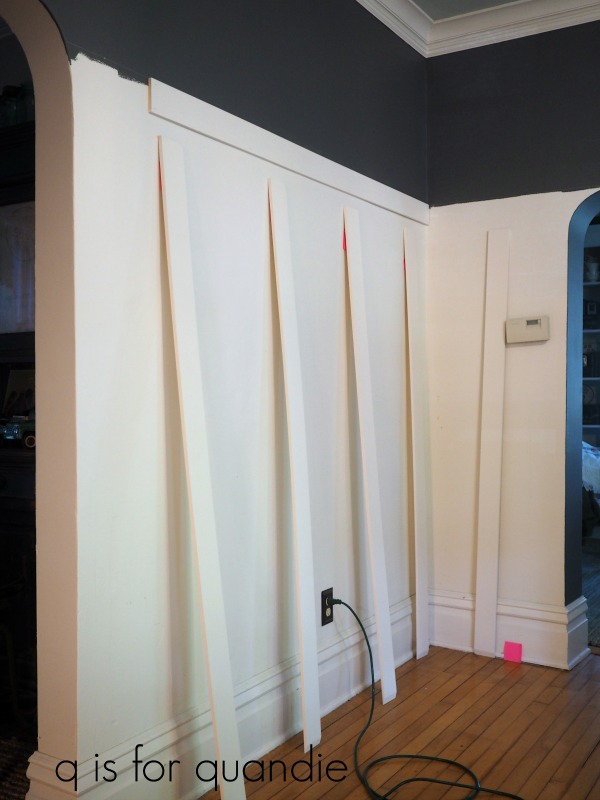
I toyed with the idea of faux ship lap. That worked really well in our master bedroom. But ship lap felt just a bit too casual for this room and its baby grand. Then I came across a picture of board and batten and realized it would be perfect.
I’m not going to attempt a tutorial on how to do board and batten. There are a million of those out there, all done far better than mine would be (just google it, or look on pinterest).
I can tell you that it cost around $90 for the wood. We used solid Aspen rather than cheaper furring strips because it had a nicer, smoother finish. The wider boards are 1/2″ x 4″ x 6′ and the horizontal trim board above that wider board at the very top is 1″ x 2″ x 4′.
I played around a bit with the distance between the vertical boards. I didn’t want any of them to end up in a corner and I didn’t want to have to cut around any electrical outlets or other obstructions. We ended up keeping them 20″ apart.
The paint cost another $80 or so, but I have lots left over for other projects. So for less than $200, this made a huge impact on the room. At least I think so.
I must point out here that we definitely could not have done this project without our handyman/neighbor Ken. He had all of the necessary tools, and he had the know-how.
I opted to go fairly high up the wall with the board and batten for two reasons. The first is that I wanted to carry in the dark grey color from the living room walls at the top, but I wanted to keep that to a smaller segment of wall. The second reason is so that I can still do furniture photo shoots in here and easily crop out the dark grey (as long as the pieces aren’t really tall). You’ll see an example of that on Friday when I share my latest painted piece of furniture.
The top of the board and batten is at 6 1/2′ tall.
I knew using the dark grey at the top of the wall would really make our pretty window frames pop.

We didn’t add any vertical boards to that entire east wall. The angles of the wall make it feel consistent though.

This project was a bit more work than I thought it would be. I took a week off at the day job and figured I’d have lots of time for other things plus this project. Instead I just barely got this room done by Friday.
I painted the walls, both top and bottom. Then I sanded and painted all of the boards (before installing them). Then it took an entire day for Ken and I to install the boards. Then I filled nail holes, patched seams and added a 2nd coat of paint to the boards. I painted the chair to match the piano. I also painted the bookshelves under the window. Phew!
Luckily I didn’t need to repaint my pretty pale blue ceiling, and we already had both the ceiling fan project and the piano painting project completed.
We took care of some final details on Friday like changing out our thermostat to something a little fresher looking and hanging things back on the walls. I also painted all of my switch plates. They were an oil rubbed bronze sort of color so I just gave them all a quick paint job with some basic creamy white spray paint. I didn’t want them to stand out.

I moved some things around a bit. The yardstick shelves with my non-collection of vintage alarm clocks went into the living room, while the window framed black and white photos came out here.
I moved my aqua McCoy pottery into my pantry and opted to keep these shelves monochromatic like the living room shelves.

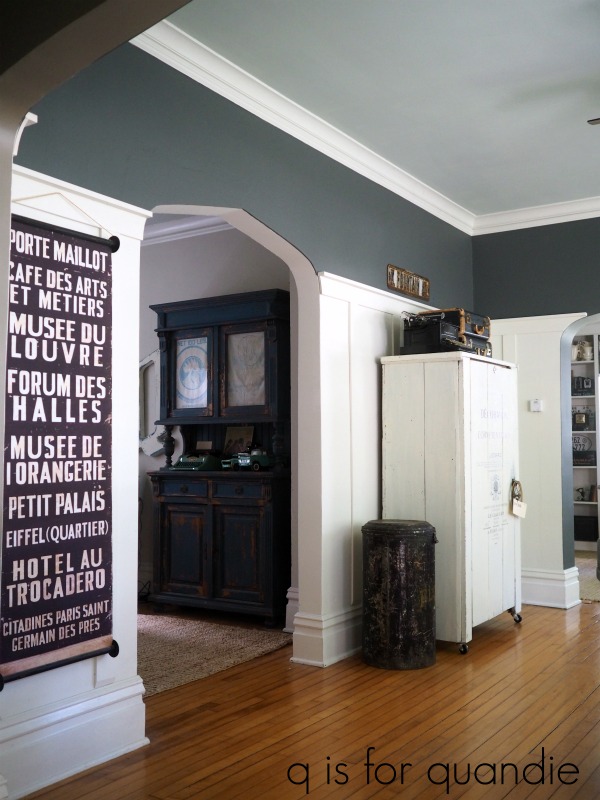
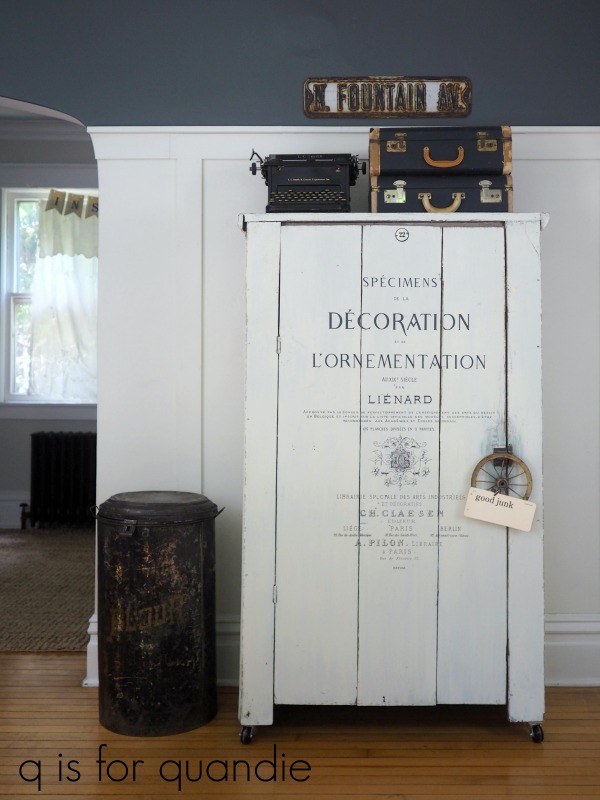
A couple of things stayed in the same spots, like my French subway sign scroll and the black suitcases on top of my Specimens cupboard.

So, instead of six weeks it actually took just over 7 months, but I am finally done with my redecorating plan. It would have been so much easier to just wave a magic wand, if only I had one.

But it feels so good to finally be able to check this last item off the list. I’m not sure which room I’ll tackle next but I’m sure I won’t be undertaking anymore redecorating projects until 2020. I have a trip to DisneyWorld with my sister coming up in October and then the holiday season will be here before we know it (I know, scary, right?). In the meantime, I’m back to furniture painting. So be sure to stay tuned!

One word. Perfect.
LikeLike
Wow…just wow. I’ve seen this room through all its transformations and this is the best by far. The colors and use of the wood are perfect. Great job … took longer than you thought, but just look at the results!
LikeLike
Yep, it was worth the extra time I think!
LikeLike
Thanks Sue!
LikeLike
Linda…your room looks beautiful!! I love the color…and the piano just makes the room “pop”…Thank you for sharing..!!
LikeLike
Thanks Linda!
LikeLike
It looks very nice. I wasn’t expecting it to be so tall. Can’t wait to see it in person.
LikeLike
See you Saturday!
LikeLike
Sue said it perfect and so fresh looking! 👍🏻👍🏻👆🏻
LikeLike
Thanks Victoria!
LikeLike
Love it! You got it right, looks awesome!
LikeLike
Thanks Darleen, I’m so glad I went with the board & batten. It was definitely the right choice for this room.
LikeLike
Absolutely stunning and sophisticated!
LikeLike
Thank you Laura!
LikeLike
Very nice work. So professionally done!
LikeLike
Well … it appears professionally done in photos anyway 😉 Ken and I may have taken a short cut or two, but it still looks great.
LikeLiked by 1 person
The pictures look wonderful.
LikeLiked by 1 person
The piano room looks beautiful!!!
LikeLike
Thanks BFF!
LikeLike
Perfect decision for this beautiful room. I’m very impressed with your ability to envision this magnificent change to the room. Love all of it and that recessed ceiling is unexpected.
LikeLike
I was inspired by a photo in a magazine. I get lots of my ideas that way!
LikeLike
Wow! I just love it. The board and batten is the perfect height. Congratulations on finishing your list of projects. Now enjoy
LikeLike
Thanks Donna! Yep, I’m going to kick back for a bit and not take on any more projects, at least for a week or so 😉
LikeLike
This is just lovely and the perfect thing for this room. It really make s the trim and that fabulous stained glass window pop. Simply beautiful!
LikeLike
For sure. We are lucky to have such beautiful original trim in our house.
LikeLike
Gorgeous! We put board and batten in our hallway. Of course my contractor husband had to go all out and actually put boards up and not just use the wall. And we did only about a 3rd way up and I have photos on top. We love it!
LikeLike
My walls are so warped, pretty much not flat at all, so I’m not sure we could have done it your way even if we wanted to. But faking it was good enough for me 😉
LikeLike
I love seeing your posts in my email in-box and this one was especially wonderful. All your choices are gorgeous! What a wonderful room!
LikeLike
Thanks so much Netti!
LikeLike
Wow, this post is great. Makes me want to go downstairs and look at it again! 😉
LikeLike
LOL, you go ahead and do that hon!
LikeLike
Well Miss Quandie, this room looks absolutely wonderful………both cozy and classic. And what a lot of work you did! You need to be super motivated to start a project like this! Did Mr. Q help? He seems a little spoiled! (smile)……..
LikeLike
He is totally spoiled! But no, really, this kind of work is not his forte. I don’t like to compel him to help with stuff that he has pretty much zero interest in. That’s not to say he doesn’t pull his own weight around here, he does do all of the cooking, cleaning, lawn maintenance, errand running, and grocery shopping … plus, as an added bonus, he will rub my shoulders whenever I ask him to 🙂
LikeLike
Your home is beautiful!!! Both inside and out!
LikeLike
Thank you so much Annie!
LikeLike
I want to trade you places! I love your place and I want to live next door to Ken! He is so talented! You made a great choice for the room! I also would love a husband that would do cleaning and cooking! Mine does the grocery shopping, and the mowing and usually will rub my sore legs, feet, back and shoulders/neck when I ask! All my stress ends up in my shoulders! So I guess he’s not too bad! Lol
Pat yourself on the back for getting through your list!
LikeLike
I definitely feels great to have gotten through that list 🙂
LikeLike
This came out beautiful. We did this in our dining room about four years ago. It was the only room in our house that had no architectural detail and looked like a rectangular box. Our ceilings are only 7’ high so we went up two thirds with the boards, painted it all off white and then a pretty blue/gray on the top one third. So simple but what a difference it makes. I’m still thrilled with how it turned out.
LikeLike
It really adds so much to a room doesn’t it? I’m betting I’ll still love mine in 4 years too!
LikeLike
Lovely! Classic! Timeless! We did a similar project in our dining room last year. I have white wainscotting and “Distant Storm” (dark dark blue paint color in my kitchen similar to your DR and LR, and after five years still love it!) in my kitchen and wanted to dress up the dining and living rooms – so maple board and batten went into the dining room last year in a stained finish. We love it. And there is definitely some math involved with the spacing – every wall is a little different, and then the windows….
Great project – I love the height on yours – the room supports it so well! Another beautiful project – congratulations!
LikeLike
I struggled a bit with the height decision, but I’m glad I went as high as I did. It’s going to work well for future furniture staging 🙂
LikeLike
The piano room is awesome!
LikeLike
Thanks so much Freida!
LikeLike
Looks absolutely amazing!! Love every detail!!
LikeLike
Thanks Debbie!
LikeLike
What a beautiful room! I love everything about this room. That piano is stunning! I love the colors and the stained glass window looks so pretty. You are a very talented decorator.
LikeLike
I don’t think I mentioned it here, but I made that stained glass window myself. When we moved in there was just clear glass in that spot, so I took a glass and gave it a whirl. It’s not perfect, and now I wish I’d chosen different colors, but I am glad I did it.
LikeLike
I love the board and batten, it really fits with the style of your home and the dark gray is beautiful with the white.
I always enjoy reading your blog posts.
LikeLike
Thanks so much Margaret!
LikeLike
Wow. This is a gorgeous transformation. We had a piano growing up and I’ve always dreamed of having a music room. But as the mom of 3 athletic and not musically interested or inclined, at all, boys – play rooms, mud rooms, and laundry rooms have always gotten the available space in our home. Such a beautiful room, restful room. 😍
LikeLike