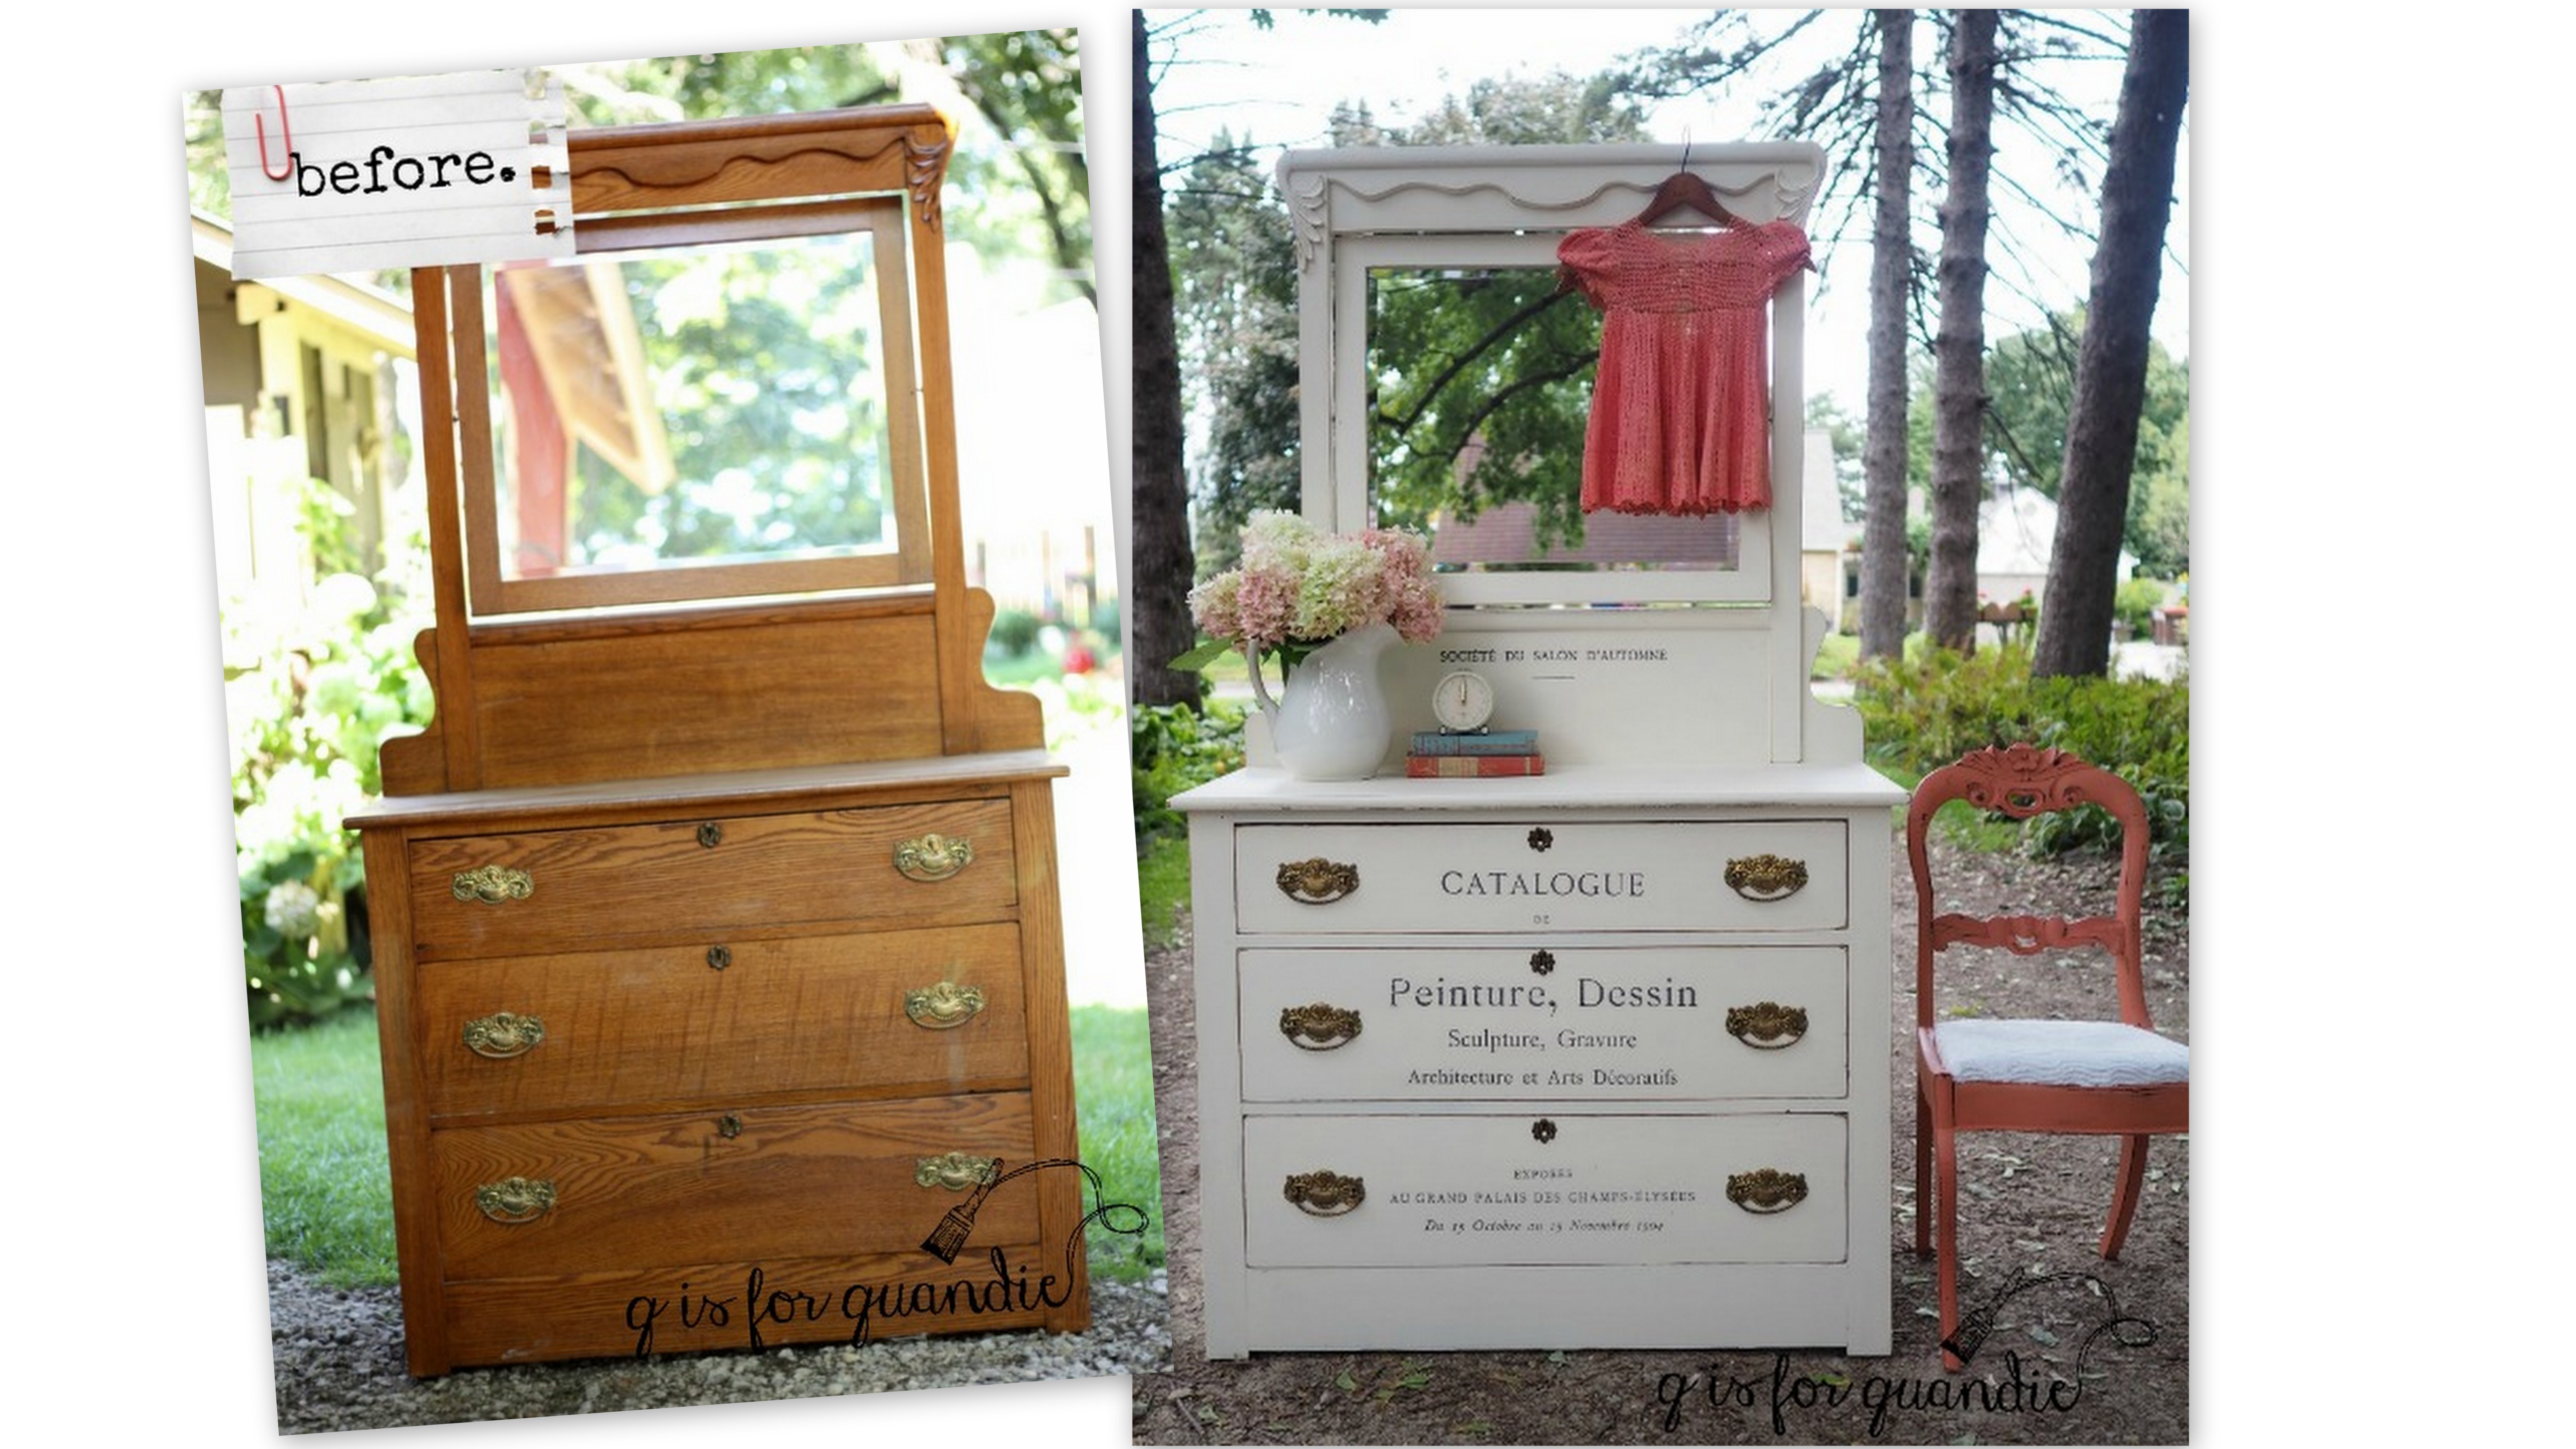
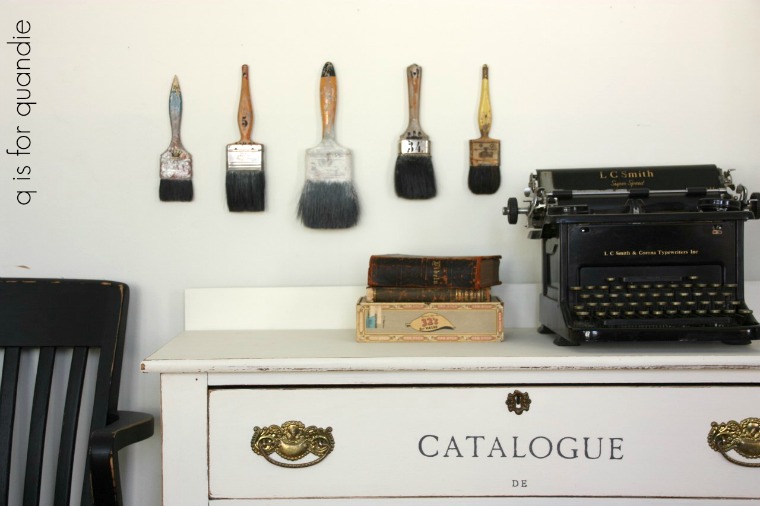
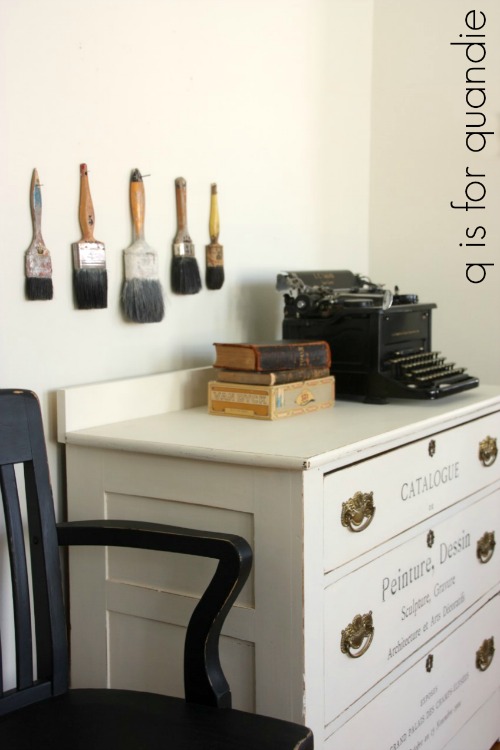
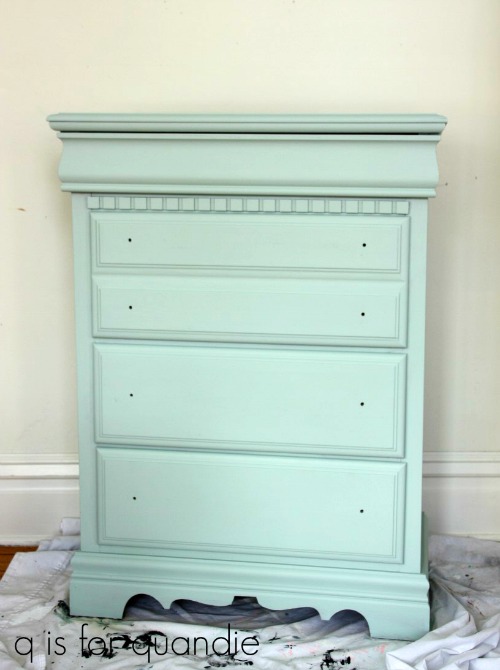
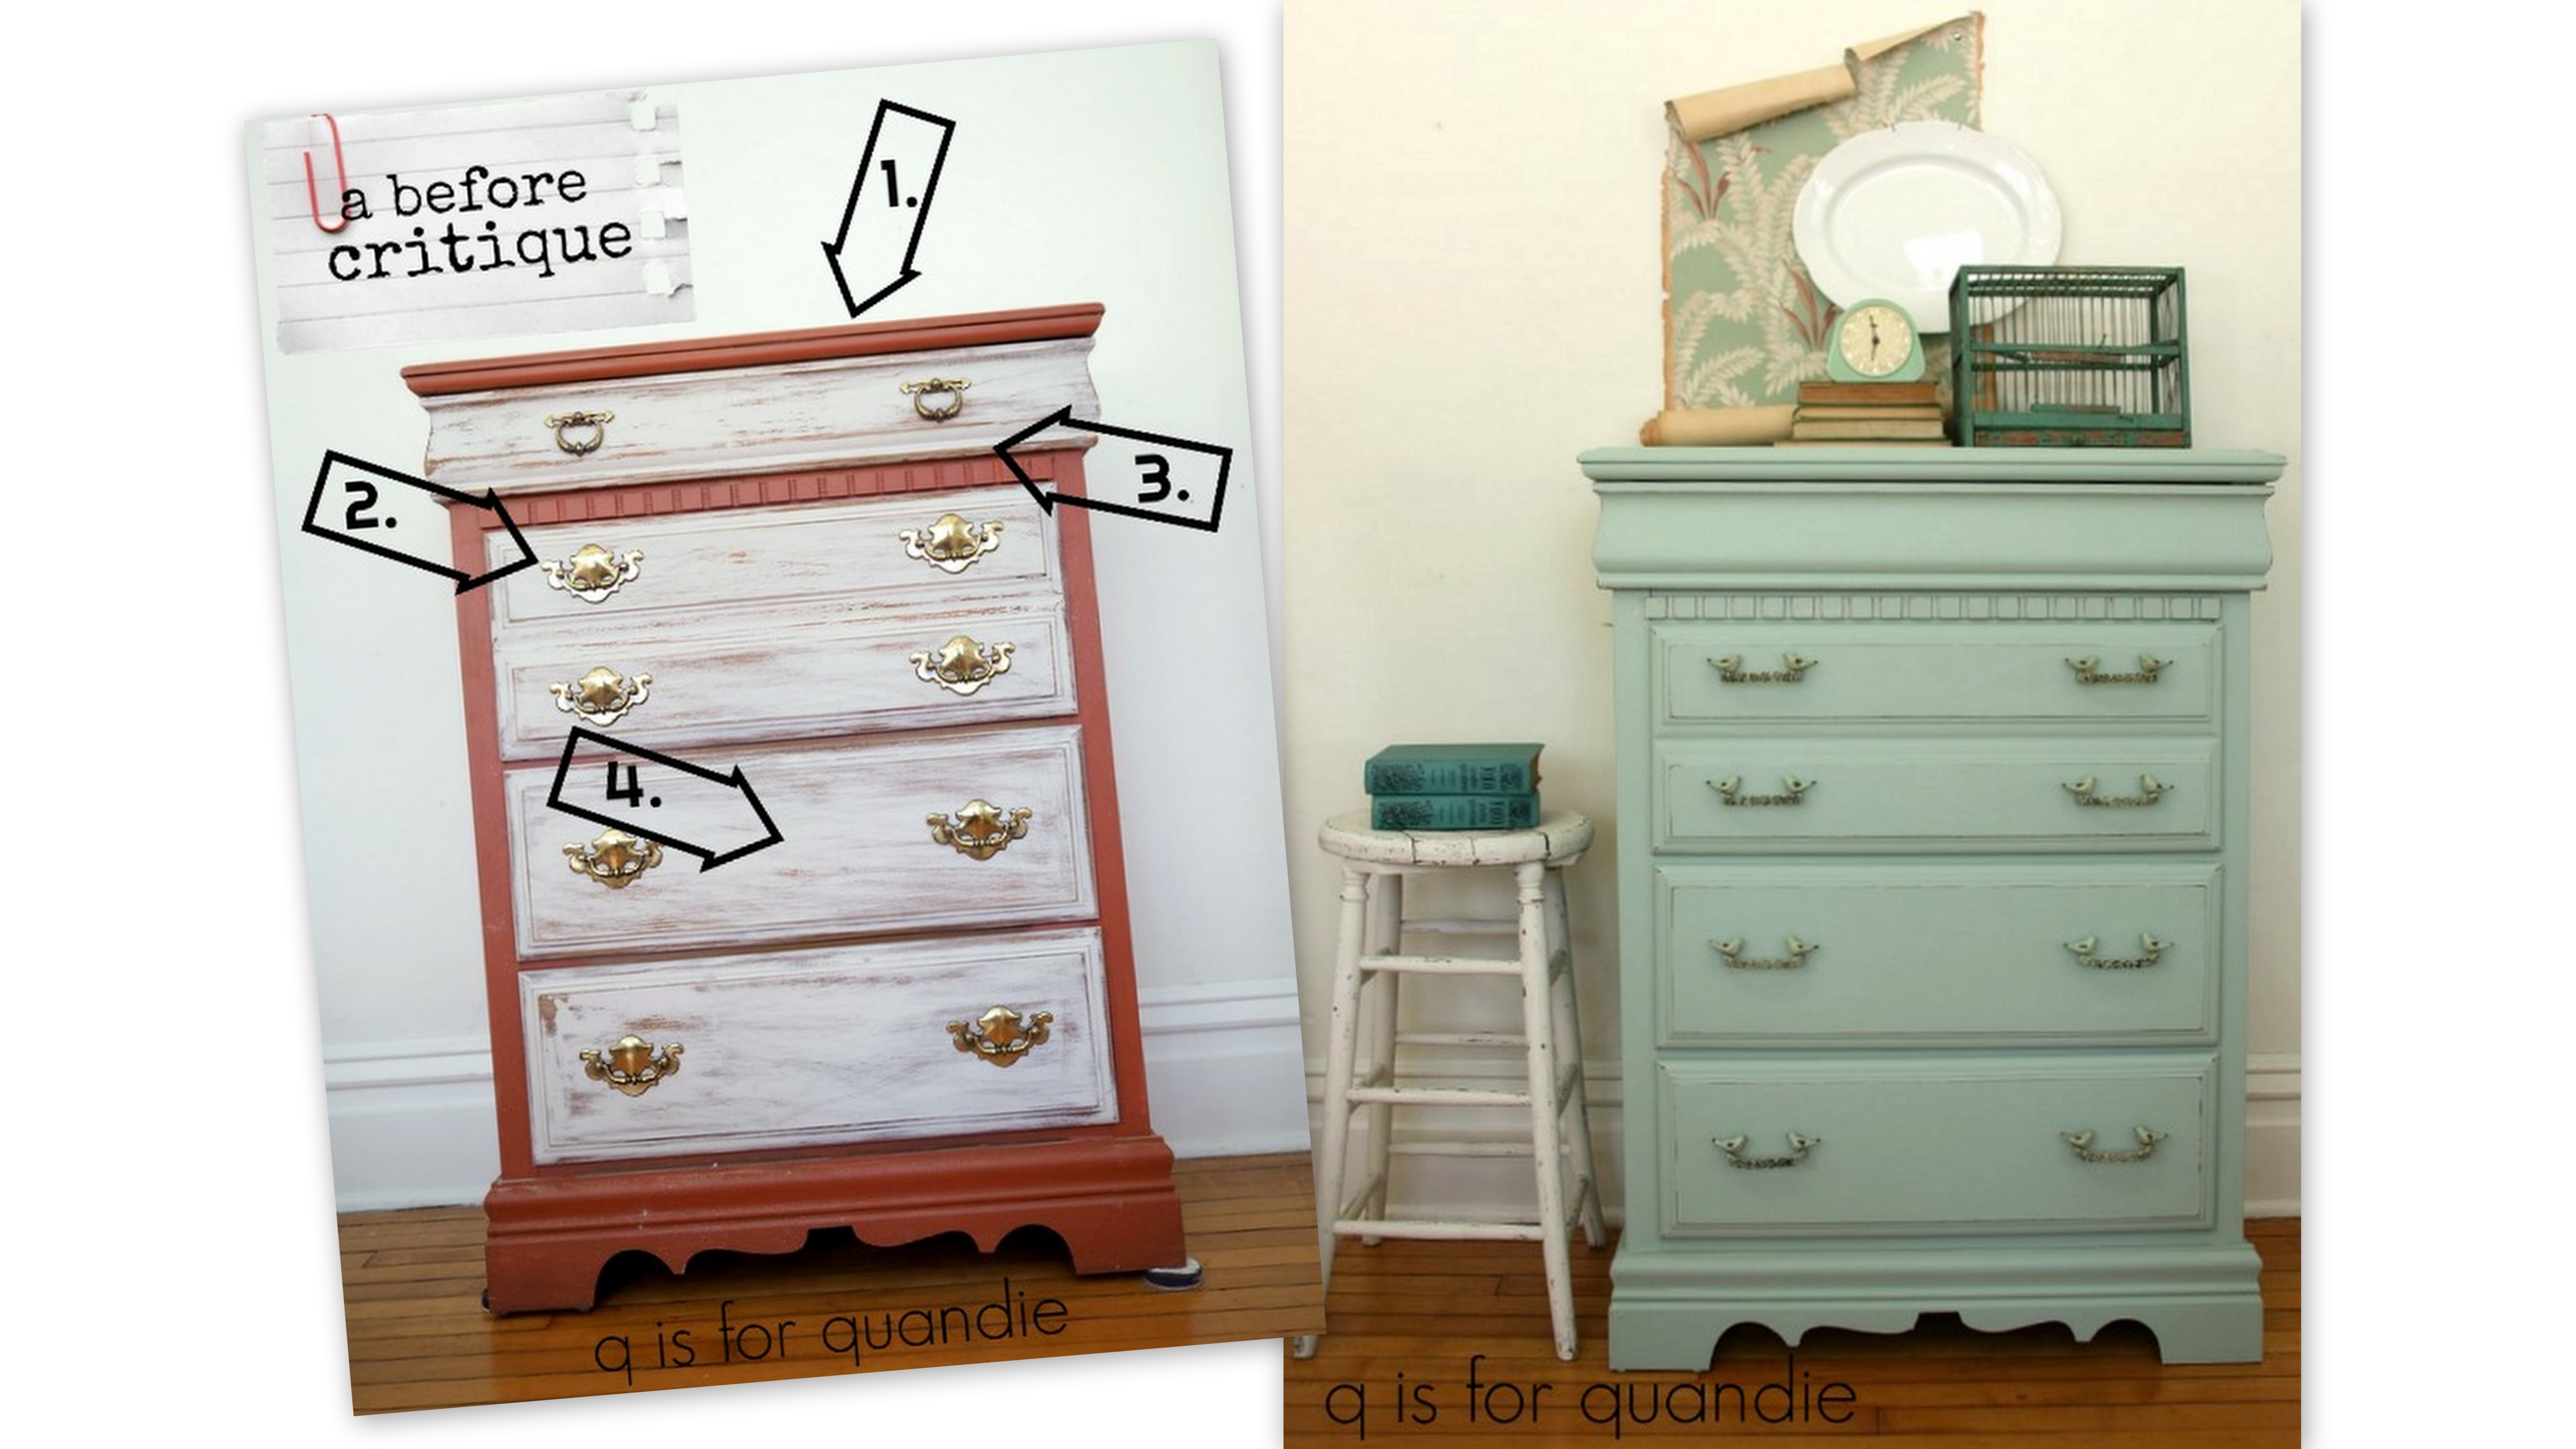
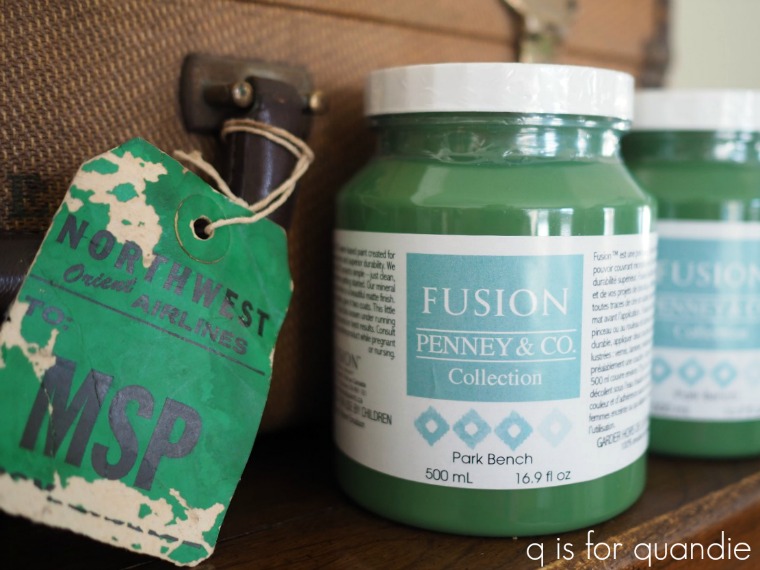
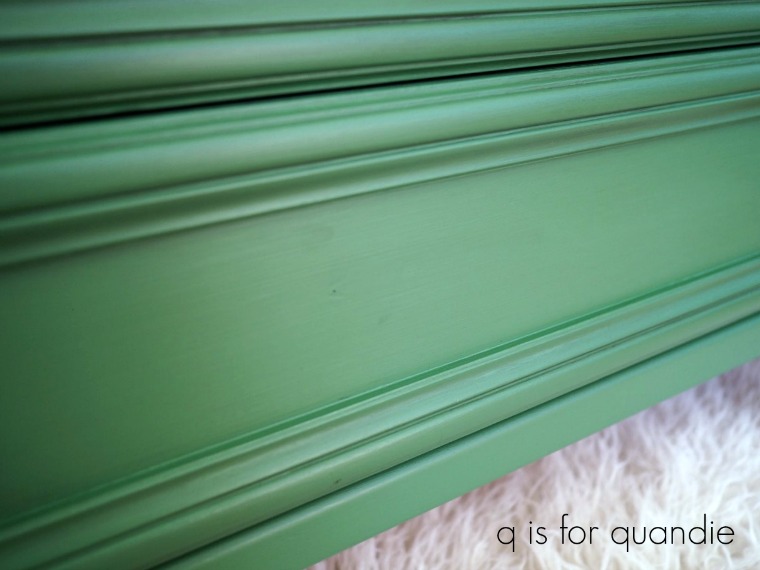
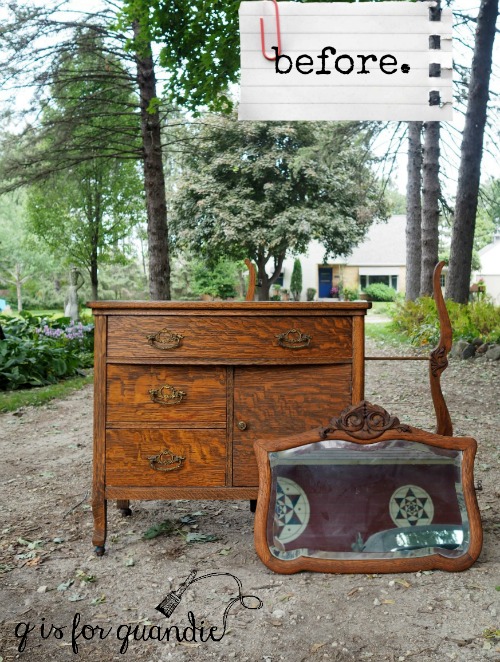
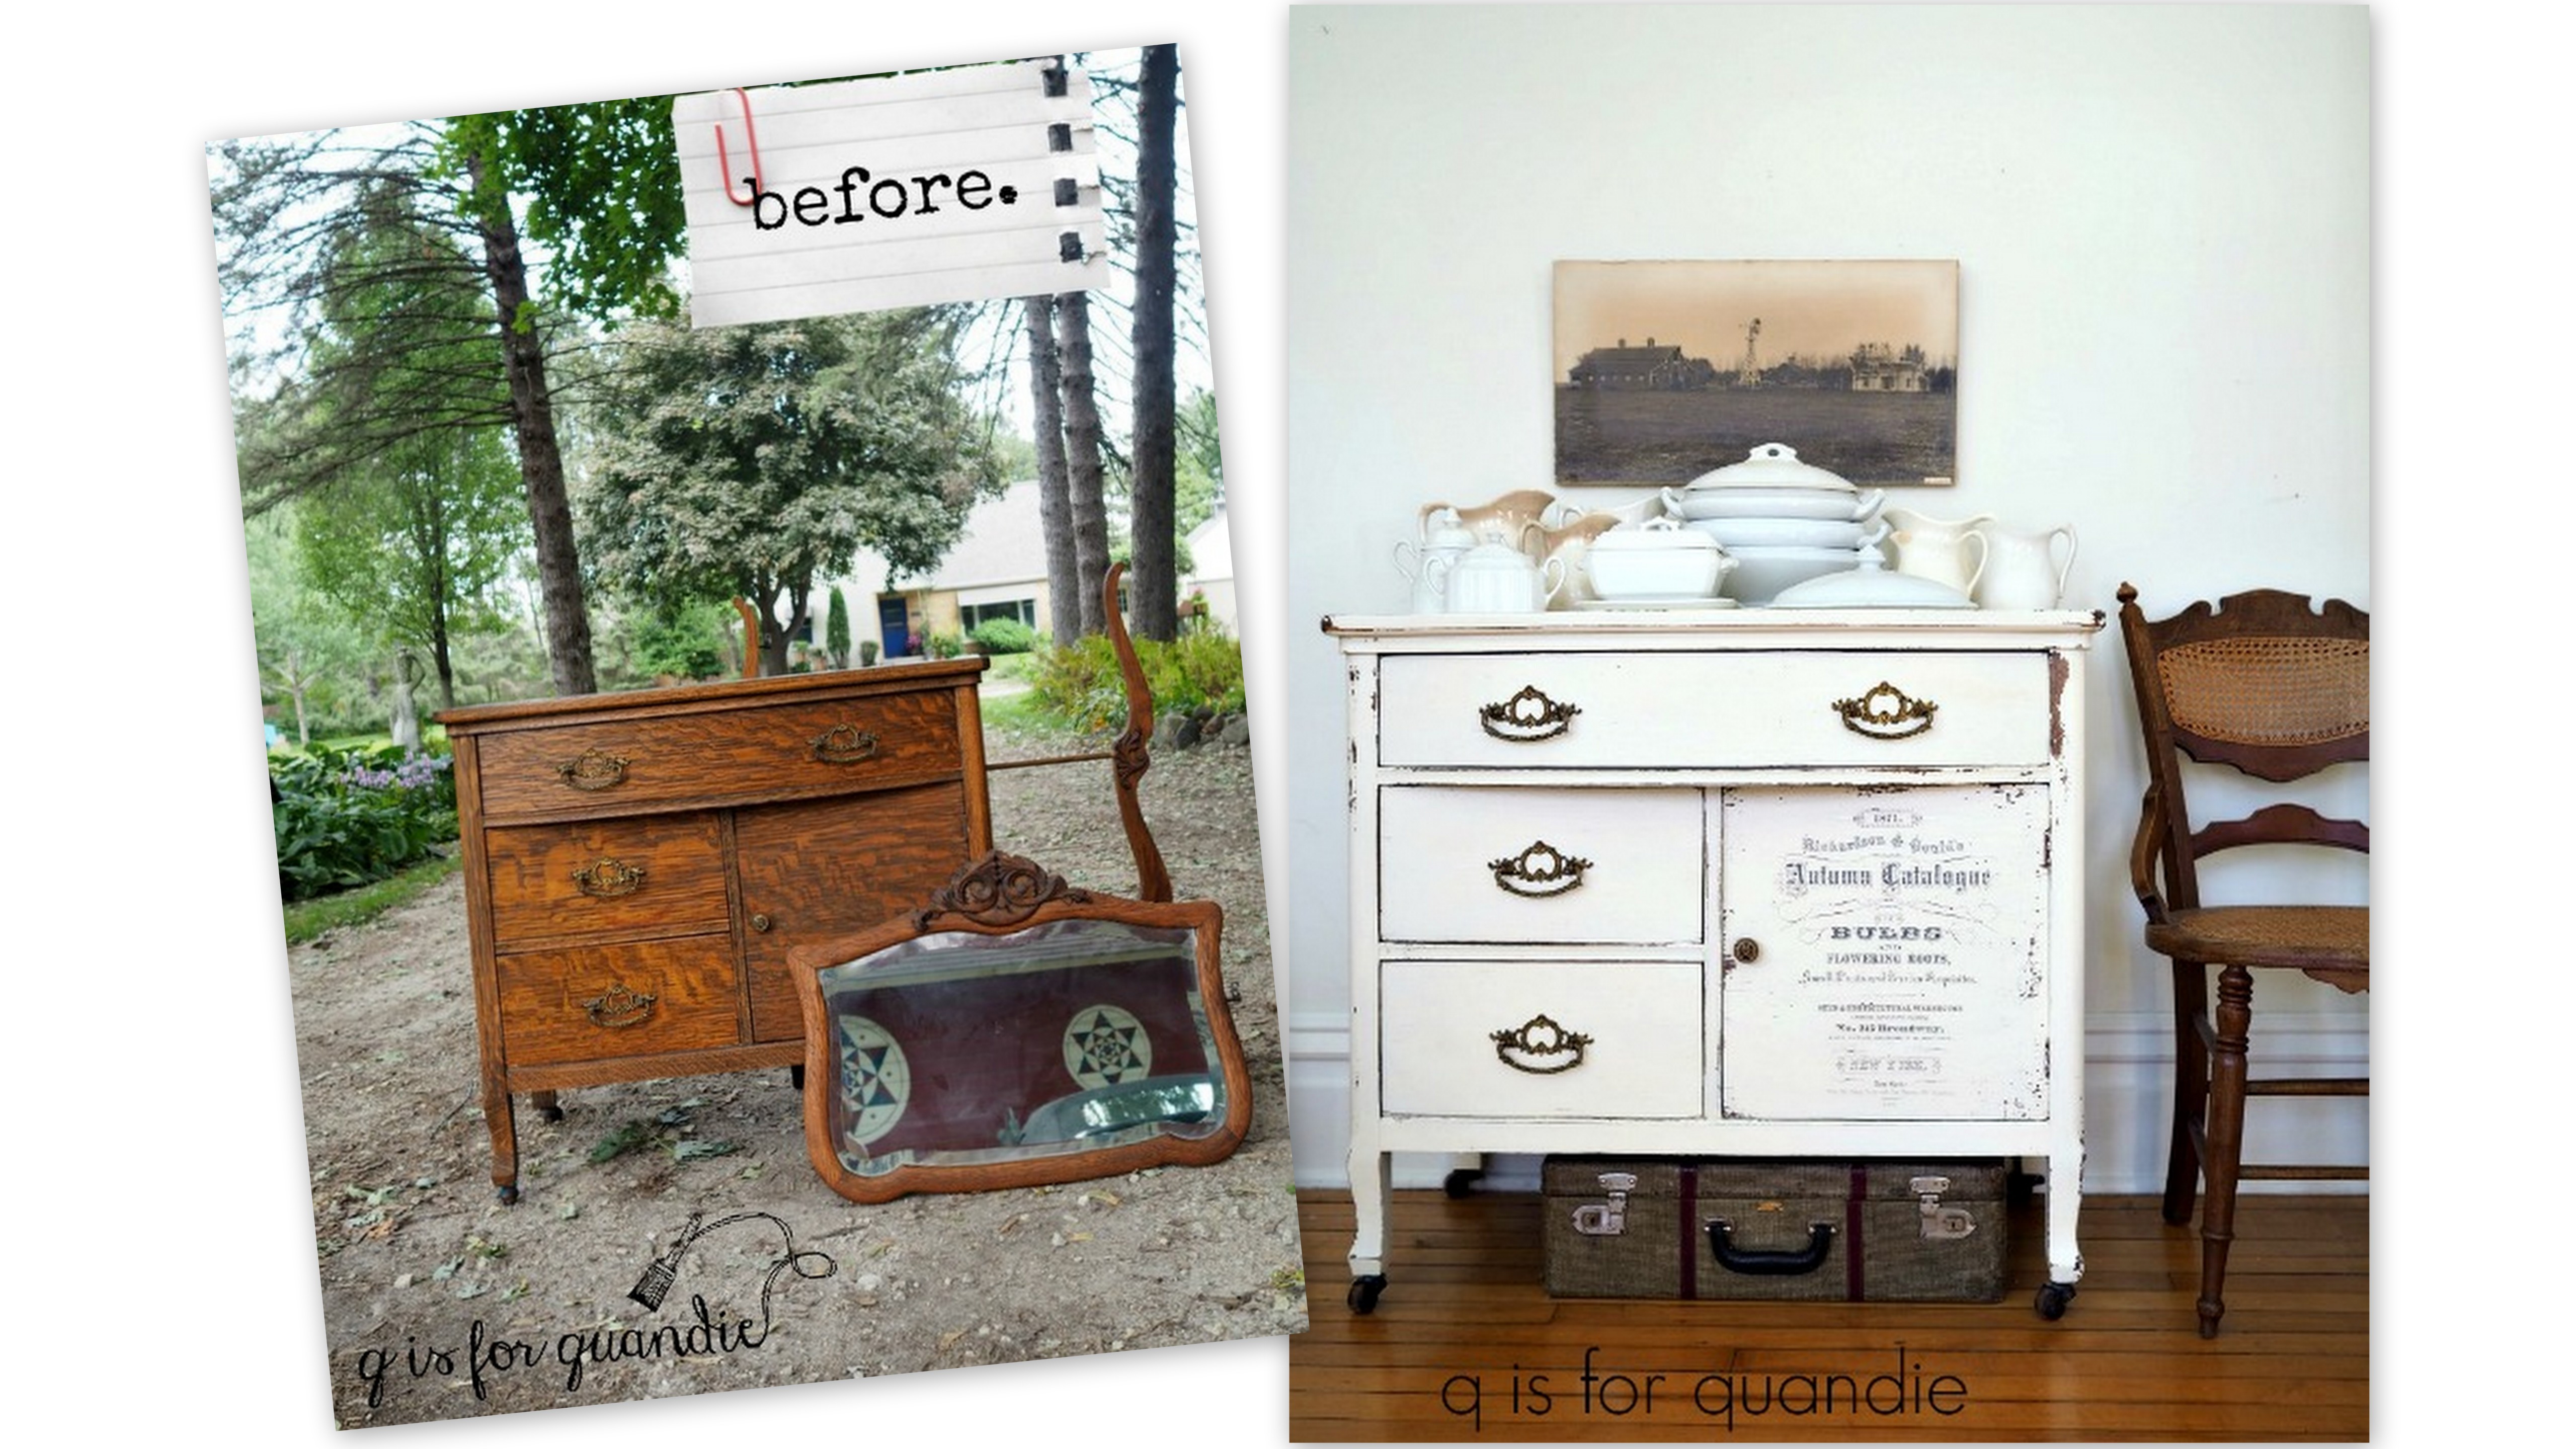
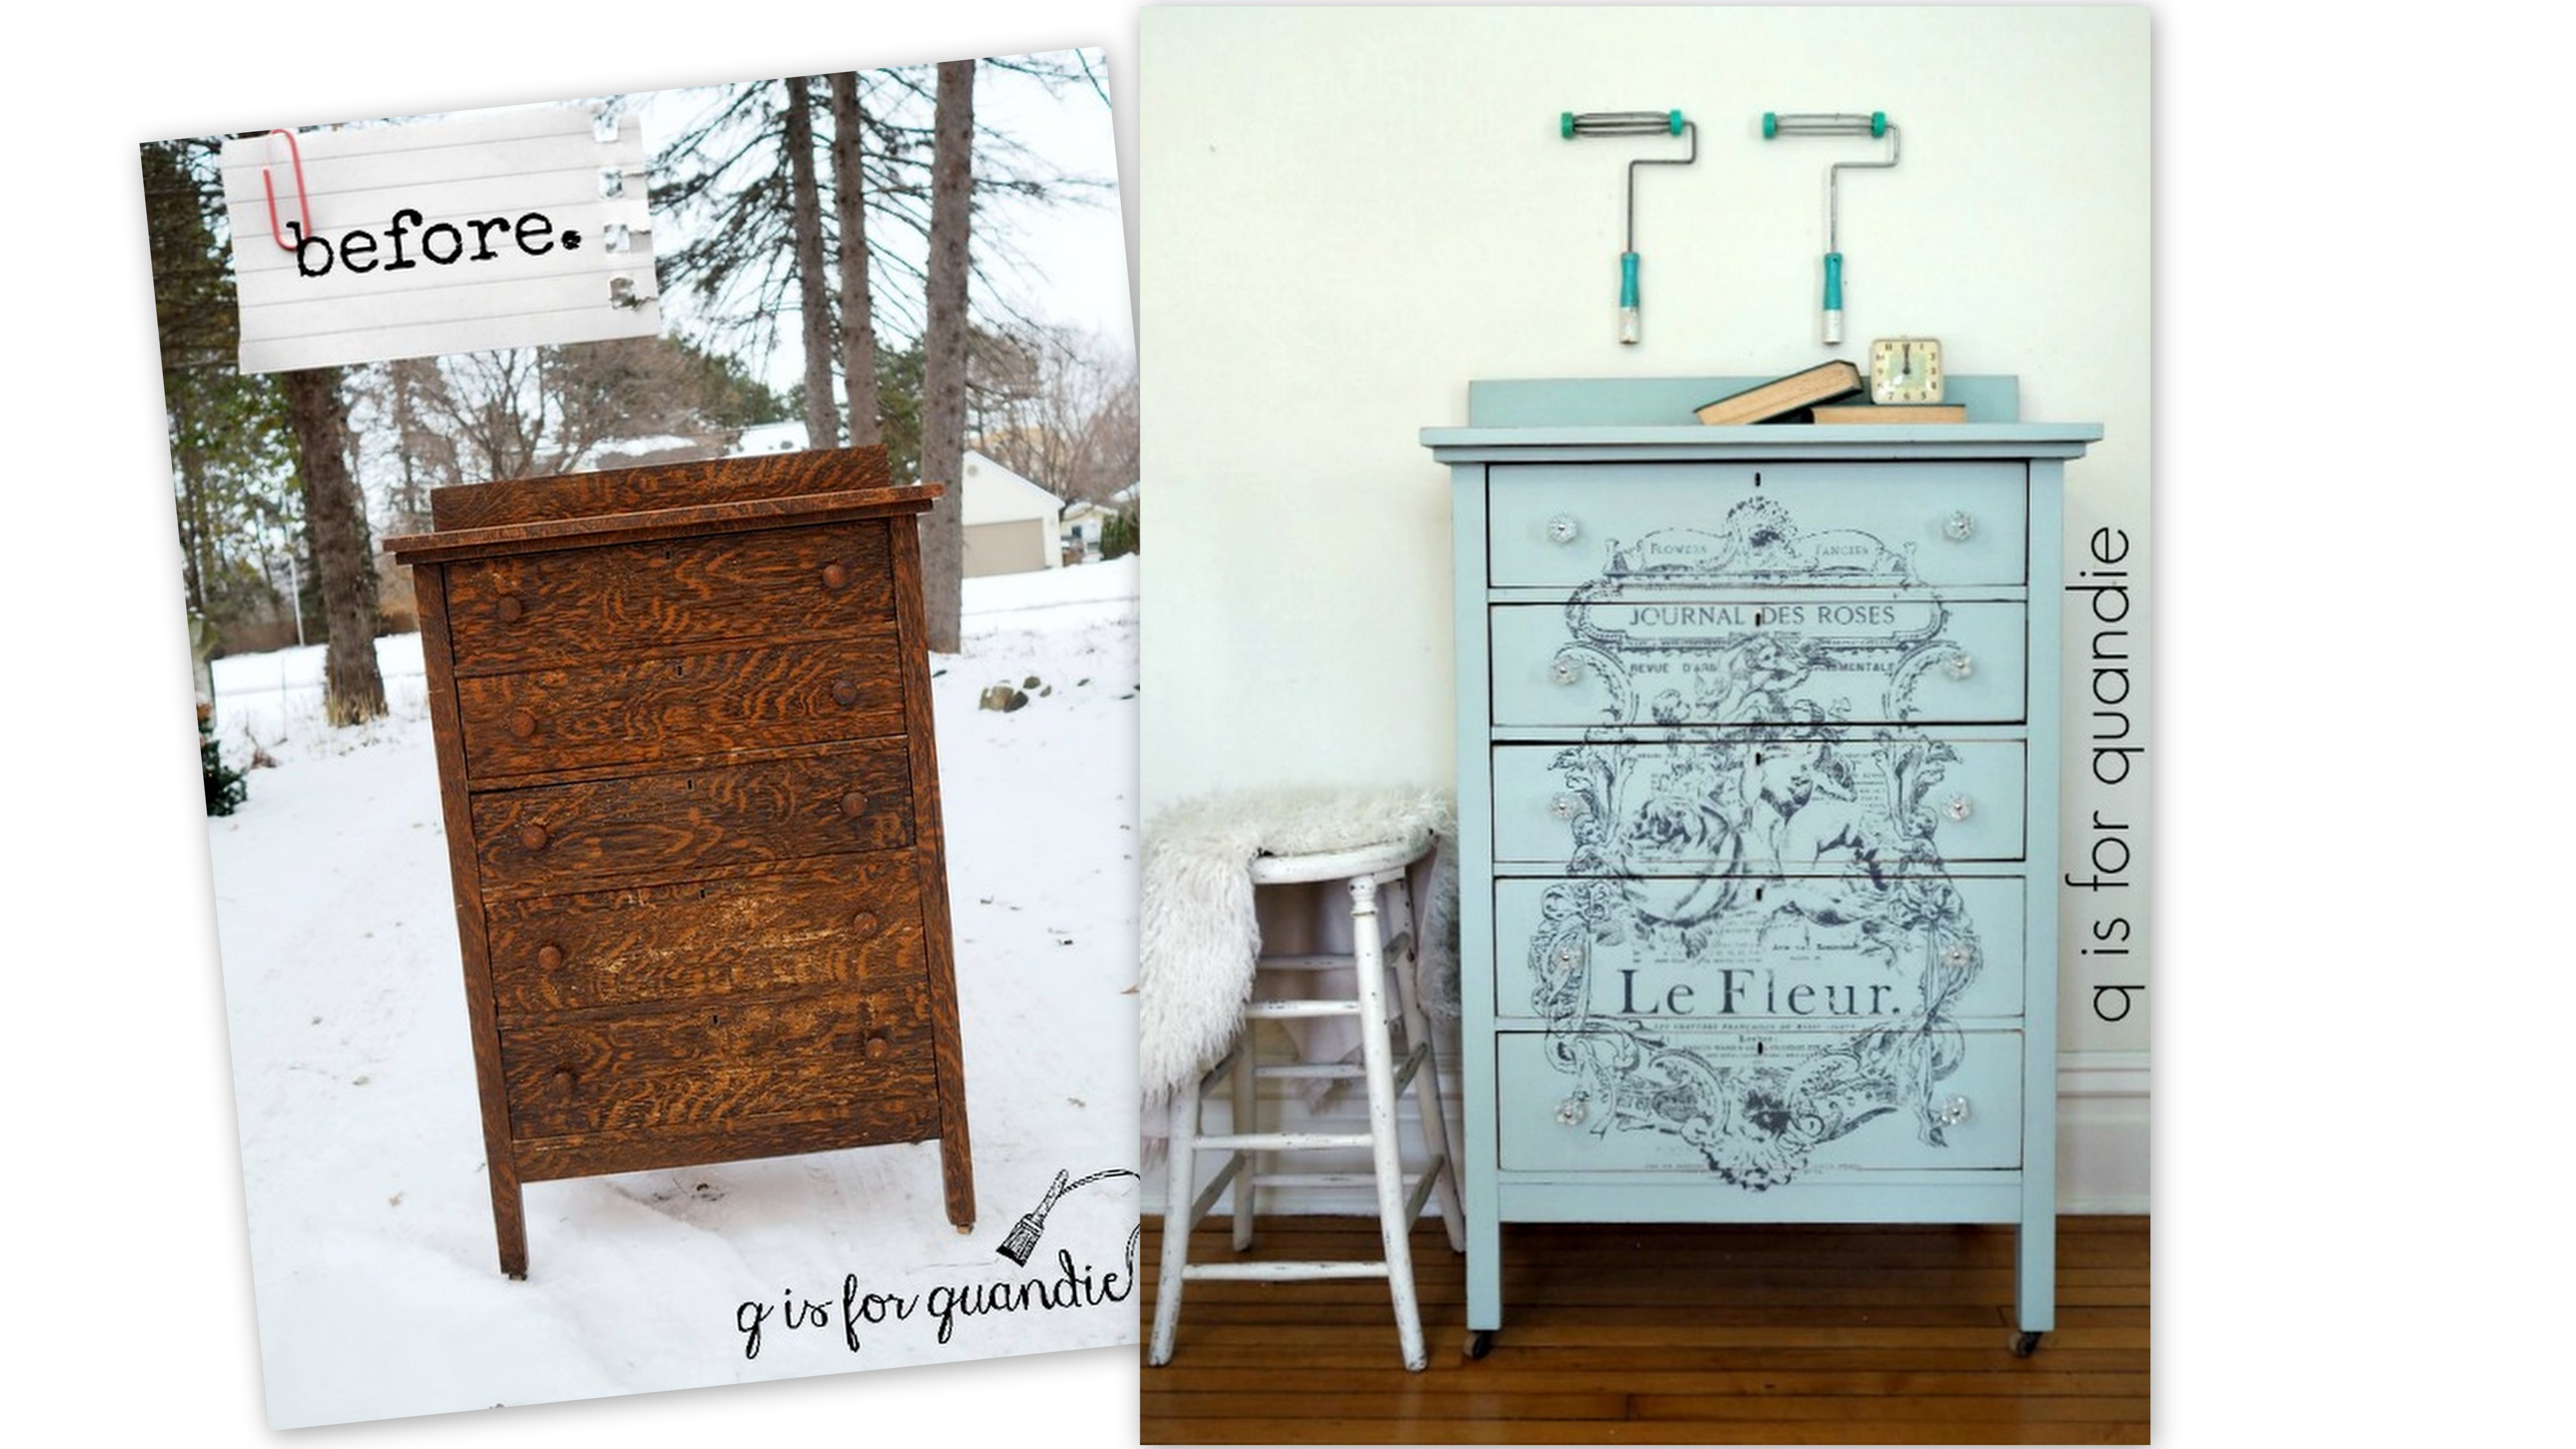
I saw this desk listed on Craigslist shortly after painting the ‘young at heart’ dresser in Fusion’s Park Bench (green).

If you’ll remember, I’d purchased a 2nd pint of the Park Bench that I didn’t need for that dresser so I was looking for something else to paint green. I did some searching for ‘green painted furniture’ on pinterest looking for some inspiration and I came across a very similar desk painted green. So Mr. Q went off to New Richmond, Wisconsin to pick this one up.
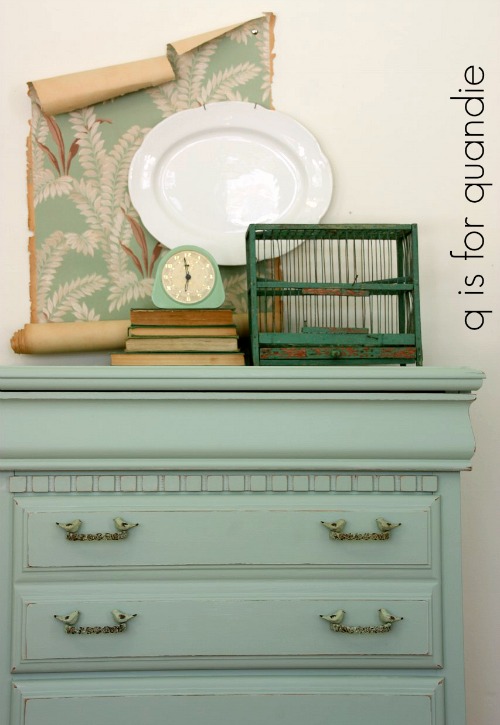
The inspiration desk on pinterest was gorgeous. Very fresh and modern looking. But as it turns out I just don’t lean towards fresh and modern. I really want to be young and trendy. But when it comes right down to it, my vision almost always seems to go in a different direction. I might as well face it, I am neither young nor terribly modern.
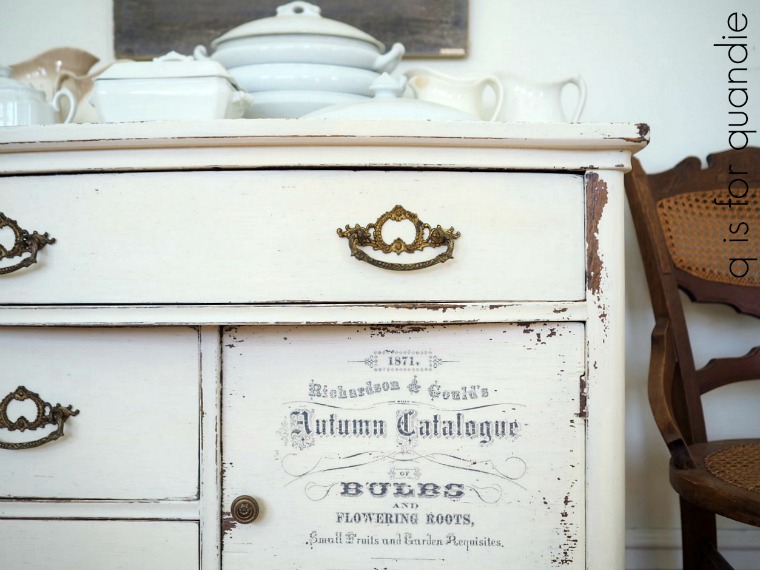
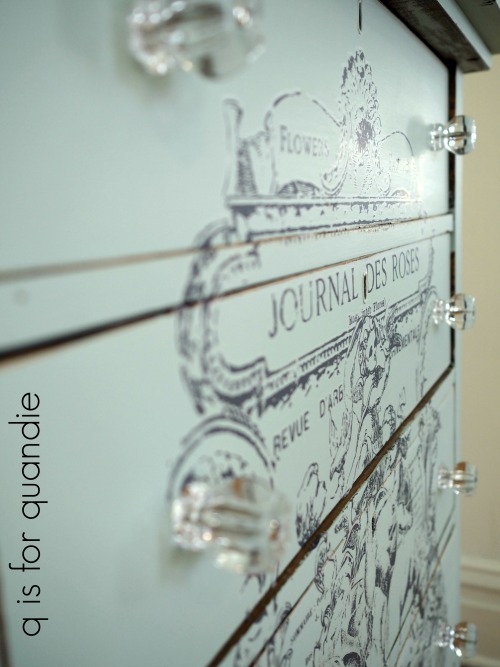
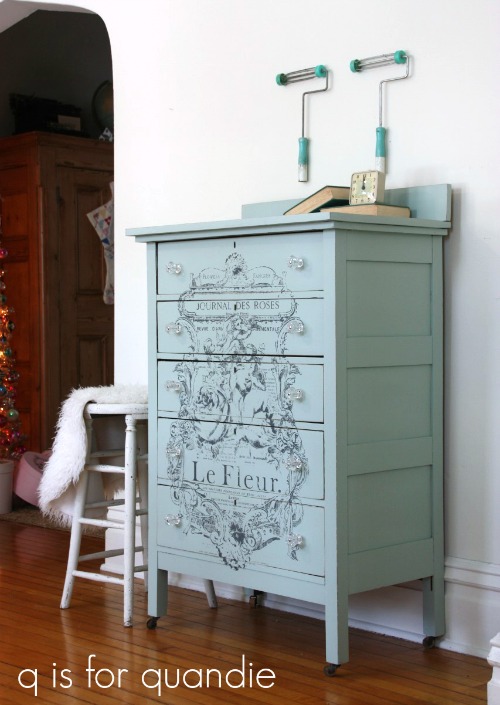
So let me show you what I did with desk instead, starting with the top.
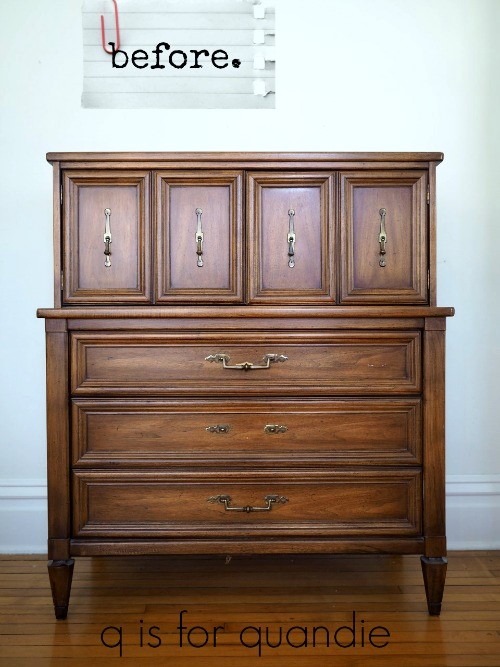
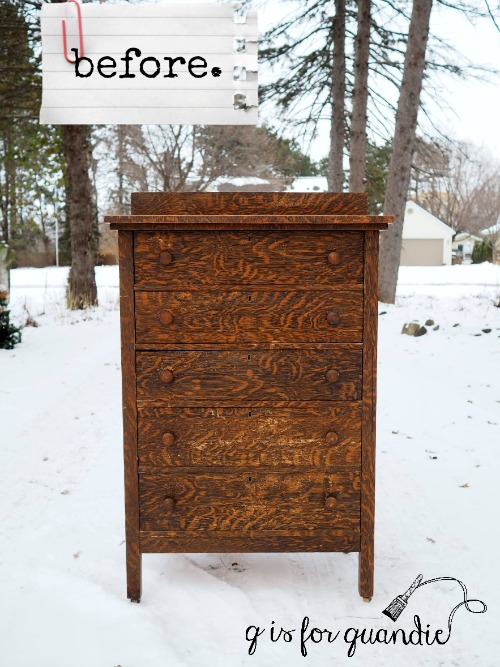
The seller turned out to be one of those guys who buys out storage units where the renter has defaulted on their rental payments. He had a huge pole barn full of stuff. This desk had likely been stored for a while. That’s always a bit of a dicey situation. Furniture really doesn’t do well in storage, and sure enough this piece was not in the greatest condition, especially the top.

But underneath all of those stains, scratches and gunk I thought there might be some very pretty wood veneer. It was time to play doctor and do some serious desk top surgery to save it.
I started by pulling out my Citristrip.
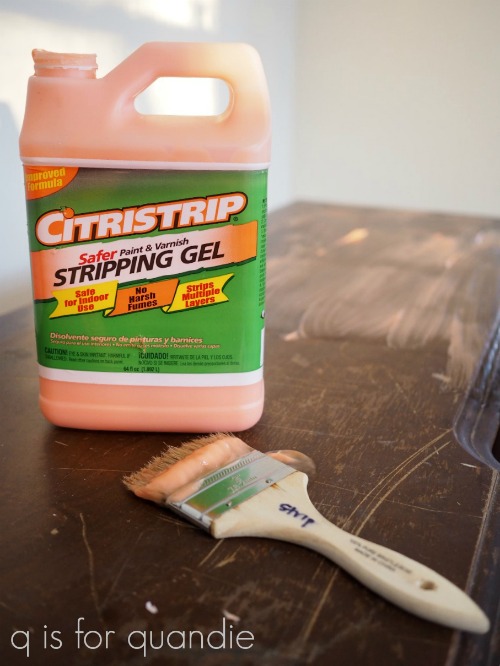
As I mentioned last week, this is my stripper of choice because I can use it inside the house in the middle of winter. It has a slightly orange scent, not a nasty chemical smell. And see? Right on the label it says ‘safe for indoor use’.
It seems that there are two camps when it comes to refinishing wood tops; the strippers and the sanders.

I’m definitely a stripper (but please don’t quote me on that out of context). There are a few reasons for that. For one thing, when sanding veneer you have to be very careful not to sand right through it. Second, when using a power sander you also have to be careful not to leave sanding marks behind. Third, sanding to remove a finish in the middle of your living room (which is where I work in January) would be huge mess. But the main reason is that I don’t enjoy using power tools of any kind, including electric sanders. I know, hard to believe that a prolific furniture refurbisher like myself doesn’t like power tools.
It all stems back to a childhood incident. My friend Heidi and I were playing with our Barbie dolls on her back porch one pleasant summer day. I must have been about 8 years old or so. The neighbor was out mowing his lawn when something must have gotten clogged in the mower, so he stuck his hand in to dislodge it. Yep, you know where I’m going with this. When he pulled his hand back out it was missing four fingers. I still clearly remember vivid details from that day, like how much I loved my Malibu Barbie and the fact that the neighbor’s wife ran out of the house with an adorable embroidered vintage dish towel and wrapped it around his bloody hand. Although of course the towel wasn’t vintage at the time, it was just your standard dish towel and obviously it never got the chance to fulfill its vintage destiny.

Anyway, you get the picture. It was traumatic. To this day I refuse to operate a lawn mower, or a snow blower, electric hedge trimmers or any kind of power saw whatsoever (thank goodness for Mr. Q). I’ll probably get some sort of DIY blogger demerits for admitting that out loud, but there you have it. I prefer to work with plain old hand tools whenever possible. I still have to break out the electric sander sometimes, but I try to limit its use.
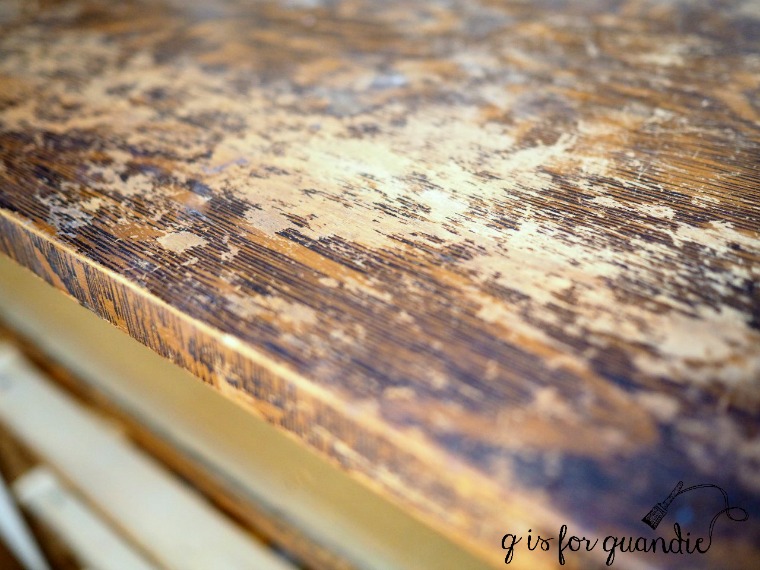
So, back to my desk. Here is how the top looked after being stripped.

Hmmm. Not sure that is an improvement. And the stripping brought to light a secondary issue. The veneer had started to buckle in a couple of spots.
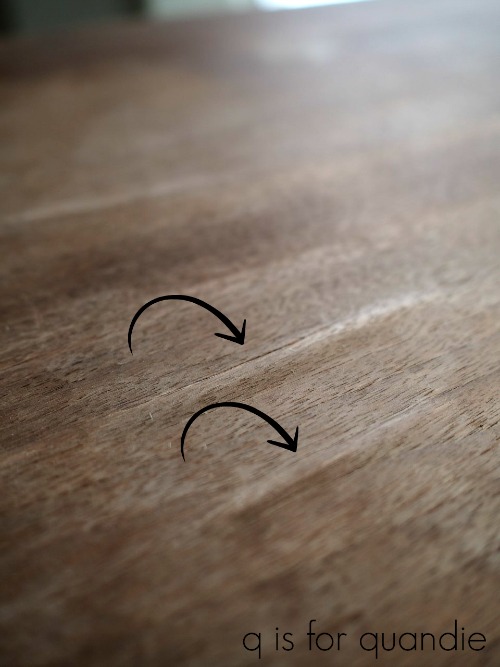
Drat. At this point even painting isn’t an option that will disguise that problem.
So I decided to attempt to fix it. First off I had Mr. Q order some glue syringes via Amazon. We paid $7.50 (free shipping with Amazon Prime) for a kit with two syringes and 4 tips (the yellow and metal part). The tips are meant for a single use only because you can’t clean the glue out of them well enough to save them for another use.

To repair spots of buckling veneer you fill the syringe with wood glue and then insert the small metal tip under the loose veneer to get the glue way back in there. If your veneer is buckled, but hasn’t cracked you may have to use a razor blade to make a small incision along the buckled area for inserting the syringe.

Incisions? Syringes? Paging doctor q, you’re needed in surgery, stat!
Once you’ve got plenty of glue under there, press the veneer flat and wipe away any excess glue that squishes out. Then lay down a sheet of wax paper first, followed by lots of heavy stuff to hold the veneer flat while the glue dries. Of course you can also use clamps if your repairs happen to be in a location where clamps will work. Mine weren’t, so I used bricks and heavy books. The purpose of the wax paper is to prevent you from gluing the books to the desk top.
Let your glue dry overnight, remove the books and voila! No more buckling.
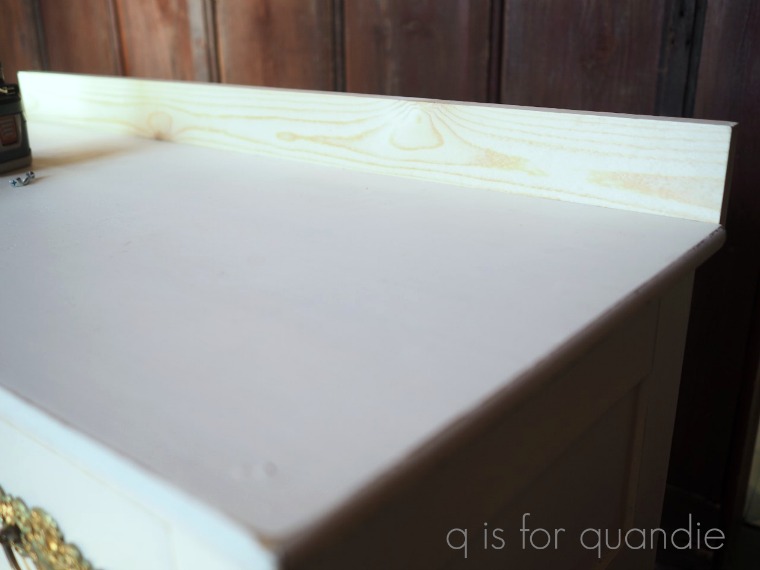
My next step was to sand the desk top smooth removing any last remains of finish that didn’t come off with the stripping. This is not the heavy duty sanding that would be required to completely remove a finish from scratch, just a couple of passes with my new orbital sander.
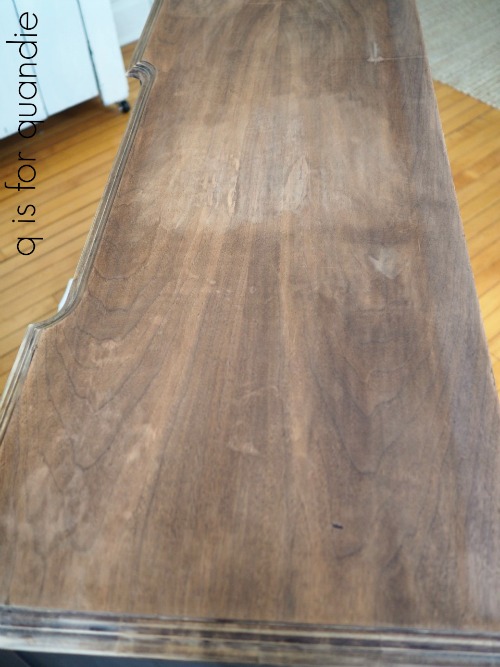
Although the sanding made the water stains a little less dramatic, they were still fairly obvious. This was the point where I had to step back and consider my options. I debated using some Miss Mustard Seed antiquing wax and going with a more rustic look for the desk top. I wasn’t sure how much of the discoloration would be disguised by the wax. If I was keeping the desk, I would have chosen this option because I like a very rustic look.
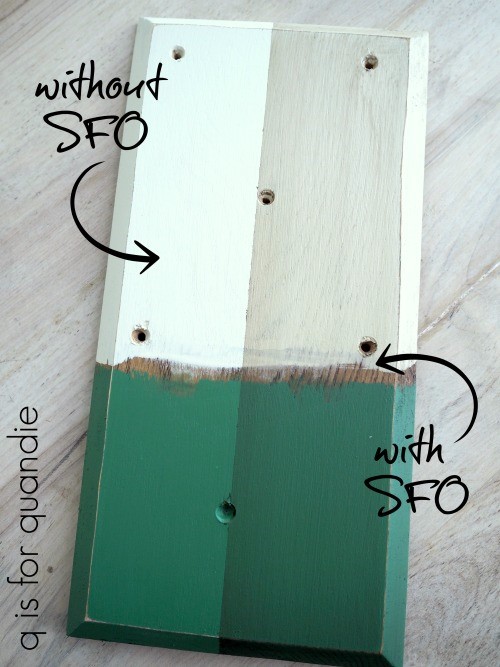
But I’m not keeping it. So I next considered using a milk paint stain made with watered down Miss Mustard Seed Curio (brown) to even out the color first, followed by the Homestead House Stain & Finishing Oil that I wrote about last week. I knew the SFO would work beautifully over milk paint.
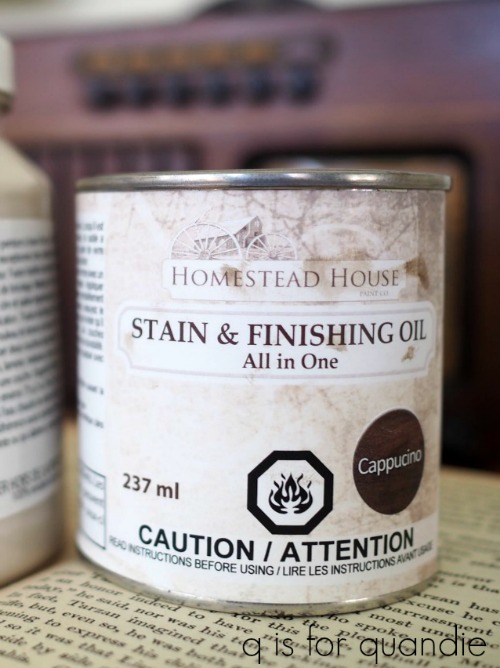
But ultimately I decided to use just the Stain & Finishing Oil in Cappucino alone and keep my fingers crossed that the color would be dark enough to disguise those stains. In a worst case scenario, if the top looked awful, I would have to wait three weeks for the SFO to fully cure before painting over it. I decided it was worth the gamble.
Luckily my gamble paid off. Here is one coat of the SFO.
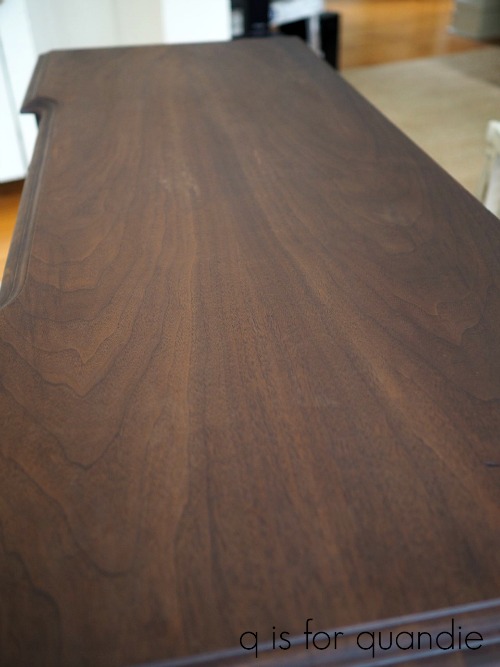
Pretty much amazing, right?
I do have a couple of wonky spots where I fixed the buckling veneer. I suspect it’s because I didn’t quite get all of the glue off and the SFO wasn’t able to penetrate to the wood in those spots.
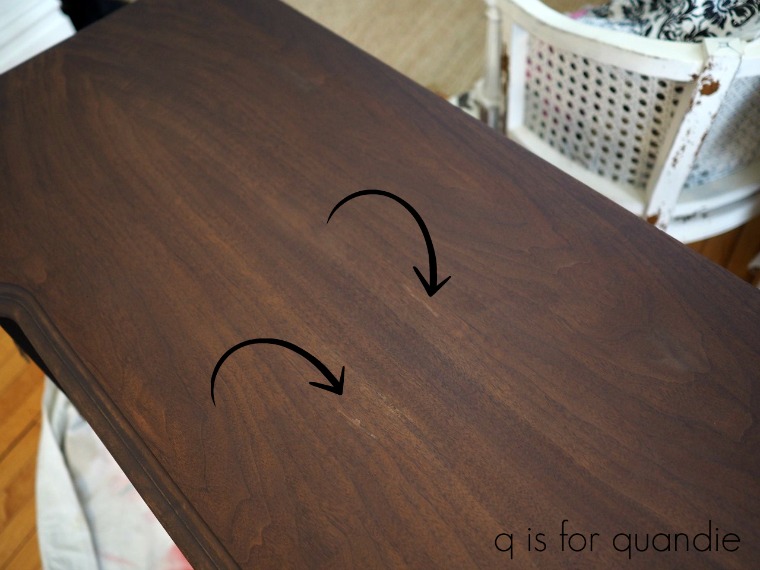
Next time I’ll try using some mineral spirits to make sure that I’ve gotten every last bit of the glue before applying the SFO. Unless one of you has a tip for that? If so, please be sure to share in a comment.
But despite those couple of marks, the difference between the ‘before’ and ‘after’ of this desk top is like night and day.
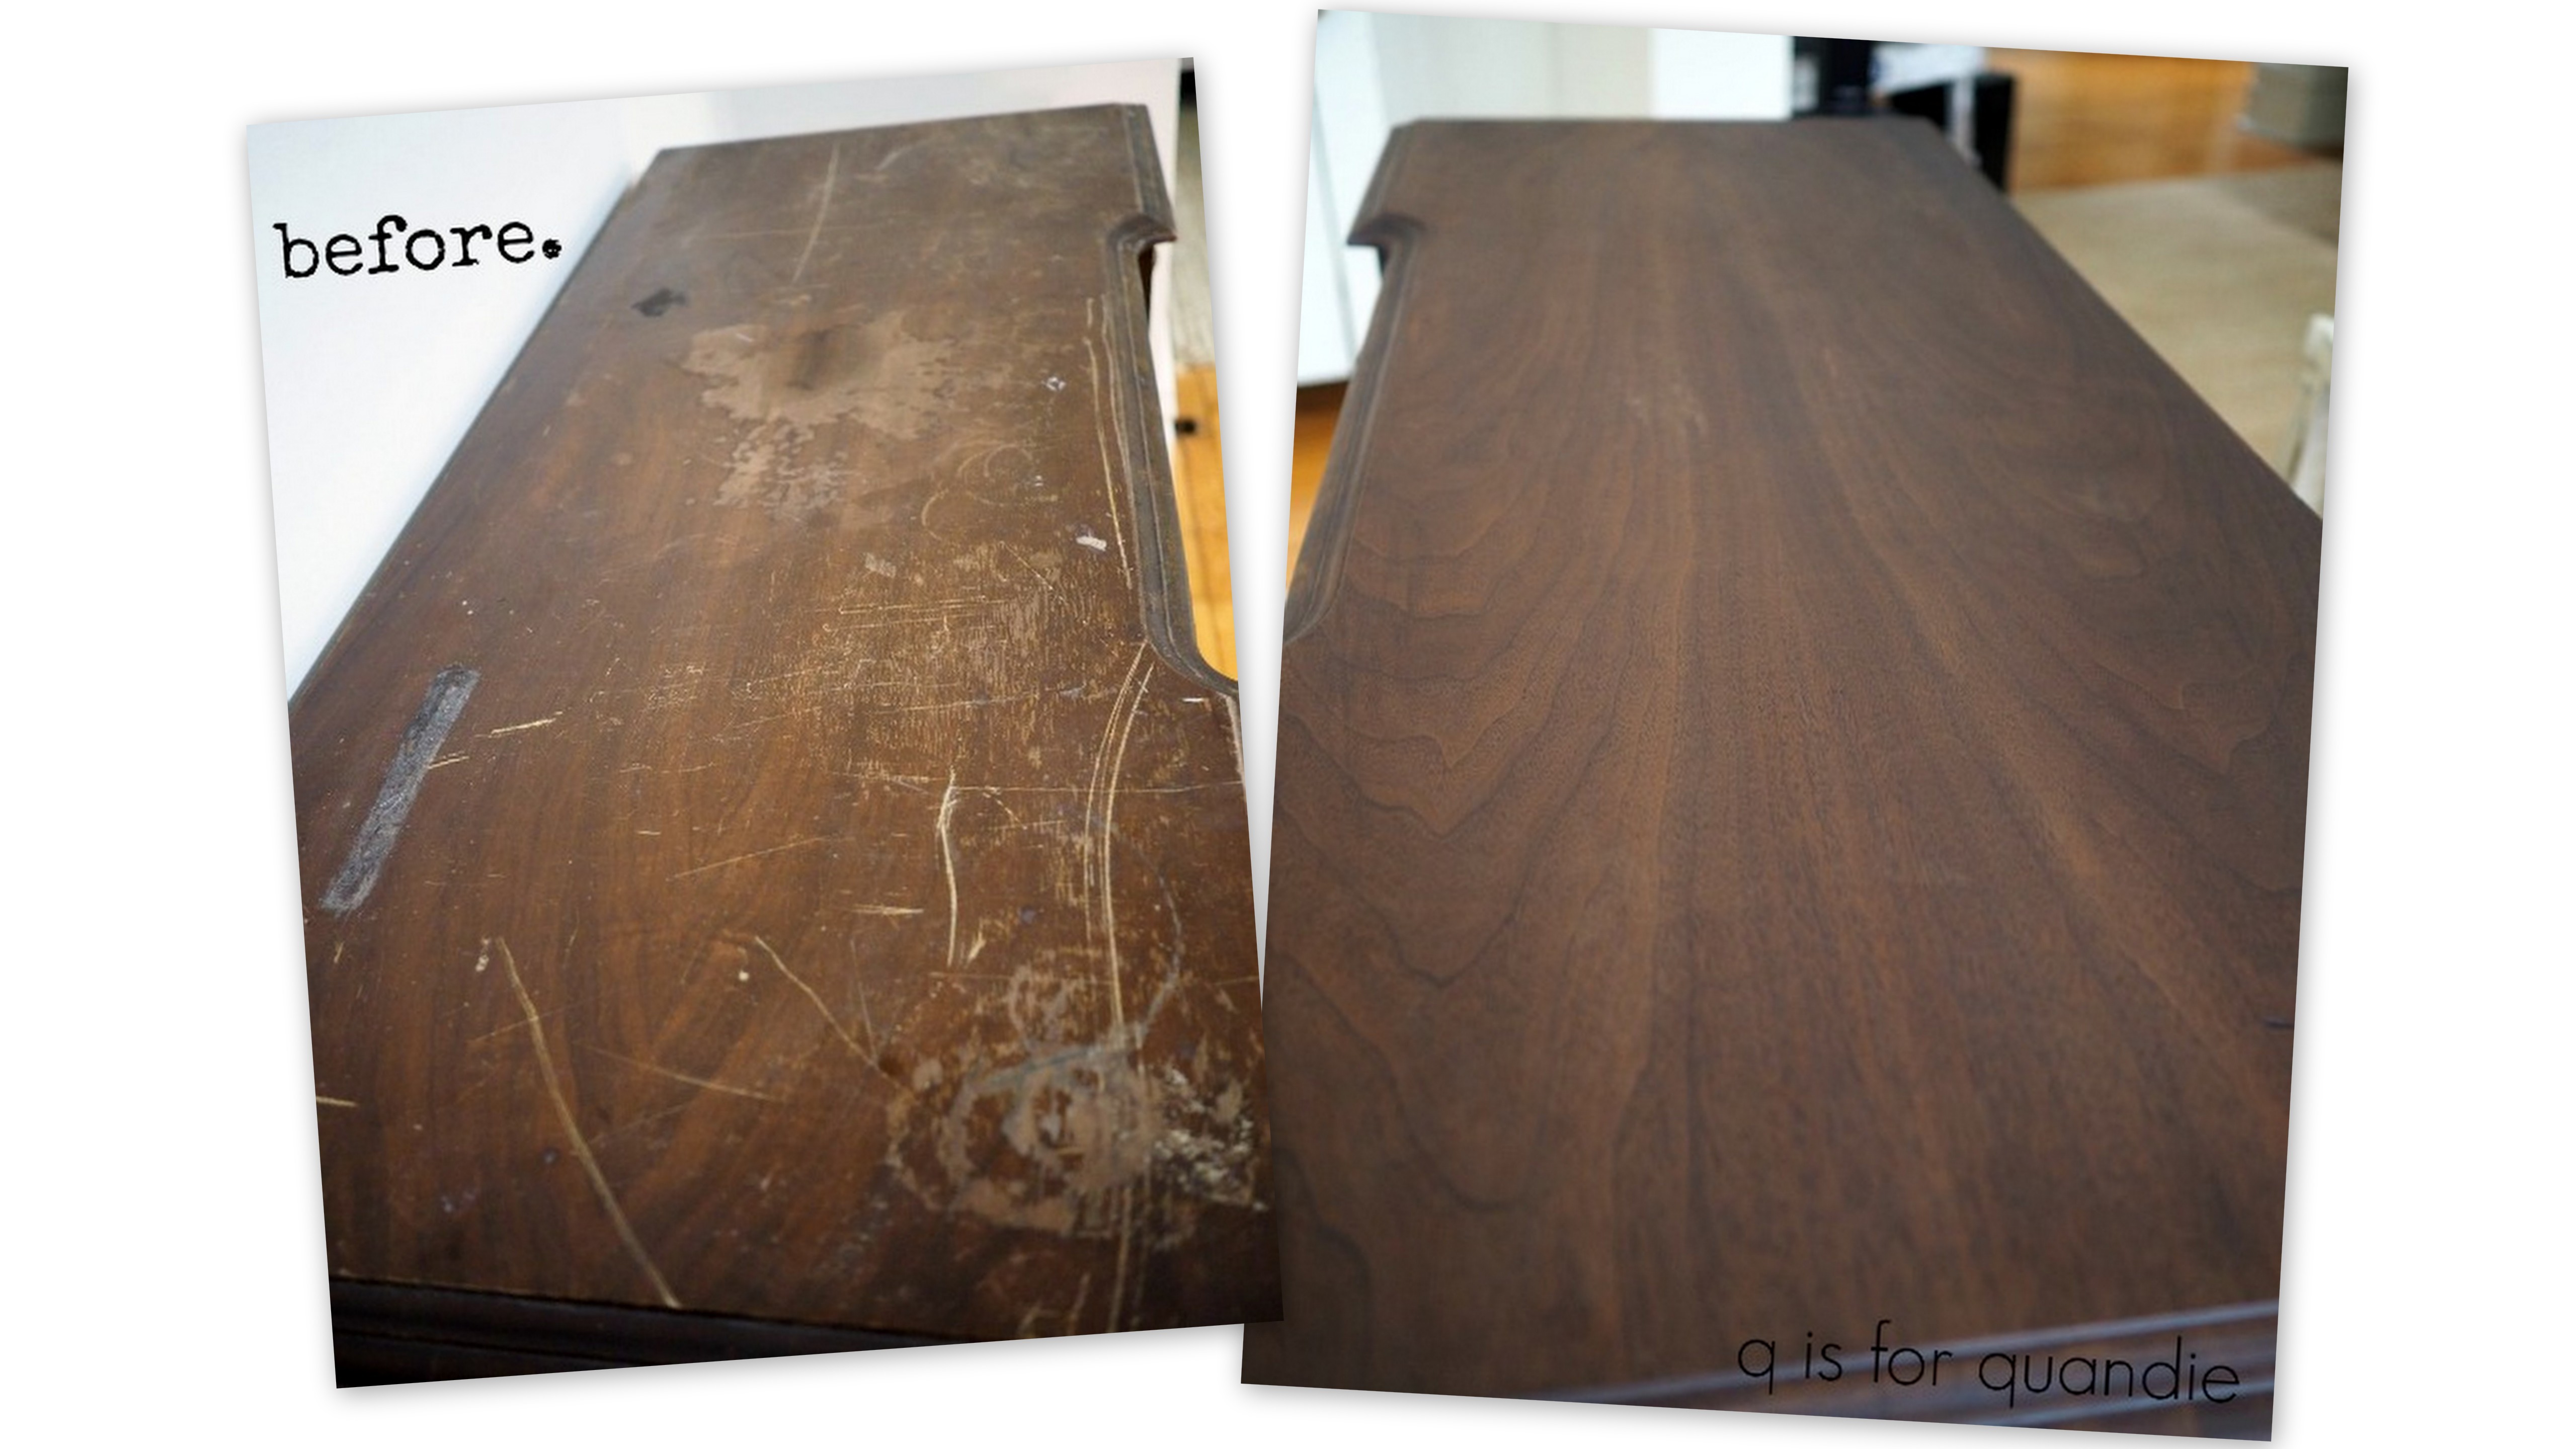
I am perfectly happy with this transformation despite a couple of flaws.
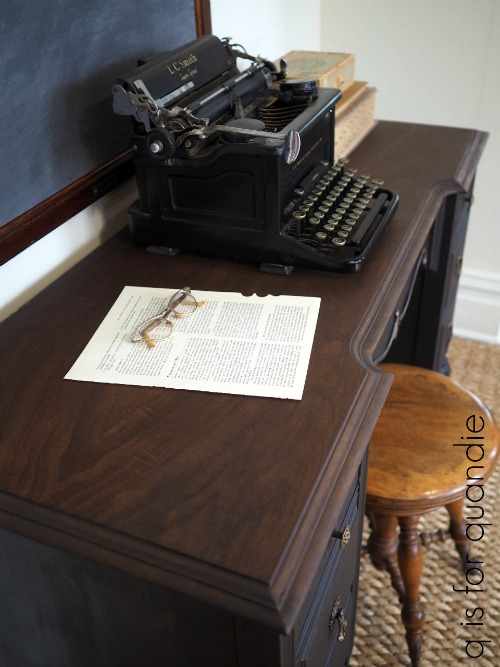
But it took me so long to explain this process that I’ve run out of time for sharing the rest of the desk today, so be sure to check back later in the week to see the total transformation!
In the meantime, be sure to pin this post for future reference. You never know when you may have to play doctor and repair some buckling veneer.