apron strings.

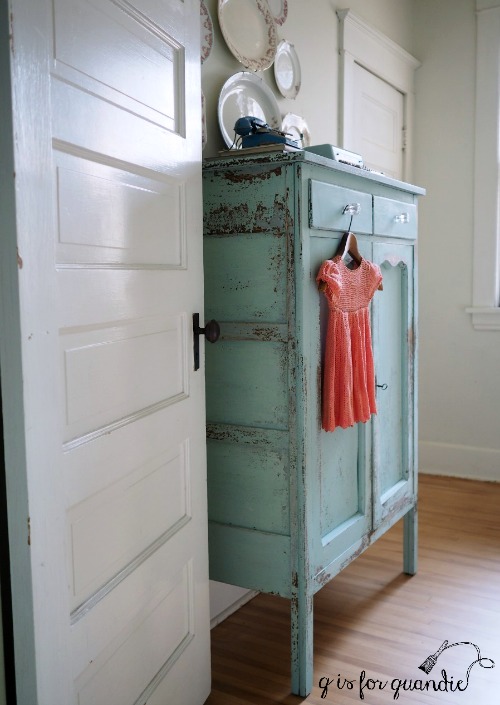
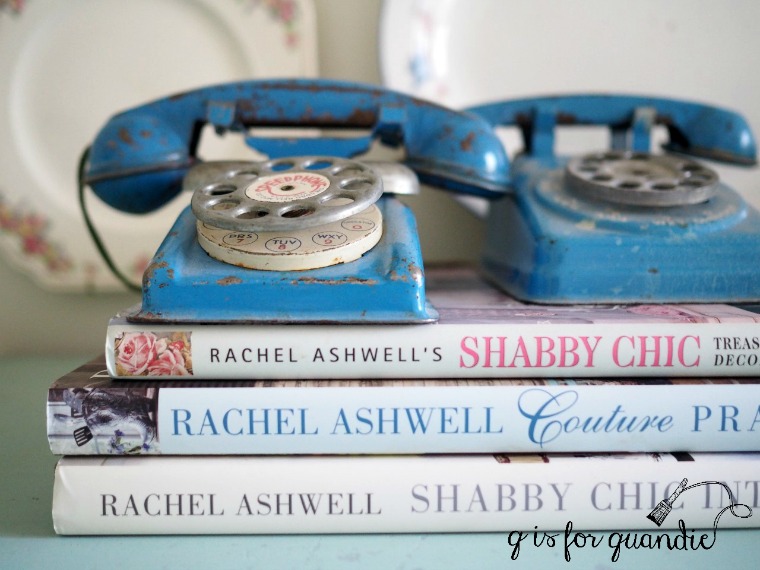
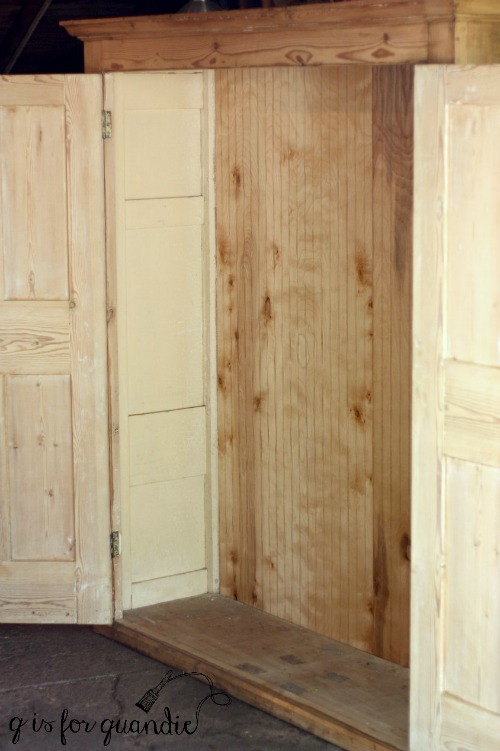
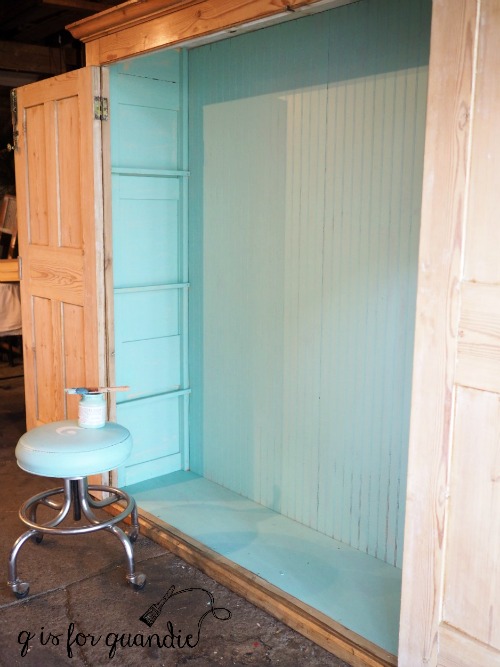
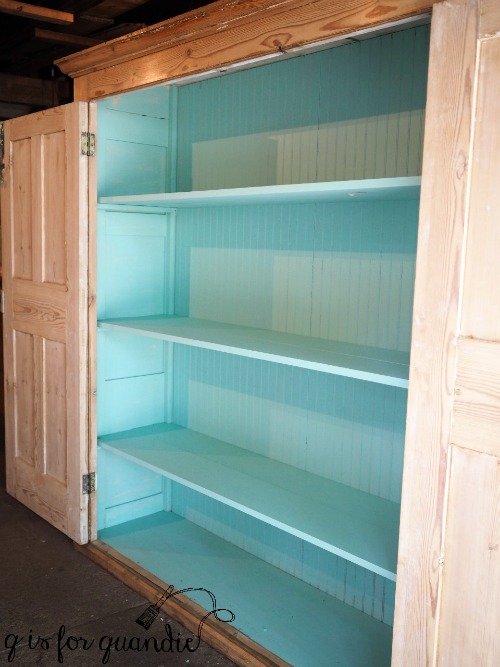
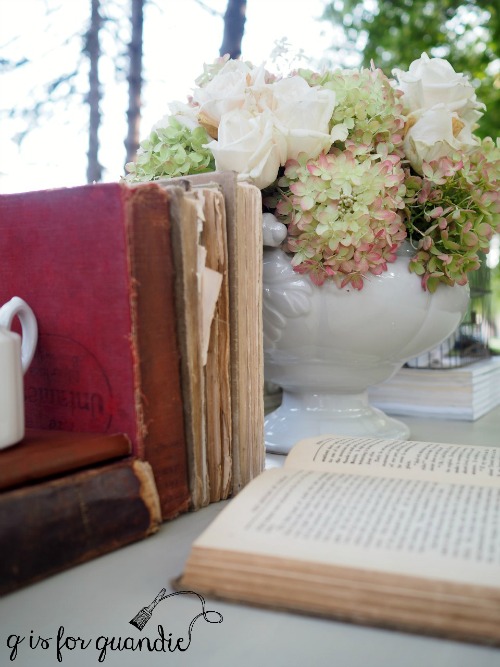
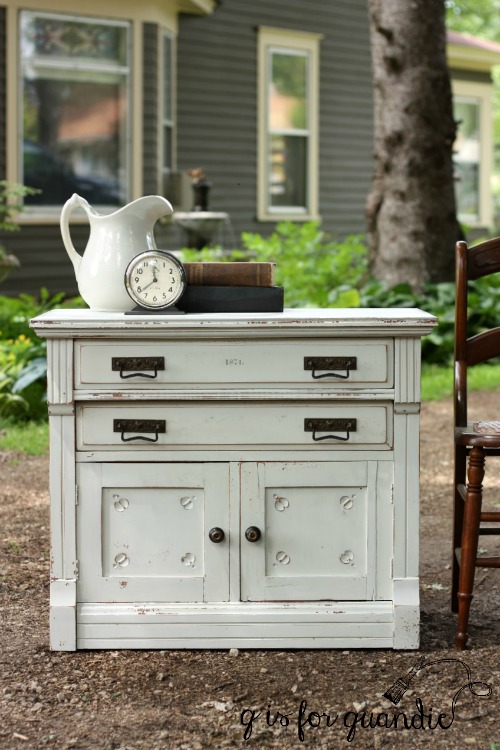
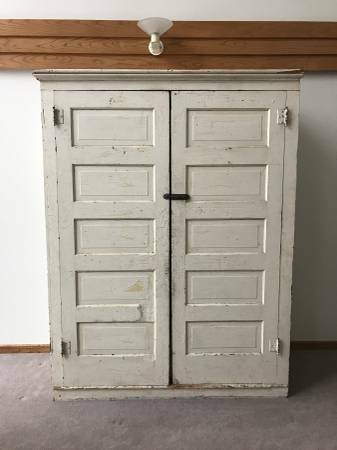
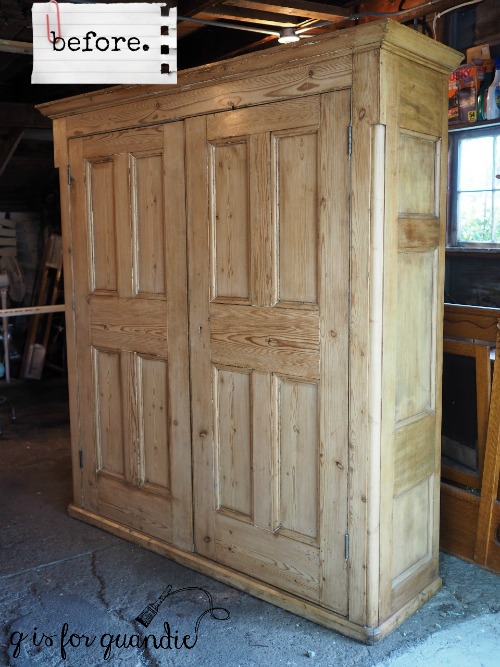
Last Friday I shared the beginnings of my guest room makeover with you.  I didn’t really purposely ‘choose’ a color scheme for the room, it came about rather by chance.  As I mentioned, the cupboard painted in Homestead House’s Laurentien milk paint was something I painted months ago not intending to keep.  I added my mom’s little crocheted dress to the mix, and then realized that these two colors worked beautifully with a couple of vintage books I had and thus a color scheme was born.

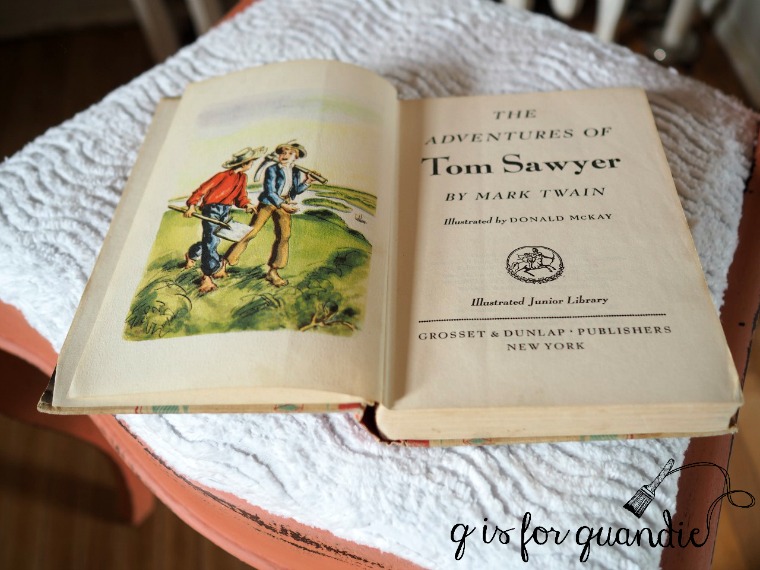
At that point I couldn’t help thinking that the dress and that Tom Sawyer book were both similar in color to Miss Mustard Seed’s Apron Strings milk paint.

It’s not quite a pink, more of a coral, but a pink-ish coral.  Hard to describe, but coincidentally all of these items are this same shade.

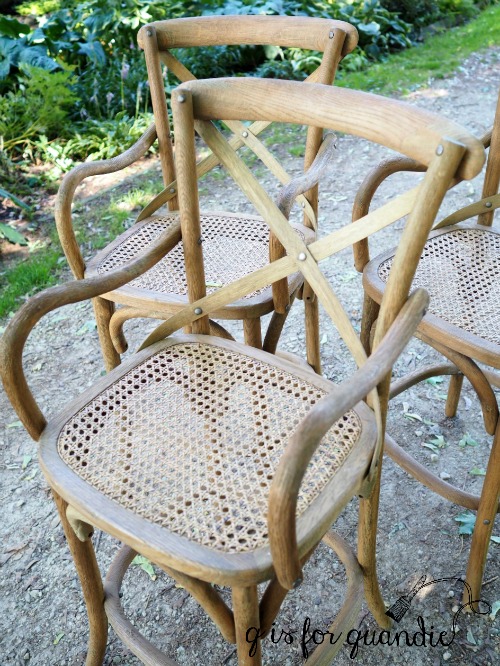
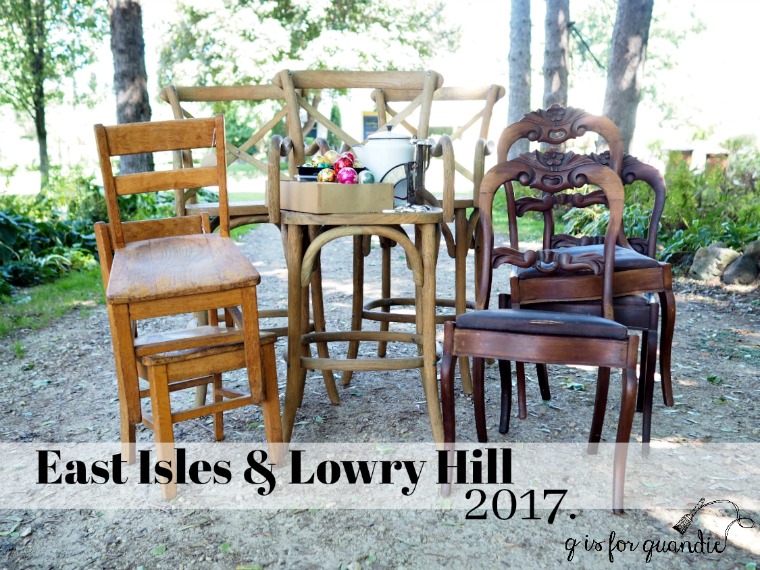
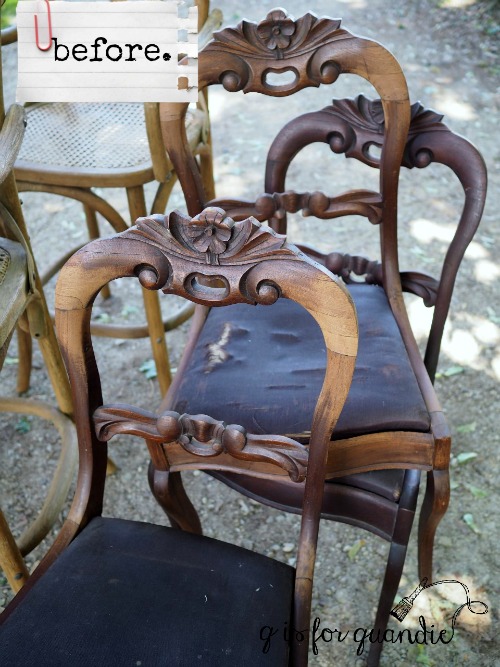
Since I happened to have some Apron Strings on hand, I decided to keep an eye out for some small accent piece to paint for my guest room.  So when I brought these chairs home on Saturday, I was inspired to paint one in Apron Strings.

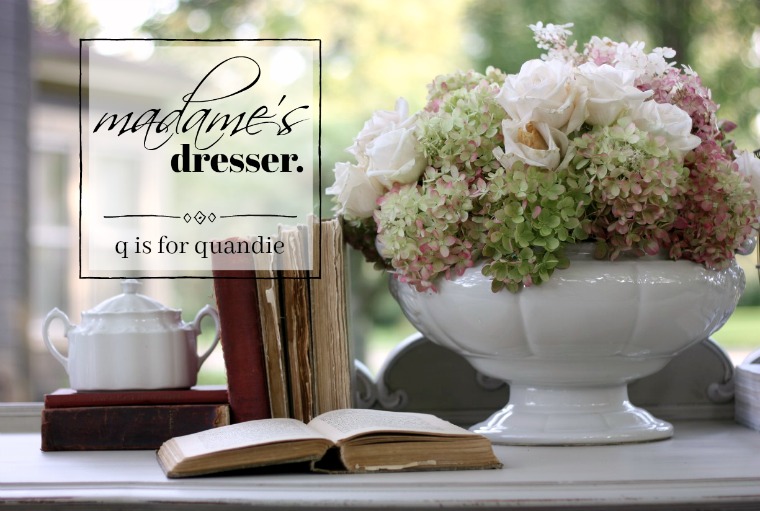
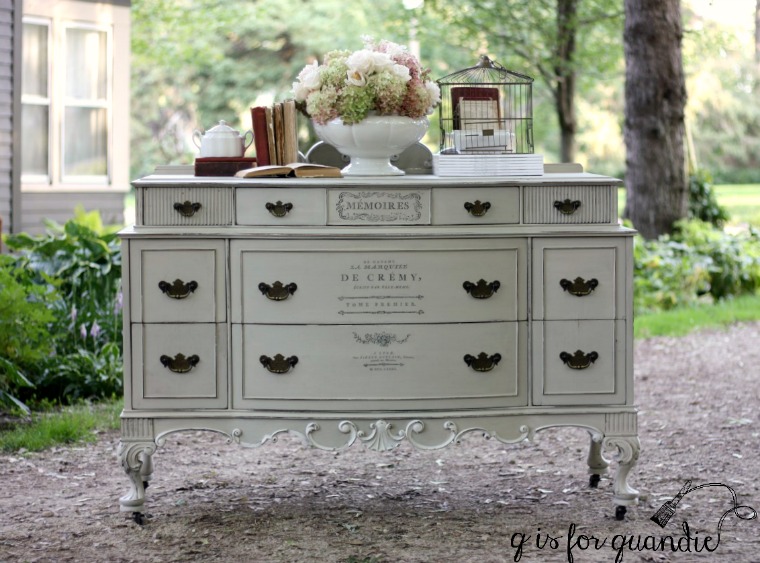
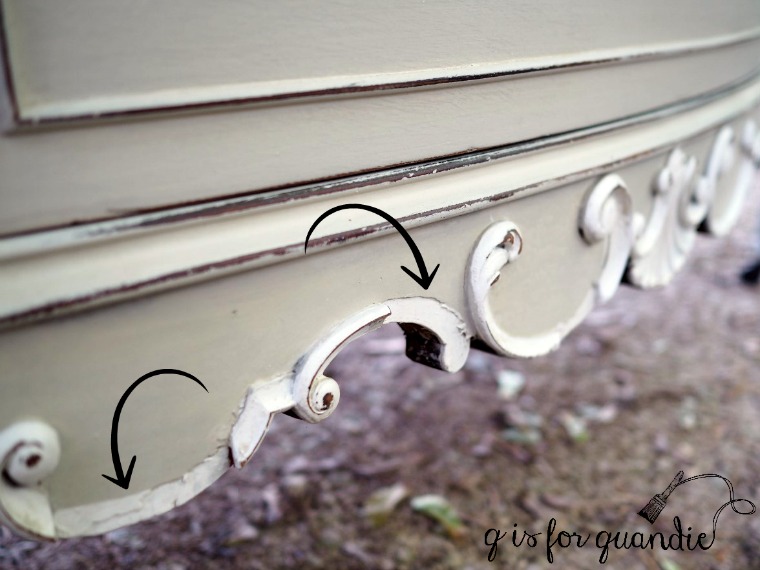
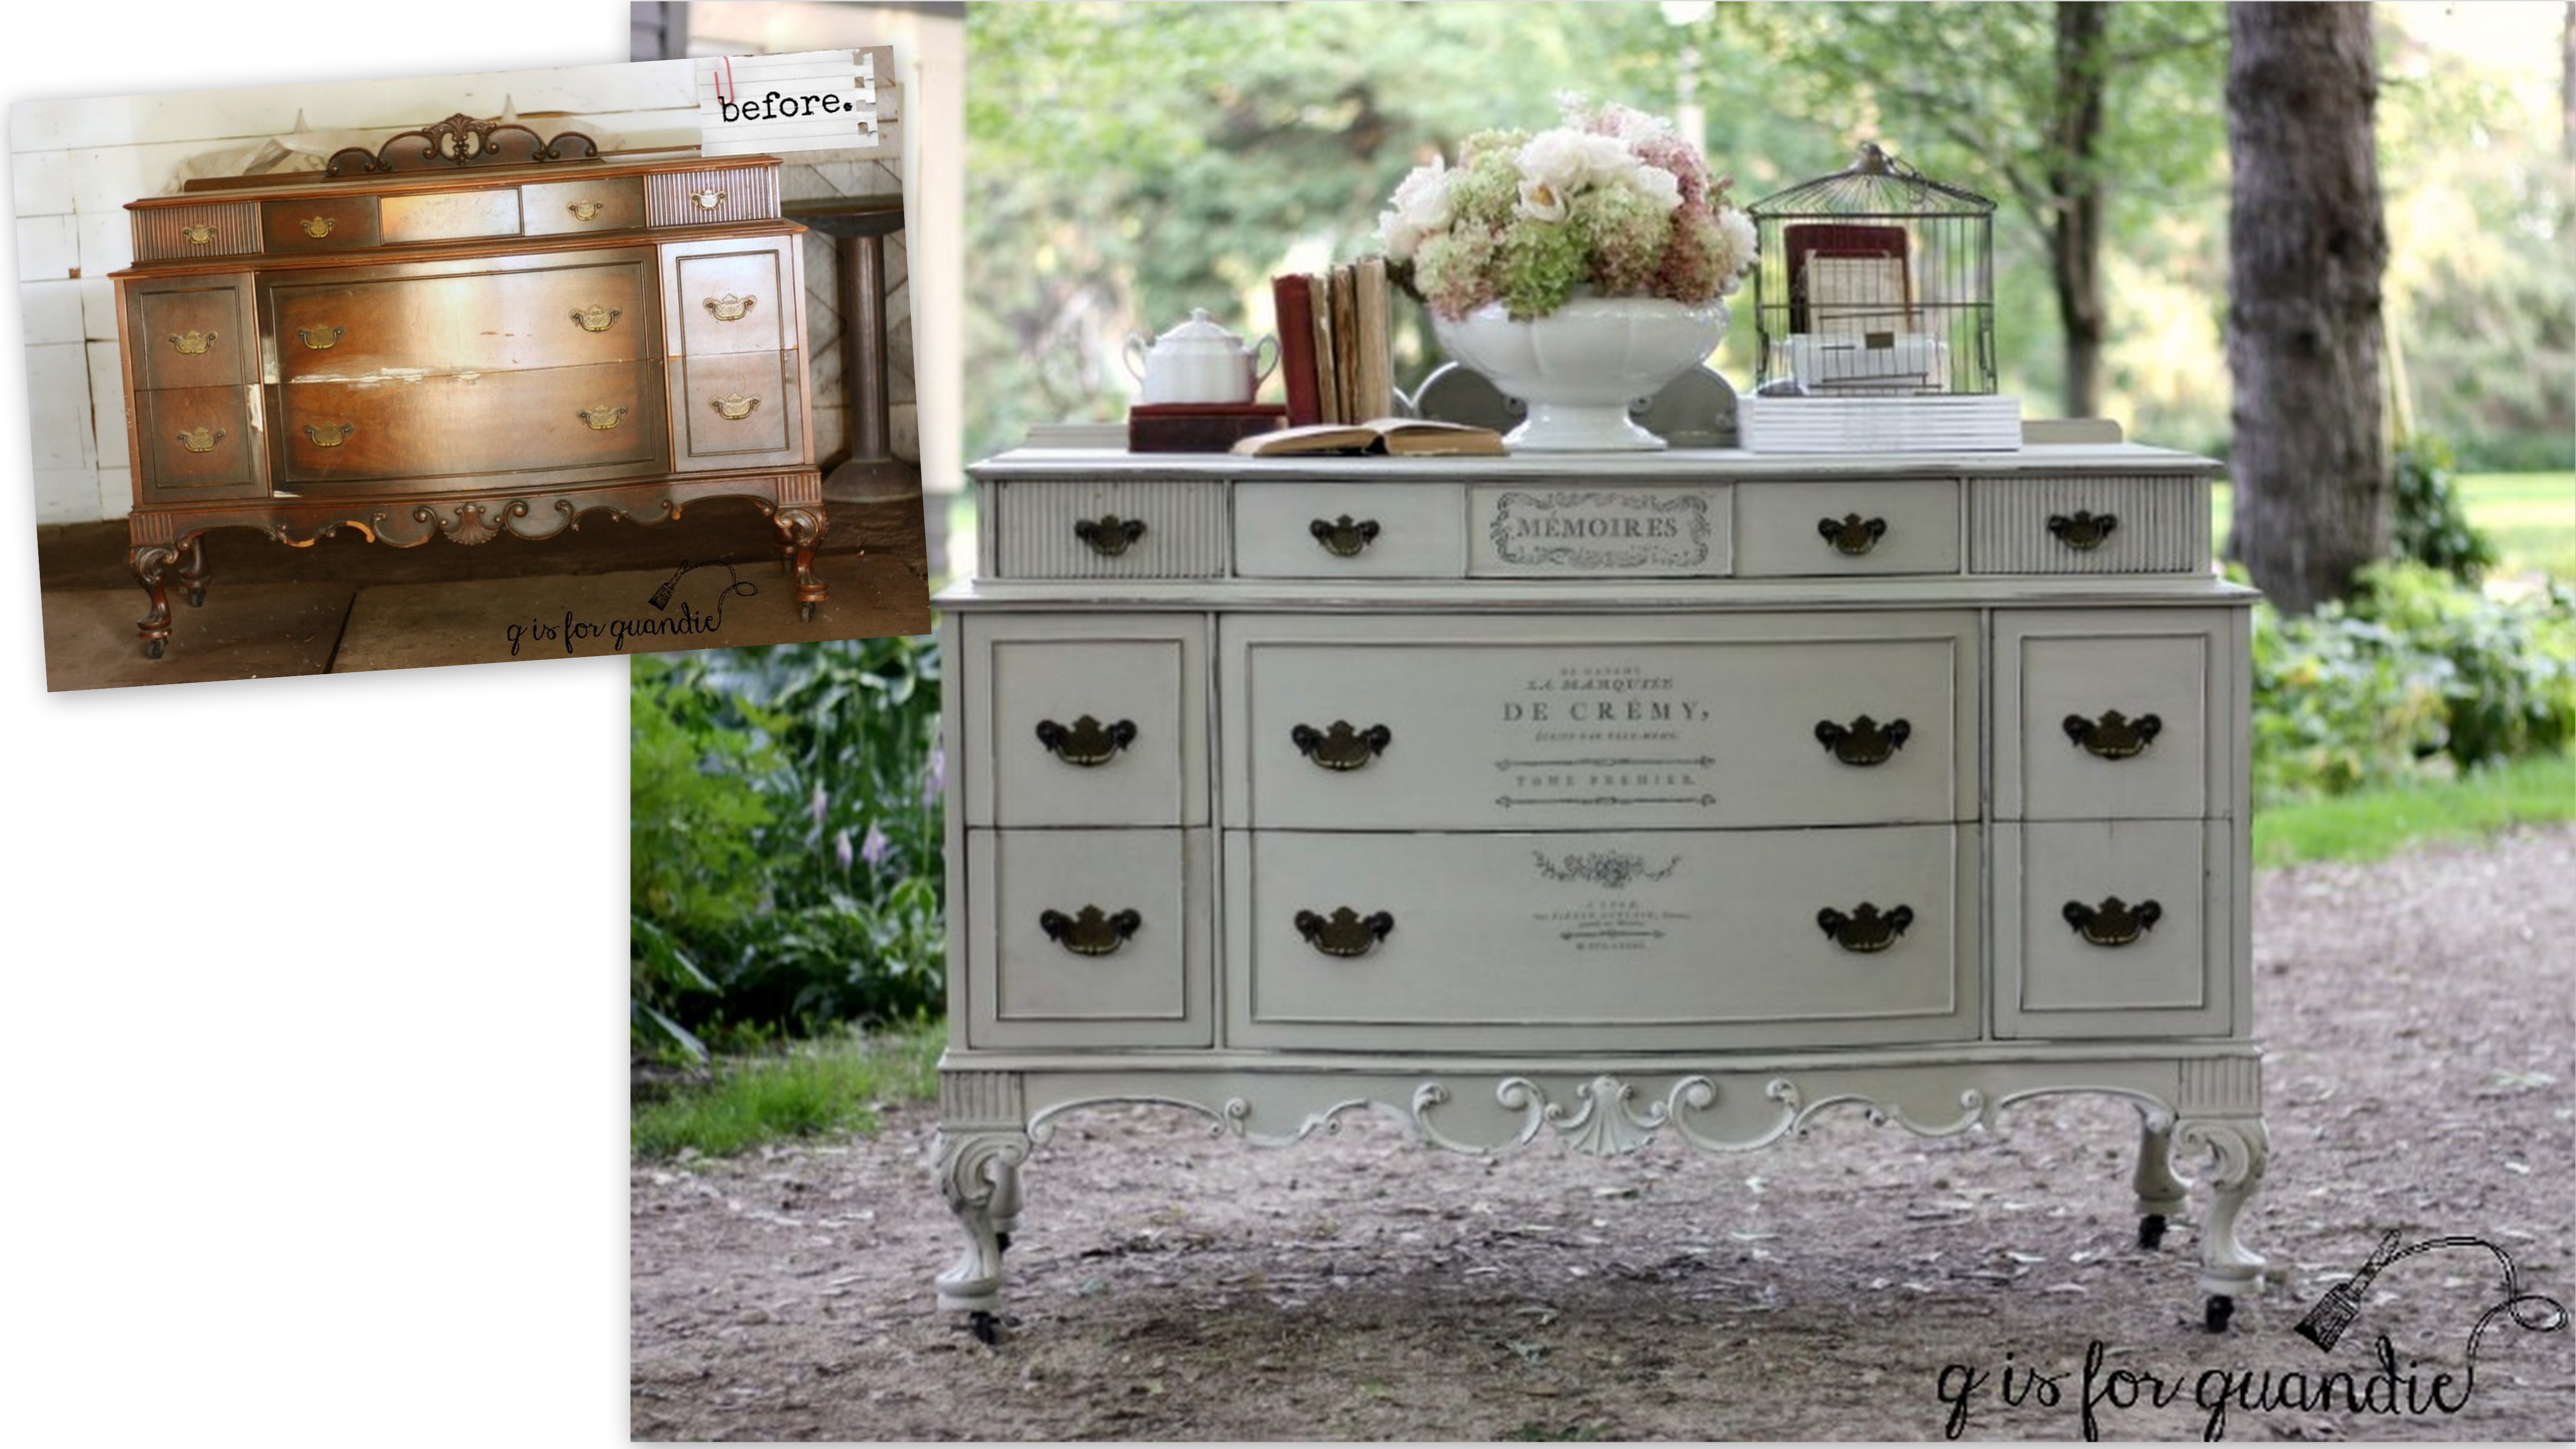
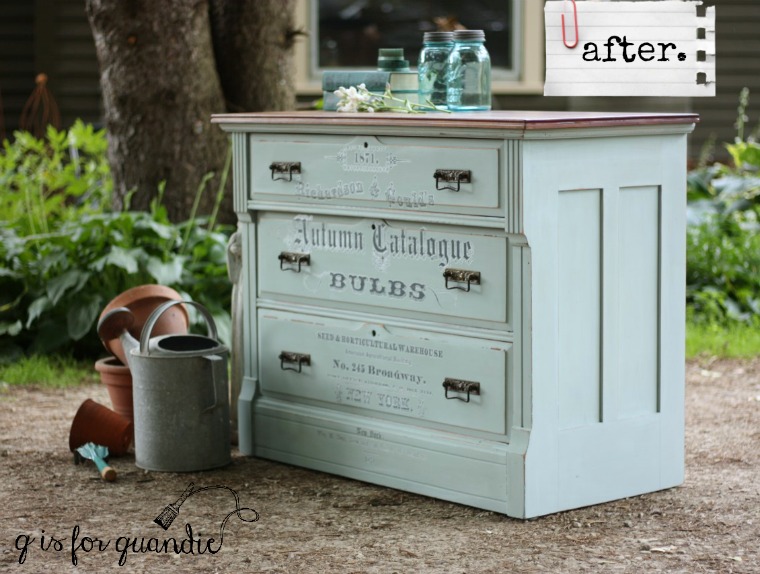
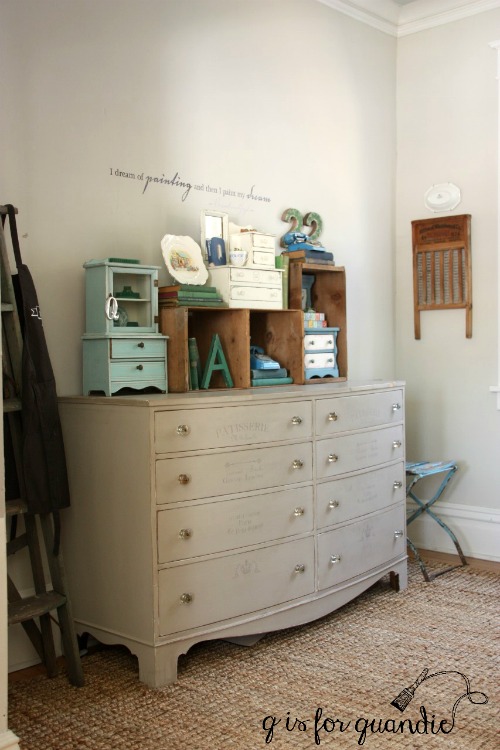
I’ve seen some pieces painted in Apron Strings on pinterest where the pigments show a fair amount of variation, like this gorgeous dresser from All Dolled Up.

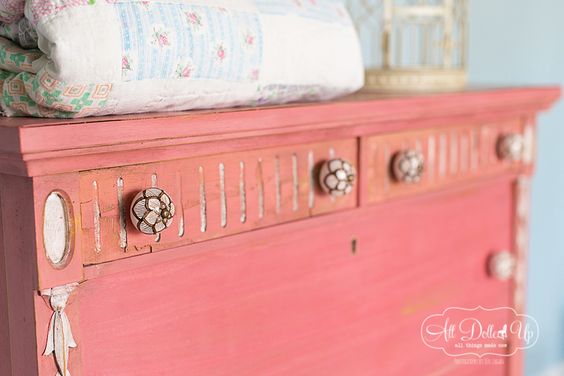
You can see that the paint has a little more yellow on the upper drawers, but is a little more pink on the lowers.  Certain color pigments don’t always dissolve as well as others, especially the yellow.  I actually love that look on the dresser above.  I think it gives it a gorgeous, almost water color, sort of effect.  I was hoping to get some of that color variation on my chair, but I really didn’t.  I think I may have mixed my paint a little too well.

I also thought I might get bleed through from the original dark stain, but there was none.  I worried it might end up taking at least 3 coats of paint to get good coverage over that dark color (this was the darkest of the three chairs), but no, it just took two.  I was also was prepared to get too much chipping because I didn’t prep the chair much at all.  I just wiped it down with a damp rag.  But again, no problem at all.  In the long run, painting this chair could not have been any easier.  Keep in mind that the existing finish was very worn and dried out.  If the finish had been more recent, more shiny, more impervious, I would have either sanded it down more thoroughly before painting, or used a base coat of Fusion paint followed by the milk paint.

Since I didn’t get much natural chipping I ‘created’ some with my masking tape method.  I basically press some tape into the paint and then sort of rip it back off quickly.  I use the yellow Frog tape (for delicate surfaces) for this.  If you want more chipping you could try a stronger tape like regular masking tape.

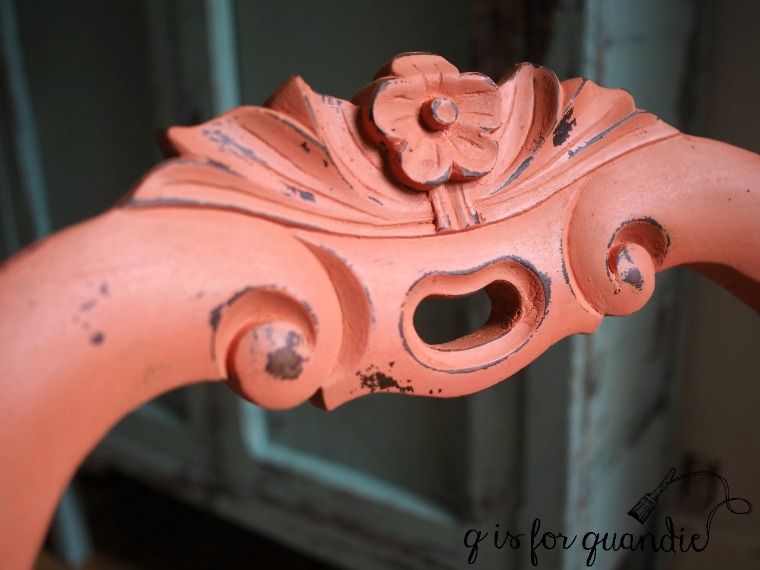
So to recap; very little prep, no primer, no pre-sanding, two coats of milk paint, some post-sanding, a little frog tape and then I added a final coat of hemp oil.

I recovered the seat using some white chenille that I already had on hand.  The chenille tones down the formality of the chair a bit.

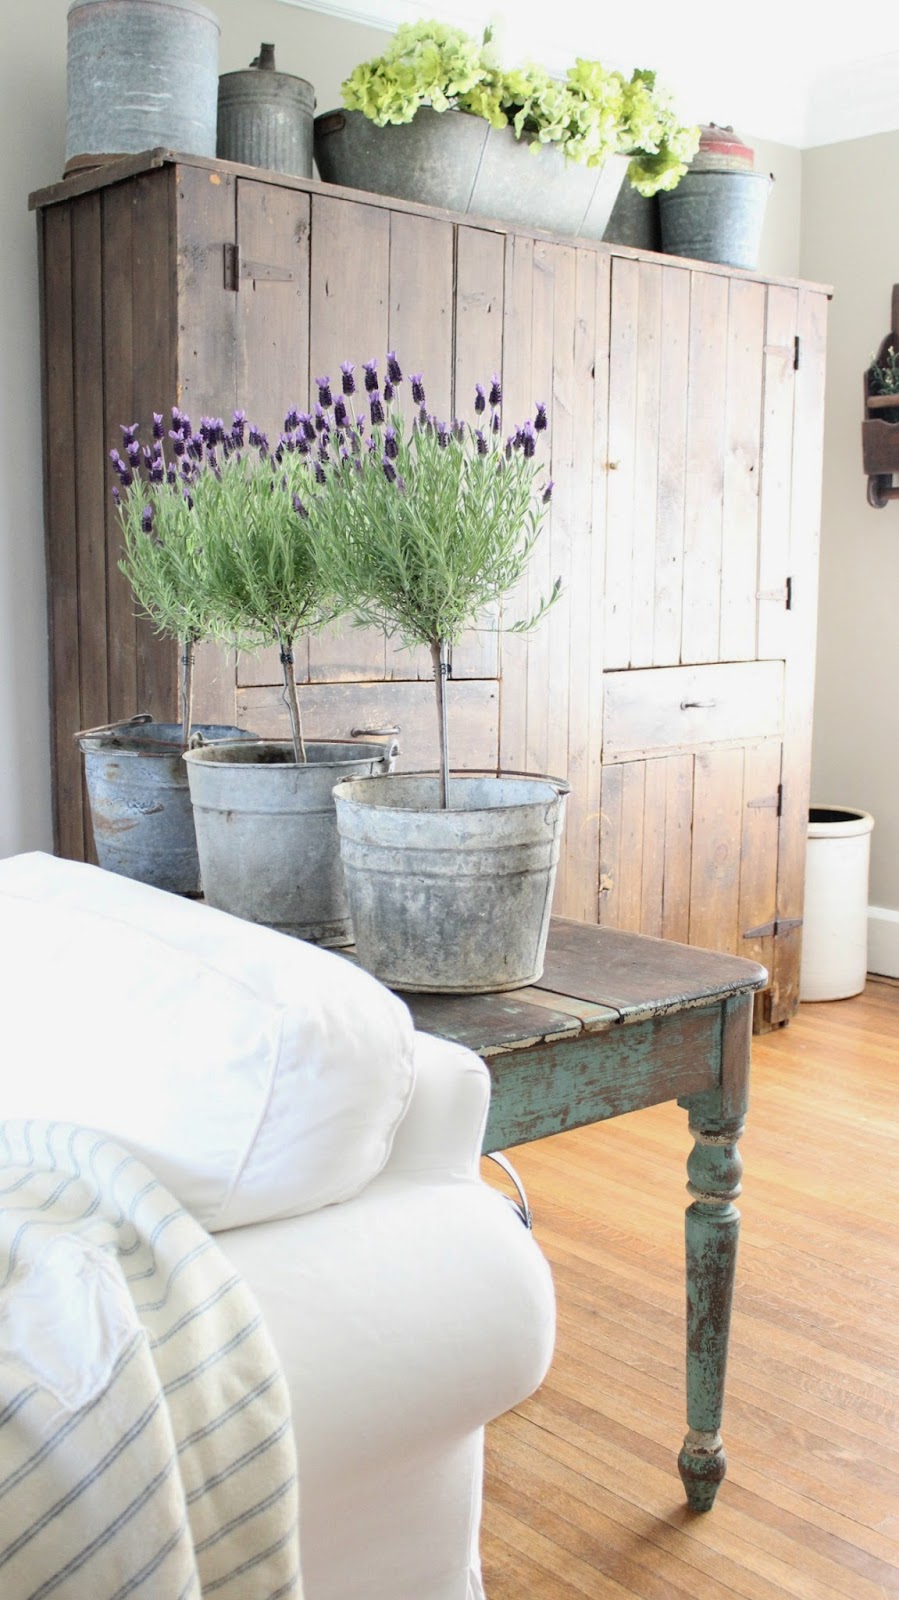
I’d initially thought the chair would work next to the cupboard, until I put it there and it looked like a miniature.

OK, that photo is a bit misleading, it’s not really that small, but the cupboard is quite tall and the chair is a little on the petite side.

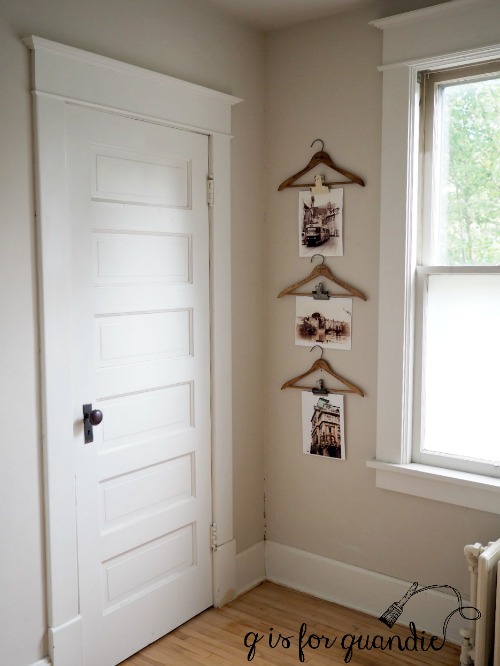
So I’ve moved it over to the corner next to the radiator, a much better fit.

By the way, I almost nabbed a Jenny Lind bed for my guest room at the garage sales last Saturday.  There was one for sale for $5.  But then I noticed it was missing a spindle.  And it didn’t have side rails, just a headboard and foot board.  Still … I debated grabbing it and using the foot board (which had all of its spindles) as a headboard.  In the end I walked away though.  I’m still holding out for the perfect find, but eventually this room is going to come together.


the day for chairs.

This year has pretty much been a bust for me for garage sale finds.  I missed most of the early summer sales while gone on my trip and while helping my sister move into her new house.  I went to a few random sales in July and August, but didn’t find much.  But all is not lost.  There are a handful of good neighborhood sales in early fall so I might not have to write off the entire 2017 garage sale season.

This past Saturday was the 6th Annual East Isles Super Sale with about 40 sales and as an added bonus the neighborhood just north of them, Lowry Hill, added their own neighborhood sale with about 25 additional homes participating.  My sister picked me up bright and early and we headed off to hit the sales.

If you aren’t familiar with Minneapolis neighborhoods, both of these are stunners.  They are situated along the eastern shore of Lake of the Isles and they are filled with gorgeous historic homes.  My sister and I play a fun game while driving around the neighborhoods called ‘which house would you buy if you won the lottery’ (I know, not a very clever name).

The day started out slow.  We didn’t buy a single thing at the first 5 sales we stopped at.  But then things picked up.  I found two adorable kid sized chairs.

I love painting these little chairs so I pick them up whenever I see them at a good price.

Next, I spotted a trio of gorgeous old chairs that I knew would be fantastic painted, so those went in the back of the SUV too.

I also found some ornaments to add to my growing non-collection.

At that same sale, Debbie picked up a stash of these adorable vintage candy molds.

I hadn’t really looked at them closely until I pulled them out to take photos.  Each one is different and quite a few animals are represented, including a cat, a rooster, a pelican, a frog, a horse and a fish.

Debbie recently put up some open shelves in her kitchen and has displayed some blue canning jars on them.  She’s looking for fun things to put in the jars, and that’s where these will go.

By the time we ended up at the sale with these awesome bar stools, the back of the vehicle was already pretty full.

But I just couldn’t pass them up.  So we unloaded everything onto the curb and then reloaded more carefully so that we could fit them in.  We had to remove the headrests from the car seats to get it all situated, but we were determined.  I had to spend the rest of the morning with big rusty metal planter on my lap (and I forgot to get a photo of it) because there wasn’t another inch of room in that vehicle.

One of the sales we stopped at was donating all of their proceeds to hurricane victims.  Although we didn’t buy anything, we did make a donation and get a free homemade cinnamon roll which was delicious.  Our thoughts were with the people in Florida as we were enjoying the perfectly gorgeous day here in Minnesota.  One of Debbie’s good friends from high school (we both went to high school in Boca Raton, Florida) still lives in Boca and was on the road for hours on Friday evacuating from her home.  We were both happy to hear that she had arrived safely at her destination late Friday night and I hope that everyone else in Florida stayed safe during the storm.

Meanwhile, back here in Minnesota, it’s always fun coming home with a haul, and it definitely was the day for chairs!

Be sure to check back tomorrow (yes, I said tomorrow, I think it’s going to be another five post week!) to see what I did with one of them already!


coming soon.

You may remember that when we had our upstairs floors refinished we also made the decision to swap Mr. Q’s study with the guest room.  Prior to this, Mr. Q’s study was in the smaller room and the guest room was the larger room.  That set up really didn’t make a whole lot of sense for us.  After all, Mr. Q uses his study nearly every day and the guest room got used about once a year.

As an added bonus, swapping the rooms gave me an excuse to completely refurnish the guest room.  The furniture from the larger room was not going to fit in the smaller room.  But I’m giving myself permission to take it slow on this makeover.  I’m taking the time to find just the right antique bed frame and just the right light fixture, both of which need to be at bargain basement prices because I’ve run out of money for this project.

First things first though, I painted the walls white (using left over paint from the faux shiplap wall in my master bedroom).  I wanted the room to be nice and bright, and I also want to be able to switch the colors in the room on a whim.  Next I added the chippy farmhouse cupboard that I painted last winter using Homestead House milk paint in Laurentien.

I had this cupboard listed on Craigslist for months and it simply didn’t sell.  I had a few inquiries on it, but somehow they always fell through.  Maybe it was fate telling me that this piece was meant to stay with me.

The sweet little crocheted dress was made by my grandmother for my mom when she was little.  I shared it here on the blog once before back in August 2014.

Yep, that’s my mom wearing the dress.

When we refinished the floors upstairs we had to clear everything out of our closets, which led to a big purge of stuff we didn’t need to hang onto anymore.  My wedding dress ended up in the trash can (it was totally yellowed and ruined), but when I pulled this little dress out of the closet I decided to display it for a while.

I had initially talked about keeping my pretty floral plates in the master bedroom, but they didn’t work in there at all.  So I moved them all into the guest room.  I had enough to fill the entire space on the wall above the cupboard.

I also moved my vintage blue typewriter into the room.

As well as some blue toy phones and a few Rachel Ashwell books.

I plan to use the chippy white stool that used to be in our master as a bedside table in the guest room.

Hopefully the rest of the room will be coming soon.  I’m keeping an eye on Craigslist for the perfect bed, I have a fun idea for a window treatment and I’m searching for a budget friendly light fixture.  Be sure to stay tuned!

bats in my belfry.

Shortly after I brought home the giant English cupboard that I shared last week, Ken started working his magic and added bead board paneling to the inside back to cover up the particle board.

This is just cheap faux bead board paneling.  I debated adding actual bead board, but I felt it would make the cupboard way too heavy.  Plus I knew I was just going to paint it, and ultimately it would mostly be hidden by stuff on the shelves so no need to go overboard.  By the way, I suspect that the creamy color on the interior sides is the original color of the entire cupboard.

After adding the bead board, Ken moved the shelf supports on one side based on my specifications.  He also had to add new shelf supports on the other side because as it turned out there were only supports on one side of the cupboard.

 Then he cut down some 1″ x 8″ boards to use as shelves.  Two 1″ x 8″ boards side by side were a perfect fit for the depth of the cupboard, Ken just had to cut about 8″ off the length of each 6′ board.

Once that was done I painted the inside.  I decided to go with a pop of pretty color inside, even though I don’t really have this color in the room.  But since the cabinet is never intended to be left open, the only person who will see that color is me.  So why not go with a color that will make me happy every time I open those doors to put things away?

For me that color is Fusion’s Laurentien.  I really love this color.  The ladies who own Reclaiming Beautiful knew that about me when they gave me a jar of it last Christmas, and because of that I had plenty of it on hand (thanks again Monique & Susan).  Turned out that I definitely needed it for the cupboard interior plus the shelves.

I don’t know if you’ve noticed, but with summer coming to a close it’s starting to get dark out earlier in the evening.  When I started painting it was still light out, but by the time I was almost done with just the inside back and sides it was dark out.  As I was sitting on my stool painting the cupboard I kept seeing a shadow flicker out of the corner of my eye.  I figured it was a moth circling one of my lights because I’ve had that happen before.  The shadow looks so big, but it’s just a moth close to the bulb casting a big shadow.  No big deal.  But I kept looking up and not seeing a moth.  Finally I finished the cupboard interior, I stood up and eeeeeekkkk! a bat swooped over my head and through the door to the other side of my carriage house.

I know bats are good to have around, they eat lots of mosquitoes and so on.  I also know full well that I very likely have bats in my belfry … or is it technically a cupola?  Anyway, that thing on the top of my carriage house.  We certainly see plenty of bats in the night sky around here.

But I really would prefer they not swoop around my head while trapped inside a room with me.  Shudder.

At that point, although I had intended to continue on with painting the shelves, I found that I just couldn’t make myself stay out in my workshop with a bat for company.  So I decided to save the shelf painting for another day.  But at least I had gotten this far …

A few days later I set up an assembly line of sorts for painting the shelves (in broad daylight) and I cranked them out in no time.

So the inside is done.

I’m super excited to get it moved into place and start filling it up with stuff!

laundry today or naked tomorrow.

My sister was off work last week, so on Friday she swung by my office, picked me up and we went to a few garage sales that were nearby on my lunch break.  We only had time to stop at about 5 sales and I didn’t find much, but my sister got a great deal on a leaf blower just in time for fall.

One thing I saw and debated buying was a vintage wooden ironing board.  I didn’t grab it because at $35 I thought it was a bit overpriced.  Plus I already had two of them in my carriage house.  However, it did inspire me to dig one of those out and turn it into a sign for today’s quandie quickie Wednesday post.

I used this ‘designer wall lettering’ to make my sign.  I can’t remember exactly where I found this, either Hobby Lobby or Joann Etc.

It couldn’t have been easier or quicker.  Simply remove the protective sheet, place the wording on your surface, rub with a plastic thingie (sort of like a credit card, it came in the package), and peel off the backing.

My only complaint about this product is how shiny the letters are.  The label says “appears hand painted”, but unless you are using some super glossy paint, I beg to differ.  They definitely look more like stickers than like hand painted lettering.

Next time I will opt for stenciling with actual paint.

Nonetheless, the ironing board laundry sign is pretty darn adorable.

I wish I had one of those gorgeous laundry rooms that other bloggers seem to have, with things like subway tile and vintage containers for the soap.

Oh, who am I kidding, even just having walls would be an upgrade.  My laundry facilities are in my cellar-like basement complete with cinder block walls, lots of spiders and perpetual dampness, so I had to stage these photos in the photo cottage.

But hey, I’m not complaining.  I’m lucky to have the photo cottage even if I have a less than stellar laundry room.

But if you happen to have a fabulous laundry room, or even just one with real walls, this fab vintage ironing board sign is available for local sale.  I’m planing to bring it down to Reclaiming Beautiful in Stillwater tonight so you can look for it there starting tomorrow. However, if you are local and want to call dibs on it for your laundry room, check out my ‘available for local sale’ page for more details and send me an email asap.


union jack with a side of mustard.

I feel like mustard is one of those things where you either love it or you hate it.  It’s true of the condiment and the color.

Personally I love all kinds of mustard; honey, dijon, yellow, brown.  Mmmmm, just thinking about mustard is making me kind of hungry.

I also love Fusion’s Mustard paint.  I fully admit that I probably wouldn’t have chosen this color initially, but Fusion sent me a free sample of it last year and I used it on a toolbox and fell in love.

Recently nnK returned a typing table to me that she purchased at one of my sales and no longer needed.  The top was a bit worn, so I decided to give it a fresh new look.

I was planning to give it a little more personality with a union jack on the top in shades of grey, like the end tables I painted last year.  But then Monique from Reclaiming Beautiful saw it and suggested I consider using Mustard as one of the colors.  I took her advice and thus gave it a lot more personality.  I’m calling it ‘union jack with a side of mustard’.

This color combo gives the table more of a modern twist, or maybe I’m sensing a bit of a mid-century vibe.  What do you think?

This table itself is really rather challenging to photograph.  From straight on you just see the metal base and the 1/2″ sides of the top.  I tried a bunch of different angles when I was getting the ‘before’ shots and they were all pretty awful.  So I really wasn’t sure how I was going to stage the piece and get good photos.  I also debated, do I stage it as a desk, or should I stage it as a side table?  How about staging it as a bar cart?  Or maybe as a nightstand?  All were possibilities.

But then I remembered the September issue of Conde Nast Traveler that nnK had left on my deck the other day.  Just look at all of that mustard!

I had to use that.  Then I added a vintage camera to play off the ‘travel’ theme of the magazine plus the union jack.  Finally I threw in a golden toned wooden piano stool that plays well next to the mustard.

It was still a bit tricky to get a good angle on the table, but I had fun trying.

This piece really wouldn’t function terribly well as a desk, except possibly for a child.  It is the ergonomically correct height for a typewriter which is a bit lower than typical desk height.  However, it would be perfect for all of those other uses I mentioned; beside the sofa, beside the bed, as a bar cart or for that matter as a TV stand.  There is a lever you move to lower and thus activate the wheels.  Or it can be perfectly stationary with the wheels raised slightly.

By the way, did you notice that it’s only Tuesday and I’ve got a blog post?  I was so productive this past weekend that I have a back log of stuff to post about.  So I’ll be posting every day this week, hope you enjoy!

In the meantime, this union jack table with a side of mustard is for sale.  Be sure to check my ‘available for local sale’ page for more details if interested.


madame’s dresser.

Oh my gosh, I can hardly believe that it is September already.  Where did the summer go?  It started out with my two week trip in May.  Then there was moving my sister into her new house in June.  I spent a lot of time working on my master bedroom makeover in July and August.

In between all of that, I worked on this dresser and the summer just flew by.

But first, here is the ‘before’ photo.

This piece is large and heavy and I didn’t have the manpower to move it out of the workshop for a ‘before’ photo, so you’ll just have to excuse that.  I’d also already re-glued and patched some of the chipping veneer on the drawer fronts.  Ken had also already worked some magic on this dresser by re-attaching all four of the feet.  Two had come off when we loaded it in the truck, and the other two were pretty wiggly.  Ken added dowel pins and fresh glue and now those gorgeous feet will fully support the weight of the dresser.

If the style of this piece feels familiar to you, that’s because I’ve already painted its companions.  This small table

and this small vanity

As you can see, I got a lot of chipping on both of these pieces.  In fact, I even ended up re-doing the small vanity.  I had tried using General Finishes Flat Out Flat as a top coat over the milk paint and I discovered that rather than ‘sealing’ the chipping paint, it brought up more chipping.  I did that right before I left on my trip, and the photo above was taken then.  When I got back home I found that the finish had chipped even further while I was gone.  Basically I’d say about 80% of the paint had completely chipped off.  Unfortunately I didn’t think to take a photo of it at that point.  To salvage the piece I simply sanded off the chipping paint and then re-painted with the same Homestead House Stone Fence milk paint.  This time I added Miss Mustard Seed furniture wax as a topcoat.  Here is how it finally looked.

The good thing about discovering the propensity towards chipping on these two smaller pieces was that I was forewarned before starting on the large dresser.  I wanted some chipping, but I didn’t want to lose 80% of my paint.  So I prepped the piece really well by sanding it with 120 grit paper and then cleaning it thoroughly with TSP substitute.  That definitely did the trick because I ended up with just a very small amount of chipping on this one.

I painted it with Homestead House milk paint in a color called Bedford.  This is a lovely greige that is just a tad darker and a tad warmer than the Stone Fence.

I used another Iron Orchid Designs transfer on the front of the dresser.

If you look closely at the transfer you can see why I decided to call this madame’s dresser.  I thought about going with the full ‘dresser de madame la marquise de Cremy’, but that’s really a mouthful!

Once again I used the Real Milk Paint Co’s Dead Flat Finishing Cream on this piece.

I am really loving this stuff for pieces that I want to sell.  It’s nice being able to tell the buyer that the finish is washable.  And in fact, I was able to put that to the test on this piece.  When Mr. Q helped me move it into place for the photos he left a dirty hand print on top of the dresser.  It came right off with a damp cloth.

When looking at the ‘before’ photo you might have noticed that some of the trim at the bottom of this dresser was missing.  Some people have fancy ways of molding replacement trim out of bondo or some such thing.  I prefer to just fake it with paint.

I painted the trim with Homestead House Limestone milk paint and I just painted the areas of missing trim as though it was still there.

My staging of this piece hid the pretty trim at the back of the dresser top, so I took a quick photo after clearing it off.  I didn’t have to fake anything with that bit of trim.  It’s all there and isn’t it gorgeous?

The two little upper side drawers each have fun little coin/jewelry holders inside.  There was a velvet liner at either side of them that was pretty grungy though.  I thought I’d be able to remove the coin holders, replace the velvet and then put them back in.  I also discovered that one can’t get to the screws that hold the pulls in place because the coin holders block them.  Much to my surprise the coin holders were not removable.  At least not without leaving major damage behind.  I had Ken take a look and he thinks they are both nailed and glued into place.

So, I improvised.  I painted the drawer fronts with the pulls in place and I added fresh toile fabric over the velvet.  I used a little 3M spray adhesive to keep the fabric in place.

I had fun staging this dresser using old books, some hydrangeas from my garden, some pale roses from the grocery store and some ironstone.

We had a gorgeous sunny morning here yesterday so it was perfect for taking photos outside.

I may have gotten a little carried away with the quantity of photos, but I couldn’t help myself.  There is just something about these beautiful summer mornings in September.  They start to feel so fleeting this time of year.

 This is such a lovely piece of furniture, I’m sure it won’t last long.

This piece would work beautifully as a sideboard in the dining room or for storing clothing in your bedroom.  Be sure to check my ‘available for local sale’ page for more details if you are local and in need of a gorgeous new dresser or sideboard!

a heck of a deal.

You all know my opinion on matched bedroom sets, or as they called them back in the day, a bedroom suite.  I’m not a fan.  To be more specific, I’m not a fan of keeping them together and using them in one room.  On the other hand, I’m a big fan of buying them and separating the pieces.  It can be a tremendous value.

Even though I’ve already shared the ‘afters’ of most of the pieces in this set, I thought it would be fun to put them all together in one post so you can see just how far it went.

Funny enough, when I first looked at the ad for this set I was specifically trying to decide whether or not I liked the bed well enough for my own room.  I debated back and forth with myself on it for a while before I had one of those smack your forehead, duh, sort of moments when I realized that this set was a heck of a deal regardless of whether or not I was going to keep the headboard.  If I ended up deciding I didn’t like the headboard, I could still sell it along with everything else.

As it turned out, I loved the headboard and it is perfect in my master bedroom.  I altered it to fit my queen sized bed (read that post here).

I also love how the little nightstand/washstand turned out.  If I didn’t already have a similar piece that came from my grandparents, I would have been tempted to keep this piece myself.

I separated the mirror from the dresser, painted the dresser and added an IOD transfer.

Since I couldn’t use the foot board after converting the headboard to fit a queen sized bed, I decided to ask Ken to use one of the side rails to add a shelf to it.  I’d done this once before with a headboard and it was a great success.  This one turned out pretty awesome as well.

I made a Farmers’ Market sign out of the remaining side rail.  I currently have this hanging in my dining room, but it’s also listed on my ‘available for sale’ page because I don’t think it’s perfect for this spot.  I’ll continue to keep an eye out for just the right thing for my dining room wall.

 Finally, I turned the mirror frame into a chalkboard.

I didn’t share that makeover here on the blog since I’ve done several of these in the past and blogged about them here and here.  Usually I have Ken add a shelf to these, but this one didn’t have a good spot for the shelf because it has that raised panel at the bottom.

Here’s a close up so you can see the chippy, layered finish I achieved with milk paint.

That is a base layer of Homestead House Upper Canada Green milk paint with HH Limestone over it.  I used my secret weapon for perfect chipping, adding some HH Salad Bowl Finish (or Miss Mustard Seed Beeswax Finish, same stuff) between the layers of paint.

I finished with a top coat of Low Sheen Finishing Cream from the Real Milk Paint Co.

Currently this piece is hanging in my living room, but I don’t think this will be its permanent home either.

So, if you’re keeping track, I took this one 3-piece bedroom set and made six individual pieces out of it.  And technically I still have the mirror itself, which has a pretty frame.  I’m debating whether to turn it into a chalkboard also, or leave it a mirror.  So really, I will have 7 pieces in the end.  Like I said, a heck of a deal!

hanging it up.

I really debated using that title for this post.  I didn’t want to give any of you a scare, thinking that I was giving up blogging.  Nope, so far I am hanging in there (bwa, ha, ha, ha).

This post is about actual hangers.  Although maybe I could give the title a double meaning.  I’m hanging up the Wednesday travel posts, and instead I’m going to try to feature a small decorating project every Wednesday.  Something that can be pulled together in an afternoon.  We’ll see how long I can keep it up.

So, as I said, today’s post is about actual hangers.  Vintage wooden advertisement hangers that is.

I pick these up whenever I see them at garage sales.  Sometimes if you dig through a box of plain wooden hangers you’ll find one or two with advertising on them.  I usually pay less than a dollar each.

Oddly enough, I rarely find hangers from local shops.  So far I just have one, and it’s not one of my favorites.

I decided to use a few of the hangers in the simplest way possible in my master bedroom.

First I printed out some of my favorite travel photos (oh, maybe there is a hint of a travel theme to this Wednesday post after all).  The top two photos on the wall are from Prague, the bottom photo is from Vienna.

Several years ago I had Photoshop on my computer and I had some great plug in’s.  When my computer crashed in 2014 I lost them and never took the time to reinstall them.  Now I can’t even remember the name of the plug in!  Ugh.  But the two Prague photos were altered using that plug in.  The Vienna photo was altered using a Picmonkey effect called Filmstock.

Isn’t that a gorgeous building?

I printed the photos on matte photo paper (I use Target’s Up & Up brand).

  Then I gathered up some vintage metal clips (another thing I like to grab whenever I see them at garage sales) and simply clipped the photos to the hangers.

Easy peasy.

I hung them on the wall between my windows and my closet.  They fit perfectly there and it seems apropos to have ‘hanger art’ next to the closet.

I wondered whether or not the photo paper would curl a bit in humidity, but they’ve been up for close to a month now and we’ve had plenty of rainy weather and so far, so good.

Down the road I can easily change up the photos on a whim, or if they start to look less than fresh.

So the next time you see some old advertisement hangers, consider nabbing them and creating a gallery of ‘hanger art’ yourself!

my giant English cupboard.

For quite some time now I’ve been looking for a giant cupboard for the Q branch.  I wanted something that would mostly fill up this wall …

The dresser that I currently have in that spot is very functional, it holds lots of crafting supplies and camera paraphernalia.  There isn’t anything wrong with it, but I don’t love it.  It’s a bit more traditional than I am.  Since it was functioning well, I wasn’t in a hurry to replace it, but it’s something that has been in the back of my mind for some time.

I like the idea of being able to shove everything inside a cupboard and shut the doors leaving the room looking nice and tidy.  Otherwise I tend to pile stuff up on the dresser and it looks messy most of the time.

I’ve pinned quite a few examples of large cupboards as inspiration, like this beautiful example from Rustic Farmhouse

And this gorgeous cupboard from Rusty Hinge

Amazing, right?

So I’ve been keeping an eye on Craigslist for a suitable candidate.  To begin with, pieces this large are few and far between on Craigslist.  In addition, when I do find them they tend to be newer pieces that were intended to house clunky television sets in the 90’s.  But I have seen a handful that were fabulous vintage pieces, but for the most part they were way out of my price range.  And by ‘way out’, I mean over $1,500.

For example, I’ve been admiring this gorgeous cupboard for months now (here’s a link to the ad if it’s still out there) …

But the price tag is $1,800 and it hasn’t come down since I started looking at it last winter.  I suspect the buyers are holding firm.  It does have a gorgeous original painted finish.  I’m not saying it isn’t worth that much, I’m just saying that I can’t pay that much.

Then I spotted the ad for this one …

The ad was very short, it simply said “Antique English country armoire (late 18th / early 19th century) with the original lock.” And it gave the dimensions:  63″W x 17.5″D x 72″H.  But it was priced at $900, which was pretty high for me.  Still, I couldn’t stop thinking about it.  So I checked the measurements first and they were perfect for my space.  Next I contacted the seller to ask what was inside because there were no photos of the inside included with the ad.

The seller got back to me and said there were bars inside for hanging clothes, but no shelves.  However, she said there were supports for shelves, so at one time it must have had shelves.

So.  No shelves.  $900.  I decided to put it out of my mind.  It wasn’t really right for me after all.

I sent an email back to the seller letting her know that it was just too far out of my price range with the cost of adding shelves on top of the $900.  I didn’t hear back right away and assumed that was that.

But then one Saturday morning I got an email from the seller saying she would take less and asking me to make an offer.  So I offered $600.  I really didn’t expect her to go for it.  And I thought for sure she’d counter with $750, which was still going to be too high for me.  Let’s be honest, even $600 is a lot for me to spend.  I was surprised when she emailed back and said “Great!  I’ll take $600 if you can come today.  We’ve just moved and we need to get it out of our garage.”

As luck would have it, Mr. Q had already left the house for the day with his truck.  But nnK (my neighbor Karen) said her dad, Larry, was coming over with his truck and he’d probably be game to let us use it to pick up the cupboard.  Shortly afterwards Larry showed up and instead of his truck he was driving his baby blue classic Oldsmobile.  Hmmmm, that wasn’t going to work!  Next nnK suggested we borrow Ken’s trailer.  We could hook it up to her SUV.  So we called Ken next, and he said ‘sure!’   So we hooked Ken’s trailer up to nnK’s SUV, and then Ken and Larry both decided to come along for the ride too, so the four of us headed out.

As nnK says, we must have looked like one of those Shriner clown cars when we got to our destination and all four of us piled out of the car!  The sellers did look a little surprised that I had brought the entire neighborhood with me.

I headed into the seller’s garage to check out the wardrobe.  It’s an interesting piece.  It’s made out of pine and looking closely I could see that at one point it was painted (there are still traces of paint in the grooves), but it had been stripped.  Pine pieces were typically painted, so that didn’t surprise me.  And it was good news to me because if I decide to paint it, I won’t feel guilty about painting over an original finish.

It has some really cool hardware inside including this gadget used to hold one door closed …

And a huge lock mechanism …

The husband of the woman I’d been emailing with asked if I wanted to know the story behind the piece, and of course I did!  He said he was from Texas and he purchased the wardrobe from an antique dealer in Texas who regularly travels to England, buys antique cupboards, ships them back to the U.S., refinishes and repairs them and then sells them.

I always hear stories like these and wonder how in the world it is possible to buy something in Europe, ship it back here, refurbish it and still make any sort of profit.  The guy didn’t tell me how much he paid for it, but I’m guessing it had to be a lot more than $600.

While listening to the seller’s story, I was also giving the piece a thorough inspection.  The back of the cupboard was obviously a replacement.  It’s made out of cheap particle board.  Or possibly this cupboard was originally a built in and never had a back, but instead just used the wall as its back.  I wasn’t convinced that the cupboard was as old as the ad said it was (late 17th, early 18th century), but it’s definitely an old piece.  I loved the simplicity of the design.  And the size was perfect for my space.  So after much scrutiny, I said “I’ll take it” and handed over the cash.

Next came the fun part.  Loading this monster into the trailer.  In the end it took 6 people!  The seller’s neighbor came over to help too.  Part of the problem was that there just wasn’t anything to grab onto to lift it off the ground.  We ended up putting cardboard under it and then sort of sliding it out of the garage.  Once we’d cleared that space we were able to tilt it backwards with three people on each side and then lift it up and into the trailer.

We strapped it down and headed out.  I wish I’d taken some photos.  The cupboard is huge and hung halfway out of the trailer.  We took back roads all the way home to avoid traffic and high speeds.  We made just one stop at the Dairy Queen.  I’d promised my helpers some ice cream for their efforts.

So for $600, plus the cost of two malts, one blizzard and one small cone, I am now the proud owner of this beautiful antique English pine cupboard.

 Now that I’ve got it home, Ken will work his magic on this inside and then I’ll work some magic on the outside … maybe … I still haven’t decided.

What do you think?  Should I paint it, or shouldn’t I?