It’s finally here! Neighborhood garage sale season! And it started off with a bang this year. There were multiple neighborhood sales to pick from. But on Saturday my sister and I stuck with my traditional favorite, Bryn Mawr.
It’s actually called the Bryn Mawr Festival of Garage Sales, and for good reason. It is a lot like going to a street festival complete with food trucks, live music, porta potties and lots of people!
Bryn Mawr is what I call a walking sale. In other words, you park your car, pull out your collapsible carts and you walk from sale to sale. There is far too little parking, and way too many people to even consider driving from block to block. Luckily my sister is game for a lot of walking, and by the end, a lot of pulling heavy carts laden with the spoils.
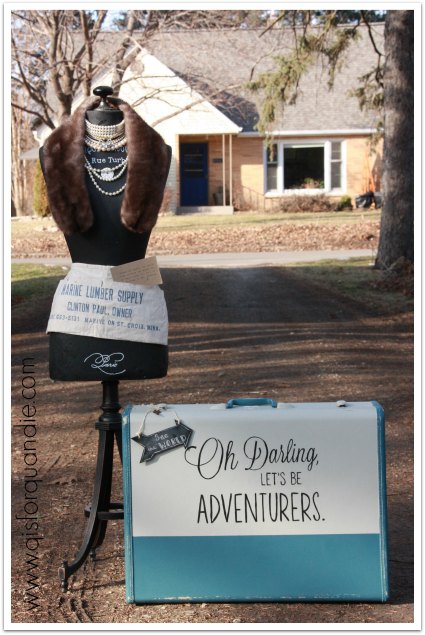
So Debbie and I found a great parking spot in the middle of the action and the first sale we came to had this display.
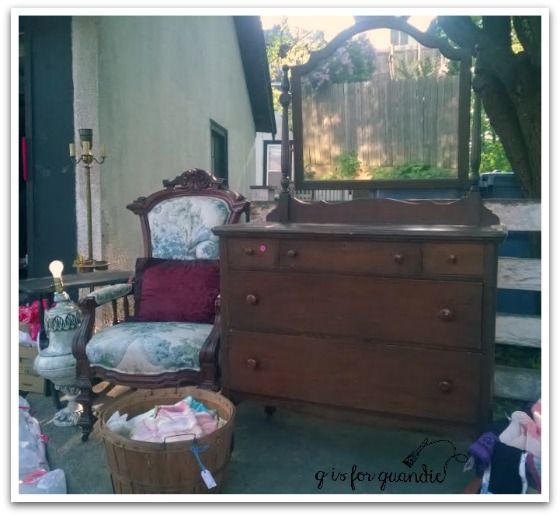
Unfortunately that dresser was a bit out of my price range at $150, but it was still a fun way to kick off the day!
My garage sale mentor (also my Carriage House sale partner) Sue doesn’t do Bryn Mawr anymore because she thinks it has gotten too expensive. And she is probably right. But I still can’t resist the party atmosphere.
I went in not expecting to bring home a lot of furniture to makeover, but hoping to find a few treasures just to keep for myself.

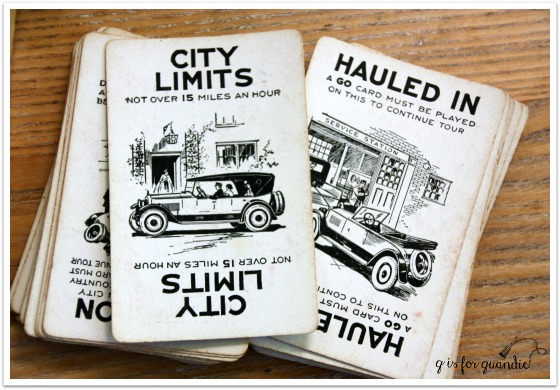
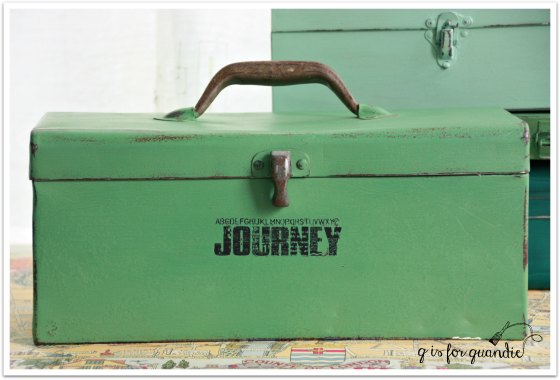
Debbie thought I was a little nuts for paying $8 for this …
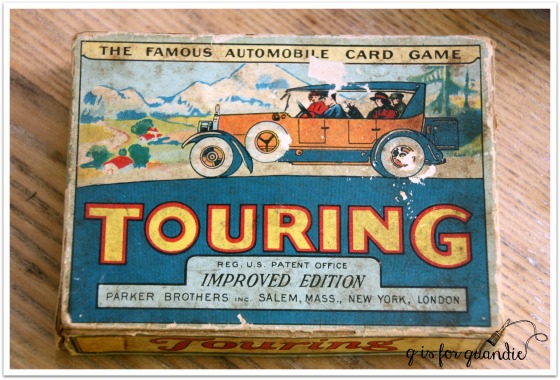
But I love the graphics on the box, and I know I’ll find some great uses for the cards inside. Also, since I think it’s fun to share, I thought I’d share some of these cards with someone. I don’t need all of them! So if you’d like a chance to have some of these yourself, leave a comment today! I’ll draw a random name or two from among anyone who leaves a comment here on the blog by midnight tonight.
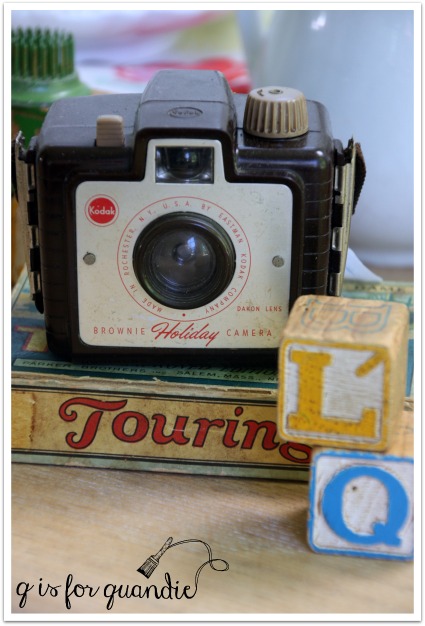
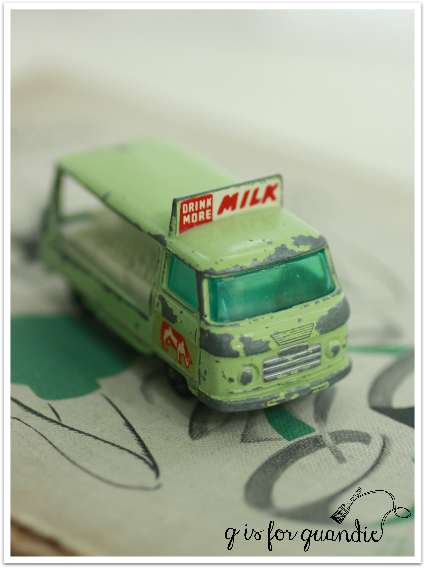
I also found a fun camera to add to my collection. This one will be great as a holiday decoration too.
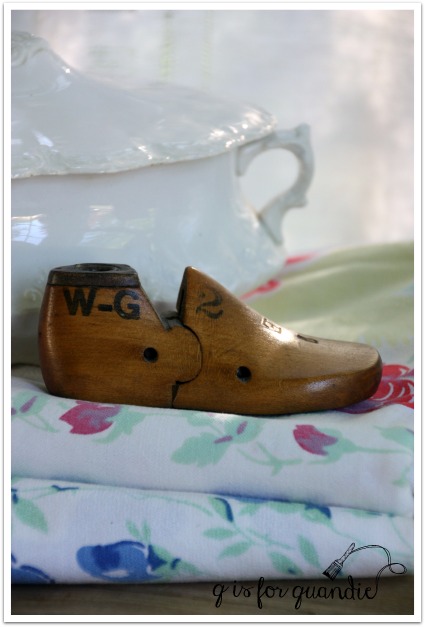
I couldn’t resist this little shoe form.
Or this red and green flour sifter and tiny green flower frog. Wouldn’t the flour sifter be perfect with a red geranium planted in it?

I’m sure you’ve already noticed that there is some great ironstone peeking out of these photos, as well as some lovely tablecloths to add to my pile.

I also brought home this pair of old shutters.
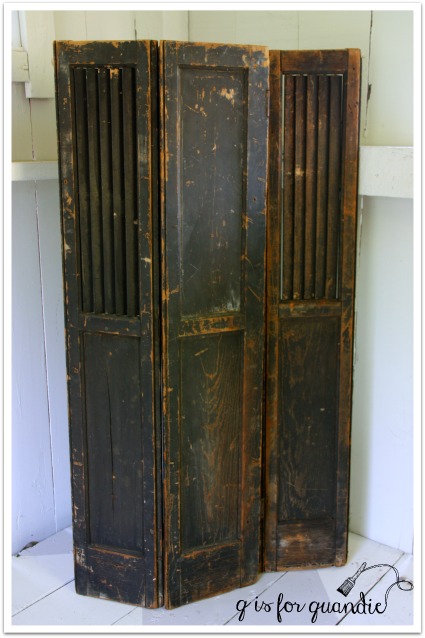
They already have the most fabulous patina, so I don’t plan to do anything except clean them up. Or maybe I could add some stencils and turn them into ‘signs’ of some sort. I’m not sure if I’ll find a spot for these myself, or if they’ll be put away for the next Carriage House sale.
I did score a couple of chairs so as to not return without any furniture at all. I’ll be honest, I don’t generally like to deal with chairs. With all of those round legs or square legs with 4 sides each, they can be a pain to paint with a brush. Chairs are probably better left to those who paint with a sprayer. But both of these were too hard to pass up.
First this one with its gorgeous detail on the back. I have no idea what someone was thinking with the poor white paint job that didn’t include the feet, followed up by a half coat of a gold-ish color.

Just check out that detail though.

How could I walk away from that? I plan to paint this one with milk paint and I’ll keep my fingers crossed for a nice chippy finish. I’ll have Ken cut a new seat, which I can then upholster myself.
I also grabbed this chair. It also has a wonderfully aged paint job, but a ruined cane seat.
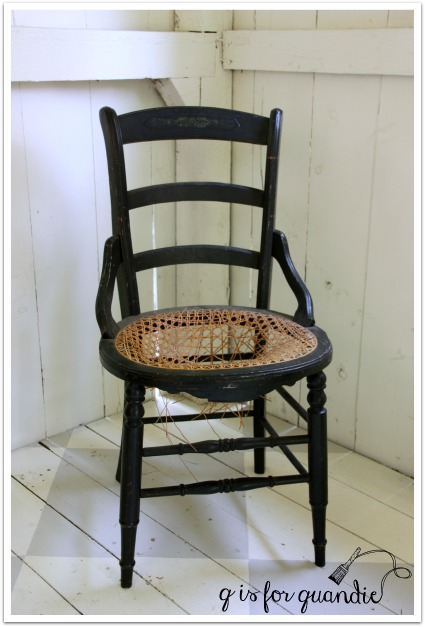
I hemmed and hawed about throwing this one in the cart. But it was only $5 and I knew it would make a perfect ‘planter chair’.
Here’s how to make your own planter chair. Buy a chair with a round hole where the seat once was. Add a hanging basket of flowers. And voila!

These are super cute on a patio or porch, or even just tucked into a garden bed somewhere. They are great for moving around to a spot in the garden that needs a little more height, or to fill in an area where perennials are not currently blooming.

If you’re wondering how long a chair like this will hold up out in the elements, I’d say I usually can get 2 – 3 seasons out of them, but ultimately they will get ruined. Since I’ve only spent $5 on the chair, I don’t feel like it needs to last forever.

I’m giving this one to Mr. Q’s mom for mother’s day though. I think she’ll get a kick out of it.
I’ve saved the item that earns ‘find of the day’ status for last. I didn’t actually get this piece at Bryn Mawr though. I took some time off at the day job last Thursday and was hard at work cleaning out my workshop when my friend Meggan texted and told me she’d seen an amazing bench at a garage sale just one town over. She included a photo and told me that the seller said it was made from a bed that her parents brought over from Belgium. That seemed like kismet, since my next trip to Europe will be to Belgium and my sister and I have been studying up in preparation. It clearly was meant to be mine! So I sent Mr. Q to the address with some cash and he came home with this.

Isn’t it awesome? I might even have to keep this one.


 Since I have to come up with five gifts and it’s on my own dime, I try to be creative and come up with something fun that doesn’t cost a lot of money. After all, it’s the thought that counts, I hope.


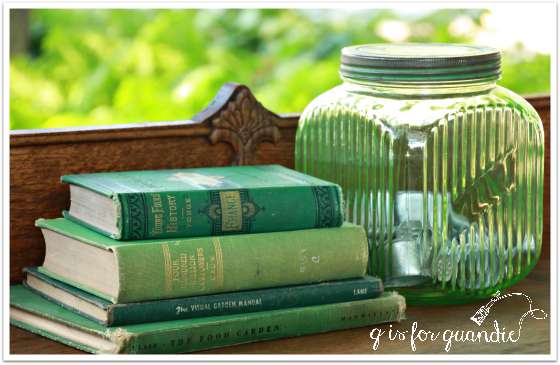
 This green depression glass canister belonged to my grandmother.