Late last winter I shared the story of the three pieces of furniture that I purchased from one of my readers, Mary. I finished the first two pieces earlier this year but the third piece was hanging out in my carriage house waiting for some more significant repairs.
Specifically, one of the legs had broken off the dresser and a big chunk of it was missing. I thought I had taken a great photo of the dresser in its initial ‘before’ state, but I can’t seem to find it anywhere. Drat!
I did manage to get a photo of the repaired leg before I painted it though.
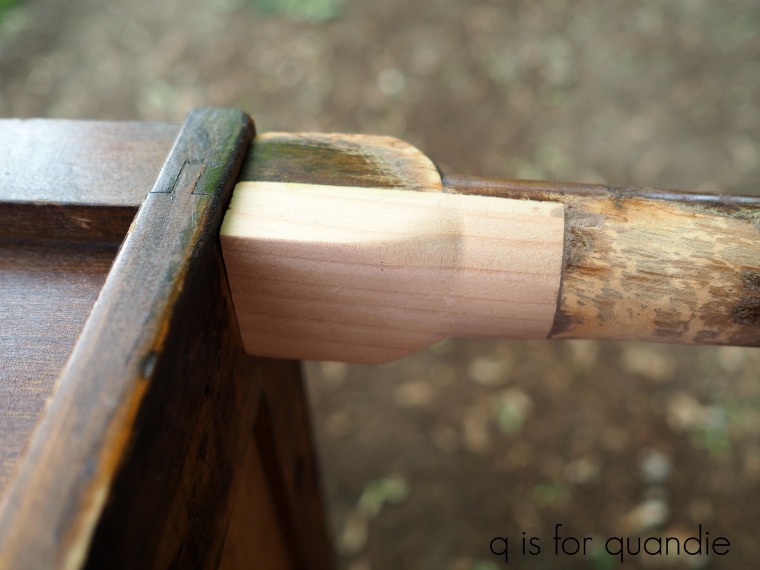
I have to tell you guys, when I first asked my handyman/neighbor Ken to take a look at this leg he gave me one of those looks. You know the one, the look that says you’ve got to be kidding me. But I had total faith that he could fix it and make it look like it was never even broken.
And I was right. Basically Ken cut away the broken portion of the leg. The he cut down and carved a new section of wood to match the shape of the original leg and glued it in place. The man is basically a miracle worker.
Next I realized that a piece from the side of one of the lower drawers was cracked and had broken off. We could have tried gluing that back together, but I don’t think it would have held up very well. So I came up with plan B, remove the lower two drawers and add a shelf to the bottom instead. Then the future owner could use baskets on that shelf instead of having drawers.
This involved another consultation with Ken, and a bit more work on his part, and here’s what I ended up with.
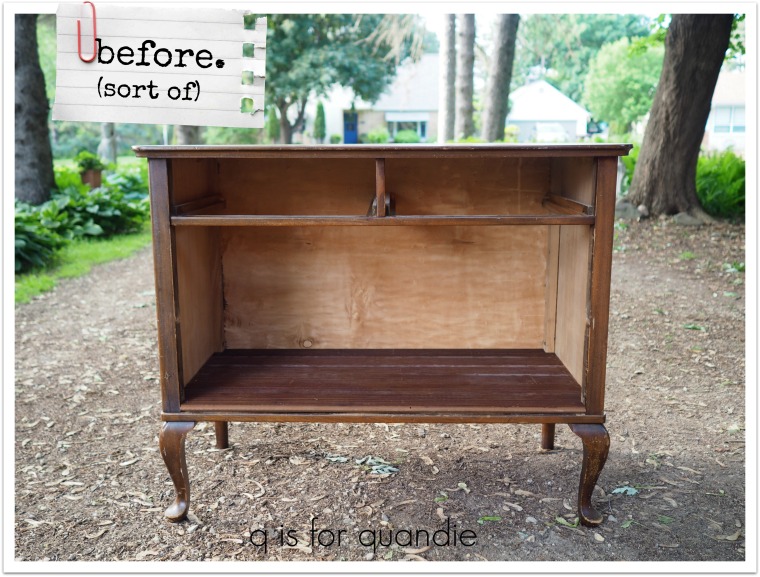
Ken removed the framework that was between the two bottom drawers, and he added a sturdier bottom ‘shelf’ made from the old bead boards from a ceiling that nnK tore out of her breezeway. Try to imagine that there are two smaller drawers still in place at the top because those are going back in.
The next task was to strip the top using Citristrip. That was easy enough.
Once I got that far, I was a little stumped about what color to paint the piece. It had to be something that would work with the wood top and wood bottom shelf because I was leaving both of those unpainted. I also wanted to use a contrasting color inside the bottom section. I debated using green, or maybe aqua, or even just white. But none of those choices felt right.
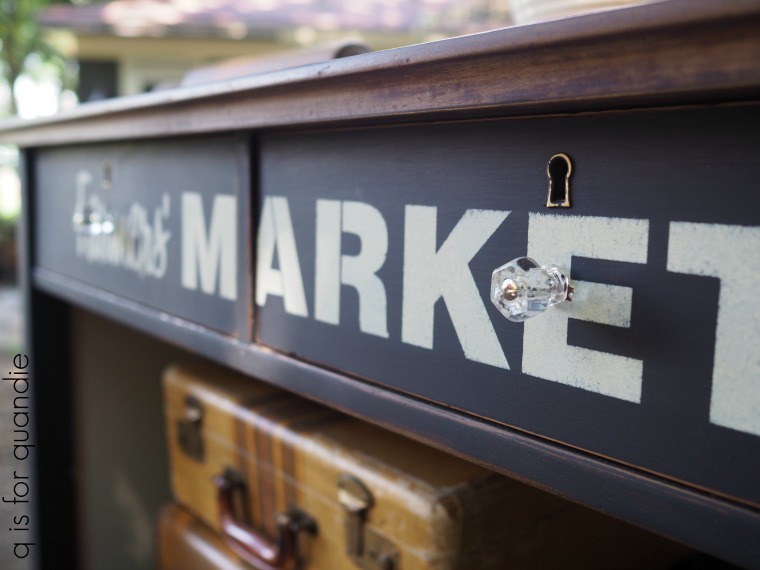
That’s when I decided to just go with what has become my favorite black, Dixie Belle’s Caviar.

And to brighten up the inside of the lower section, I painted it in Fusion’s Plaster. I also painted the insides of the upper two drawers in the same color.

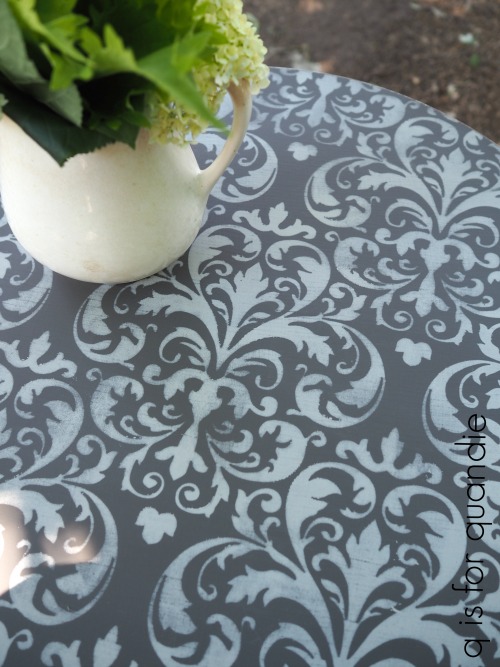
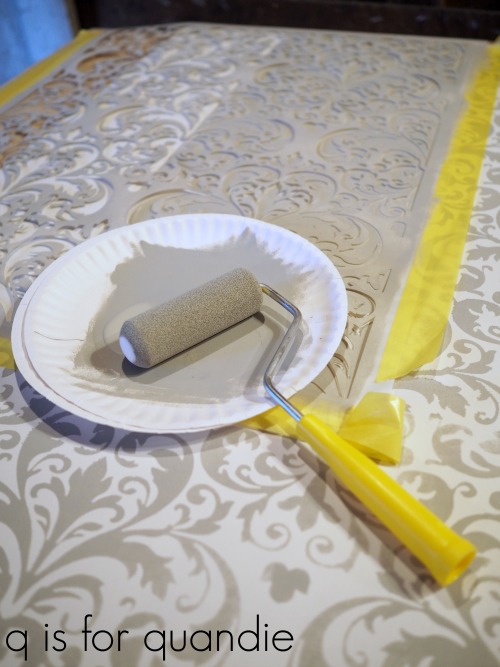
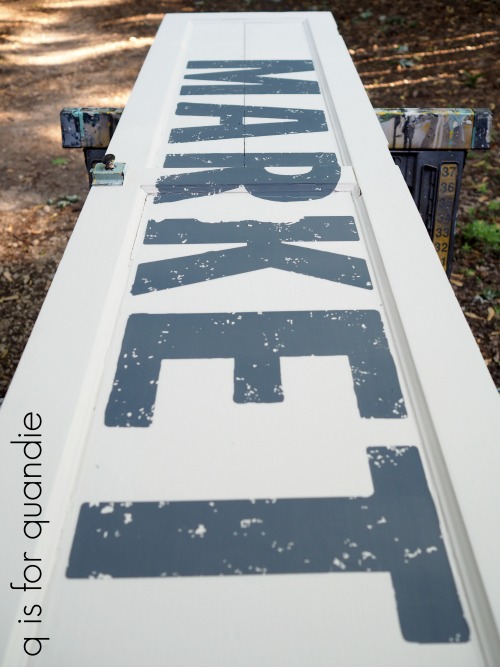
Then, while I had the Plaster out, I went ahead and used it to stencil ‘Farmers Market’ across the top two drawers.
It really wasn’t until this moment that I decided this piece would make an amazing kitchen island. But for that it needed to have some sturdier updated casters so that it could be moved around in a kitchen. The dresser had come with old wooden casters, but a couple of them no longer had the wooden wheel, just the metal framing for the caster.
So I removed all of them, but was unfortunately left with holes that were larger than the size of the new casters that I purchased at my local DIY store.
Once again, I called on Ken for assistance. He filled the old holes using a dowel stick and lots of glue. Once the dowel stick was in place, he cut it off even with the bottom of each leg.

Once the glue was dry, he drilled new holes of the correct size for the new casters.
Next I realized that I also needed to paint the back of the dresser if it was going to be used as an island floating in the middle of someone’s kitchen. So I gave that a couple of coats of Dixie Belle’s Caviar too.
Finally I used Dixie Belle’s Easy Peasy spray on wax as a top coat over the paint. I used Miss Mustard Seed hemp oil to freshen up the bead board lower shelf. And I used Miss Mustard Seed Antiquing Wax on the dresser top.
You might now be rolling your eyes and asking yourself ‘why oh why does she use so many products? couldn’t she have gotten by with just one?’ And the answer is yes, I could have. I could have used the Antiquing wax for the entire piece. It would have worked beautifully over the black paint, and it also would have freshened up the bead board nicely. However, it would have required more elbow grease for both of those than the products I did use and I’m a fan of saving myself extra labor whenever possible. So, three different topcoats it was.
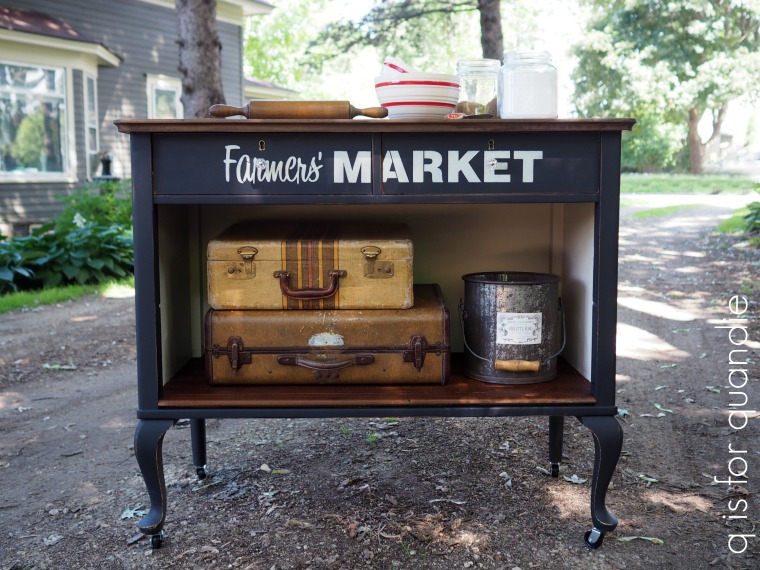
So after many starts and stops and decisions along the way, the Farmers Market Island is finished!
And I absolutely love it!
My sister loved it too and is inspired to create a similar piece for her own kitchen. I’ll be sure to share her project when she gets going on it.

In the meantime, if you are local and need a Farmers Market island be sure to check out my ‘available for local sale‘ page for more details!
P.S. Be sure to let me know what you think of the results on this one Mary!


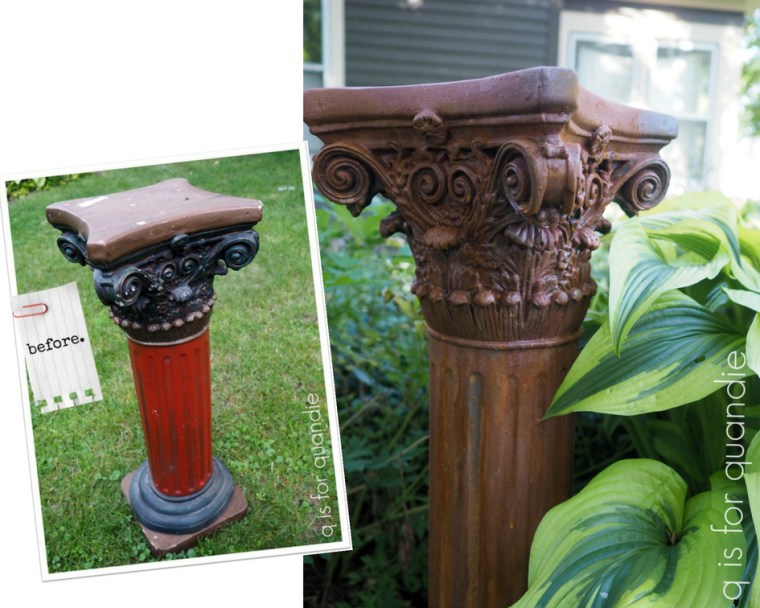
 So I got out my razor blade and started scraping off the paint. I didn’t completely remove all of it, but I did take it all off the top and the bottom portion of the pedestal where most of the peeling was occurring.