when it rains, it pours.

At the middle of last week I was lamenting how dry the ground was for spring.  Typically we get plenty of rain this time of year, so it was odd that I was debating getting out the sprinkler in mid-May.  But then it rained … and rained … and then rained some more.  That’s because I had taken a couple of days off at the day job.  First to recover from vaccination number two, and second, to get some stuff done in the garden.  If we need rain, all I have to do is take a vacation day to work in the garden and voila!  Rain.

OK, maybe I’m being just a little bit dramatic.

And the real reason for that blog post title has to do with old toolboxes rather than weather.

You may remember that the last time I posted one of my painted toolboxes it was already spoken for and I had several people who wanted to buy it.  I was really wishing I had more.

Here’s the thing about the toolboxes.  At the price I sell them for, I really can’t pay more than $10 for the toolbox to start with.  And it’s better if I can get them for $5 or less (even then I’m probably making about $5 an hour for the time that goes into them).

That may sound impossible, but they can be found at garage sales for those kind of prices.  At least here in my area (Twin Cities, MN).  I never find them that cheap at thrift stores though.  So back in February when I posted that last toolbox, I knew I probably wouldn’t have more to paint until garage sale season.

Then one of my readers contacted me and asked if I’d paint up a couple of toolboxes that she already had.  Typically I don’t do custom work, but I will make an exception if the client gives me carte blanche to do what I want, which she did.  I’ll be sharing what I did with her toolboxes in a separate post, so stay tuned for that one.

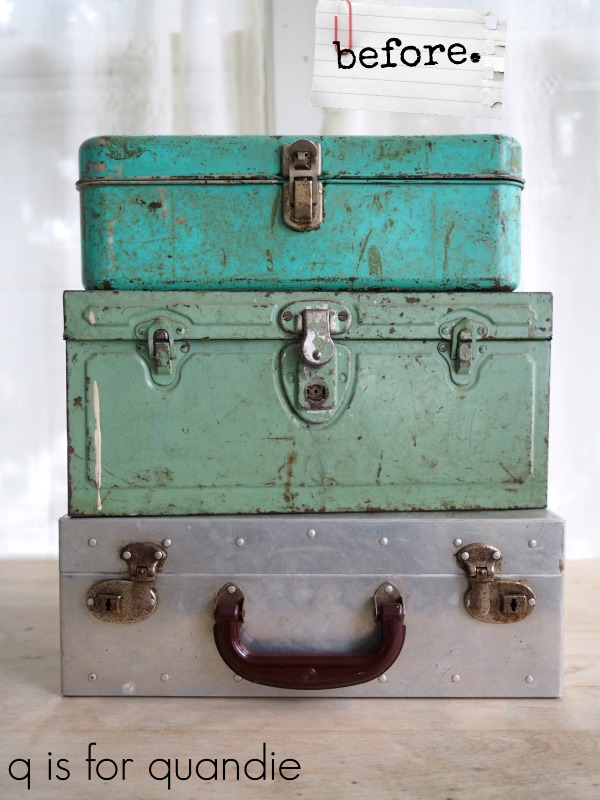
Next one of my co-workers found another toolbox for me and oops, I totally forgot to get a ‘before’ picture.  Well, no worries, you can just imagine an old rusty metal ‘before’.

For this one, I followed my usual prep process for old toolboxes; sanding down the rust a bit, cleaning well (in this case I used Dixie Belle’s White Lightning cleaner to remove any greasy residue), and then sealing the box with Dixie Belle’s BOSS which will help prevent the rust from coming back through the paint.

Then I painted the inside in a Dixie Belle color that I had not used before, Blueberry.

Isn’t that a lovely color?  Sort of a periwinkle blue.  I love pulling out these pretty colors for the insides of the toolboxes.  I’m not sure I’d ever paint a full on piece of furniture in this shade, but it’s perfect for a pop of color inside something like this.  And I’d definitely use this color on a kid sized chair.

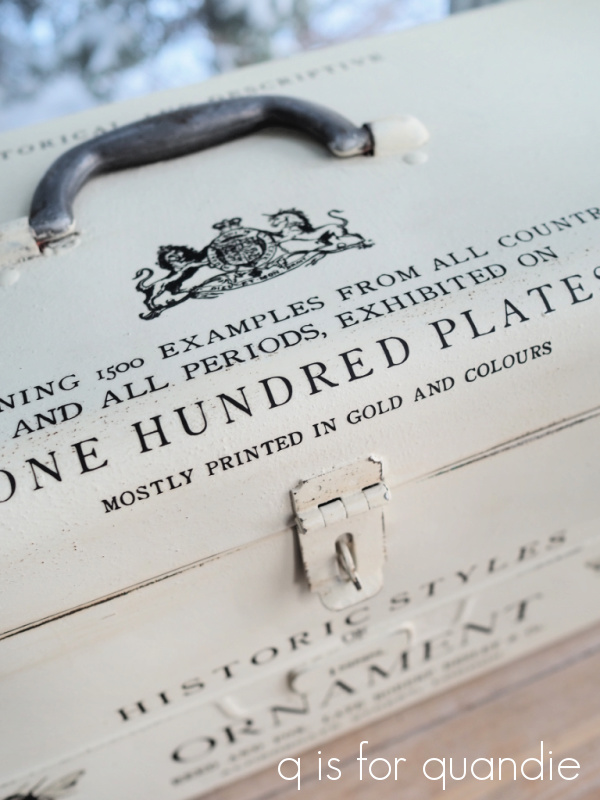
Next I painted the outside in Dixie Belle’s Drop Cloth.  Then I pulled out my transfer scrap pile.  I have quite a few remnants of transfers left over from projects where the entire transfer didn’t quite fit.  I had a 4″ section left from the bottom of the large version of IOD’s Le Petit Rosier transfer and it fit perfectly on the front of the toolbox.

Then I pondered what to put on the top.  With all of my other toolboxes, I’ve been sticking with just black transfers.  This time I decided to add a little color with some florals.

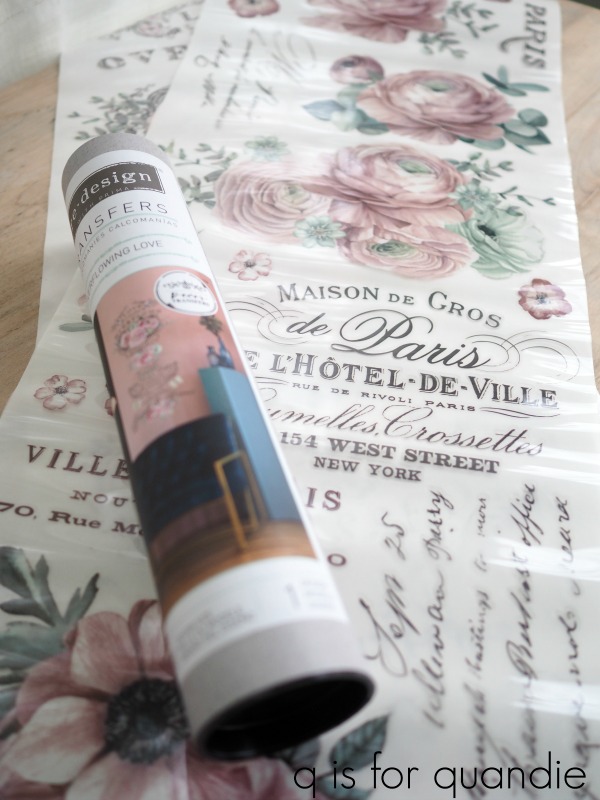
I had a partially used re.design with prima transfer called Wondrous Floral II, it has the prettiest flowers and in particular I thought the blue hydrangea would tie in well with the Blueberry interior of the toolbox.  The transfer didn’t fit perfectly ‘as is’, I ‘cut and pasted’ the individual flowers where I wanted them.

I added one to the side of the toolbox as well.

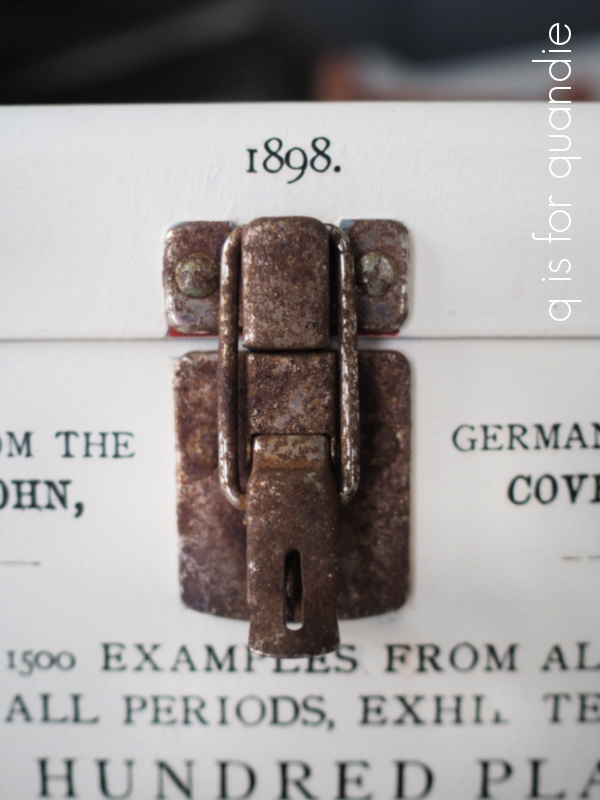
I left the handle and latch untouched.

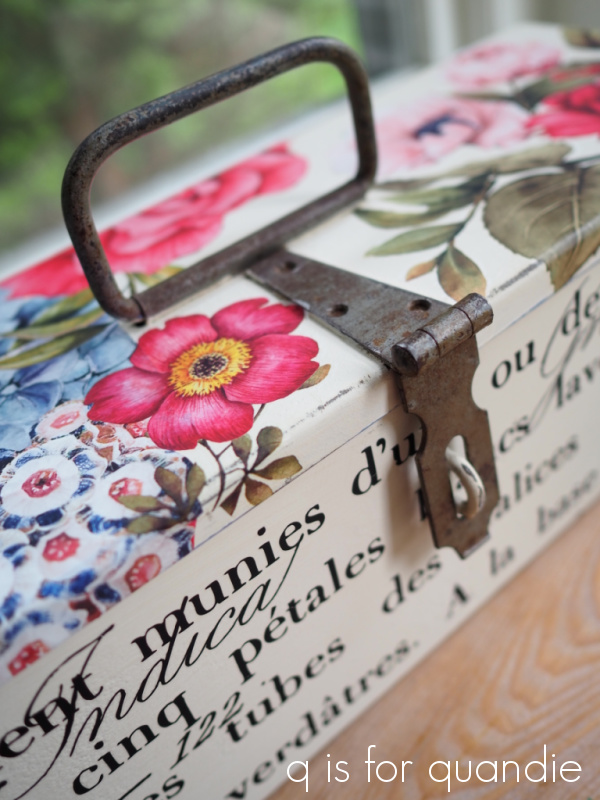
They have an awesome patina, don’t they?

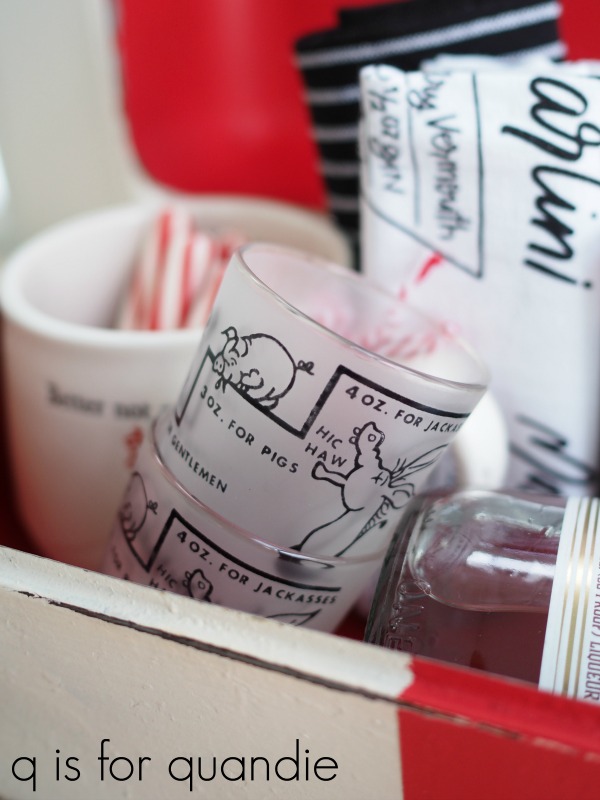
This toolbox would be the perfect container for gardening, or floral arranging, supplies.

Sidebar note, that is one of my favorite lilacs.  Isn’t it gorgeous?

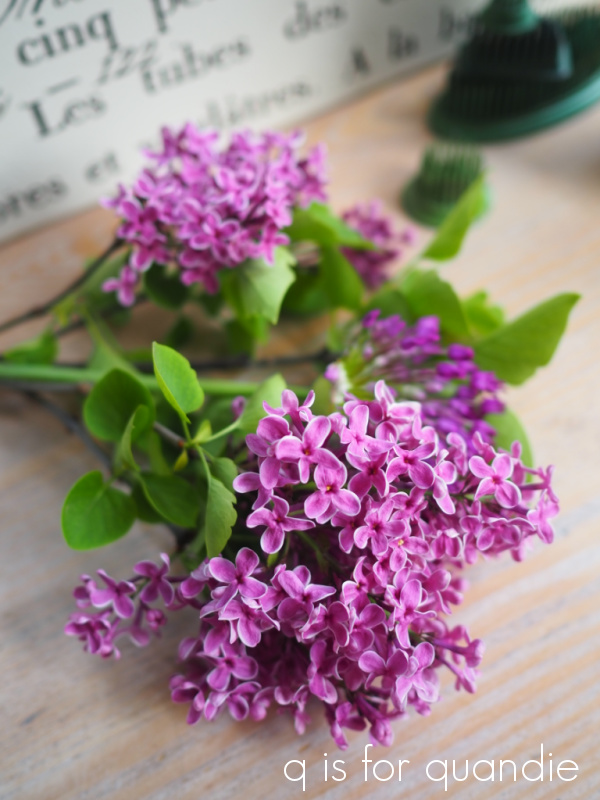
If you’ve followed the saga of my sad lilac hedge, that lilac is one of the original plants I put in 10 years ago.  I started out with a row of really gorgeous modern hybrids rather than the classic old fashioned variety (because of course, who wouldn’t want the prettier ones?).  None of the hybrids have done well.  Over the last 8 years or so I have ended up pulling out at least one or two at a time and replacing them with the plain, old fashioned ones.

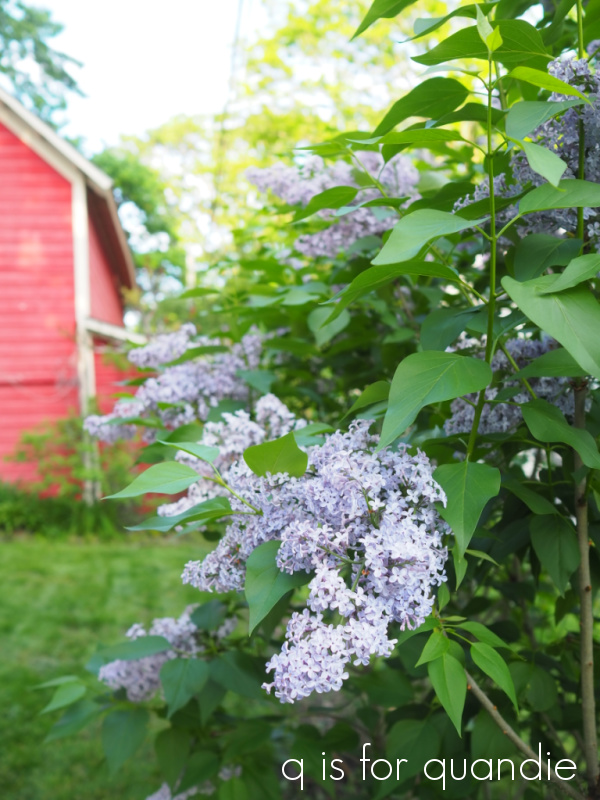
The old fashioned ones are growing (and blooming) like gangbusters now, while the hybrids continue to look scraggly.  I’ll be pulling out two more this year and replacing them.

Anyway, I digress.  Back to today’s post.  You might be thinking hey, she said ‘when it rains it pours’ and three toolboxes don’t really constitute pouring.  Especially when two of them are custom projects.

Well, while I was working on these three, my picker found 4 more toolboxes for me!

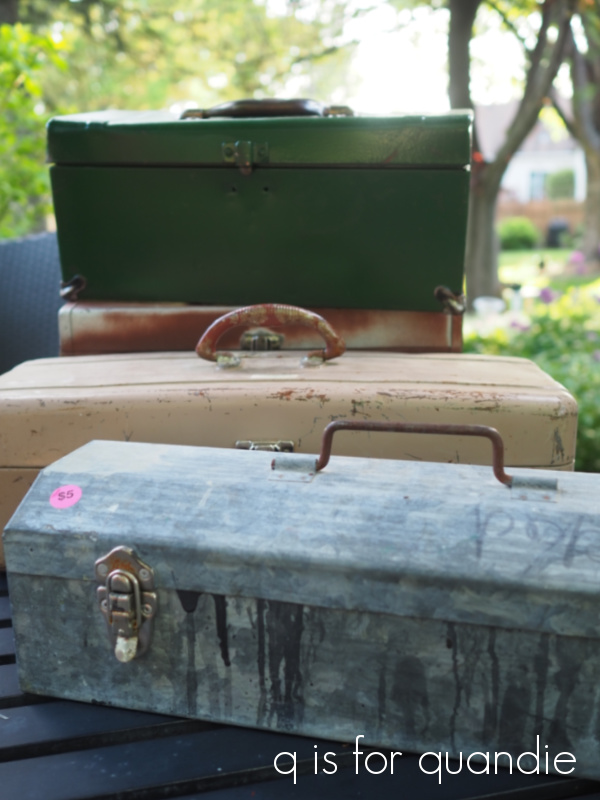
So there’s going to be a few more painted toolboxes in my future.

In the meantime, this one is already spoken for.  If anyone would like to be on a waiting list for the next four, be sure to send me an email at qisforquandie@gmail.com.

So, tell me, what do you think of this one?  Are you a fan of the flowers, or do you prefer the wordier ones?  And have any of you had success with hybrid lilacs?  I’d love to know, so be sure to leave me a comment.

Thank you to Dixie Belle Paint Co for providing some of the products used in this toolbox makeover.

toolbox no. 3

Sometimes when you have a formula that’s working really well you just have to stick with it.

This is the umpteenth toolbox that I have painted, and the 3rd one that I have specifically painted in Dixie Belle’s Drop Cloth.  Each time I post one of these I have multiple people who’d like to purchase it, so I thought, why not do another?

Before I proceed with today’s post though, I want to mention that this one is already sold.  I offered it to one of the people that missed out on the last one and she has already come by and picked it up.  In fact, I think I am going to start keeping a list of who wants one so if you want to be on the list let me know (you can leave a comment on this post, or email me at qisforquandie@gmail.com).  I am definitely going to be on the lookout for more toolboxes!

In the meantime, I popped out into the carriage house and looked around to see if I had any toolboxes left, and sure enough I did.

Yikes!  It was in rough shape though.  But then again, they have all been in pretty rough shape.  I think that is part of their charm.

So, once again I sanded off the rough spots a bit, then scrubbed it up with Dawn dish soap, let it dry and then gave it a coat of Dixie Belle’s BOSS to seal up that rust. Although all three of the toolboxes have been painted in Drop Cloth on the outside, I’ve chosen a different color for the inside of each.

The first one was Peony.

The second one was Flamingo.

And now this one is Apricot.

I apologize that I haven’t really kept track of the names of the different decoupage tissue papers I’ve used to line them.  If you really want to know, leave me a comment and I’ll look them up for you.

But in the meantime, which is your favorite color for the inside?  I originally thought the Peony was perfect, but then I loved the warmer color of the Flamingo, and now I must say that I also think the Apricot is lovely.

Although the outside is Drop Cloth on all three, the snippets of transfers I’ve used are slightly different on each.

The first one had the large crown on top, and sort of naturalist themed wording.

The second one has a crest on top and the historic styles of ornament wording.

This last one is similar with the wording just moved around a bit.

I did treat the hardware a bit differently this time around.  It was quite rusted up, which isn’t necessarily a bad thing in my opinion …

But I decided to spruce it up a bit.  So I pulled out the new Gilding Waxes from Dixie Belle.

I chose the Bronze and applied it to both the latch and the handle.

I had first sanded the handle to get it a little more smooth, but I think you can see that I left the texture of the rust in place for the most part on the latch and just applied the wax over it.  Once again I used a small artists brush to apply the wax because I wanted to be precise and not get any on my white paint.

After letting the wax dry overnight, I buffed it a bit to bring out some shine.

I just love working on these toolboxes, although they can be a bit putzy.  There is a lot of ‘paint the outside, let it dry, paint the inside, let it dry, paint the bottom, let it dry,’ going on.  Each step doesn’t take more than 5 minutes, but there is a lot of drying time in between.  They are great projects for those of us who have day jobs because each evening after work you can add a coat of something and by Saturday you are ready to add transfers!

And that’s the really fun part.  I cut them up and place them where I think they look best, and sometimes I keep adding more here and there until I have a look that I like.

Here’s hoping I find a few more toolboxes to paint at garage sales this summer!

another sales pitch.

I hope no one is too disappointed to realize that today’s post is nothing more than a thinly veiled sales pitch.  Well … for that matter it’s not really even veiled at all.  It just is a sale pitch.

Remember the tool box that I shared back in October?

It was snatched up right away by one of my local readers.  There were a couple of additional readers who expressed interest in buying it, but they were too late.

However, I just happened to have more toolboxes on hand, so I told the 2nd interested party that I would paint another one for her.

As you can see, it’s not exactly the same.  I used some different sections of the IOD Label Ephemera transfer on this one.  But it’s very similar in style.

I also used a different color on the inside of this one.

This time I used Dixie Belle’s Flamingo to add a pop of color to the interior.  Last time I used Peony.

Once again I also lined the bottom using one of re.design by prima’s decoupage tissue papers.

So, you must be wondering at this point, why is Q calling this a sales pitch when she already has a buyer lined up for it?

Well, my buyer didn’t follow through.  I’ve reached out to her a few times but, as you can see, I still have the toolbox.  I’m not complaining, I know full well that people get busy, life gets crazy, etc.  The best laid plans and all … especially these days with COVID running rampant.

But I think it’s time for me to stop beating a dead horse, move on, and see if someone else wants to purchase it.

The price is $38 and the toolbox is 20.25″ wide x 8.5″ deep by 9.75″ tall.  Quick update:  I do have a buyer!

As you all know, I don’t like to ship things (I’m just not set up for it and so far haven’t found that I need to be) so the potential buyer will have to be a local who can pick it up.  If interested, you can email me at qisforquandie@gmail.com, or leave a comment here on the blog.  First come, first served.

If there aren’t any takers, it will go in the pile of things I’m putting together for the next time I take a load of items to the shop that sells things for me, Reclaiming Beautiful in Stillwater, MN.  I’m sure that eventually this piece will end up going to a good home!

the ugly, old, rusty, crusty ones.

I’ve long been a fan of old metal toolboxes.

But I have to say, it’s rather rare to find them with an original painted finish in a good color.  The ones in nice colors tend to be priced a bit higher too.

So I’ve been known to make do with the ugly, old, rusty, crusty ones that no one seems to want.  I clean them up and give them a paint job, like this fun one that I painted as a gift for my Secret Santa recipient at work last year.

That was such a fun one to fill up!

Another of my favorite painted toolboxes of all time was this one that I also did last year just before Christmas.

Over the summer my friend Sue found a nice little pile of the rusty, crusty toolboxes for me to work some magic on.  I’ve been hanging onto them until the weather got too cold to paint out in my workshop, thus requiring me to move my painting production indoors.

Well, it snowed this past weekend, so I decided that meant I could get going on these.

But wait a minute, back up a bit … a week ago Friday it was 80 and sunny here in Minnesota  (yep, we went from sunny and 80 one week, to snow the next, that’s how we roll here in the Midwest where there aren’t any moderating influences from a nearby ocean).  Knowing that cold weather was coming, I prepped all of these by washing them in the yard using my garden hose and spray on Dawn dish soap.  I let them air dry and then gave them a coat of Dixie Belle’s B.O.S.S. in clear.  I’ve used B.O.S.S. to seal up rusty toolboxes before and it seems to work well.

Today’s q tip:  Only use B.O.S.S. as a sealer if you’re going to paint over it.  If you want to just seal a rusty toolbox without painting it, use one of the clear top coats.

I worked on toolbox no 1 first.  It was definitely the rustiest of the lot.  I started out by painting it in Dixie Belle’s Midnight Sky on the outside, and Sawmill Gravy on the inside.  If you’re going to try this at home, I have to warn you, painting a toolbox inside and out can take a while.  Not because you’re spending a lot of time painting, but because you’re spending a lot of time waiting for paint to dry.  You have to let the top dry before you paint the bottom, let the inside dry before you can shut the lid, and so on.

Anyway, once I had it painted I added some bits and pieces from the Somewhere in France transfer from re.design with prima.

I also added a gold bee to the top from their Gilded Home & Nature transfer.

As you can see, I did leave some bits in their original rusty condition.

Finally, I lined the inside of the box with some of re.design with prima’s decor tissue paper.

The inside of the box is sealed with Dixie Belle’s Gator Hide, which is also the product I used to decoupage the tissue paper.  The outside of the box got a coat of clear wax (Gator Hide can leave black looking filmy or streaky).

I also completed toolbox no 2 over the weekend.  This one is painted in Dixie Belle’s Drop Cloth on the outside and Peony on the inside.

Isn’t that pop of pink brilliant?  I just love it.  I used some decor tissue to line this one too.

Next I pulled out the IOD Label Ephemera transfer and added some wording to the outside.

The bees are from the Classic Vintage Labels transfer from re.design with prima.

The crown is from the Lovely Ledger transfer, also from re.design with prima.

I ended up adding a quick coat of Dixie Belle’s Midnight Sky to the handle to clean it up a bit.

Initially my plan was to take both of these in to the shop to sell.  I need another painted toolbox like I need a hole in my head … but … I really love how this 2nd one turned out!

I liked it so much that I rearranged my living room shelves in an attempt to accommodate it.  But no, it really didn’t work there, so I will take it off to the shop after all.  Probably on Wednesday.

You can check out my ‘available for local sale’ page for pricing info.

As always, if any of my local readers want to snatch it up first just let me know by either leaving a comment or emailing me at qisforquandie@gmail.com

Thank you to Dixie Belle Paint Co and re.design with prima for providing some of the products used in today’s makeovers.

better not pout.

Today I’m sharing the gift that I put together for my Secret Santa recipient at work.  Since we’ve exchanged our gifts by now, it’s safe to go public with this one.

I started out with another crusty old toolbox that my picker found for me.

When they start out this crusty, plus are an unappealing color like … hmmm … what can I call that color that is blog appropriate? … I like to give them new life with paint.

In this case I also decided it was a good idea to seal it (after washing it thoroughly of course).

This time I used the Dixie Belle BOSS as a sealer.  I gave it one coat inside and out and let it dry 24 hours before painting.  I probably could have gotten away with painting sooner this time, but the BOSS is most effective if given a day to dry.  Better safe than sorry, right?

Next I painted the entire outside of the box in two coats of Dixie Belle’s Drop Cloth.  Once that was dry, I taped off a red cross and then painted that plus the inside of the box in Honky Tonk Red.

I sanded the edges to distress and then added one of the newest re.design with prima transfers.

I bet you guys are going to love this new set of transfers as much as I do.  This one is called Classic Vintage Labels and contains a collection of 27 ‘labels’.  These are going to be perfect for use on clay pots, galvanized watering cans, glass jars … the possibilities are endless.

I decided to use a more durable top coat than wax on the inside of the box so that it would hold up to potential liquid spills (based on the contents, which you’ll see in a minute), so I pulled out Dixie Belle’s Clear Coat Flat.  I applied it using a new to me tool, their blue sponge.  To use, simply dip the sponge in the clear coat and wipe it on.  It worked really well for this project.

My red and white color scheme had a double meaning.  First, I wanted the box to look like a first aid kit (sort of an ‘open in case of emergency’ vibe) and second, it also has a peppermint theme.

I’ve included all of the ingredients for making Peppermint Patties.  In case you aren’t familiar, that’s basically hot chocolate with peppermint schnapps.

I threw in this pair of vintage shot glasses that I found at an estate sale …

Plus this cute mug from Hobby Lobby …

You might think I was super creative when I thought to add some broken candy cane stir sticks to my photos, but that wasn’t quite how it happened.  Actually, as I was setting up for my photo shoot I dropped the mug with the sticks inside.  Fortunately the mug survived the fall, but every single one of the candy canes broke.

Luckily I just happened to have a second package of them so my photo shoot was salvaged and I decided to put the broken sticks to use as props for my photos.

Hopefully my Secret Santa recipient loved her gift!

I know I really enjoyed putting it all together!

Thank you to Dixie Belle Paint Co and re.design with prima marketing for providing the products used in this project.

oh deer.

Congrats to Laura Hopwood, the winner of the day no. 2 prize.  I’ll be drawing a name for the winner of the day no. 3 prize tomorrow (is this getting confusing for you guys too?  I’m doing my best to keep track of it all), if you haven’t commented on that post you have until midnight tonight!

In the meantime, today is day 4 of my 12 days of giveaways, and I’m first sharing the transformation of this adorable (if I do say so myself) metal toolbox.

This toolbox started out looking like this …

My picker, Sue, found this for me.  She always grabs metal toolboxes when she sees them.  She knows I love to give these a new life with some paint.

To begin with I washed the toolbox using Dawn dish washing soap to cut any grease that might have been left behind by the former owner.  Next I added a coat of Miss Mustard Seed’s Tough Coat Sealer to prevent the rust from coming through my paint.

Today’s q tip:  Keep in mind that the Tough Coat Sealer does not block stain from bleeding thru (try the Dixie Belle BOSS for that), but I have found that it works well as a protective coat over rust.  It also works well as a top coat for a rusty piece when you want to retain the rusty look.

Next I pulled out a couple of new Dixie Belle paint colors, Sawmill Gravy and French Linen.  I can tell you now, both of these colors will be making their way onto my list of favorite neutrals.

I first painted the entire toolbox in two coats of the Sawmill Gravy.  Once dry, I taped off a wide stripe down the middle and painted it in the French Linen.  After that dried, I sanded the box lightly and then added a few sections from re.design with Prima’s Deer transfer.

I have to say, I totally underestimated the cuteness factor of this transfer!  When I first saw it I thought it was only going to be good for some sort of man-cave or hunting shack item.  But then I looked a little closer and realized it had a reindeer on it.

Seriously!  How cute is that?

If you have a few men in your life and you are looking for something that’s not feminine and flowery, be sure to check out the Deer transfer.  And if you really do need to dress something up for the hunting shack, this transfer would still be perfect for that too 😉

Now, for today’s giveaway.  I wish I had a spare Deer transfer, but unfortunately I don’t.  I do, however, have some Sawmill Gravy and French Linen to give away.  I also thought, why not give them away along with the toolbox itself?  They fit perfectly inside.

Thank you to Dixie Belle Paint Co for sponsoring this giveaway by providing the paint, and to Prima Marketing for providing the Deer transfer that I used on the tool box.

The rules:  to be eligible to win today’s prize leave a comment on this blog post.  If you can’t think of anything to say, just tell me what you would keep in this toolbox.  Your comment must be left on the blog, not on Facebook or Instagram.  You are not required to follow my blog, although it would be awesome if you did!

I will randomly draw the name of a winner for today’s prize from all of the comments left on this post by Friday, December 6, 2019 at the stroke of midnight (U.S. Central time).

The fine print: no purchase necessary, you must be 18 years of age or older to win, void where prohibited by law, the number of eligible entries received determines the odds of winning, approximate retail value of prize is $65, if the prize is not claimed by Sunday, December 8, another name will be drawn at random to win, blah, blah, blah.

Good luck!

restyled tool box.

Earlier this summer I picked up an old wooden tool box at a garage sale.

Funny enough, I took that ‘before’ photo on my deck before Mr. Q cleaned it up, so there’s another good shot of where he started from on the deck.

Anyway, the tool box itself also got cleaned up and then I added a couple of coats of Dixie Belle paint in Midnight Sky.

Next I pulled out one of Prima Marketing’s Decor Moulds called Royalty.

I used their Modeling Material to make two of the crowns.  Next I used some wood glue to attach one to each end of the tool box.

I let them dry overnight and then painted them with the Midnight Sky as well.  Once the paint was dry, I rubbed on a little of Prima Marketing’s metallique wax in Bronze Age.

I also added one of my favorite stencils to the front of the box.  I’d love to share a source for this particular stencil, but I purchased it on Etsy from a vendor that no longer sells there.

I filled the toolbox with some ironstone, some old silverware and a beautiful monogrammed tablecloth.

I just love old white on white embroidered linens.

I actually completed and photographed this project quite some time ago.  In fact, it was way back when the peonies were in bloom.

I just never got around to sharing it with you until now.

Although I got two pieces of furniture finished this week, I never found time to photograph them.  So I needed a quick blog post to fill today’s spot, but I’ll be back next week with some more furniture transformations.

In the meantime, tomorrow is one of my favorite neighborhood garage sales, MacGrove.  Keeping my fingers crossed that I come across some fab finds there!  How about you?  Got any fun weekend plans?

somewhere in France.

Here’s a sneak peek at another of the fabulous new transfers coming soon from Prima Marketing called Somewhere in France.  Well, technically, I used only a small part of one of the three transfers that come in this set.

When I unboxed the transfers I immediately wondered how they would look over black.

Although it was a bit difficult to capture in a photo, they are a subtle metallic gold.

Since I wanted to give that a quick test before I planned an entire piece of furniture around one, I decided to try it on an old toolbox that I have.

I got this toolbox from my friend (and picker) Sue.  It’s bigger than it might look in that photo at 22″ wide by 7″ tall.

Each of the three sections of this transfer set are about 24″ wide x 9″ tall.  So I just used the bottom two lines of one.  I simply cleaned the surface of the toolbox and then applied the transfer as per usual.

I wanted to show you guys a close up of how the transfer looked freshly applied.

See that sort of halo or white filmy look around the letters?  Well, look what happens when you apply just the smallest amount of Fusion’s Beeswax Finish over the transfer.

It totally disappears.  Keep that in mind if you end up purchasing this transfer.

And I have to say, the gold looks positively amazing over black, doesn’t it?

This toolbox sits on a shelf in my living room.

And here’s a little secret, it actually holds all of my waxes and other top coats.

It’s a great way to store my painting supplies, sort of hidden in plain sight.  Since I paint in the piano room during the winter, it makes sense to have all of my supplies nearby.

I’ve seen pictures of this transfer used over white and that creates a beautifully subtle look, so I’m definitely going to try that sometime too.

The Somewhere in France transfer is not yet available to purchase.  However, this design should be shipping to stores in mid-April so be sure to look for it then.

If you’re wondering where to purchase the Prima Marketing transfers, check out their ‘where to buy’ page.

toolboxes playing dress up.

Recently Prima Marketing sent me a few of their newest transfer designs.  To be honest, it might have been the best thing I received for Christmas this year!

They’ve got a couple of new kinds of transfers; foil transfers and adhesive transfers which are used with metallic foils.  I’ll be experimenting with both of those styles down the road, but for today I’m sharing some of their newest transfer collections.

I’m calling them ‘collections’ because these sets aren’t meant to be used as one large design on a single piece, but instead they have a bunch of smaller designs on each sheet that are meant to be cut up and used separately.  This makes them perfect for smaller projects, like dressing up some old toolboxes.

I’m guessing that I’m not the only one here who likes a rusty old toolbox.  Sometimes I re-paint old toolboxes, but when they are already a fab color I like to leave their original rusty patina alone.

But adding a little something extra is good too.

I started with this collection of transfers called Overflowing Love.

This one comes with two sheets of transfers, the one shown above which has several different designs and is meant to be cut apart and used individually (on the right below) and a second sheet with a full design meant to be kept together (on the left below).

It’s like getting two for one!

I added a couple of the big roses to the top and side of my turquoise toolbox.

They were super easy to apply.  I made sure the toolboxes were clean and dry first, and then I just rubbed them on.

Next I pulled out the Everyday Farmhouse collection.  This one comes with three sheets inside, all with various wording or numbers.

This is perfect for giving something a less flowery, more farmhouse-y rustic look.

You could literally do dozens of small projects with just this one set of transfers.

Finally, for a definitively industrial look, I pulled out the Industrial Mechanics transfer.

This set comes with three sheets that could be joined up together to create one large design.  Or you could use just part of it like I’ve done on this last metal case.

It has a chalkboard-ish sort of look to it, don’t you think?  This transfer would be perfect on a desk.

I use these toolboxes to store my craft supplies.

They work great for holding my hot glue gun or other crafting tools too.

Got any ideas for things you could use these new transfers on?  If so, please share in a comment.

If you’re wondering where to purchase the Prima Marketing transfers check out their ‘where to buy’ page.

my picker’s finds.

It’s official, I have a picker!  What’s a picker, you ask?

Here’s the official definition.

pick·er ˈpikər/ noun

a person or machine that gathers or collects something. “a tomato picker”

a person who plays a plucked instrument, especially a guitar, banjo, or mandolin.

“banjo pickers”

My picker doesn’t play the banjo or pick tomatoes (although she does pick strawberries every year), but when she sees something at a garage sale that she thinks I might like she buys it for me.  My picker is my friend Sue, who is also my partner for the Carriage House sales (which are currently on an indefinite hiatus) and also a co-worker at my day job, and also a neighbor, but most importantly she is my garage sale mentor.  If it weren’t for Sue, I probably never would have even tried garage saling.  She taught me the ins and outs of finding the good stuff over 20 years ago.  I shared a tour of Sue’s beautiful home and garden back in the early days of my blog (you can see that here and here).  I’ve been wanting to update that house tour this summer but haven’t found time yet.

But today I’m sharing a couple of fun pieces that she picked for me lately.

The first is this cute little stool.

OK, well maybe not so cute in its ‘before’ state.  But it’s very sturdy and I like the little slot that can be used as a handle to carry it around.  This would make a great gardening stool.

I started by sanding it down, especially trying to remove all of those paint drips.  If you don’t get all of those off of there, they will come back to haunt you when you later sand to distress your paint job as you may notice in my ‘after’ photos below.

Next I mixed up the same custom color of milk paint that I used on the bookcase I shared on Monday.  Mostly Homestead House’s Craftsman with a little of Homestead House’s Loyalist mixed in.

After two coats of paint, I sanded it well to distress, then wiped the dust off and added my favorite Prima Marketing transfer.  This is the small version of the Seeds transfer.

For you hosta lovers out there, that one on the upper left is called Lakeside Dragonfly.  It’s perfect for the front of the garden because it doesn’t get huge.

 By the way, I had to cut the transfer in half to space it around the handle opening and I didn’t use the entire thing.  I’m sure I’ll find somewhere to use the rest of the transfer.

After the transfer was applied, I lightly sanded over the whole top again and then added a top coat of the Real Milk Paint Co’s Dead Flat Finishing Cream.

I really do love using this finish over milk paint.  It’s so easy to apply and it provides a little more protection than wax or hemp oil.  It has a thick gel-like consistency, so you don’t have to worry about drips.  It will also provide plenty of protection for the transfer.

Sue also found a simple wooden tote (or toolbox if you prefer) for me.  I neglected to get a ‘before’ photo of it though.  Drat.  But it was made out of fresh, new wood and had never been painted.

So I added a couple of coats of different colored paints to give it a little fake history.  First a coat of Fusion’s Laurentien, then a coat of Miss Mustard Seed’s French Enamel, and finally a coat of Homestead House milk paint in Raw Silk.

I sanded the edges to distress down to some of those other layers of color.

Initially I was going to stencil this tote, but the stencil I had in mind didn’t fit so I used a remnant of another one of my Prima Marketing transfers instead, this time the large Seeds transfer.  I’d already used the rest of this transfer on a dresser.

That’s one of the things I love about these Prima Marketing transfers, you can cut them up and create several masterpieces with just one of them.

I originally filled the tote with books for the photos, but then I thought ‘what the heck, it’s summer, let’s fill it with greenery instead.’

Plus, I used a portion of the transfer on both sides of the tote so I wanted to show the other side anyway.

By the way, that gorgeous purple flower is a purple astilbe.  It just started blooming last week.

Since both sides of this tote have a design, one could easily use it in the center of the dining room table.

In case you are wondering what in the world I do with all of this smaller stuff after I transform it, the answer is that I take it to Reclaiming Beautiful (a shop in nearby Stillwater) to sell on consignment.

The stool is already sold, but this week I’ll be bringing in the tote along with a few other fun things I’ve finished up lately.

Some stenciled buckets …

The blue bucket is painted with Miss Mustard Seed milk paint in French Enamel.  As I’ve mentioned before, milk paint works beautifully over dull galvanized metal (it may chip more if the metal has a shiny coating over it).

A vibrant aqua toy truck …

Yes, I painted it this color.  It had also been painted by the previous owner, so I wasn’t defacing a collectible toy or anything.  This is Cece Caldwell chalk paint in Santa Fe Turquoise.  Just for fun I also added a small rub-on transfer to the hood too.

My sister picked up that truck for me at a garage sale one of her neighbor’s was having, so technically I guess I have two pickers!

I also have another painted wood tote (this one I found at a garage sale myself).  It’s also painted in Miss Mustard Seed’s French Enamel and then stenciled with a warm white acrylic craft paint.

So if you’re local, be sure to swing by Reclaiming Beautiful this weekend to see what other fab items they have in stock (open Thursday – Sunday only).