it’s beginning to look a lot like Christmas.

As I mentioned yesterday, we had our first snow here on Friday.  Go figure, we went from 80 degrees on Tuesday, to snow on Friday.  Lucky I finished getting my windows washed and the storm windows in place on Thursday!

There’s always something magical about that first snow of the season.  And what better way to celebrate than with a little Christmas project?

I’ve been plugging away at my pile of toolboxes, tackle boxes, and lock boxes.  As I was working on them, I decided it might be fun to give one a holiday look.  I have to admit, I chose one of the very simple lock boxes for this because I wasn’t sure I would like the results.  I figured if it didn’t turn out well, it was a small one and I could easily do it over.

Silly me!  How did I not realize how lovely a Christmas lock box would be?

OK, let’s start at the beginning.  Well, not precisely because I’ve gotten really bad at taking ‘before’ pictures lately.  But you can just picture your average putty colored lock box here.  Nothing special.

This one wasn’t really rusty or gross at all (that’s generally reserved for the toolboxes), so after washing it, I skipped over the B.O.S.S. step and went right to paint.  In hindsight, I won’t do that again.  Somehow that coat of B.O.S.S. just makes them easier to paint, although I can’t really explain why.

I went with Dixie Belle’s Silk paint in Fiery Sky on the inside.

It took three coats to get really good coverage, but red is just like that.

Next I painted the outside in two coats of Dixie Belle’s Sawmill Gravy.  Then it was time to get creative.  I first pulled out Dixie Belle’s Evergreen and Holly transfer and added the pretty poinsettias and holly to the box.

But then I felt like it needed just a little something more.  You know how I love to use typography.  So I pulled out another new Dixie Belle transfer called Vintage Post.

I trimmed out a section here and a section there and added them to my box.

It was precisely what the box needed.

The typography doesn’t have anything at all to do with Christmas, but those fonts have a holiday look to me.  What do you think?

I finished off the outside of the box with a couple of coats of Dixie Belle’s flat clear coat.  I didn’t need to clear coat the inside because the Silk paint has a built in topcoat.

Wouldn’t this lock box be perfect for storing your most treasured vintage glass ornaments?

It would also make an amazing gift box!  If you have someone special you’re exchanging gifts with this Christmas, why not package it in a fabulous lock box?  Or simply fill it up with homemade baked goods, or Christmas candy.

I’m definitely going to do some more of these holiday themed boxes.  I just can’t get enough of ’em.  Well, I say that now, but by mid-December I’m sure I’ll be sick of anything that’s red and green.  But for now, staging these photos sure was a fun way to welcome the first snowfall of the year.

So tell me, is it looking a little like Christmas where you are?

This Christmas lockbox is for sale, so be sure to check my ‘available for local sale‘ page if you are local (sorry, I still don’t ship my creations) and in need of a fabulous lock box.

Thank you to Dixie Belle Paint Co for providing the paint and the transfers used on this project.

just for judy.

Thank you to those of you who took the time to leave an encouraging comment about my ‘sunday mornings in the garden’ posts. I was reminded that even though many of you never leave comments, you’re still out there reading and enjoying (hopefully) my posts.

I think the most surprising feedback I had was from my neighbor’s mom, Judy.  I popped across the street for lunch one day and Judy was visiting and she mentioned how much she enjoyed my gardening posts and wished I wouldn’t discontinue them!  I didn’t even realize she followed my blog.

So just for Judy, and the rest of you who said you didn’t want me to quit posting about the garden, I am going to continue with ‘sunday mornings in the garden’, just maybe a bit more sporadically.

Which brings me to today’s garden subject, fall color in the garden.  I have to say, I really do think fall is the most beautiful season of the year.  It’s an unfortunately short season, but I sure do enjoy it while it lasts.

Now I have to admit, I have not done all that well with adding fall color to my garden.  I don’t have a single tree that turns a beautiful color in fall.  Well … that’s not entirely true, I do have a huge maple next to the driveway that eventually turns a pretty yellow, but it’s not a show stopping orange or red.

But that photo is from a few years ago, this tree turns really late in the season and it’s only just starting to show a tiny bit of color now.

We’ve attempted to add pretty fall color trees to the front yard, but we’ve had bad luck with trees in that spot.

Since we’ve lived here we’ve had two trees in front that have come down in wind storms.  I feel like there’s something about this spot that funnels the wind through in some way.  The last one came down in September 2019 and we still haven’t talked ourselves into replacing it.

But gosh, that tree sure was pretty in the fall.

I think I’m talking myself into replacing it again as I’m writing this post!

Anyway, I also have to say that luckily I don’t have to just rely on trees in our yard to provide fall color, just down the street there are some trees that put on an amazing show every fall.

I get to admire those regularly from my piano room window.

In addition, you don’t have to rely solely on trees for fall foliage.  There are shrubs that provide some fabulous color too.  One of my favorites is Tiger Eye Sumac.

My Tiger Eye is planted right next to a Vanilla Strawberry hydrangea, and the flowers on that also turn a deep red as the season progresses.

And of course, all of my various hydrangeas add nice color to the garden in the fall.  The Limelight turns a pretty combo of pink and green.

I also get a surprising amount of pretty fall color from some of my perennials.  Have you seen how many gorgeous options there are out there for heuchera these days?

This one is called Fire Alarm, and it’s the perfect color for fall.

Believe it or not, there are also some varieties of hosta that change color nicely in the fall.

Not all hostas turn color like this, but if you google it you can find lots of recommendations for those that do.

I also rely a bit on annuals to add some fall color to my garden.

I feel like a few of my favorite garden vloggers have been dissin’ the mums lately, but I like to pop a few into my containers after pulling out the more brightly colored summer annuals.

I try to stick to a moderate budget of $100 for that though because the fall season just tends to be so short for us here in Minnesota.  I filled the front window box with some inexpensive mums from Home Depot, and then filled in with some of my dried hydrangeas.

I left the Lemon Coral sedum in place because it’s pretty hardy.  It won’t make it through the entire winter here in zone 4, but it can handle some freezing nights in fall.

But speaking of fall being a short season, we went from 80 degrees last Tuesday to snow on Friday.

So, I guess you could say our fall season lasted about three days this year.

The snow didn’t stick around long, it was gone by lunchtime.  But it was certainly a reminder that summer is definitely over and winter is coming.  We should all enjoy fall while it lasts!

an indiscriminate painter.

Despite what may seem like evidence to the contrary, I’m not an entirely indiscriminate painter.  I don’t think that absolutely everything can be improved by slapping some paint on it.  There have been times when I’ve passed up purchasing an item because I don’t think it should be painted, and yet it’s also something that won’t appeal to my market ‘as is’.  Sure, I realize that someone else is going to come along and buy that item, and they may even paint it, but it won’t be me.

Some of the things that I think shouldn’t be painted include mid-century pieces that are in good condition, antique pieces with a nice patina and no damage, and pieces with authentic original chippy paint.

I really had no idea that today’s project would fall into that last category.

But let me go back and start at the beginning.  First a little history for some of my newer followers.  My picker, Sue, and I have been friends for a long time.  We met at our day job, where we worked together for 34 years.  Last year both Sue and I retired.  The situation at our day job had really gone south and we both wanted out.  Sue was my original garage sale mentor.  She introduced me to the fine art of shopping garage sales and thrift stores.  For many years Sue and I hosted an occasional sale together out of my carriage house too.  These days Sue picks up items for me that she knows I’ll like.  Quite honestly, she often has more confidence in my ability to breathe new life into something than I do.

Today’s project is a case in point.  Sue bought this very rusty, crusty toolbox for me over a year ago, before either of us were retired.  I remember this because she brought it to me at work, and I put it in the trunk of my car.  And then it stayed there for all of last winter!  I dug it out this summer and stashed it in my workshop knowing that I needed to get to it when I could work on it outside.

Now, sadly, I totally forgot to take a ‘before’ picture of this one.  Drat!  It would have made an amazing ‘before’ and ‘after’ collage.  So just try to imagine a toolbox that was almost completely rusted shut.  The bottom was solid rust inside and out.  Although I didn’t get a true ‘before’ photo, I did take some pictures after I sanded, cleaned and gave it a coat of matte spray sealer (and apparently set it down on some wet blobs of Dixie Belle’s Drop Cloth).

My initial plan was to sand the heck out of it to get as much rust off as possible, then paint it up.

As I started sanding though, I began to reveal a lovely minty green color underneath the coat of black that someone must have added at some point.

I really liked how the lid of the toolbox looked with the chippy black over that mint green, but I wasn’t so fond of that rusty bottom.

So I started to think about possible ways to keep the lid ‘as is’, but cover up that rust at the bottom.  My first thought was that I could paint the bottom in a matching black and then just add some gold wording … along the lines of this toolbox …

And I did pull out Dixie Belle’s Silk paint in Anchor, and I painted the bottom.

The Anchor was perfect for this use.  But then I started thinking about the Rose Chintz paint inlay from I.O.D.  I’d seen it used over black and I thought it might just be perfect for the sides of this toolbox.  The paint inlays work best with a chalk style paint rather than an acrylic style paint like the Dixie Belle Silk paint.  So I made the switch to Dixie Belle’s Caviar for the sides of the toolbox and I applied the paint inlay all the way around the four sides of the box.

Eureka!  I love it!

The distressed look of the paint inlay was perfect to go with the chippy lid.  And isn’t that Rose Chintz floral gorgeous over black?

I wanted to add just a little something more to that lid though, so I pulled out an old small Seeds transfer in white and chose a portion of the wording to add to the lid.

Then I also cut out a little white crown from the I.O.D. Traditional Pots transfer and added that under the handle.

Next up I added a couple more coats of Rust-Oleum clear matte spray sealer to both the lid with the transfers and the paint inlay.

Today’s q tip: always remember that the paint from the inlays can be reactivated with water.  To avoid smearing it, it’s best to seal it with a spray sealer.

Next up was dealing with the interior of the toolbox.  As I mentioned, it had a solid layer of rust inside the bottom.  I had sanded that down a bit and cleaned away the dust.  Then I gave it two coats of Dixie Belle’s B.O.S.S. in clear.  I find that the B.O.S.S. does a good job of blocking any bleed thru from rust.  I can’t vouch for its long term effectiveness since I’ve only been using this product for a couple of years, but so far it seems to do the trick when I’ve used it on rusty pieces.

Once the B.O.S.S. was dry, I added a couple of coats of Dixie Belle’s Mint Julep.  I knew this color would be a good match for that mint color I’d revealed on the lid.

I wanted to also add a pop of something special inside the toolbox so I pulled out this leftover scrap from the I.O.D. Petit Rosier transfer and applied it inside the lid.

It was a perfect fit.  Well, almost.  I had to trim a little off the edges.

I also sealed the inside of the toolbox with the matte spray sealer.

People occasionally ask me what my buyers do with these re-fabbed toolboxes.  Some have told me they use them to store art supplies, or sewing supplies.  I think this one would also be perfect for housing all of one’s ribbons.

But regardless of what is inside, I just love how this one turned out.  What do you think of it?  Would you have kept the chippy lid, or would you have painted over it?

As hard as it may be to part with this one, I won’t be hanging onto it.  It is for sale locally.  If any of you locals are interested, be sure to check my ‘available for local sale‘ page for more details.

Thank you to Dixie Belle Paint Co for supplying the paint used for this project.

the most wonderful chair.

I recently pulled this schoolhouse chair out of my workshop to give it a fun holiday makeover.

In case it’s not obvious, this chair is child sized.  It has a bit of a mid-mod vibe, don’t you think?  I actually would have liked to strip and re-finish this one in that raw wood look, however it had some fairly significant damage to the veneer …

I feel like paint is the best way to disguise this sort of damage, so I decided to go ahead and paint the wood using Dixie Belle’s Caviar.  But I also decided to leave the legs in their rusty, worn state.  I think I’m taking a bit of a gamble with that, but I’m hoping that there will be a fellow rust lover out there who appreciates this choice.

My first step was to sand the chair all over, including those legs.  That’s just to remove any flaking bits.  Then I cleaned the chair well using TSP substitute.  Next I sprayed the legs and the metal parts of the chair back with a Rust-Oleum clear matte sealer.  I like to seal in the chipping paint and/or rust so it doesn’t continue to flake off.  So the legs are beat up and rusty, but they are clean and sealed.

Next I painted the seat and back with two coats of Caviar.  Once that was dry, I sanded to distress.

I specifically chose to sand the Caviar, and vacuum/wipe away any dust, before moving on to my next step, which is adding a stencil in Dixie Belle’s Drop Cloth.  That’s because I wanted to avoid getting any of that black dust smeared into my white lettering.  I’ve learned from experience to do this when using contrasting colors.  It’s just a good way to make sure the white stays crisp.

Next up I pulled out the Most Wonderful Time of the Year stencil that wallcutz sent to me when they offered to sponsor this post.

I added that to the seat of the chair using the Dixie Belle Drop Cloth.

It was a perfect fit.  That’s because I ordered it that way.  This stencil is available anywhere from 10″ x 10″ up to 21″ x 21″, so you can order the size best suited to your project.  In my case, that was the smallest 10″ x 10″ size.

I used a small artist’s brush to fill in the bridges in a few spots to give this a more hand-painted look rather than a stenciled look.

If, like me, you don’t particularly like to do a free-hand design on your chalkboards, this particular stencil would be perfect for that too.  It would mimic the look of a message that was handwritten in chalk.

On one of my recent posts about stenciling a reader asked me two things; what brush do I like to use for stenciling and how do I clean my stencils.  I figure if one person is taking the time to ask that in a comment, there are probably more of you wondering the same thing.

First up, my current favorite brush for stenciling is the Best Dang Brush from Dixie Belle.  I’ll admit, it’s not cheap at $25.95.  So if you don’t do a lot of stenciling, you may not want to invest in this brush.  However, if you do, it is one that won’t fall apart on you after six months of regular use like so many others.

It is a large brush, so it covers a lot of area quickly.  I like that.  The one downside to its size is that you may have to mask areas that you don’t want to accidentally hit with the paint, like over the edge, or a portion of the stencil that’s going to be a different color.  I just use painters tape for that.

Now, as for cleaning my stencils, the honest truth is that I don’t always clean them.  The only time I clean a stencil is if I’m just using it for one project at the moment and I’m about to clean my brush anyway.  That’s because I clean both at the same time under running water.  I use the Best Dang Brush to rub away the paint on the stencil, and then I finish with cleaning the brush.  This works great as long as you do it immediately upon completing your stenciling.  If you give the paint too much time to dry on the stencil it will be harder to get off.

This is certainly an instance where it’s better to do as I say, not as I do.  With a stencil that has some fairly fine details, like this one in particular, your results will remain crisp if you keep the stencil clean.  If you allow paint to build up on it, over time your edges won’t be as crisp.  So yeah, I really should clean my stencils every time I use them.  But hey, nobody’s perfect, right?

This chair just might be perfect though.  OK, well, perfection is in the eye of the beholder.  But if you love a mid-mod vibe and pieces that show a bit of history, then yes, you might call this perfect.

I think it would be adorable sitting next to the tree at Christmas, or maybe sitting next to your door to welcome guests as they arrive for the holidays.  It would also be perfect for adding to a child’s bedroom during the holiday season.  It is for sale, and if it doesn’t go to one of you local readers then I’ll be adding it to my growing stash of holiday items that I’ll take in to Reclaiming Beautiful (the shop in Stillwater, MN where I sell on consignment).

If you’re local and interested in more details, check out my ‘available for local sale‘ page.

Thank you to wallcutz for providing the stencil, and to Dixie Belle Paint Co for providing the paint and the brush used for today’s project.

thrifty wednesday.

Somehow ‘thrifty wednesday’ just doesn’t have the same ring to it as ‘thrifty thursday’.  None the less, Wednesday is the day our local Goodwill stores offer a senior discount, and since I’m older than 55 (really, only slightly, I swear), I qualify.  And so does my friend Sue.  So now that we are both retired, we schedule our thrifting get togethers for Wednesdays.

Sue and I headed out on a gloriously beautiful fall day last Wednesday and I came home with a nice little pile of goodies, so I thought I’d share my finds with you guys.

Actually, looking back, very few of these things were actually from Goodwill.  We went to two different Goodwill stores, and I only purchased one thing at each.

I found this set of 10 pretty vintage Grapevine pattern plates at the first Goodwill.

They definitely have a mid-century vibe, don’t they?  And maybe a little bit of a fall harvest sort of feel to them.

At the 2nd Goodwill I found this set of three copper molds.

The rest of the items are from various other stops we made; an estate sale, a garage sale and Turn Style (which is a consignment shop).

The estate sale was first, and let me tell you … the poor people running this sale must have put hours and hours into getting everything priced and set up.  There was so much to look at.  The living room was lined wall to wall with big folding tables and every possible inch of that room was full of just the Christmas stuff.

Apparently the former occupant of the home also collected anything, and everything, that had a giraffe on it.  There were giraffe purses, giraffe towels, giraffe throw pillows, giraffe luggage, giraffe china … and an entire bedroom was filled wall to wall with giraffe figurines of every kind.  Seriously, like easily 100’s of them.  I should have surreptitiously taken a photo to share with you guys, but I didn’t think of that.

There wasn’t really much in the way of vintage items though, and I didn’t really need a giraffe figurine.  Still, I did grab a couple of fun items including this little galvanized container with a lid.

As you can see, I’ve already added a Classic Vintage Label transfer to it.

I also grabbed this cute little wire basket.

I try to purchase good baskets when I see them at a reasonable price.  You never know when you’ll want to put together a gift basket so it’s nice to have a stash of baskets handy.

I also bought these two galvanized bin thingies at the estate sale.

I added the Everyday Farmhouse transfers to the fronts of them after I got them home.  They still had their Hobby Lobby stickers on the bottom, so I know these are just inexpensive reproduction sort of items.  The addition of the wording gives them a more authentic feel though.

I like the idea of filling them up with some ironstone pitchers …

or how about a quartet of potted herbs?

You could hang one in the bathroom and fill it with rolled up wash cloths, or maybe toiletries.  You could fill one with jars of spices in the kitchen.  There are so many different ways you could use them.

After the estate sale, we stopped off at a garage sale that was a few blocks away and I scored these fabulous candle holders.

I just think they are so elegant looking.

I’ll be putting them in the pile of stuff that I’m bringing in to the shop for Christmas.

I purchased a couple of items that I’m keeping myself from Turn Style.  The other day I had some former co-workers over for drinks and I realized that I was in need of some cute, small bowls for nuts on my charcuterie tray.  So I grabbed this set for $7.50 …

And I’ve been on the lookout for a kleenex box cover that was more my style than the one we currently have.

I found this one for $4.25 at Turn Style.  And of course, I added the Classic Vintage Label transfer to it, it was originally plain.  It’s actually from the Hearth & Hand collection at Target where it costs $14.99 new, so I think I got a bargain.

Oh, and I almost forgot the little enamelware cup.

That was from the estate sale, and I added the wording from the I.O.D. Traditional Pots transfer.

When Sue picked me up for our thrifty outing, she had a few goodies in the car for me as well including this tall ironstone pitcher …

and a green toolbox.

The red tacklebox and the blue toolbox were from the garage sale.

I spent a warm day last week out in the backyard washing up a bunch of toolboxes with some Dawn dish soap and the garden hose, so you should be seeing some painted toolboxes here in the coming weeks.  Later this week I’ll be sharing my latest wallcutz project with you too.  So be sure to stay tuned!

adding some fall color.

Before getting on with today’s post, congrats to Cynthia Goscinak.  I drew her name at random to win the giveaway of the white Silk paint colors (Cynthia, I’ve emailed you to get your mailing info, if you didn’t get my email check your spam folder).

Our temps are dropping, the nights are getting cold and the leaves are starting to turn pretty shades of yellow, orange and red.  We’ve had a couple of nights that dipped into the 30’s already and that killed off some of my coleus, so it was time to start pulling annuals out of the planters and replacing some of them with mums and ornamental kale.

Although I don’t really decorate inside the house for fall, I do like to change things up a little outside for fall.  You may remember the Fresh Flower Market sign that I made up last year using a stencil from wallcutz.  I had it hanging on the carriage house in 2021 …

And then this summer I had it hanging on the deck.

As I was looking at it earlier this week I thought it looked just a bit too summery for fall, so I decided to make it reversible.  I simply removed the hooks from the front, flipped it over, removed the hanging hardware from the back and then gave it a good clean.

Next up I pulled out some fall paint colors.  I started out with Suzanne’s Fall Colors from Dixie Belle.

However, I realized that I must have given away the Pumpkin Spice color because I couldn’t find it anywhere in my stash.  Hmmmm.  What was I thinking?  Well, no problem, Dixie Belle’s Mojave from their Silk line would work just as well.

I painted the flip side of the sign in a base coat of Juniper.  Then I pulled out my Farmers Market stencil, also from wallcutz.

By the way, this is not the sponsored project for wallcutz that I mentioned on Wednesday.  I had already purchased this stencil a couple of years ago and I’ve used it on several projects already including some old table leaves that I turned into signs last fall.

I had to make a few adjustments to the spacing and design of the stencil to work with my uneven surface.  I started by stenciling just the bottom line of wording on the raised border at the bottom of my cupboard door using Cashmere.

Next I stenciled the words ‘always fresh’ in Dixie Belle’s Cocoa Bean.  Then I adjusted the stencil slightly over and down and stenciled just the word ‘farmers’ also in the Cocoa Bean.  Thus I created a shadow behind that word when I moved the stencil back into place and stenciled over the Cocoa Bean with more Cashmere.

Creating a shadow this way is so, so simple and it adds a ton of impact.  I highly recommend it for the wording on signs especially.

I completed the rest of the stenciling just using Cashmere straight up.  If you look back at the image of this stencil, you’ll see that there is a box around the word “market”.  I left that out on my sign because I thought it would be hard to get that to look right going over that raised piece in the middle.

While we’re on that topic, you might be wondering how I stenciled over that raised section in the middle.  Basically I was just very careful to hold the stencil as flat as possible and to not get too heavy handed with the paint.  Then, once I pulled the stencil away I went back in with a small brush and touched up those letters that fell on the uneven surface and needed a little more paint.

Next up I stenciled the little do-dads on either side of the word ‘market’ in Mojave.  This is where I would have liked to have that Pumpkin Spice color on hand, but I think the Mojave substituted nicely.  Once that was dry I added a little swoop of Cashmere to give them a little more dimension too.

After all of the paint was dry, I sanded my new Farmers Market sign to distress the edges and make everything look a little more worn, and then I added a coat of Big Mama’s Butta to finish it off.

I added some mums, a faux pumpkin and a little wooden lantern to the bench under the sign.

That’s part of the I.O.D. Label Ephemera transfer on that bucket, and the pot on the right with the yellow mum is concrete, but has been given the faux rust treatment using Dixie Belle’s patina paint (you can check out how to do that here).

I absolutely love how this sign turned out!

And that might be a problem come spring when it’s time to turn it back around to the flower market side.  I may have to re-paint that side in similar colors now because these colors look great up against the dark green of my siding.  Plus, I also have to admit that my sign stenciling skills have improved greatly over time.

What do you think?  And how about you, do you change up your outside décor for fall?  Leave a comment and let me know.

sponsored by wallcutz.

A while back the people at wallcutz reached out and asked if I’d be interested in having them sponsor another post here on q is for quandie.  It was easy to say yes.  After all, I have purchased quite a number of their stencils in the past, and done many projects with them here on the blog.  But they were offering to send me another one, so I was hardly going to say no to that.

I’m still working on that new project, but in the meantime I thought this would be a good time to share some of my past Christmas projects created with wallcutz stencils.  OK, I know, it’s only October.  Way too early for Christmas!  But I also know that a lot of you sell your creations either in a shop, or at market events, or even online.  If so, then much like me, you’re probably already starting to work on holiday inventory.  If you’re planning some stenciling projects, you want to get those stencils ordered and have them available when you’re ready to start painting.  Shipping takes 2 to 7 days (and is currently free if you spend over $50), and I’ve found that they always ship my orders promptly.  Still, you don’t want to wait until the last minute.

I think my absolute favorite wallcutz stencil is the Rudolph & Co Reindeer Treats stencil.

I have this one in two sizes, and speaking of that, one of the things I really like about Wallcutz is that you can order their designs in multiple sizes.  This one comes in 7 different sizes ranging from 12″ wide to 29″ wide.  So when you’re turning a footboard into a sign, you can get a stencil that is big enough to not get lost on it.  And if you are working on smaller projects, you can get a stencil that fits those as well.

I’ve used the smaller version of this stencil when creating my own Christmas wrap …

on this antique grain shovel …

and also on this toy wooden truck.

Another of my faves is the North Pole stencil.

It was perfect on this painted suitcase …

and I also used it to create a craft paper scroll.

The Milk and Cookies Gingerbread Man stencil is a great choice if your project is more square rather than rectangular.  It was adorable on this pair of kid sized chairs.

I tried it two different ways, a colorful red and green version …

and a more monochromatic version.

I masked off the border and the gingerbread man with painters tape and then used this one on some Christmas wrap as well.

I’m planning to paint up a few more cupboard door signs for Christmas this year, like this one with the wallcutz Polar Express Train Depot stencil.

Stencils are a great choice for those of us who create multiple similar items for resale since you can use them over and over again making the cost per use incredibly affordable.  But even if you’re just working on a project for yourself, I find the wallcutz stencils reasonably priced.  Even the largest version of that Polar Express stencil, which is 20″ high x 11″ wide, is only $20.75.

So tell me, are you already thinking about Christmas projects like me?  Or are you rolling your eyes and thinking ‘it’s way too early for this!’?  And which of the above projects is your favorite?  Leave a comment and let me know!

an ounce of prevention.

Today’s piece is another one that I got from my friend Annie.  When she and her husband moved back to Minnesota recently, they had some excess furniture including this linen press dresser.

As you may be able to tell from that photo, this piece was subjected to a poor paint job.  It was drippy in spots, and lumpy in others, but worst of all it was a bleeder.  Over time either the previous dark stain or tannins in the wood have bled through the white paint causing all of that yellowing that you see.

So this piece required a bit of extra work in the prep phase.  I started out by stripping the two front legs using CitriStrip.  The paint job on them was particularly bad, peeling in spots, really thick in some spots, and barely covering in others.  I felt like the best option was to strip it off entirely.  Plus, they are such pretty turned legs I thought it would be fun to go with the bare leg look.

After stripping the paint, I sanded them well and then finished them with Dixie Belle’s brown wax.

Next up, I did the same with the inner drawers.

Stripped, cleaned, sanded, waxed in brown.

I cleaned up the insides of the drawers while I was at it.  I sanded them lightly, then gave them a coat of Dixie Belle’s Big Mama’s Butta in the Orange Grove scent.  Now they look great, plus they smell nice and citrusy.

For the outer shell, I prepped by sanding vigorously first with 120 grit sandpaper and my orbital sander, and then following that up with 220 grit.  My goal wasn’t to remove all of the paint, but to smooth it out.  I didn’t get it perfect, but I was going for ‘good enough’.  After cleaning away all of the dust, I gave the piece a coat of Dixie Belle’s B.O.S.S.

As it says right there in the name, it stops bleed thru.  I prefer using the clear version (it also comes in white), especially when using a dark paint color.  You may think that you don’t need a stain blocker if you’re using a dark paint, but that’s not really true.  Dark paint may help disguise the look of bleed thru, but it will still be there.  It can show up as a slight variation in the color, or sometimes the sheen, that you only see at certain angles.  Still, as they say, an ounce of prevention is worth a pound of cure.

Which brings me the paint color I chose for this one, Dixie Belle’s Collard Greens.

I love this dark gray green.  It looks different depending on the light, sometimes looking more green, other times looking more gray.  It was just what I wanted as a background for the I.O.D. Midnight Garden transfer.  I’d ordered this transfer on a whim a while back and it ended up being the perfect width for this linen press.

I opted not to put the existing hardware back on this dresser.  I didn’t love it, and I didn’t love the placement of the knobs with those on the top drawer not aligned with those on the bottom drawer.  I had filled all of the holes with Dixie Belle’s Mud before I painted, so once the paint was dry and the transfer was applied to that lower drawer, I measured and drilled new holes for some simple wooden knobs that I had in my stash.

I definitely prefer this more aligned arrangement over the original placement of the knobs, how about you?

I used Dixie Belle’s Easy Peasy spray wax to topcoat the Collard Greens and transfer.

I staged this one simply with some of my favorites; an old family photo, my brass bird cage, an ironstone pitcher and a Bakelite clock.

I like to think I improved this one a tad, what do you think?

This linen press dresser is for sale.  Be sure to check my ‘available for local sale‘ page if interested in more details.

Thank you to Dixie Belle Paint Co for providing the B.O.S.S., paint, Big Mama’s Butta, brown wax and Easy Peasy spray wax used on this piece.

fall bulb planting.

It seems as though my Sunday morning garden posts aren’t terribly popular so far, so I’ve decided to re-evaluate.  I’m guessing that many of you spend time with family and friends on Sunday’s, rather than reading blogs.  In addition, I’m finding it a little challenging to pull together four blog posts every week.  It’s really cutting into my actual gardening and/or painting time!

I’m not ready to give up garden posts entirely though, even though gardening season is going to be wrapping up here soon.  So I may throw in a few here and there on a weekday rather than waiting until Sunday.

If any of you want to provide feedback on that, feel free to leave me a comment.

That bring me to today’s post, where I want to share a huge q tip on fall bulb planting!

Over the past five years or so, we’ve developed a bit of a deer problem in our garden.  They like to come and munch on my tulips as they come up in the spring.  Add to that how stressed and busy I was during my last several years of working a day job, and you might understand why I’d pretty much given up on bulb planting.

But this past spring a bunch of tulips came up in my garden that I hadn’t seen in years.

I’d forgotten how fabulous it is to see these early flowers in the garden after a long winter.

Now that I have a little more time on my hands, I decided to do some more significant fall bulb planting.  Back in July I placed an online order with Longfield Gardens for tulips, daffodils and three varieties of allium, and my order arrived this week!

It was perfect timing because we had some gloriously sunny days, and some much cooler temps at night.

You’ll know it’s a good time to plant tulips when you’ve already had your first light frost (ours was on Tuesday) and your nighttime temperatures are between 40 to 50 degrees. In my zone 4 garden, that’s usually late September to early November.  I have to admit, I may have jumped the gun slightly here.  I probably should have waited another couple of weeks to plant my bulbs.  But it’s so much more pleasant to plant bulbs when it’s 60 degrees and sunny rather than 40 degrees and blustery, right?

I had a lot to plant, so I thought it best to strike while the iron was hot.

At this point you might be wondering, what is the huge q tip?

Today’s q tip; fall bulb planting is SO much easier with a garden auger!

OK, so I don’t actually own a garden auger, but my neighbor nnK got one for Christmas and was generous enough to share it with me.

This post isn’t sponsored, and I am far from being any kind of an expert on power tools.  So I can’t really help you figure out what brand to buy or any of that stuff.

However, I will say that you might be tempted to think you want a smaller auger for planting bulbs.  And sure, if you are someone who puts each bulb in its own hole, each spaced precisely 4″ apart like the directions say, then you might be happy with the smaller auger.

But I used that big honkin’ 6″ one shown above.  I like to plant tulips and daffodils in clumps.  They look so much more natural that way.

Depending on the bulb size (those above are daffodil bulbs that were quite large), I can get 4 to 6 bulbs in each 6″ wide hole made with the bigger auger.

The process is super simple.  Dig the hole to the appropriate depth with the auger (one thing to note, the one I used is quite heavy, so bear that in mind).  Add some bulb tone to the hole …

Plop in your bulbs, pointy side up, then cover them back up.  Water them in well, and you’re done.  Easy peasy.

And hopefully next spring I’ll have lots of lovely tulips and daffodils.

And I won’t have to buy so many to stage my photos!

How about you?  Are you going to be planting any bulbs this fall?  Or have you ever used a garden auger?  Leave a comment and let us know!

the raw wood experiment.

I’ve been admiring the raw wood trend in furniture refinishing for a while now.  I know it’s probably not everyone’s cup of tea, but I love the Scandinavian vibe of raw wood pieces.

However, I haven’t really understood why so many people are resorting to using oven cleaner to strip pieces when they want to achieve this look.  But if you can’t sand (thin veneer, have to work indoors and can’t afford a fancy sanding system, whatever the reason may be) why not just use furniture stripper?

It seems to me that oven cleaner must be harder on the environment, and your own health, than a stripper like CitriStrip.  I did a little google research and according to an article from Martha Stewart, oven cleaners can contain lye, ethylene glycol, and methanol, which can be very toxic.  Yikes!  That does not sound good to me.

Nonetheless, I thought there must be a reason why so many people are turning to oven cleaner instead of a safer stripper like CitriStrip so I decided to put it to the comparison test myself.

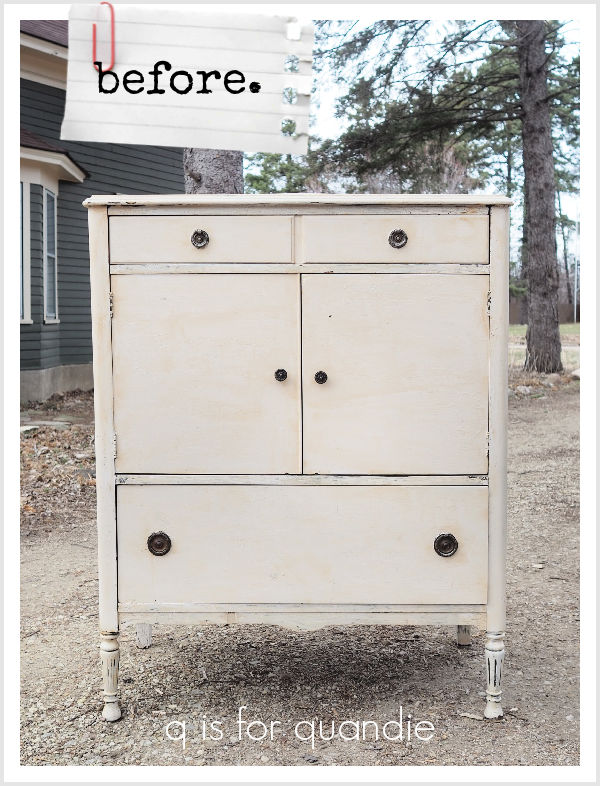
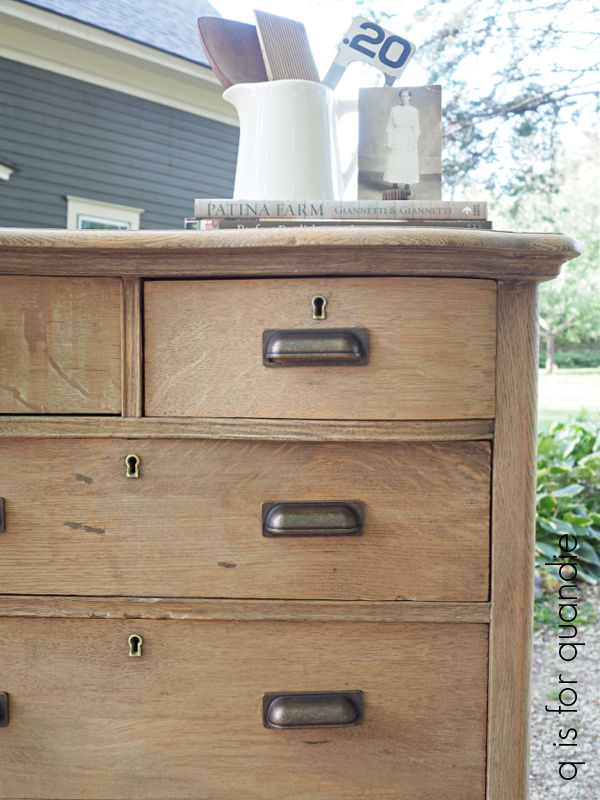
I’m starting out with this dresser.

I picked this up at the thrift store last winter.  It ended up being a really poor purchasing decision.  It was way overpriced for its condition, and I neglected to check it out thoroughly enough before pulling the trigger (always open ALL of the drawers).  In the end, my handyman Ken had to re-build the two lower drawers because they didn’t even have bottoms in them!  How did I not notice that??  And if that weren’t enough, he then had to completely take apart and re-glue the back of the piece as well.

Once all of that was done, I stripped one drawer front using CitriStrip and one using oven cleaner.  Here are the results after one pass with each.

I definitely got a better result with CitriStrip.  Clearly it did a much better job of removing the dark stain than the oven cleaner.  What I’ve heard from other furniture refinishers is that it often takes several passes with the oven cleaner to achieve the desired results.  While it’s true that it can sometimes also take two passes with the CitriStrip, that’s often not the case (this piece required just one application).

The method I used with the oven cleaner was to spray it on heavily, wait 30 minutes, scrub the finish with a brush, hose off to rinse.

I’m having trouble figuring out how this is easier than using stripper, especially if you have to do it three times to get the desired result.

Both processes are quite messy.  However, the oven cleaner method pretty much requires you to be outside on a surface that you don’t mind drenching in dirty, stain filled oven cleaner.  Your driveway?  Your lawn?  Your cement patio?  I’m not sure I want to add oven cleaner to any of those areas.

With the Citristrip, I prefer to use it outside as well, but I’m not washing it off with the hose.  I’m scraping it off with a plastic scraper and then wiping it off into a disposable cup.  I have stripped the tops of pieces indoors in winter too (winter is coming!).  I’m just more careful not to fling the stripper around as I’m scraping it off.  CitriStrip in particular does not have any toxic fumes and can be used indoors with adequate ventilation.

Finally, drenching your piece of furniture in water from the rinsing process can create all kinds of problems such as loosened joints, loosened veneer, swelling, and raised grain.

After my experiment with the two drawer fronts, and considering all of the above factors, I decided that stripping furniture with oven cleaner just isn’t for me.  I’ll stick with the CitriStrip.  I gave my extra can of oven cleaner to my neighbor so she can clean her oven.

However, even though it only took one pass with the CitriStrip for this dresser, and I preferred it over the oven cleaner, ultimately this project reminded me how much I dislike stripping entire pieces of furniture regardless of the method.  I don’t mind stripping a nice flat top here or there.  Or maybe even just the drawer fronts (you’ll see that coming up on my next piece of furniture).  But stripping an entire piece is messy and time consuming whether you use stripper or oven cleaner.

So, as much as I like the raw wood look that is so trendy right now, I doubt you’ll be seeing a lot of it from me.

And that brings me back to today’s makeover.  After all of the work it took to repair this dresser, and then to strip it, I was ready to just chuck it on the firepit when I realized that after all of my hard work the wood itself wasn’t the nice, light color I was hoping for.  But I already had so much into this piece, I knew I had to keep going.  I decided that white wax might be a great way to lighten up the color of the wood.  So I ordered up some of Dixie Belle’s white wax and then tested it out on a single drawer front.

Yikes!  Nope.  It was way too white, and it really enhanced the grain, which wasn’t a feature I particularly wanted to enhance on this dresser.  I have used white wax on other stripped wood and really loved the look, but those pieces had much more subtle grain patterns.  It definitely wasn’t the look I was going for.

That brings me to your q tip for today; you can remove furniture wax using mineral spirits. 

In my case I dampened a scrubby pad with mineral spirits and scrubbed off the wax, then followed that up with a soft cloth with more mineral spirits to wipe away any last remaining bits of white wax.  See?  White wax is gone …

And then I went back to the drawing board.  I still didn’t love the look of this raw wood, I wanted it to be lighter.  This would be the perfect opportunity to test out one of the two-part wood bleaching kits that are on the market.

Sure it would.  If I could find one.

I went to Home Depot, Menards & Fleet Farm, they were all sold out.  Of course.  The bleached wood look is so trendy that stores can’t even keep those kits in stock.  I did find one available on Amazon where it was over $50 when you added in shipping (despite having Amazon prime).  There was no way I was spending $50.

So that left the DIY version of lightening the wood using regular old household bleach and the power of the sun.

Mr. Q and I hauled the piece out into the sunniest spot in the yard and I used a brush to coat it in straight up bleach.

Then I left it outside to sunbathe all day.

The dresser certainly seemed lighter after its sunbathing.  I have to say it wasn’t a night and day sort of difference.  I’ve also read that you often have to repeat the bleaching 2 or 3 times to get the desired result as well.

People who do these things clearly have way more patience than I do!  Good gracious.  Three passes with oven cleaner, followed by three sunny days of bleaching??  Not for me.

I decided to move on to the next step, which is neutralizing the bleach by wiping the dresser down with vinegar water (I used about a cup of vinegar to a gallon of water).  Once the piece was dry again, I sanded it first with 120 grit, and then again with 220 grit.

The work was still not done!  After vacuuming away the dust and deciding the raw dresser looked pretty good, I still had to seal it.  I did a lot of research on the world-wide web and saw that many people noted that adding a clear coat can darken the wood right back up again (or bring red/orange tones back out).  I also noted some people that thought wax did the same.

However, I’ve found that although the wax darkens the finish as it goes on, it does dry lighter.  So once again I pulled out a drawer to experiment.

As you can see, the side of the drawer on the left with the freshly applied wax is darker than the unwaxed right side.

However, here is the same drawer after about 20 minutes of dry time.

I couldn’t really see a color difference between the waxed and unwaxed halves of the drawer at that point.  Just a side note here, both of those photos are a bit over exposed and lit with my very bright workshop lighting.  I don’t want to mislead you into thinking the wood got that light from one afternoon of bleaching.  It didn’t.

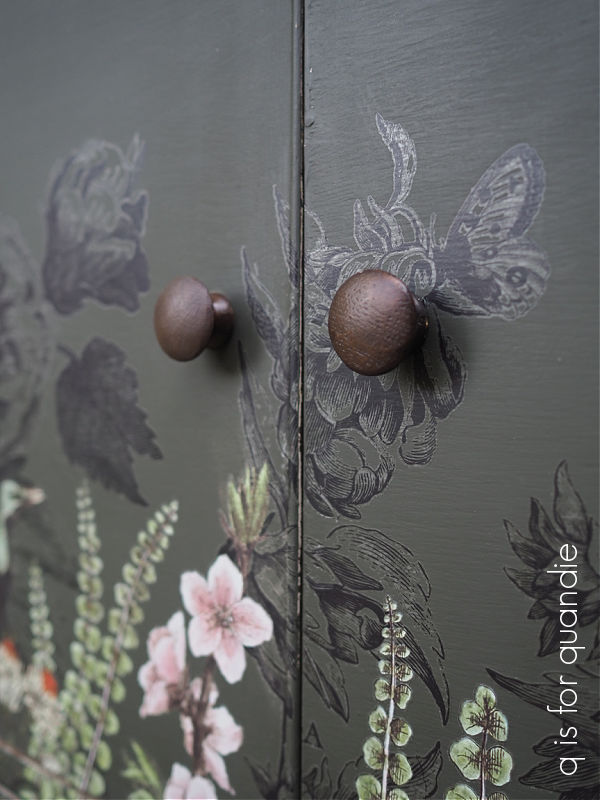
I went ahead and clear waxed the entire dresser.  That left me with the question of the drawer pulls.  I really didn’t want to put the existing pulls back on.  I doubt they were original to the dresser, they are totally the wrong style.  They are also way too dainty for the look I wanted to achieve.

Normally with a dresser like this I would have filled the double holes, painted over the filled holes and drilled new holes for knobs rather than pulls.  Knobs are much more affordable than pulls.  But since that wasn’t an option here (since I didn’t paint this piece), I had to come up with a 3″ pull that wasn’t too terribly expensive because I needed 10 of them.  Once again, the search was on.  I looked all over the place for an affordable option, but in the end I just wanted to get this dresser finished so I splurged on a $4.49 cup pull.  Yep, ouch, adding $45 to my expenses for this piece.

That being said though, I really felt like the hardware was pretty important to the overall final raw wood look of this dresser.  So it was worth the extra $45.  Or at least I hope so.

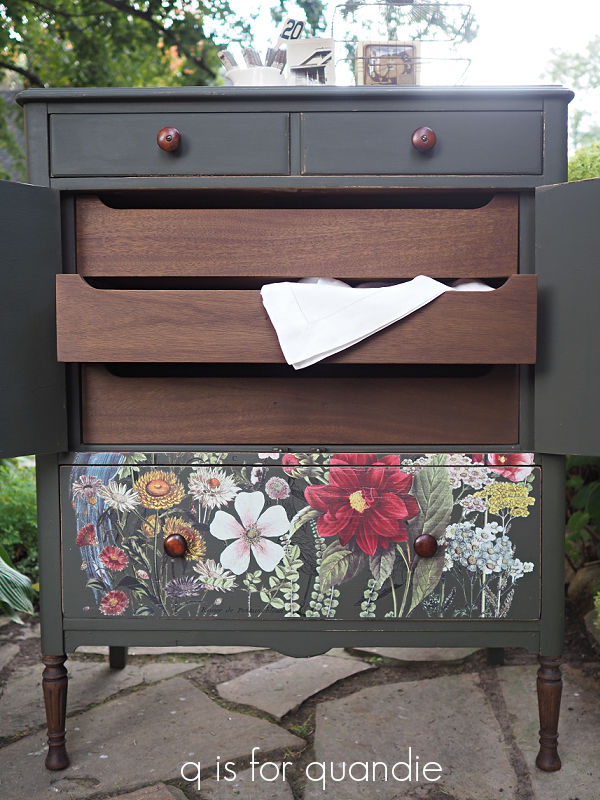
In the end, I do rather love how it turned out.

However, I will say that this is not a piece for a perfectionist.  It has plenty of dings and gouges, some discoloring in spots that wouldn’t come out, and some funky repairs to the drawers.  But it is fairly solid after Ken basically rebuilt it.  And I would say that it has tons of character and a certain rustic charm.

So tell me, what do you think of the raw wood look?  Are you dying to have your own piece?  Or do you think it would look good in someone else’s home, but just not yours?

I have to admit, it was a bit tongue in cheek to use a photo of my grandmother while staging this piece.  I’m quite sure she would consider this dresser unfinished looking.

But then, that’s sort of the point, isn’t it?

Leave a comment and let me know what you think.

This raw wood look dresser is for sale, be sure to check out my ‘available for local sale‘ page for more details on this piece and any others that I currently have listed.