a Saturday post.

Do most of you know who I’m talking about when I say nnK?  nnK stands for ‘new neighbor Karen’.  She moved in … gosh, I’ve lost track now, 8 years ago maybe?  At the time I already had a neighbor named Karen, so I had to distinguish which Karen I was talking about and thus she became ‘new neighbor Karen’, then shortened to nnK.

cast - nnK

Even though the original neighbor Karen passed away quite a few years ago, nnK is still and always will be nnK.

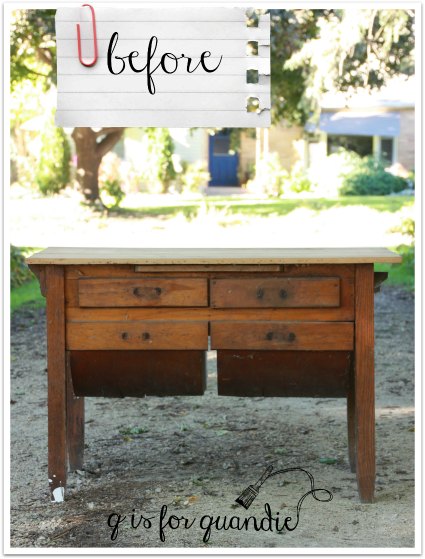
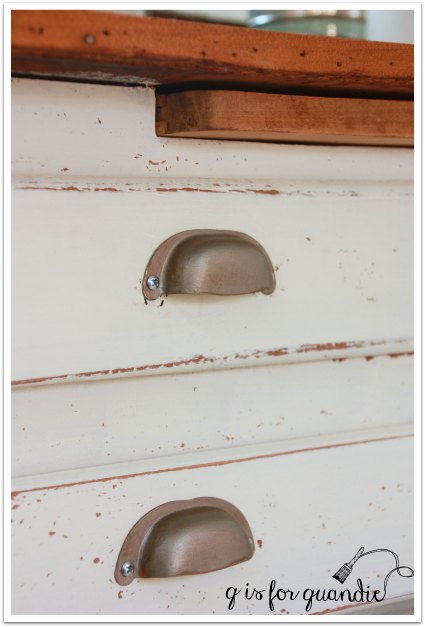
You may not realize it, but you have seen plenty of nnK’s home here on q is for quandie.  It provides the backdrop to all of my driveway staged photos.

seriously studious desk

Yep, that’s her house with the blue door directly across the street from me.  You’ll see that distinctive blue door in quite a few of my photos.  Sometimes I have to yell at her to duck when she’s out working in the garden and I’m trying to stage some photos.  She does love a good photo bomb.

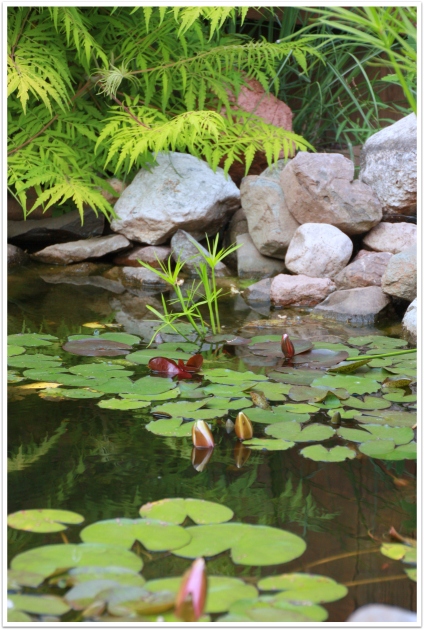
I featured her backyard water garden in August 2014.

nnk water plants

Before nnK moved in, my gardens were the ones that turned people’s heads as they rode by on their bikes or walked their dogs down our street.  But one of her early projects was to add a curbside garden along nearly the entire frontage of her property.  It’s a rock garden filled with lower growing alpine plants.

nnk's rock garden

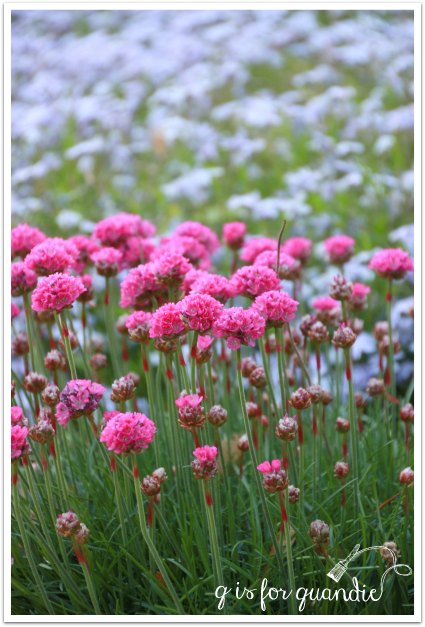
Now passers by are drawn to her bright flowers that are right there next to the street.  They don’t even glance in my direction.  Seriously, it’s quite comical.  All I see are the backs of people’s heads now as they ride by.

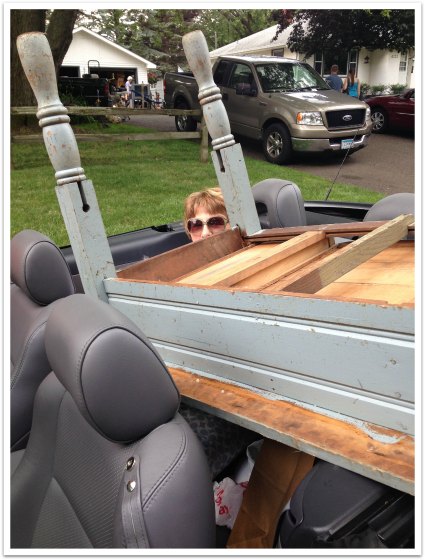
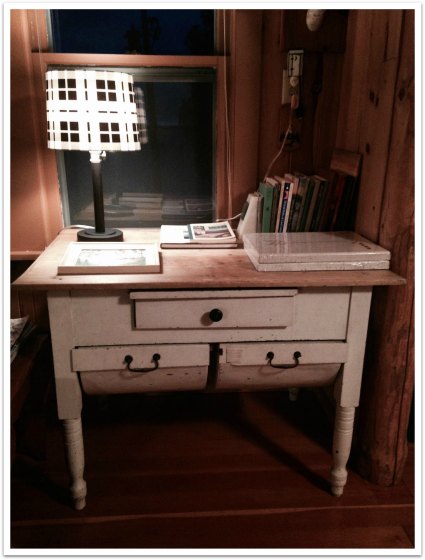
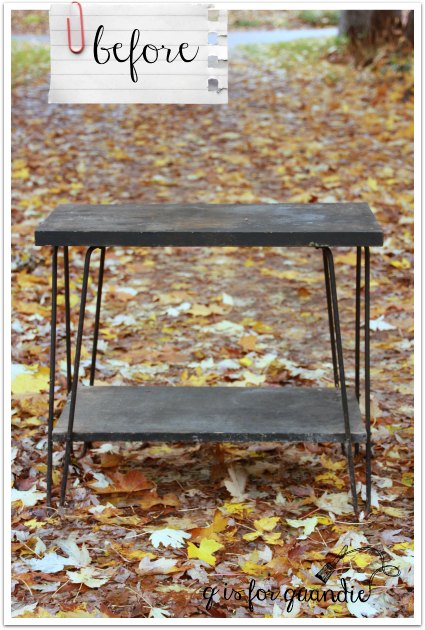
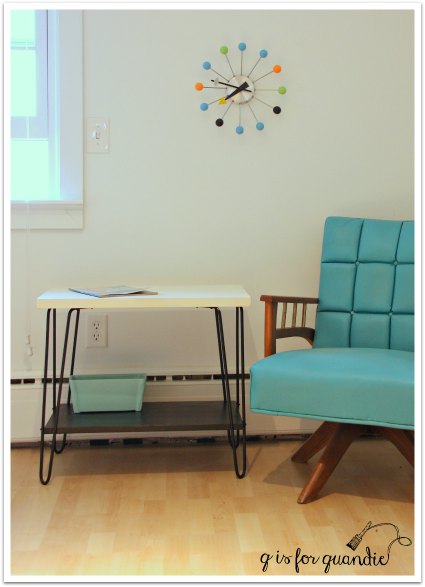
Not only is nnK a great neighbor, but she has great family too.  I recently posted about the table her dad pulled out of a trash pile for me, and I’ve also posted about the time her mom let me drag a really dirty old farmhouse table home in her convertible!

Judy and the table

But really, the best part of having nnK around is that she loves to cook, and she frequently invites Mr. Q and me over for dinner.  You’ll probably have noticed by now that I do not love to cook.  You aren’t going to find any blog posts about cooking on this blog.

nnK frequently gives me a hard time because I never publish any blog posts on the weekend.  She seems to think that it would be nice to relax in her p.j.’s with a cup of coffee and a blog post to read.

I have a pretty good reason for not doing blog posts on the weekend and it is simply that I know I’ll be too busy to read comments and follow up with a response.  I like to respond to comments the same day that they are left.  Plus, I also assume that others are out having fun on the weekends, not reading blogs (that’s probably not entirely true, or is it?).

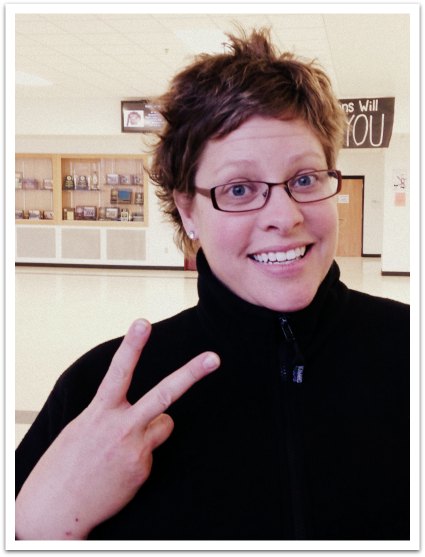
Well, anyway, nnK recently celebrated a birthday and her birthday wish was to see a Saturday blog post on q is for quandie.  So here is your birthday wish come true nnK!  Hope you enjoyed it with a cup of coffee!

my other hobby.

In addition to my usual furniture painting, garage saling and gardening, I have another hobby too.  Scrapbooking!  I don’t do nearly as much scrapbooking as I would like.  In fact, these days about the only time I work on it is when I can get away for a retreat weekend.

So last weekend my sister, my friend Terri and I headed off to Lindstrom for a weekend of cutting, glueing and goofing around.  Usually we go in February when the world outside our window is frozen solid and there is nothing better than holing up in a big room with a wood burning stove and all the scrapbook supplies you’d ever need in one place.  I’m not sure how we ended up going in November this year, but there was space available for three so we took it.

scrap hello

I was working on two projects.  The first was my photos from our recent trip to Duluth.

scrap lake

I tried to focus on letting my photos be the stars on the page instead of the embellishments.

scrap split rock

Which isn’t to say I don’t love to add some fab embellishments!  I use quite a lot of October Afternoon products.  All of the paper on this page is October Afternoon.  I’ve added some Tim Holtz rub-ons, a travel quote rub-on that I found at Hobby Lobby and some October Afternoon washi tape.

scrap split rock close up

This is one of my favorite pages from the weekend.

scrap stairway

I print all of my own photos, by the way.  I talked a little bit about this when I posted some scrapbook pages from my Danube River cruise last year.  I’ve begun using a matte photo paper instead of the glossy stuff.  I love the results.  I did a little research on the matte paper and discovered that photos printed on it will last longer than those printed on glossy paper.  I’m not particularly interested in archival quality with my scrapbooks though.  I’m just prefer the matte paper for aesthetic reasons.  The other thing I like about printing my own photos is that I can vary the sizes.  This photo was perfect for a long, skinny print …

scrap stairway close up

My second project was working with photos that my dad took back in the 60’s.  When my dad passed away a few years back, my sister and I went through his boxes and boxes of slides and tried to pick some out that we wanted to keep.  I had them all turned into jpeg files so that I could try and clean them up with photo editing software and also so I could print them.  I’ve been slowly printing some out, and then scrapping them when I have time.

Some of them are quite hysterical, like this one that I have titled “the original selfie” …

scrap selfie

Get it?  My dad is taking a photo of our reflection.  He seems to have his camera on a little stand that I’m assuming was placed in front of the mirror (or whatever reflective surface it was) for precisely this purpose.  That’s me on the right.  I can’t believe my mom dressed me in yellow, I’ve never looked good in yellow.  My sister is tucked in the back at my dad’s elbow.  The tall girl in the striped shirt is actually our baby sitter (not my mom) Kris.  She traveled with us a couple of times, and my niece Kris is named after her.

The “selfie” is cut out of October Afternoon paper using the Cricut.  After I cut out the letters, I outline them with a fine point black pen to add definition.  This is really easy to do and it doesn’t have to be perfect to look good.

scrap selfie close up

This next photo is not the greatest quality, but on close inspection I just had to share it because the clothes crack me up.  This is me and my brother.  Dig those nifty threads?

scrap nifty threads

I have to say, I think those striped pants I have on would be cutting edge stylish today.  They’ve come full circle.  I’m not so sure about my brother’s pants 😉

scrap nifty threads close up

I have to admit, what I loved most about this next photo is that fantastic pink sofa that my Aunt Barb is sitting on.

scrap barb

When designing this page I looked through my embellishments and pulled out anything in that dusty rose color.  I was so happy to find a use for my pink typewriter chipboard (also October Afternoon).

scrap barb close up

The illustration behind the pink slide frame is from an old children’s book.  I love to include vintage items even in my scrapbooks.

scrap barb close up 2

We had a great time on our weekend, and I finished up quite a few pages.  I hope you’ve enjoyed seeing some of them!


only 36 more days ’til Christmas.

I might be giving the impression that I’m really on top of this Christmas thing.  As you saw last week, I’ve got my winter window boxes all ready to go.  And the other day I gathered up all of my vintage Christmas stuff to send to Eye Candy ReFind.

xmas 1

I didn’t have a ton of stuff, but I was able to pull together some red and green.

The old jars full of vintage red Christmas light bulbs would look fab added to a shelf.

xmas 2

I love the idea of decorating with red and green vintage books for Christmas, even if they aren’t holiday books.

xmas 4

And as you can see, I whipped up some Christmas messages to add to some plates.

xmas 5

xmas 6

I got the idea for this mailbox from pinterest.  The words are also Cricut vinyl rather than painted on.

xmas 3

How cute would it be to have this on a shelf or table so you could tuck all of those Christmas greetings you receive inside?

Despite having my winter window boxes done, and all of my Christmas merchandise sent off to the shops, I have only just started to think about shopping for Christmas gifts and decorating inside the house.

Thanksgiving will be here a week from tomorrow though, oh, how time does fly!  Have you started to decorate yet?

farmhouse dresser no. 5

farmhouse title

Ladies and Gentlemen this is farmhouse dresser no. 5!

Any Lou Bega fans out there?  Am I the only one?

A little bit of Quandie in my life …

OK, moving on.  Mr. Q and I picked this dresser up one dark night a few weeks ago.  It was conveniently located just a couple of miles away.

farmhouse dresser before

The gentleman that I purchased it from said they had used it “up at the cabin” (a true Minnesotan thing).  I suspect there are many fabulous pieces of vintage furniture tucked away in cabins all over Northern Minnesota.  In fact, a small sidebar, after I posted my recent possum belly table makeover, my friend Meggan texted me and said “look what was shoved in the corner by the fridge” in the cabin her family had just purchased.

meggan's table

Isn’t that crazy?  Another possum belly table.  Meggan’s table is in much better shape than mine was and even has the original metal possum belly drawers!

By the way, I shared Meggan’s house on the blog a while back, if you missed it you can find it here.  I bet her new cabin (which, by the way, is on its own private island!) is going to be fabulous as well!

Anyway, back to this dresser.  It definitely has a certain rustic charm.  Initially I was planning to strip the top and paint the body white.  Every once in a while I like to go back to basics.  I actually mixed up the MMS Ironstone milk paint and painted one coat.  Then, I stepped back and looked at the dresser and decided white just wasn’t going to cut it.  So I added some French Enamel (blue), nope, too blue.  Then I added some Luckett’s Green.  Hmmm … too dark still, so I added some Eulalie’s Sky.  Well, you get the idea.  I mixed a bunch of different colors and ended up here …

farmhouse dresser 5 title

This dresser had all but one of its original brass key hole escutcheons.  I had a couple of spare escutcheons lying around and I was just going to replace the missing one, but then I came across these little metal numbers that I forgot I had.  The color was perfect.

farmhouse dresser number

And thus, farmhouse dresser no. 5 was born!

When I pulled open one of the drawers, I thought for a moment that I might try to salvage the lining paper …

farmhouse dresser inside before

Unfortunately it was in pretty rough shape, and for this dresser to truly be functional I knew its new owner would prefer a fresh and clean surface inside the drawers.  After ripping out the contact paper liner, I found that the insides of the drawers had been painted already.  Some were pink and some were a very dingy white.  I gave them all a fresh coat of Fusion in Lily Pond.

farmhouse dresser inside after

You know I like to use Fusion on interiors because I don’t have to top coat it with anything.  Once cured, it is fully washable.  Also, this is just one coat and it covered beautifully.

The dresser came with glass knobs, but originally it probably had brass drawer pulls.  There were still two holes in each drawer.  Once again, I am having issues with my choice of fill material.  Remember I switched to a different brand and it resulted in purple paint?  Well, of course I knew not to use that again, so this time I tried a Minwax wood putty.  Here is the description of this product:

Minwax Wood Putty® is designed to fill minor surface imperfections in wood that has already been stained and finished. Unlike Minwax Stainable Wood Filler, it never hardens. It requires no sanding and no finishing, and comes in a variety of pre-mixed colors to perfectly match Minwax Wood Finish stains. Ideal for bare, stained or finished woodwork, paneling, molding, trim and doors.

Easy to use – no sanding or finishing required!

Yeah, well, I missed one small detail.  See it there at the end of the second sentence?  Yeah, it never hardens.  But you know me, I like to learn things the hard (pardon the pun) way.  Naturally the milk paint did not adhere to the wood putty.  That last sentence should have read no sanding or finishing “possible!” instead of “required!”

farmhouse problem

Dang.  And of course it’s the two holes on the top drawers that are the worst.  It couldn’t have just been the bottom drawers.

To add insult to injury, I didn’t notice this problem until after I sanded the dresser, which was several days after I painted it.  And remember that custom color that I mixed?  Yeah, I had used up every drop on the dresser.  I had no more paint.

My choices at this point are 1)  dig out the wood putty, refill with wood filler, and repaint the entire dresser (or at least all of the drawer fronts).  Or 2) leave it alone and assume there are people out there who don’t mind these sorts of imperfections.  I know that I don’t.  It’s not like I was aiming for a flawless finish.  I was aiming for a chippy, vintage, “I have some history” sort of look.  I am OK with this dresser looking like it spent the last 85 years up north in someone’s cabin.

farmhouse corner close up

Would I have preferred that this didn’t happen?  Yes.  Do I want to do all that work to fix it?  No.

But seriously, what do you think?  Would you be OK with the dresser as is?

farmhouse dresser

 Seriously, I want to know.  Would this bug you, or would you just ignore a minor imperfection such as this and embrace the shabby charm?

winter window boxes.

I’m so ahead of myself this year!  Last year I waited too long to get my winter window boxes done.  As a result, the dirt was frozen solid so everything had to be sort of placed on top of it.  That really doesn’t work well at all, so this year I was determined to not let that happen.  Maybe I overcompensated just a little, but the weather was so lovely last week that I decided I would get a jump on them.

winter window box 1

 I think the trick to a gorgeous window box is to fill it chock full, and here is how I make that happen.

I start by placing in my twig lights, spruce tops and some filler evergreens.  I purchased the evergreens from Bachman’s (my local nursery).  I spent about $60 for enough evergreens for my front window box, my two galvanized boiler window boxes, a planter on my deck and some small planters that hang on the mailbox post that I share with nnK.

window box layer 1

Those twig looking things are my twig lights.  Each end has a little light on it.  Last year I wasn’t able to use them because the boxes were too frozen to poke them in the dirt.  I mentioned this to one of the clerks at Bachman’s and she recommended using a drill (to drill a hole in the frozen dirt) should this happen again.  Great idea!  But easier in the long run to just get this done before the dirt freezes solid!

Once I have a base of greens I fill in with lots of hydrangeas.

window box layer 2

It would cost me an arm and a leg to purchase enough stuff to fill in this huge window box, so I sort of wander around my garden looking for dried plants that might add some interest, like these alium flowers …

window box allium

I don’t know what these are called, but they grow from the ferns.

window box ferns

I also added some dried Astilbe flowers.

window box astilbe

As Christmas gets closer, I’ll add some more festive yuletide touches to the window box, but for now it just has a simple wintery appeal.

I used a similar process on my galvanized boiler turned window box that is hung on the side of the Carriage House.

boiler window box 1

I went with a bit more color in this one though.  With the exception of the spruce top and the ornamental kale, everything in this arrangement was salvaged from my garden (well, or nnK’s garden across the street).

boiler window box close up 1

I have used hydrangea, sedum, lavender, foam flower and burning bush.

boiler window box close up 2

I also tucked my garden cranes in this year.  I purchased these at a garage sale several years ago.

boiler window box cranes

I put away most of my garden planters for the winter, but I add a winter arrangement to this large planter so I have something nice to look at when I come home every day.

deck planter

That planter, by the way, is faux.  It looks like concrete, but really it’s a Styrofoam like material that is very light.  I purchased it at a garage sale (naturally).

This year I decided to add some birch logs to this arrangement.  It’s all the rage you know, and I have to say I really love the look.

deck planter close up

This arrangement is mostly evergreens with a few hydrangeas in the front.  I purchased those tall brush-like things last year and last spring they were still in good enough condition to put away for use again this year.  This year I’ll save the birch logs to re-use as well.

You can see that my ironstone platter with my house numbers on it is holding up really well.  This is another plate that I did with my Cricut and some vinyl.  It has been hanging outside since June and the vinyl isn’t peeling at all.

Well, I hope I’ve inspired you to go gather some things from your garden and put together some winter arrangements whether inside or out.

free is good.

I’m not sure if I should have called this “mid mod week” or “free is good” week!  Either way, I have another free mid century modern piece to share with you today.  Plus if you read to the end, I’m sharing a link where you can get a coupon for some free paint too!

My neighbor Karen (or as I like to call her, nnK) brought this table to me a while ago.  I think she said her dad, Big Larry, dragged it out of someone’s trash pile.  She likes to bring me trash.

hair pin leg table before

Fortunately, she has pretty decent taste in junk (and apparently so does Big Larry).  She does lean towards the mid-century modern.

Shortly after she gave this piece to me I happened to be browsing through the latest Schoolhouse Electric & Supply Co catalog and this page caught my eye …

schoolhouse table

photo via Schoolhouse Electric

See the bedside table?  Very similar to my freebie, no?  Certainly similar enough to provide inspiration for a makeover.  By the way, the table pictured above is available for $350 from Schoolhouse Electric … bwa ha ha ha.

This table was really dirty when I got it.  I scrubbed it thoroughly with a Scotch pad and Dawn dish washing soap and the brown gunk that came off this thing was disgusting.  Also, unexpectedly, as I was scrubbing with the Scotch pad the black paint started to come off too!  Underneath the black was the original green.  Once I dried it off, I realized I had to sand it to get more lose paint off.  Gack!

Once I had that done, I gave the legs and the bottom shelf a fresh coat of spray paint in Rustoleum’s Canyon Black in a satin finish.

Then I painted just the top level in Fusion’s Limestone.

And voila!

hair pin table 4

It only seemed fair that I stage the photos for this table over at nnK’s house.  She had the perfect mid mod props for me.  The atomic clock and the turquoise leather chair.  That chair, by the way, is another freebie.  She snagged it when the people next door to her were cleaning out the house after our former neighbor passed away.  They just thought it was an old ugly chair and were going to trash it.  It’s in fantastic condition, and that shade of turquoise makes me drool.

In hindsight, I wish I had worked harder to stage the table itself.  I just plopped a magazine on top and called it good.

hair pin table magazine

But really, I felt like I couldn’t compete with that chair and clock.

hair pin table 5

I suppose I could have chosen chalk paint for the top of the table, but I chose Fusion because I wanted a little more shine than you get with chalk paint and wax.  Plus, it was a one step paint job.  Paint and let dry.  I did use two coats, but it really couldn’t have been easier.

Not bad for a free table, right?

If you have been thinking about trying Fusion paint yourself, now is your chance to get something for free too!  Clicking on the image below will take you to the Fusion website where you can request a coupon for a free tester pot of paint to be redeemed at participation locations (offer good through November 30, 2015).

Fusion giveaway

For those of you who are local (Twin Cities), I checked with Jody at Farmhouse Inspired and she is participating in this giveaway.  Just bring your coupon to her and exchange it for a tester sized pot of Fusion in the color of your choice.

Hey, free is good, right?

This is not a sponsored post.  All opinions are my own.  I was not compensated in any way.

the greyson.

A couple of weeks ago my BFF’s sister texted me to say that she pulled a piece of furniture off the curb in her neighborhood for me (thanks again for thinking of me Laura!).  I’m always a little nervous about ‘free’ stuff, because it usually tends to need a lot of work.  There is often a very good reason why the current owner has kicked it to the curb.

But she then sent me a blurry phone photo and I was intrigued.  I do love a good MCM piece, and this one looked interesting.

Greyson before

Once I got a closer look at it, I could see that originally there would have been sliding doors on that bottom section, as well as a shelf in the top section.  I’m not really sure what the original function of this piece would have been, other than just a book shelf with storage on the bottom.  It does not have a pull out desk top, so you have to rule out desk.  The top part is not deep enough for a phonograph, so you have to rule out record player stand.  Although the bottom section is sized right for album storage.  Any other guesses?

Well, whatever it was, it now is a bookshelf.  I asked Ken to cut a new shelf for it, which was child’s play for him!  He also had to re-attach one of the legs.  No problemo!

greyson blog title

This piece is painted in a color called Greyson from Little Billy Goat.

Unfortunately, this piece had some pretty significant water stains on the inside.  You can see them in the ‘before’ photo.  I painted over them with two coats of Greyson, but those stains were going to just keep bleeding through.  I could have sealed them with some shellac or Tough Coat Sealer, but in the middle of the night a brilliant idea came to me.  Paint the back in Fusion’s new metallic, Brushed Steel.  Eureka!

Greyson corner

It’s a little hard to capture in photos, but I think the Brushed Steel looks amazing at the back of the cupboard.  It works beautifully with the Greyson.  And by the way, I finished the Greyson with my custom mixed dark wax which darkened up the color considerably.

Since I was loving the Brushed Steel so much,  I decided to ‘dip’ the feet in it too!

greyson feet

Oh boy, now you can see just how dirty the floor in the photo cottage is!  Please ignore that!

At first I wasn’t at all sure how I was going to stage this one, but then I pulled out some of my vintage cameras …

greyson cameras

and some vintage suitcases …

greyson suitcases

and they added the perfect touch!

I have to admit, I’m kind of wishing I had a spot for this bookcase myself.  I need a bigger house.

greyson collage

But, I’m not getting a bigger house, so I have to let this one go.  If you are interested, leave me a comment!


momma’s fridge.

The gals at Reclaiming Beautiful in Stillwater (one of the shops that carry my pieces) have started to sell a new paint line called Little Billy Goat.  When I popped in the other day I picked up a few colors to try it out, Greyson, Prize Winner and Momma’s Fridge.

little billy goat paint 3

I gotta say, the packaging on this stuff is fabulous.  It comes in a canning jar!  And each jar has a cloth over the top, how cool is that?little billy goat paint 1  
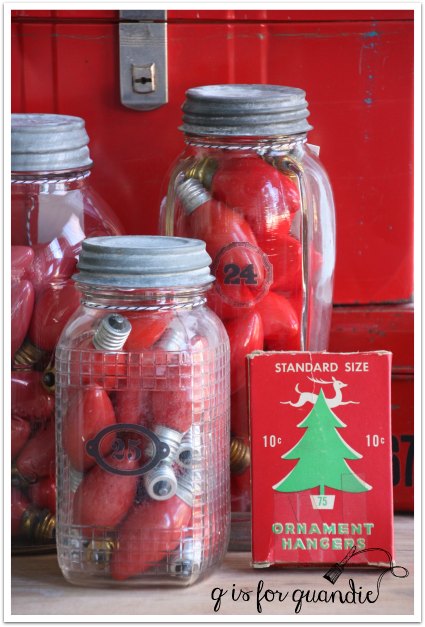
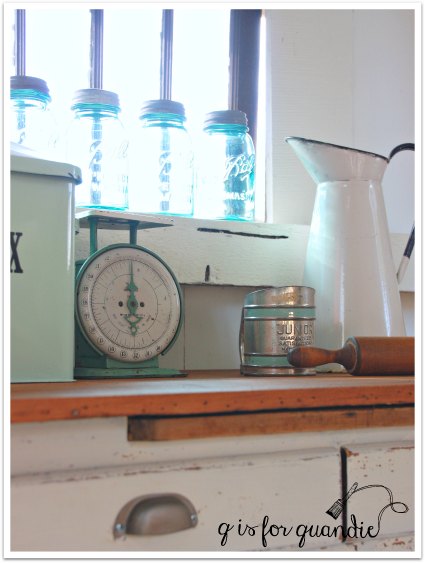
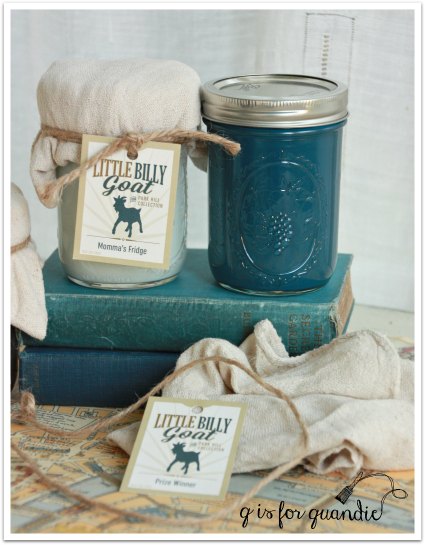
From a practical point of view, I have to say that I really love the canning jars!  It’s very easy to wipe the rim and put the lid back on.  Somehow much easier than a traditional can like Annie Sloan uses, and definitely better than the plastic lidded can that Cece Caldwell uses.

Mr. Q and I picked up this sweet little dresser a couple of weeks ago and I knew it would be the perfect guinea pig for testing this paint.

momma's fridge before

See that funky octagon on the top drawer?  There was an odd little piece of trim glued on there.  I took it off before I remembered to take the ‘before’ photo.  I gotta tell you, it looked like a nipple.  There.  I had to say it.  A big ol’ nipple in the middle of the drawer.  Yeah, it had to go.

Aside from the nipple, this sweet little dresser basically had no flaws.  I love finding pieces like this!  No repairs necessary, it just needed a new paint job.

So I opened up a can of Momma’s Fridge and happily painted away.

momma's fridge title

Wait, let’s back up a step.  First I visited the website for Little Billy Goat.  They claim their paint “rarely requires any preparation, such as sanding or priming” so guess what?  I didn’t do any prep.  Well, I did wipe it down ever so quickly with a damp cloth.  That was it.  In addition, the website says “adding water makes for a smoother surface.”  OK.  I’m down with that, so I added some water to my paint to thin it out a bit.  I like a smoother surface.  You can use it ‘as is’ if you like a more textured surface.

I painted two coats of paint on the dresser.

momma's fridge angle 2

I then used white acrylic craft paint on the little details at either side of the top drawer to give them a little more pop.  I also added a small stencil to the middle of the top drawer.  I did that because I could still see a little ghost of that darn octagon nipple and the stencil helped to camouflage that.

Once everything was dry, I sanded lightly to distress and then finished with Miss Mustard Seed clear wax.  Little Billy Goat sells a clear matte sealer with their paint, but I have not tried that product.  I think I’d like to though.  I have to admit, waxing is hard work.  There has to be a better way.  I’ve always loved the end look of wax though, plus I definitely can use the arm workout.

momma's fridge close up

The hardware on this dresser is very pretty.  I love the pulls on the lower three drawers.

momma's fridge hardware

I staged this piece with some vintage toys, a tiny chair and a gorgeous handmade baby dress.  Just look at that stitching.  This dress must have taken quite some time to finish.

baby dress close up

Whereas this dresser did not!  The Little Billy Goat paint went on easily, covered well in two coats and distressed quickly.  I didn’t seem to have any problems due to not sanding my piece before painting.  So if you’re looking for an easy product to use to revamp your own furniture, this one fills the bill.

But if you’d rather purchase a dresser already painted for you, this one is available!

Please note, this is NOT a sponsored post.  I purchased this paint myself, all opinions are my own.

a thing for plates.

It’s true.  I have a thing for plates.

plates title

I just love old china patterns, and new ones for that matter.  I’m sure that I’m not the only one.

Last Saturday morning my sister and I went to my absolutely favorite Zumba class (Cindy’s Saturday morning class at the Xperience Fitness in Vadnais Heights, in case any of you locals need an amazing Zumba class).  She did a Halloween themed class complete with Thriller, Monster Mash and The Time Warp.  So fun, and it left us totally sweaty and gross.  But that didn’t keep us from stopping off at the Goodwill on our way home!

By the way, Goodwill on Halloween morning?  Not the greatest of plans.  We barely got out of the parking lot alive.  Lots of last minute costume items were being purchased.

But … I did find plenty of plates!  Which was what I was looking for.

plates numbered

I was pretty excited to find another set of these numbered plates from Target.  I already have two sets of these, which means I can serve appetizers or dessert to 8 people.  So I sort of had to buy these.  At $1.99 each this was a no-brainer.  Now I can have 12 people over.  The more the merrier, right?

I also purchased a small stack of plain ironstone plates.

ironstone plate mark

Isn’t that little bee hive sweet?

I’ve been picking up stacks of ironstone plates when I see them to add to my Welsh cupboard.  That thing is huge, and I want to really fill it up.

plates in cupboard

I also found some china with gold patterns.  I plan to use them for Christmas decorating this year.  You’ll just have to stay tuned to find out what I do with them.

plates gold

plates gold 2

Finally, I will add some holiday words to some pretty vintage plates that I picked up.

plates grapevine

I’m thinking words like merry, peace, jolly … hmmm … got any other ideas for me?

plates silver pine

I’ll be making up a few of these for both Reclaiming Beautiful and Eye Candy ReFind.

All told, my stack of 26 plates cost just under $40.  Not bad, right?

playing possum.

At the same lunch time garage sale where I found the drop leaf table, I also purchased this possum belly table.

possum belly table before

At the time I didn’t know it was called a possum belly table.  The seller told me it was called a “Minnesota cabinet”.  I had never heard that term before and I was unable to find any sources that referred to them with that name.   But I did find lots of info about possum belly or baker’s tables and that is exactly what this is.

Usually there would have been a hutch/cupboard type top that sat on the table, and that combination of items was the pre-cursor to the Hoosier cabinet.

possum belly cupboard
photo via pinterest

The possum belly drawers on the bottom would have held flour and sugar.  Normally they were lined with tin to keep rodents out (ewww).  I didn’t take a very close look at the drawers on my table when I purchased it.  It wasn’t until I got it home and pulled the possum belly drawers out that I realized they were in pretty poor condition on the bottom.

bad bottom

In fact, most likely unusable in the condition they were in.  I’m not a big fan of having furniture that is ‘just for looks’, so I knew that making these drawers functional again was going to be step number 1.

Fortunately, once again I was able to call on my amazing handyman/neighbor Ken!  I showed him the drawers and explained that ‘back in the day’ when Ken was a young man (I always give him a really hard time about being older than the hills, and luckily he finds it amusing instead of annoying) these drawer bottoms would have been made of tin.

possum belly drawers
photo via pinterest

That was all it took to get Ken’s mind thinking on the problem of how to fix them!

I can’t really give you a lot of detailed instructions on how Ken accomplished this.  I just consider him the furniture fixing fairy.  I go to work at the day job and come home at the end of the day to find completed fixes.  I know that he was able to find pieces of sheet metal that were already the approximate size needed.  He only had to cut a few inches off the end of each piece.  I also know that he used carpet nails to attach the sheet metal to the drawer frame.

possum belly drawers 2

possum belly drawers

The sides of the drawers are still the original wood.

possum belly drawer sides

The next step was to paint the base and drawer fronts in Miss Mustard Seed’s Linen milk paint.  I was happy to get just the right amount of chipping.  Not too much, but just enough to look authentic.

pb chipping

As I mentioned earlier, the top of this piece appeared to be unfinished when I got it.  It’s possible that it’s a newer replacement, but I really think it originally had a sheet of zinc over it.  If you look at the above picture you can see that there are little tack holes all around the perimeter of the top.

I decided to just sand my top down a little to smooth out the wood and then wax with Cece Caldwell’s Aging Cream.  It turned out gorgeous!

possum belly table top

Like most of the possum belly tables I saw online, mine also has a cutting board that pulls out.

pb cutting board

cutting board

Finally, I needed to replace the hardware since it didn’t come with any.  Most of the photos I’d seen of these possum belly tables show cup pulls.  I just happened to have a set of 4 that my father-in-law gave me when he changed them out for something newer (horrors!).  When I got them, they looked like this …

cup pulls before

In other words, nothing special.  I came up with a brilliant plan to paint them copper with the Fusion metallic paint.  But once I saw the drawers with their new sheet metal bottoms, I realized I needed to stick with just one metallic look so I repainted them in Fusion’s Brushed Steel.

possum belly hardware

And finally, the end result of all of this …

possum belly title

With holiday baking season almost upon us, couldn’t you use a possum belly table in your kitchen?

possum belly closeup

This one is available.  If you are local (Twin Cities) and interested in it, leave me a comment and I’ll get back to you with details.

Linking up with:  Finding Silver Pennies