jardin de fleurs desk.

jardin de fleurs desk

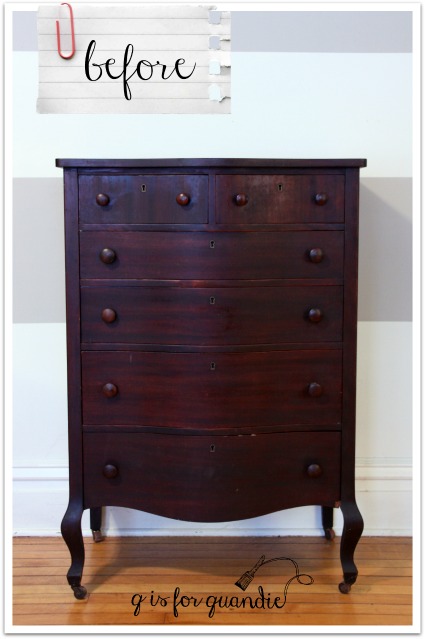
Mr. Q crossed state lines (to Wisconsin) a week or two ago to pick up this desk for me.

desk before

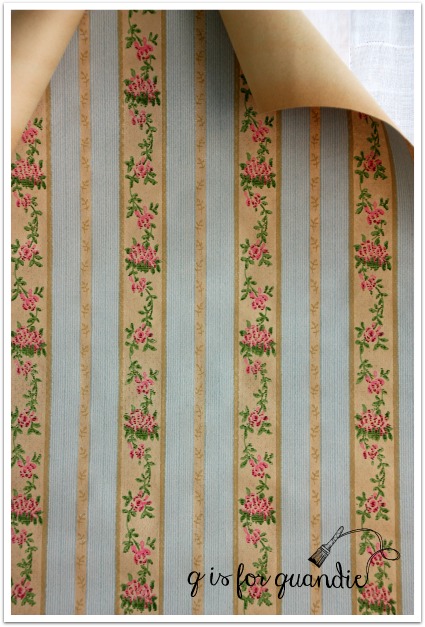
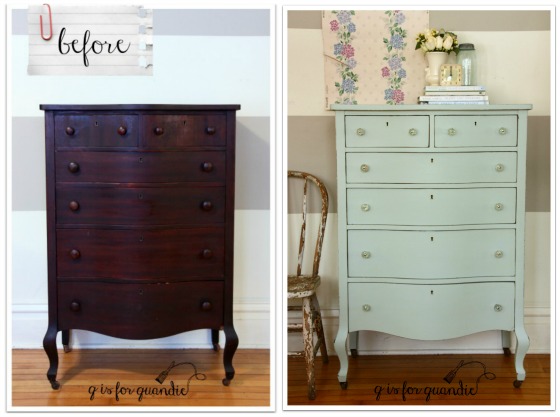
I thought the vertical trim on the corners was lovely.  I knew that a little paint would really bring out those details.

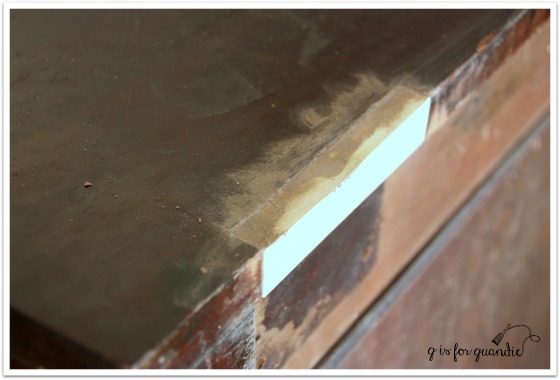
First step was having Ken work on the structural integrity.  He glued up some joints and replaced all of the screws holding the top on.  He also had to re-glue a couple of the drawers.  Once that was done, I stripped the top.  You can see in this next photo that there was a shadow on the top of this desk.  I suspect that there was a desk pad in place for a long time and as a result the desk top faded all around it, but not under it.

desk top before

After stripping, I sanded this some by hand.  Since it’s veneer, I didn’t want to sand too heavily and sand right through it.  If I had been able to completely eliminate that shadow, I would have then just waxed the top.  However, although it was diminished somewhat, I could still see it.  So I decided to stain the top to help even out the color.  I added two coats of Varathane gel stain in Dark Walnut.  Since I am far from being an expert wood stainer, I really like working with a gel stain.  They are super easy to apply, I just wear gloves to avoid staining my hands too, and then use an old t-shirt to rub the stain on.  I find that I can work the stain without it getting streaky or uneven.  I waited 24 hours and then added a couple of coats of  Minwax Wipe on Poly in clear satin using that same technique.  I don’t usually use a poly, but I do like it for desk tops that might get a fair amount of wear.

desk top

Unfortunately that shadow is still there.  Perhaps I should have tried bleaching that area a little.  Or, I cold have gone with a really dark stain like Java gel.  But although the shadow is obvious when the desk top is empty, once there are a few things on top it’s not so glaring.

black desk top filled

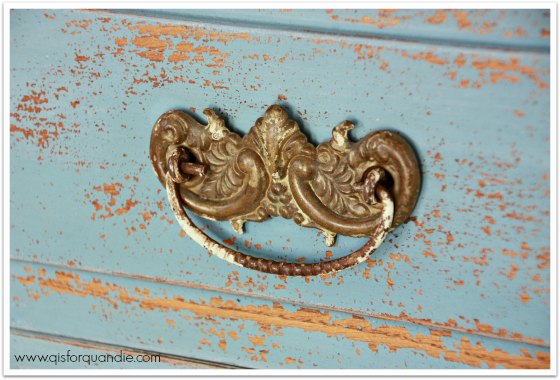
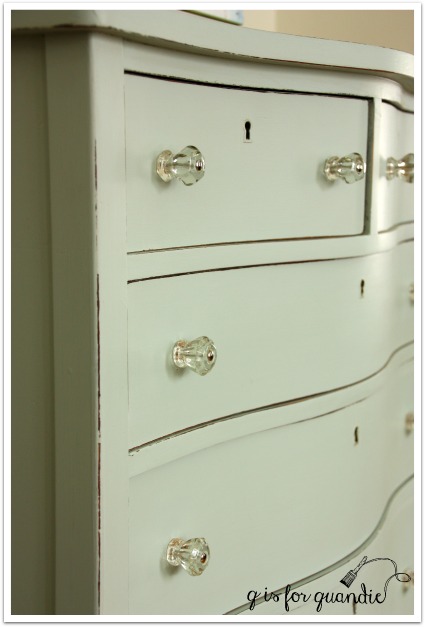
Another problem this desk suffered from was ‘ring around the drawer pull’.

ring around the drawer pull

See that groove worn into the wood around the drawer pull?  That is from the pull being too loose and spinning around, thus wearing that groove into the wood.  So sad.  Usually when you see this problem it’s because the escutcheon pin is missing from the drawer pull.  On many old pieces of furniture with this type of pull, there is a tiny little nail that holds the back plate stationary so that it won’t spin.  Those are often long gone on older pieces.  However, in this case there were never any pins.  The handles had just been allowed to work loose over time and no one took the time to tighten them up.

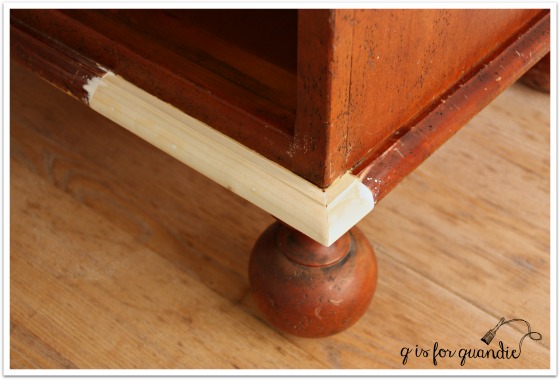
I added a little wood filler to all of those circular grooves and then sanded them smooth so that when I painted the dresser they wouldn’t be quite as obvious.  You can still see them if you look closely, but they are far less obvious …

black desk and typewriter

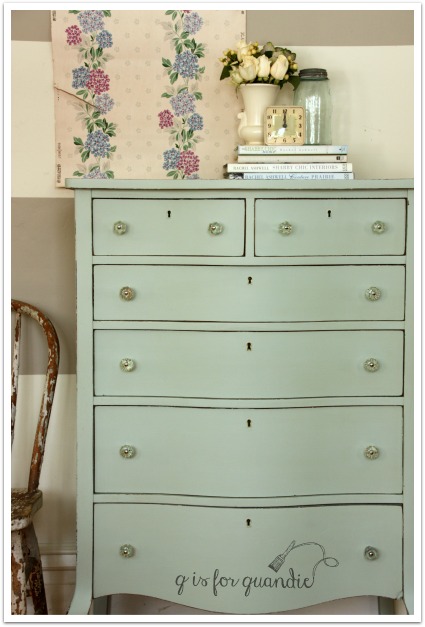
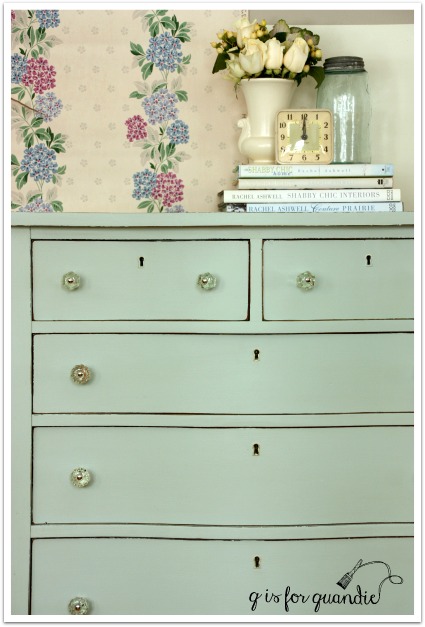
I sanded all of the flat surfaces lightly before painting, but I didn’t sand the detailed corners at all.  I was hoping for some chipping!  As it turns out I was hoping in vain; I didn’t get any chipping at all.  I even tried my masking tape trick (using tape to pull the paint off creating more chipping) and nada.  This is Miss Mustard Seed’s Typewriter milk paint by the way, and it’s finished with hemp oil.

black desk corner

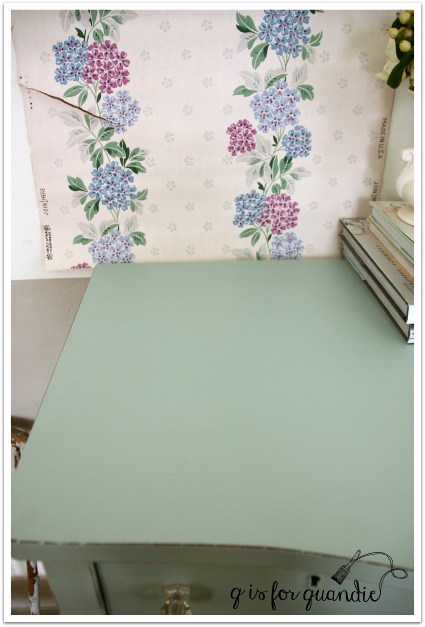
I also painted the back of this desk.

black desk back
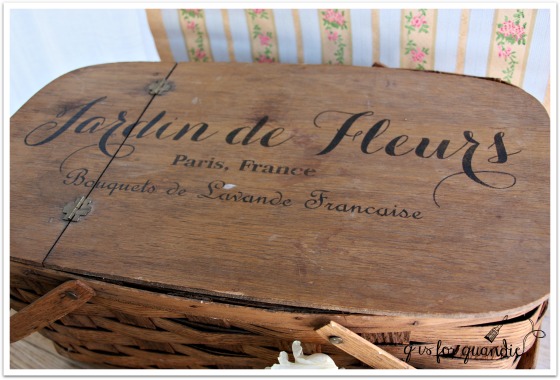
The desk is trimmed out all the way around so that the back is presentable and could face out, so I went ahead and painted it too.  The middle piece of that back was positively calling out for a stencil, so I couldn’t resist using my new “Jardin de Fleurs” stencil there.black desk stencil close up

I used Martha Stewart acrylic craft paint in Grey Wolf.  I’ve mentioned this before, but when I stencil on black I don’t like to use white paint because the contrast is too heavy.  The Grey Wolf is actually a medium grey, but on the black it reads as ‘white’ without being too harsh.

black desk back close up

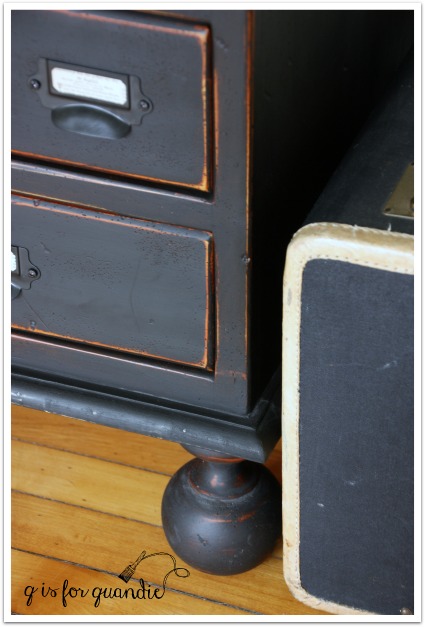
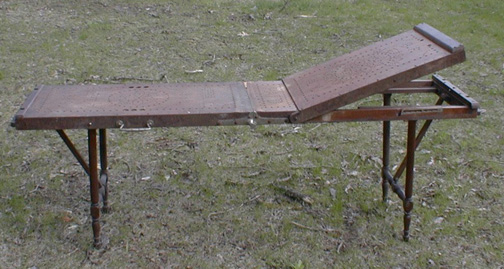
One final fix that I thought I would share with you is replacing the doodads that keep the drawers from pushing in too far.  You  know, these things …

doodad 
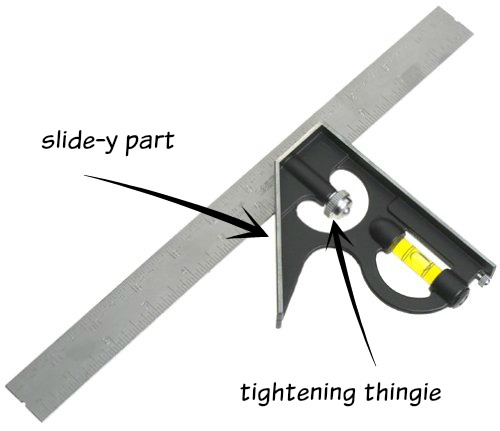
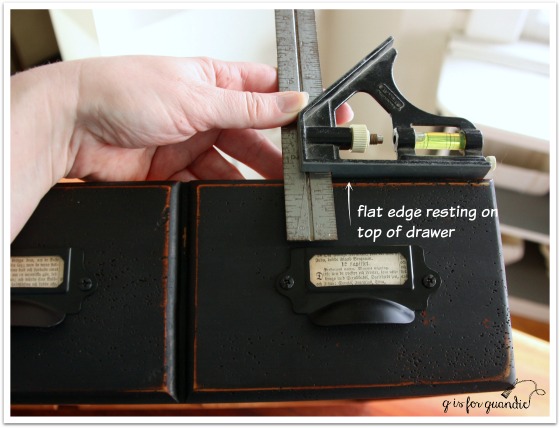
I think I’ve established that I often don’t know the proper names of tools and other hardware.  I get a lot of funny looks at my local Menards store when I ask the employees if they have those ‘metal thingamajigs that keep the drawers from getting pushed in too far’ or ‘that tool with the slide-y thing on the ruler’.  I was never able to find these at any of my local hardware stores, but I did ultimately find them online at VanDyke’s Restorers.  And by the way, they are called ‘drawer stops’ (duh) and there are two different styles that I see fairly regularly in vintage furniture.

do dads

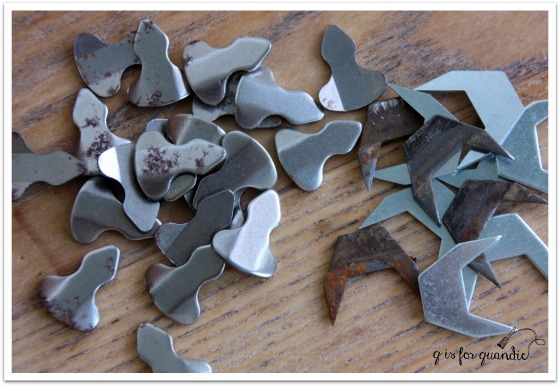
This desk has the type that are on the right.  You are better off replacing like with like because the grooves they go in are different sizes.

And here’s what it looks like when one is missing.

doodad space

It’s quite simple to just pound another one into that groove.

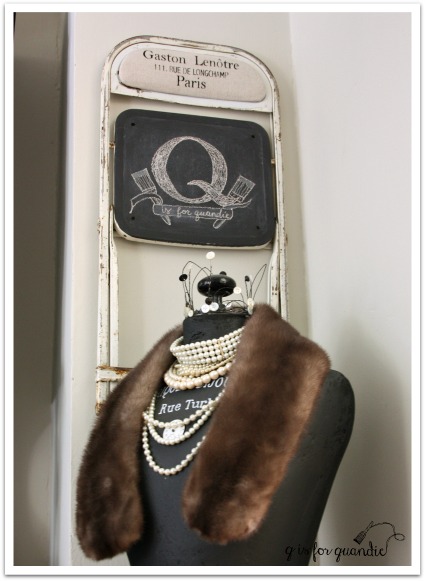
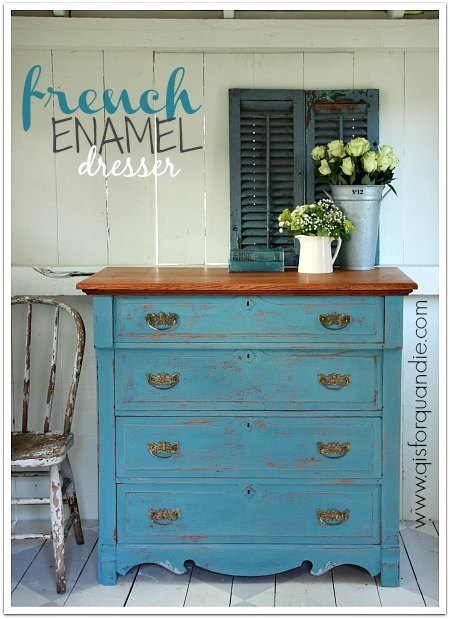
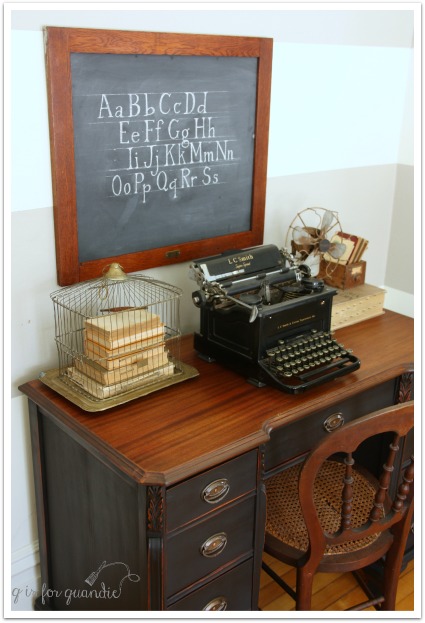
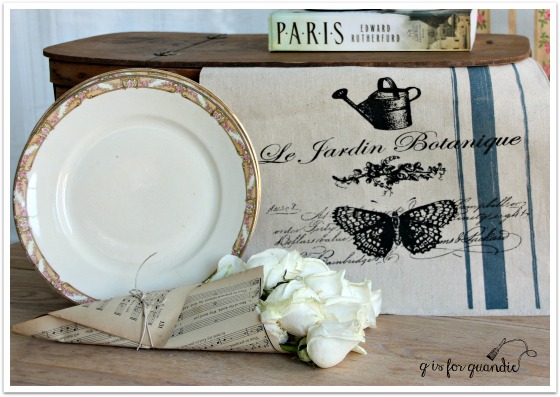
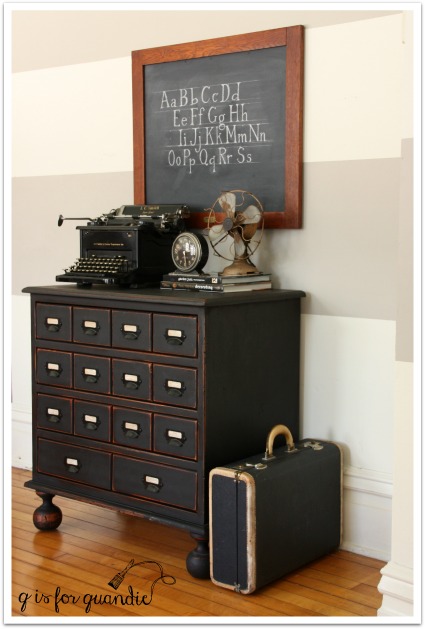
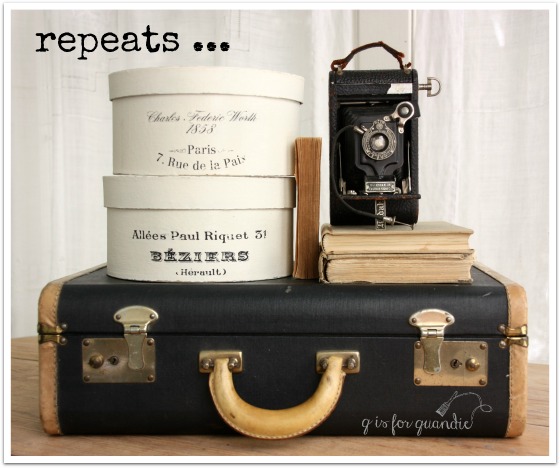
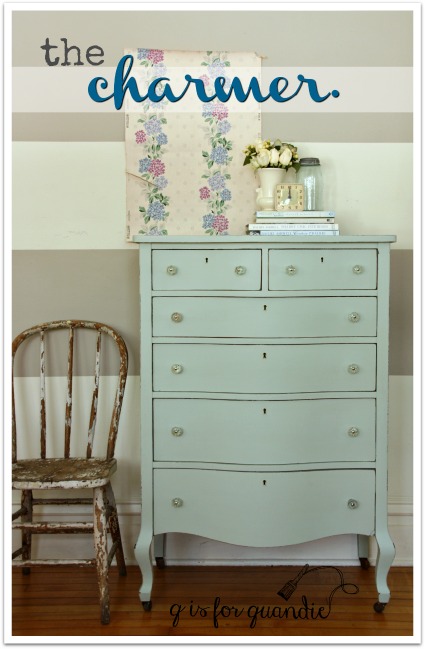
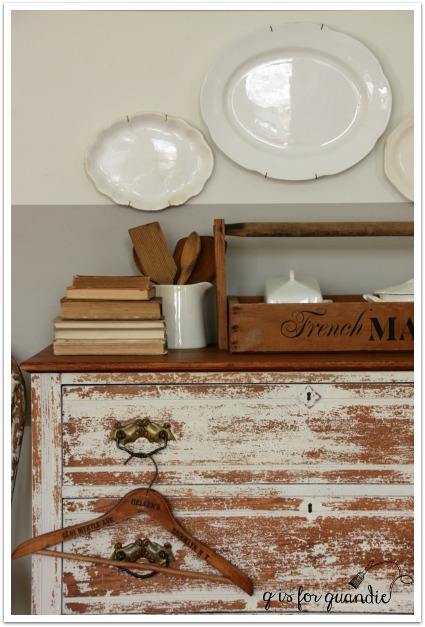
I had a lot of the props from my photos of the faux card catalogue handy including my chalk board, so I used them again.

black desk angle

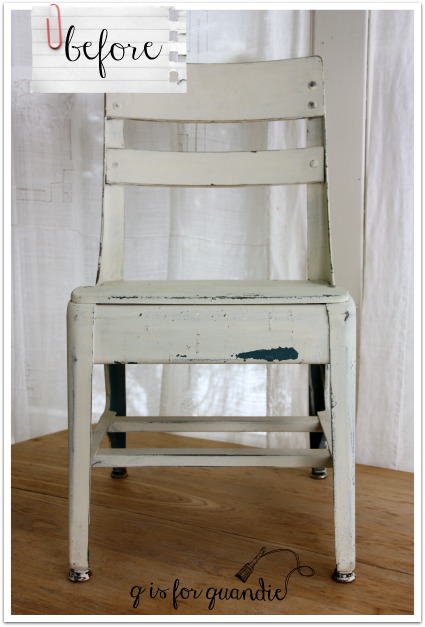
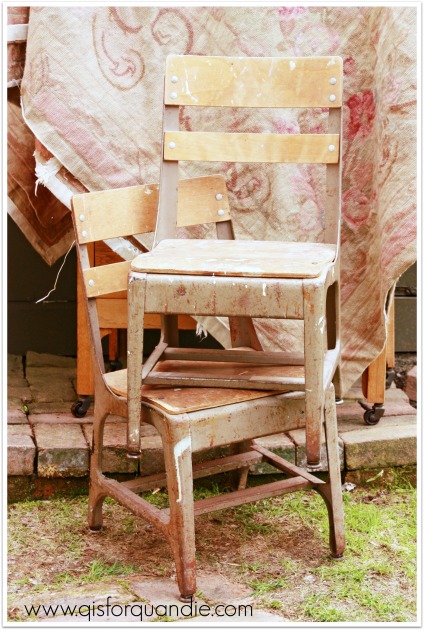
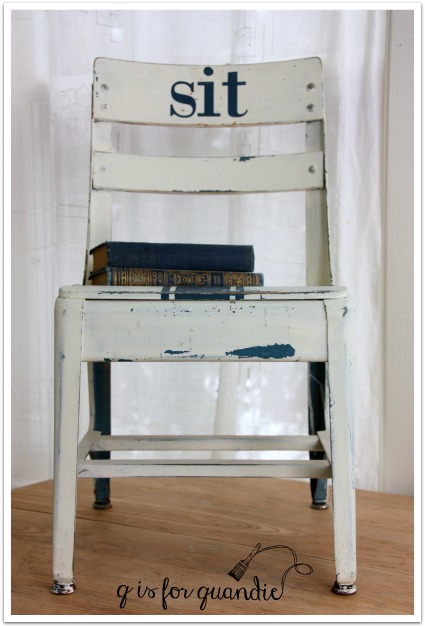
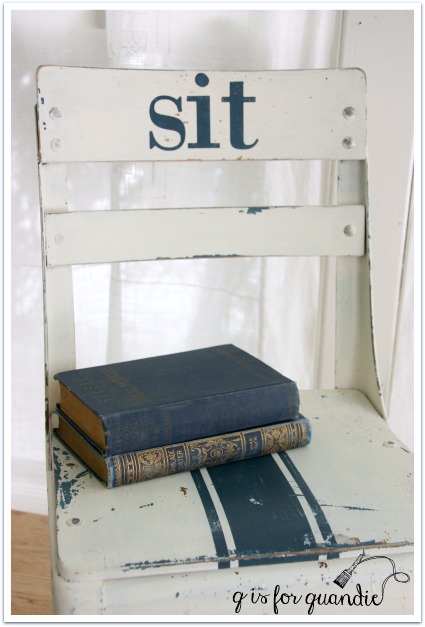
Don’t you love that sweet little chair?  Some of you might recognize it from previous posts (here, here or here).

desk chair

It works perfectly with this desk, but unfortunately the cane seat is in very bad shape.  It would be cute with a little skirted seat cover, but I am sadly lacking in sewing skills!  I just keep the chair around to use as a prop with desks.

The jardin de fleurs desk is available for local sale.  If interested leave a comment and I’ll get back to you with the particulars.

Linking up with Making Broken Beautiful at The Curator’s Collection and Friday’s Furniture Fix at Patina Paradise.


think spring.

I’m probably jumping the gun a little thinking about spring, but last weekend it was sunny and close to 40 here in the Twin Cities.  Sunlight was streaming in through my windows.

roses in blue jar

After our previous stint of sub-zero temps, that felt positively balmy.  Snow was melting, birds were singing and it just smelled like spring outside.   The days are starting to get longer already, I’m no longer coming home from work in the dark.  But then yesterday we got a big pile of snow dumped on us.  I think it was Mother Nature’s way of reminding me that it really is only early February after all.  Drat.

Nonetheless, I am ‘thinking spring!’ and in anticipation of gardening season I ordered a new stencil for myself via Etsy.  I took it for a test run on this vintage picnic basket that I found at the thrift store.

stenciled picnic basket

And I love it!  I hope to use it on many more things.

While I was feeling floral, I also picked up some more pretty floral plates to add words to, as well as a Le Jardin themed table runner, both also from the thrift shop.

thrift store finds 2

I also ordered some more vintage floral wallpaper from Hannah’s Treasures via Etsy.

vintage wallpaper

This is in anticipation of an upcoming project that I have in mind using this …

coming soon

Ta da!  I am so excited!  I’ve been sent some samples of the new Rachel Ashwell Shabby Chic paint line to try out!

But before I can get to that project, I have to finish up the desk that I’m currently working on.

desk before

And speaking of desks, my February post at Reclaiming Beautiful is up and running today and is all about desks.  Head on over and check it out!

desks

a faux card catalogue.

chalkboard 2

On what proved to be the coldest day of the winter so far (windchills of more than 30 degrees below zero), my friend Meggan and I decided to do some thrifting.  I believe we officially qualify for ‘die hard’ status now, don’t you?  But our local thrift store was having a 50% off preview day for members only (we are members), so we had to check it out.  This piece proved to be the ‘find of the day’.

apothecary before

Can you see the giant flaw?  Lower right corner? A huge chunk of trim was ripped off.

But the price on this was really right at a mere $15.  And I could just picture using the same label cup pulls that I used on the book page dresser on it.  Most of all, I knew that my handyman neighbor Ken was up for the challenge of repairing that trim.

Sure enough, I sent it home with Ken and a few days later he sent it back over with this patch job …

apothecary fix

Super impressive, right?  Honestly, this kind of repair just boggles my mind.  I don’t know how he does it, and I can’t even begin to explain it.  Let’s just reiterate how very lucky I am to have Ken living next door and leave it at that.

Once that repair was done, next I removed all of the knobs and filled the holes with wood filler.  The fill didn’t have to be perfect because the holes are behind the new label holder cup pulls.  With a ‘label’ in place, you can’t even see them, but if you take the book page paper labels out you can.  So I filled them.  I then sanded the whole piece.  The existing finish was a little shiny and I wasn’t sure how milk paint would react with it, so when in doubt I tend to sand.

Next came a simple paint job using two coats of Miss Mustard Seed’s Typewriter.  I sanded to distress and added a top coat of hemp oil.

faux card catalog angle

Here is how that front repaired section looks after the paint job.

faux catalog front corner

If you didn’t know it was there, I don’t think you would really notice it.  But it does stand out a little in so far as it isn’t as distressed as the rest of the piece.  Had I been really meticulous I should have stained the new wood first, then painted over it.

Once the paint job was finished it was time to attach the new label holder cup pulls.

Ken taught me a little trick to making sure they all lined up properly using a combination square.  Do you have one of these?  I bought mine at a garage sale for a couple of bucks, of course.  It looks like this …

combo square

Basically you loosen up the tightening thingie which allows the slide-y part to move along the ruler part (I’m so technical!).  In my case, I then decided exactly how far down from the top of the drawer I wanted to place the pulls.  Once you have that measurement, you tighten it back up.  Now it’s easy to measure for the placement of each pull …

combo square demo

Just rest the flat edge of the slide-y part along the top of your drawer, then butt your label pull up to the bottom of the ruler part.  You can slide the square along making sure that the pull is straight all the way across.  Does that make sense?  I then used a pencil to mark the holes for the screws, pre-drilled small holes, and then screwed the pulls on.

This worked great for the top to bottom placement, as for the side to side placement, I just eye-balled it.  That could probably have backfired for me, but I did it carefully and was able to keep each pull centered on it’s faux drawer.  I think I did a pretty good job keeping them all lined up.  When I mentioned this to Ken, he asked me if my arm hurt.  I thought he meant from having to attach so many pulls, which wasn’t really that hard, so I said “no, not really” and he said, “oh, I thought it might hurt from all that patting yourself on the back!”  Ha!  Yes, it’s true, I was overly proud of myself for getting these all on straight.

faux catalog pulls

I used more Swedish bible book pages to fill the slots for labels.

faux catalog label pulls

Are you wondering what makes this a ‘faux’ card catalogue?  It’s because those aren’t really small drawers.  Each set of 4 across is really just one drawer.

faux catalog drawer

So much more functional than lots of small drawers!  Although I did once see a real card catalogue turned into a wine cabinet.  Each drawer held one bottle of wine.  That was pretty cool.  But this piece is really just a small dresser.  I think it’s the perfect size to use as a bedside table.  It would also work great in a foyer or as a TV stand.  I also like the idea of using it in your home office with your printer on top and various office supplies inside.  There are so many possibilities for a small chest of this size.

How do you like my chalkboard?  This was a fun little project of its own!  The frame actually belonged to a mirror that came attached to the book page dresser.  I took it off the dresser.  The size wasn’t the right scale for it.  Plus it was poorly attached.  I had to wonder if it was even original to the dresser.  So, it never went back on.  Later I removed the mirror from the frame and replaced it with some hardboard painted with chalkboard paint.  Then I added a little brass number plate to the frame (at the bottom).  Next I got out the Complete Book of Chalk Lettering that my sister gave me for my birthday and did some more practicing.  I love how it turned out!

chalkboard 1

My chalkboard skills are slowly improving.

chalkboard angle

These make a great pair, don’t you think?

faux card catalogue

Both the chalkboard and the little chest of drawers are available for sale (chest of drawers is SOLD).  If interested, leave a comment and I’ll email you with details.

DIYFM-featured1-250x250

sit.

I painted this little chair last summer and then took it to Eye Candy ReFind.

sit before

Since it didn’t seem to be selling, I decided to bring it home and add a little more pizzazz to it.

But first, I managed to dig up the original ‘before’ photo from May of 2014.

Linden Hills 8

Yep, this chair and its companion were pretty ratty looking when I first brought them home.

Initially I painted this chair with an undercoat of Miss Mustard Seed’s Flow Blue and MMS Linen over that.  The second chair was painted in MMS Luckett’s Green, but that one is long gone.

I decided to jazz up the white chair with some grain sack stripes on the seat, and a stenciled ‘sit’ on the back.  I have to give credit for the ‘sit’ idea to my friend Sue.  She brought the most darling little chair to one of our occasional sales that was painted with ‘sit.’  I am totally copying her.

I used my Cricut machine to cut a vinyl stencil for the ‘sit’.  My sister gave me some of the stencil vinyl for Christmas.  It worked perfectly for this project.

sit chair stencil

sit chair 1

I just used tape for the grain sack stripes.  I sanded them down a bit to make them look good and worn.

sit seat

I think the chair has a little more pizzazz now.

sit chair 2

Don’t you?

sit 2

repeats.

How do you feel about repeats?  Personally, I’m not a huge fan.  I almost never watch the same movie twice (exceptions made for James Bond and Jason Bourne).  I don’t buy movies on DVD specifically for this reason.  I don’t watch too many television repeats either, nor will I read the same book twice.  In general I don’t even like to travel to the same places, but prefer exploring a new destination.  I try not to repeat my furniture makeovers either.

repeats title

But sometimes I repeat smaller projects because I loved them so much the first time around.  Such is the case with my painted hatboxes.

I painted my first one back in February of last year.  It was painted using chalk paint though, which made the transfer process a little tricky.

hat box on suitcase

I then improved on the idea back in March by using Fusion paint instead …

painted hat box

It worked much better because it held up well to getting wet when removing the paper after the transfer.

When I ran across a couple of cardboard hatboxes at a garage sale last summer for a dollar each, I grabbed them so that I could make more faux French hatboxes.

repeats before

I used the same basic process as before (check out those previous posts for more detail).  I painted them in a couple of layers of Fusion paint, then used a gel medium to transfer mirror images that had been printed on a laser printer.

repeats 1

I used a few different graphics.  I used to always get my graphics from Graphics Fairy, but lately I’ve found some good ones on pinterest also.

I actually purchased this next graphic a couple of years ago on Etsy.  I think I paid a few dollars for it at the time.

repeats 3

If perfection is your goal you might not like the results you get with a gel medium transfer, but I like the aged and worn look.

repeats close up

How about you?

repeats 2

the charmer.

charmer title

Remember I told you that I sent Mr. Q after two dressers recently?  The first was the ‘how chippy is too chippy’ dresser from last week, and this is the second.

charmer before

Before getting started on the paint job, there was a small fix on this one that Ken helped me out with.  This dresser must have originally had a mirror.  It would have been mounted onto the back and the mounting would have fit into two notches cut into the top of the dresser at the back.  I did a crappy job taking photos of the fix, so you’ll have to excuse the poor picture.

charmer repair

The lighter piece is an insert that Ken cut to fit the notch.  He used glue to hold it in place, along with a few nails driven in from the back.  I then patched the edges with another new wood filler I’m trying, Elmer’s ProBond in Walnut.

These are the kinds of flaws that make pieces good candidates for painting.  If one wanted to strip and stain this piece, you’d have those two big notches at the back of the top.  Do you try to match the wood?  Do you leave the notches?  Either way you’d probably end up with a so-so end result.  But with paint, the repair is barely even noticeable.  In fact, you might roll your eyes in disbelief, but I totally forgot about this repair by the time I had this painted.  It wasn’t until I started editing the photos for this post that I remembered, ‘oh yeah, Ken fixed this one.’

charmer fixed top

See, you can’t even tell there is a patch back there can you?

As you can see in the ‘before’ photo, the existing stain on this dresser was dark, dark, dark and had a slightly reddish tinge.  I was fully prepared for it to be one of the dreaded ‘bleeders’.  You know, where the stain bleeds through the paint?  I was pleasantly surprised to find that it was not.  My course of action when I have a piece that might bleed is to paint the first coat and then watch for bleeding.  If I see stain coming through the first coat of paint, then I seal it before moving on to coat number two.  In this case, my plan payed off.  No bleeding after the first coat meant I didn’t have to seal this one, thus saving myself the cost of sealer and the time spent to apply it.

If you’ve been following me for a while, you might know that my usual philosophy is to not fight against the existing color of pieces.  In other words, with a finish this dark to begin with I would usually paint it in a dark color.  Originally I was leaning towards Miss Mustard Seed’s Typewriter (black).  Or possibly the Little Billy Goat Prizewinner (dark blue).  But in the end, this dresser was crying out for light (or maybe that was just me projecting my own feelings onto an inanimate object on a dreary winter day).

After reviewing my paint inventory, I pulled out Fusion’s Inglenook.  Good grief I love this color!  It’s just so pretty.

charmer 2

In addition to being pretty, I am once again impressed with Fusion’s coverage.  It did take two coats to cover this piece, but look again at how dark it started out!  Going this light in two coats is pretty impressive.

charmer angled view

And of course, the second real benefit of the Fusion, I didn’t have to use a top coat!  I sanded the edges for a distressed look and I was done.  I accomplished this makeover (not including Kens’ repair) in two evenings after work.  The first evening I removed hardware, lightly sanded, wiped it down with TSP substitute and painted the first coat.  The second evening I painted a 2nd coat of paint before dinner, watched an episode of The Blacklist (James Spader, who remembers when he had hair?) while it dried, sanded the edges and replaced the hardware.  Bam!  Done!

the charmer title

Isn’t this dresser just a little charmer?  I love that curved bottom on the lowest drawer, and the curve of the front two legs.  This piece is just full of subtle curves.  I purposely left the paint job simple so that the design of the dresser could speak for itself.

You’ll notice that I replaced the hardware with glass knobs.  The wood knobs were still in good shape.  I could have opted to just paint them and put them back on.  In fact, I most likely would have done that had I chosen a dark color for this one.  But this color was calling out for pretty glass knobs.  Right?

charmer glass knobs

Like adding sparkly jewelry to a pretty outfit.

This vintage alarm clock was the perfect color to use for staging.

charmer staging

It’s still set to midnight from New Year’s Eve!

charmer collage

So what do you think?  It’s hard not to be charmed by this pretty little dresser isn’t it?

Linked up with:  the FAB Friday link party.

the gleason board.

Melanie from Lost and Found Decor (the blogger who spearheaded Monday’s Fusion giveaway) recently wrote about her trip to the auction house.  Reading it reminded me of one of my favorite auction stories, so I decided I should share it with you guys!

There is an auction house just a few blocks down the street from me.  They hold an auction nearly every Monday evening.  The owner/auctioneer is quite funny and entertaining.  In a way, attending the auction is similar to live theatre.  It’s definitely worth the trip just to enjoy the show.

Quite a number of years ago I got the auction bug.  I bought a few really cool things that I still have, like the full length mirror in my bedroom that is framed in copper salvaged from the roof of a historic building in Philly (or at least that is what the sticker on the back claims).  Here it is leaning on the wall next to my armoire.

mb armoire

And hey, sidebar note, I have an exciting project coming up involving this armoire … so check back for that in the coming weeks.

The lamps made out of antique Chinese tea tins that used to be in my dining room were also from the auction house …

waterfall buffet painted black

In the end though, I realized that auctions were a bad idea for me.  The problem was that my right arm would just fly up on its own accord every time I saw something that I liked.  In the excitement of the moment, my brain didn’t have time to compute the full price with fees and taxes added in.  This particular auction house adds a 15% commission plus 7.125% sales tax to every item.  For example, a dresser that you bid $75 on suddenly costs you something closer to $92.

But the real problem for me ended up being items sold in ‘lots’.  It always seemed like the items I wanted were being sold as part of a ‘lot’ and the other items in the lot were crappy stuff that I didn’t really want.  And to further complicate matters, at that time when you bid on a lot you were bidding per item.  So, if your lot contained 3 items and you bid $25, you were going to pay $25 per item, or $75.  And then you still had to add in that pesky commission plus sales tax.  Yikes!  That’s a lot of math to do in your head in a split second!  In the excitement of the moment your brain is thinking “$25!  What a bargain!” And what it really should be thinking is “$25 times 3 equals $75, plus commission and taxes is $92.  Yikes!”

Such was the case with a vintage birdcage that I really wanted one night.  It was being sold in a lot with two other items.  One was a small rocking chair with a cane seat and the other was listed as an antique folding table.  I didn’t want either of those things, but I figured I could unload them at my own occasional sale and just keep the birdcage.  I can’t remember now what I ended up paying for the lot, but I’m fairly sure it was more than I should have paid for just the cage.  I loaded up my items and brought them home.  I then decided to put the table up and see how it looked.  I first noticed that the legs were a little short.  The table was only about 2’ tall or so.  And weirdly enough, one side sort of tilted up.  It also had a label that said “Gleason Board”.

I immediately got a bad, bad vibe from the thing.  But I’ll admit I was thinking ‘doctor’s office’ at the time, not ‘funeral home’.

I put it in my front hall closet and put it out of mind for the moment.

A few months later I went to the Oronoco Gold Rush (an annual antiques flea market here in Minnesota).  As I was wandering around, what did I happen upon?  A very similar table.  I still remember thinking “Oh look!  One of those tables.  Let’s see how much they are charging for it.”  I walked over and took a look at the tag, which prominently said “antique embalming table”!

mortuary_Gleason_1886_table_overview

Quelle horreur!

I dropped the tag with a gasp and jumped back.  Dear lord!  I had an antique embalming table in my front hall closet!  I don’t think I even noticed the price because I was so horrified.

Later that night as I slept in my bed I had a terrible dream.  I dreamt that the spirits of every person ever embalmed on that table were now inhabiting my front hall closet.  I opened the closet door and there they all were.  I woke with a start and reached over and shook Mr. Q awake as well.  I told him the table needed to be removed from the closet a.s.a.p.  I didn’t care what he did with it, it just had to go.  And by a.s.a.p. I meant ‘right now in the middle of the night’, not just sometime soon.

He ended up putting the table in the trunk of his car.  I think his intent was to get rid of it somewhere eventually, but instead it stayed in the trunk of his car for quite some time.  And as a matter of fact, it was still there when we traded the vehicle in on a new one!  Yep.  We left it in there.  Somewhere out there, someone bought a used car that came complete with an antique embalming table!

Accidentally buying an embalming table sort of ruined auctions for me.  I haven’t gone back since then.  I think I’ll leave auctions to the people who can control the are holding their paddle, do math really fast in their heads, and recognize creepy antiques when they see them!

how chippy is too chippy?

Thanks so much to everyone who took the time to leave a comment regarding the question of drawer pulls last week.  Pressed brass drawer pulls, should they stay or should they go now?  If they go there will be trouble, if they stay it will be double … is anyone else singing along?  For those of you not old enough, that song is by The Clash and was written in 1981.  I’m pretty sure it wasn’t about drawer pulls though.

Well, to clear up any mystery, here are the actual drawer pulls in question.

chippy title

And I’m guessing that some of you might be tempted to think that was a ‘before’ picture, but no, it’s not.  Thus leading to today’s question.  How chippy is too chippy?

Let’s start at the beginning though, shall we?

chippy before

A week or two ago I found three dressers in one day on craigslist.  Two were even right here in my own hometown, which was pretty awesome.  It was also Mr. Q’s day off, so he was free to run around picking them up.  In the end, we only purchased two of them.  The third was a little overpriced and the seller wasn’t budging on the asking price, so Mr. Q passed on it.  This dresser is the first one he purchased that day.

As you can see, it had that ugly orange-y/reddish stain.  I am not a fan.  Job no. 1 was to strip the top and then wax it.  Easy enough.

chippy top

Turned out beautifully.

Next step was to paint the body in Miss Mustard Seed milk paint.  Those of you who follow Miss Mustard Seed have probably been reading about the new color she has coming out, Farmhouse White.  I was so wishing I had that color for this dresser!  But no, I am just impatiently waiting for it like most everyone else.  Meanwhile, since I’d had such good luck with the Marzipan and leaving it unwaxed (on the book page dresser), I chose to go with that color again.  I was aiming for a chippy, vintage farmhouse look, so I opted not to pre-sand.  I did wipe the dresser down with some TSP substitute though.

I have to say, even after having painted, let’s see, maybe close to 100 pieces of furniture in milk paint, I still often can’t predict the end result.  I suspected I would get some chipping.  I wanted plenty of chipping.  What I got was A LOT of chipping.

chippy dresser 1

Personally, my heart still skips a little beat whenever I see an awesomely chippy piece of furniture.  One of my own favorite pieces is this chippy cupboard that resides out in my photo cottage.

studio cabinet inside lower

Recently I saw a very similar cupboard (much taller, but the doors were missing) for sale at my local Bachman’s and the price tag said $1,000 (Maplewood location in case any of you locals want to rush out and buy it).  No lie.

So when I saw how chippy this dresser turned out, I thought it was pretty fab.  My sister wasn’t so sure.

chippy corner

I could have opted to sand this all down to the wood and start over.  I have done that before and in general once you do the sanding necessary to take all of the paint off, the next coats of paint tend to adhere pretty well (not always, but generally).

But I was kind of loving the chippy.

chippy angle

When my friend Meggan dropped by to pick me up for some thrifting, she voted a resounding yes on the chippy as well!  So how about you?  Chippy yes or chippy no?

Lots of ironstone seemed like the right choice for staging this dresser.

chippy staging 3

chippy staging 1

Along with some old books and wooden utensils.

chippy staging 2

As for the drawer pulls, there were a couple of comments left on my last post about them that really made sense to me.  Kim made a comment about creating the look I want with the dresser and then deciding on the hardware.  And Nikkii’s comment about choosing a style really clicked with me.  I realized that this dresser was going to be vintage farmhouse all the way!

chippy drawer pulls

I think the existing pressed brass drawer pulls totally work with the chippy, vintage farmhouse vibe of this dresser.  I hope you agree!

chippy farmhouse dresser

This dresser is available for sale by the way.  If you are local and interested, feel free to leave a comment and I will be happy to email you with the details.

a Fusion Studio Metallics giveaway.

Recently one of my favorite bloggers, Melanie from Lost and Found Decor, decided to put together a blog hop.  She asked me to join in along with three other fab bloggers, Homeroad, Bliss Ranch and Finding Silver Pennies.

metallics collage

Our focus is the Mathew Mead Studio Metallics paint from Fusion.  As you may remember, a while back Fusion sent me some free samples of this paint.  So far I have painted a pale gold chair and added some brushed steel to the back of a mid-century bookcase.  I’ll admit that when I agreed to try the metallic paint I really wasn’t sure what I would do with it, or if I would really even like it.  Since then I have become a serious fan of the stuff.  Along with the Pale Gold and the Brushed Steel, Fusion also sent me some Copper.  So I pulled that out for this project.

copper 1

Back just before Christmas my sister and I had popped into one of our local thrift shops where we picked up some wooden divided bowls.  I had seen similar wooden serving dishes painted in a metallic gold, so I thought it would be a fun project to try with one of the Fusion metallics.

wood trays before

I’m afraid I have a confession to make at this point.  I went ahead and painted them without my sister.  When Melanie sent out the post asking if anyone wanted to join her in this blog hop, I knew this would be just the right project, so I got painting pronto without waiting for Debbie.  Sorry sis!

I started by sanding the bowls slightly and then wiping them down with TSP substitute.  I then painted them entirely with three coats of Fusion’s Picket Fence, which is a nice, bright, crisp white.

copper step 1

This is one of those projects that doesn’t take a lot of effort to do, but there is a lot of waiting between steps.  You know, paint the top, wait for it to dry, paint the bottom, wait for it to dry … repeat twice.

Next, tape off a section of the bowls to paint in the copper.

copper step 2

I absolutely love this copper color.  Isn’t it gorgeous?

copper paint

I used two coats of the copper paint.  I wanted a very solid coverage.

Once the copper was dry, I taped off at another angle to add the next color.  But before I started I used a little sandpaper on the seam between the copper and the white that I was painting over.  If I hadn’t done this, there would have been a visible ridge under the final color.

copper sanded

I wiped the dust away and then added a couple of coats of my favorite Fusion paint color, Laurentien.

copper step 3

As you can see, I don’t do a very good job of keeping the mouths of my paint jars clean.  Bad, bad, painter!  I often have to ask Mr. Q to help me get these open again.  It also works to run them under hot water for a minute.  But I always ultimately get them open.

Laurentien

After all of these small steps, in the end I have these lovely painted bowls perfect for holding jewelry.

copper with jewelry

Including my Mantraband bracelets.

copper with bracelets

You’ve probably noticed that I seem to have plenty of jewelry in my favorite color of aqua as well!

copper bowl aqua earrings

So there you have it, a simple way to update some divided wooden bowls.

copper bowl necklace

So snag some at your local thrift shop and get painting!

copper with jewelry 2

To help you out with that, Fusion is sponsoring an amazing giveaway for us today.

giveaway

The giveaway includes the following:

2 MM Studio Metallics (winner chooses color)
2 Pints Fusion Paint (winner chooses color)
1 small Fusion Brush
1 Fusion Brush Soap
1 Fusion Antique Glaze
Nice, right?
There are numerous ways to get your name in the hat via Rafflecopter to win!  There is the same Rafflecopter on all five posts, so you only have to enter on one of the blogs to qualify.  Click the following link to enter …

a Rafflecopter giveaway

Please take a moment to visit each of the other blogs participating to see their Studio Metallic projects:

Bliss Ranch

Finding Silver Pennies

Homeroad

Lost & Found Decor


one year later, and a quick question.

Can you believe that it has been almost one full year since I revamped my study (now fondly referred to as the Q Branch)?

  Well, I’m one of those people who do a lot of tweaking at home (not to be confused with twerking, I’m pretty sure I don’t ever do that).  Very few things in my home are static.  I’m always swapping out this for that, or changing things up somehow.

q branch update title

So after posting about my new ‘Q’ on Monday, I thought it would be fun to re-visit the Q Branch in its entirety and show you a couple of tweaks I’ve made in the past year.  If you’d like to first refresh your memory about how this room started out, check it out here.

OK, now let’s start with my wall quote.  Believe it or not I found this at a garage sale for a quarter!

q branch wall quote

I pretty much had to buy it, right?

q branch wall quote close up

After all, sometimes I do literally dream about painting.  And in some ways, I day dream about how to paint particular pieces of furniture and then I really do paint my dream!

If you’ve never tried one of these rub-on wall quotes, I’d encourage you to try one.  You can find them at Hobby Lobby, Michael’s, JoAnn Etc, even Target has some I think.  They are fairly easy to apply, you just have to have some patience, go slowly and make sure the letters are sticking to the wall as you pull off the backing paper.  I had a different wall quote on this same wall before I made over the room, so I can tell you from experience that they are very easy to remove when you want to change up your room.

q branch bureau

I’ve refined the display on top of my bureau under the wall quote a little bit too.  The vintage cameras went out to the front porch, the ironstone went out to the Welsh cupboard in the dining room.  I limited the pieces here to vintage items in blues or greens.  I filled my little Eulalie’s Sky hutch with my collection of old flower frogs.

q branch frogs

I moved some toy phones around.

q branch toy phone

I also put this sweet vintage plate out to remind me that spring is just around the corner.  OK, maybe that’s a little optimistic, but it really will be here before we know it.

q branch plate

Remember the old paint brushes I bought at a garage sale last summer?

crusty brushes 1

Well, I found a few more at the thrift store last weekend and I finally got around to doing something with my favorites.

q branch paint brushes

I used my favorite decorating trick, when all else fails hang it on the wall!  There is just something about all of the old bits of paint on these that really appeals to me.

q branch paint brushes close up

The ‘sign’ hanging above the paint brushes is an old drawer front. q branch paint brushes close up 2

It came off the re-styled sideboard I painted back in May 2014.  Here’s the ‘b & a’ of that piece …2014 spring blog14

Yep, see that skinny top drawer in the before photo?  I painted it in Miss Mustard’s French Enamel, added a stencil, and then hung it on my wall.

I didn’t hang all of the old crusty paint brushes though, some hopped into the back of my blue truck …

q branch truck with brushes

Which is currently parked on my rooster cupboard. q branch rooster cupboard
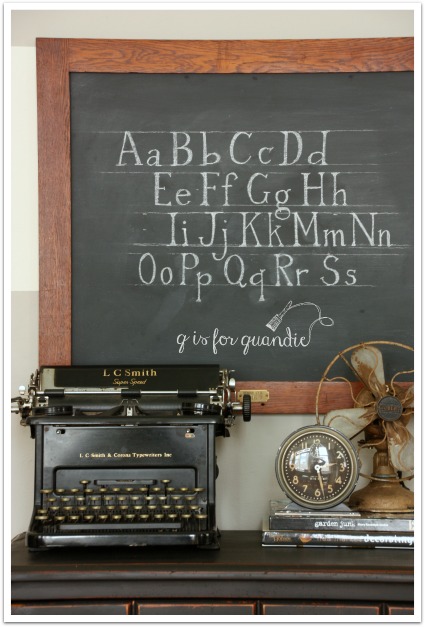
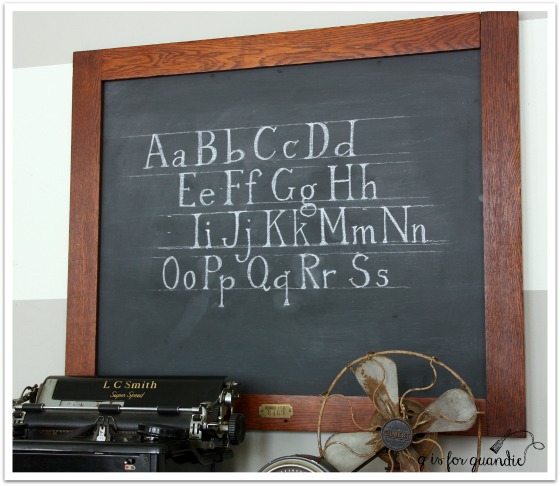
I still have my pal Lula hanging out in the corner (just out of view to the right in the above photo), but I’ve changed out the design on the chalkboard chair that hangs on the wall over her head (well, she doesn’t technically have a head, does she?).

q branch chalkboard chair

To draw my logo on the chalkboard I simply printed it out on paper, rubbed chalk all over the back of the paper, and then placed the paper over my chalkboard and traced the design.  Once that was done, I took the paper away and just went back in with sharpened chalk and darkened (lightened?) up the design.  Easy peasy.

I haven’t changed up the desk and chair, or my chalkboard door behind the desk, but this photo gives you a better idea of how the Q looks hanging on the wall.

q branch desk close

q branch desk

I have to laugh, that photo makes the room look positively expansive.  And trust me, it is not.  It’s really only about 9′ square!  Still, it’s the perfect size for a little room of my own where I write my blog.  And you’ll notice that my chair is right next to the radiator, so this time of year I am quite cozy sitting there tapping away on the computer.

Well, there you have it.  The Q Branch one year later.

Before I leave you for today, I want to ask for your opinion.

You’re all familiar with this style of antique brass drawer pulls, right?

blue hardware

So, my questions is, do they stay or do they go?  I have a dresser to work on this weekend (not pictured) and I can’t decide.  Do I keep this style of drawer pull, or do I change them out?

french enamel dresser 2

Do I replace them with glass knobs?

patriot

Or do I paint them?

crackled linen side angle

What is your preference?  Original brass drawer pulls, painted pulls or some sort of replacements?