what’s blooming this week?

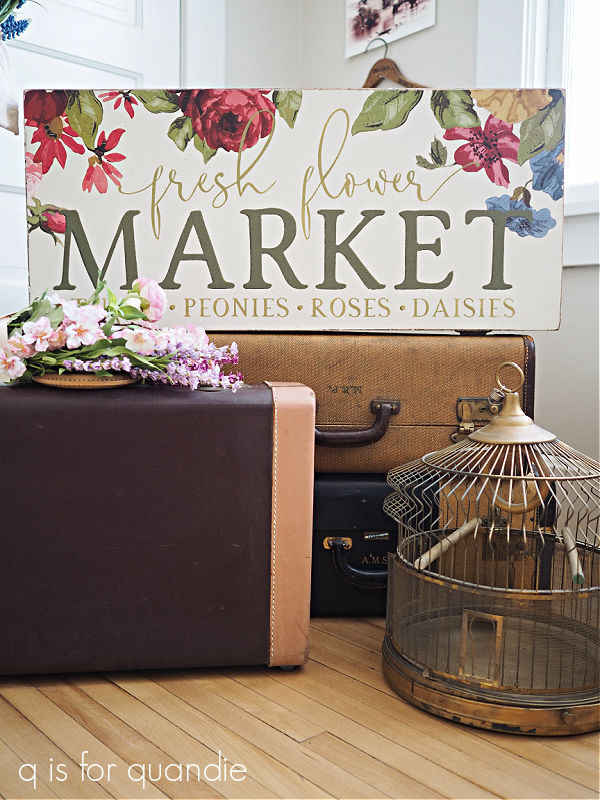
Good morning from my zone 4b garden!

It feels like we’ve gotten a bit of a late start this year, but then again, I’m pretty sure I say that every year.

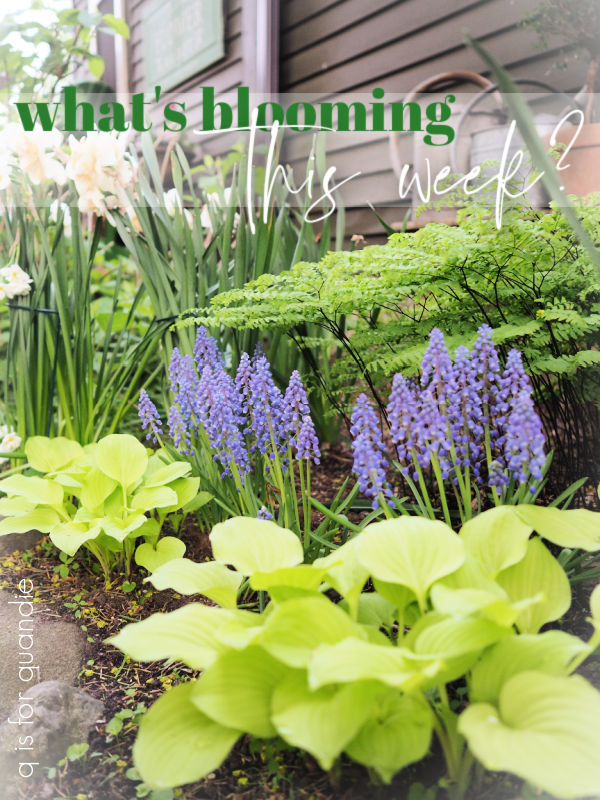
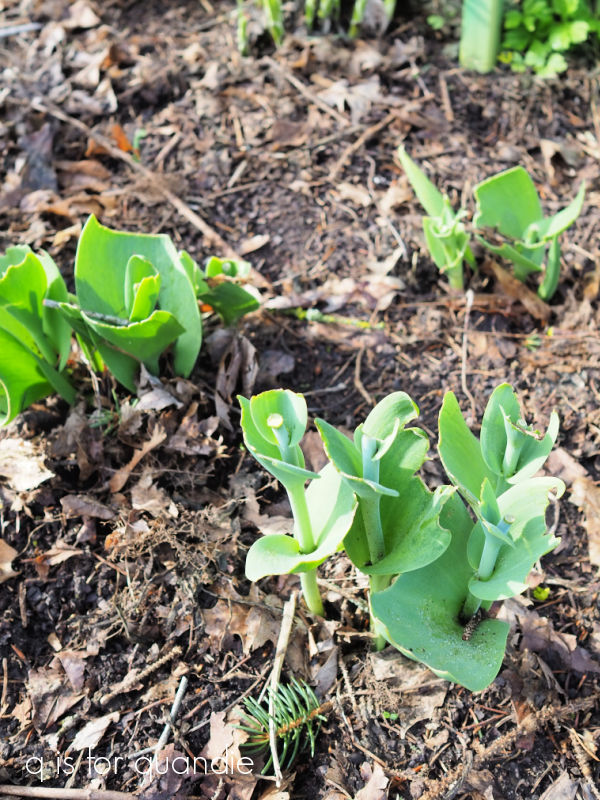
As you can see above, most of the hostas are starting to fill in, although there are still a few that are only pointy shoots just coming out of the ground …

While I wait for all of the foliage to fill in, I’m enjoying lots of early spring flowers.

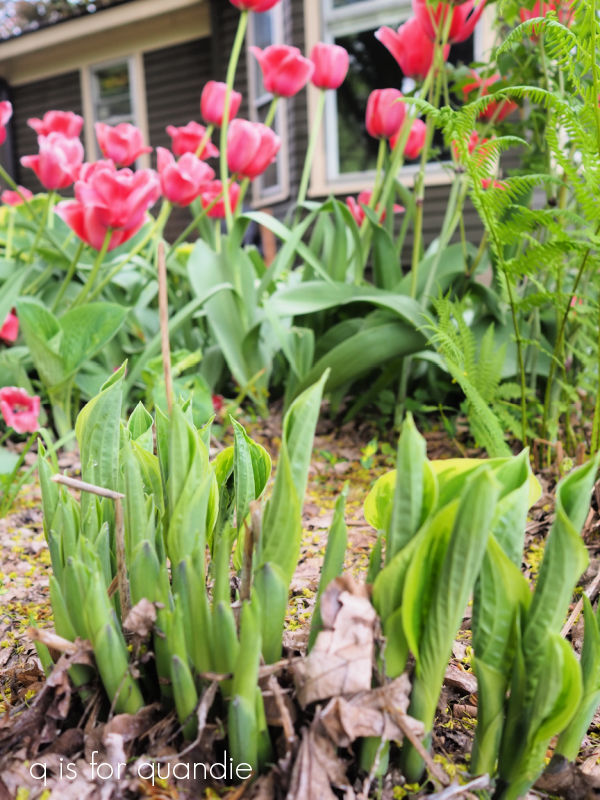
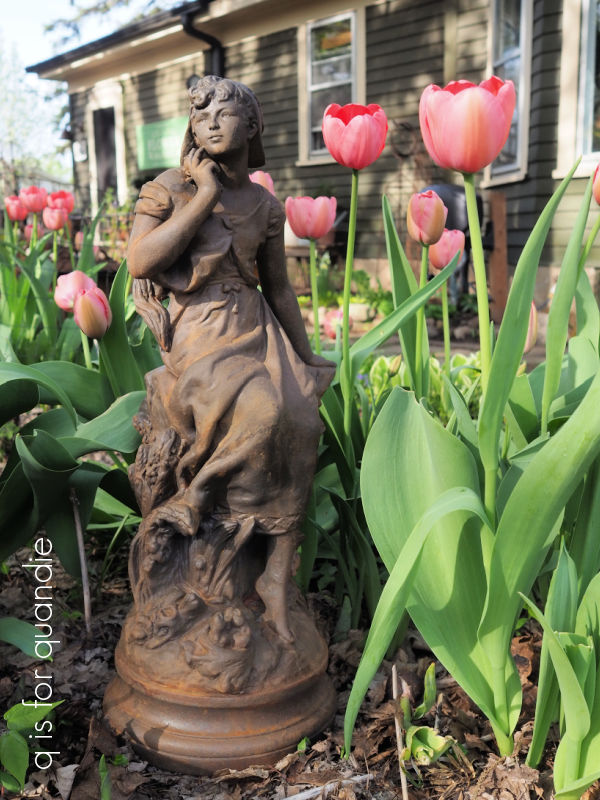
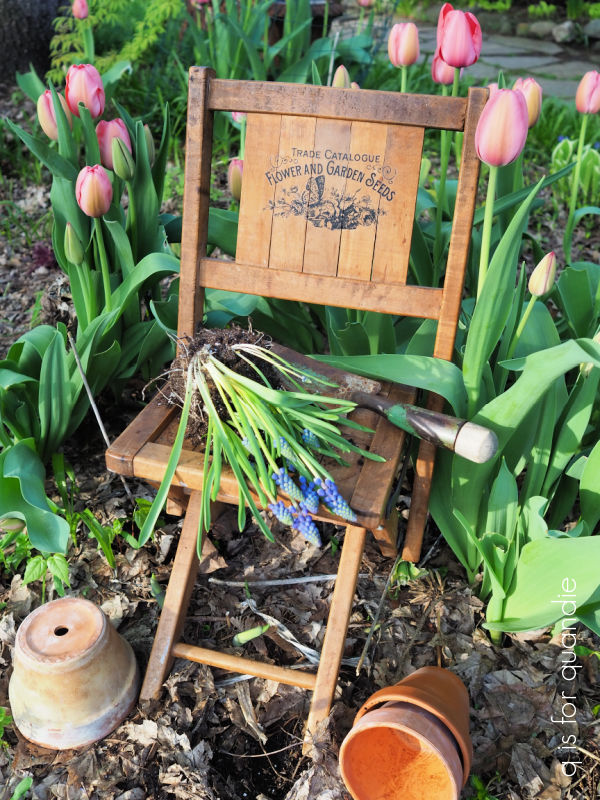
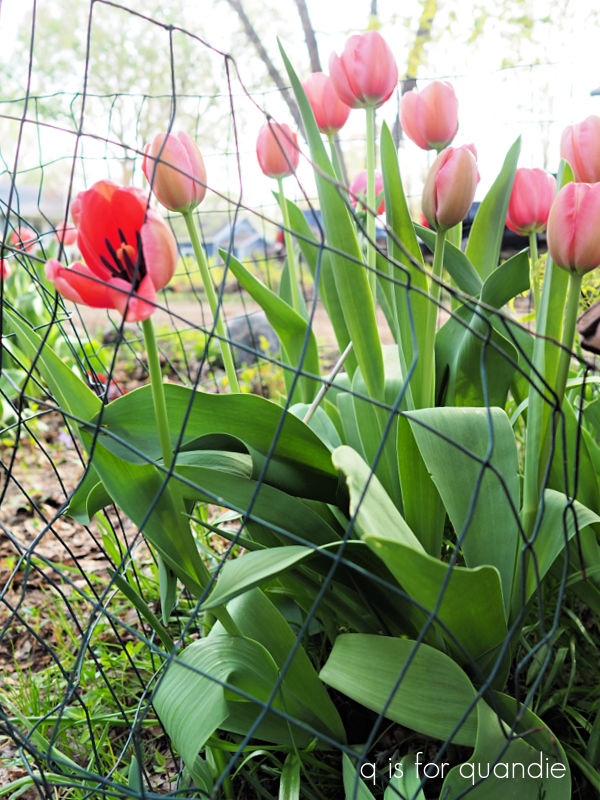
The tulips were still looking great earlier in the week, but they’ve pretty much gone over by now.  I’ll be cutting off the flower stalks this week, but leaving the leaves to store up energy for next year.

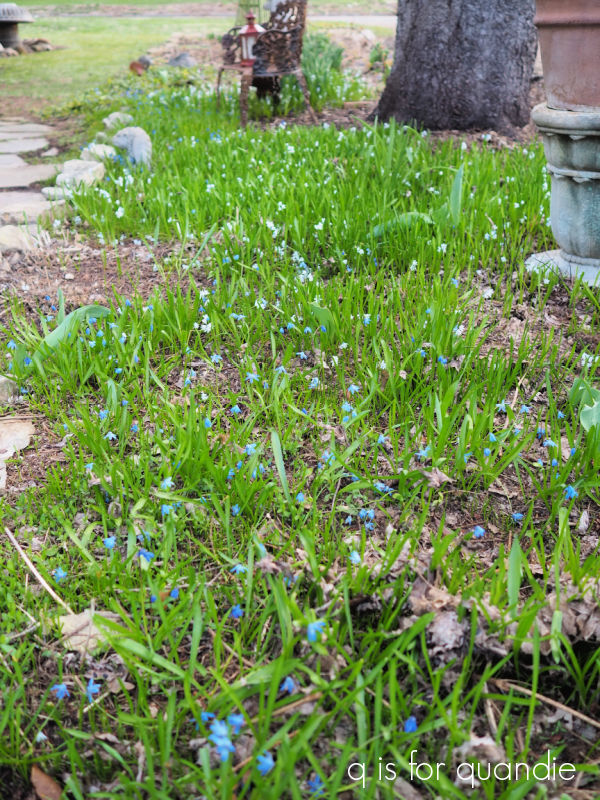
I planted Darwin Hybrid Pink Impression tulips, and I specifically chose a Darwin Hybrid because they are more likely to naturalize, ie. they will bloom again next year and even potentially multiply.  Overall though, daffodils, scilla, crocus and muscari are better at naturalizing than tulips.  So we’ll take a wait and see approach with that one.

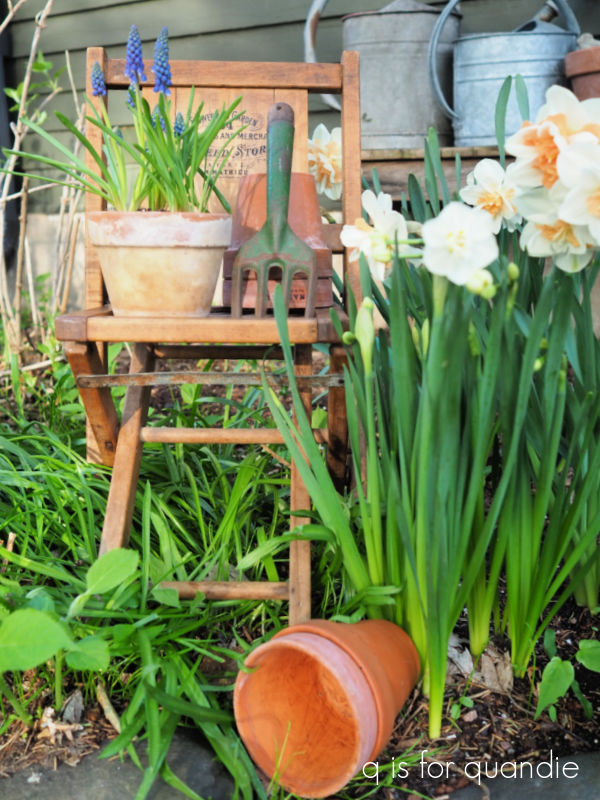
Speaking of muscari, I added some this year.  Here they are with some lovely Maidenhair Ferns (one of my favorites, I love how delicate they look) behind them, and the pop of a small lime green hosta in front (I wish I knew the name of that one, but I’m not sure which one it is).

Normally I would plant the muscari as a bulb in the fall, but I found these for sale in pots and decided to see if planting them now would work.  The employee at the nursery where I purchased them said it would, but I’m not sure she knew her stuff.  I do hope they come back next year though, because they are lovely in that spot.

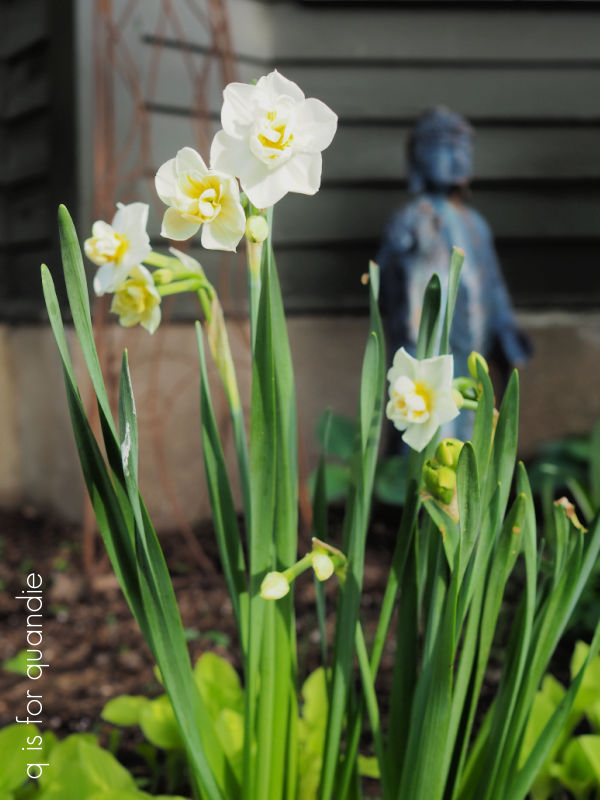
It’s interesting to see how much of a difference in bloom times there can be even in a garden as small as mine.  The daffodils that I planted on the east side of the house in a very sunny spot that is rather protected from wind started blooming two weeks ago, while the very same variety planted in a spot with less sun only just opened this week.

This fabulous rich, wine colored dwarf iris is blooming this week too.

It’s hard to tell from that photo, but these are only about 8″ tall.  I love them for that reason, the other bearded iris in my garden often require staking.

Someone gave these to me, so once again I don’t know what variety they are, but they certainly look like ‘African wine‘.

Another favorite of mine that is blooming right now is the Brunnera.  I have some Jack Frost which has the silver veining on the leaves, but I also have some that have solid green leaves.  The thing is, I’m pretty sure I planted all Jack Frost but some have reverted back to solid green.  Do any of you have any experience with that?

Either way, I just love the delicate froth of pale blue flowers that shoot up this time of year.

Speaking of blue flowers, my wild blue phlox is also blooming now.

I purchased this plant at a garage sale, and I didn’t know what it was.  But I posted about it here last year and one of you identified it for me.

It will eventually be overtaken by those hostas, but for now it looks rather sweet.

Now, I know I’ve called a number of the plants in my post today a favorite, and everything can’t be a favorite, but I do love the lilacs too.

They have just come into full bloom, and I think our cool weather this week is making them last (it was 44° when I woke up yesterday).  Even the flowers I cut and put in that watering can have stayed fresh looking for days (and usually I have trouble with preventing lilacs from wilting in a vase).

If you’ve followed me for long, you know that I have struggled for years to create a lilac hedge along our back property line.  In fact, earlier this week I dug out two more spindly, pathetic looking plants and replaced them with new ones.

However, the center of the ‘hedge’ has gotten to at least 8′ tall and is covered in flowers.

Now, if only either end would catch up.  I suspect it will be several years yet before these lilacs provide proper privacy, but I’m feeling optimistic.

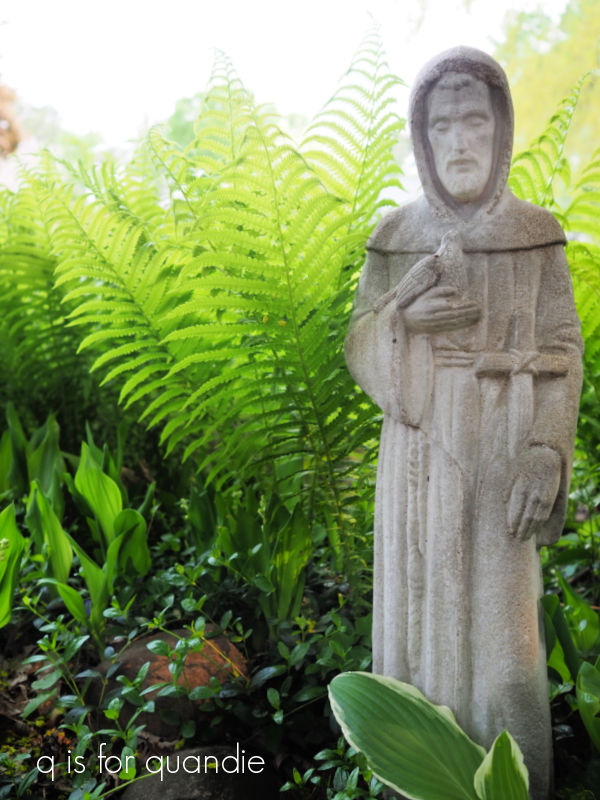
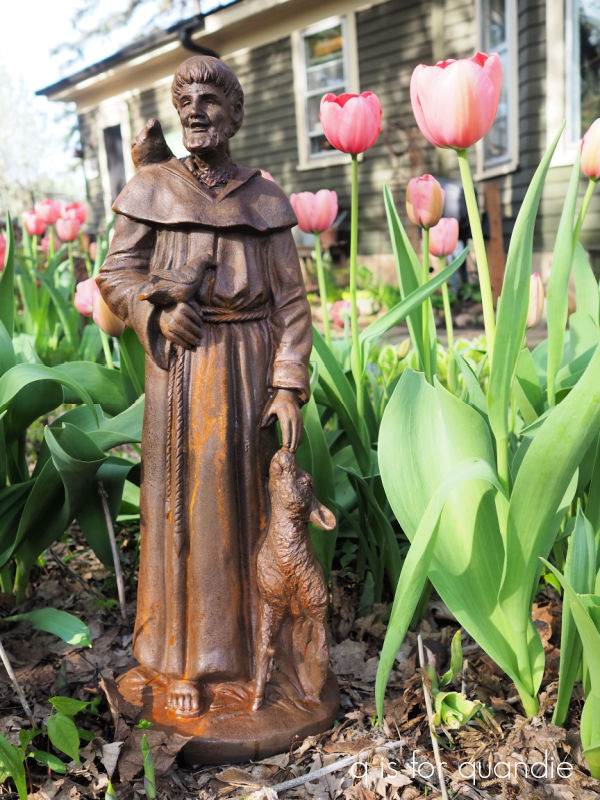
That’s about it right now for blooms.  But before I go I thought I’d share my fern glade.

I’m fairly sure these are Ostrich ferns.  I planted them at least 25 years ago or more.  At the time that patch was under pine trees and it was only good for growing weeds.  The pines are all gone now, but the area is still in full shade from nearby trees.  It’s also a low spot in our garden, so it gets very wet in spring.  In other words, perfect for ferns.  These will take over and become almost impossible to eradicate though, so keep that in mind if you decide to plant some.

They are  are presided over by St. Francis.

It’s always amazing how fast these ferns shoot up out of the ground.  They look just gorgeous this time of year.  I wish they would last through to the first freeze, but they usually start dying back to the ground in late August, especially if we have a dry summer, and then start to look quite awful.  Also, in recent years, they’ve been plagued by the Japanese beetles too.  According to the internet, Japanese beetles aren’t attracted to ferns.  But they sure do like mine.

So tell me, what’s blooming in your garden this week?  Are your plants way ahead of mine?  Leave a comment and let me know.


is English green a thing?

I watch a lot of British television.  Mostly garden shows, detective shows like Vera or Father Brown, and the occasional Graham Norton.

One thing that always seems to catch my eye are brick or stone cottages with a vibrant green trim.  I searched high and low online for a photo of the shade of green I picture in my head, but couldn’t find the exact color.  I have this photo that I took at The Beamish back in 2017.

That green isn’t quite as vibrant as others I’ve seen, this next one might be a bit closer.

Hopefully you get the idea.

Last summer I decided to change up my front door color to what I think of as that English Green.  I ended up choosing a color from Behr called Mown Grass.

Then earlier this week I pulled that color back out and painted the obelisk trellis that my handyman Ken made.

You may remember that earlier this spring.  I painted up a Flower Market sign to hang on my back deck.

Well, OK, it was supposed to be spring, but we had that freak snow storm on April 1.

I used a Dixie Belle color called Kudzu on that sign, and I really love it.  At the time I was only thinking about what color would work well on the dark olive green-ish color of our siding.

I never even thought about the pair of Adirondack chairs that would sit in front of it.

It wasn’t until we pulled them out of winter storage this spring that I realized their existing yellow-green color was all wrong with the Kudzu.

I did love that color on the chairs.  It’s Rust-Oleum spray paint in a color called Eden.  It worked beautifully with all of the lime green foliage in my gardens.  But it definitely didn’t work with the sign.

But that’s OK because the chairs needed a paint touch up anyway.  So after giving them a good cleaning with some TSP substitute, I went ahead and painted them with the Mown Grass too.

It’s the perfect garden green.

And this color works much better with my Flower Market sign.

Try to ignore the fact that there is a hole in our deck under the chair on the left.  We’re working on getting that repaired.  It’s on the list with all of the other spring projects.  But I can check off ‘paint the Adirondack chairs’ and that feels good.

How do you like the new color?  And have you ever noticed that shade of English green?  Leave a comment and let me know!

a little bit rusty.

Between my most recent trip to my mom’s and then to Florida, I feel like my painting skills have gotten a bit rusty.  Since coming back I’ve been so busy in the garden that I haven’t even picked up a paint brush … well, except to paint the obelisk trellis in my garden.

But more on that later in the week.

In the meantime, speaking of rusty, I did pull out the Dixie Belle patina paint before my trips to turn some small garden statues into rust.

As you probably know, I just love this stuff.  The Iron paint combined with the green spray creates a perfectly authentic looking rust.

Here’s where my two pieces started out.

The pretty girl on the left is from the thrift store, and St. Francis came from my friend Sue.

Both are made from some sort of plastic or other man-made material, and have faux finishes.

After cleaning them up, I gave them a base coat of spray red primer from Rust-Oleum.  Dixie Belle does make a primer to be used with the patina paint called Prime Start, and they recommend you use that on metal pieces to prevent the patina paint created rust from becoming actual rust.  But I prefer to use a spray primer on pieces like these that have lots of nooks and crannies simply because it is easier.  In addition, neither of these are metal, so technically they don’t require the Prime Start.  However, both of them have a surface that may not hold onto paint well.  So rather than attempting to scuff sand, I just spray primed them.

For the full instructions on using the patina paints, check out my how-to post here.

I painted both pieces with the Iron paint, followed by the green spray.  After a day or two, they still weren’t looking as rusty as I wanted so I sprayed them with water.  That’s not an official technique for using this product, but I have noticed on my outdoor garden pieces that more rust comes out after they get rained on.  Sure enough it did the trick.

Here is how St. Francis turned out …

And here is how the peasant girl turned out …

I’m always rather particular about faces when it comes to statues like these.  Some of the cheaper versions have some fairly awful faces.

But her face is quite sweet I think.

At this point you may be wondering how this rusty patina holds up outside, and if it continues to develop more rust over time.

I’ll start by first noting that the durability of any paint treatment really depends upon what you are painting over, and in addition whether or not you applied it correctly.

But here are some examples of my rusty pieces that have been outside for a while.

I painted both of those last summer, and they both sat outside all winter.

Sometimes, in fact, even literally buried in snow.

They get some pine sap drips on them from the tree overhead, but otherwise they look really good.  I didn’t blog about the bench specifically, but I did share the two matching chairs and small table with all of the details here.

But how about items that have been outside for more than one year?

You may remember that I rusted up a pair of planters back in the summer of 2019.

These are made out of that molded plastic composite stuff, I don’t know exactly what that material is made out of.  But they are lightweight, not iron, not metal, not concrete, but some kind of man-made material.

These have been outside since they were painted, including winters.

So they are going on four years and are holding up fairly well, except for the very bottom where they often sit in snow.

When I purchased these pots, they were dark brown.  So actually, it’s the original paint that has failed down to the white material underneath it here, not the patina paint.  I plan to touch these up with some more patina paint, and that will be quite easy to do.

Also, you may notice that the pot looks a bit rustier now than it did when I first finished it (first photo with purple flowers).  So yes, these items will get rustier over time when outside in the elements.

I think my advice would be to take these items in for winter (if you live in a climate like mine in Minnesota) if you want them to last for many years.  However, if you only paid $30 for the pair at a garage sale, and you don’t mind having to touch up the patina paint down the road here and there, I say enjoy them outside in the winter!

Tell me what you think of my garden statues, was the rust an improvement?  Leave a comment and let me know.

the festival topiaries.

As promised, today’s ‘Sunday mornings in the garden’ post is brought to you from Disney World’s Epcot.

Normally when my sister and I go to Disney, we like to go in the fall.  The weather is perfect in late October to early November, and the crowds aren’t super awful then either. But this year we decided to go for my sister’s birthday, which happened to be during Epcot’s Flower and Garden Festival.

The mouseforless.com says that “more than 500,000 plants, trees, and shrubs are planted for the festival; 250,000 of those are annual blossoms installed for the festival.”

In other words, it’s a massive amount of plants and tons of color.

I really thought I’d be able to share all of my photos in one blog post, but as I’m working on it I realize that it’s far too much for just one so I’m going to break it down into a couple of different posts.

There are around 25 themed gardens featured for the festival ranging from the Bouquet Garden in the France pavilion to the Shishi-odoshi Garden in the Japan pavilion (and I’ll share more on those in my next post).  There are also a butterfly house, food booths featuring plant based and/or themed food and drink, and a Garden Rocks concert series.  We saw Kool & the Gang and that was super fun.

In addition, there are over 100 topiaries.

But they aren’t what I think of as legit topiaries.  When I say ‘legit topiary’ I am thinking of living shrubs that have been strategically pruned to form a shape.  In my mind, these are the kinds of topiary that Disney was originally known for having in their parks, like these examples in front of It’s a Small World in Disneyland.

Large shrub topiaries can take up to 10 years to create though, so I can understand that they aren’t very practical if you need over one hundred of them.

They had a Topiary Heritage Garden in the United Kingdom Pavilion where they had placards explaining the different types of topiary being used in Epcot, with examples of each.

Standard Form topiary are created by training a woody plant to a long, single stem topped with a round head of foliage.  I think the double globes of foliage below also count as standards, but don’t quote me on that.

The spirals fall into the category of Free Form topiary.

They did have an example of a shrub topiary in the Topiary Heritage Garden, but there were a couple of gardeners trimming it up while we were there so I didn’t snap a photo of it.

Almost all of the topiary at the Food & Garden Festival are what is called Sphagnum Topiary though.  They are created using heavy steel frames that are then fitted with sphagnum moss and fast growing vining plants.  They also will use dried plant material to create details like faces or clothing items.

For example, I’m betting that Miss Piggy’s lavender gloves and shoes, as well as her face, legs and arms are made out of dried plant material.

I’m sorry, I just can’t help but feel like that’s cheating.  How much of these are even real growing plants?

However, although these topiaries feel rather ‘fake’ to me, they are pretty cute.

And this is Disney after all, their goal is to create magical illusions, right?

And I do rather love the ‘fluffy’ ears on Lady …

But tell me, what do you think?  Are you a fan of the sphagnum moss topiaries, or do you find them a little too ‘fake’ looking?  Leave a comment and let me know.

chairs, tulips and daffodils.

Phew!  My trip to Disney World really took it out of me.  My sister and I were there for 8 days, and we walked more than 20,000 steps almost every day.  It was really fun, but also really exhausting.  I’m still recovering.

I made a bit of a tactical error in that I didn’t have a completed project lined up to blog about upon my return.  So I’ve spent the last few days wondering just how in the heck I was going to come up with something, and where I was going to find the energy to quickly get it done.

Then I remembered this pair of little wooden chairs that I’ve been meaning to sell.

My friend/picker, Sue, found these for me back in the fall of 2018.  I’ve had them hanging on the wall in our bedroom since then.  But I’m ready for a change so I thought I’d move them on.

I was initially thinking about painting them in chippy milk paint, but the wood had a rather nice patina.  So rather than paint them, I decided to simply add some Classic Vintage Labels transfers to the backs.

I gave both of them a garden theme.

They are a bit wobbly, so I wouldn’t necessarily want a small child to sit in them.  But they’d be perfect for holding a potted plant, like this little pot of muscari.

I staged them out in the garden, mainly because I wanted to show off my daffodils.

And my tulips.

But that being said, these little chairs wouldn’t hold up for more than one or two seasons if you left them outside unprotected.

They would be awesome on a protected porch though, or maybe in a sun room.  Or really anywhere inside.

In that last photo, you may have noticed that my scilla (all of that stuff that looks like grass in the garden behind the chairs) are pretty much done blooming.  They have been followed up by the daffodils and tulips.  I planted a few new ones last year (for more details on that, go back to this post), so I thought I’d share how they did and exactly what they are in case any of you want to get some this year.

This first daffodil is Narcissus Double Delnashaugh.  It’s a late blooming double, and the white and apricot flowers are fairly long lasting.

If you’re not a fan of the typical yellow of most daffodils, this is a great alternative.

I also planted Narcissus Double Cheerfulness.

The flowers on this one are about half the size of the first one and not nearly as showy, but they really are rather sweet I think.

I managed to save a couple of patches of tulips from the deer by surrounding them with chicken wire.

If you use the green chicken wire, it’s not nearly as noticeable when it’s in place as the silver stuff so it’s not a horrible eye sore.

Also, I just loosely circled each patch and that seems to do the trick even though a deer could easily pop his head over it to eat the tulips.  My neighbor nnK gave me that tip.

I’ve been removing the chicken wire during the day so I can enjoy the tulips without it though.

These are Darwin Hybrid Pink Impression tulips.  And just to put quantity in perspective for you, I planted 100 of them and that gave me a patch this size …

I purchased these tulips, and both of the daffodil varieties from Longfield Gardens.  I also purchased three different varieties of allium from them last year, so I’ll keep you posted when those start blooming.

In addition, I planted some cheap tulip bulbs from my local Menards, but those were the ones that the deer got to before I could cover them.  So they look like this …

So it’s pretty much impossible for me to compare the quality of the cheap tulips with the more expensive tulips from Longfield.

But back to those chairs, what do you think?

Do you like them this way, or would you have painted them?  Leave a comment and let me know.

the first flowers.

Before I headed off to visit my mom a couple of weeks ago, I mentioned that I hoped my scilla wouldn’t bloom while I was gone.

I needn’t have worried, because it held out and I enjoyed it for the full week and half between that trip and leaving for Florida yesterday.

These are always the first flowers of the season in my garden.  Scilla siberica, or squill, is a bulb that blooms in late winter to early spring.  In my zone 4b garden they usually bloom anywhere from the middle to the end of April and I’m always so excited to see them after a long, cold winter.

I have two colors of scilla in my garden, white and blue.  The white ones were already in the garden when we purchased our house 30 years ago.

As you can see, up close they have a little bit of a blue streak to them.  From a distance they mainly look white though.

I prefer the blue ones, so I planted some of those myself a few years back.

They are such a gorgeous, vibrant shade of blue.

Scilla is perfect for naturalizing, ie. it will spread over time filling in the space where it’s planted.

  Some consider it to be invasive, so keep that in mind.  If you decide to plant it, be sure to put it somewhere that you won’t mind having lots of it.

Over time, mine has crept out into the lawn in some spots.

It also pops up randomly, rather far away from where it was originally planted.  I’m not at all sure how it does that.

The brilliant thing about scilla is that after it blooms it dies completely back to the ground.  In the garden, it starts dying back as the perennials around it start to fill in, so it’s perfect.  And in the lawn, by the end of May you won’t even know it was there.

Another huge plus to scilla is that it’s deer and squirrel resistant.

Speaking of which, I have decided to give up on tulips.  You’ll remember that I planted a bunch of new ones last fall, and here’s what I found out in the garden the other morning.

Not only have the deer munched them right down to the ground, they’ve literally pulled two of the bulbs right out of the dirt.  Argh!

I know I could do things to thwart the deer, like spray smelly deer repellant on the garden after every rain or enclose the tulips in chicken wire, but neither of those solutions are appealing to me.  I’d just as soon forgo the tulips and plant other bulbs that the deer won’t eat, like daffodils, alliums or more scilla.

How about you?  Do you have scilla in your garden?  Or are you able to grow tulips without deer eating them all for breakfast?  Leave a comment and let me know.


planting outside of my comfort zone.

I had planned to get out to the botanical garden at Ethel M’s while I was out at my mom’s house last week.  I thought it would make a great ‘Sunday mornings in the garden’ post.

If you aren’t familiar with Ethel M chocolates, first of all they are named after Ethel Mars.  She was Forrest Mars Sr.’s mother, and he is the founder of Mars, Inc.  So many brands are under the Mars umbrella, including Snickers and M & M’s, but Ethel M is their fresh-crafted gourmet chocolate line and they make them in Henderson, NV.

You can tour the factory to see where they are made, and to try a free sample.  But I go for the botanical garden outside.

I have to admit, I’m not really a big fan of desert scenery.  I tend to prefer a much more lush look.  But the Ethel M garden shows how beautiful cacti and other desert plants can be.

All of that being said, I didn’t actually get out there this time.  All of those pics are from my visit last year.  My mom came down with bronchitis just before I arrived last week, and she wasn’t feeling up for much.  So I basically spent the week laying low with her.  Honestly, I was quite lazy and didn’t accomplish much.

However, I did do some planting for her.

She has a few pots on her patio, and I tend to plant those up with annuals each time I visit.  When I was out in February I put in some pansies.

They were still looking OK, but with hot weather just around the corner for her, I knew they weren’t going to last much longer.  I wanted to replace them with some moss roses, which did extremely well for her last summer, but they weren’t available at her local Lowe’s yet.

So I left most of the pansies in place and decided to plant a few things right in the ground for her this time around.

Here’s the thing, my mom lives in a townhome.  They have a rock landscape with irrigation spots here and there for specimen plants.  As plants have died over time, it seems that her HOA is not replacing them.  So there are lots of spots that have a functioning irrigation drip, but no plant.

I’m not usually a rule breaker, technically my mom is supposed to get approval to do any planting in the ground.  But … well … I didn’t have time to wait around for approval.  I planted anyway.

The first challenge for me was figuring out what to plant in her zone 9a, which is a long ways from my own zone 4b garden.  I started out with the yellow lantana.  There are already several of these in the ground in her complex, so I figured they were a safe bet.  I also thought maybe the HOA wouldn’t notice them since they would just blend in with existing plantings.

I grabbed that plant in the back of the photo above with the bright pink flowers because I thought it might attract hummingbirds.  My mom has a hummingbird feeder just outside her sliding glass doors and she loves to watch the birds.

It’s a Chiapas Sage which grows best in full sun and is drought tolerant so I’m hoping it will do well, and draw in lots more hummingbirds.

I also grabbed a gardenia while shopping.  When my family lived in Florida we had a gardenia and my mom loved it, so I thought I’d give it a go.

I wasn’t sure it would do well in the ground with their once a week drip irrigation, so I decided to put it in one of her pots where it would be easy for her to water.

The tag said it would do best with 3 to 4 hours of morning sun, but with protection from the intense afternoon sun.  I was able to place the pot in the perfect location on her patio for that.

I had to laugh when digging through the boxes of stuff in my mom’s garage looking for plant food because I found some vintage garden tools.

She was never much of a gardener, so I was surprised to find this.  If I came across it at a garage sale I’d probably pick it up to use as a photo prop!  Who knows when the last time was that this tool was actually used.  I may have to sneak it into my suitcase the next time I visit.

For now, I’m keeping my fingers crossed that everything I planted survives.

How about you, do you ever garden outside of your zone?  Leave a comment and let me know.


the first gardening task of the year.

I can now positively say that spring has finally sprung, and so have my alliums.

Just before I left to visit my mom in Vegas we had several days with temps in the 70’s and it really started to feel like summer is on the way.

Between you and me, I’m taking full credit for the weather warm up.  Every time I plan a trip somewhere warm in the winter, Minnesota gets unseasonably warm temps while I’m away.  As soon as I booked my ticket to Vegas, the forecast went from 1′ of snow to sunny and 75.  You’re welcome Minnesota!

Now that gardening season is upon us, I’m going to resume my ‘Sunday mornings in the garden’ series.  So for those of you who are gardeners, be sure to keep an eye out for Sunday morning blog posts.

The very first gardening task I take on each year is pruning my hydrangeas.  This is a job that can be tackled pretty early on in the season (even late winter if you’re so inclined), but I usually save it for our first warm sunny day when it’s still too soon (and too muddy) to do much else in the garden.

After a long, snowy winter the blooms that I left on for winter interest are looking pretty tired (and yes, that is still a big patch of snow and ice in front of the potting shed, will it ever melt?).

There are a few general rules I keep in mind while pruning my panicle hydrangeas (Limelight, Little Quick Fire, Strawberry Vanilla, etc, etc).

  • reduce the overall height of the shrub by about 1/3.
  • remove any dead, broken or weak branches.
  • remove any branches that are rubbing on other branches.
  • prune just above a leaf node.

All of that being said, in my experience you don’t really have to worry too much about rules when pruning panicle hydrangeas.  A couple of years ago I totally hacked at the Limelight hydrangea in my front garden.  I took it down to about 2′ (from probably about 7′ or so).  I left only the thickest stems, and I didn’t even look for leaf nodes.  Yet it still came back gangbusters, and was right back to 7′ tall two years later.

Since panicle hydrangeas bloom on new wood, pruning them will maximize the number of blooms you get.

  I like leaving a little more height on the hydrangea next to our deck because once it leafs out it creates a nice little privacy screen.  It doesn’t look like much now, but here’s how it will look from this spot in August.

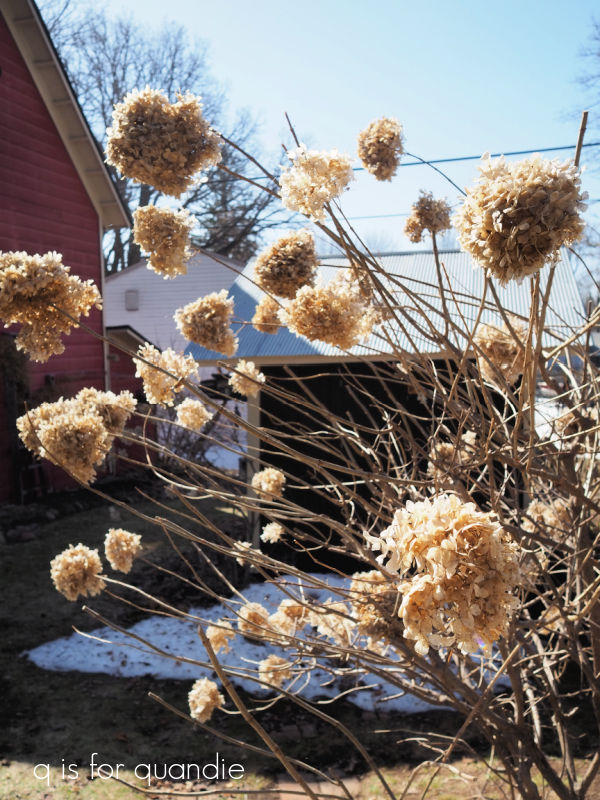
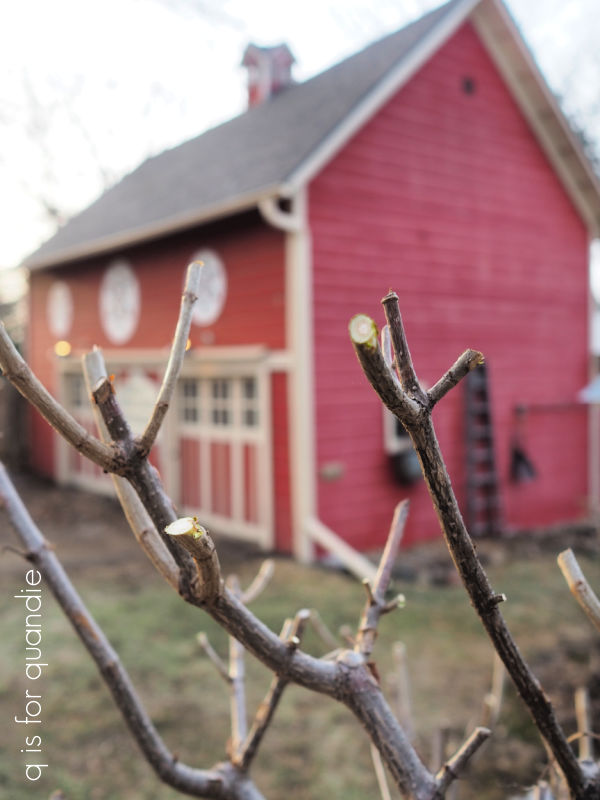
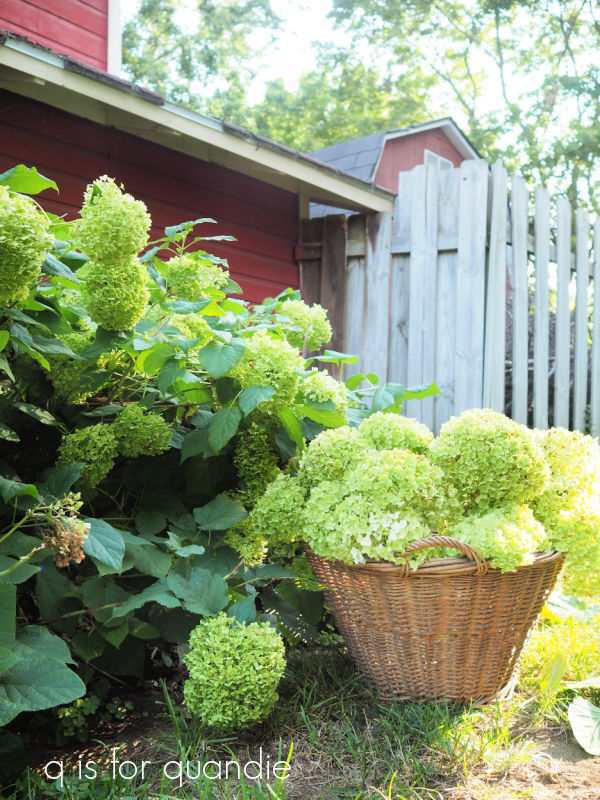
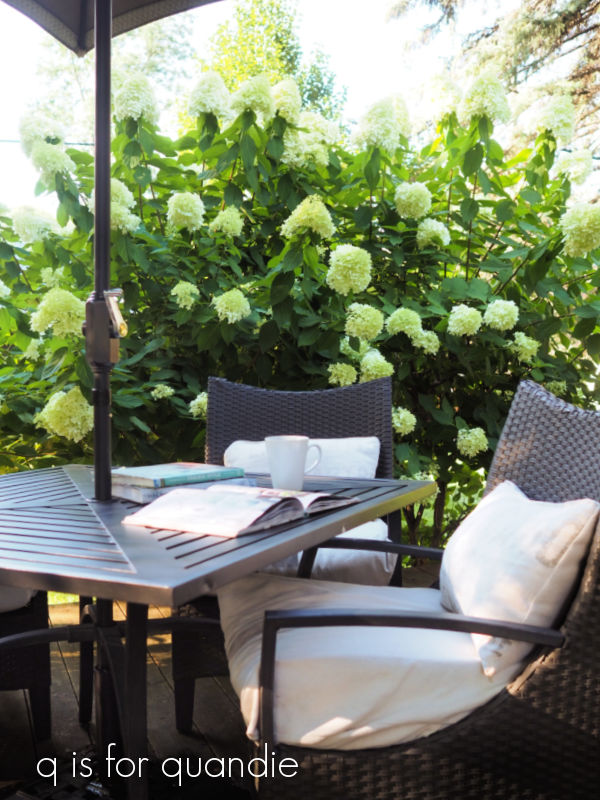
I also prune my arborescens variety hydrangeas (I have Annabelles) in the spring.  They also bloom on new growth, so pruning will encourage blooms.  However, one major downside to this variety of hydrangea is that the stems are often not strong enough to support the flower heads.  The first big rain after they bloom will turn your bush into a floppy mess.

A few years back I read an article that recommended pruning your Annabelles by no more than a couple of inches below the flower heads, leaving the strong old wood stems in place to help support the flowers.  You can also remove weak, broken or dead stems all the way down.

I’ve also given the Annabelle under my kitchen window a little extra support with an old brass headboard.

It was looking quite straggly after the long winter, but I cleaned it up a bit.

Personally, I wouldn’t recommend adding an arborescens hydrangea these days.  Even though some of the newer versions claim to have solved the flopping problem, they haven’t eliminated it entirely.

I actually inherited this Annabelle with the house, and since we moved in I’ve divided and moved it.  There is a big chunk of it out behind the carriage house in my cutting garden, which can be another good idea for this variety.  Place it in a spot where you will just be cutting the blooms off, but it doesn’t have to look good in situ.

So now I’ve checked the first gardening task of the year off of my to-do list.

I’m hoping that I don’t miss the blooming of my scilla while I’m out at my mom’s.  The flower buds were just appearing before I left, but they weren’t open yet.  They do usually bloom in mid to late April, and have even been known to be blooming in the snow as they were in 2020.

I think they’ll hold off this year until I get back.  Fingers crossed.

I also have lots of daffodils, tulips and allium coming up.  Luckily they are willing to pop right up through the snow.

You may remember that I put in a lot of bulbs last fall, so I can’t wait to see how they do.

It feels so good to be back out in the garden!  I’m really looking forward to spending lots more time out there again this year, and sharing lots of tips with you guys along the way.

So tell me, are you back out in the garden yet this year?


on the flip side.

I’m embarrassed to admit that my Rudolph and Co. sign, and all of our other outdoor Christmas decorations, were still up until last week when we’d finally had enough snow melt to be able to reach some of it.

You have to cut us some slack here in Minnesota, especially when we’ve had a winter with a lot of snow.  We can’t always get through the snowbanks to take things down.  In addition, decorations often get frozen into place and we have to wait for them to thaw.  The spruce tips in my rusty urns only just thawed out enough to remove them, and I still can’t get to the potting shed or my front window box at all.

But now I’ve gotten at least some of my Christmas things tucked back away for next year, and I wanted to put something else in that spot on our deck for spring.

Last fall I painted a Farmers Market sign to hang there.

Somehow ‘Farmers Market’ says autumn to me though, so I didn’t want to just put that back up again.

You may also remember that I had a fresh flower market stencil on the flip side of that sign though.

But I was rather tired of that black and white look.  It definitely pales in comparison to the Farmers Market side, doesn’t it?

So I decided to give the flip side some new life with the Flower Market – Open Til Dusk stencil from Wallcutz.  I started by sanding over the previous stenciling.  You always want to do this to prevent seeing a shadow of that old stencil under your new paint.

Next I painted the sign in Dixie Belle’s Kudzu, a spring-ier green than the Dixie Belle Juniper I used on the other side.

I followed that up with the stencil, painting a shadow of the word “FLOWER” in DB’s Midnight Sky, followed by the full stencil in their Drop Cloth.

That tiny black shadow adds so much!

You may remember that the first time I used this stencil on a dresser, I separated the first two lines of wording.

But no worries, I was still able to use the entire thing on this piece.  In fact, it made it even easier for me to once again re-arrange the layout somewhat to fit my sign.  I moved the “always fresh” to the top where it fit nicely on that raised trim, and then put the curved “open ’til dusk” wording below that instead of above it.

Once all of the paint was dry, I sanded to distress.

It’s always fun to distress down to a pre-existing color that works well with your new look.

To finish the sign, I added a topcoat of clear wax.  I’m often asked if clear wax is suitable protection for an item that will be outside, and if I wanted to be on the safe side I would say no.  Certainly not if the item will have standing water on it, and maybe not if you want the piece to look good for years and years.  This sign hangs vertically and although it will get wet, it won’t sit in water at all.  The Rudolph sign that I took down is also finished in clear wax and it has held up just fine in our snowy climate.

So, for me, wax is good enough for things like this sign.  Plus, I don’t mind a little accelerated aging … at least when it comes to painted décor items.

Once the sign was finished, I hung it back up outside.  Just in time for April Fool’s Day!

Yep, Mother Nature played a cruel joke on us and we got a foot of fresh snow on April 1.  I had been planning to get some pansies to replace those spruce tops and fill the urn on the bench before taking some pictures of the sign for this post, but luckily I hadn’t done that quite yet.

But I think it’s going to warm up enough for pansies next week, fingers crossed!

In the meantime, I’m still enjoying my Flower Market sign and telling myself that garden season is going to be here before I know it.  Right?

the fresh flower market case.

Sometime last summer I came across this wooden case at a garage sale.

I have to admit, I walked away from it at first thinking it was too big and cumbersome, and it felt a bit too utilitarian for my tastes.  But then I realized that of course I could change that last part with some paint, and maybe a stencil or some transfers.  So I went back and grabbed it.

Here’s what the inside looked like initially.

The whole thing looks very much homemade.  I do wonder what it was made for, a ventriloquist’s dummy?  an accordion?  a secret stash of gold bouillon?  Hopefully it wasn’t anything creepy, like that time I accidentally bought an embalming table at an auction.  It’s made out of solid wood, so it is rather heavy for toting things around.  Any of you have any ideas about its original purpose?

After scuff sanding and cleaning the case inside and out, I painted the inside in Dixie Belle’s Collard Greens, and the outside in their Drop Cloth.  Next I added some sections from the I.O.D. Wall Flower transfer to the inside lid.

I think the florals in this transfer have that look of old 1940’s wallpaper.

I also added some pieces of the Wall Flower transfer to the front of the case, and then I pulled out a new stencil from Wallcutz called Fresh Flower Market.

I couldn’t quite fit the entire thing on my case, so I masked off those trim lines around the outside as well as the bottom line of wording using painters tape.  I then stenciled the word “MARKET” in Dixie Belle’s Collard Greens, and the rest of the wording in their Holy Guacamole.

I used a small artist’s brush to fill in the bridges on my stencil, and I think that really made the cursive font of ‘fresh flower’ work better.

For a final little touch, I added one of the bees from the I.O.D. Brocante transfer near the handle of the case.

You can’t have a flower market without bees, right?

With it’s fresh new interior, this wooden case could be used to store all kinds of things.  Maybe your spare linens, or your heavy winter sweaters?  Or even your ventriloquist’s dummy.

Or, you could just simply use it as décor.

It would be sweet just hanging out in your foyer, or on a protected porch.  It would also be perfect in your potting shed …

assuming you can get to it.

Earlier this year when I was planning for this project, I thought I’d be able to photograph the finished case out in the potting shed.  But then we got a lot of snow, and then we got a lot more snow, and then earlier this week we got another 7″ more.  I basically can’t get to the potting shed at this point.

Well … I could if I was willing to trudge through a couple feet of snow, and then shovel away the giant pile that fell off the roof and is now blocking the door.  But I’m not.

This was a bit of a tactical error on my part since most of my garden themed photo props are out there too.  I sure do hope spring is just around the corner.

In the meantime … an indoor photo shoot it is.

What do you think?  What would you use this case for?

The fresh flower market case is for sale, check out my ‘available for local sale‘ page for more details.

Thank you to Dixie Belle Paint Co for providing the paint, and to Wallcutz for providing the stencil used for this project and sponsoring this blog post.