a one year report.

Good morning from the garden!

I thought this might be a good time to report back on the performance of some of the new perennials that I put in last year.

First, for those who don’t know, I garden in a zone 4b, and we had a very snowy winter last year, although not an abnormally cold one.  In fact, according to bringmethenews.com it was 0.4° warmer than average.  So I can’t blame any of my plant losses on worse than normal cold temps for my zone.  Also, for those of you from warmer climates who might think snow is bad, lots of snow cover can actually a good thing for gardens.  It insulates the plants from extreme cold, and as it melts it provides lots of spring moisture.

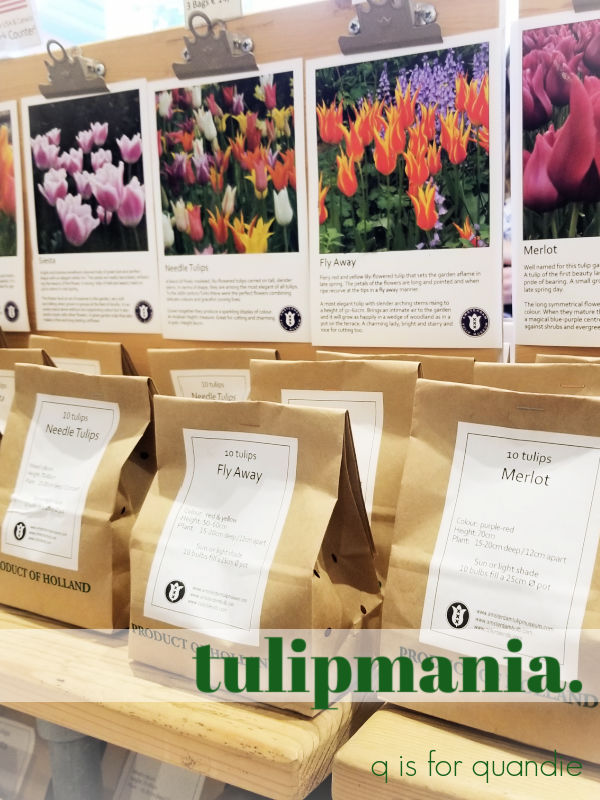
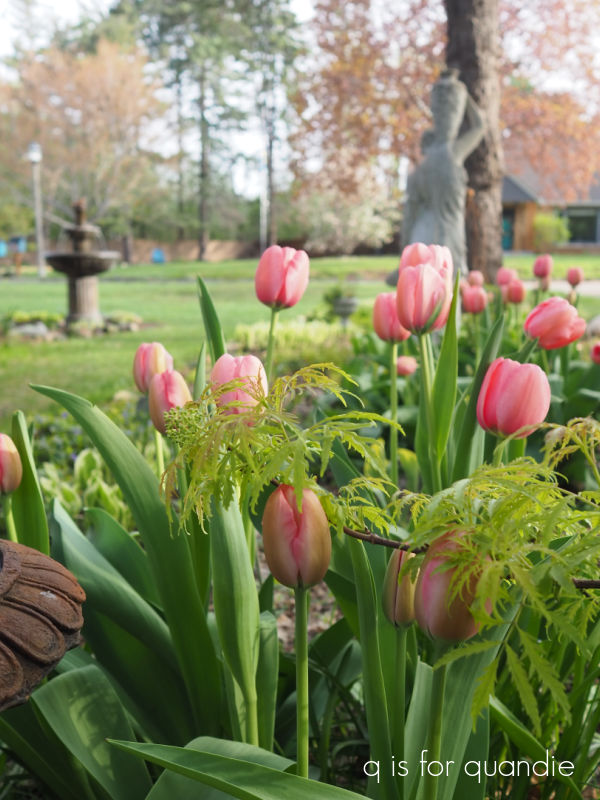
Speaking of spring, let’s start with the spring bulbs.  I ordered a bunch of bulbs from Longfield Gardens last year (now is the time to order if you want to put some bulbs in this fall).  Despite the deer trying to eat them all, the Darwin Hybrid Pink Impression tulips did amazingly well.

So well in fact that I ordered 100 more to plant this fall.  I also purchased a roll of green wire mesh at a garage sale earlier this summer that I can put around them to deter the deer.

The daffodils that I put in last year did great as well.

Daffodils are deer resistant, so I ordered some more to put in the spot where the deer did the most damage last year.

I didn’t have quite as much luck with some of the allium bulbs.  I planted three different types; Sphaerocephalon Drumstick, Atropurpureum and Nigrum.

The Nigrum and the Atropurpureum performed well enough, but I didn’t really love either one. That’s probably why I neglected to get any photos of them while they were blooming.

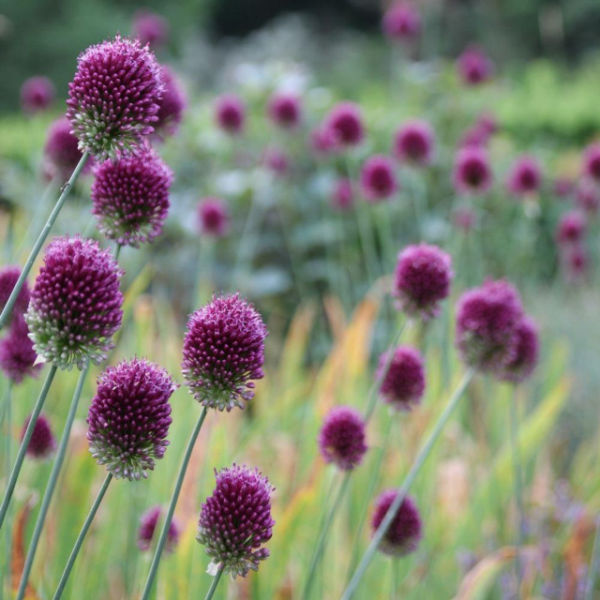
The Sphaerocephalon Drumstick was blooming a couple of weeks ago.  I ordered it based on this photo …

Isn’t that pretty?

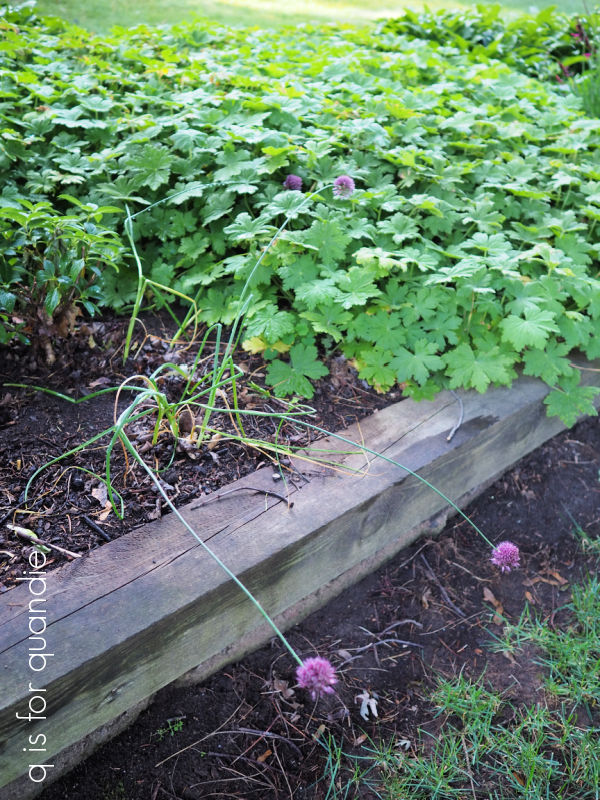
But here’s what mine looked like …

LOL, seriously, is that pathetic or what?

It could be that they don’t get enough sun, but a little online research brings up a number of people who have commented on how these tend to flop.  I plan to move them to the cutting garden where they will get more sun, and where it won’t matter quite so much if they flop.  I’ll just cut them and use them in floral arrangements.

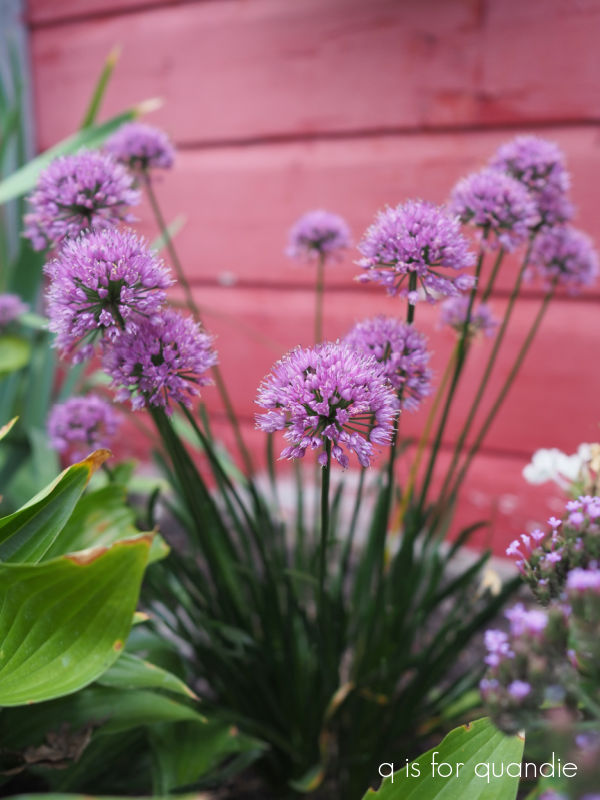
I admit that last year I was a little obsessed with alliums.  Not only did I plant the bulb type alliums, I also planted a couple of the herbaceous forms.  I planted one called Windy City and three of the Serendipity alliums from Proven Winners.  All are performing really well.   This one is the Windy City …

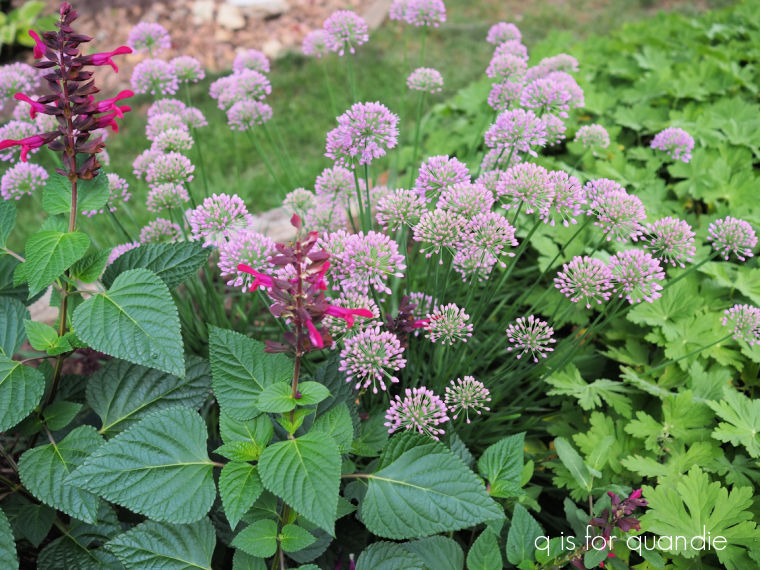
And here are the Serendipity with some Unplugged Pink salvia planted next to them (on the left).  By the way, the hummingbirds love that salvia.

In May 2022 I planted two types of clematis.  The Jackmanii is what I think of as the quintessential clematis, the basic dark purple clematis that so many people have had in their gardens for ages.  Mine bloomed quite nicely, but is still looking quite spindly.

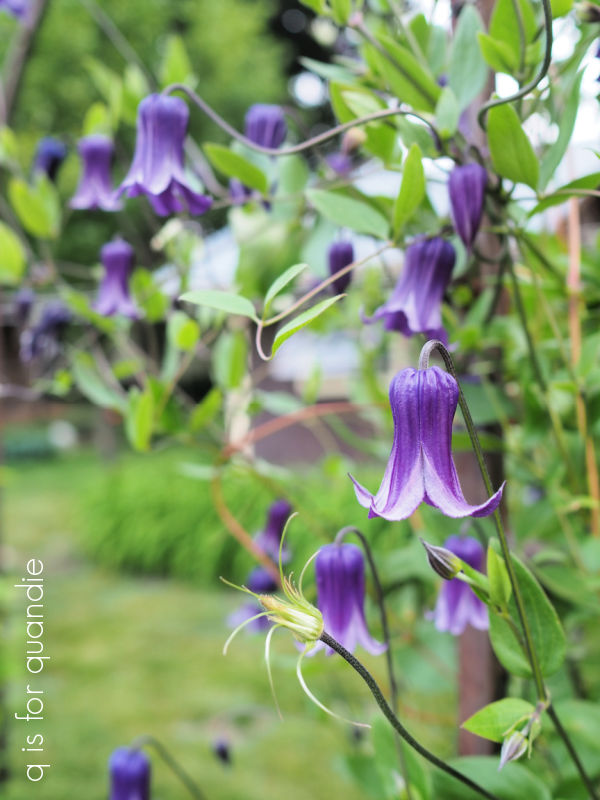
The Roguchi on the other hand is amazing.  It has completely filled out, and is constantly loaded with flowers.

I also planted those Fire Alarm heuchera in May 2022.

And as I reported earlier this year, they barely came back in spring … and ultimately I dug them up and tossed them.

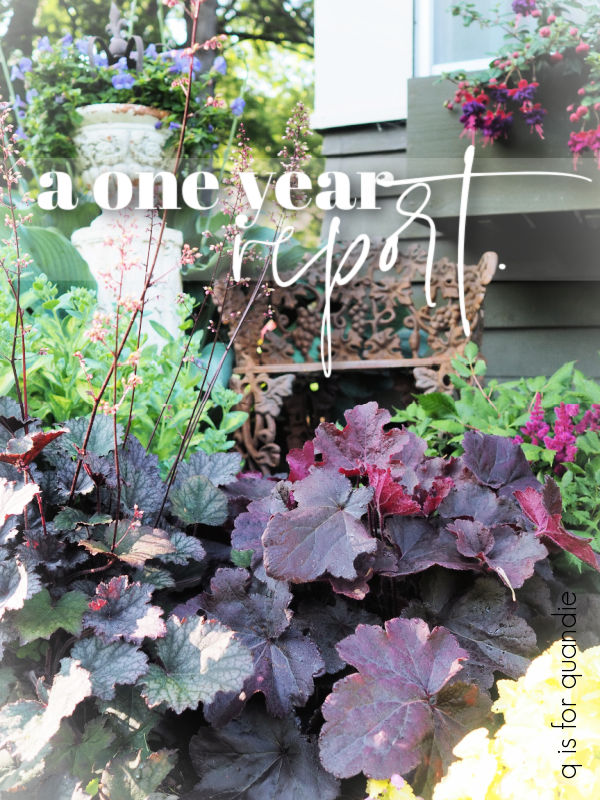
I also planted a Northern Exposure Black heuchera last year.  It’s the deep purple plant on the right below.

After a slow start in spring, it’s looking amazing right now!  The heucheras in the Northern Exposure line were specifically bred for hardiness, and are considered hardy down to zone 3 so maybe this is the type of heuchera I should stick to.  There is also a lime green version (along with a few more colors) in this series, so I may need to add that to my plant wish list.

I added some Alexander’s Great brunnera to my shade garden last year, and it was gorgeous when it bloomed in the spring.

The flowers are long gone now, but the plants are filling out nicely and I’m looking forward to even more blooms next year.

Proven Winners has a new brunnera out called ‘Queen of Hearts‘ that looks to be quite fab.  I’m thinking of searching that one out and underplanting my Limelight hydrangeas with it.

Now, I know I’ve mentioned this next plant more than once already this year, but I’m just so darn impressed with its performance.

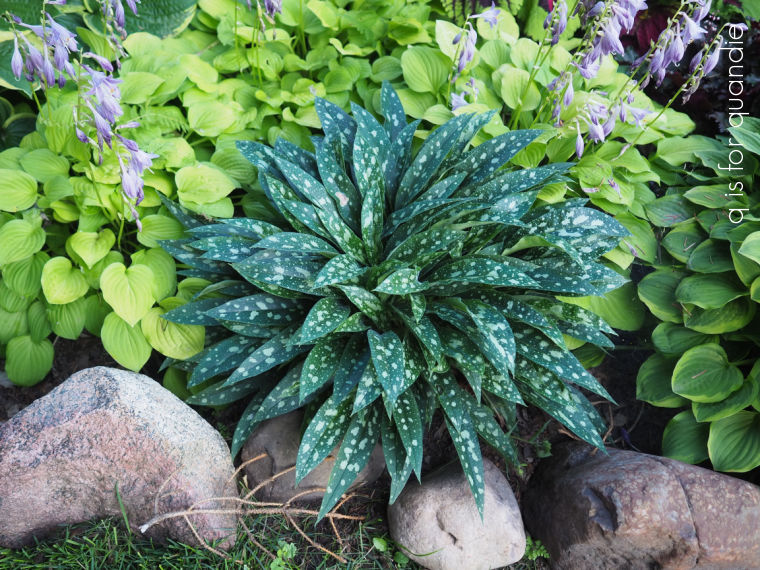
That is a Raspberry Splash lungwort (or pulmonaria) from Monrovia.  Just look at the size of that thing!  OK, it might be hard to tell from the photo, but it’s 2′ across (I measured).  Comically, the tag says it grows to 18″ wide.  Um, mine has exceeded that by quite a bit in just one year.

However, I should also mention that I planted a 2nd one near my large fountain and it didn’t do nearly as well.  Apparently pulmonaria don’t like to be in damp soil, and that fountain does splash quite a bit.  I guess the ‘splash’ in the name isn’t literal.

Anyway, I moved that one away from the fountain and it is recovering nicely, but definitely is not as large yet.

Now for a quick lilac hedge update.  For those of you who might be new here, I have been attempting to create a lilac hedge on our back property line since 2011.  Good grief, that’s 12 years now!  Jeesh!  Do I wish I’d just gone with a Limelight hydrangea hedge?  You bet I do.  Hindsight is always 20/20.

Over the years I’ve eventually pulled out every single lilac I planted originally as they never flourished.  I really never figured out exactly what the problem was, they get plenty of sun.  I blamed it on various things; rabbit pressure in winter, overspray with lawn weed killer, delicate new hybrids, etc.  I replaced some of the plants with old fashioned common lilacs a few years back, and those are now about 10′ tall.

My plan was to do that all the way along the line, but last year I couldn’t find any common lilacs, so I planted three newer varieties on the west end of the hedge, a Yankee Doodle and two Ludwig Spaeths.

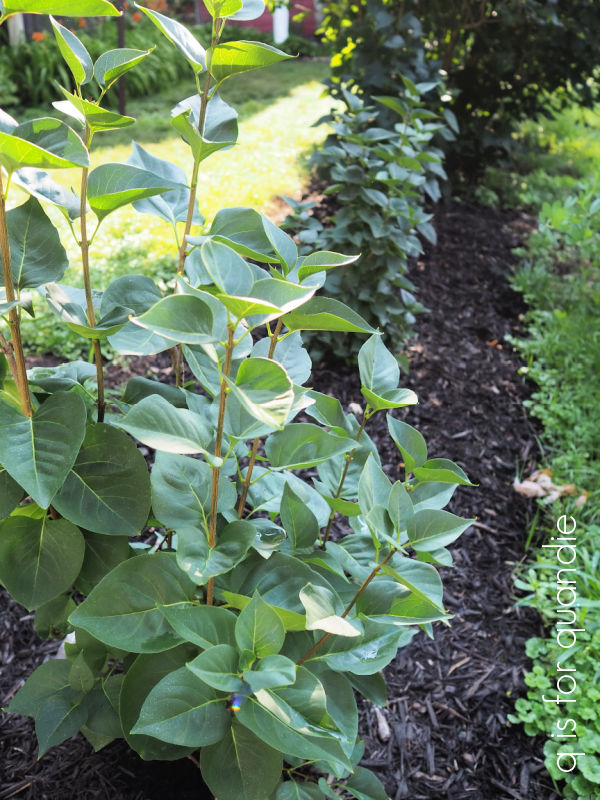
So far, so good.  They are about 4′ tall and have remained nice and full, however, they did not bloom this year.  Fingers crossed that they continue to do well because this year I planted an Albert E. Holden and a Charles Joly at the other end of the line.  I’m dreaming of the day when we have a solid 10′ hedge of lilacs back there!

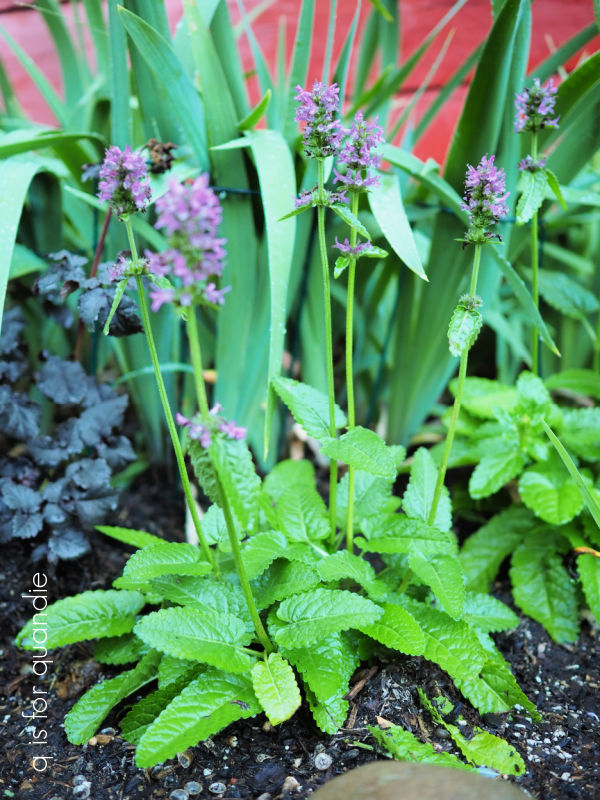
Another plant that was new to me last year was Stachys moneiri ‘Hummelo‘, or you may know it as betony.

The flowers were already a little bit spent when I took that photo unfortunately.  I’d seen this plant on The Impatient Gardener’s Instagram and had to have it.  Fortuitously, my neighbor nnK had it growing in her garden and gave me a couple of chunks of it last year.  I liked it so much that I bought two more and added them this year.

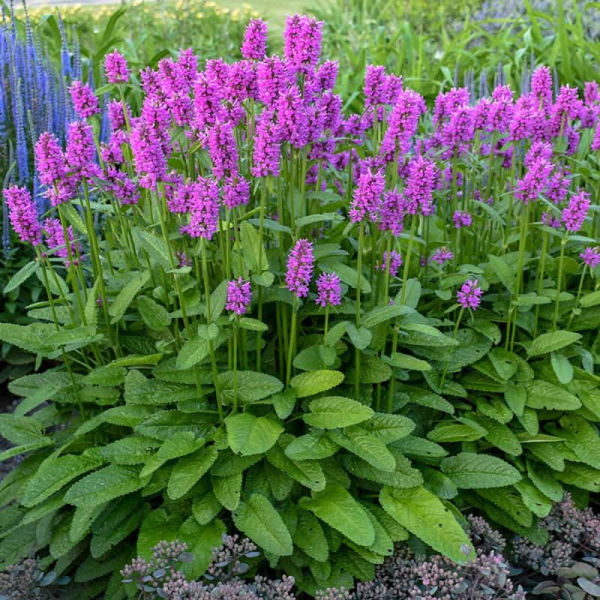
Here’s a photo that I grabbed online that gives you a better idea of what the flowers look like.

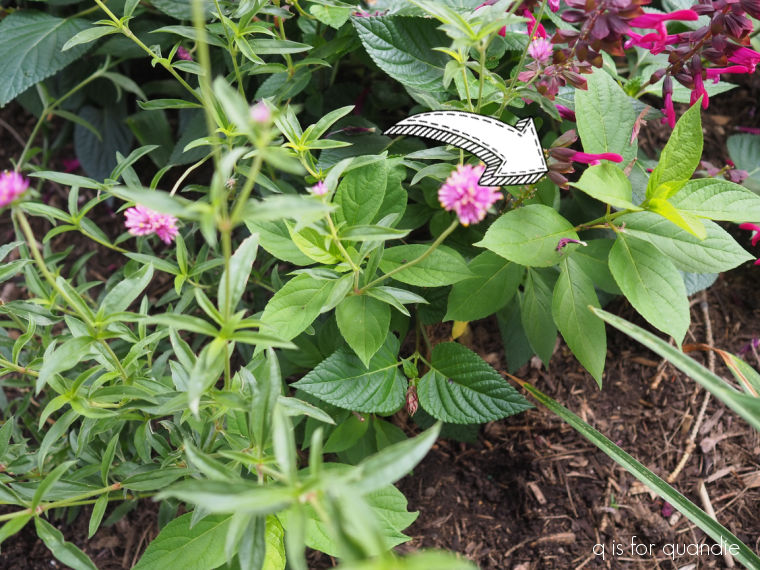
I planted a few Proven Winners plants last August with mixed results.  The Pugster Amethyst butterfly bush did not come back at all.  The Magic Show Purple Illusion veronica is looking OK, but didn’t put on much of a show so far.  It may not get enough sun in my garden.

I am totally babying the Fire Light Tidbit hydrangea that I put in last year.  It struggled to get established last summer, and I’ve had to water the heck out of it this summer to keep it from wilting.  It’s starting to put on a little bit of growth, but is still really small.  Like, I’m lucky if it’s 8″ tall, small.

I seriously considered just pulling it out and getting a new one for that spot, but in the end I didn’t have the heart to do that.  So I planted some annuals around it to fill in and am hoping it will continue to perk up.

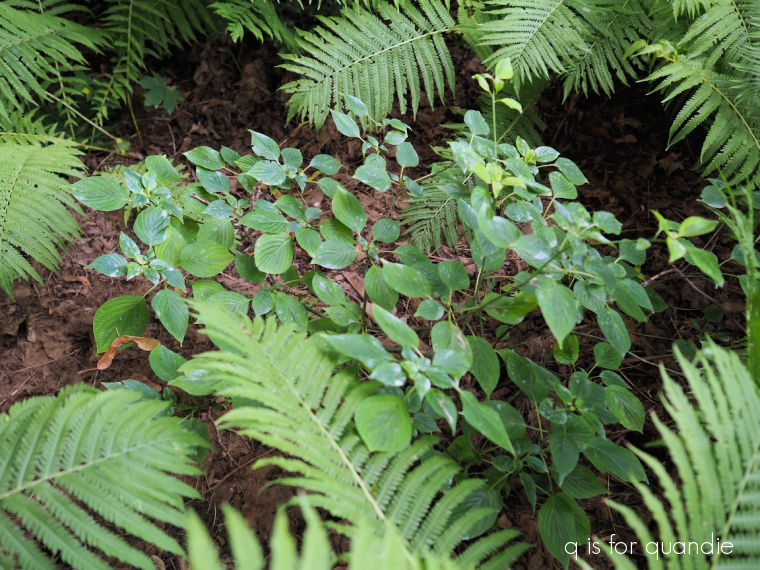
Lastly, I planted a Golden Shadows Pagoda Dogwood, also from Proven Winners, in the fern garden.

It might be a few years before it does the job I planted it for.  I want an understory tree to fill in the area under my huge maple tree, but above the ferns.  It should grow 10′ to 12′ tall and have strong horizontal branching.  It has put on a lot of new growth this year, but hasn’t gotten more than a foot or so taller.  I’m still waiting for it to pop its head out of the ferns.  Fingers crossed for next year.

So, overall I’ve had mixed results from new plants I added last year.  Some winners, some losers.  How about you?  Did you put in anything new that is really spectacular?  Leave a comment and let me know.

the August slump.

Good morning from the garden!

Before I get into this morning’s post, I wanted to share some disappointing garden news.

Do any of you recall the beautiful row of trees on my neighbor’s property line that I shared last fall?

I’m talking about the brilliantly colored orange/red trees (I believe they are some kind of maple) in the background of that photo (not the yellow foreground tree).  There was a line of five or six of them all the way down the property line.  And they were simply stunning in the fall.  I mentioned how much I loved seeing their fall color in a post last year.

Well, yesterday we spent the day listening to chain saws and the occasional crash as each tree came down.  And now all but one of the trees are gone.  Such a bummer.

The property they were planted on is a double-wide lot, and it was sold recently.  Apparently the empty lot itself was split off and now someone is going to build on it.

Unfortunately, this is how things can go when you don’t own 20 acres or so immediately surrounding your property.  Neighboring home owners can remove trees at will, and lots can be split up and built on if there’s room.

The loss of those trees coincides with what I like to call the August slump.  I always start to lose steam in the garden about now.  By mid-August, lots of things are starting to look a bit tired out.  The peonies are getting powdery mildew, the lawn is dried out, the trailing verbena is getting leggy and those darn Japanese beetles are going full throttle.

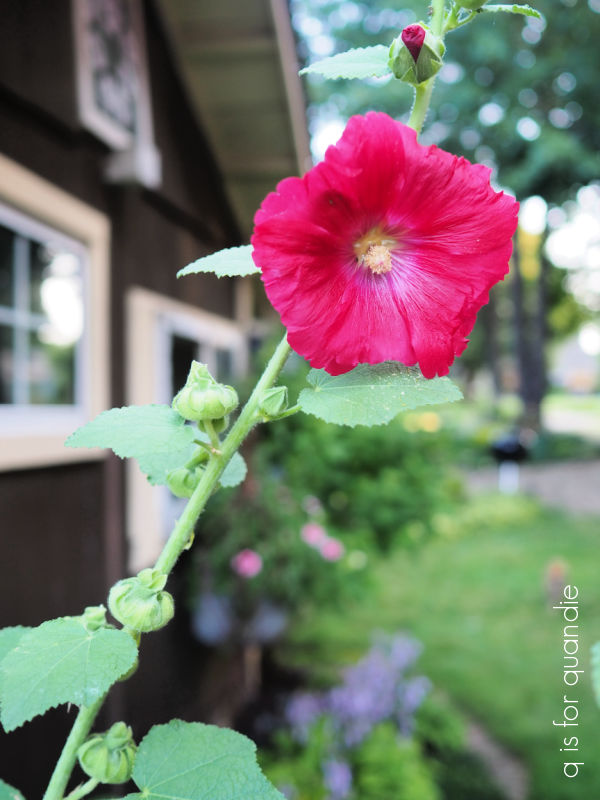
I’ve been attempting to grow hollyhocks successfully for years, and this was the first year that I got one to actually bloom.

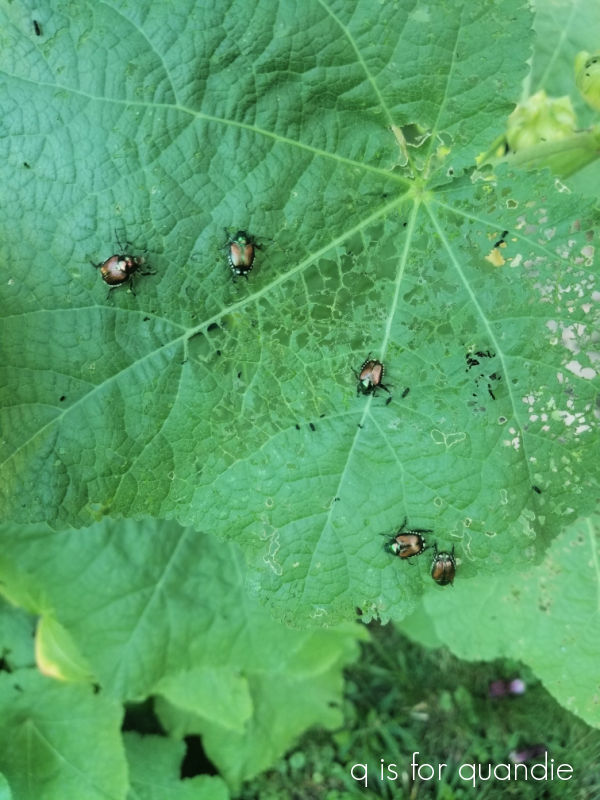
It looked great last month, but little did I know that Japanese beetles LOVE hollyhocks!

I have had to go out and knock dozens of beetles off the plant into a bucket of soapy water in the last couple of weeks.  I finally gave up the other day and just pulled out the entire plant.  I’ve decided the hollyhocks just aren’t going to work for me.

That has pretty much been my strategy for dealing with Japanese beetles, pull out the plants they love.  So far I’ve pulled Virginia creeper, roses, and a wild grapevine out of my garden, and now a hollyhock.  I’m just hoping they won’t go for my crab apple next.

I’m sure some of you have also experienced a garden slump now and then, and one way to motivate yourself to get back out there is to get inspired by others.  So as requested by a couple of you, here’s a list of some of my favorite garden vloggers on YouTube.

First up, of course, is Garden Answer.  Seeing as they have 1.78 million (yes, million!) subscribers, I’m guessing that many of you have already heard of this one.

Without a doubt, this is the vlog I watch the most.  Probably because they post a new video every day!  When you have 1.78 million viewers, and your vlog is the full time job of husband and wife, and several full or part-time employees, you can pump out enough content to post every day.

I really enjoy Laura’s vlogging style, and her gardening style.  I learn a lot about new varieties of plants from watching this vlog.  I also get ideas for plant combinations that might work for me.  I do admit that watching the massive, and very pricey, projects they undertake may not be everyone’s cup of tea.  They recently added a gorgeous pond to their property that would cost at least $80,000 or more (although it sounds like most of the parts and labor were gifted to them).  And I can’t even imagine how much their Hartley greenhouse cost.   Even some of their ‘smaller’ projects, like adding a row of gorgeous concrete urns that probably cost around $1,000 each are out of reach for most of us.

So if you can’t look past that sort of thing, this might not be the right garden vlog for you.

Instead I’d like to recommend the next garden vlog on my list, The Impatient Gardener.

Erin’s garden is much more realistic for most of us, as is her lifestyle.  She has a day job, she does all of her gardening herself on evenings and weekends with only occasional help from her husband, or as she likes to call him “Mr. Much More Patient”, and while she does get some promotional items free, most of her garden projects would be within the realm of possibility for the average person.  I also like that she is in Wisconsin in a zone 5b, not quite my own zone 4b, but not too far off.

That brings me to my next vlog, Wyse Guide.

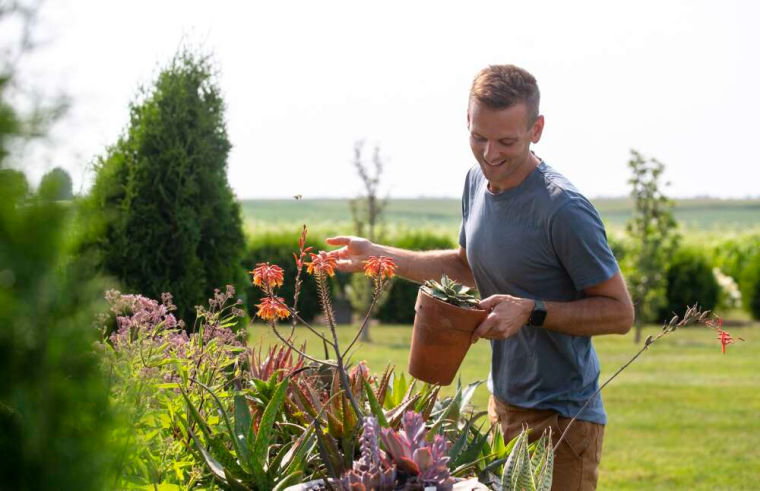
Kaleb has taken over his grandparent’s farmhouse where he gardens right next to cornfields in Iowa.  In addition to gardening, he also includes baking, cooking and other lifestyle content on his vlog.  As you may know, I don’t really cook, but I’m tempted to try some of his simple recipes.

I also like that he gardens on what is a much more realistic level for most of us.  His garden style leans a little bit more modern (think succulents, agave, and native plantings) than mine, but he also focuses more on foliage than flowers, which I can relate to.

I would consider those my top three garden vlogs, but there are a couple of others that I watch on occasion starting with Gardening with Creekside.

Jenny and her husband own a garden center in North Carolina.  Probably the main reason I don’t watch her as much as some of the others is because she grows quite a few things that won’t grow in my zone.  That being said, she gives lots of practical advice.  I learned what a hori hori garden knife is from her, and now it’s one of my most used garden tools.

I also occasionally check in with The Southerner’s Northern Garden, mainly because he loves hydrangeas as much as I do.

I have to chuckle a little bit over this one because he calls his a ‘northern garden’, but he gardens in southwest Ohio in zone 6 … so not quite as northern as my own garden.

He recently moved to a new house and left behind his established garden, so he is starting over from scratch.  I think it will be interesting to watch his progress and see what he does with a blank slate.

So, if you feel like you’re in a bit of an August garden slump, check out a few of these vloggers and see if they can’t motivate you to get back out there.

And if you have some favorite gardening channels on YouTube, please share them in a comment.  I could use some more inspiration to help get me out of the August slump myself!

the shade garden.

Good morning from the garden!

We had a bit of rain last week, and when it stopped and the sun came out in the evening, the shade garden was looking particularly lush.  So I thought it would be the perfect time to get some pictures to put together a little tour of this area for you guys.

Let me explain the layout a little bit.  Our gravel driveway runs along the east side of our house and goes to the carriage house which is all the way back at the southeast corner of our lot.  The shade garden sits between the driveway and the house, and pretty much runs the entire length of the house.

OK, now the basics.  I garden in zone 4b in the Twin Cities (for those who don’t already know).  This garden ranges from part shade on either end to full shade in the middle.  It’s shaded by two huge maple trees on the other side of the driveway, and a couple of ancient pine trees down the middle of the garden.

This particular garden is definitely the one that gets the most attention from me.  There are a couple of reasons for that.  First of all, I much prefer working in the shade over working in the hot sun.  It’s so much cooler.  So I find myself wanting to spend more time weeding there.  Second, it’s very visible from inside the house.  Most of our windows look out to this side of the house including our large picture window in the piano room.

So we get to enjoy this garden from inside the house as well as outside.

We never could get grass to grow in the area between the shade garden and the house, although we tried for years.  It’s a fairly high traffic area because our spigot is just next to where you see the watering can on the chair on the left.  We eventually gave up on grass and put in the flagstone.  Ironically, when we started digging up what grass was there, we found a layer of sand under it.  So at some point in the past, this area must have been paved in some fashion.  No wonder we couldn’t get any grass to grow!

I’ve always wanted to extend the flagstone all the way down, and then create a path to the front door as well, but um, yeah, that’s probably never going to happen.  There are too many other things ahead of that on the wish list.

The fountain that you can see down at the end has been located in a couple of different spots since we purchased it, but I like this one the best.

My garage sale statue, Cossetta, sits in the middle of the shade garden.

She’s actually quite tall, but so are the plants surrounding her.  There is a fern around her base, and some fairy candles (a.k.a. Black Cohosh, Black Snakeroot, Black Bugbane or Cimicifuga racemosa) behind her.  Those fairy candle flowers are taller than me.  I think the way Cossetta emerges from the foliage looks rather magical.

This garden is full of shade loving plants.  Some of my favorites (other than hostas, which are a given) include tiarella, or foam flower …

Japanese painted fern …

Maidenhair fern …

Canadian wild ginger …

and fernleaf bleeding heart (this one continues to bloom for most of the season, and doesn’t start dying back this time of year like the other bleeding hearts).

All of these make great companions for hostas.

Speaking of hostas, my neighbor nnK’s mom, Judy, gave me three Curly Fries hostas as a thank you for helping in her garden earlier this summer.  I planted them in a triangle in front of the wrought iron bench that came from handyman Ken and his wife, Arlene.

Aren’t they fun?  Their texture contrasts perfectly with the large blue hosta behind them.

I’m trying to follow a new rule in my garden, and that is to plant at least three, if not five, of a single type of plant.  Planting in groupings of odd numbers like this feels more natural and harmonious than having lots of single specimen plants dotted around.

I have definitely not always followed this rule!  I mean, let’s face it, it’s 3x more expensive to buy three of a particular plant rather than just one.  But, I’ve been working on dividing existing plants into groupings, and whenever I add something new I try to add more than one.

That being said, I definitely still have some single specimen plants like these hostas.

That is a Guacamole on the left, and a Lakeside Dragonfly on the right.

The Sun Power hosta packs a big punch with it’s bright color, so I think it can stand alone as well.

It’s flanked by two June hostas, and that yellow blooming plant in front is a freely self-seeding Corydalis lutea.  It pops up all over the place, but it’s also quite easy to pull out if it shows up somewhere that you don’t want it.

Something that I’ve been experimenting with a bit more this year is interspersing some annuals in with my perennials, usually to fill in a space where a neighboring perennial won’t reach full size for a couple of years.  I pulled out some bleeding heart last year and after popping in three of the budget heuchera ($5 each!) that I found in the clearance aisle at my local nursery this spring, I also added in some King coleus to fill up the space.

It has created a gorgeous swath of colorful foliage.

Another good way to fill up some empty space is to place pots right in the garden.

My ‘Sun King’ aralia will eventually fill in this whole corner, but in the meantime a couple of my rusty pots filled with caladium look pretty here.

By the way, have I mentioned that I prefer my gardens to be jam packed with plants?  It really cuts down on weeding.

There can be some issues with plants that are crowded in like this, they are competing for water and nutrients and there is a greater risk of disease and insect pressure.  But personally, I think it’s worth the risk.

I hope you enjoyed this little tour of my shade garden.  If you have any questions about particular plants, be sure to leave a comment and I’ll do my best to answer them.  Otherwise, I’m heading out to enjoy a cup of coffee in the shade garden!

hosta flowers, yes or no?

Good morning from the garden!

Today I thought I’d ask you all the question, ‘hosta flowers, yes or no?’

In the past I’ve mentioned that I tend to cut the flowers off my hostas as soon as they appear.  But that’s partly because I have 500 (small exaggeration) of this old variegated variety of hosta in my garden …

and it has tall, spindly flower stalks with tiny lavender flowers on them.  You can see a couple of stragglers that I missed clipping in that photo.

If I just let them go, they look really messy and chaotic to me.  So, I have always trimmed them off.

In fact, in the past I’ve tended to remove the flowers from almost all of the hostas in my garden.

But this year it seems like the flowers on quite a few of them are really looking good.

Rather than having spindly flowers poking out in every direction, they have nice full clumps coming from the center of the plant.

Maybe it’s because they didn’t suffer any hail damage this spring.  Or maybe it’s because I top-dressed a lot of them with compost this year.  Or maybe it’s because I have been very diligent about keeping them watered.  We’ve had a very dry summer so far, currently we are experiencing what is considered a moderate to severe drought, so I’ve been doing a lot of watering.

Or maybe it’s just that I’ve never let them reach their full glory before!

Whatever the reason, this year I’ve decided that some of the hosta flowers deserve a spot in the garden.  In fact, I was standing over at nnK’s house across the street the other evening, and I noticed that from a distance it looks like my garden is full of purple blooms right now, and that’s not a bad thing.

One of the most prolific bloomers at the moment is this one …

This is a hosta that originally came to me from my friend Sue, and I’m fairly sure it’s called Golden Tiara.  Over the years, with lots of splitting here and there, I now have at least a dozen of them.

Another that’s full of flowers right now is this one.

I’ve got it tucked in between some Golden Tiara hostas on the right, and that glorious Raspberry Splash pulmonaria on the left.  I have no idea what this one is called, it’s similar in size to the Golden Tiara but is solid lime green.

Most of my hostas have pale purple flowers, but I do have a couple that get white flowers.

Wouldn’t that be a pretty addition to an all white blooming shade garden?

This next one starts out with pale lavender buds that fade to white as they open.

Not all hostas bloom at the same time.  I have several borders of a plain green hosta (also gifted by my friend Sue) that aren’t showing any signs of blooming yet.

In fact, oddly enough, although I’ve had these for years, I can’t even recall what their flowers even look like.  Clearly I don’t grow this variety for the blooms.  Instead, they make a great edging plant for a perennial border.  In fact, I just dug up two of them, divided the pair into 10 plants (yes, 10!, five each) and replanted them as a border under my Limelight hydrangeas.

They don’t look like much right now, but they will fill in quickly and create a solid border.

And speaking of hostas that aren’t blooming yet, one of my readers, Annie O, gifted me with a Royal Standard hosta that she says gets beautiful, and highly scented, white flowers.  But it’s also one that hasn’t bloomed yet (on left).

As is the Shadowland Autumn Frost hosta to the right of it.

I’ve done a little research and as far as I can tell, it does not harm your hosta in any way to remove the flower stalks before they open.  And you should definitely remove them after the flowers fade to reduce the amount of energy the plant spends on producing seed.  It can then devote that energy to growing more roots and foliage instead.

So I’m curious, do you whack the flowers off your hostas right away?  Or do you leave them until the flowers are done?  Do you have a particular hosta that you grow for its spectacular flowers, or do you pick hostas for their foliage alone?

Leave a comment and let me know.

a visit to tangletown.

I used to love going to the Tangletown neighborhood garage sale, it was always one of my favorites.  Unfortunately, it’s one that bit the dust during Covid.  The last one was held in 2019, and they haven’t brought it back.  Such a bummer.

But last weekend I found myself in Tangletown once again, this time at Tangletown Gardens.

If you are local, and looking for some garden inspiration, this is a spot you should check out.  It would be better if you’ve recently won the lottery, because I’m not going to sugar coat it, their prices can be high.

That may be partly because they have a lot of unique offerings that you won’t find at your typical garden center, like this Tibouchina grandiflora, or Princess Flower.

They have this one planted in what I’m going to call their boulevard (a.k.a. verge, tree-belt, the section between the sidewalk and the street, what do you call it?) border.

More on those borders in a minute, but as for that Princess Flower, it was $24.99.  I did a bit of googling and found that it is grown as a shrub in tropical climates, it’s hardy in zones 9 to 11.  So clearly not here in Minnesota, meaning that we would grow it as an annual.  That’s certainly a pricey annual!

But really, despite the high prices, Tangletown Gardens provides a wealth of inspiration starting with the various planters scattered around.

You definitely aren’t going to find your traditional petunias here.  I like the use of Scotch moss in the planter above, at least I think that’s what that is.

I also like that they used birch logs in this next planter.

Of course, we’ve all seen birch used for winter arrangements, but turns out it looks pretty good in summer too.

I also like how they’ve carried over the plants in this next trio of planters to the ground surrounding them, it’s as though they’ve spilled out of the planters and onto the ground.

Let’s take a closer look at the plants themselves.

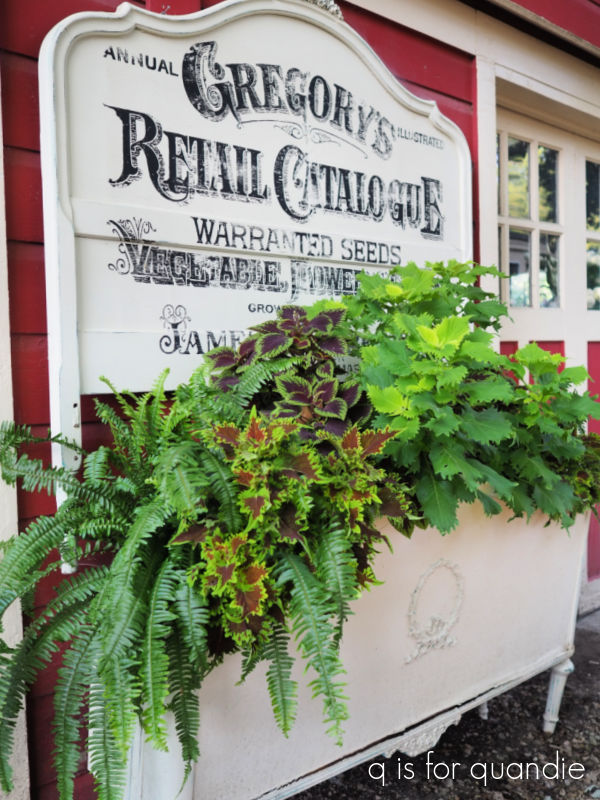
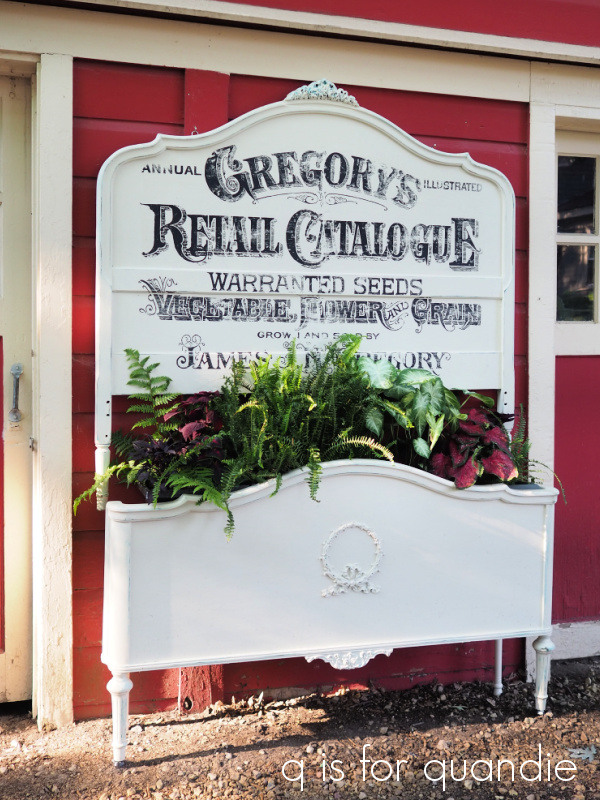
I believe that bright yellow grass is Hakonechloa, or Japanese forest grass.  The front center plant seems to be a coleus, and there is a cala lily behind it.  In the upper right of the photo is an upright fuchsia.  Have you seen these?  I actually bought one by mistake earlier this year.  I was rather annoyed when I got it home and read the tag because I wanted the trailing version for my front window box.  I ended up putting the upright version in the Gregory’s Catalogue bed planter and now, a couple of months later, I’m realizing that I really like it.  I may buy some on purpose next year.

As you can see, it’s holding its own height-wise amongst coleus and ferns.

Although the planters at Tangletown were fantastic, the star of the show for me was those boulevard borders that I mentioned earlier.

They were nothing short of spectacular.

Isn’t this a fun little plant …

I should have paid attention to what that was called, but unfortunately I did not.

They used a wide variety of plants in these borders, both annuals and perennials, ranging from your typical things like zinnias, gomphrena, celosia, grasses, and coleus.  But they also had some more unusual things like that Princess Flower I shared earlier.

They also used a plant that I’m finding is super trendy right now, Angel Wings, or Senecio candicans.  It’s the plant below with the big, silvery wings … I mean leaves.

Isn’t that gorgeous?  As I mentioned last week, I’m not typically a fan of silvery foliage because it looks like powdery mildew to me, but I might make an exception for this one.

They also used one of my new favorites, Verbena bonariensis.  It’s the tall, wispy plant with purple flowers …

I’d been seeing a lot of this plant on my favorite British gardening show, Gardener’s World, and although I looked all over for it at my usual nurseries I couldn’t find it at any of them.  I did end up finding it at the Abrahamson’s in St. Croix Falls, but I now know that I can also get it at Tangletown Gardens.

The main reason I was visiting Tangletown Gardens this time around was to look for scented geraniums.  My friend Jackie, who loves to grow plants for their scent, told me that this was the place to find them.  And she was right.

They had quite a number of different varieties.

I know it’s weirdly confusing, but the flowers most of us call geraniums aren’t true perennial geraniums at all, they are pelargoniums.  Basically geraniums are perennial plants like this one (also called Cranesbill) …

or this one (Geranium macrorrhizum, or Bigroot Geranium) …

Pelargoniums are annuals usually grown for their flowers, or in this case, their scent.

In my opinion, most scented geraniums are not grown for their looks.  They tend to look a bit spindly, and their flowers aren’t usually very impressive.  So keeping that in mind, I chose both of the ones I purchased strictly by smelling them.  Scented geraniums come in lots of different scents like apricot, chocolate mint, rose, peppermint and nutmeg, but I chose two that both have a lemon scent.

First up is Pelargonium ‘Mabel Grey’.

And the 2nd one I chose is Pelargonium ‘Prince Rupert’ variegated.

I’ve placed these on the tiered plant stand that I found at the Fridley garage sales (after giving it a quick coat of black spray paint).

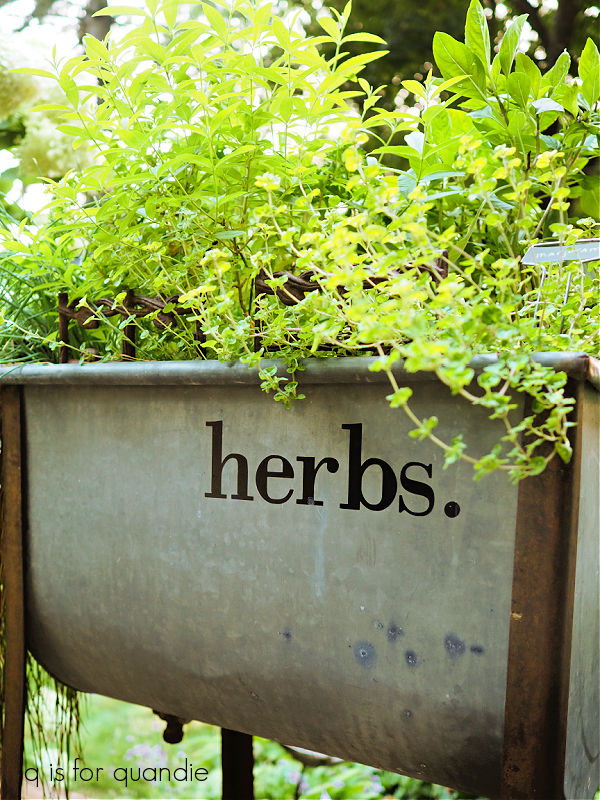
It’s sitting in between my newspaper roller planter of succulents and my galvanized tub herb garden.  You may remember that I mentioned having chosen a couple of the herbs for their scent as well; lemon verbena and lavender.

Our outdoor dining table is right next to this, and this is often where I sit to have coffee in the morning.  Mr. Q and I frequently eat dinner out here too.  These scented plants are best enjoyed up close and personal.  I find that you have to brush against them to release their fragrance, so this is the perfect spot for them.

Although they were priced just a little higher than what I would normally pay for an annual at $7.99 each, I plan to over-winter them as houseplants.  I hope to get many years out of them.

So tell me locals, have you been to Tangletown Gardens?  Or have any of you grown scented geraniums?  Leave a comment and let me know.

a front window box fail.

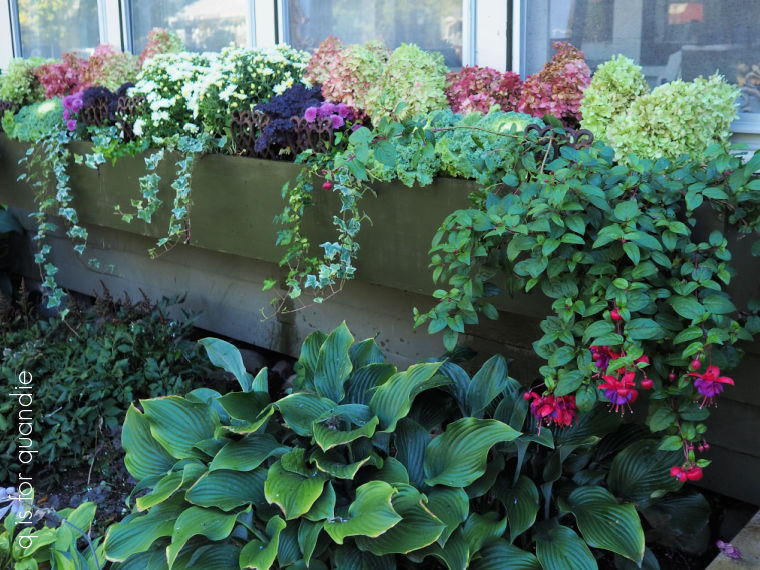
As you may know, I have a window box along the front of my house.  Here’s a picture of it from last year.

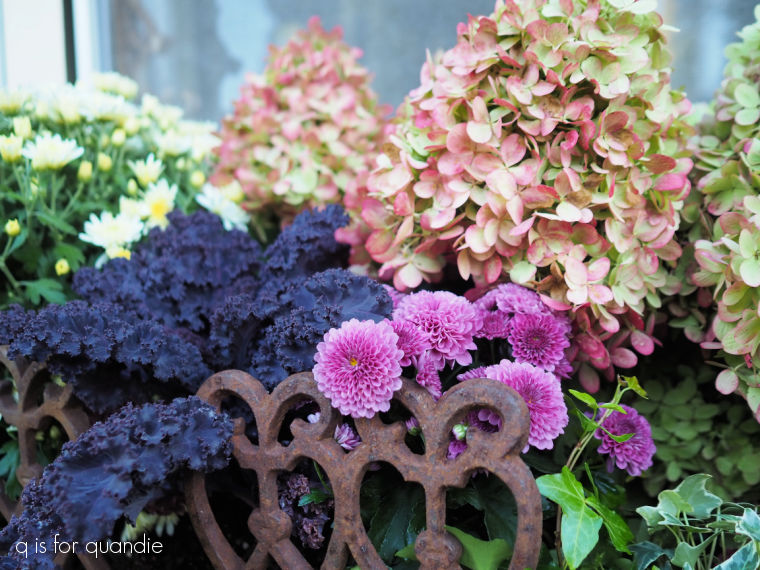
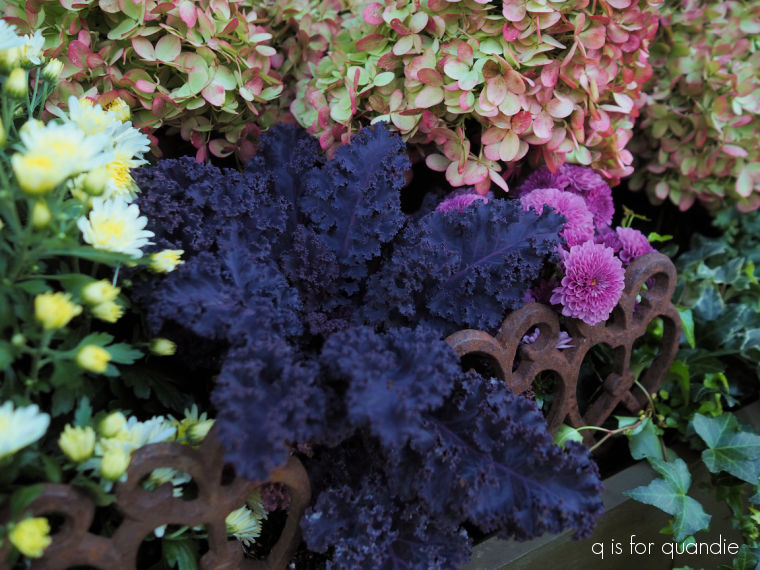
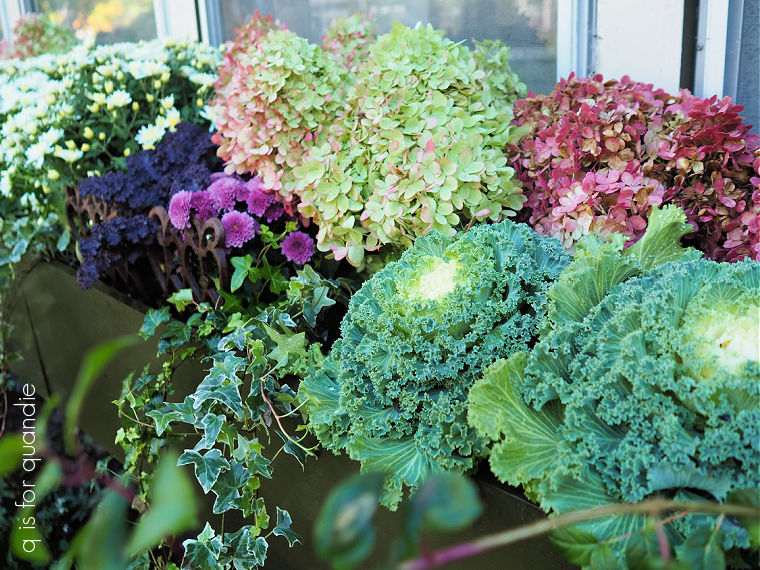
At 11′ long, it ends up taking quite a few plants to fill it with annuals every spring.  Not to mention mums for fall …

and evergreens for winter.

I find that there are two ends of the spectrum when it comes to filling window boxes; at one end you have the gardener (not naming any names here) who plants exactly the same thing in their planters every year without fail.

Then there are gardeners like Erin from the Impatient Gardener who can’t stand to do the same thing every year and thus tries something new each spring.

I think I fall somewhere in between.  When I find something that works I like to stick with it.  But I also don’t want to fall into a gardening rut.  So this year I decided to step outside my comfort zone and experiment with some new things in the front window box.

Unfortunately, in my opinion, the resulting combination is a bit of a fail.

Before I start listing the plants for you, I’ll point out that this window box faces north and is in full shade which limits the plant options considerably.

My starting out point was a Streptocarpus Ladyslippers™ Deep Blue Vein that I found at the Amish nursery in Wisconsin that nnK and I visited in spring.

I’ve grown this plant as a house plant in the past, but had never put it outside in a planter.  These plants were just loaded with gorgeous purple flowers when I saw them at the nursery so I thought they’d add a fabulous pop of color.  And actually, they did look great for about 6 or 7 weeks, but lately the blooms have petered off quite a bit.  After doing a bit of research I learned that temperatures above 80° will cause that.  So … maybe not a great choice for an outdoor planter in summer.  They also haven’t grown much, so they are getting swallowed up by some of the more vigorous plants.

My next ‘mistake’ was taking the advice of a random stranger at the garden center who suggested that Dusty Miller would be a great companion to the Streptocarpus.

I hadn’t grown this plant in forever.  I can remember planting it in the ground way back when I was new to gardening.  So when she suggested it, I thought ‘why not?’  After all, I’m experimenting with some new options.

But I have to say, I don’t really love it.  It’s doing great, but I think I’m just not a fan of ‘silver’ foliage.

Which leads me to my next plant choice, Dichondra Silver Falls.

I’d been hearing about this plant on various gardening vlogs lately and I needed something to tie in with the Dusty Miller, so I gave it a shot.  I will say that it is also performing exceptionally well, I mean, just look at it (photo above).  It clearly loves this spot.

But again, I don’t love that silver foliage.  You know what I think it is?  To me it looks like these plants have a bad case of powdery mildew.

I also opted to add a second pop of color with a couple of Amstel Netja Dark begonias.

An Amstel begonia is a cross between a tuberous begonia and a wax begonia.  Again, I hadn’t grown begonias in years.  I’d never had good luck with them in the past, I tend to overwater them leading to root rot.  They are rather picky about not sitting in wet soil.  But these newer varieties are improvements over those I planted in the past, so why not give it a shot.

And once again, I was drawn in by that gorgeous color.  It’s always tricky to find a plant that will bloom reliably in the shade.

Although these have done fairly well with continuous blooms for color, they also haven’t really put on any additional bulk.  Much like the Streptocarpus, they aren’t holding their own against the other plants in the box.

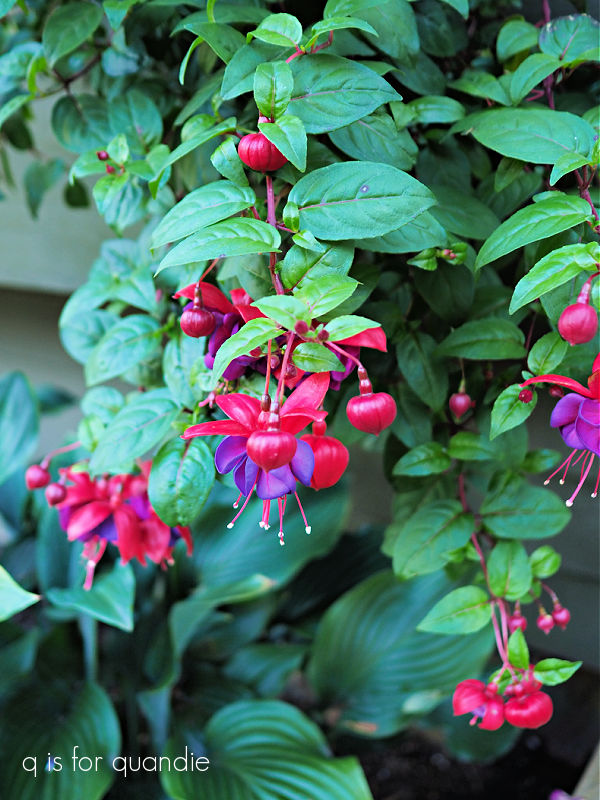
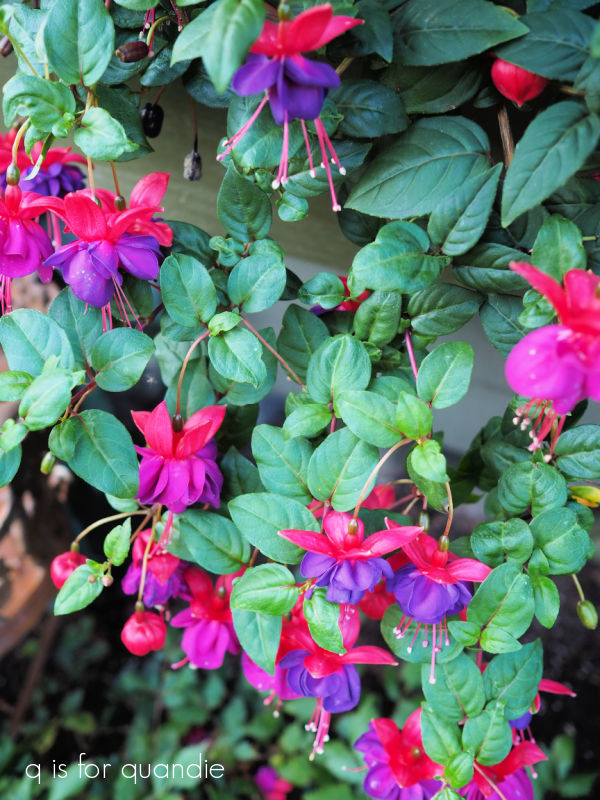
I did put a couple of old favorites in the window box too including a Dark Eyes fuchsia.

These always do really well in this north facing location.  They tend to be messy plants, dropping those flowers all over the place, so I wouldn’t use these in a spot where they would hang over a deck or patio.  But there is a garden beneath this window box and the flowers all fall down under the plants below.

Finally, I also planted some Diamond Frost Euphorbia in the window box.

It always makes a great filler, but this year it is quickly taking over and almost smothering the other plants.

So, in the end, I’m calling this year’s front window box a bit of a fail.  Although most of the plants look rather pretty up close, in combination and from a distance they just look rather anemic to me.

I don’t think I would repeat any of them, except the fuchsia.

I would use the euphorbia again too, especially if I ever decide to do another all white and green combo like the one I did in 2014.

That one included the euphorbia along with white impatiens, a white caladium, some jester ferns and some ivy.  And it was one of my favorites.

It was a fun one to transition into fall too.  I simply pulled out the impatiens and added white mums and pumpkins, and some flower heads that were turning green from one of my hydrangeas.

I have to give the award for ‘most spectacular combination’ in a window box to this one from 2021 though.

That combination of coleus, sweet potato vine and lemon coral sedum just pops.

There were some white New Guinea impatiens in that mix too, but as you can see they got rather swallowed up as well.

In the end, I learned some valuable lessons from the choices I made for this year’s window box.  I think next year I may try another all white combination again.  In the meantime, I may try to salvage this year’s combo by pulling out the Streptocarpus and the begonias and replacing them with something else.  We’ll see.

But how about you?  Have you learned any lessons from garden fails?  Leave a comment and let me know.

a hint of lime.

I’m not gonna lie, Hint of Lime Tostitos are one of my favorites.  Especially paired with a mango salsa.  I also love adding a hint of lime to my Diet Coke.

But today I want to talk about a different kind of lime, a vibrant pop of chartreuse foliage in the garden.  It’s a great way to brighten up a shady area, as well as a good way to add interest to a perennial border that doesn’t have much blooming currently (like mine).

One of my favorite perennials with bright lime green foliage is ‘Gold Heart’ Dicentra spectabilis, or bleeding heart.

That photo is a couple of years old, bleeding heart blooms in the spring so mine is not currently blooming.  But I actually grow this one for the foliage rather than the flower, isn’t it fabulous?

Lamium, or dead nettles (which is an awful name and that’s why I never call it that), is one of my favorite lime green ground covers.  It’s practically evergreen, even here in Minnesota.  It pops up in the spring looking green as the snow is melting all around it.

There are many different varieties of lamium with varying leaf colors including some pretty white and/or silver versions like the Pink Pewter or the Sterling Silver.  There are also a few varieties that I really don’t like at all, like the one called Yellow Archangel.

I don’t know the precise variety of the one shown above because it was a hand-me-down from a fellow gardener, however, I do also have a patch of the Lemon Frost variety in one spot that I purchased at a garden center.

It leans just a bit more towards lemon rather than lime.

One characteristic common to pretty much all of the plants that I’m mentioning in this post is that the more sun they get, the yellower and brighter their foliage.

Golden Creeping Jenny, Lysimachia nummularia ‘Aurea’, is a good example of that.  I took this next photo at the St. Anthony Park garden tour a couple of weeks ago.  The creeping jenny in the lower left of the frame gets quite a bit of sun.

My creeping jenny is in full shade, one of the shadiest areas of my shade garden in fact, and I wouldn’t even call it lime green at this point.

So that’s something to keep in mind with all of the plants I’m sharing today.

I do have a couple of shrubs that fit into my ‘hint of lime’ category.  The first is a Morden Golden Glow Elderberry.

Laura of Garden Answer recommended elderberry as a good substitute for Japanese maples.  They have a very similar leaf structure, but are much hardier in cold climates like my zone 4b garden (they are hardy in zones 3 to 9).  The photo above was taken when I first brought the plant home from the garden center.

I ended up planting it in a fairly shady spot, and the color is definitely less yellow or more lime now.

The second shrub on my list is the ‘Tiger Eyes’ sumac.  Unfortunately, my 8′ Tiger Eyes died back to the ground last winter.  If you plant one of these in our area, you’ll find that it is one of the last plants to break dormancy.  Every spring I wonder if mine is dead, and then it eventually sprouts new leaves.  But not this year.  So we cut it back to the ground.

But I’m happy to report that it has sent up some big new shoots, so all is not lost.

A big bonus to this one is that the leaves turn a vibrant orange to red in autumn, it’s fantastic for fall color.

Unlike most of the plants I’ve mentioned, the sumac is not a shade loving plant.  Mine gets a bit of shade from the carriage house and thus has always shot out nearly perpendicular to reach the sun.

There are lots of fabulous annuals with lime green foliage too.  Last year I had Wasabi coleus and Lemon Coral sedum (far right) in my front window box.

Lime green paired with deep purple foliage is always a great combo, like this sweet potato vine paired with a dark purple Oxalis.

I’ve left the most obvious example of lime green foliage plants for last, hostas!  You know I love ’em.  And there are lots and lots of options for lime green in hostas.

One of my favorites is the ‘Sun Power’ hosta.

This one positively glows in the garden.

I have a smaller solid lime colored hosta in multiple spots in my garden.  Once again, this was a hand-me-down plant, probably from my friend Sue, so I don’t know the name of it.

But over the years, many divisions have given me about 20 of them scattered throughout my shade gardens.  They create the perfect background for the spotted Pulmonaria ‘Raspberry Splash’.

Of course, there are also many, many options for variegated hostas that can add a hint of lime to your garden.  Sunset Grooves is a smaller one that has a lovely pop of chartreuse in the middle of each leaf.

Of course, the latest hint of lime I’ve added to my garden is an  Aralia cordata ‘Sun King‘.  After seeing so many of them at the garden tour I attended a couple of weeks ago, I had to get one for myself.

It’s small right now, but I’m hoping it will grow to fill in that space entirely.  I’ll be sure to keep you all posted on how that works out.

In the meantime, my sister and I are headed out to another garden tour today, this time put on by the South Saint Paul Garden Club (thank you Jayne for the heads up on this one).  One of the gardens featured belongs to my old friend Jackie, I toured her garden for you guys here on the blog back in 2018 (you can see those posts here and here).  So I’m really looking forward to getting another tour of her garden and others today!

So tell me, what’s your favorite plant for adding a hint of lime to the garden.  Leave a comment and let me know!

a summer garden tour.

Good morning from the garden!

I was so excited when I saw that the St. Anthony Park Garden Tour was taking place this year.  This tour is put together by the St. Anthony Park Garden Club and usually takes place every other year, however, like so many things, it was halted during Covid.  So it has been 4 years since the last tour.

St. Anthony Park is a neighborhood in St. Paul, Minnesota.  I’ve gone to their neighborhood garage sales many times over the years, and the last time I did that was back pre-Covid as well.

The neighborhood was developed in the late 19th century as a streetcar suburb (ie. you could commute to the city via streetcar) for the wealthier residents of Minneapolis/St. Paul (wikipedia).  It’s full of large 100 year old homes and each one is unique (unlike more modern developments).

Last weekend my sister, niece and our friend Annie all joined me for the tour.  There were 11 gardens in total, but I’m just going to share some of the highlights with you.

The first garden we visited was really colorful.

Isn’t that a pretty combination of sedum and heuchera?

The back yard slopes down into a ravine and is filled with flowering plants that are bursting with yellows, reds, oranges and purples.

There is also a little pond that is guarded by a very colorful frog.

In contrast to that fairly wild look, this next garden was somewhat formal and very tidy, and I absolutely loved the house itself.

I’m not normally a fan of the combination of grey and black, but it was certainly working on this place.

I also came away from this house with an awesome idea for making some supports for my peonies.

I spent a bit of time this spring searching for attractive peony cages that weren’t too expensive (since I have about 10 peonies), and I came up empty handed.  But these would be fairly simple to make.  They are just furring strips, 2″ x 2″ strips on each corner and 4 wooden finials.  My sister and I are going to attempt to make some of these for our gardens.

The next garden I want to share was the most difficult to get to because it involved heading up this staircase.

This is the path between the street and the house.  However, there is an alley behind the house and I’m betting that the homeowners barely ever use this staircase, especially not in the winter!

But these home owners definitely took advantage of their sloped location, because here’s what they also have out behind the house.

That stunning waterfall was worth the hike up that staircase.

I totally coveted the iron planters in this next garden.

I have to admit that I probably won’t ever have the real thing in my garden, but instead I’ll just stick with my faux rusty urn planters.

If you’re into a more modern look for your planters, the pair flaking this porch should be right up your alley.

And just take a moment to admire that porch, especially that twisted wrought iron railing on the steps.

One of the gardens had an interesting combination of ground covers planted in a small bed.

It certainly is a pretty combination of creeping jenny, sweet woodruff, ajuga, dianthus and I’m not sure what that plant with the silver foliage in the back is.  It almost felt like this was a spot where they were testing out different ground covers to see how they would do.  It was a fairly small area, and as you can see the plants have totally filled it out.  Now they are probably going to start fighting for space.

I wanted to be sure and share this clematis with you guys …

The home owner was fairly sure that this is a Betty Corning.  I just planted this variety in my own garden, and I am hoping it will be as prolific as the Roguchi that I planted last year.  If this one is any example, I think it will be spectacular.

I’ve saved my favorite garden for last.  First, lets just check out the house.

Aren’t those windows fabulous?  See what I mean about all of the houses in this neighborhood being totally unique?

But the real showstopper for me was the sloped front border which is divided in half by the sidewalk.  I chatted with the owner of this garden, Shawna, and she explained that the two sides are meant to be mirror images of each other.

They are filled with shade loving plants chosen for their beautiful foliage colors, textures and shapes.

Shawna also explained that she gardens year ’round, which is quite the feat in Minnesota.  She brings many of her rex begonias and other plants indoors for winter.  She also told me that her indoor plant real estate is limited, so she also just takes cuttings from many of her plants and propagates new plants for the next year that way.

You can certainly see why she wants to save them.

In addition to these beautiful plants, she also had some really lovely copper garden ornaments scattered here and there.

And isn’t that carpet of sedum alongside her dry creek bed just fantastic?  Let me get you a little closer to that …

We all really enjoyed the tour, it’s always inspiring to see what other gardeners are doing.  I’ve been keeping an eye out for other garden tour possibilities in my area, there used to be lots of them (again, pre-Covid) and so far I haven’t seen too many coming back.  If any of you locals know of any, please leave a comment and let me know!

But before I let you go, I want to share what I’m calling the ‘plant of the day’.

That honor goes to the Aralia cordata ‘Sun King‘.

Ironically, somehow I didn’t manage to get a decent photo of one, even though I would say that almost every garden we toured had one … well, more than one actually.  They were everywhere.  I borrowed this photo from the internet so that you can get a good look at this plant.

I had seen it more than once recently on gardening YouTube videos (sorry, can’t remember which ones exactly), so when I saw them in these gardens they really jumped out at me.

The ‘Sun King‘ was the 2020 perennial of the year, and I can see why.  It provides a vibrant pop of chartreuse in a shady garden.  It grows 4′ to 6’ tall and wide.  It dies back to the ground in winter, but is fast growing and fills out quickly in the spring.  It’s hardy in zones 3 to 9, so can easily handle my zone 4b.  It’s also deer resistant.

One of the gardeners I spoke with mentioned that the color is definitely brighter if it gets some sun, but it will grow in full shade.

So now I’m off to figure out the best spot in my garden for the one I found at Abrahamson’s Nurseries in St. Croix Falls (but if you locals are looking for one too, don’t count on them, my neighbor and I bought the last two that they had!).

Do you have garden tours where you are?  Leave a comment and let me know!

don’t get attached.

Good morning from the garden!

Since I seem to have eight of them, I have to say that clematis is one of my favorite plants.  I have several of them blooming right now so I thought it would be a good time to post about them.

There are so many different varieties,  allaboutgardening.com says over 350!

There are different flower sizes from huge and showy to tiny and delicate.  And different flower shapes from star shaped to bell shaped.  They come in plenty of different colors; whites, reds, purples, blues, yellows and pinks.  Apparently there is even one called ‘Orange Peel’ that has flowers that start out yellow but gradually darken to orange.  You can find different varieties that bloom at all different times during the season from early to late.  And even some that bloom all summer long, like my Roguchi.

I planted this last year and found that it bloomed continuously from the time I planted it in late May to September.  It has come back strong this year and is already over the top of my arbor (on the right side).

The clematis on the left side of the arbor is one whose name has been lost to time.  It blooms a bit later than some of my other ones and although it has lots of buds, they aren’t quite open yet.  But here’s a photo of how it looked last year when it bloomed.

One thing to know about clematis if you want to grow them successfully are that there are three pruning groups.

Group 1 are the spring bloomers.  They should be pruned back immediately after blooming.  They bloom on last year’s growth, so if you prune them in the spring you won’t get any flowers that year.  Luckily I don’t have any of clematis from this group because the rabbits eat my clematis to as high as they can reach in the winter.  So, in a sense, my clematis is all ‘self-pruning’ … or rabbit pruned anyway.

Group 2 are the mid-season hybrid bloomers with large flowers.  You should avoid heavily pruning this group, only pruning out the weak or dead stems in late winter or early spring.

Group 3 are the ‘late’ bloomers and I have quite a few of them.  They call them late, but several of my group 3 clematis are blooming now, and I wouldn’t call the end of June ‘late’.  The beauty of this group is that they can be cut back hard in the spring (or over the winter, by rabbits) and they will flush back with vigorous growth and plenty of flowers.

Unfortunately, I never kept track of the name of that one either, but it’s the prettiest deep violet color and it’s filled with flowers right now.

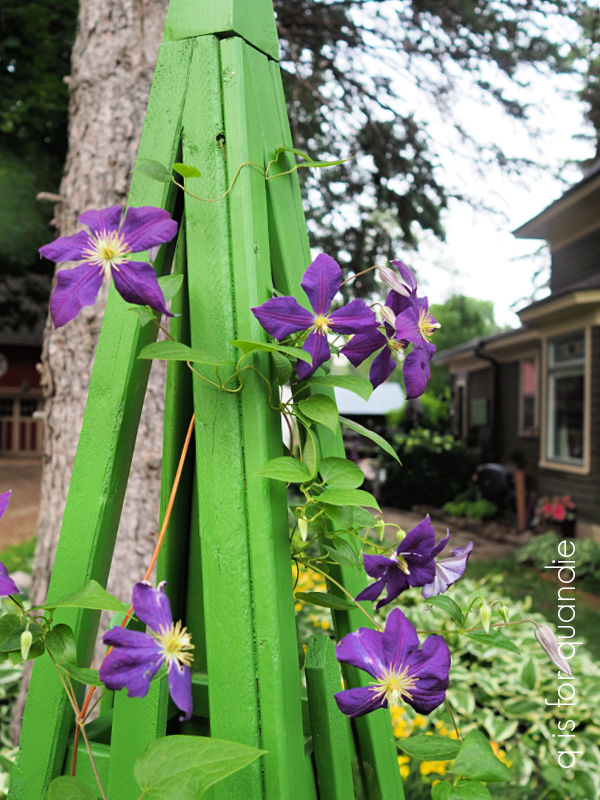
I have most of my clematis growing up structures like an arbor or garden obelisk.  Last year I planted a Jackmanii  on the pyramid that Ken made (and I painted with my English racing green earlier this spring).

I think this variety is one of the most common, you see them everywhere.  It has been around since its introduction in 1862.  I’m hoping that one day it will entirely cover that pyramid with flowers, but it’s just a bit sparse yet this year.

You can also use a shrub, or even a tree, as a ‘trellis’ of sorts for clematis.  My neighbors Ken & Arlene have one growing over a tree stump.

Many people also combine them with climbing roses.  I have a shrub rose that I pretend is a climbing rose.  The rose itself won’t attach to a structure, but I let the canes grow long and tie it onto an obelisk.  Last summer I planted a Huldine clematis to intertwine with it

So far the Huldine hasn’t bloomed, and I don’t see any buds on it.  I’m hoping to see it bloom later this summer though.

I have what I think is a variety called The President on a trellis right outside our back window.

It’s not blooming all that well this year, which would make sense since The President is in pruning group 2 and shouldn’t be heavily pruned.  But of course, mine was rabbit pruned right down to the ground along with all of my other clematis.

A few weeks ago I planted a Betting Corning clematis next to it.  It hasn’t bloomed yet, but it’s another bell shaped clematis like the Roguchi.

You’ll often hear that clematis like to have their feet in the shade and their head in the sun, and many of us planted lower growing plants around the base of them to ‘shade’ the base of the plants.  But really, what they want is moist soil.  So they don’t have to be shaded, but it’s a good idea to mulch around the base of the plant well, and also to keep it watered.

I think my biggest piece of advice when it comes to clematis is to not get too attached.  I’ve had more than one that is huge and beautifully covered with blooms one year, and then just simply doesn’t come back the next.

For example, this gorgeous clematis used to grow on that pyramid from Ken …

It was there for years, and then one spring … nothing.

I once had a spectacular white clematis growing on the side of the carriage house.  It was huge, and absolutely covered in big white flowers every year.  Until one year, it just never came back.  So disappointing!
Theoretically a clematis can live upwards of 50 years, so perhaps it’s just our harsh Minnesota winters that sometimes do them in.  Or maybe it’s those pruning rabbits!

I guess in the end, losing one just provides the opportunity to try a new variety next time, right?

How about you?  Do you have a favorite clematis?  Or do you have rabbits that provide a free winter pruning on yours?  Leave a comment and let me know.

chop or flop.

Good morning from the garden!
Can I ask you a personal question?  Does your tall sedum tend to get floppy?  Does your phlox fall over?

Well, if so, I have the solution for you, and it’s free!  It’s called the Chelsea chop and the reason it’s called that is because the timing of this process in England usually coincides with their RHS Chelsea Flower Show, which is held in late May.  However, here in my northern, zone 4b garden, mid-June is a good time to Chelsea chop (you want to do it before you see any flower buds on your plant).

The Chelsea chop encourages branching, so the plants will be shorter and more compact thus reducing, or hopefully even eliminating, the flop.

So what is the Chelsea chop?  Basically you simply cut down the stems by 1/3 to 1/2.

  You don’t need to be precise, I’ve seen some gardeners just take a hedge trimmer and go to town.  Or, you can let the deer get in on the action.  They seem to be Chelsea chopping my neighbor’s asters!

But personally I like to be a little more discriminating, so I use my handheld pruners to do the job.

There are a few things you should know about the chop.  First of all, it’s only suitable for perennials that bloom in late summer or early fall such as phlox, bee balm, cone flower, asters, veronica and of course, sedum.

Second, the Chelsea chop will delay the bloom time of your plant by as much as a month or so.  If that thought bothers you, another option is to only prune every other stem on your plant leaving the other half of them long.  There are a couple of benefits to that option.  For one, you’ll still have flowers at the normal time, plus you’ll have more flowers several weeks later.  So basically, you’ve extended the bloom time of your plant.  In addition, the shorter, sturdier stems that have been chopped will help support the stems that you left long.

Another potential benefit of the Chelsea chop, at least with sedum in particular, is that you can easily root some of your trimmings to grow more plants.

I did this a couple of years ago, and they all took off like gangbusters.

I have to say, before I discovered the Chelsea chop this variegated sedum was definitely not one of my favorite plants.  It always tended to flop over and look pretty sloppy in the garden.  Now that it stays a bit more compact, I really love the way it looks in combination with the ‘blue’ upright hosta behind it, and the purple heuchera beside it.

By the way, I believe that is Palace Purple heuchera, in other words one of the older, more reliable varieties.  If you read my post about heuchera from a couple of weeks ago, you know that I have trouble getting any of the newer, more colorful, varieties of heuchera to perform well.  But I’ve had these two plants for years now and they continue to do well.

How about you?  Have you ever tried the Chelsea chop?  If any of your late summer or fall blooming perennials don’t have flower buds yet, it’s not too late to consider it!