a short break.

Hey everybody!  I’m going to be taking a short break from the blog next week while my sister, niece and I are in Disney World!

Rather than schedule posts ahead of time, and then try to respond to comments from afar, I’m just going to go on a blog hiatus.

Those of you who have been reading my blog for a while know that my sister and niece moved here to Minnesota from New Jersey just over two years ago.  Prior to that I hadn’t lived in the same state as my sister since she was 20 and I was 18 (and had never lived close to my niece)!  So for more than half of our lives, my sister and I lived far apart.

During that time rather than just visit each other in our respective home states, we always met at various destinations instead.  Sometimes Mr. Q, my niece Kris and/or our mom would join us as well (Mom lives in Las Vegas).

We’ve been on so many fabulous trips together including a whirlwind trip across Europe from London to Rome.  A second trip just to London.  And a trip to Budapest with a cruise on the Danube River.

We’ve done plenty of trips closer to home too including a Mexico cruise for our mom’s 70th birthday.

And we’ve done a few trips to either Disney World or Disneyland.  We’ve been going to the Disney parks since 1969!

Our last trip to Disney World was just before I started blogging, October of 2013.

I’m telling you, heat and humidity does my hair no favors!  And I’m sure you can see why I really prefer to be behind the camera instead of in front of it.

We’ve been itching to go back to a Disney park so when my niece was asked to be a bridesmaid in a wedding that was taking place in Florida we decided this was our golden opportunity.

I thought now that we all lived in the same state we would be able to fly to our destination together.  Ironically, no.  We are all three on different flights.  My niece leaves a day ahead of us and heads to Boca Raton for the wedding.  My sister and I head to Orlando at the same time the next day, but she’s on the cheaper Sun Country fight while I’m using frequent flyer miles on Delta.

Oh well.  We are pros at flying solo by now.  We’re used to meeting up at our destination’s airport!  We did it before cell phones and texting, so we can easily handle it now.

Have a great week you guys, and be sure to check back  in another week.  I’m planning a fun blog giveaway when I get back!

the handmade hutch.

Mr. Q and I picked up this petite secretary hutch a few weeks ago.  The gal we purchased it from said she got it from a friend who said that his grandfather made it.

It had a couple of flaws, but nothing major.  However, as you can see in the ‘before’ photo, one of the drawers fell apart as we were unloading it.  That was an easy fix that just needed some glue.

In addition, there were no stops in place to keep the drop down desk surface from falling back inside the piece when it was up.  The only way to keep that piece in place was to use the lock mechanism, which was rather tricky.  Ken solved that problem by just adding a small peg on either side.

When I first brought this piece home I had envisioned a fabulously chippy milk paint finish on it.  That didn’t quite work out.  I did start out painting it with a couple of coats of Homestead House milk paint in one of my favorite pale greys, Bedford.

However, when I came back out to the workshop the next day I saw that most of the paint had chipped off the fronts of the drawers and the front of the drop down desk.  The paint on the sides of the piece didn’t chip, but it looked really blotchy.  I had a feeling before I painted this one that I might end up with this problem.  You see there were spots on the sides where the previous finish was entirely worn away.  Those spots absorbed the milk paint quite differently than the spots that still had some finish on them.

I thought that maybe I could still work with the milk paint and just go really chippy and distressed, but in the end I knew I wouldn’t be happy with it.  So I wrote off the milk paint and switched to Fusion acrylic paint in the same color, Bedford.

First I vigorously sanded down the super chippy drawer fronts and drop down desk front.  If I hadn’t, the chippy texture of the milk paint would have shown.  Once I had those mostly smooth, I wiped them down and then added a coat of Fusion’s Bedford.  I didn’t sand the sides of the piece that hadn’t chipped, I just painted right over the milk paint.

It only took one coat of paint to get good coverage and to solve the blotchy problem on the sides.

I added another Iron Orchid Designs transfer to this piece.  I thought this design suited it perfectly.

I painted the inside of the hutch in Fusion’s Midnight Blue.  I thought this would be a great color if one has some ironstone that they want to display and they want to make it pop.


I also painted the inside of the desk in the same dark blue.

I had a heck of a time trying to get photos of this piece on a brilliantly sunny fall day.  The glass in the doors reflected everything.

I even resorted to moving the hutch inside, but I didn’t think those photos were any better.

Maybe outside was better after all.

Either way, I think the hutch itself definitely looks better painted.

Would you agree?

french pumpkins.

When it comes to fall decorating, I’m not exactly a traditionalist.

Last year I made a French pumpkin using Fusion’s transfer gel and a printed French opera graphic.  And you’ve all seen my ‘hello fall’ book page banners.

This year I decided to add another white pumpkin to my line up.

I started out with this orange wooden pumpkin wall hanging with a decidedly 90’s country look.  In fact, I do believe I’ve probably owned this since the 90’s.

First I de-countrified it by taking off the heart and the “Autumn Greetings” top.

Next I painted it white with some Homestead House milk paint in Sturbridge White.  Once that was dry I sanded it to distress, vacuumed off the dust and then added a Iron Orchid Designs transfer.

I totally ignored the fact that pieces of the design got lost in the cracks.  It really doesn’t matter.  I was going for a very distressed look anyway.

Next I sanded lightly over the transfer with 220 grit sandpaper.

Since I was planning to hang this outside, I added a top coat of the Real Milk Paint Co’s Dead Flat to protect both the milk paint and the transfer.  However, you should note that Dead Flat is not intended for outdoor use.

I have it hanging on the carriage house where it is partially protected from the elements by an overhang and it will only hang here for a month or two, not year round of course.  Still, I’m taking a bit of a chance.  If it gets ruined I will only have myself to blame.

How about you, are you more of a traditional orange pumpkin sort of decorator?  Or do you also prefer some pumpkins with a french twist?


the jenny lind bed.

After getting distracted by other projects, I finally got my Jenny Lind bed painted.

As a reminder, here is the before photo.

I’m going to be honest with you guys, I didn’t do much prep here at all.  I tend to slack a bit more when I’m working on items I’m going to keep for myself.  If it doesn’t hold up over time, well, no big deal.  I can easily re-paint it.  If I was going to sell this piece, just to be on the safe side, I would have done my typical prep, a light hand sanding followed by cleaning with TSP substitute.  Instead, I just wiped it down with a damp cloth.

I mixed up some of the Homestead House Ochre milk paint (no. 2) that I chose after comparing 3 different shades of yellow (thanks again to Homestead House for providing me with the paint) and once I had it good and mixed, I started painting.

It took 3 coats to get good coverage with the pale yellow over that dark wood.  That’s something you should know about milk paint.  It is not as opaque as other kinds of paint, and if you’re covering something dark with a pale color it may take a few coats.  Or, as I learned this weekend from Miss Mustard Seed, another good option is to paint the piece in a medium shade first, then cover that with the lighter shade.  Next time I’ll give that a try.

All of those spindles!  Oy vey.  I’m not a big fan of painting spindles.

Today’s Qtip:  I did get some awesome chipping on this piece and you can chalk that up to the lack of preparation.  Had I done more sanding and cleaning with TSP, I wouldn’t have been as likely to get this amount of chipping.  Prep is the key to controlling chipping.  Check out {this post} for tips on how to get the perfect chippy finish.  Or just take your chances like I did with this bed.

I sealed the bed with The Real Milk Paint Co’s Dead Flat which will help halt any further chipping.

It wasn’t until I was making up the bed that I came across this single vintage pillow case in my linen cupboard.  I’d forgotten all about it.  Somewhere my sub-conscious must have had this in mind when I chose the yellow for this bed, don’t you think?

I still need a few final touches for my guest room.  I’m looking for the perfect something to hang over the bed.

I definitely need a bed skirt, as well as some sort of duvet cover.

But so far the guest room is really coming together.  Slowly maybe, but also very inexpensively which is a good thing.  I spent $40 on the headboard and another $25 on the frame.  I traded my former full size guest bed mattress and box spring for this twin set with my neighbor across the street, nnK.  She even included the sheets and duvet, so it was quite the bargain.

I’ll be sure to keep you posted as I continue to make progress in the guest room!


the day I met miss mustard seed.

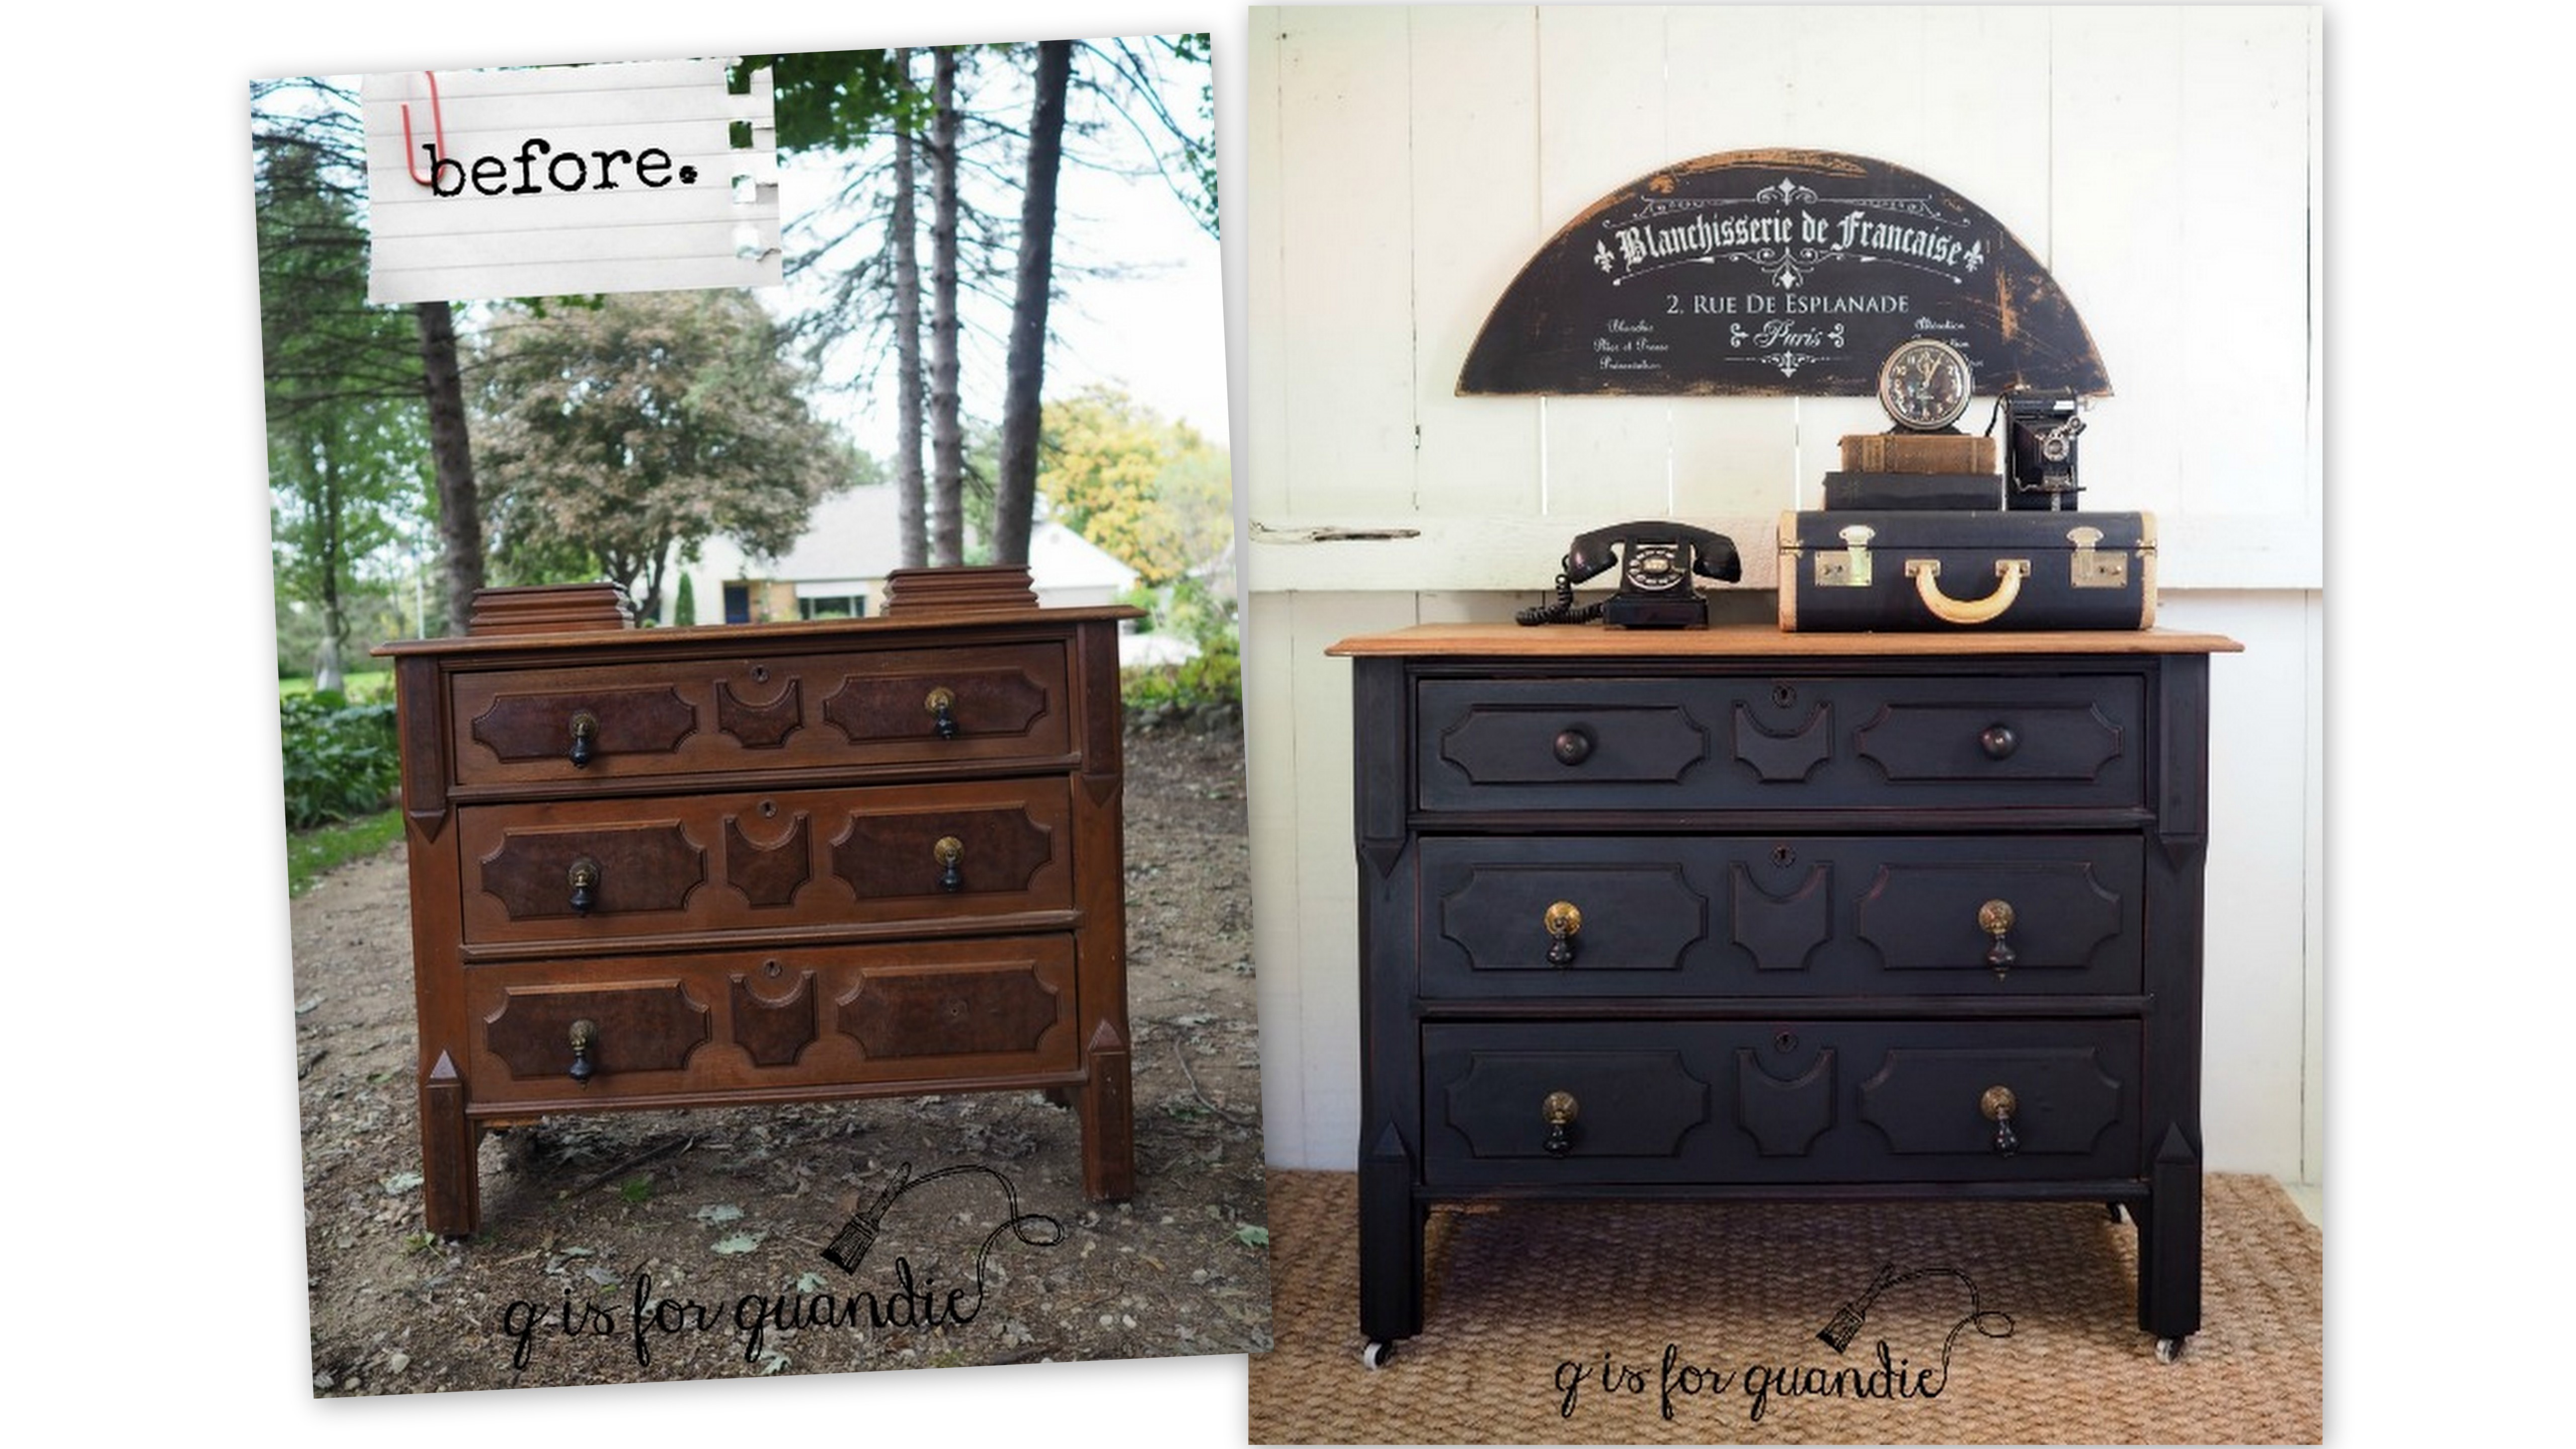
This past Saturday I woke up bright and early … no wait, scratch the bright part.

Let’s start over.

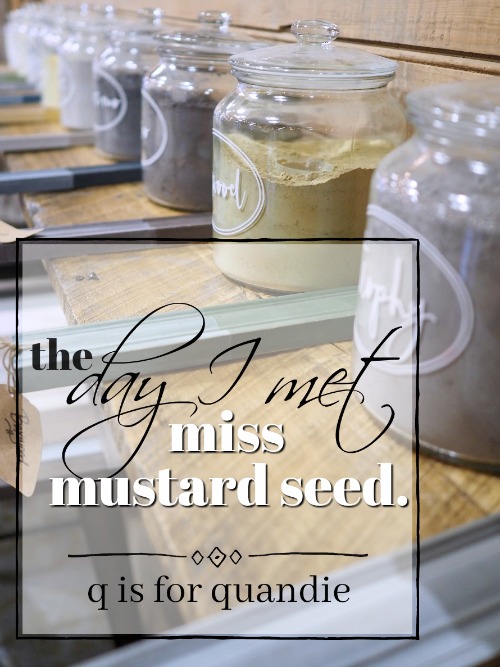
It was a dark and stormy morning when I left my house last Saturday at 7 a.m. for Carver Junk Co’s workshop with none other than Marian Parsons of Miss Mustard Seed.  Literally one minute before I walked out the door the skies opened up and a torrential rain began.  Lightening strikes lit up the sky as I made my way to the interstate to drive the 45 minutes to Chaska.  It was definitely an auspicious start to the day!

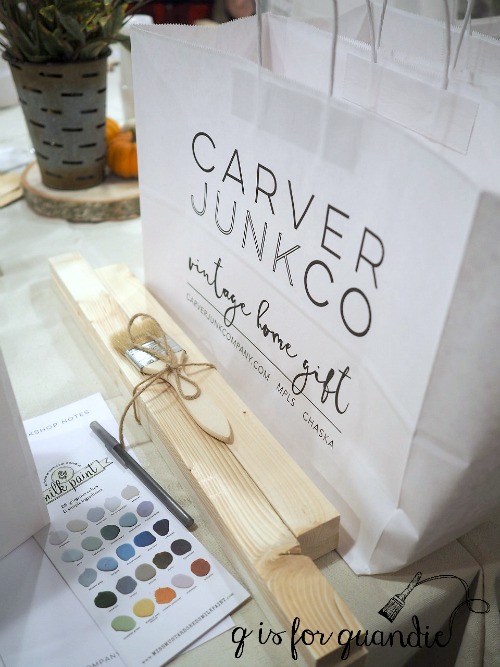
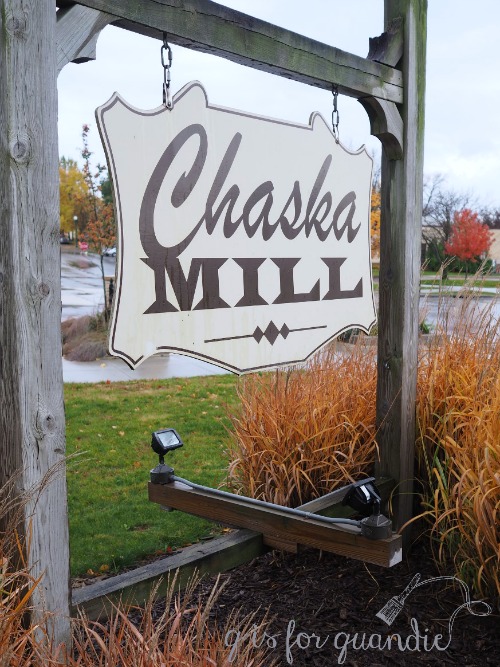
After a white knuckled drive with my windshield wipers on full speed, I arrived at my destination, the Chaska Mill.

Marian (I feel like I can call her that now that we are practically bff’s) had invited me to come to the workshop as her guest, but I volunteered to be a helper of sorts.  It was sort of like auditing a college course.  I showed up, I soaked up the knowledge that Marian was sharing, but I didn’t actually do the project or get a grade.

I tried to be helpful, but I don’t know that I succeeded.

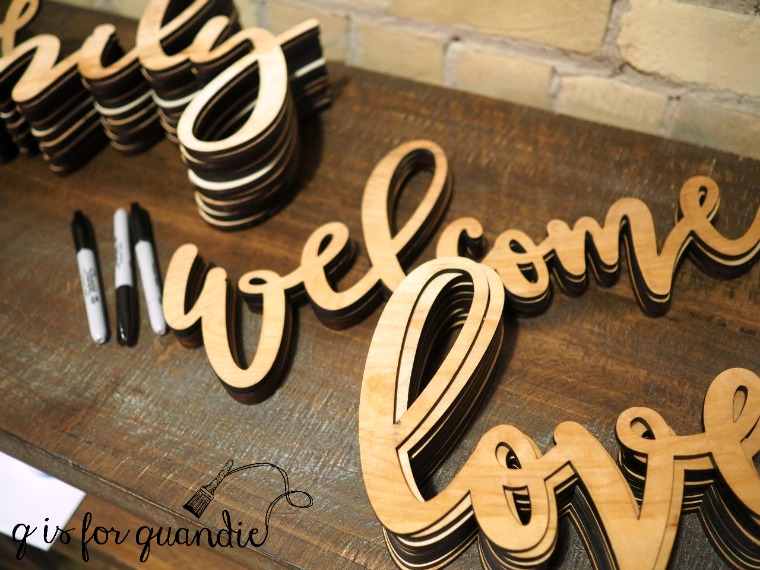
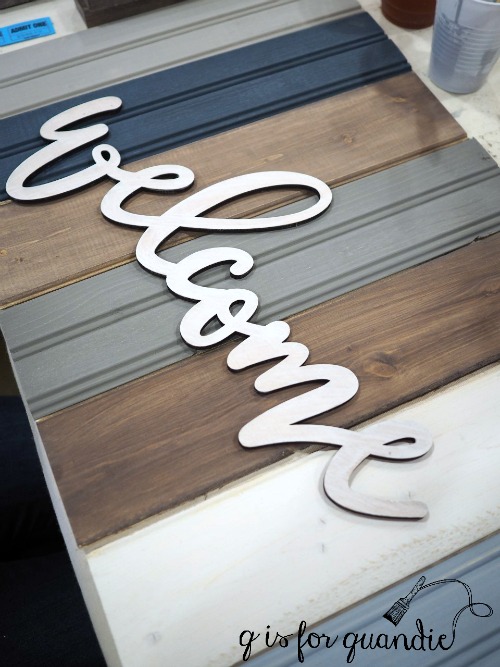
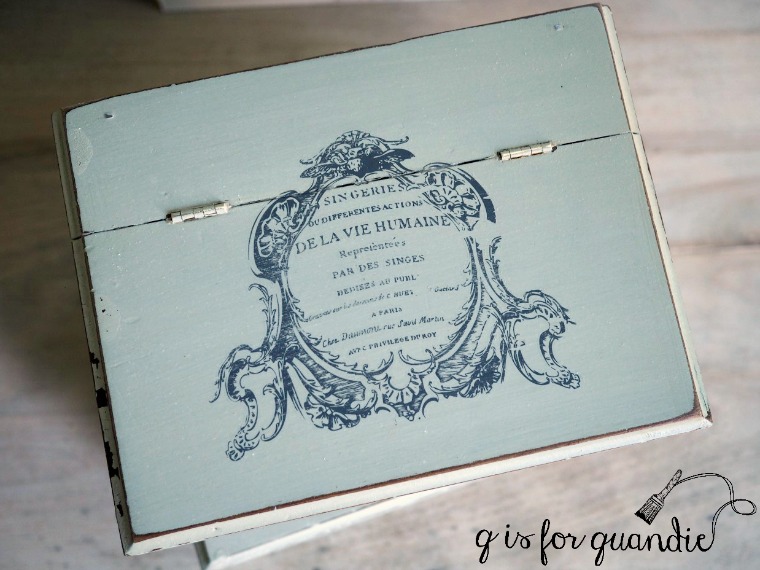
In hindsight, I should probably have done the project.  After all, everyone was making these amazing ship-lap style signs.

There was a choice of three different words …

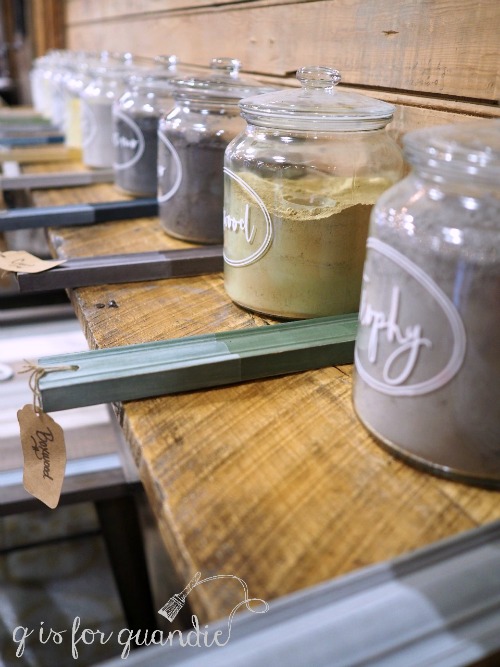
And you could choose from quite a few of the Miss Mustard Seed milk paint colors for your boards.

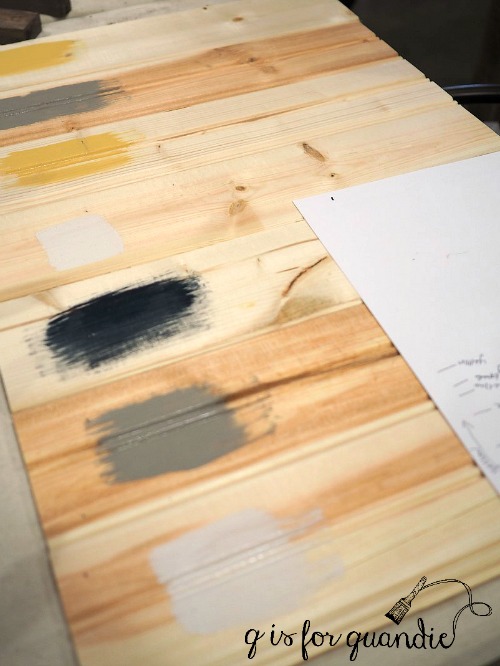
Some participants just went with copying the sample, while others really studied the colors and came up with their own combinations.

I really wish I had gotten that gal’s name so I could share it here, drat.  But anyway, she was very scientific in her approach.  She grouped the sample boards until she found a combo she liked, she drew up a plan, and she painted a swatch on each board.

Her efforts really paid off because she ended up with an amazing sign that was uniquely her own.

Her combination of Artissimo, Mustard Seed Yellow, Trophy and Farmhouse White works beautifully.

It was really fun to see the different combinations of colors that participants came up with.

Some even got creative and went in another direction, literally, with their word.

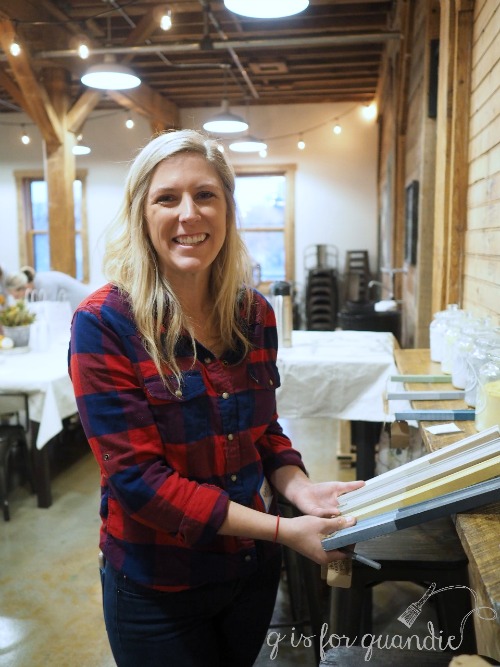
Brandy & Chad from Carver Junk Co did an amazing job planning every detail of the workshop including holding it in a gorgeous historic building, bringing in delicious food, and providing drink tickets for the bar next door.  They and their staff were incredibly friendly and welcoming.

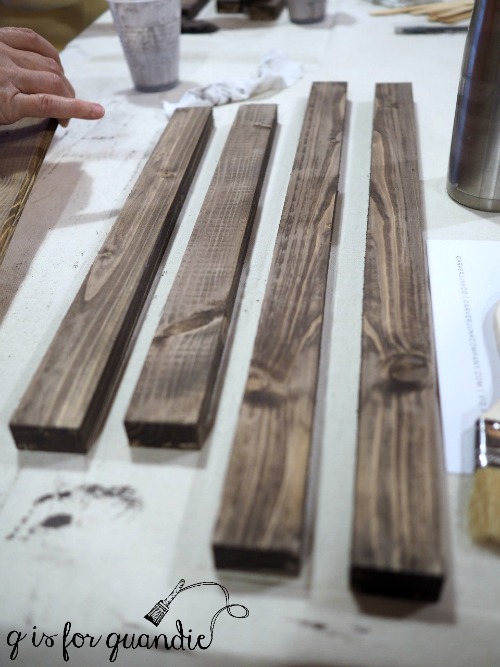
I was especially impressed with the project they designed.  It provided an opportunity for participants to try multiple techniques with MMS products including using Curio as a stain on the frames …

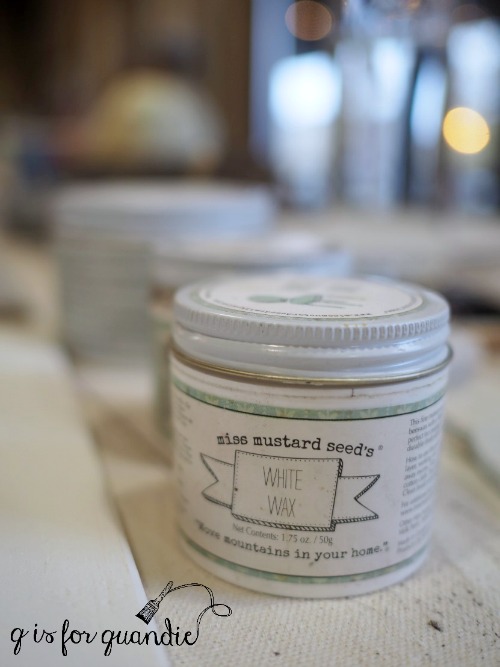
Using multiple colors of MMS paint, and trying out the various waxes in her line.

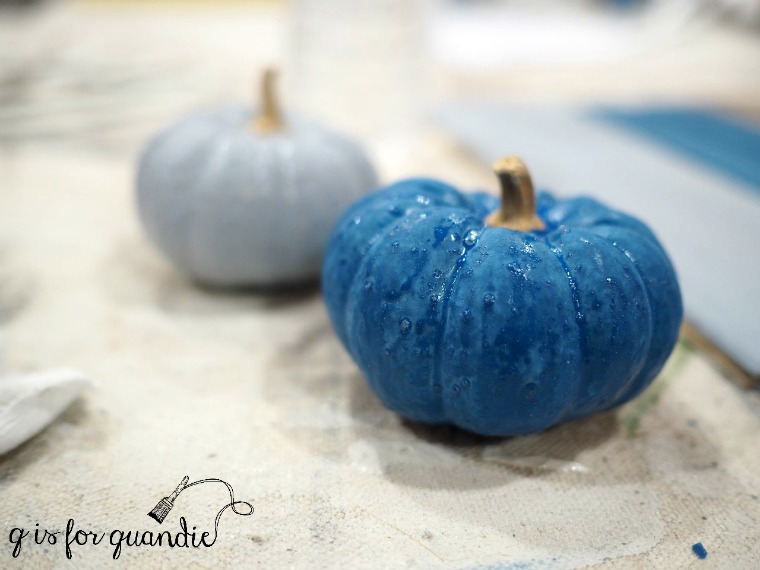
They even added some bonding agent to the leftover paint and gave people little pumpkins to paint.  What a brilliant way to use up leftover paint and also demonstrate what you can do with bonding agent.

By the way, did you know that you can order Miss Mustard Seed products online from Carver Junk Co and get FREE shipping?  Check it out {here} and use the code “MILKPAINT” to get the free shipping!

But … hello!  I haven’t yet gotten to the most amazing part of the day.  Miss Mustard Seed herself.

I can now officially verify that she is indeed a real person.

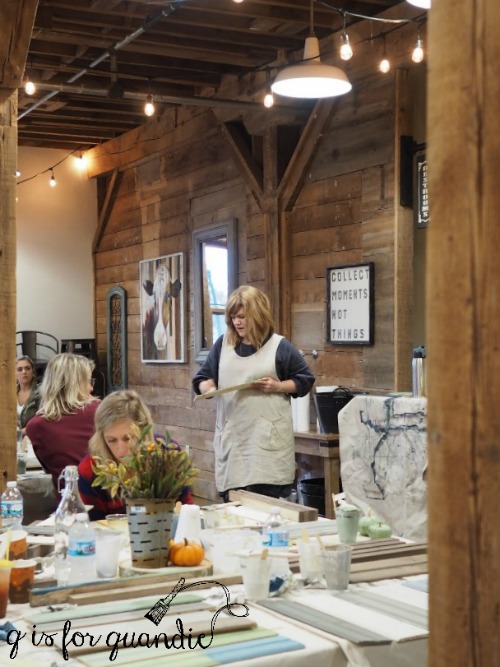
At first it was a bit surreal to be in the same room with her, but over the course of the day I discovered that in person she really is just as she appears on her blog.  And by that I mean that she is down to earth, friendly, and really, just like you and me.

However, she’s also an excellent teacher.  She gave tons of information about milk paint and how to use it.  I really enjoyed just taking in all of her tips and advice.

There were actually quite a few opportunities for me to just sit and chat with her throughout the day and I learned some interesting little tidbits.  First of all, that she and I both graduated from high schools in Florida.  Marian in Orlando, and me in Boca Raton.  And as it turns out we both prefer the cooler climate up north rather than the heat and humidity of Florida (yep, she’s going to fit in perfectly here in Minnesota).

Marian also mentioned that she feels really welcome here already.  I’m so proud of my fellow Minnesotans for making her feel at home.  And someone even brought her a hot dish!  I’m not sure if it was a tater tot hot dish though.  But so funny, Marian said that when they called it a ‘hot dish’ she assumed that meant it was spicy.  For the rest of you who aren’t from around here, in Minnesota we don’t have ‘casseroles’ we have a ‘hot dish’, and they are rarely spicy!

I also learned that there will be another new MMS color coming out next year called Aviary.  I’m really looking forward to giving that color a try!

Now you might be wondering, ‘hey, where’s the photo of Q and Miss Mustard Seed?’ and I have to confess, I hate photos of myself.  I much prefer to be behind the camera instead of in front of it.  So much so that I just never quite worked up the gumption to ask someone to take a photo of us.  I know, a missed opportunity for sure.

But even though there isn’t any photographic evidence, I did have an amazing day with Miss Mustard Seed and I’m so glad I made that white knuckle drive to Chaska.  Hopefully I’ll have more opportunities to connect with her now that she’s a Minnesotan like me!


a rusty toolbox.

Back when I sent a welcome email to Miss Mustard Seed, a.k.a. Marian Parsons, she offered to send me some of her products to try.  How totally awesome of her, right?  But I had to admit, I’d pretty much worked with most of them already.

However, I thought I vaguely remembered reading somewhere that her Tough Coat Sealer had been re-formulated to have more of a matte finish since the last time I’d used it.  So I asked her to please send me some of that.

So the other day when I was contemplating what product to use to seal the rusty toolbox I brought home from that garage sale I wondered if I could use the Tough Coat Sealer.

The toolbox isn’t terribly bad on the outside, but the inside was quite rusty.  It was rather greasy and dirty as well.

So I did a little google research.  I googled “using Miss Mustard Seed Tough Coat Sealer to seal rusty metal” and that search took me directly to this post from Miss Mustard herself where she conveniently addresses that question in the comment section.  She also mentions the reformulation of the Tough Coat Sealer in the post itself.

So, full steam ahead.

I first scrubbed the toolbox well with Dawn dishwashing soap and one of those 3M Scotch Brite scrubbies.  I tend to use dishwashing soap when I’m trying to cut grease.  I suppose that TSP substitute would work just as well, if not even better, but I haven’t tried that.

I wasn’t aiming for perfection here, just an easy clean up and coat of sealer that would allow me to store stuff in the toolbox without it getting all gross.

Once the toolbox was dry, I simply brushed on the Tough Coat Sealer.  I gave the inside bottom of the toolbox a 2nd coat just to be sure I was taking care of that rust, while every other surface only received one coat.  Here’s how the inside looks after …

Much improved, wouldn’t you say?

Although it’s cleaned up and the rust is sealed, I also added a paper liner just to make it a little prettier.  I used one of my favorite October Afternoon papers, and just laid it in place with no adhesive.  If it gets grungy over time I can easily replace it.

Here is how the toolbox looks on the outside with its coat of Tough Coat Sealer.

I did save the label.

I think I might use the toolbox to store my ribbons.

I don’t really know why I have such a fascination for rusty old toolboxes.

Something about them just appeals to me, especially when they are used for something unexpected, like vintage ribbon.

Looking at the ‘before’ and ‘after’ pics side by side you might be thinking that they don’t look all that different, but that actually was my goal.  I wanted to seal the rusty metal so it wouldn’t rub off on things or continue to deteriorate, but I also wanted to retain the rusty aged patina.

The Tough Coat Sealer did that perfectly.  It added a tiny amount of shine and it darkened up the color just slightly as well, but for the most part it didn’t change the look by much.

So the next time you need to seal some rusty old metal, consider reaching for the Tough Coat Sealer.

And speaking of Miss Mustard Seed, tomorrow is her workshop with Carver Junk Co.  I think they may still have some spaces left and tomorrow is supposed to be cool and stormy, so a perfect day for hanging out indoors and learning about milk paint.

I’ll be there and I’d love to see you there too!

a garage sale story.

I’ve mentioned before that my day job is at City Hall and it’s located in a fairly residential area.  That makes it somewhat convenient for lunchtime garage saling.

The other day I had to run a couple of boring errands at lunch, but I had about 30 minutes to spare so I followed some random garage sale signs.  It was a pretty fall day, cool but sunny, so I think a lot of people decided to throw together one last garage sale before the snow flies.

When I pulled up to the first sale I saw a little old lady sitting in a lawn chair all by herself.  I always see that as a good sign.  Little old ladies have the best stuff, usually at the lowest prices.

Not so this time.  This particular little old lady had easily over 100 jigsaw puzzles and that was about it.

  But tucked in among those puzzles was a gallon sized Ziploc bag with a set of ‘day of the week’ dishtowels.  Except they had only been stamped with the designs, the embroidery had never been done.  Clearly she had good intentions, but never finished the job.  The price?  $30!

What?!  Even if they were embroidered, $30 would be high for a garage sale price.  Especially a ‘little old lady’ garage sale price.

So, I walked away with nothing.

The next sale I found was being held in a garage that was chock full of mounted deer heads.  Literally, there were at least 20 of them on the wall.  In the garage.  They weren’t there as part of the sale, there was a very prominent sign that said “items on walls not for sale!”  Those things aren’t cheap, so it surprised me to see them displayed in the garage.  I mentioned something along those lines to the sale’s proprietor, a gentlemen probably around my age, and he said “you should see inside the house, that’s where all the best ones are.”

Oh my.

I’m not going to lie, I’m pretty seriously creeped out by stuffed dead animals of any kind.  But this is Minnesota.  There are many, many hunters here and it’s not at all unusual to see mounted trophies.  So I didn’t let that deter me because clearly this garage sale was being held by a Collector with a capital C (unlike me, a non-collector).

This person collected dolls, depression glass, chintzware tea pots, vintage wood working tools, figurines … and obviously, mounted deer heads.  An odd combination to be sure.  I asked the guy if this was his parent’s house.  Perhaps dad was a hunter and mom was the collector.  But he never really answered that question.

Had I come across this sale 15 years ago, I definitely would have nabbed the chintzware teapots.  I used to collect those too, but I got rid of all of mine except this one favorite.

Luckily for me … among all of the collectibles there were some vintage Christmas ornaments.

Unluckily for me, the ornaments were sorted into Ziploc bags (again with the Ziplocs!), fab vintage ornaments mixed with junky tacky ornaments.  And they were priced at $10 per bag, a little steep.  But then I did a little math in my head, each bag had around a dozen good ornaments mixed in with 4 or 5 bad ones.  So even though $10 felt high, it was less than $1 per ornament, so I grabbed two bags.

I ended up with a really nice assortment of ornaments, many of them shaped like bells or other shapes.

I was especially excited to realize I’d scored not just one, but two teapot shaped ornaments.

It’s amazing to me that those delicate little spouts and handles haven’t been broken.

I also grabbed this toolbox.  It’s pretty rusty, but I love the size and shape.  I want to try and save the design on the front, but we’ll see how that goes.

As I was checking out, the proprietor asked me if there was anything else I collected.

  ‘No, um, well, yes, to be honest, yes I collect a few things but I hate to admit it.’

I mentioned vintage wind up alarm clocks and he said “There are tons of clocks inside, do you want to come in and take a look.”

I glanced over at the 40 fake deer eyes staring at me from the walls of the garage, looked around and noticed that I was totally alone here.  I realized that this was the point in every horror movie where the audience wants to yell “noooo!  don’t go through that door!”  So I politely said “no thank you” and walked away with my bag of ornaments and my tool box.

Chances are probably good that I missed out on some great vintage stuff from inside the house.  Had I not been alone, it would have been a different story.  But you just never know.  After all, if I didn’t return from my lunch break how long would it take for my co-workers to start to wonder where I was?  And after that, how long before they guessed that maybe I stopped at some garage sales?  How many months before they find my body buried out behind that garage full of mounted deer heads?  I can just picture the ‘made for TV movie’ now, can’t you?


the gothic hanky drawers.

Are you wondering what I did with the hanky drawers that were on the gothic dresser?

Well, first of all I should mention that it was very easy to take them off the dresser.  There was a felt liner inside each one, so I pulled that out and could see that they were held in place by a couple of screws.  I simply unscrewed them and they came right off.

You might be wondering if that meant there were screw holes in the dresser top, and yes, there were … or more correctly there are.  I just left them.  They were small, and the wood top of the dresser had plenty of dings and other blemishes.  I like to embrace those rather than try to hide them.  Since I gave the dresser top a rustic waxed finish the dings just blend right in.

I keep referring to these as hanky ‘drawers’, but really in this case they are just a hinged box not technically a drawer.

Once I had them removed I realized they would make fun little keepsake boxes.

I started by painting them with some Homestead House milk paint in a color called Stone Fence.  This is one of my favorites.  It’s a pale, warm grey (you can see more of it on this foot board shelf).

I didn’t do much in the way of prep before painting.  I was OK with as much or as little chipping as fate would deliver.  I did wipe them down with some TSP substitute though.

After the second coat of paint was dry, I sanded rather haphazardly.  Again, I wasn’t feeling very picky about my results.  I wanted an aged, distressed look.

Next I added some Iron Orchid Designs transfers to the tops of the boxes.  Both are from their French Pots line and are intended to be used on clay pots, but I have found any number of other great uses for them!

This design is from French Pots I.

And this one is from French Pots III.

After applying the transfers, I sanded very lightly with some 220 grit sandpaper.  Next I wiped the boxes down and then added a top coat of The Real Milk Paint Co’s Dead Flat.

I lined the insides of the boxes with a page from an old Atlas.

You could keep a stash of old photos in one of these boxes.

Or maybe your old love letters.  I don’t know, does anyone write letters anymore?

Maybe you can just keep your vintage jewelry in it.

So many possibilities, what would you keep in yours?

the gothic chalkboard.

The minute I laid eyes on the Craigslist ad for the gothic dresser that I posted yesterday I knew I had to have it just for the mirror.  In fact, I was so excited to get my hands on it that I didn’t even take the time to get a proper ‘before’ photo, which is unfortunate.

Mr. Q went and picked it up in the afternoon while I was still at work, and the minute I got home from work I separated the mirror from its ‘harp’ and sent the harp home with Ken to cut a chalkboard back for it.

While Ken was working on that, I also made a chalkboard out of the framed mirror itself.  I shared that a while back.

Once I got the harp back from Ken, I went to work painting it.  I knew I wanted a warm white milk paint, which for me means either Homestead House Limestone or Miss Mustard Seed Linen.  Unfortunately, when I dug into my milk paint stash I discovered I was fresh out of Linen and I only had a small amount of Limestone left.  Maybe enough for just one coat on the harp.  I knew that I’d likely need at least 3 coats of paint to cover the dark wood with white.

So I decided to employ one of my favorite tricks.

Today’s Qtip:  If you know you don’t have enough paint left for multiple coats, start with a coat or two of another similar shade and just do your final coat in your chosen color.

In this case I mixed together the dregs of a couple of shades of white Homestead House milk paint, Raw Silk and Sturbridge White, and started with a coat of that on my piece.

I would have gone right into a second coat, but that’s when I discovered I had a bleeder.  The orange-ish stain was coming through and turning the paint a lovely shade of peachy orange right before my eyes.  If this has never happened to you, be aware that no amount of paint will ever solve this problem.  The stain will just continue to bleed through multiple coats of paint.  At this point, you have to seal the stain before continuing on.  Shellac works really well for that.

So once the paint was fully dry I got out a can of spray Shellac.  I keep this on hand for moments such as these.  If you have an entire piece of furniture with a bleed thru stain, it’s probably not cost effective to use spray Shellac, but when you have a smaller piece or just one or two spots of bleed-thru I find it’s convenient to just get out the spray.  And of course I only use the spray outdoors.

So, I sprayed the mirror quickly with a coat of Shellac.  Once dry, I added a second coat of my random mix of whites.  I could see that I’d solved my bleeding problem and I was getting good coverage with the 2nd coat of white.  So once that was dry, I mixed up the little bit of Limestone that I had left and added one last coat of that color.

My trick worked perfectly.  You can’t tell that I have a different shade of white under that Limestone.

The chalkboard itself is painted with Homestead House milk paint in Bayberry.  I find it makes the perfect green chalkboard.  To use milk paint for a chalkboard you simply mix the paint as usual (equal parts water and paint powder), paint two coats sanding lightly in between with 220 grit paper to keep your chalkboard smooth.  Also lightly sand the final coat.  Then season the chalkboard by rubbing white chalk all over it and ‘erasing’ it back off with a dry cloth.  Do not add any other sort of top coat over the paint.

After sanding the frame to distress the edges a bit, I added one last detail.  I used part of an Iron Orchid Designs transfer to add the year ‘1888’ to the top of the mirror.

I just love all of the detail on this frame including the little shelves on either side.

They make a great perch for a vintage camera, or an old family photo.

When I grabbed those two little books to put under that photo I took a moment to take a closer look at them.  The pretty little blue book was signed inside.

It was a gift from Great Aunt Nettie to my mother, which reminded me of a funny story.  Many years ago my sister and I were going through my mom’s family photo album.  It’s an ancient thing that has photos of our ancestors going back to the 1800’s.  One photo was labeled “Great Aunt Nettie Fleaner and her daughter Flossie.”

I thought about it for a minute and then I just burst out laughing.  Flossie Fleaner?!  Really?!

Poor Flossie.  That can’t have been easy to live with.  Then again, I’m sure Flossie was just a nickname, short for Florence or something like that.  Although Florence Fleaner isn’t much better, is it?

Anyway, I’m still deciding on the perfect spot in my house for this chalkboard.

Just for now it looks good hanging above my farmhouse table though.

the gothic dresser.

A while back I sent Mr. Q off to purchase this dresser via Craigslist mainly for its mirror harp, which I took off and am keeping because it’s amazing (you’ll see it tomorrow).  But even though I was mainly interested in the mirror, I also thought the dresser itself was pretty fab.  Here is the ‘before’ photo, which doesn’t include the mirror, but it does include the ‘hanky drawers’.

Hanky drawers are those two little drawers, or in this case hinged boxes, that are sitting on top of the dresser.

They were meant to store handkerchiefs back in the day when people actually had such things.  I generally remove hanky drawers.  Much like mirrors, they tend to limit the use of the dresser.  And without the mirror, they look kind of silly sitting there on top of the dresser.  I’ve already re-purposed them as well, and I’ll share those later this week too.

But for today, let’s just talk about the dresser itself.  I’m calling it the gothic dresser, although technically I don’t think this dresser is ornate enough to qualify as ‘gothic’.  It has a kind of gothic vibe though.  Do any of you know what this style might be called?

I love those tear drop drawer pulls.  Even though one had fallen off, it was included with the dresser so they were all there.  They were the reason I chose to paint the body of the dresser in Homestead House’s Coal Black milk paint.

Unfortunately, when I went to put the drawer pulls back on after painting I discovered that the one that wasn’t on when I purchased the dresser was damaged beyond use.  Argh.  That explains why it was just lying in the drawer!

Luckily I had just purchased some round black knobs with a matte finish from Hobby Lobby and I think they ended up working well with the tear drop pulls.

Rather than paint the entire dresser black, I stripped the top and waxed it with Miss Mustard Seed’s Antiquing Wax for contrast.

I have been getting a ton of mileage out of that MMS Antiquing Wax lately!

I had so much fun staging this dresser with some of my favorite black props like my vintage phone.

And the all black Big Ben from my non-collection of clocks.

Since I had some paint left over after painting the dresser itself, I painted the 2nd drop leaf from my green alligator table with it and then added a French stencil.

I have to say, I absolutely love how this one turned out.  You can be sure there will be more drop leaf signs in my future with this stencil on them.

By the way, I added a top coat of Miss Mustard Seed’s hemp oil on both the dresser and the drop leaf sign.

I’m so glad I went with the Coal Black on this piece despite the damaged drawer pull, I think it was the perfect choice with the contrast of the wood top.

Both the dresser and the sign are available for sale while they last.  If you are local, be sure to check my ‘available for local sale’ page for more details.