a quandie quickie.

Each year for Administrative Professional’s Day I try to come up with something fun to give my accounting staff.  Last year I made floral arrangements in vintage enamelware tea cups.

flower groupSince I have to come up with five gifts and it’s on my own dime, I try to be creative and come up with something fun that doesn’t cost a lot of money.  After all, it’s the thought that counts, I hope.

Earlier this year I came across these little metal mailboxes at Target.

mailboxes before

They were intended for Valentine’s Day, but I thought I could make them work for my purposes.  Obviously the hearts had to go, and I really didn’t love the plastic red ‘flags’ on the side paired with hot pink.

So my first task was to paint them.  Have you tried the new matte finish spray paint from Rustoleum?

matte spray paint

I had not tried it, so this seemed like a good opportunity.  Please note that this post is not sponsored in any way by Rustoleum and the opinions expressed are just based on my own experience.  I had a lot of problems with a leaky spray nozzle.  You know what I mean, right?  When the paint drips down all over your trigger finger.  I also didn’t feel like the paint went on as smoothly as most spray paint.  It came out in blobby spots rather than as a fine mist.  Perhaps I had a defective can?  Or maybe I hadn’t shaken it enough (although I did shake quite a bit).  Possibly it was just a little too cold out that day.  In any case, it required quite a few coats to get a nice even coverage.  I lost count of how many.

But eventually they were done.

mailbox 1

And once done, the finish was very nice.  I love the matte-ness of it, and the Robin’s Egg blue is quite lovely.

I paired the mailboxes up with some cute ‘to-do list’ notepads. some pretty pencils and some candy.

mailbox notepads

It was fun to add my own spin to these inexpensive, off the shelf items.

mailbox 2

 And I’m pretty sure my co-workers enjoyed them!

a quick folding chair makeover.

Last year I purchased these painted folding chairs at one of my favorite neighborhood garage sales, Bryn Mawr.

bryn mawr chairs (2)

They are fairly small, not the typical size of today’s folding chairs.  I liked the colors, but I didn’t especially like the way the vinyl seats were painted.  I knew from experience how to re-cover these though, so I thought I’d share that process with you today.

blue metal chair before

Here’s a close up of the seat.

blue metal chair seat before

Since normally I’m a fan of crackly and chippy paint treatments, I can’t really explain why this seat wasn’t working for me.  It was a little too far gone maybe.

If you flip one of these chairs over, you’ll see that the seat ‘cushions’ (I put that in quotes because these are hardly cushion-y, but what else should I call them?) are held in place by little metal tabs that are folded over.

blue chair tabs

It’s easy to just pry those upwards using a screwdriver and then take the seat right off.

blue chair without seat

I had some pretty vintage tea towels on hand that I also purchased at a garage sale to use recovering these chairs.  So I pulled one out and cut it to fit.

blue chair supplies

Normally I would pull out a staple gun for recovering a chair seat, but in this case the seat was made out of cardboard!  So instead I pulled out some tape and I just used my gift wrapping skills to cover the seat.

blue chair seat tape

By the way, when you have a seat cushion that is curved in the front and only goes on one way, try to pay attention if your fabric also has a ‘top’ and a ‘bottom’.  I was reminded of that when I put the cushion back in place.

blue chair backwards

Ooops.  That doesn’t look right!

I took it all apart and switched it around.

blue chair seat close up

Ahhhh, better.

blue chair final

What do you think?  I haven’t done the pair of green chairs yet.  I’m debating, will they be more marketable with a paint job?  Do I leave them green and recover the seats with vintage fabric?  Or do I remove the seats entirely and turn them into chalkboards, like these …

chalkboard pair

What would you do if you were me?

a quandie quickie.

I really enjoy quick little projects to just dress something up.  Improvements that don’t take long, but totally change the look of something.

I purchased this green metal box a while back.  I liked the lid, and that the box was quite heavy duty, but I didn’t love the forest green color.  Not to mention the fact that it looked decidedly ‘spray painted’.

green box before

I knew this piece could benefit from a makeover.  I started by sanding it rather well.  Partially to allow the new coat of paint to adhere well, but also partially to remove that spray paint texture.  I then painted it with two coats of Fusion’s Lily Pond, a pretty paler green.

green box painted

Next I used sand paper to distress the box.  I distress almost everything I paint.  I think distressing is what brings an item to life.  It gives it a sense of history.  It keeps the piece from looking ‘freshly painted’ and too bland.  It has a secondary function that I also like.  When a piece is distressed it doesn’t matter down the road if it gets a few more dings.  They just blend in with the intentional distressing.

You can really see the results of the distressing on the lid …

green box lid

Once the box was distressed, I went over it with some of Fusion’s beeswax just to get a richer sheen and to protect the areas that I distressed down to the metal.

Next, I glued on an enameled number plate using some E6000.

green box after

This box could be used to store all kinds of things.  It’s a nice size for your extra toilet paper rolls in the bathroom.

green box for tp

I use boxes like these in my pantry to store things that aren’t in the greatest packaging on their own.  Things like cat food, kleenex, cleaning products, etc.

smile jar

This was such a quick and easy update!  Projects like this are perfect for the working gal like me, you can accomplish them in one evening between supper and bedtime, while doing a load of laundry in between coats of paints.  Multi-tasking at its finest!

This weekend I plan to do some serious multi-tasking.  I’m finishing up a dresser and a buffet, plus I have a couple of smaller projects to work on as well.  But first my sister and I are going to attend the anniversary celebration at Reclaiming Beautiful in Stillwater this evening.  If you didn’t see my post about that over on their blog, check it out {here}.  Maybe I will see you there!

Mar reclaiming beautiful

sit.

I painted this little chair last summer and then took it to Eye Candy ReFind.

sit before

Since it didn’t seem to be selling, I decided to bring it home and add a little more pizzazz to it.

But first, I managed to dig up the original ‘before’ photo from May of 2014.

Linden Hills 8

Yep, this chair and its companion were pretty ratty looking when I first brought them home.

Initially I painted this chair with an undercoat of Miss Mustard Seed’s Flow Blue and MMS Linen over that.  The second chair was painted in MMS Luckett’s Green, but that one is long gone.

I decided to jazz up the white chair with some grain sack stripes on the seat, and a stenciled ‘sit’ on the back.  I have to give credit for the ‘sit’ idea to my friend Sue.  She brought the most darling little chair to one of our occasional sales that was painted with ‘sit.’  I am totally copying her.

I used my Cricut machine to cut a vinyl stencil for the ‘sit’.  My sister gave me some of the stencil vinyl for Christmas.  It worked perfectly for this project.

sit chair stencil

sit chair 1

I just used tape for the grain sack stripes.  I sanded them down a bit to make them look good and worn.

sit seat

I think the chair has a little more pizzazz now.

sit chair 2

Don’t you?

sit 2

repeats.

How do you feel about repeats?  Personally, I’m not a huge fan.  I almost never watch the same movie twice (exceptions made for James Bond and Jason Bourne).  I don’t buy movies on DVD specifically for this reason.  I don’t watch too many television repeats either, nor will I read the same book twice.  In general I don’t even like to travel to the same places, but prefer exploring a new destination.  I try not to repeat my furniture makeovers either.

repeats title

But sometimes I repeat smaller projects because I loved them so much the first time around.  Such is the case with my painted hatboxes.

I painted my first one back in February of last year.  It was painted using chalk paint though, which made the transfer process a little tricky.

hat box on suitcase

I then improved on the idea back in March by using Fusion paint instead …

painted hat box

It worked much better because it held up well to getting wet when removing the paper after the transfer.

When I ran across a couple of cardboard hatboxes at a garage sale last summer for a dollar each, I grabbed them so that I could make more faux French hatboxes.

repeats before

I used the same basic process as before (check out those previous posts for more detail).  I painted them in a couple of layers of Fusion paint, then used a gel medium to transfer mirror images that had been printed on a laser printer.

repeats 1

I used a few different graphics.  I used to always get my graphics from Graphics Fairy, but lately I’ve found some good ones on pinterest also.

I actually purchased this next graphic a couple of years ago on Etsy.  I think I paid a few dollars for it at the time.

repeats 3

If perfection is your goal you might not like the results you get with a gel medium transfer, but I like the aged and worn look.

repeats close up

How about you?

repeats 2

thinking outside the jewelry box.

Not a traditionalist?

jewelry box title

Prefer to think outside the box?

jewelry box top

Well, how about keeping your jewelry in an old tackle box?

jewelry box inside

I painted this old metal tackle box back in October when I had some friends over for a painting party.  I hadn’t done anything with the inside though, so recently I decided to line it with pretty paper and feature its potential use as a jewelry box.

jewelry box earrings

For Christmas this year Mr. Q gave me a giant cutting mat and a rotary cutter.

jewlery box cutter and mat

I thought these tools would be handy for cutting vintage wallpaper to use on furniture, and also for cutting fabric liners for the insides of drawers.  I pulled them out to give them a test drive for this project.   However, as it turns out they were overkill this time.  I found that it was just easier to use my Creative Memories paper trimmer since the October Afternoon paper I was using was 12″ square (anything larger than 12″ won’t fit in this trimmer).

jewelry box CM cutter

I’m sure my new mat and cutter will come in handy for projects using larger pieces of wallpaper or fabric, but for today I was easily able to cut my scrapbook paper on my old trimmer.

jewelry box watches

I just measured and cut each piece of paper and placed it inside, it’s not adhered to the bottom.  This way if it gets yucky it can be easily changed out.

Have you heard of MantraBands?  I purchased mine a little over a year ago.  If I need a reminder to dream bigger, live in the moment, or even just to breathe, all I have to do is look at my wrist!

jewelry box bracelets

I bet there are plenty of other great ideas for using old tackle boxes.  Got any that you want to share?


quick mirror makeovers.

A common question facing most of us who rehab furniture is whether or not to keep an attached mirror with a piece.  I’ve written about this a few times.  A dresser can be so much more versatile without a mirror.  It can become a TV stand, a buffet, a kitchen island, etc.  Once you put the mirror back on, it becomes a piece that is really just suited for a bedroom.  A vanity without its mirror can become a desk.  If you have a large room, you can place it back to back with a sofa that floats in the room.

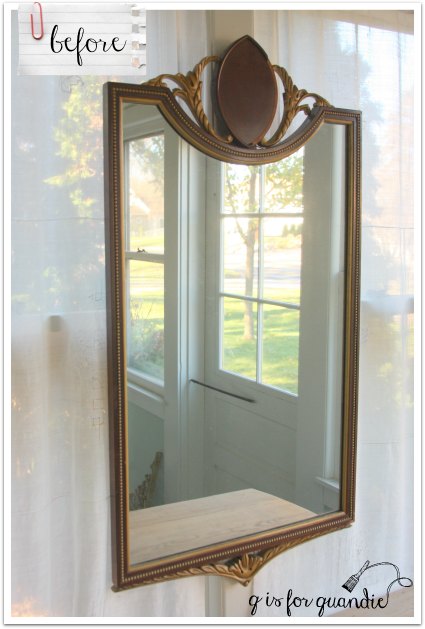
Sometimes the mirror is what gives a piece its personality, as was the case with the Prize Winner dresser I posted on Monday.  But I often remove mirrors and separate them from their furniture when they aren’t very special.  Last summer I removed the mirror from this vanity, turning it into a desk.

seriously studious desk

The mirror just didn’t work with the vanity.  It felt too narrow to me.  Also, it was not securely attached and I didn’t want to mess with it.  And honestly, I thought the mirror was kind of unattractive.

blue mirror before

The mirror sat out in the carriage house for a few months.  Then last week one of the shops I sell in, Reclaiming Beautiful in Stillwater, sent out a request for mirrors.  I pulled this one out of storage, as well as another mirror I purchased at a garage sale last summer.

grey mirror before

I have to laugh looking at these pictures.  It looks as though I took these at the height of summer, but in reality I took them early last week.  It was a bright sunny day, our grass was still green, and I happen to have a pear tree in the front yard.  Pear trees are notorious for losing their leaves very late in the season, sometimes not until a heavy snow storm knocks them off.  It no longer looks like this outside my windows since we got several inches of snow on Monday!

Anyway, back to the mirrors.

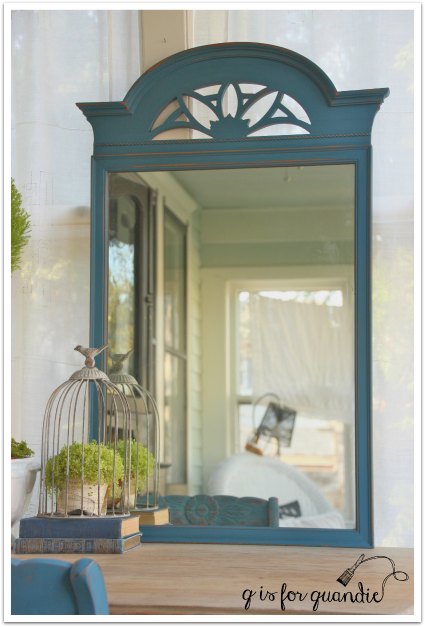
The former vanity mirror got a quick sanding and a wipe down with TSP substitute followed by two coats of Miss Mustard Seed’s Flow Blue.  I expected a lot of chipping because the former finish was fairly shiny.  But as per usual, milk paint surprised me and I got no chipping at all.  Dang!  I shouldn’t have sanded.  Hindsight is always 20/20.

blue mirror topiary

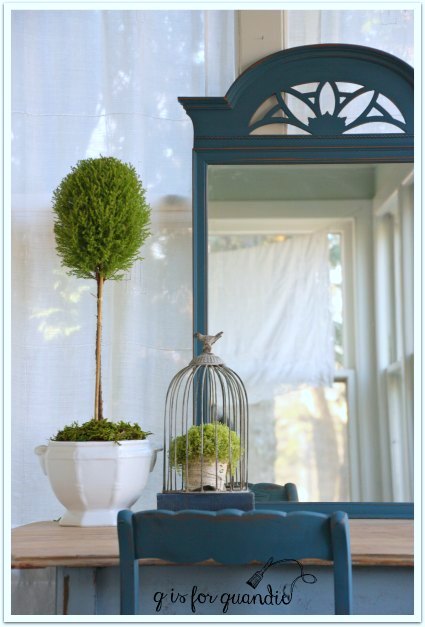
I ended up distressing the paint and finishing with a coat of hemp oil.

blue mirror closeup

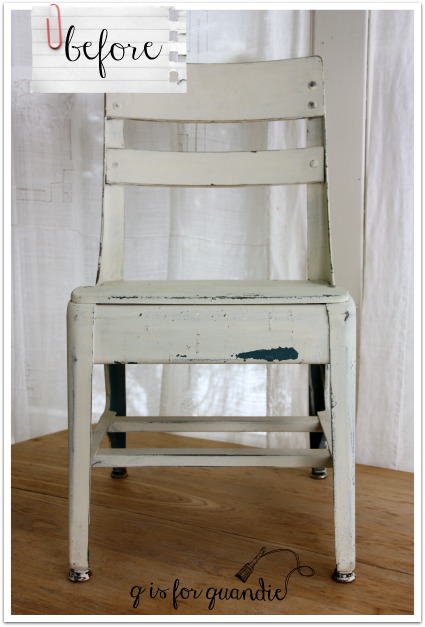
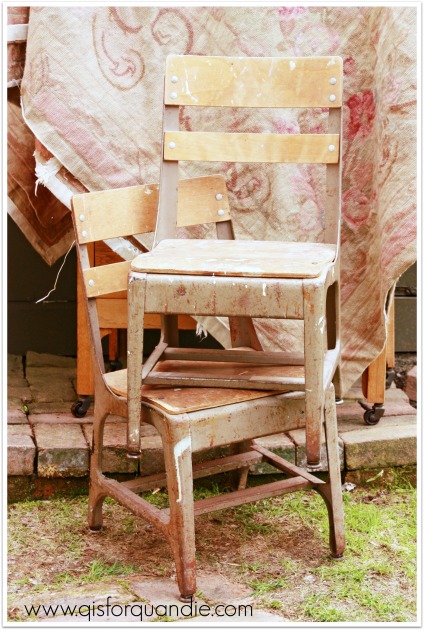
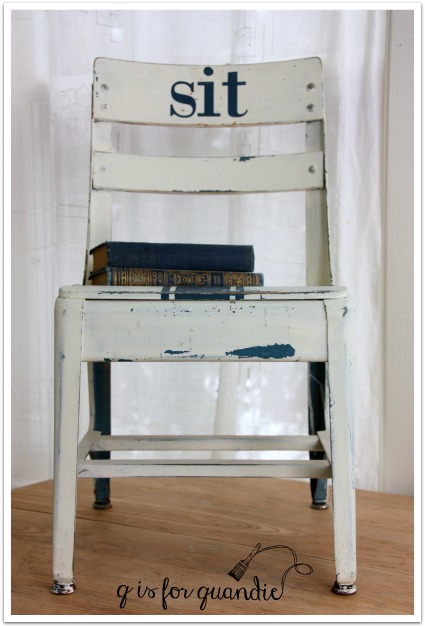
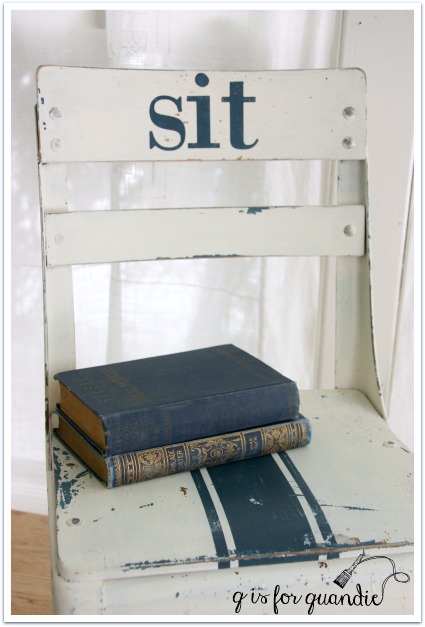
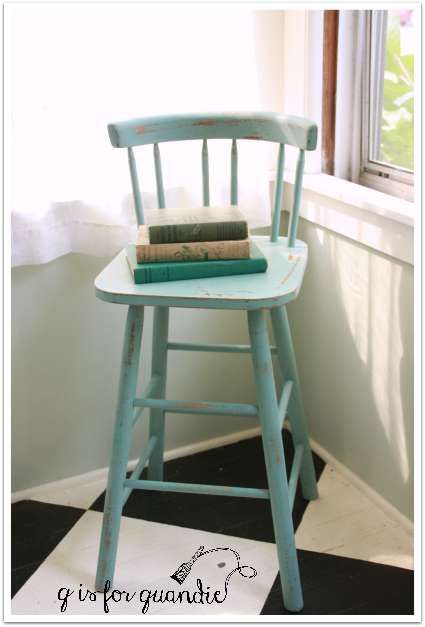
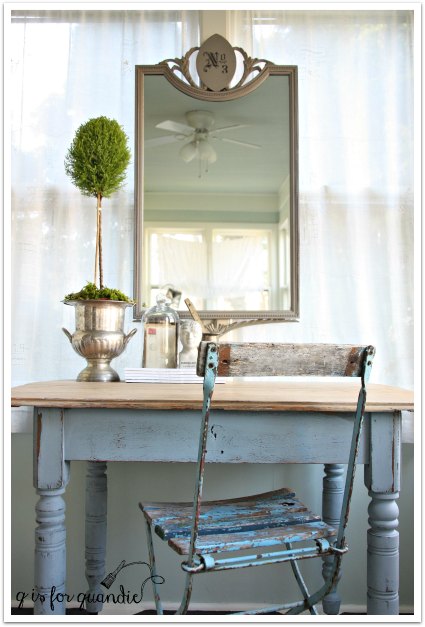
For my photo shoot I just placed it on top of a farmhouse style table and pulled my grandma’s chair up to it.  This chair is the first thing I painted in Flow Blue, if you check back to that earlier post you’ll see that I didn’t much care for the color then.  I have since changed my tune and I now absolutely love this color.  I even used it on the hutch in my Q Branch.

farmhouse table as desk

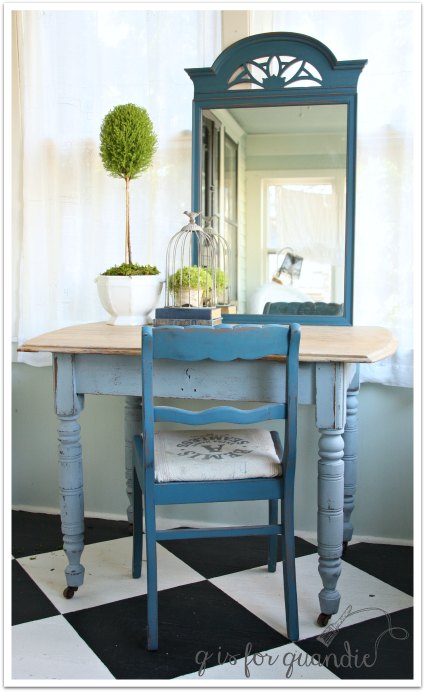
A vast improvement for the mirror I think.  I love the richness of this vibrant color.  This would add a gorgeous pop of color to your foyer, or perhaps help reflect light in your hallway.  Hang it over the sink in your bathroom, or above the dresser in your bedroom.

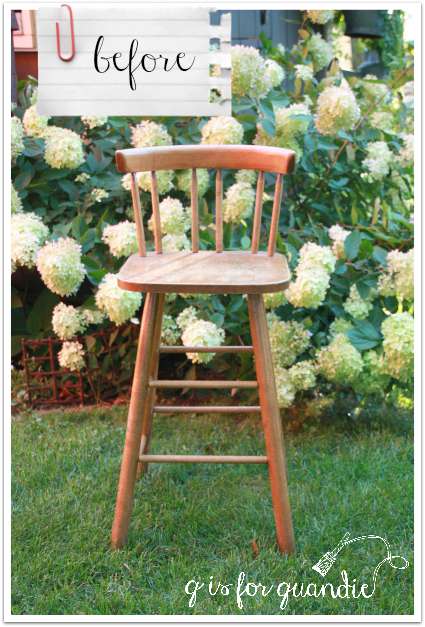
I just couldn’t pass up this next mirror at a garage sale last summer.  It had such beautiful details.  Unfortunately, part of the trim was broken off at the top.    I also didn’t really love that cherry colored wood mixed with the gold.  So this mirror was destined to be painted from the start.

grey mirror damage

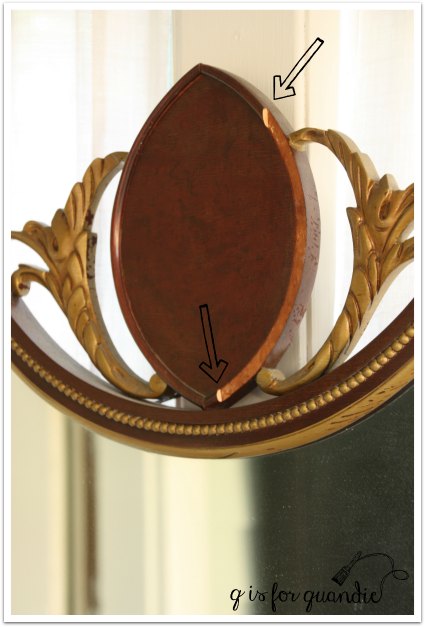
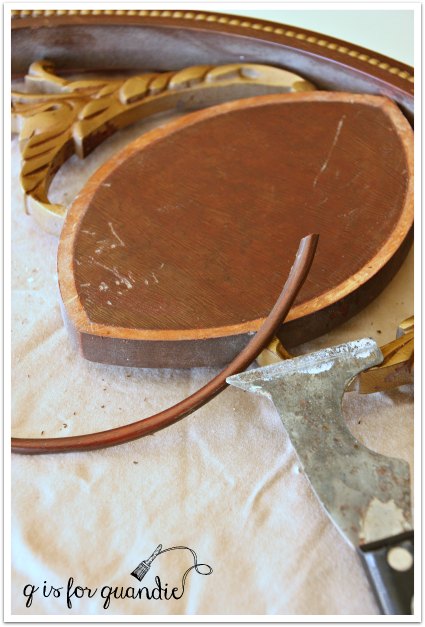
First I removed the remainder of the damaged trim.  That was easy to accomplish with my handy scraper.  I just gently pried it off.

grey mirror damage repair

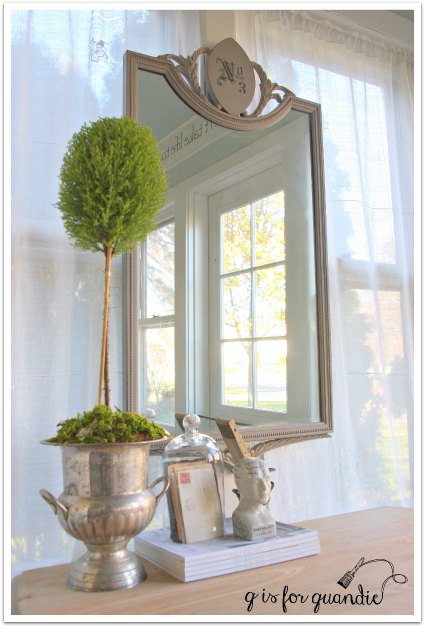
I followed my normal prep steps of a light sanding followed by some TSP substitute, then painted two coats of Miss Mustard Seed’s Schloss on this one.  I always think the Schloss is going to be darker than it is based on the little color sticker on the package, but no, it is a fairly pale warm grey.

grey mirror

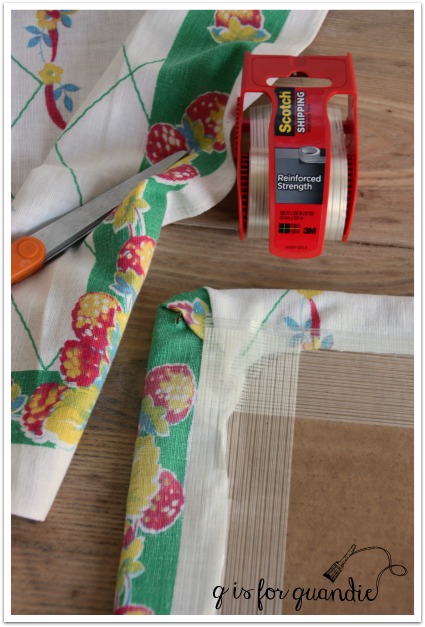
I used my tape trick to encourage chipping on this one (I did try that on the Flow Blue mirror, by the way, and it didn’t take any paint off), but the chipping is hard to see in these photos.  You’ll just have to trust me that it’s there.

I added a simple stencil to the decorative oval at the top of the mirror.

grey mirror stencil

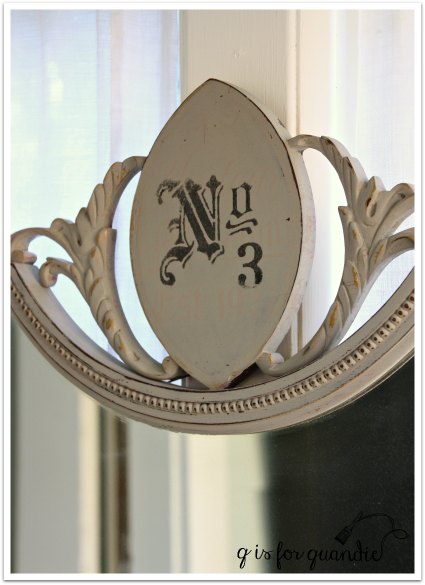
You can see that I let some of the gold peek back through after painting it.

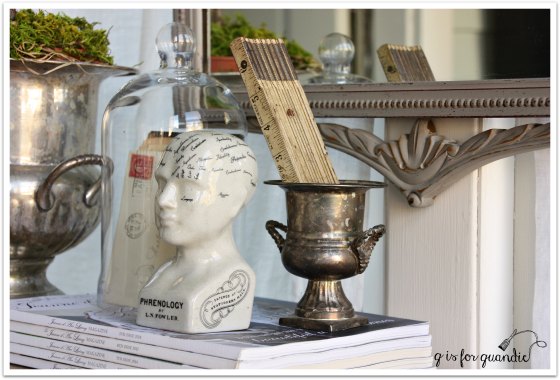
I love this detail at the bottom of the mirror.

grey mirror detail bottom

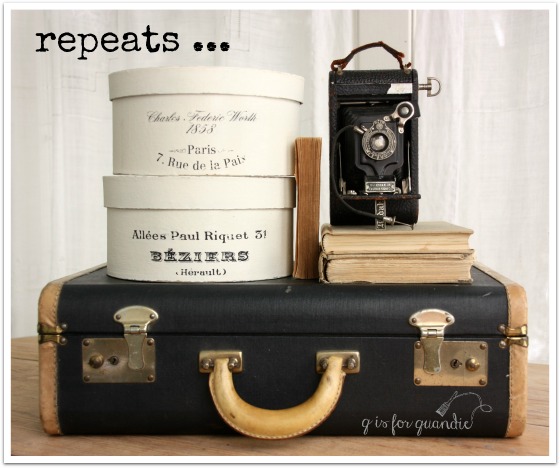
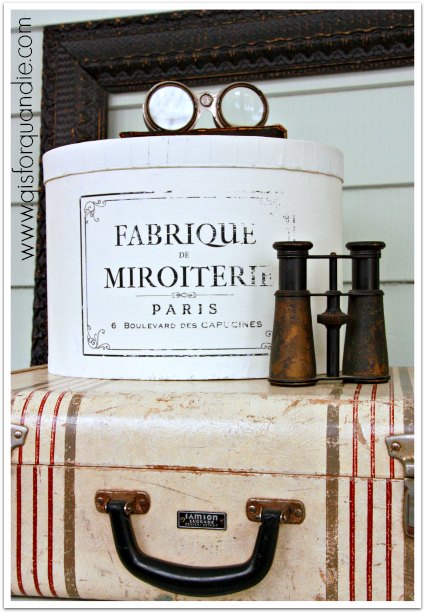
I had some fun switching up the accessories to go along with the mirror change.

grey mirror with farmhouse table

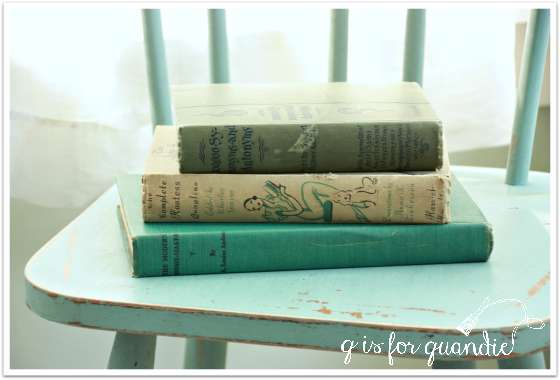
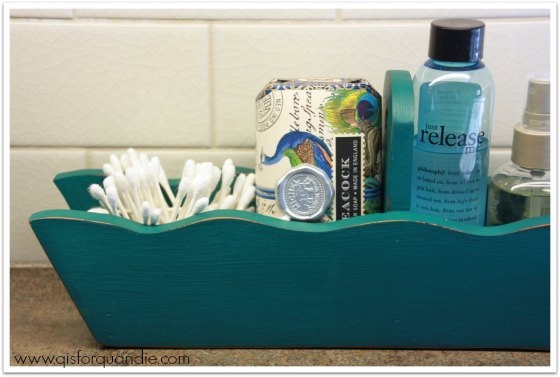
I moved the lemon cyprus topiary into a silver ice bucket, I switched out the chair, I swapped the cage over the baby tears plant for a glass cloche over some old letters and I switched from blue vintage books to a stack of Jeanne d’ Arc magazines.  Did you notice?

mirror collage

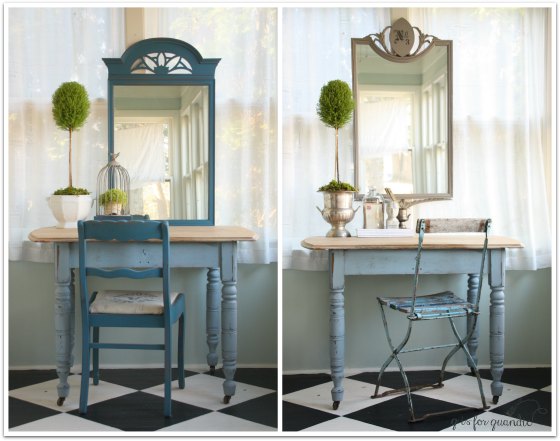
So which look is your favorite?

metallurgy.

Fusion is coming out with a new line of paint colors!  The Matthew Mead Studio Metallics.  When they offered to send me some free samples to try out, how could I resist?

metal paints

When they came in the mail I was sort of drooling over them, but I wasn’t prepared yet.  I have a great plan in mind for the Copper color, but haven’t got everything I need for that project yet.  But I really wanted to try the paint on something!

So I went out into the Carriage House to see what I could find that needed painting and I came across this clock.

Who else remembers the heyday of sponge painting?  Gack!  What were we thinking?

clock before

Of course, when it was done well it looked better than this clock.  I like to think that when I sponge painted, it didn’t look this hideous.  But I could just be kidding myself, seeing the past through rose colored glasses and all of that.

Well, anyway, my friend Cathy brought this clock to the last Carriage House sale with a price tag of $10 on it.  I’m not sure what she was thinking (she’s a regular reader of my blog, so I’m sure she’s going to give me crap for saying this out loud).  I think we all can see why it didn’t sell though.  It’s pretty much butt ugly.  When it didn’t sell (surprise, surprise) she left it behind.  Well, anything left behind is fair game.  So when I saw it hanging out there a little light bulb went off.  This was the perfect candidate for some metallurgy.

So I sanded the clock lightly and wiped it clean with a damp rag.  Then I painted on two coats of Brushed Steel.  I didn’t tape off the glass, and I got paint all over it.  Once dry, I just cleaned that up using a razor blade.  I’ve found that this is really easy to do with the Fusion paint (assuming you do it right away).  I also sanded the clock once dry. I wanted a distressed metal finish.

And here it is.

clock after

Ahhh, so much better, right?

Even up close and personal, it really does look like brushed steel.

clock close up

You can see that the sanding I did gives it a more distressed look, but you wouldn’t have to distress it.

clock after 2

I love how easy it was to give this clock an updated look.  Got anything hideous laying around at your house that could use a makeover?

Farmhouse Inspired in Hudson is going to be getting in a shipment of the new Fusion metallics any day now.  They come in a 8.45 fl oz jar and will be priced at $22.95.  The Brushed Steel that I used on the clock isn’t available quite yet, but they will have bronze, copper, pale gold, pearl and silver.

And hey, if you are local and you really love the clock, it’s available at Eye Candy ReFind for $28.  Never mind, it sold in a flash!

small projects.

Just a couple of quickie projects to share with you today.  First, this darling stool.  I purchased this from the same gal I bought my giant hutch from.  When I picked up the hutch, she happened to mention that she had a couple of other things for sale.  I picked out this little stool because I thought it would be super cute painted.

stool before

I wanted to go chippy on this one, so I used Miss Mustard Seed milk paint.  I mixed some Kitchen Scale and some Eulalie’s Sky, then added a little Linen to lighten it up some more.  Sorry, I didn’t keep track of exact ratios, I just kept adding a little of each thing until I got a color I liked.

stool after

Once again though, I had to use my tape trick to get some chipping.

stool close up

The height of the seat on this stool would make it perfect as a small bedside table.

Next up, this industrial hanging light.

industrial light 1

When I bought this, it had some ancient wiring in place.  It looked pretty scary to me, so I removed it.  I added a swag light kit from World Market which just happened to fit perfectly!

swag light kit

I decided to paint the inside of the lamp with Fusion’s Inglenook.  I think it will make a pretty pop of color when you catch a glimpse of it.

mac grove light inside

I just realized that a perfect combo would be using the stool as a bedside table, and then hanging this lamp above it.  I wish I’d thought of that before I sent both of these items off to Eye Candy ReFind!

mission possible.

One of my blog followers, Janice from Fred and Bessie’s, was kind enough to pass my info on to Homestead House Paint Co and they offered to send me some of their new Fusion paint to try!  It was like Christmas when a box filled with paint and other goodies arrived on my doorstep!  However, my sister and niece were here visiting, so I didn’t feel like I could say “hey, go entertain yourselves, I’m going to paint something.”  So, instead I suggested that we all head to a local thrift store and each of us pick something out to paint.  Their mission, should they choose to accept it, was to pick something ugly and turn it into something fabulous with Fusion paint.

fusion thrift finds

Debbie is holding two cutting boards (that were mine), a little wooden handled container and a counter top paper towel holder.  She and I also purchased some glass jars.  Kris picked out some hideous framed ‘art’ and a large silver glass platter.  Pretty much looks like a pile of tacky stuff from the thrift store, right?

fusion thrift finds before

Debbie wins the contest for spending the least amount of money at $3.75.  I came in second, spending $4.75 and Kris spent a whopping $9.20!

After we hauled our items home, we pulled out the Fusion paint and got to work.  Debbie was really drawn to the saturated hues of the Renfrew Blue and Ceramic.

fusion Renfrew

I really wasn’t sure about the bold teal blue of the Renfrew when it first went on.  But look how cute this turned out!  Debbie is going to use it on the counter in her bathroom.  She painted it with 2 coats of Renfrew Blue, then she used sandpaper to distress.

fusion trug after 2

She used the Ceramic on her glass jar and got some interesting results when she sanded it.  The sanding brought out a little more yellow in the color.  We both really liked that effect.

fusion jar after

Kris decided to simply remove the tacky prints from her two picture frames, paint them and then stencil the glass.  She used Champness on one frame, and Seaside on the other.  She used acrylic craft paint for the stenciling.  Stenciling on glass is a bit tricky.  The paint tends to slide around a bit more and not give a crisp result, and she wasn’t happy with that.  I think this one will look great hanging over the sink in her apartment though.

fusion french market sign

Kris also embraced her inner Jackson Pollock when it came to the glass plate she painted.  She painted two coats of Sterling, a very pale, silvery grey, first.  Then she used the colors that both my sister and I used on our pieces to splatter on top.  She’s going to use this plate on her coffee table.  The Fusion paint left a finish that was smooth as silk on the glass, by the way.

fusion painted plate

As for me, I painted both of my cutting boards using Fusion’s Bedford, which is a very nice greige.  I used two coats of paint, and then added my stencils using acrylic craft paint.  Once mostly dry (after about an hour or so), I sanded vigorously.  I felt like both of these benefited from some serious distressing.

fusion cutting boards after

As for my jar, I painted it with my favorite color, a beautiful turquoise shade called Laurentien.

fusion Laurentian

Since I had the paint out and ready to go, I decided to see how it worked with metal as well.  I grabbed a plain metal tin that I had on hand and slapped on two coats of paint.  Once dry, I added a couple of rub-ons.

fusion Laurentian 2

So, in the end our pile of thrift store goodies went from this:

fusion thrift finds before

to this:

fusion after

We accomplished all of it in an evening.  My sister and niece don’t have any special painting skills.  They are both ‘crafty’ people, but neither of them has any experience with using milk paint or chalk paint.  They didn’t require any special instructions from me to use this product.  So, if you are looking for a paint that is easy to use straight from the can, Fusion is for you.  If you are also looking for a paint to use on surfaces other than wood such as glass or metal, Fusion is a good choice.  I plan some more in-depth testing with Fusion over the coming weeks, so stay tuned to learn more.

If you are local to the Twin Cities, you can find Fusion at Farmhouse Inspired in Hudson or the Porch and Atelier in Buffalo.  Check it out!