stuff is happening.

Now that spring has finally sprung here in Minnesota, stuff is happening.  I have to admit, those last couple of months of winter were tough ones.  I’m going to have to adjust to being retired and figure out what to do with all of my time in the winter.  But that’s a (first world) problem for next winter.

Now that the weather has warmed up, the gardens are growing, garage sales are everywhere, and I can work out in my carriage house workshop … so, as I said, stuff is happening!

In fact, I have so much stuff to share with you guys this week that I’m going to post daily, at least on the weekdays.

First up for today, the garden.  I would say that this time of year is when my gardens are the most work.  I keep them packed full with perennials that don’t require much maintenance throughout the summer.  If I get everything pruned, weeded and mulched with compost now, before the plants get too big, the rest of the summer just involves occasional watering and deadheading.  If you want my top q tip for gardening, I think this is it.

If your plants take up every available space and you add a good layer of mulch, weeds have a much harder time taking over.

Here’s what my garden looks like once it has filled out (early June).

See?  Jam packed.

Of course, I know this isn’t easy if you’re starting from scratch.  Plants can be expensive (and the prices are going up this year, just like with everything else).  But you don’t have to spend an arm and a leg.  I recommend buying plants at garage sales, getting divisions from friends, or keeping an eye on Facebook Marketplace for people dividing their perennials.  You can often get them free, or in exchange for helping to dig them up.

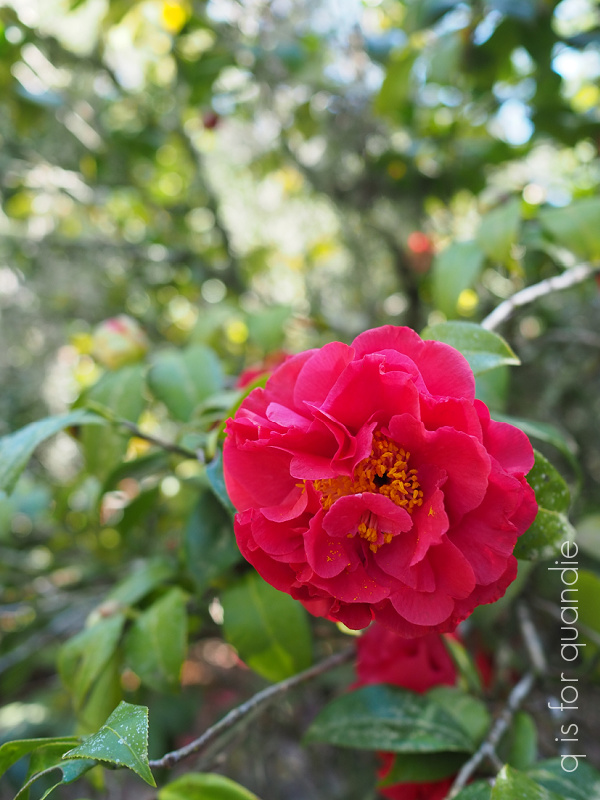
My tulips seem to have done really well this year.  For the last several years, deer have treated my spring garden as a salad bar, munching all of the flower buds right off the tulips before they could even open.  As a result, I decided to give up on planting tulip bulbs again last fall.

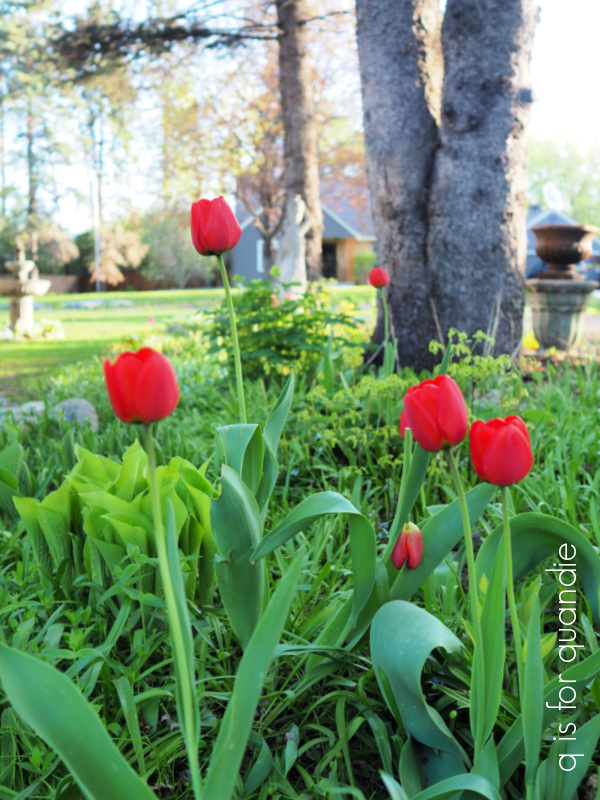
So now, of course, we seem to be having a really good year for tulips.  The red ones in my photo above are tulips that I planted at least 20 years ago.  They literally hadn’t bloomed in years.

Now I wish I’d planted more tulips!

Here’s another q tip for you.  Take photos of your garden regularly throughout the season, and keep notes regarding where you’d like to add things like tulip bulbs.  I plan to get more in this fall, especially since my neighbor has one of those fancy garden augers to make planting easy.

But wait a minute, this post isn’t supposed to be about gardening.  It’s actually supposed to be about sharing last week’s garage sale haul.

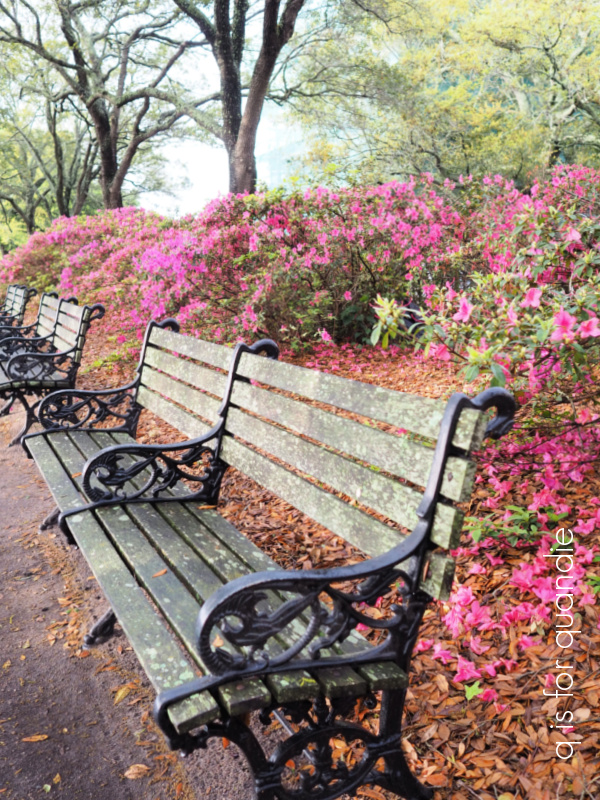
I went out on Thursday with my friend/picker Sue.  Now that we are both retired we can take advantage of sales that start on Thursday.  We went to a small neighborhood sale around Como Park in St. Paul.  Not all of the participating homes were starting their sales on Thursday (some started on Friday, some were Saturday only), but we were able to hit up all of the ones that were.

Although I didn’t bring home a huge load of stuff, I did get some really cool finds.  Plus Sue had a box load of stuff for me as well.

I found the mini dresser on the left (below) at Como, Sue found the rest of the items in this photo including that really, really tiny dresser.

I’ve already added an I.O.D. white transfer to the tiny oil can.

It’s hard to judge the size of it from my photos, but in total it’s only 6″ tall, but the can part is only about 2″ tall.

I like to add little clips to these and use them as photo holders.

And of course I’m going to give both of the small dressers a new look.

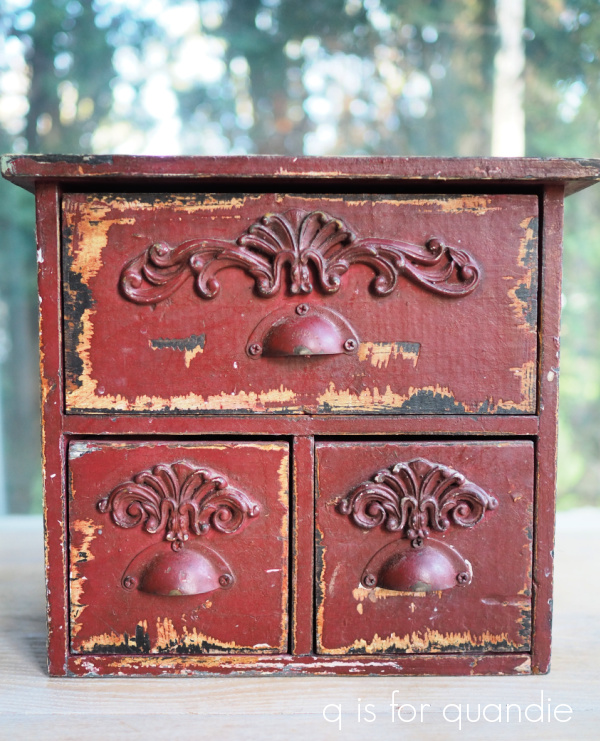
I feel like the combination of the cup pulls plus the scrolly embellishments on this one is too much.  I may remove those embellishments.  Or, I could remove the cup pulls and replace them with little glass knobs. What do you think?  And of course I’ll be painting both of them.

I also picked up these things.

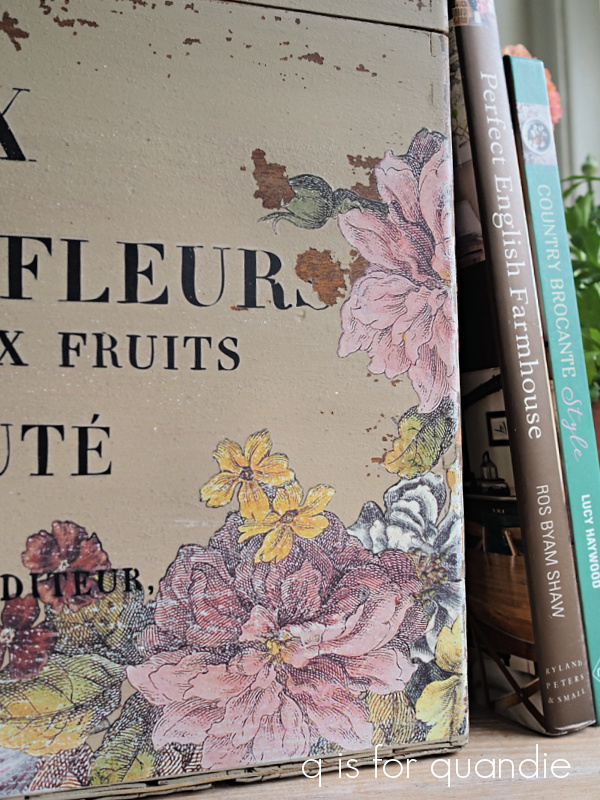
I thought Mr. Q might like to have the books, since he tends to be a Goethe fan, but no, he didn’t want to keep them, so I’ll be selling them on.

They are a nice looking set to add to someone’s décor, even if they don’t want to read them.

Sue spotted the glass vessel at one of the sales we visited and handed it over to me.

Neither of us really knew what this was, we just liked the ‘writing’ on it.

I googled it later and discovered it would have been part of a butter churn like this one.

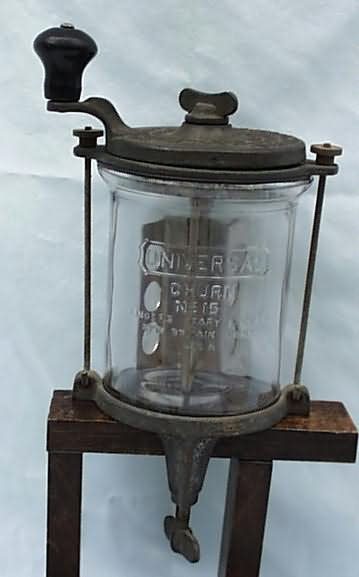
Isn’t that kind of cool?  I think it would make a great vase, or one could fill it with pens and pencils on a desk, or use it to corral your paint brushes.

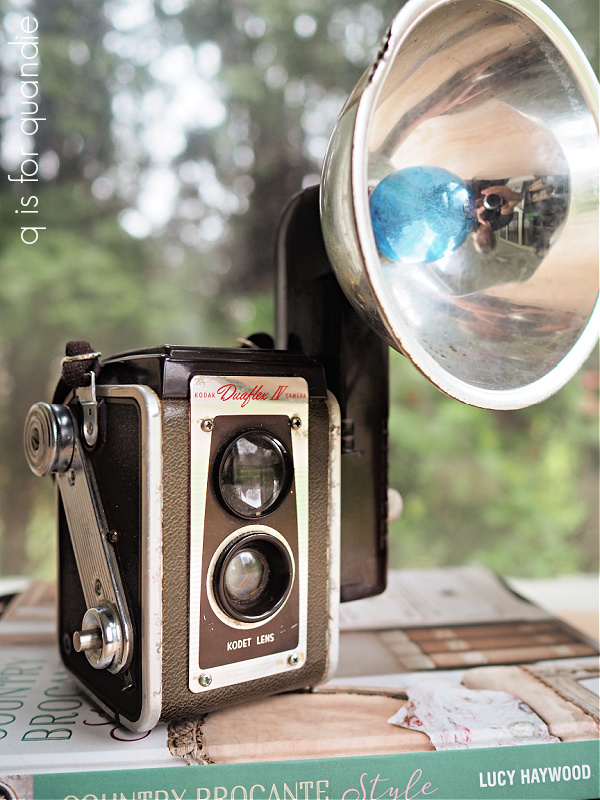
I purchased the camera from a guy who was a collector.  He was refining his collection and thus getting rid of some.

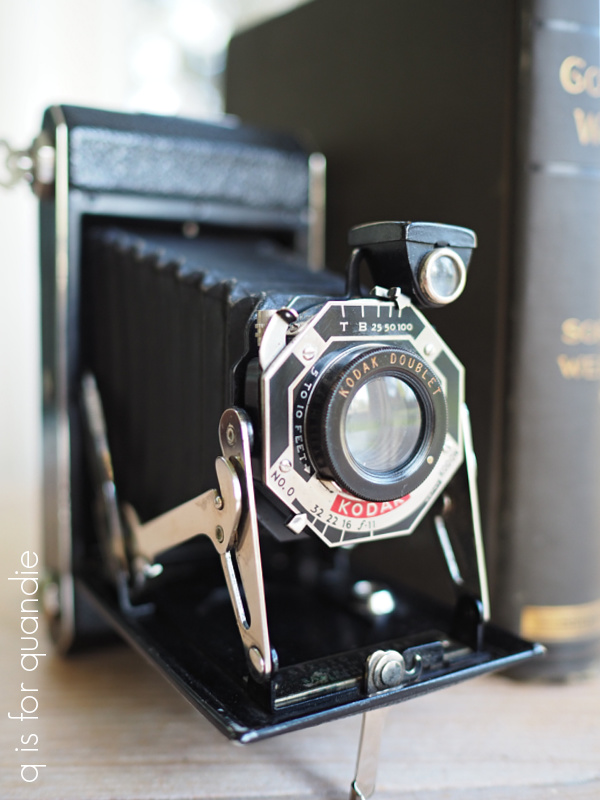
I’m not sure why this one didn’t make the cut for him.

I thought I’d take this opportunity to show you guys how these cameras work, and especially how to identify them if you see them and they are closed up (as this one was when I found it).

They really don’t look like much when they are closed, right?

There is always some sort of lever or catch that opens it up.  In this case, I had to ask the seller how to open it because it wasn’t obvious.  I was trying to slide that little lever on the lower right in the photo above, but you had to lift up rather than slide.

The case opens up and then the lens can be pulled out all the way.

So the next time you see a closed case like this, be sure to take a closer look.

Sue had also brought me a camera, along with this little train case.

Check out the back of this camera …

Doesn’t that look complicated?  Imagine having to putz with that before each shot.  We’ve got it so easy now!

In true Baader–Meinhof phenomenon fashion, I came across another stoneware pitcher.

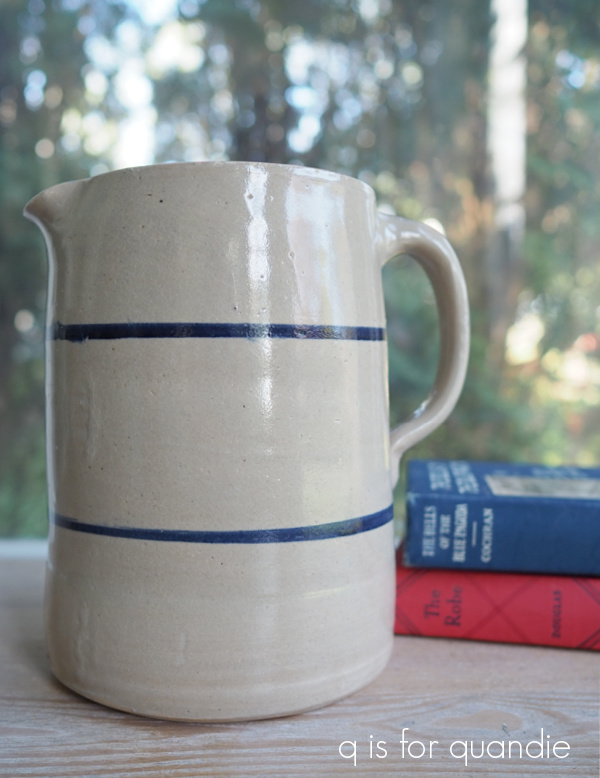
If you aren’t familiar, the Baader–Meinhof phenomenon “is a cognitive bias in which, after noticing something for the first time, there is a tendency to notice it more often, leading someone to believe that it has a high frequency of occurrence.”

I’m sure it’s just a coincidence that I found a similar stoneware pitcher at the thrift store back in April …

but we’ll see if finding these pitchers really has a ‘high frequency of occurrence’ this summer!

I’m still picking up nice copper pieces when I see them.  They seem to be selling like hotcakes at the shop.  If only I could raid my handyman Ken’s kitchen!  His wife has a serious collection of vintage copper … and when she originally purchased it, it was not vintage.  I’m sure those pieces have been in her kitchen since they built their house 50 years ago.

That gorgeous ironstone platter is one that Sue had and is now passing on to me.  It’s a nice big heavy one, and just check out the mark on the back …

I sometimes will hang an ironstone piece on the wall backwards just to show the mark because they can be so pretty.  I’m not sure if I’ll keep this one, or sell it on.  I have to look around to see if I have a spot for it first.

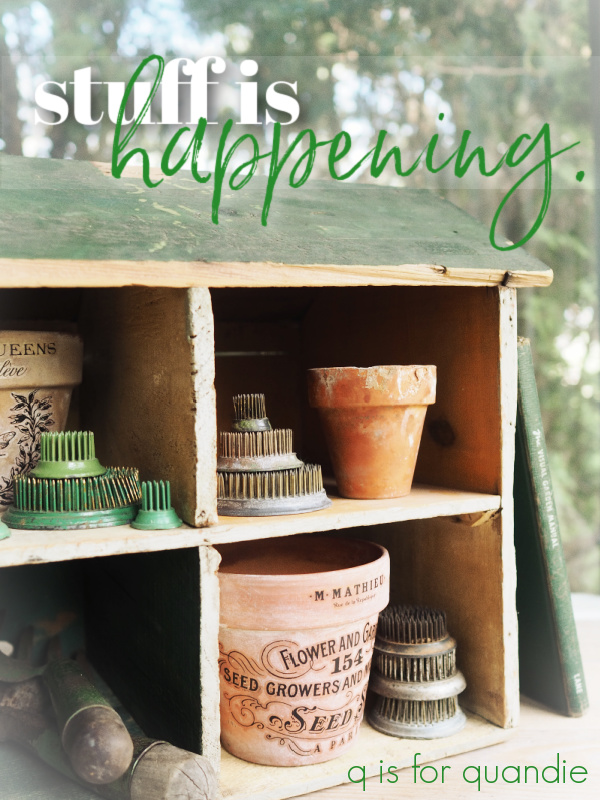
I’ve saved my ‘find of the day’ for last.

Now, I’m sure this primitive dollhouse made out of an Old Dutch Cleanser crate isn’t everyone’s cup of tea, but I found it totally charming.

I just love that someone made this out of simple items they had on hand, and they took the time to paint a couple of the ‘rooms’ in different colors.

And add those shaky looking windows painted onto the sides.

But I bet some little girl absolutely loved it and spent hours playing with it.

I’m not sure what the fate of this piece will be.  I may keep it, I may let it go.  Those little cubbies (rooms) could be used for all kinds of things …

I like the idea of using it on a potting bench.

Hmmm, yeah, I may not be able to part with this one.  I’m considering turning my photo cottage back into a potting shed this summer, so this is going to go in the pile of potential décor for the potting shed.

So tell me, what is your favorite from amongst my finds this week?  And if you’re local, did your tulips do especially well this year, or is it just me?  Also, are you OK with five posts this week, or will it seem like I’m flooding your in box with blog posts?  Oh, and P.S., there will be a giveaway included with one of them, so be sure to stay tuned for that!

annie’s toolbox.

I promised to share some toolbox updates with you this week, and here is the first one.

My friend Annie gave me this toolbox.

She’s seen some of my toolbox makeovers here on the blog, so she thought I could do something with this one.  And she was right!

I started out with my usual prep; a good cleaning with a grease cutting cleanser (Dawn dish soap in this case), a light sanding to remove any flaking paint and to scuff up the surface, then two coats of Dixie Belle’s B.O.S.S. to slow down any rust or other things bleeding through the paint.

Once I had that done, I painted the interior and the tray in two coats of Dixie Belle’s Kudzu.  Then I added the I.O.D. Rose Chintz inlay to the bottom of the tray.

I just love this green!  And I love how the pinks in the paint inlay pop in contrast.

Next up, the exterior got two coats of DB’s Drop Cloth.

Initially I planned to use just transfers to dress this one up on the outside, but ultimately I decided to add some of the paint inlay to the top also.

This required a fresh coat of paint in each of the areas where I wanted the inlay, but that was no big deal.  To accomplish this, I cut the inlay sheet to size for those two strips before applying.  For more details on using the inlays, check out my how-to post.

Once the inlay was dry I coated those areas with Rustoleum spray matte sealer.  Keep in mind that paint inlays are re-activated with water, so using a water based sealer with a brush may cause the inlay to smear.  Also, sanding the inlay without sealing first will allow the colors to smear as well.  So always seal your paint inlay after it’s dry and before moving on to your next step.

I sanded fairly heavily over the inlay to give it a more faded appearance.  It also would have worked well to use a section of the inlay paper that had already been used once, but I didn’t have any that were long enough for these two strips.

I absolutely love the authentically distressed look I ended up with.

Next up I added some bits and pieces from I.O.D.’s Label Ephemera transfer,

and a couple of tiny bees from re.design with prima’s French Maison knob transfers.

I absolutely adore the shabby chic vibe of this toolbox now.

Isn’t it pretty?

This is normally the part where I say, if any of you locals are interested, be sure to check out my ‘available for local sale’ page for more details.  However, this toolbox was spotted by a different Annie and it seemed meant for her.  So this one is already spoken for.

As always, thank you to Dixie Belle Paint Co for supplying the B.O.S.S., paint and sealer I used for this project.


not tired of toolboxes.

I don’t think I’ll ever get tired of painting toolboxes.

I totally enjoy the process.  Well, most of the process.  I don’t enjoy the initial cleaning.  They tend to start out pretty gross; rusty, greasy, dirty, and smelly.

But after I give them a good cleaning with Dawn dish soap (or you could use any grease cutting cleaner), a light sanding to remove any flaking paint, and a coat or two of Dixie Belle’s B.O.S.S., we are good to get started with the fun part.  Painting and embellishing.

One of my favorite paint combos on a toolbox is Dixie Belle’s Sawmill Gravy and French Linen.

These two colors pair up beautifully, and it’s easy to add a wide stripe to the outside of a toolbox using some yellow frog tape.

Lately I’ve been loving a more floral look on toolboxes as well.

Most of those are I.O.D. transfers, although the floral portion of the one on the bottom right (and below) is a re.design with prima transfer.

I personally prefer the more muted colors of the I.O.D. florals …

But that’s just me.  I know there are those of you that love a vibrant, brighter floral as well.

My go-to favorite neutral for toolboxes is, of course, Dixie Belle’s Drop Cloth.

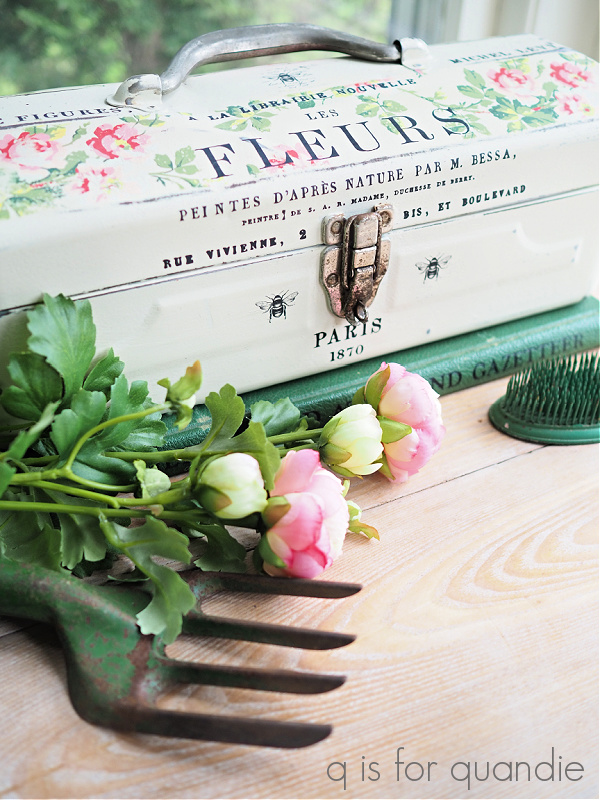
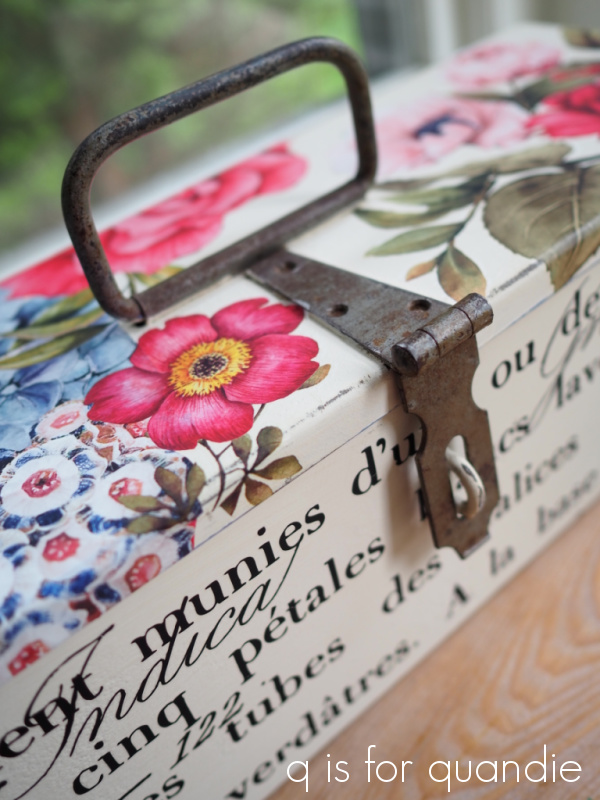
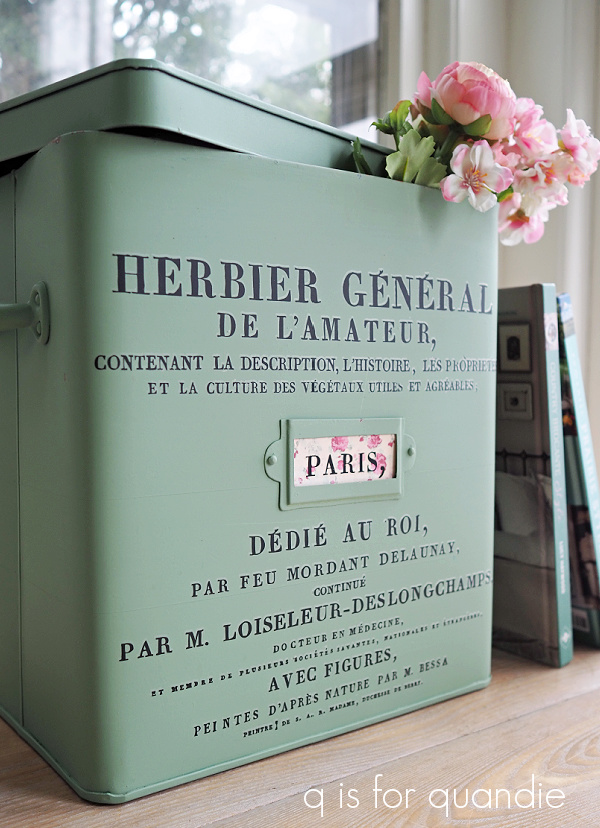
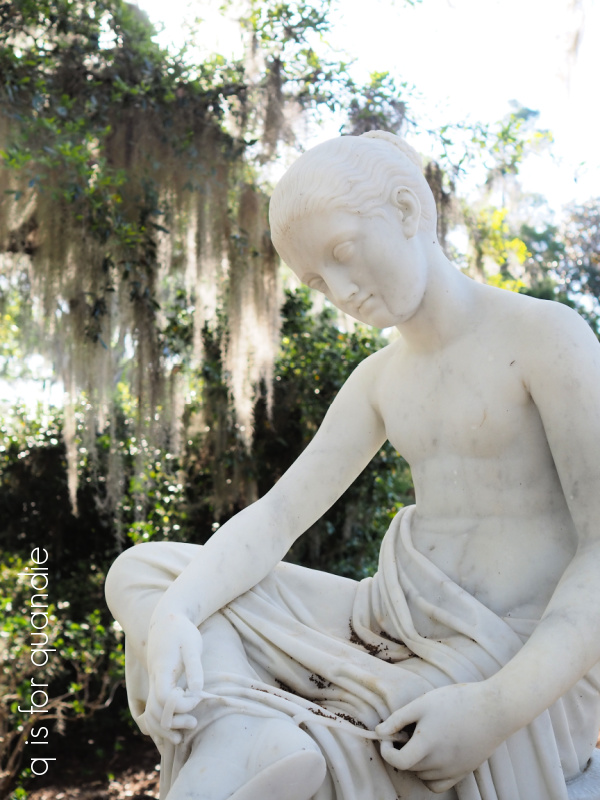
I just love that warm white shade, it has a very vintage look.

Even though I keep these Drop Cloth toolboxes neutral on the outside, I really enjoy adding a pop of vibrant color on the inside.

I find this a great way to use some of those gorgeous colors without feeling like it’s going to limit the marketability of my piece (top row colors: Peony & Flamingo, bottom row colors: Blueberry and Mint Julep).

I often line the bottom inside with decoupage paper.

I find that the Decoupage Décor Tissue Paper from re.design with prima is the easiest ‘paper’ to use for this purpose.  I put ‘paper’ in quotes because this stuff has a texture similar to dryer sheets.  It’s not at all like a flimsy tissue paper.  It doesn’t tear easily (in fact, I don’t think I’ve ever torn it), and it doesn’t wrinkle when you decoupage it.  I use the Dixie Belle flat clear coat as a decoupage medium, but there are lots of options out there including Mod Podge, Fusion’s Decoupage and Transfer Gel, and others.

I don’t always keep the color on the inside.  I’ve painted color on the outside of a few toolboxes too.

Does black count as a color?  Well, maybe not.  But it isn’t white so I’m going to count it.

I didn’t always keep the tray inserts with my toolboxes, but after one of my favorite customers requested that I paint one up I decided why not?

They aren’t that hard to paint, and they do add more functionality to the toolbox.  Especially if you’re using it for artist paints and brushes, or a glue gun with glue sticks.  Plus it adds another layer that I can decorate with transfers, decoupage paper or stencils.

I’m currently working on a couple of toolboxes that I’ll be sharing here next week.  Both came with trays that I’ll be painting up to match.

This one was one of my friend Sue’s finds …

And this one came from my friend Annie …

Both will be for sale locally, so if any of you locals are in the market for a toolbox be sure to stay tuned next week to see how these turned out.

As I was putting this post together, I realized just how many toolboxes I’ve painted in the past and decided that I needed a ‘category’ on my blog devoted solely to toolbox makeovers.  So if you want to see the details on any of these, just look on the right side of the page (if you’re viewing this on a computer) and under ‘sorted.’ where it says ‘Select Category’ simply choose ‘toolboxes’.  I think I may have missed a few, but for the most part you’ll see all of my toolbox makeover posts there.

So tell me, do you have a favorite from amongst them all?  If so, do share in a comment!

when biscuits get vicious.

Whenever I travel, I like to look up local brick and mortar shops that carry the products I like to use such as Dixie Belle Paint, or I.O.D. or re.design with prima transfers.  If a shop carries those products, they also tend to have other things that appeal to me.

So when I was planning our trip to Charleston, I visited the ‘find a retailer’ pages on the Dixie Belle website and the Iron Orchid Designs website.   I ended up finding a shop in Summerville, South Carolina called A Brush of Color that carried the I.O.D. stuff, and another called Antiques & Artisans Village that carried Dixie Belle products.

In addition to that, one of my lovely readers, Victoria, lives in South Carolina and when I asked her for recommendations on things to do she suggested eating at a place called Vicious Biscuit.  I looked them up online and found that they had a location in Summerville as well.

Then I did a little more research on YouTube and learned that Summerville has a self-guided historic homes tour and that you can get a guide and map at their Visitor’s Center.

Well, it seemed like a day trip to Summerville was a no-brainer.  It was also easily accomplished because we had a rental car.  It’s about a 40 minute drive from Charleston, so a car was necessary.

Our first stop in Summerville was Vicious Biscuit so that we could fortify ourselves for the day.

Having lived in the south for a decade or so when I was younger, I developed an appreciation for a good biscuit.  So I was super excited about this place.

There was a bit of a line to get in when we got there, so we knew it was going to be good.

I ordered what I consider one of the quintessential southern breakfasts, and also one of my personal favorites, biscuits and gravy with a scrambled egg on top.

Yum, it was delicious!

By the way, for those of you who have always wondered about the Dixie Belle paint color called Sawmill Gravy, this is what it’s named after.  The sausage gravy that goes over biscuits.

Mr. Q ordered the Vicious Beignets.

He was a little disappointed that these weren’t authentic beignets, but instead were deep fried biscuit dough.  But once he got over that, he loved them.

All I can say is that it seems to be a good thing when biscuits get vicious!  Thanks for that recommendation Victoria!

After filling up on biscuits, we headed to the Summerville Visitor’s Center to grab that historic homes guide.  While we were at it, we picked up a couple of other visitor guides as well.

As it turned out, we had missed their Flowertown Festival by one week (it was the previous weekend).  Judging by the number of porta-potties they still had in town, I’m guessing we dodged a bullet there.  I’m not sure we would have enjoyed dealing with those crowds.

Instead, we pretty much had the place to ourselves for the self-guided home tour.  And that was just fine with us.

All of the homes on the tour were built in the 1800’s including the one above which dates to somewhere around 1885.

One of my favorite houses on the tour was the William Prioleau House.  This house was built in 1896 in the Queen Anne style.  I just love that metal roof, although I’m guessing the rusty-ness of it is probably a bad thing (I’m sorry, but the practical, accountant side of my brain is now thinking how crazy expensive it would be to replace that roof, if you could even find someone willing to tackle the job!).

The Oliver House (below) is well known for its mansard roof and the distinctive circular wrought iron gate leading to the front walk.  It was built in 1888.

The Samuel Lord/Elizabeth Arden House (below) was built in 1891 and is considered more representative of Charleston homes.

This house was purchased by Elizabeth Arden in 1954, and that red door is the door that inspired her Red Door perfume.

I was a little confused when Mr. Q read from the guide and told me this next house was a crack house.

It seemed like a strange thing to put on a historic home tour.  But no, it’s actually the Kracke House and was built in 1886.

The Blake Washington House (below) was built in 1862.

This is a typical plantation style house with wide open porches both up and down that wrap around the house.  I am green with envy over those porches, wouldn’t they be fun to furnish?  If you look closely you might be able to see that the ceilings of the porches are painted in a pale sky blue.

Painting your porch ceiling blue is a southern thing, and I’ve heard two explanations for it.  The first, more pragmatic, reason is that it confuses wasps and/or birds into thinking the ceiling is really the sky so they don’t build their nests there.  But the second explanation I’ve heard is that painting your porch ceiling the color of water was supposed to keep ghosts away because spirits can’t cross water.  In fact, this color is called ‘haint blue’ for that reason, ‘haint’ being a Gullah term for a ghost, or more specifically, a restless spirit.

So, hey, that explains another Dixie Belle color, Haint Blue.

And as a sidebar, my own porch ceiling is painted in this color because I always loved the blue porch ceilings when I lived in the south.

Little did I realize that I was also keeping restless spirits at bay.  It’s a win/win.

After checking out the historic homes, we headed to the first shop on my list, A Brush of Color.

Just from the setup outside, I knew this shop was going to be right up my alley.

And just inside the door I knew I was in the right place.

Doesn’t that look just like something I would do (for those who don’t recognize it, that is a portion of the IOD transfer called Label Ephemera).

And isn’t this buffet gorgeous?

That is the IOD Midnight Garden transfer, and since this shop sold Annie Sloan chalk paint, I’m sure those are Annie Sloan paints.  But you could create a similar blended look using Dixie Belle’s Collard Greens, Kudzu and Spanish Moss.

The shop owner here was super friendly and welcoming.  I chatted with her for quite a while.  Unfortunately her shipment of the newest IOD release hadn’t come in yet, so I wasn’t able to find the newest paint inlay that I am obsessed with (I did order it online when I got home and you’ll see it here eventually).

After checking out a couple of other shops on the main street of Summerville, we hopped into the car and headed to the second shop on my list, Antiques and Artisans Village.  I neglected to take any photos of that one.  It was your typical strip mall location with a big space divided into ‘booths’ for various vendors.  It was mostly antique dealers, which I only enjoy in very small doses (high prices, lots of knick knacks, etc).  They did have a fairly good selection of Dixie Belle products though.

One last thing before we leave Summerville.  I just had to share this …

We saw this near the park, and I have to admit it brought a tear to my eye.  What a sweet gesture and a lovely way to remember a beloved pet.

After drooling over the window boxes, taking the hidden alley tour, walking around south of Broad, and visiting Middleton Place and Summerville, the last half of our Charleston vacation was spent at the beach.  I’ll have one last post next week about that, so stay tuned for that.

Typically in the past when I’ve traveled I’ve brought home something to give away here on the blog, but I neglected to do that this time.  But that doesn’t mean I can’t still have a Charleston themed giveaway!

It was easy to find lots of options in the Dixie Belle paint line that were appropriate.  I debated including Haint Blue, Sawmill Gravy, or Collard Greens but I ended up with these three colors; Kudzu, Antebellum Blue and Spanish Moss plus one of their flat medium brushes.

The rules:  Simply leave a comment on this blog post letting me know what has been your favorite post about Charleston to be eligible to win.

Your comment must be left on this blog post, not on Facebook or Instagram.  You are not required to follow my blog, although it would be awesome if you did!

I will randomly draw the name of a winner for today’s prize from all of the comments left on this post by Sunday, May 15, 2022 at the stroke of midnight (U.S. Central time).

The fine print: no purchase necessary, you must be 18 years of age or older to win, void where prohibited by law, the number of eligible entries received determines the odds of winning, approximate retail value of prize is $95, if the prize is not claimed by Friday, May 20, 2022 another name will be drawn at random to win, blah, blah, blah.

Thank you to Dixie Belle Paint Co for providing the paint I’m giving away today.

the festival of garage sales.

The Bryn Mawr neighborhood garage sale in Minneapolis has traditionally been the one that kicks off the summer garage sale season for me.  I can’t even remember when I first started going to this sale, but I’ve been going to it for a long time.

Then, along came COVID in 2020 and of course Bryn Mawr was canceled.  I was hoping it would be back in 2021, but it wasn’t.  But this year, it was back!

This sale is officially called the ‘Festival of Garage Sales’ and with good reason.  It does feel like a festival.  Especially this year.  It was packed with party-goers, um, I mean garage salers.

It’s not just the crowds that make it feel like a festival.  It’s also the food truck, and the police officer directing traffic, and the people having a tailgate party with snacks and drinks, and definitely the guy serving margaritas.

I really typically don’t come home after Bryn Mawr with a ton of finds, but it’s just so much fun to go to this sale.  Really, it’s the people that make it so fantastic.  There was the guy who was drinking a glass of wine at 10 a.m. because he asked his wife to bring him a drink expecting water, but she brought him wine.  Why not?

And then there were the ladies who were explaining what a peach emoji represents, which drew us into an entire conversation about the not-so-secret meanings all of the various fruit and veg emojis.

My sister and I also ended up in a 15 minute discussion of the pros and cons of the various Disney World resorts with the guy wearing a Disney World t-shirt who admired the vintage Mickey t-shirt my sister was wearing (FYI fellow Disney fans, he swears that the Be Our Guest restaurant is well worth the money despite what everyone says online).

I purchased a vintage American flag on a pole from a guy for $5 and as I was handing over my money he explained that he had a hard time pricing it because how to you put a price on patriotism?  Well, apparently it’s worth about 5 bucks these days.  He told me not to use it as a weapon and I promised that storming the capitol wasn’t really my style.

All joking aside, I am calling this my ‘find of the day’.  Not because I’m all that into flying the American flag (and in fact will be selling this one), but simply because it has this beautiful vintage quality.  The soft cotton fabric is gently faded, but not torn or tattered.  And then there is also the fact that my friend Sue had found some vintage metal flag pole brackets for me recently, so now I have the vintage flag to go with one of them.

We don’t normally get to see inside any of the houses during the Festival of Garage Sales, but this year one house was having an estate sale and everything inside was for sale.

I just had to snap a few photos of the attic because it was like taking a step back in time.

It was tiny, but it was filled with vintage trunks.

You just have to wonder how long these trunks had been stored up there, untouched.

As well as what kinds of voyages they’d been on.

In addition to Bryn Mawr (which is a Saturday only sale), I also spent some time at a couple of other local neighborhood sales on Thursday and Friday.  Now that I’m retired I can scoop up some of the bargains I always missed out on as a working stiff.

Here are the majority of my finds from the weekend.

Runner up for find of the day is this adorable Scottie dog boot scraper.

The price was right on this set of 4 canisters …

and I recently purchased another set of the I.O.D. Traditional Pots transfers so I’d been looking for more white ceramic items for the blue ones.

I made quick work of washing these up and adding the transfers.

I have to admit I mainly was drawn to this Watkins Household Hints book because of the color.

I also have this idea of putting together a grouping of stuff that will include this book, but I’m still working on it.

I think I mentioned last week that I’m grabbing vintage books in red and green for the Christmas season.  Well, red and navy works for 4th of July too.

I just have to share the book on the top of that pile especially.  This is one that my friend Sue found for me …

This was published in 1920, and FYI, it’s not at all valuable.  I see it for sale online for $10.  I just think the title is amusing, wouldn’t it make a great gift for a farmer?

I really don’t know why I was drawn to these fish shaped pâté molds.

The guy selling them said he used them as Christmas tree ornaments one year.

I found a tackle box that I’ll eventually paint …

and I purchased that black oval tin because apparently I have a weakness for oval tins.

That stack resides in my pantry, but there isn’t room for a 4th one to be added to the stack where it is.  So now what?  Clearly I’m going to have to re-arrange the pantry again.  Or maybe I’ll part with that striped one on the bottom.  I’m not sure.

By the way, I painted the pink one in the middle (here’s that post if you’re curious about the process).

If you’re wondering about the 3 canning jars filled with a brown liquid in my first photo, that’s syrup.

The Lakedon’s from Lakedon Family Syrup had a table set up at Bryn Mawr to sell their pure maple syrup.  They had three grades available and were kind enough to let us test taste all three to see the difference.  I hadn’t realized that there were specific grades of maple syrup, or that you could easily taste the difference.

Both my sister and I ended up purchasing three different grades; golden, amber and dark.  The Lakedon’s pointed out that the dark version has a stronger taste similar to molasses and is perfect added to baked beans.  Yum!  Can’t wait to try that.

I did bring home a few larger pieces; a vintage dry sink, a pair of small wooden benches, and a huge pot that I’m going to use patina paint on.  But it was raining yesterday so I decided against hauling them out of the carriage house to get photos.  I’m sure I’ll be sharing all of those projects with you as they get completed though.

So, I’m curious, what would you choose as the find of the day from my weekend haul?  Leave a comment and let me know!

a small craft advisory.

Back when we were on vacation in Charleston, we were watching the weather report one day and they mentioned that there was a ‘small craft advisory’ in effect.  I hadn’t heard that terminology in years, probably since I lived in Florida.  Although we have plenty of people with boats on lakes here in Minnesota, it’s not quite the same thing as ocean going vessels.

Anyway, when they said it, Mr. Q said ‘that sounds like it should be the title to one of your blog posts!’

What a clever idea.  I made a note of it in my phone.  And lo and behold, it seemed appropriate for today’s post.

I’m about to share a very quick and easy update to a metal bin today, so consider this your ‘small craft advisory’.

I’ve had this particular container in my pantry for years.  I’m sure that I originally purchased it from a garage sale, but I don’t remember when, where or how much I paid.  It started life in copper, and who knows what I kept in it back then.

This is the best I could do for a true ‘before’ photo.

Yikes!  Who remembers my pantry in its ‘before’ state?  I’ve shared it here in the past.  It was not pretty.  It was behind a closed door most of the time back then.

Here is how the pantry looks now (to see the full transformation of this space, check out this post).

As part of the pantry makeover, I decided to paint the container in that everyday kitchen green color.

Copper just didn’t work with my color scheme out there.  I painted it using a fancy spray paint that I got at Michaels, I’m fairly sure that it was the Liquitex Chromium Oxide Green 6, but I’m not 100% positive about that.  FYI, it has held up beautifully, even on a metal canister with a very tight fitting lid.

Well, recently Mr. Q and I purchased an air fryer from Amazon.  When it arrived, it was too big to fit inside any of our kitchen cupboards, or in the other pantry/closet we have next to the kitchen, so that left finding a spot for it in my pretty pantry.

I’ll just go ahead and admit it, I tend to value form over function.  I love the way my pantry looks.  It does serve a function as well though.  We store toilet paper, kleenex, cleaning supplies, cat food, extra coffee pods, and other pantry items in it.  For the most part these items are kept inside pretty containers.  Generally, if I can’t put it in a pretty container, it gets stored somewhere else.

So I’m not super happy about ruining the carefully curated look in my pantry with a big, black, shiny appliance.  But sometimes I guess function has to win out.  In order to make room for the air fryer, something had to go from the pantry.  And after a process of elimination, this container is the item getting the boot.

I decided I may as well snazz it up a bit and then try to sell it.  So I gave it a good cleaning, and then I added a section from I.O.D.’s Label Ephemera transfer to the front.

I added a couple of coats of Dixie Belle’s flat clear coat over the transfer to protect it.

Then I cut out a new label from some pretty floral scrapbook paper and added the “PARIS,” which is also from the Label Ephemera transfer.

What a difference a little transfer can make!

I love how it turned out, but since it seems likely that we’re keeping the air fryer, I don’t have a spot for this anymore.

So it’s up for grabs.  If you’re local, and in need of a pretty container to stash things in (please note, it is not food safe), check out my ‘available for local sale‘ page for details.

I’m curious, which do you tend to value more, function or form?  Do you want things to look pretty at the expense of functionality (like me!), or are you more practical?  Leave a comment and let us know!


the best laid plans.

One thing I don’t think I’ve mentioned about our recent trip is why we originally chose to visit Charleston in April.  The timing was supposed to coincide with the blooming of the azaleas.

According to my research, azaleas bloom anywhere from mid-March to late April in South Carolina.  I was never able to take a trip during azalea season while I was employed because that was also the exact timing of our annual audit.  So one of the items on my post-retirement bucket list was a trip to see the azaleas in bloom (another is a trip to the Netherlands to see the tulips in bloom, maybe next year?).

But as all of you gardeners out there know, the timing of spring blooms can be somewhat unpredictable.  The weather can have an impact, it can depend on how soon things start to warm up.  So even though we visited Charleston the first two weeks of April, we pretty much missed most of the azaleas, except for that little patch of them in Waterfront Park that I shared earlier.

  I suspect that the storm we flew in on (with torrential rain and high winds) didn’t help either.

My grand plan for viewing azaleas included a trip to Middleton Place, the oldest landscaped gardens in America.  The gardens were originally laid out in 1741 and they were inspired by the gardens at Versailles.

Here is how I was picturing the gardens at Middleton (photo borrowed from the web) …

And here is how they actually looked.

Well, you know what they say about the best laid plans …

And although I was disappointed to have missed the azaleas, I definitely was not disappointed with our visit to Middleton Place.

You have to remember that when we left home there was still snow on the ground, and actually, it was snowing when we returned home too!  So I was quite happy to wander around these gardens and just admire the green.  The fact that is was also a gloriously sunny day and around 70 degrees didn’t hurt either.

It was not crowded at all the day we visited.  Probably because most people were aware that the azaleas were done.  I suspect that when the azaleas are at their most magnificent, the place is packed.

There were a handful of azalea blooms here and there, and a few of the camellias still had flowers as well.  So I did see some color.

But Middleton Place is definitely worth a visit even if there isn’t anything blooming.

There are 110 acres full of paths, formal gardens, and secret gardens to explore.

Just beware that, as all the signs say, the gators are real.

Yikes!  I have to admit, those guys freaked me out a little.  But they pretty much seemed to be minding their own business, and we didn’t get too close to them.

Prior to the civil war, the house at Middleton Place consisted of a main center building with a ‘flanker’ on either side.  It was burned down by union troops in 1865.  The south flanker was the least damaged and thus was repaired and continued to function as a home until 1975 when it was turned into a museum.

It’s certainly a lovely building, but probably not quite what you picture in your head when you hear ‘plantation’.

You can pay extra for a guided tour of the inside (which is the only way to get inside), but we chose to forgo that.

You don’t have to pay extra to explore the stable yards which serve as an open air museum with costumed artisans explaining the functions of the various buildings and the craftmanship of the era.

We chatted with the blacksmith who showed us how they made nails, the cooper who was making wooden buckets, the potter who was making clay pots, and the seamstress who was spinning wool.  All four of them knew a lot about their craft and it was very interesting to visit with them.

They also have livestock including cattle, goats, sheep, pigs and horses at Middleton.

Now you know I’m always keeping an eye out for furniture inspiration, and I found some in the candle making building.

Isn’t that an awesome chippy cupboard?  I love the zinc top that is nailed all around the edge.

Despite missing the azaleas, I enjoyed visiting Middleton Place.  However, if you’re looking for a more traditional visit to a “plantation” while in the south, this may not fill the bill.  There are a few other options in the area including Drayton Hall and Magnolia Plantation.

Do you have any recommendations to share with others?  If so, be sure to leave a comment and let us know!

check the box.

Aside from the occasional winter estate sale here and there, I got in my first real bit of garage saling this past weekend and I’m so excited that garage sale season is finally here!  OK, maybe not quite in a big way yet, but in dribs and drabs.

My picker Sue gave me a heads up on a sale taking place nearby last Friday while I was out plant shopping with my neighbor, nnK.  So we headed over there after purchasing our plants.

I didn’t find a ton of things, but I did come home with these items from that sale …

First up, I grabbed that vintage camera.  It was priced a little higher than I wanted it to be, but I purchased it anyway.  I didn’t realize it was brown rather than black until I got it home and was cleaning it up.

Boy, it’s really hard to see that it’s brown even in that photo.  You’ll just have to trust me.  It’s dark brown rather than true black.

I won’t be hanging onto this one, I will be taking it into the shop to sell.  My non-collection of cameras is mostly black.  Although I guess I do have one brown one, the Brownie Holiday camera is also dark brown.

I hang onto this one to use for staging photos around holiday time, although looking back it doesn’t seem as if I’ve ever remembered to do that.  Hmmmm, I need to work on that.

And speaking of photo props, I snagged the vintage, green handled garden clippers to use for that purpose as well.  They were 50¢, how do you pass that up?

I plan to keep an eye out for red and green vintage books this summer at garage sales.  I will hang onto them until Christmas and then sell them as sets.  They work great for elevating Christmas village pieces …

But also, well, the book called The Boy Scouts to the Rescue is just kind of fun.

Finally, I couldn’t resist the box because I thought the zinc lining was kind of cool.

I have no idea what the original purpose of this box would have been?  nnK suggested it was for storing one’s plutonium.

I’m pretty sure that’s not it.

Could it be a milk box like this example on chairish?  Priced at $275!  What?!  Anyway, it does seem feasible that this box could have been for milk.  It seems like the right size for bottles of milk.  Do any of you have a better idea what it might have been used for?

Well, regardless of the original purpose, there is some water damage at the bottom of the box.

So I decided to paint it.

I mixed up some Homestead House Milk Paint in Algonquin.  If that color sounds familiar to you, it might be because there is also a Fusion paint by the same name (Homestead House is the parent of Fusion).  I brushed two coats of Algonquin onto the box.  I specifically chose to use milk paint because I wanted a chippy look.  So once the paint was dry, I sanded lightly with 220 grit paper but there was no chipping.

No worries, I can fake it with tape.

I always start out with the yellow Frog tape when I’m using this technique.  This is the tape for delicate surfaces, so it has minimal sticky-ness.  I have run into pieces where the yellow tape won’t pull off any paint, and then I switch up to regular masking tape.  If that still doesn’t work, I’ve even been known to use duct tape … but those instances are few and far between.

All you have to do with the tape is press it onto your surface randomly and then whisk it back off again.  It’s a lot like using tape to remove cat hair from your favorite black trousers (I have a fair amount of experience with that too).  Just use caution and go slowly, especially with that first strip of tape.  It can surprise you and pull off more paint than you think it will.  Go slowly and get a feel for it as you go.

Next up I added a coat of Dixie Belle’s flat clear coat before adding some I.O.D. transfers.  If you have chippy paint, sometimes the paint will stick to your transfer (much like with the tape), rather than the transfer sticking to your surface.  In fact, even though I’d taken the precaution of adding the clear coat, I still had this happen in one little area …

I lost most of my ‘S’ and a little bit off the end of that flower bud above it.  I should have let my clear coat dry longer before applying the transfer, but I’m an instant gratification sort of gal.  I can’t make myself wait the recommended 24 hours before adding a transfer.

So, to be on the safe side, let your clear coat dry overnight if you’re going to be adding transfers.  Or, if you’re willing to live on the edge, do as I do and wing it.

Just be prepared to live with the consequences.

And P.S., I used sections from both I.O.D.’s Label Ephemera and their Floral Anthology transfers on my box.

This box is for sale if any of you locals are interested (you can store your plutonium in it!).  Check out my ‘available for local sale‘ page for more details.  I’ll likely take it into the shop in the next week or two.

We had stopped off at one more sale before heading back home that day, and that’s where I found another wooden box.

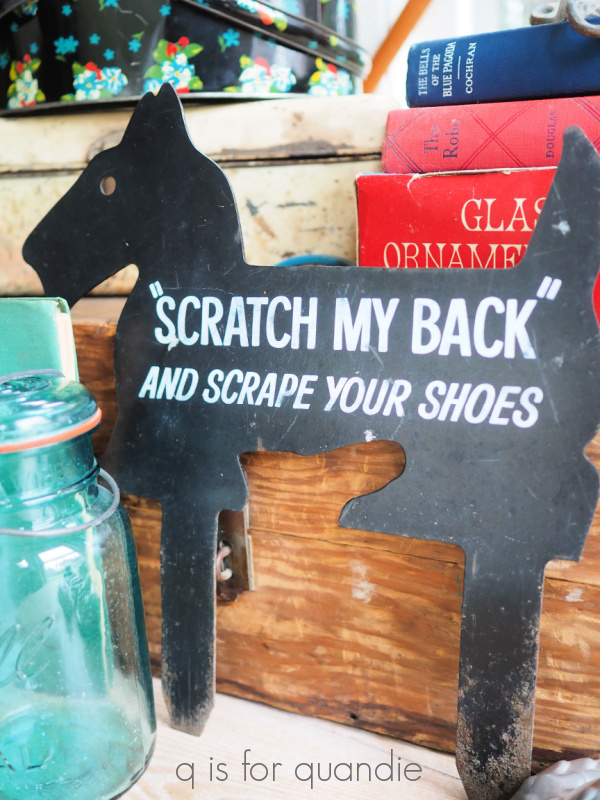
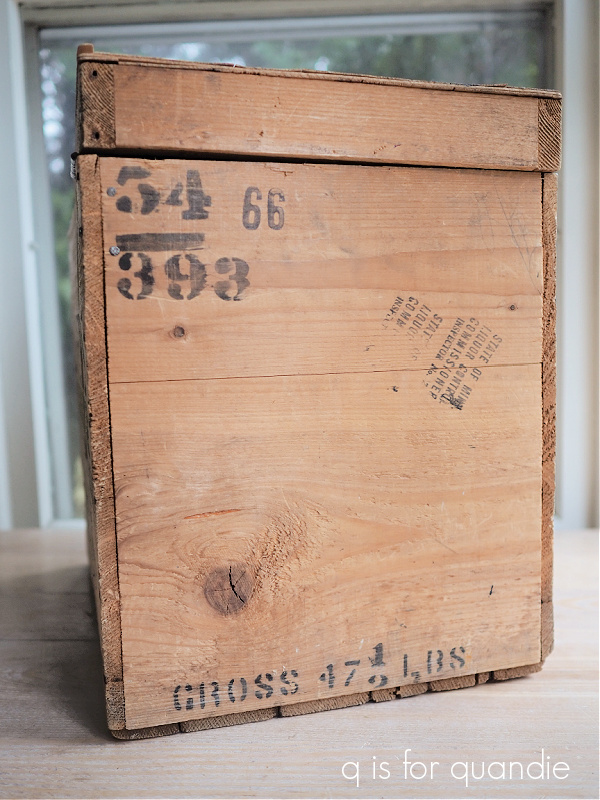
This box came filled with everything needed to shine your shoes.  There were something like 10 brushes for various colors of shoe polish, multiple tins of dried up shoe polish, and lots of well used polishing rags.  I tossed all of that.

When I initially grabbed this box I definitely planned to paint it.

But when I looked at it more closely, I thought the markings on the sides of the box were pretty cool.

And I really liked the back of the box too.

So I’m kind of loathe to cover all of that up.

But I don’t love the front of the box, and the top lid is in pretty rough shape.

As is the inside …

So here are some options I thought of …

□ option no 1 – I could paint the interior of the box, and the lid, but just clean up and wax or hemp oil the rest of the box.  But what color?  Black, green, dark grey?

□ option no 2 – I could do the painting in option no 1, and then also re-attach the lid facing the other way so that what was the back of the box becomes the front of the box (because I much prefer the graphics on the back of the box).

□ option no 3 I could remove the lid from the box entirely.  Paint the interior of the box black or grey, clean up and wax the exterior, but leave it unpainted.

□ option no 4 – I could paint the whole shebang, inside and out, and dress it up similar to the zinc lined box.

This is where you come in.  Which box would you check?  Option 1, 2, 3 or 4?  Or do you have an option 5 that I should consider?  Leave a comment and let me know.