

I promised to share some toolbox updates with you this week, and here is the first one.
My friend Annie gave me this toolbox.

She’s seen some of my toolbox makeovers here on the blog, so she thought I could do something with this one. And she was right!
I started out with my usual prep; a good cleaning with a grease cutting cleanser (Dawn dish soap in this case), a light sanding to remove any flaking paint and to scuff up the surface, then two coats of Dixie Belle’s B.O.S.S. to slow down any rust or other things bleeding through the paint.
Once I had that done, I painted the interior and the tray in two coats of Dixie Belle’s Kudzu. Then I added the I.O.D. Rose Chintz inlay to the bottom of the tray.

I just love this green! And I love how the pinks in the paint inlay pop in contrast.
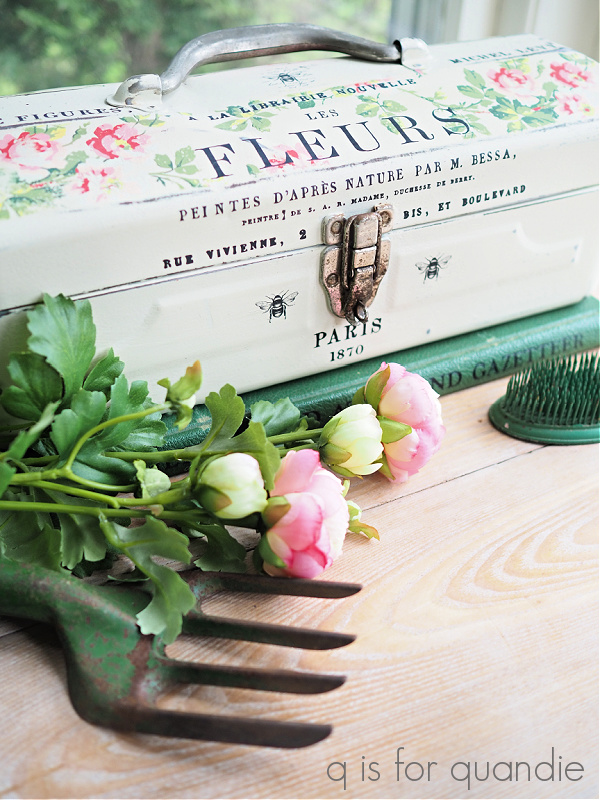
Next up, the exterior got two coats of DB’s Drop Cloth.
Initially I planned to use just transfers to dress this one up on the outside, but ultimately I decided to add some of the paint inlay to the top also.

This required a fresh coat of paint in each of the areas where I wanted the inlay, but that was no big deal. To accomplish this, I cut the inlay sheet to size for those two strips before applying. For more details on using the inlays, check out my how-to post.
Once the inlay was dry I coated those areas with Rustoleum spray matte sealer. Keep in mind that paint inlays are re-activated with water, so using a water based sealer with a brush may cause the inlay to smear. Also, sanding the inlay without sealing first will allow the colors to smear as well. So always seal your paint inlay after it’s dry and before moving on to your next step.
I sanded fairly heavily over the inlay to give it a more faded appearance. It also would have worked well to use a section of the inlay paper that had already been used once, but I didn’t have any that were long enough for these two strips.

I absolutely love the authentically distressed look I ended up with.
![]()
Next up I added some bits and pieces from I.O.D.’s Label Ephemera transfer,
![]()
and a couple of tiny bees from re.design with prima’s French Maison knob transfers.

I absolutely adore the shabby chic vibe of this toolbox now.
Isn’t it pretty?
This is normally the part where I say, if any of you locals are interested, be sure to check out my ‘available for local sale’ page for more details. However, this toolbox was spotted by a different Annie and it seemed meant for her. So this one is already spoken for.
As always, thank you to Dixie Belle Paint Co for supplying the B.O.S.S., paint and sealer I used for this project.

What a gorgeous transformation!
LikeLike
Thanks Netti!
LikeLike
I think this is my all time favorite toolbox redo! Great job with the inlays-they can be a bit fussy to work with.
LikeLike
Trying out the inlays on something small like this is a great way to get your feet wet, and I agree, this might be my all time favorite to date as well!
LikeLike
Love it! It’s a summery-vintagy box!
LikeLike
Thanks Olga!
LikeLike
I am semi obsessed with these toolboxes too!
LikeLike
You just can’t help it, right?
LikeLike
Such a pretty color combination! This is one of my favs of all your toolboxes!
LikeLike
I just love the green, pink and warm white. Takes me back to my preppy days in the early 80’s.
LikeLike
I love this! You are so creative and talented!
LikeLike
Thanks so much Sarah!
LikeLike
Well this is sooooo pretty Miss Quandie! I just love it! You’re able, with your skillful eye, to combine so many different elements to this smallish piece and to have it turn out beautifully…….a beautiful mash-up (-: The Two Annies toolbox!
LikeLike
Thanks so much Connie!
LikeLike
My favorite so far! I still love me some shabby roses!!
LikeLike
Me too! I don’t have many left in my home décor, but this little toolbox would add the perfect pop of them somewhere 😉
LikeLike
Love this one too! The contrast when you pop open the box is fabulous!
LikeLike