holiday toolbox roundup.

While I’m off enjoying the sunshine in Puerto Vallarta, I thought I’d just share a quick recap of all of the Christmas themed toolboxes/tackleboxes/lock boxes that I’ve created over the past several years.

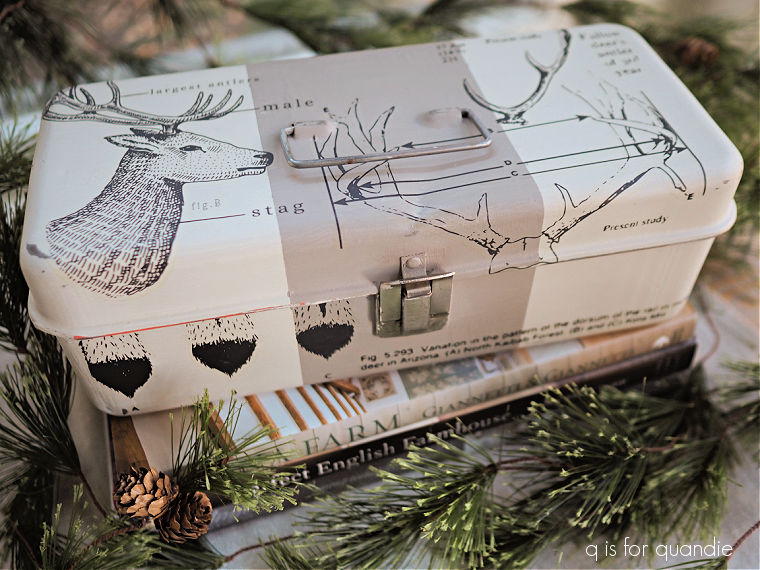
I started making Christmas themed-ish boxes back in 2019 with this Oh Deer tackle box.

It wasn’t overtly Christmas themed, but featured reindeer from re.design with prima’s Oh Deer transfer.

I really wasn’t sure if this sort of thing would sell.  And in fact, I didn’t even try to sell this one.  I included it in a giveaway here on the blog.

I ended up making a 2nd similar toolbox that I did try to sell, but it didn’t go.

I ended up giving that one away a year later.

I made up this next toolbox as a secret Santa gift in 2019.

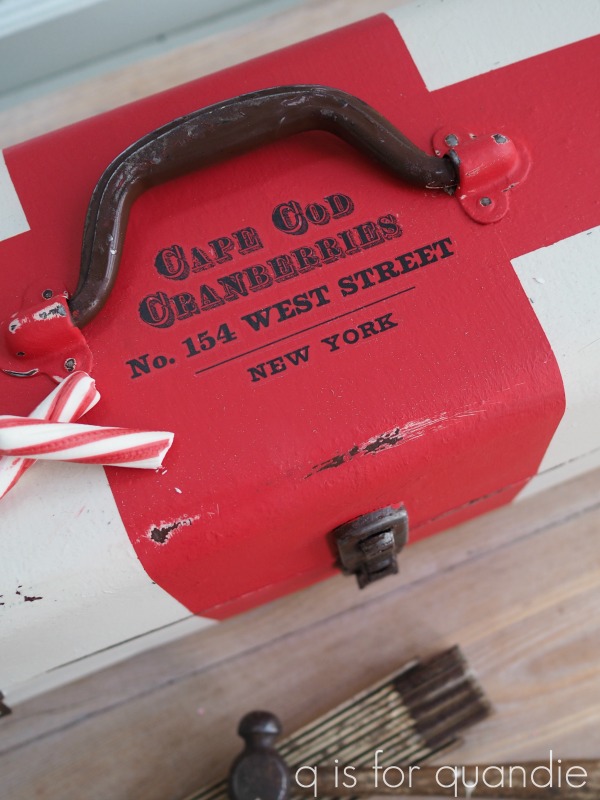
It also doesn’t have an overtly Christmas look to it, but it’s hinted at with its red and white color scheme and the re.design with prima Classic Vintage Labels cranberry transfer.

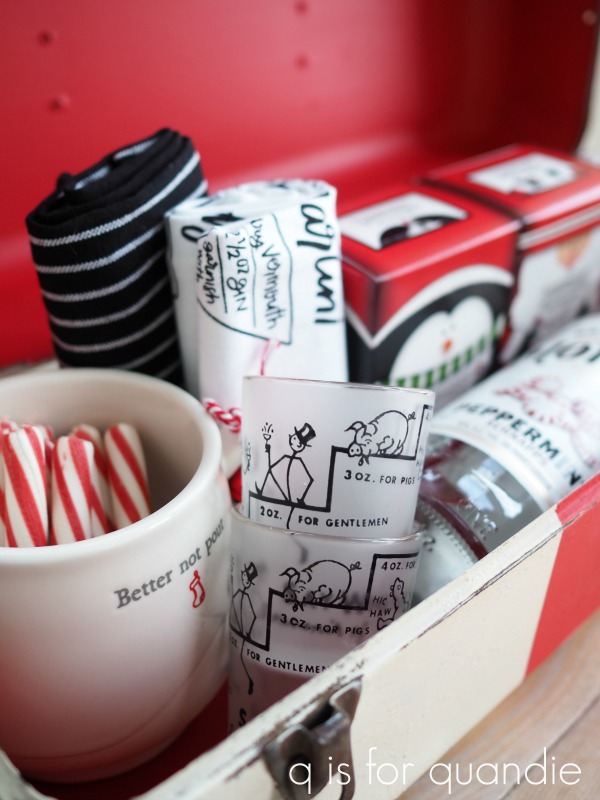
The contents had a peppermint theme which made it more Christmas-y as well.

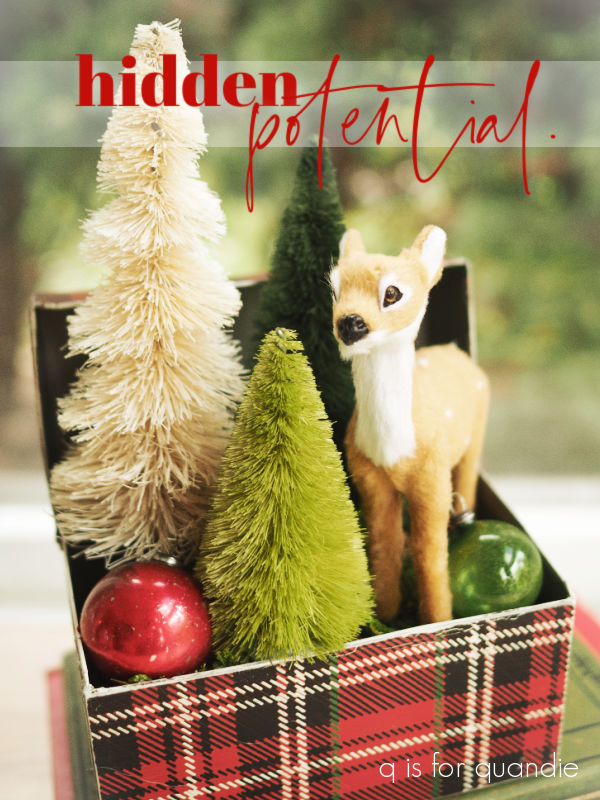
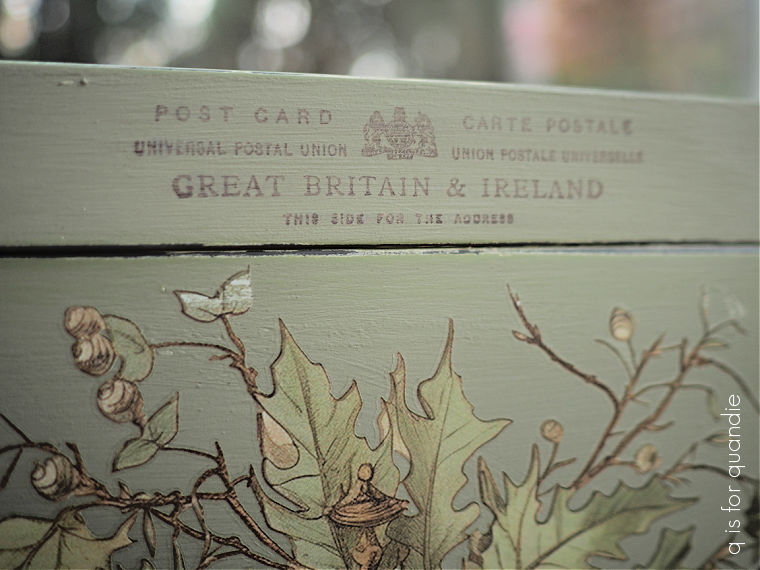
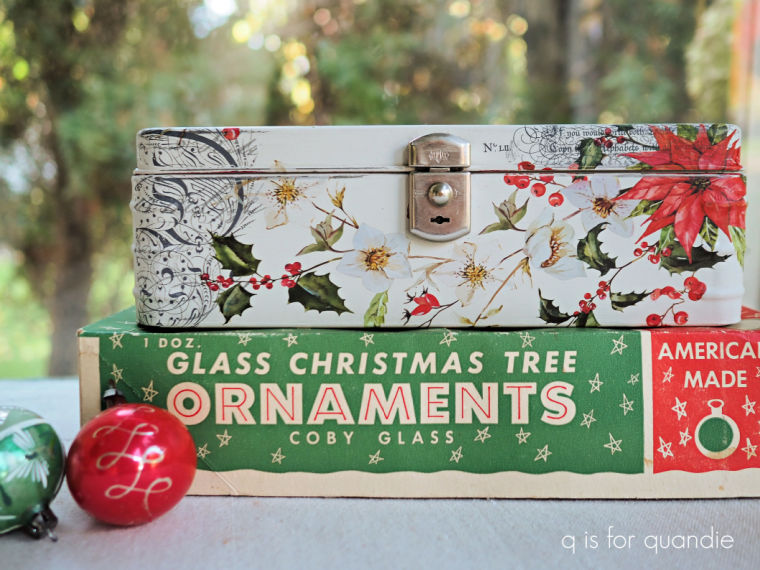
It wasn’t until October 2022 that I decided to go all out with a truly Christmas themed box.

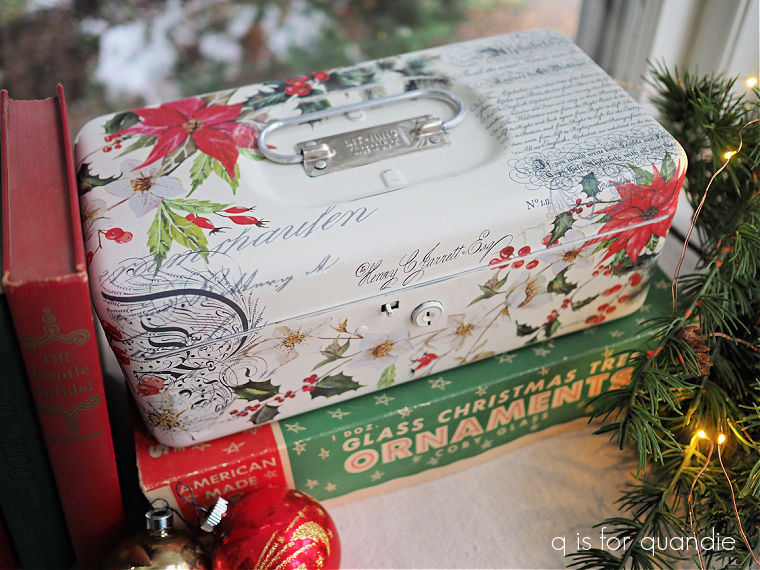
When I posted about it here, I mentioned that I purposely chose a simple unassuming lock box, rather than a larger toolbox, because I really wasn’t sure if I would like it.  I also really wasn’t sure if there would be a market for a Christmas themed box.

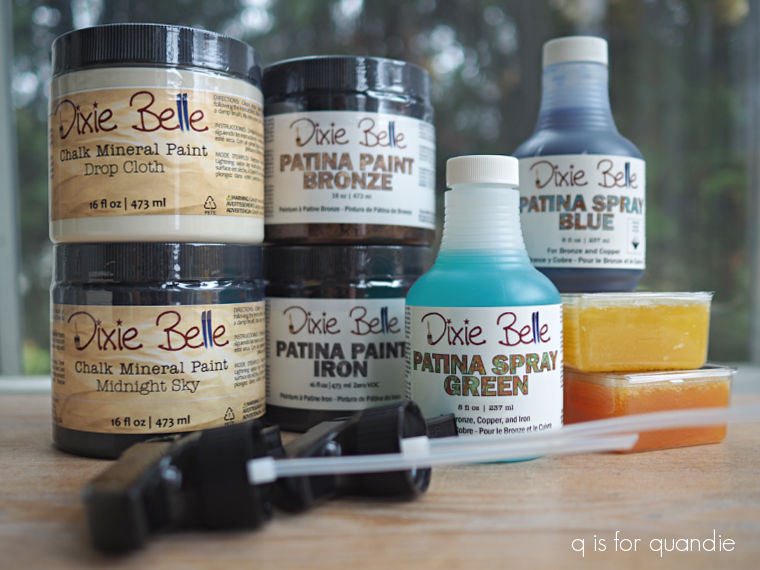
I used two Dixie Belle transfers on this one, Evergreen and Holly and Vintage Post.

And of course I loved it.  Plus it sold rather quickly so I thought perhaps Christmas themed boxes would be good sellers after all.

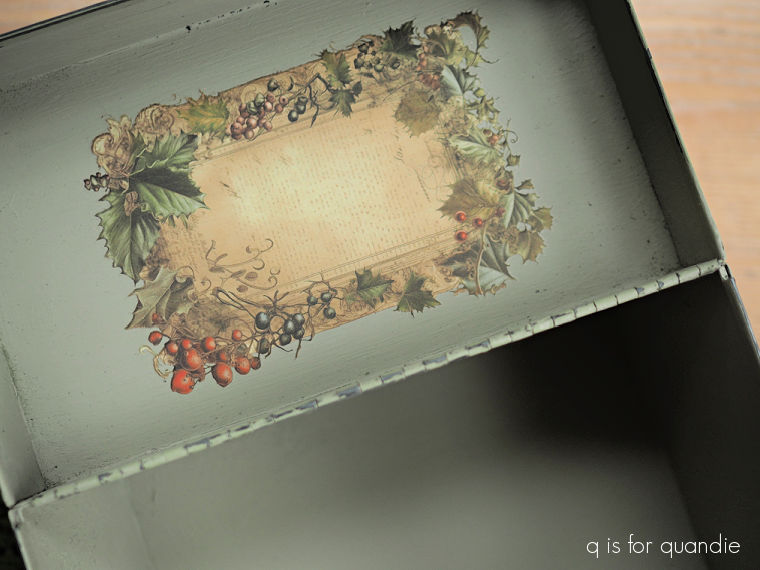
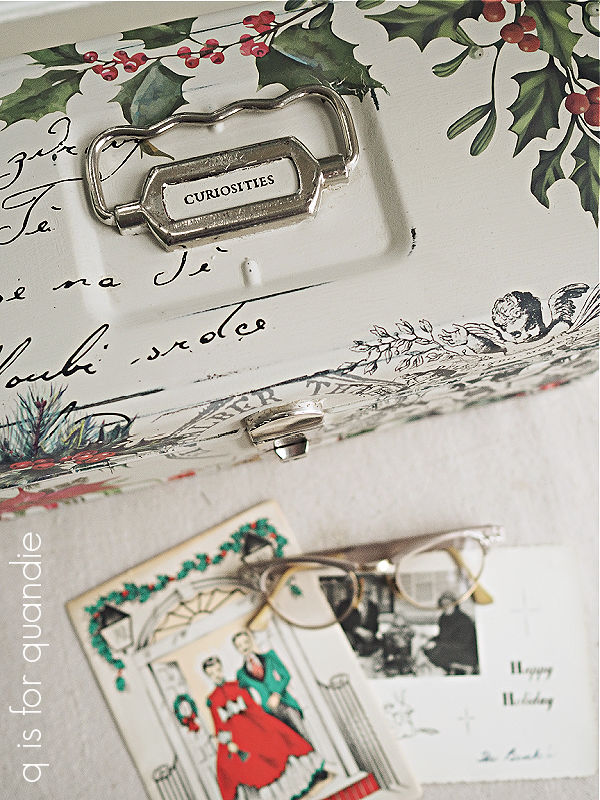
So the following month I made up another one with different segments from the same two Dixie Belle transfers, the Christmas Curiosities box.

I still have yet to find another transfer with Christmas florals that I like as much as those in the Evergreen and Holly transfer.

This one sold fairly quickly as well.

Fast forward to the 2023 holiday season.  One of my favorite readers asked if I would do a custom lock box for her.

At the time I was all out of the Dixie Belle Evergreen and Holly transfer, but she had one herself.  So in exchange for creating her custom box, she let me keep any of the transfer I didn’t use which was a definite bonus.

And technically I guess you can count that one as sold before I even made it.

I used some of that leftover Evergreen and Holly on this Christmas Tackle Box.

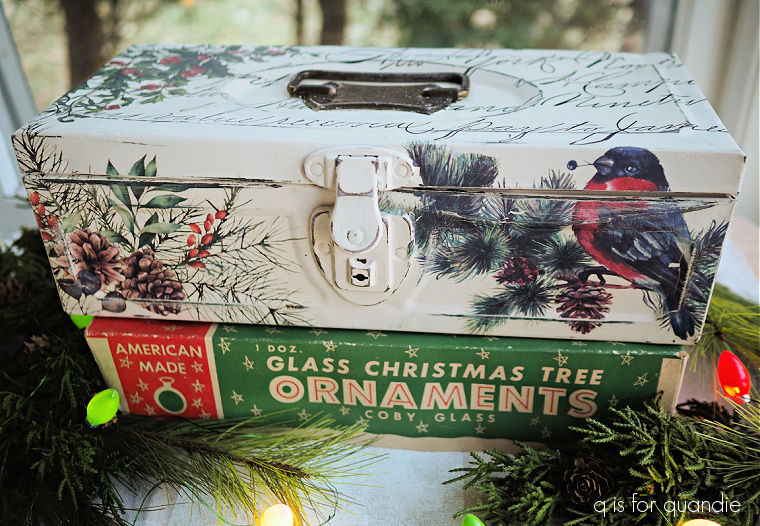
I painted the inside of this one in Dixie Belle’s English Ivy.

As of the last time I checked, this one has still not sold.  I did bring it into Reclaiming Beautiful (the shop where I sell on consignment in Stillwater, MN) a few weeks ago.

I also created the Candy Cane Toolbox in 2023.

I used elements from the I.O.D. Candy Cane Cottage transfer on this one.

This one sold rather quickly.

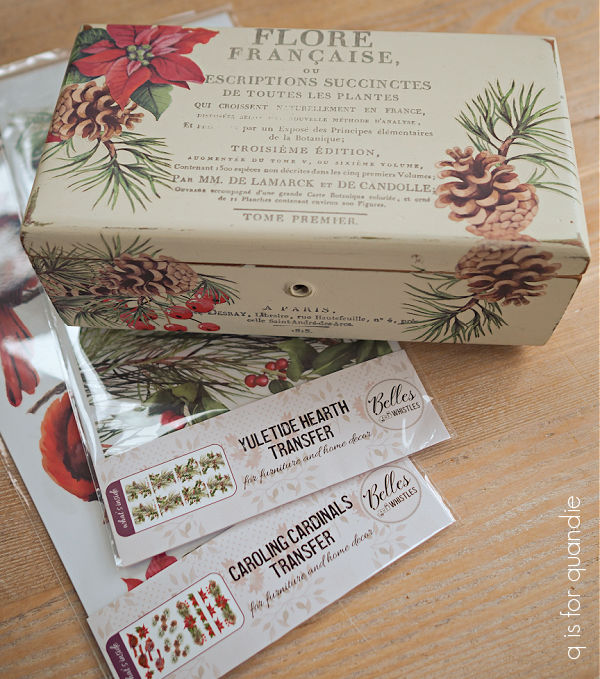
This year I ordered two of the new Dixie Belle Christmas transfers, Yuletide Hearth and Caroling Cardinals …

and I used them on a Lane cedar box and a tackle box.  Don’t get me wrong, they are both nice.  But in my opinion, not as pretty and also not as versatile as the Evergreen and Holly transfer was.

I also added a stencil to a toolbox this year.

I love how this one turned out, but last I checked it hasn’t sold yet either.  There is still time this year, so we’ll see what happens.

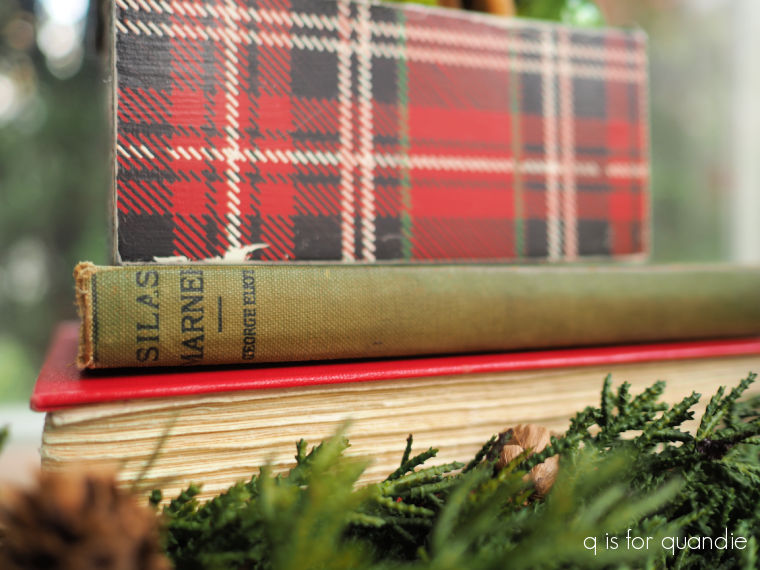
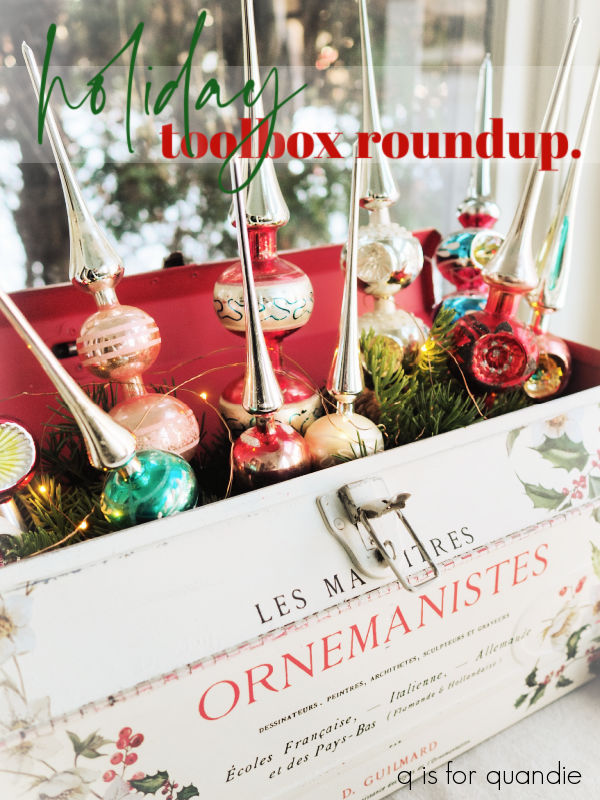
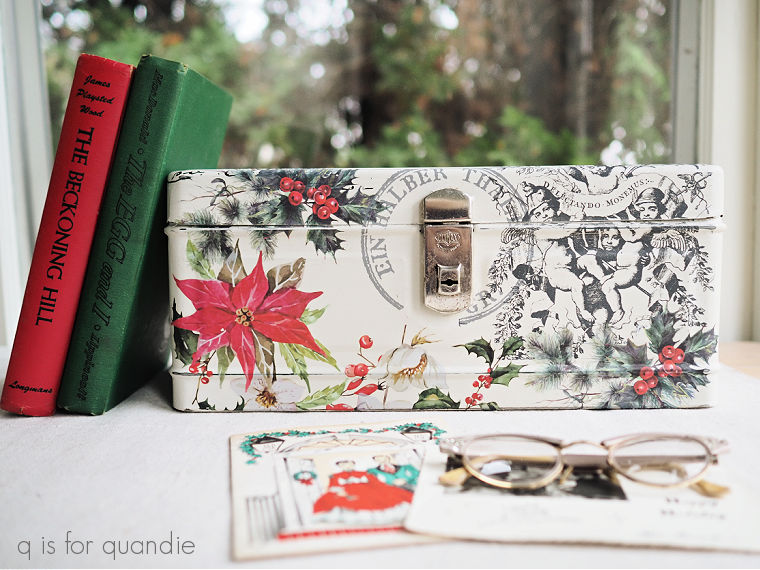
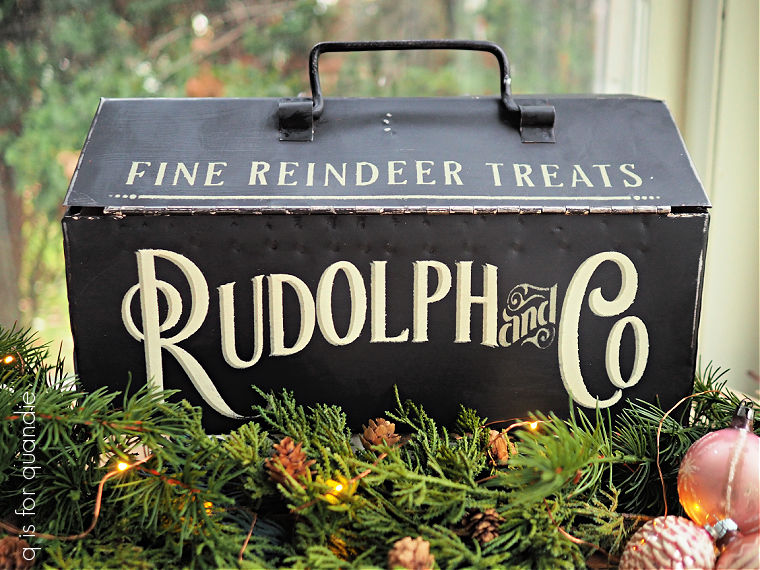
I’ve saved my all time favorite Christmas toolbox for last, and that’s the tree Topper toolbox from November 2022.

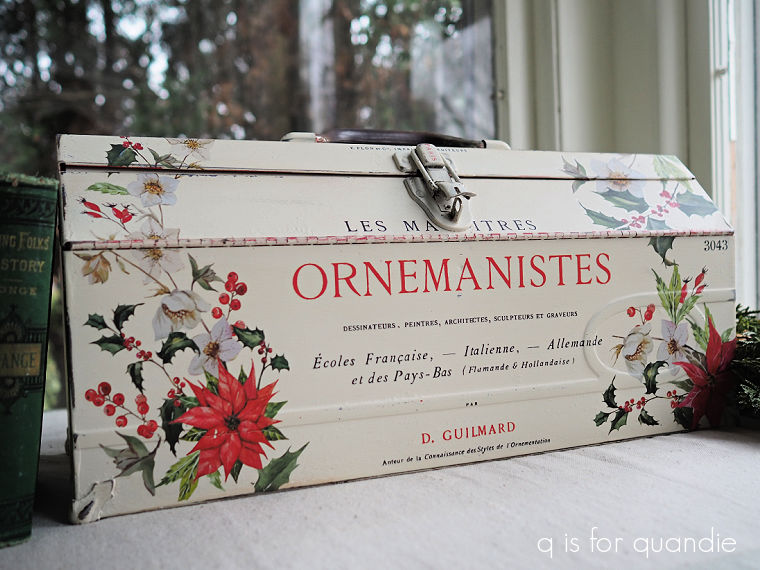
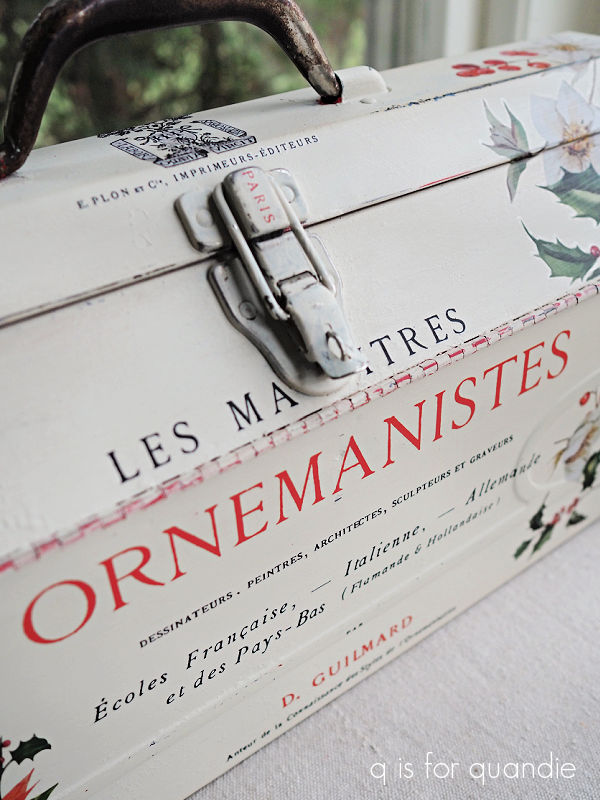
The red and black wording is from the I.O.D. Cosette transfer, and it has nothing to do with Christmas.  But the red wording was perfect, and “ornemanistes” is French for one who ornaments, in other words a decorator.  So that seemed somewhat apropos.

By the way, complete sidebar here, as I was researching this post I found that this entire segment of the Cosette transfer is from a book from 1880 (you can see it here).
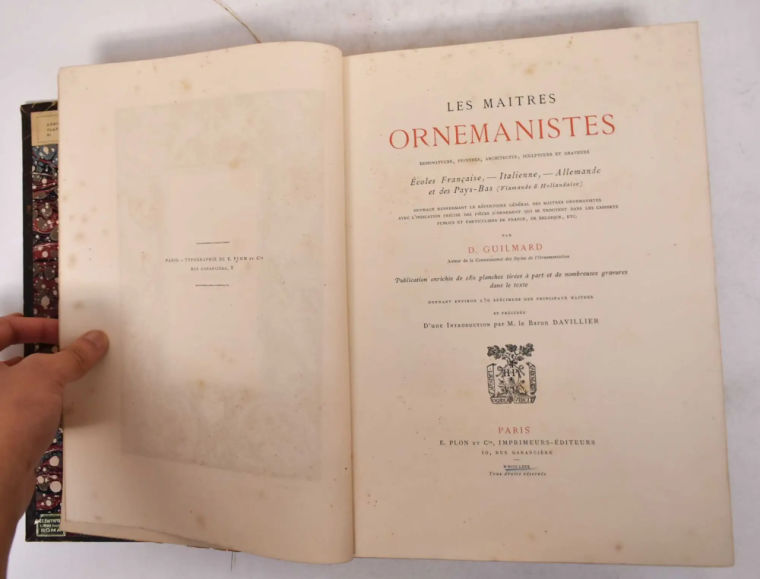
Who knew?

Anyway, the holly and poinsettia florals on this toolbox are also from my favorite Dixie Belle Evergreen and Holly transfer.

As much as I love this particular look, I have never recreated it on another toolbox.  Mainly because the cost of the Cosette transfer is about $40 .  The full Cosette transfer looks like this …

And it’s gorgeous.  So it feels like a bit of a waste to harvest the wording from the middle and not use the rest of it.  Unfortunately I still haven’t come up with a use for the rest of the one I used on that toolbox.

I usually like to stick with transfers that can be cut up and used on multiple small projects, or one piece of furniture that I can price high enough to cover that cost.

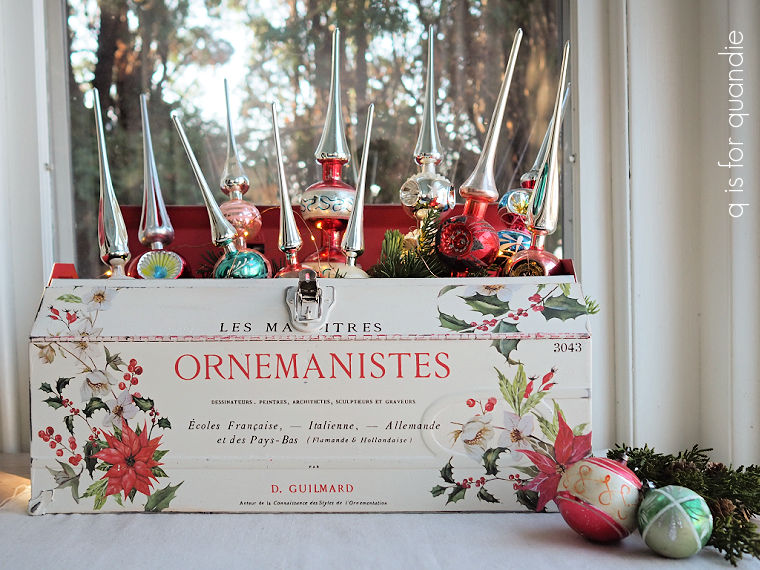
So it’s definitely one of a kind, and I’ve hung onto it because a; I love it and b; it’s perfect for displaying my non-collection of vintage glass tree toppers.

That brings me to the end of my holiday toolbox recap.  I hope you’ve been inspired to consider creating your own Christmas themed toolbox … or lock box … or tackle box.

Which one of these was your favorite?  Be sure to leave a comment and let me know.  It will give me something to read while lounging at the pool.

a tale of two rugs.

Remember way back to last winter when I repainted the walls in the q branch (a.k.a. my study)?

I absolutely love the color I ended up choosing, Globe Artichoke from Pittsburgh Paints.

Once I had the walls painted, I then hung my gallery of garage sale art on the wall.

The room still looked rather unfinished.

It needed a rug, and I also needed to wait until summer to paint those radiator pipes in the corner.

I’ll be the first to admit that I am not very patient when it comes to shopping for things like rugs.  I went to a few different brick and mortar shops with my friend opK, but nothing jumped out at me.  I also did a bunch of online browsing, but every time I picked a rug that I thought might work I either couldn’t get it in the size I wanted, or it was too expensive, or I just wasn’t absolutely sure I liked it.

And then there’s this little consideration …

That’s Lucy, a.k.a. the barfer.

Yep, she has a tendency to upchuck.  She’s also somewhere around 19 – 20 years old at this point (she was a rescue, so we’re not entirely sure, but we’ve had her for 18 years and she wasn’t a kitten when we found her), so we don’t hold it against her.

Usually we get a little warning when she’s about to blow, she makes a very unique and rather loud noise.  So we have time to move her to a washable surface.  But if we’re not home, then all bets are off.

So for that reason, we don’t want to invest in a high quality rug right now.

Which brings me to the rug I finally ordered from Wayfair.

This is the DeSoto Oriental in cream/grey.  It also comes in 4 other colors, including an option that has some green in it.  Unfortunately that one was not available in a square, and I really wanted a square rug.  As you can see above, a square fits really nicely in almost perfectly square room.

It also was less than $100, which was a good price for a rug that I don’t plan to keep forever.

So I thought I’d take a chance with this one, and that perhaps the grey would pull in the color of my dark grey walls in the neighboring piano room.

Now that the rug is in place in the room, I think it’s OK, but not spectacular.  It definitely helps give the room a more finished look.  It was also cheap enough that I plan to just keep it and use it until the perfect rug comes along, if it ever does.

As you can also see, I did manage to get those pipes in the corner painted over the summer.

I may have to bite the bullet and paint the radiator too, but that’s another job that has to wait for summer.  I’d kind of like to paint it gold, like this inspiration photo from pinterest.

I think the gold radiator would tie in with all of the gold frames in the room, and it would look gorgeous with the green walls.  What do you think?

In the meantime, next on the list is going to be window treatments of some kind, and hey, maybe I’ll even sew them myself on my new sewing machine!

One quick side note, as you may have noticed, I placed my skinny silver Christmas tree in the q branch this year.  It fits perfectly in this wonky little corner, and I can admire it while I sit at my computer working on this blog.

This tree holds my non-collection of vintage glass ornaments.

I also hung my ornament wreath over the mirror that hangs in the q branch.

Last year I displayed my Christmas village on top of the giant English pine cupboard that is in this room …

but this year I decided to forgo putting up the village.  Maybe I’ll get it back out again next year, if I have a little more time for decorating.

But wait, the title of this post is a tale of two rugs.  Are you wondering about the 2nd?

Well, here it is.

Ironically, I was shopping for both full size rugs and miniature rugs at the same time.  I looked at so many options online for both that at one point I was getting them mixed up.

I had similar requirements for both rugs; pale neutral colors, a muted pattern and a specific size.  A square no more than 7′ x 7′ for the q branch, and a rectangle at least 8″ x 10″ for the dollhouse.

I ended up finding the dollhouse rug at Life in a Dollhouse.

And I think it works perfectly with my French Country Cottage style dining set.

What do you think?

everybody’s doing it.

Good morning from the garden!

OK, if you’ve been paying attention you know that I’m not in my own garden this morning.  I’m in Mexico!

This will be my 3rd visit to this resort with my neighbor nnK and her parents (and this year my sister is joining us as well).  I’m sure that I will be enjoying the gorgeous landscaping around the resort this week.

But before I left I whipped up a quick bulb lasagna to share here today.

Many of you are probably already familiar with a bulb lasagna, its seems like just about every garden YouTuber out there has shared the concept recently.  But just in case you don’t know what it is, it’s basically spring bulbs planted in layers in a pot, sort of like the layers of lasagna.

If you plan it right, the layers come up and bloom in succession.

I wasn’t initially planning on creating my own bulb lasagna, but my sister and I were in Home Depot last week and their remaining stock of spring bulbs were 50% off so I couldn’t resist buying some.

I grabbed some Persian Blue allium because I’d never seen this color before, and it sure looks pretty.

I hope it really does look like that!

I also purchased the new Proven Winners Golden Meadow blend of daffodils.

I quickly got the allium in the ground last Monday before our weather turned really cold, but I didn’t get the daffodils in.  Within a few days, with lows in the teens, our ground was getting pretty frozen so I decided it would be far easier to plant the daffodils in a pot.

And while I was at it, I could go back to Home Depot and get some of the spring blooming iris I saw there to add to it to create a bulb lasagna.

OK, so … simple concept … plant your bulbs in layers choosing bulbs that get planted at different depths and with different bloom times.

Since this is my first attempt at a bulb lasagna, I decided to keep it very basic.  The daffodils get planted at 6″, and they bloom in mid-spring, so they went in first.  I filled the pot with soil until it was about 8″ from the top, and then added my daffodil bulbs.

As you can see, I really packed ’em in there.  Since I’m only doing two layers, that should be OK.  However, if you do three or more layers you need to leave about 2 fingers of space between your bulbs so that they all have room to grow up through the layers.

My Iris reticulata are supposed to be planted at a depth of just 3″, so I added 3 more inches of soil over the daffs and then planted the iris.

I left a bit more space between the bulbs in that layer so the daffodils can come up through them.  The irises should bloom first in early spring, and then the daffodils will come up and bloom in mid-spring.  Theoretically.

I added a final 3″ of soil over the iris bulbs, and then watered my pot thoroughly.

I ended up with one spare packet of 10 iris bulbs and I was going to just pop them into a planter outside, but the soil was frozen solid.  I swear it happens overnight!

So I pulled out another pot and just planted them up by themselves.

But now comes the tricky part, where to put them for the winter?

These bulbs have to go through a cold period of somewhere between 10 to 16 weeks, and my online research tells me that the cold period should be at temps between 35–40°F.  Hmmmm.  I was planning to put these pots outside, but our winters are definitely much colder than that.  We’ve already had overnight temps in the teens, and this coming week they’ll be in the single digits.

Further online research tells me that the bulbs can freeze and rot in a unprotected pot left outdoors in our climate.  So that option is out.

Some suggestions given online include putting them in an unheated garage or shed.  I could do that, but in Minnesota even those spaces get much colder than 35–40°F.  I’ve also seen the suggestion to put them in the basement, but my basement is quite a bit warmer than that.

So I’ve decided to opt for my front ‘three-season’ porch, or as I like to call it in winter, my walk-in fridge.  It is unheated, but since it’s attached to the house it stays a little bit warmer than the shed or carriage house.  It can also be quite sunny though, so I’m going to put the pots under a table and cover them with some old sheets to keep them in the dark.

You also have to keep the container from drying out, but also don’t let it get too wet.  So I’ll be putting a reminder on my calendar to check it about once a month and add water if necessary.

It seems like there are a lot of things that could go wrong with this little project.  Too little cold, too much cold.  To little water, too much water.  Too much light.  I’m beginning to wonder if this was such a great idea after all.  But everybody seems to be doing it, so hopefully it’s as easy as they say it is and next spring I’ll have a lovely pot of daffodils and iris.

Have you had luck with a bulb lasagna?  Leave a comment and let me know, and be sure to share any tips you might have!

the winter dining room.

I started my holiday decorating a bit early this year for two reasons.  First, I did all of my outdoor stuff a week or two ago when we had a couple of really nice sunny days in the 50’s.  It was so fun filling the window box and putting up lights without having to wear a parka and fight with frozen soil.

Speaking of the window box, one of you requested a ‘dusk photo’ with the twig lights on.  I didn’t manage to get a dusk photo, but how about a ‘dawn photo’?

As you can see, I got this stuff in just in time before winter weather officially (in my book) arrived with a dusting of snow, blustery winds and a ‘feels like’ temp of 8°.

I got a jump on my indoor decorating too. That’s due to my 2nd reason for starting early.  Once again this year I’m going to Mexico with my neighbor nnK and her parents.  And this time my sister is joining us as well.  We leave tomorrow, and then there are only two and a half weeks until Christmas once we get back.

Putting up holiday decorations is a fair amount of work, I wanted to enjoy them for more than a couple of weeks!

Today I thought I would share the decorations in our dining room.  This is where we enter our house from the back deck, and my Belgian bed bench is next to the door.

The bench is painted in Miss Mustard Seed Milk Paint in a mix of equal parts IronstoneLinen and Grain Sack.  You can find all of the details for that project here.

As for the sled hanging over the bench, that is one I found this past summer at an estate sale.  The price was a little higher than I like to spend (as is usually the case at estate sales), but I had to snap it up because of the solid surface of the seat.  I knew that would be perfect for stenciling.

I painted the seat in Dixie Belle’s Dried Sage, then created a shadow of the words ‘Bed and Breakfast’ using Coffee Bean, and finally added the full stencil in Drop Cloth.

I finished it off with a coat of Dixie Belle’s clear wax, including the unfinished wood and the metal slats.  The clear wax just freshens it all up a bit and would protect it from moisture if I hung it outside, although for this year I’m keeping it inside.

I added some faux evergreen garland and a string of battery operated lights to the back of the bench.

Then I added more garland and lights to the top of my Welsh cupboard.

Next I pulled out the vintage “Merry Christmas” sign that I purchased last year.

Although I appreciated the original red and green paint, I didn’t love the glitter that had been added to it.  So I repainted the letters in Dixie Belle’s Drop Cloth, and the bar across the back in Midnight Sky.

By the way, nearly every piece of ironstone in that cupboard is from a garage sale.  I think there might be one or two that were from antique shops, but that’s about it.

The last bit of holiday decorating in this room is my clock cloche (that’s what I’m calling it anyway) centerpiece on the table.  Some of you might remember when I popped a large glass cloche over a clock that fell off my wall and was damaged.

If not, the details can be found here.

I tend to change up the contents of the clock cloche for the seasons, and here is its Christmas look.

Well, maybe it would be more accurate to call it a ‘winter’ look.

It feels a bit plain for a holiday look.  I may have to dress it up a bit more.  Maybe it needs some faux snow, or lighting of some kind.  What do you think?

I let the paint colors that I used on the sled dictate a neutral color scheme in the dining room this year.  Sometimes it’s fun to change things up and see how you like them.  Plus, if I just remove the “Merry Christmas” signage from above the hutch, the rest of this stuff can be left in place as simply ‘winter’ decor.  Maybe next year I’ll go back to more traditional red and green.

How about you?  Are you all out red and green, with Santa’s everywhere?  Or do you sometimes stick to a more neutral ‘winter’ look?  Leave a comment and let me know.

And one last note, I did schedule a couple of posts for while I’m gone.  However, I probably won’t answer comments since I’ll be floating in a pool in Mexico.  So I hope you enjoy them, and I’ll be sure to respond when I get back!

thank you!

Today seems like an appropriate day to send out a heartfelt thank you to everyone who took the time to leave a comment on my blogiversary post (FYI, for my non-American readers, it’s our Thanksgiving holiday today).

I got so many lovely comments from you, and that reminded me that you guys are still out there enjoying my posts … even if you rarely take the time to comment.

And you know what, that’s OK.  I get it.  I’m right there with you as an infrequent commenter myself.

So honestly, if you’re not into leaving comments, don’t feel like you should.  I don’t want anyone to feel bad about not leaving comments.  Maybe just leave one once a year on my blogiversary post and that will be enough 😉

That being said, it does sound like quite a few of you find the comment process cumbersome, so I did want to touch on that for a minute.

WordPress really works hard to keep spam comments at bay.  I’m sure you can imagine just how many spam comments I get every day, and for the most part WordPress catches 99% of them (probable statistic) and puts them in a separate folder for me to review.  This is an awesome feature since it means I don’t have to go through and delete a gazillion spam comments one by one.

To help them accomplish that I have a setting in place that requires me to approve the first comment left by anyone.  When you try to leave a comment you’ll get a window that asks you to “log in or provide your name and email to leave a comment”.  Then you can fill in your name, email address and possible the name of your website (that one is optional).  You’ll also have to option to save your name, etc. for later.  If you do that, you’ll have to set up a password.  I recommend not doing that if you hate coming up with memorable passwords (or is that just me?).

After filling all of that out and submitting your comment, you should see something like this:

Your comment is awaiting moderation. This is a preview; your comment will be visible after it has been approved.

Once I have approved that first comment, future comments don’t need approval as long as  they are left with the exact same name and email address (and possibly a website name if one was filled in the first time).  If there is a typo anywhere, or if you put your name in as “Linda” one time, and “linda” another time, and then “LindaS” another time … well, those will all have to await new approval.

So if you ever leave a comment and it doesn’t show up right away, that might be why.  I try to approve legit comments quickly, but I don’t always get to it.

Of course, WordPress isn’t perfect.  There are also occasions when honest comments end up in that spam folder.  I’m not exactly sure why that happens.  Sometimes it’s because the comment includes a link, but other times I really can’t figure out why.  I am not nearly as good at checking the spam folder on a regular basis, but I do try to sift through it and retrieve the non-spam comments now and then.  So that can also explain a lag between the time you leave a comment and when it actually shows up.

Another thing to note, if the email address you use is associated with a WordPress account, you will have to know your password to leave a comment.  And let’s face it, how many of us can actually keep track of all of our passwords?  So that can be a problem too.

So yeah, commenting can be cumbersome.  I get it.  So don’t worry about it.

OK, so with that I’m off to enjoy the holiday with family.  If you’re in the U.S., I hope you’re having a wonderful Thanksgiving.  And if you’re not, thank you for following me from wherever you are.  I appreciate all of you!

so. many. things. (a blogiversary giveaway)

Did you know that November is statistically the gloomiest month in Minnesota.  It averages just five days with clear skies.  Egads.  Luckily, I have so many things to be grateful for in November to cheer me up.

For one thing, there are lots of birthdays to celebrate.  There is nnK’s birthday, my handyman Ken’s birthday, my niece’s birthday, my brother’s birthday and my own birthday.

November is also the month that I retired from the day job.  Can you believe it has been three years already?!

Then of course there is Thanksgiving, the perfect day for reflecting on gratitude.

And finally, there is my blogiversary.  Today marks 11 years that I’ve been at this blogging thing.

I never thought I would stick it out this long.

Every year around now I start reflecting on why I write this blog, whether or not I want to continue with it, and if so, where to go from here.

As I’ve mentioned many times, I don’t do this for the money.  My blog isn’t monetized, I pay extra for my WordPress account to keep the ads off (because let’s face it, ads on a blog are super annoying).  Although I do sell many of the items I create, those sales barely offset the related expenses.  I also create content for Dixie Belle Paint Co in exchange for free product, but they don’t pay me and I don’t get any commissions from them for sales.

Here’s the thing, I absolutely love blogging.  I really enjoy the creating, the photography, the writing, and the interacting with my very gracious followers.  And now that I’m retired, I have all kinds of time to devote to it.

But lately things have been feeling a bit stale.  I seem to repeat the same sorts of projects year after year.

Painted sleds for Christmas.

Toolboxes galore.

And lots of stenciled cupboard doors.

I post about gardening in the summer.

Well, sometimes in the winter too.

I also post about travel now and then.

That’s Malta, by the way.  It is one of the most beautiful places to arrive in via cruise ship.

  Anyway, I’m wondering if my readers feel like things have gotten a bit stale as well.  There has been a steep drop off in the number of comments I receive.  In 2022 I got 4,439 comments on my posts, and so far for 2024 it’s only 1,513.  Ouch.

My sister tells me that’s because it has become too difficult to leave a comment, are you having that experience as well?  Unfortunately, there isn’t anything I can do about that, that process is regulated by WordPress, not me.

People are still viewing my posts, that number is down slightly, but not nearly as drastically as comments.

So now what?

Well, as I mentioned, I don’t do this for the money.  So it doesn’t really matter what the numbers say.  I also don’t do it for the accolades, although I often have to remind myself of that.  But I take you back to earlier in this post where I said that I do it because I love the process.  As long as I continue to enjoy creating, writing, photographing, gardening and traveling, I’ll just keep at it.

And perhaps my new projects in miniature will help freshen things up a bit going forward.

I’m definitely excited about them.  You’ll certainly see more of them over the coming months.

And that brings me to my annual blogiversary giveaway where I try to pay it forward.

I’m including a few of my very favorite Dixie Belle products; Drop Cloth and Midnight Sky chalk mineral paint, Iron and Bronze patina paint, Blue and Green patina spray, and their Scrubby Soap in orange and lemon.

I don’t think I’ve mentioned this soap much, but I absolutely love it for cleaning my paint brushes.  It’s also excellent for getting paint off your hands, as well as dirt (from gardening of course).

The bars have a built in scrubby pad that works right up until all the soap is gone.  I’m also a fan of the citrus scents of the orange and lemon (it also comes in lemon/lime).

But wait, that’s not all!

I’m also including the Christmas themed Lane cedar box, and both of the Dixie Belle transfers that I used on it, Yuletide Hearth and Caroling Cardinals.

Finally, I haven’t forgotten that I promised to include the spare miniature dress form that I created back in October.

She’ll be nestled cozily in the Lane box.

You may not have a dollhouse, but she’d look great on a bookshelf or desktop.

I wish I could give these things to each and every one of you, but unfortunately that isn’t possible.  But please know that I am grateful for any support you give me, whether it’s leaving a comment, purchasing one of my items, or even just simply becoming a follower of the blog.  Thank you so much!

The rules for today’s giveaway:  Simply leave a comment on this blog post and let me know you are still out there.

Your comment must be left on this blog post, not on Facebook or Instagram.

I will randomly draw the name of a winner for today’s prize from all of the comments left on this post by Saturday, December 7, 2024 at the stroke of midnight (U.S. Central time).

The fine print: no purchase necessary, you must be 18 years of age or older to win, void where prohibited by law, the number of eligible entries received determines the odds of winning, approximate retail value of prize is $215, if the prize is not claimed by Sunday, December 15, 2024 another name will be drawn at random to win, yada, yada, yada.

Good luck!

Thank you to Dixie Belle Paint Co for supplying most of the items I’m giving away today!

sewing in miniature.

You may have noticed that I have a bit of a thing for vintage linens.

Especially when they feature incredible workmanship like this …

But aside from using beautiful pillow cases for their original function, I rarely come up with a good use for other vintage linens.

However, earlier this fall I came across some vintage hand towels at a garage sale and it occurred to me that they would be perfect for creating some custom bedding for my dollhouse project.

And at $1 each, they were a bargain.

I brought them home and gave them a good soak in OxyClean, and then I hung them on the line to dry in the sun.  That one on the top has some rust stains that didn’t come out, but otherwise they all cleaned up beautifully.

Before I got started on creating my miniature bedding, I had to deal with the bed itself.

I purchased this unfinished bed from The Modern Dollhouse.  It will go in the same room as the armoire that I shared back in October.

So I used the same technique to paint the bed; a base coat of Dixie Belle’s Secret Path, followed by two coats of Drop Cloth.  Then, after sanding to distress the edges and reveal some of the base color, I added more of the re.design with prima Vintage Labels II Middy transfers to the foot board.

I also added just a little section of the transfer to the headboard as well.

All that remained was to turn those pretty vintage linens into some form of miniature bedding.

At first I was going to just sew up some seams by hand, but then I decided maybe it’s time to learn a new skill.  I guess it’s not entirely a new skill, my mom did teach me to sew on a sewing machine when I was young.  She even helped me sew a wardrobe appropriate for an office job when I was in my early 20’s and didn’t have much money to spend on new clothes.

But I haven’t sewn on a machine in decades, and I also didn’t own one.  So I popped onto Amazon and picked out what looked like the most basic sewing machine they had.  I didn’t need anything fancy, I just want to sew a straight seam.

I had to watch a YouTube video to learn how to thread the machine.  Then I practically had to use a magnifying glass to thread the needle, but I eventually got it.  Now don’t ask me for a recommendation on this machine, I’ve only used it to sew a handful of straight lines so far.  I’ll definitely have to use it a bit more before giving an opinion.

After a bit of practice with some fabric scraps, I was ready to sew the duvet for my dollhouse bed.  Honestly, this was super basic.  I just cut out the section of the linen towel that I wanted on the bed, then cut another piece of the towel in the same size for the back.  I sewed three sides together with the right sides of the fabric facing each other, then turned it right side out.  I ran a quick iron over it to press the seams down a bit.

Then I stuffed it with a single layer of batting to make it look like a puffy duvet.

I cut the edge off a separate linen napkin to create the folded over edge of a sheet.

Rather than sew that, I just used hot glue to hold the raw ends in place after tucking them under my duvet.

I did sew up two sides of the little pillow case though, making it out of a folded over piece of scrap.  The pretty edging on the open end is the original edging from the linen towel.

I stuffed it with some batting cut up into small pieces.

I ran a bead of hot glue down both sides of the bed to keep the duvet folded down over the sides.

Not terrible for my first foray into miniature bedding, right?

I’d love to have a full sized version of that duvet on my own bed, wouldn’t that be gorgeous?

If I could do one thing over, I think I would go back and tea dye the linen.  The white is a little bright for my taste, especially next to the Dixie Belle Drop Cloth.  But that’s just one of those perfectionist-y details that matter to me and probably absolutely no one else.

With that, I think I have all the furniture I’m going to need for the ‘guest room’ of my dollhouse.  Next up I have an idea for a wall treatment in that room.  However, I’ve been holding off on bringing the dollhouse inside to work on it.  It’s going to take up a lot of space, and it’s not super portable.  For that reason I was thinking I’d wait until after the Christmas decorations are down before bringing it in the house.  But I’m itching to get started, so I may scrap that idea and just get going on it.  We’ll see.

In the meantime, how do you like my vintage linen duvet?  And do any of you have any sewing tips for me?  If so, I’m all ears!

hidden potential.

You may remember that my friend Kathy gave me a bunch of metal boxes last summer.

I just have a few left that haven’t been given makeovers yet, including two plain metal index card boxes that I didn’t really think had much potential.

But then the other day I was watching a YouTube video where the creator was adding Christmas scenes with bottle brush trees and little Santa’s or reindeer into vintage tins (Ginger Chick Rehab), and it looked like so much fun.  But I didn’t have any fabulous vintage tins on hand.

So I decided to try ‘making’ my own out of the two index card boxes.

I started with the smallest box.  I gave it a quick sanding with 150 grit sandpaper to rough up the surface a little to improve adhesion, then I also gave it a coat of Dixie Belle’s Bonding Boss for the same reason.

Next I gave the box a coat of Dixie Belle’s Drop Cloth to create a base.  Once thoroughly dry, I pulled out an old re.design with prima transfer called Gingham Red (I’m not sure why it’s called that since both included designs are plaid, not gingham, but don’t let that throw you off).

I had used most of the red plaid on this sled back in 2019 …

But I had just enough left to cover the entire box.

As you can see, it didn’t go on perfectly.  I have a couple of spots where the transfer cracked and you can see the white underneath.  But that’s OK, I wanted the box to appear vintage.

FYI, I did not apply any sort of sealer over the transfer.  I’m never happy with how a topcoat looks over these full coverage sort of transfers.  This little box shouldn’t get much wear and tear, so I think it will be OK without a sealer.

Now for the fun part.  After adding some floral foam inside the box, I hot glued in some bottle brush trees and a cute little reindeer.

Then, after adding some moss around them to hide the floral foam, I tucked in a couple of vintage glass ornaments.

Those of you who are fans of A Christmas Story might appreciate the book I used to stage the photos 😉

I went in a completely different direction with the larger of the two boxes.  I noted that when open, the lid falls all the way back, which didn’t lend itself well to the same treatment as the smaller box.

So instead I decided to just paint it up inside and out with Dixie Belle’s Dried Sage after sanding and giving it a coat of Bonding Boss first.

Then I pulled out I.O.D.’s Fairy Merry Christmas transfer (a 2023 release, now retired).  It has a really beautiful woodland wreath in muted colors.

I had been ‘saving’ it for just the right project.  I’m sure many of you know that feeling.

It was time to just go ahead and use it!

I didn’t want to just slap a wreath on the top of this box, so instead I started cutting it up to make it work on the box.  Part of it went on the front, and another section went on the top.

I also added a stamp to the box.  As I’ve mentioned quite a few times, I’m still struggling to get a result that I like when using rubber stamps.  This was actually attempt no. 2.  The first attempt was too smudged, so I tried to wipe it away with a damp cloth before it dried.  That ended up turning into a eureka sort of moment for me because I really liked the faded image that was left behind (although still not the smudging).

So I painted back over that area, and once the paint was dry I applied the stamp again.  Then I waited about 60 seconds or so, and wiped it away with a damp rag.

I’m sure this technique does not work with just any kind of ink and/or paint.  But in this case I was using VersaFine Clair ink in Pinecone over Dixie Belle paint (a chalk style paint).  I had not sealed my paint before applying the stamp.  I highly recommend playing around with this effect before attempting it on something that might get ruined.

I also added a transfer from the Fairy Merry Christmas set to the inside of the lid.

I finished the box off with a coat of Dixie Belle’s flat clear coat.

What could one use this box for?

I guess I’m not really sure.  But it definitely is pretty.  And also not overtly ‘Christmas’, so it could be popped onto a bookshelf and left there all year really.

What would you put in it?  Leave a comment and let me know!

Thank you to Dixie Belle Paint Co for their products used in this makeover.

copper and gold.

Good morning from the garden!

It’s been a while since I brought you a Sunday morning in the garden post hasn’t it?

So far we’ve had a rather mild fall.  There have been a handful of nights just below freezing, but nothing really cold.  As a result, I still have some plants that look pretty darn good in the garden, like this Alexander’s Great brunnera 

and my Hakonechloa, or Japanese forest grass.

Up until a few nights ago I could also have said that some of my hostas are still looking great as well.

Except they no longer look like that.  Every last hosta that was still green was chomped down to stalks by roaming deer a couple of nights ago.

I really only seem to have trouble with deer in the early spring when they come and eat all of my tulips, and now apparently in late fall when they turn my hostas into a salad bar.

I’ll count my blessings since they don’t bother my garden in summer.  Knock on wood.

But today’s post isn’t about the deer, or what still looks good in the garden.  It’s about my front window box.  I’ve shared it here many times, but for those who may not be familiar it’s quite large at about 12′ long.  One thing I didn’t really think about when we made it so big was how much it would cost to keep it filled with annuals in the summer, and evergreens in the winter.

Unfortunately I don’t really have anywhere that I can go to forage for free evergreen cuttings so I have to buy them, and they aren’t cheap.  So last year when I went to the Bachman’s after Christmas sale I picked up two lengths of faux evergreen garland for 75% off.  They were originally priced at $79.99 (egads!), so I got them for about $20 each.

I think it looks realistic enough from the street, and no one really gets any closer than that except me.  And now I have a nice, full base to start adding further embellishments to.  Plus I’ll be able to use this over and over for several years at least.

I still have all of the faux red berries that I used in the window box last year.

But I wanted to try something different this year.  That being said, I didn’t want to spend a lot of money on all new embellishments.

Plus, I put in a little extra effort in early fall drying quite a few flowers from the garden, like this Astilbe.

And of course, lots of hydrangeas.  So I wanted to use those.

But I didn’t want a ‘brown’ color scheme, so I decided to add a little bling with some metallic spray paint.

I took advantage of some lovely fall weather this past Friday and set up a work area outside to spray paint the flowers.

They hydrangeas look amazing, but I’m not as impressed with the painted astilbe.

I also didn’t love the copper paint as much as the gold.  I chose the matte metallic copper and this is one time when I should have gone shinier.

I had also dried a bunch of allium, and they are awesome painted in gold.

As are the handful of dried poppy seedheads from nnK’s garden.

After tucking all of the painted flowers in with the faux evergreen garland, I decided that I needed to add a few items with a bit more impact.  So I pulled a few different elements out of the workshop and gave them a spray of gold too.

Now, I’m sure that a few of you are wondering how well the painted dried flowers will last.  The answer pretty much depends on our weather.  If we get a heavy snowfall, it will inevitably crush them and they won’t look so good after that.

But hopefully we’ll just get the light and fluffy stuff between now and Christmas.

Fingers crossed!

Are you a fan of the more subtle copper and gold theme this year?  Or did you prefer the pop of red from last year?  Leave a comment and let me know.

the tate modern credenza.

I know it was a while back, but do any of you remember when I reviewed Amy Howard’s book Rescue, Restore, Redecorate?

There was a chartreuse green credenza in her book that I absolutely loved.

At the time I mentioned that I’d love to copy that look.

Well, I haven’t quite been brave enough to attempt it on a full sized piece of furniture, but how about a miniature one?

I found this fun mid-mod dollhouse credenza called the Tate Modern Sideboard Dresser at The Modern Dollhouse.

It seemed like the perfect candidate for a bright pop of yellow-ish green, and I had just the color in my stash.

That is Dixie Belle’s Everglades.

It’s not exactly the same shade as that Amy Howard color, but it’s close enough for me.

I painted the outside, and also inside the doors on the left.

To add just a little bit more interest, I used a tiny brush to apply Dixie Belle’s Gilding Wax in Gold to the ‘handles’ and the feet.

Just for fun I decided to create a few miniature boxes of vintage ornaments to stage my credenza.

First up, I downloaded the printable designs from Easy Print & Cut on Etsy for $2.85.

Next I used the templates provided to cut a piece of foam core board to build my box around.  Then after a lot of teeny tiny cutting and folding, I glued the paper around my foam core ‘boxes’.

Yeah, I’m definitely going to need more practice for teeny tiny paper folding projects like this one.  But for my first attempt I don’t think they’re too bad.

FYI, the floor lamp is also from The Modern Dollhouse.

I have to laugh at myself because first of all, I forgot that it actually works.  So I took all of my photos without it on.

Then I thought, ‘wait, doesn’t this actually light up?’  I searched all over it trying to figure out where the switch was and I couldn’t find it.  Then I looked on the The Modern Dollhouse website to make sure I wasn’t imagining that it lit up.  Eventually I did find the little bitty switch at the base of the lamp.

Then I re-took all of my photos with the lamp on.

This piece will eventually find its way into my dollhouse renovation, most likely in the attic rec room.  Or possibly one of the upstairs hallways.

What do you think of a chartreuse credenza?  Would you be brave enough to use this color on a full-sized piece of furniture?  Leave a comment and let me know.