st. anthony park.

Somehow I was thinking that neighborhood garage sale season was over.  Luckily my friend Sue gave me a heads up on the St. Anthony Park sales this past Saturday, so Debbie and I headed out at the crack of dawn to see what we could find.

SAP is another gorgeous neighborhood full of older homes in St. Paul, MN.  My sister is often so busy admiring the homes that she forgets to keep an eye on the road!  For us half of the fun of these neighborhood sales is getting to prowl around residential areas admiring the houses and the gardens without anyone calling the cops.

sa-park-2016

At our very first stop of the morning I grabbed so many things from the ‘free pile’ that we had to make a trip back to the car before we even looked at the items for sale!  Then we had to make two more trips to load up the car with our purchased items including the darling table with green legs.  I’ve already started stripping the top of the table because it had been very poorly refinished, but my sister thinks I should leave the green legs.  What do you think?

sap-green-table-legs

After our second stop I was nearly out of money and the car was pretty much full.

By our third stop I had to carefully make room to squeeze in this fantastic oak desk chair.  I’ve painted a few of these chairs in the past and although they can be putzy to paint, they always turn out fantastic.  My sister grabbed the pair of linen throw pillows.

sap-chair

By our 4th stop, I had to borrow some more cash from my sister to buy this phone.

sap-phone

I purchased this spatula just because I like the typography on the handle, and I purchased the book just because I liked the photo on the jacket.

sap-book

I thought the spatula would look good mixed in with some wooden utensils.

wood-handle

I’ve saved ‘find of the day’ status for this washboard.  I’ve never seen one with a galvanized top like this before.

sap-washboard

I might keep it, or my sister might want it, or it might end up in my sale.  At this point it’s anyone’s guess.

mid mod mint.

One of the fun things about my little furniture restyling hobby is that friends and family tend to offer me their cast off furniture.  Often it’s either me or the Goodwill (or possibly the dumpster as my friend Terri mentioned with the Parisian table).

You’d think that ‘free’ pieces are always good, but that’s not necessarily the case.  In the past I’ve taken on free furniture and wound up spending far more time on a piece than it’s worth.  Time is the one commodity that I can not get more of so I tend to be a bit stingy with mine.

So way back last winter when my friend Nan asked me if I wanted this mid-century modern blonde dresser I hesitated a little.  It’s doesn’t look too bad from this angle …

mcm-mint-before

But here’s what the top and sides looked like …

mcm-wallpapered

Yikes!  Leopard print wallpaper!

I wasn’t sure how hard it was going to be to remove that stuff.  But I decided to take it home anyway.  And that lead to a lot of procrastination on my part.  Like about 9 months of procrastination.  It’s a big piece and it was taking up a huge chunk of floor space in my workshop, but yet it just sat there all summer.

I was determined to get it done during my recent stay-cation and yet even so, I put it off until the last two days.  It may not even have gotten done then, except I pulled the old Tom Sawyer ‘painting the fence’ trick.  You know that one, right?  You convince people that the work you’re doing is so much fun that they just have to join in.

Mr. Q and I pulled the dresser out into the yard and then I coerced my sister into helping me strip off that wallpaper.  Once she and I got started, nnK and Ken’s wife Arlene both came over.  Once they saw how much fun we were having, they were drawn in as well.  Soon all 4 of us were attacking that wallpaper.  We had it off in no time!  We found that just getting the paper wet and then using a scraper did the trick.  It came off in small pieces, but eventually we got it all off.

Once we had the wallpaper off, it was a simple job to sand the dresser down a bit and paint it.  Sort of.

mcm-mint-half

I started with the gorgeous mint color on the body of the dresser and the two outer columns of drawers.  This is Dixie Belle’s Mint Julep, by the way.

Then I ran into some trouble on that center column of drawers that I painted in Annie Sloans’ Old White.  The finish bled through the white.  A lot.  But, no worries, I added a coat of Rachel Ashwell Clear Primer and tried again.  That did the trick.

I thought it was a bit odd that the finish only bled through the white paint, and not the mint.  Sure enough, when I inspected more closely I found that there were just a couple of small bleed thru spots on the top of the dresser too, so I handled the top in the same way.  A coat of clear primer followed by another coat of Mint Julep.

mcm-mint-top

I finished with Annie Sloan clear wax.  I chose that brand of wax because once buffed it has a little more sheen than some of the others.  I like a little more shine on mid mod pieces.

Since my sister was still hanging out after we got the wallpaper off, she also helped me polish up the drawer pulls with some Brasso.  They cleaned up quite nicely.

mcm-mint-corner

I love being able to retain the original hardware on mid-century pieces especially.  They usually add so much character and this dresser was no exception.

mid-mod-mint

I think this piece would work beautifully in a nursery.  It’s a great height to function as a changing table, it has tons of storage and it can be transitioned into a dresser down the road.  Check out my ‘available for local sale’ tab for more info if you’re in the market for some mid mod mint.

The clean lines of mid-century pieces appeal to me more and more these days.  How about you?  Mid-century modern, yes or no?

a little rusty bull.

You may have noticed the bull/steer/cow/whatever-you-want-to-call-it in my pile of goodies from the MacGrove garage sales.

bull before

He’s actually flat on the back side and intended for hanging on the wall.  He looks like he might be made out of metal, but he isn’t.  He’s really just made out of that polyresin sort of material and then painted to look like metal.  But I wasn’t very fond of the faux finish he came with, so I decided to give him a different faux finish.

modern masters

I’d first heard of these Modern Masters metal effects paints when my friend Sue used the ‘rust’ kit on a galvanized olive basket that she gave me for my birthday.  Then my reader, Victoria, also mentioned that her husband uses these products and swears by them.  I was intrigued.  I had to hunt around a little to find it, but I eventually found these small kits at Hobby Lobby.  I could have ordered them online as well, but I like instant gratification.  Plus I used a 40% off coupon at Hobby Lobby.

I started by painting my bull with the primer.

bull with primer

That was easy enough.  I’d say I used about half of the 2 oz. bottle of primer on this bull.

Once that dried I added a coat of the Oxidizing Iron Paint.  And let me warn you, that stuff is stinky!  I don’t think I’d want to be using that one indoors.

bull-painted

The first coat went on rather spotty and since the instructions called for two coats, I added a second coat.

Once that was dry, I spritzed it with the ‘rust activator’ which came with a pump spray nozzle for application.  After about 10 minutes, I spritzed it a second time.

Then I sat back and waited for the magic to happen.

rusty-bull

And I got a little rusty bull.

rusty-bull-face

Here’s how he looks hanging on the wall.

bull-on-the-wall

I haven’t yet decided the fate of the rusty bull.  I may keep him for a future new look in my kitchen.  Then again, I’m not entirely sure that this look is ‘me’.  I’ll have to make up my mind before October 8.

the french laundry dresser.

french-laundry-title

My stay-cation week off from the day job went by really quickly, isn’t that always the case?  And I didn’t get nearly as many projects done as I’d hoped I would.  Of course.

But in addition to lots of little things, I did get a couple of bigger pieces of furniture finished including a lovely vintage dresser.  You may remember seeing the ‘before’ of this one a while back.

tall oak before

It had that orangey oak-y finish.  I have to say, this one had me a little stumped.  I kept looking at it out in my workshop and not feeling any inspiration.  Finally I decided I wanted to give it a farmhouse look, something old and chippy.  I mixed up some Miss Mustard Seed milk paint in Farmhouse White and I started painting.  The first coat didn’t cover well at all, but that’s to be expected with white milk paint.  The second coat wasn’t much better.  Not a good sign.  By the third coat, the coverage was still not up to my standards.  Plus, I wasn’t getting any chipping at all.  Argh!

I’ve learned that sometimes it’s better to just cut my losses, so that’s what I did.  I got out the Fusion paint instead.  I had a little bit of Limestone (a warm creamy white) left in a jar, so I supplemented it with some Casement (a brighter crisp white) just to be sure I’d have enough.  And then one coat did the trick.  Now to be fair, I’m sure I would have needed two coats if I didn’t already have a base of white milk paint.

Still … once painted I didn’t have to wax or add a top coat (my favorite thing about the Fusion paint).

french-laundry-close-up

After the paint dried, I added this gorgeous French Laundry stencil using acrylic craft paint in a nice greige sort of color.  I wanted to keep it subtle.

french-laundry-stencil

I think this is one of the prettiest stencils I have, and it added just the little bit of extra something that this dresser needed.

french-laundry-dresser

Did you notice the screen hanging above the dresser?

stenciled-screen

I’ve always been fond of a pop of black in an otherwise mostly white space.  I even have a pinterest board devoted to the idea (here).  I didn’t intend for the screen to go with this dresser (otherwise I wouldn’t have used them same stencil on both), but I wanted to add that pop of black to my photos of this piece.

french-laundry-2

I think perhaps this is how this dresser was meant to end up all along, don’t you agree?

a french desk.

french-desk-title

Remember my ‘find of the day’ from the MacGrove sales?

mac grove find

I love the delicate proportions of this pretty little desk.  Or at least I am calling it a desk.  It could be a console table, or a dressing table.

I had originally envisioned a refinished wood top with a chippy white base.  But after I’d stripped two layers of paint off the top, I realized that I didn’t like the ‘wood top look’ with the more French looking details on this piece.  So after all of that work, I sanded it down and painted the whole thing grey.  This is approximately a 50/50 mix of Miss Mustard Seed milk paint in Trophy and Schloss.

french-desk-close-up

And I ended up with no chipping at all.  Once again the ability to predict chippy-ness eludes me.  I knew I wouldn’t get any chipping on the freshly stripped top, but I thought for sure that painting over existing paint would result in some chipping.  Nope.

You can see that I added a bit of Little Billy Goat Gold Leaf goat stick to the details

french-desk-close-up-2

and also to the drawer pulls.  Aren’t these pretty?

gold-drawer-pulls

I’ve played on the classic Grecian urn motif on the hardware, the drawer front and the cross piece at the bottom by hanging my favorite gold framed mirror above it for my photos.

frecnh-desk

These two pieces pair up so nicely that I’ve decided to offer the mirror along with the desk.

mirror-detail

I never thought I would part with this mirror, but it seems like they belong together.

french-desk-angle

I almost hate to put a chair in front of this because I feel like it would cover up all of the pretty details.  Maybe it would be better as a console table in a foyer after all.

What do you think?

a Parisian table.

a parisian table

Remember way back to last year when my friend Terri gave me a bunch of stuff from her deceased uncle’s house?  They were cast off items that no one in the family wanted.

This small table was among the pile and it needed a little bit of repair.  A couple of the corner supports were missing and one of the supports at the bottom was broken where it attaches to the table leg.  Luckily I have my secret weapon, Ken.

He made short work of replacing those corners and repairing that cross piece.

Paris table before

Ken made these repairs in short order, but then I let the table sit for ages.

I finally pulled it out last spring and painted it with two coats of Miss Mustard Seed milk paint in Flow Blue.  It started to chip like mad, and I felt like the red stain was bleeding through just a bit on the top.  So I shoved the table aside and worked on other projects because I didn’t feel like dealing with it.  I’m sure I’m not the only one who does this, right?

Flash forward another several months to a week or so ago.  I pulled this table out of the back of the workshop and realized maybe it wasn’t all that bad.  I sanded it vigorously to remove any chipping paint.

This photo shows a good example of what milk paint will look like on unfinished wood (the repaired corner piece) v. over previously finished wood.

paris table close up

Then I decided to add a stencil to the top.

paris table top

I feel like the small amount of stain bleed-thru was totally negated by the heavy chipping and the addition of the stencil.

I finished the table with some Miss Mustard Seed furniture wax.

You may have caught a glimpse of the finished table last week when I posted the cane back chair.

paris table with chair

It’s a sweet little side table that can be easily moved around to wherever it is needed.

It’s being added to the pile for my upcoming occasional sale!

For those of you who are local, the date has been officially chosen and is Saturday, October 8.  It’s only a month away, yikes!  Lucky I’m taking a stay-cation from the day job this week to get some stuff done.

my obsession with tiny furniture.

tiny furniture obsesssion

My obsession with tiny furniture continues!

Who remembers this little number that I picked up at a garage sale in early summer?

tiny cupboard before

It had an authentically aged original paint job, but I just couldn’t handle the red.  So I painted over the red with some Annie Sloan Duck Egg.  Then, the fresh coat of Duck Egg made the original cream exterior look seriously dingy and yellowed.  So I went over that with some Miss Mustard Seed milk paint in Linen.

tiny cupboard

I fully expected a bunch of chipping since I was painting over paint, but I didn’t get a single chip.  When I say that whether or not milk paint will chip can be unpredictable, I mean it.

Once it was painted, I also added a tiny little ’37’ rub-on to the top.

room to create

I know it can be hard to judge scale in these photos, but this little cupboard is just 18″ tall.  It’s the perfect size for placing on a dresser or table top and filling it up with some of your crafting supplies.

tiny cupboard and crafting supplies

It’s kinda adorable, right?

I was contemplating keeping it and letting it join its brethren in the Q Branch (my study).

mini collage

But I really don’t think I need another tiny piece of furniture!

So it will probably end up at my sale in October.  I think.  Maybe.  Yes. Probably.

a late summer walkabout.

To those of you in the U.S. and Canada, happy Labor Day!  To those of you in other countries, I’m curious, do you have a similar holiday?  Apparently the purpose of Labor Day is to celebrate the achievements of workers.  Well, count me in!  Not only do I have today off work at the day job, but I’ve taken the entire week off to work at home.  I’ve got that sale coming up and lots of projects to finish up before then!

We had a beautiful sunny morning yesterday and I was up early (a bonus to getting older) so I decided to take my camera on a late summer walkabout of my gardens.

late summer walkaboutThis is the time of year when my gardens start to look pretty darn unruly.  I have given up on trying to keep things under control.  After all, it’s all going to die in another month or so.

late summer house

That being said, everything has grown like gangbusters this year.  Especially that caladium in the middle of my window box.  I’ve never had caladium get quite that tall.

late summer caladium

The metal molding that I used on the front of the window box gets a little rustier every year (to see how it looked two years ago, check out this post).

late summer window box patina

I’ve managed to escape getting any hail damage this year, plus we had plenty of rain so I believe I only had to get the sprinkler out one time this summer.

late summer statue

The fairy garden is lush and full this year as well.

late summer fairy garden

late summer fairy garden 2

And I’ve already mentioned that my hydrangeas have all become monsters this season.

late summer photo cottage

Look at who I caught hiding out in the hydrangea by my photo cottage.

late summer frog

I must have some sort of colony of these tiny little green tree frogs in my gardens.  I mistakenly brought one in the house on some cut flowers earlier this summer.  He leaped from the flowers to my paper towel holder and completely freaked me out.  Luckily it was easy enough to catch him and take him back outside where he belonged.

This time of year I’m always torn between wishing summer would never end and being glad to be done with gardening chores.  How about you?  Looking forward to fall?  Or trying to eke out the last remaining drops of summer?

buying a new camera.

I take a lot of photos.  You’ve probably already noticed that about me.  But lately I’ve found that I tend to miss out on photo opportunities because I don’t want to lug around my big DSLR camera and lens(es).  On top of that, I’ve also been having some technical difficulties with it.  My Canon Rebel EOS XSi is somewhere around 10 years old I think.  Lately it has been ‘acting up’.  It just stops working.  It has happened twice now.  Each time I’ve been shooting a lot of photos on a hot, sunny day.  I find that if I let it ‘cool down’ by shutting it off and leaving it alone for about 20 minutes or so, it starts working again.  I don’t have any problems with it during short furniture photos shoots, but when I’m taking 300+ photos in the space of a couple of hours it acts up.  I have to admit, I get a little panicky when my camera stops working!  And it has stopped at some extremely inconvenient moments!  As of yet I have been unable to diagnose the problem because I don’t get an error message of any kind.  Changing the battery doesn’t help.  Changing the photo card doesn’t help.  I suspect it’s overheating, but I haven’t been able to find any definitive information on that online.

So I decided it might just be time for a new camera.  If you have absolutely no interest in cameras, stop reading now and come back next week for another post that might be more interesting to you.  But if you are considering a camera purchase of your own in the future, keep reading!

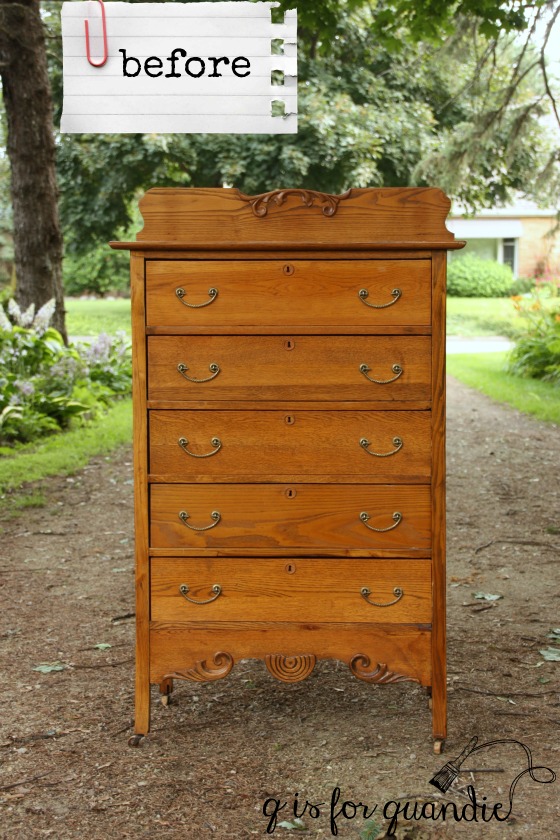
Since I have a lot of money invested in various lenses and filters for my Canon, the obvious first choice was to just buy a new Canon Rebel body that would work with the lenses I already have.  But I quickly realized that didn’t solve my first problem; that lugging around all of that equipment is not always practical.  Plus my current Canon still works well for furniture photo shoots as long as I don’t overuse it.  What I really need is a good travel camera for places like Budapest …

Budapest collage

Thus began the research.  I’m not a huge fan of techie research of any kind, but it has to be done.  There are so many options out there.  I started with reading a few different articles reviewing various cameras and their features.  That helps me narrow down the features that are available and whether or not they are important to me.  For example, I really prefer using an optical viewfinder.  I used my sister’s point and shoot camera at the McCrory Gardens when we were out in South Dakota and I hated using the LCD display to compose my shots.  I couldn’t see the screen at all in full sunlight, and even in shady areas it was difficult to see.  I felt like I was shooting blind.  I also realized that even though I want a more portable camera, I still want the ability to control my settings.  I also want good quality photos.  And down the road I want the option of investing in higher quality lenses for my camera if I decide I need them.

After doing a bit of reading, I quickly realized that what I wanted was a mirror-less camera.  Don’t know what that is?  Check out {this article}.

Can’t be bothered with reading that?  The short version; it’s smaller and lighter than a DSLR (so more convenient for traveling), but still allows you to have more control over settings than the typical point and shoot.  It also allows you to swap out lenses.

Not all mirror-less cameras come with an optical viewfinder though.  Some have an optional optical viewfinder (say that 10 times fast) that costs extra, and some don’t have a viewfinder at all.  I really wanted a viewfinder so that limited my choices.

I also was working with a budget of $500.  There were plenty of options that were priced way out of my price range!  I just can’t justify spending $1,500+ on a camera.

I ended up with two potential cameras on my list.  The Olympus OM-D E-M10 and the Canon EOS M3.

Once I had my choices narrowed down to these two I used a very helpful website to make my decision, cameradecision.com.

I used their comparison tool to see how the two cameras stacked up.  Check that out {here}.

The Olympus OM-D E-M10 came out just slightly ahead of the Canon overall according to this website.  Despite that, I was still leaning towards the Canon because I’m used to a Canon (less of a learning curve), plus I could use my current Canon lenses on it (with the help of an adapter, I think).

But in the end I went with the Olympus after all.

camera

As it turned out, the price on the Canon EOS M3 on Amazon was $479 for just the body with no lens.  The camera with an 18-55 mm kit lens was $599.  To add on the optional viewfinder was another $189.  Yep, suddenly I’m looking at almost $800 for a camera that I thought was under $500.  If I also wanted an adapter so that I could fit my existing lenses on the camera, that’s another $100.

By comparison I found the Olympus (with its built in viewfinder) in a kit that included a 14-42 mm lens for $399.  Wow!  That’s half the price of the Canon and $100 under budget.

Purchasing the camera was just the first hurdle.  Somehow I had this crazy notion that my new camera would arrive and I’d pop it out of the box and start shooting.  Silly me.  It practically took me five minutes just to figure out where the memory card went!

After struggling with that, I went to youtube and found an awesome video tutorial for my camera by Tony Northrup.  That radically simplified things for me.  I find it so much easier to learn by watching and playing along.  Plus, that guy is not exactly hard to look at, if you know what I mean (although obviously not nearly as handsome as Mr. Q).

So, the new camera is up and running and I’m playing around with using it.

caladium

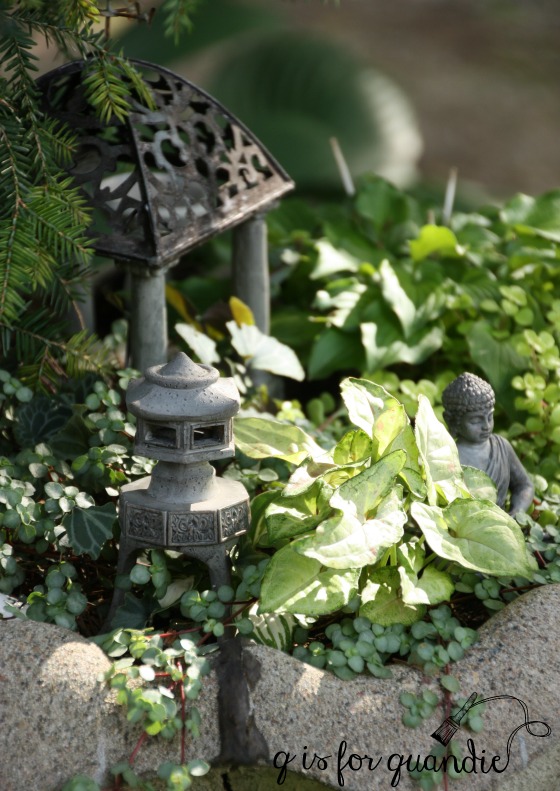
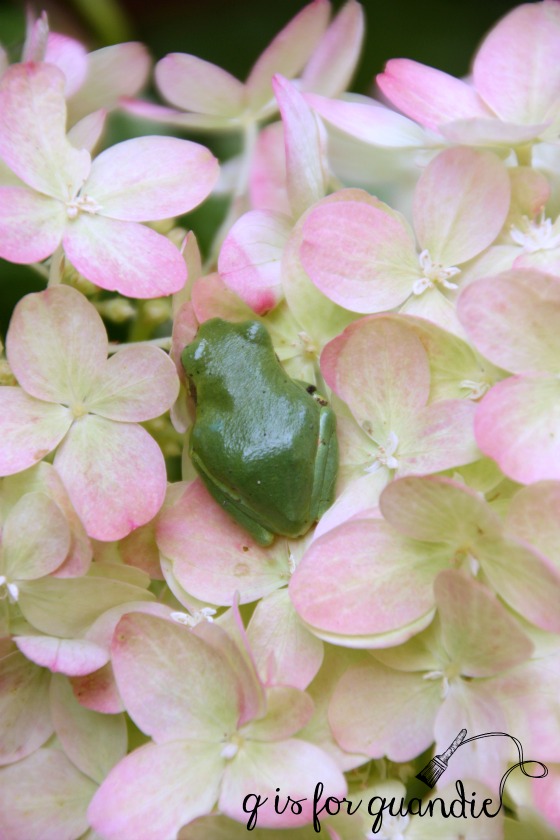
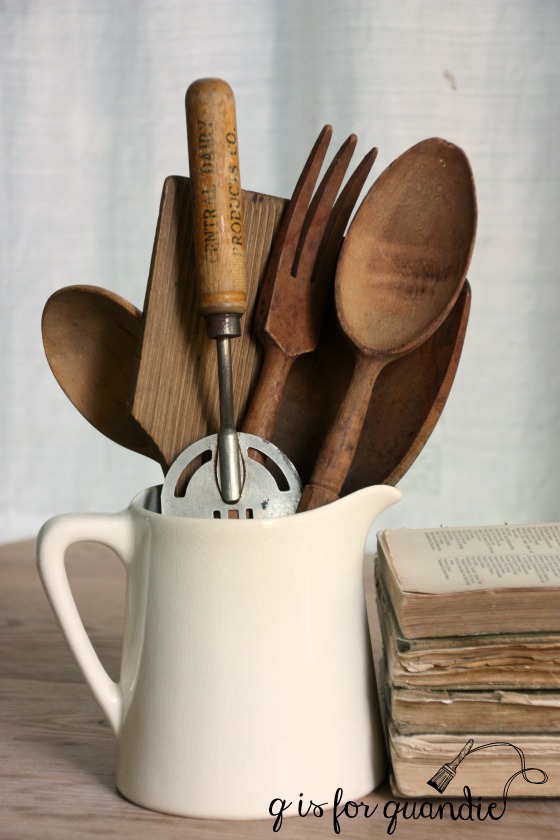
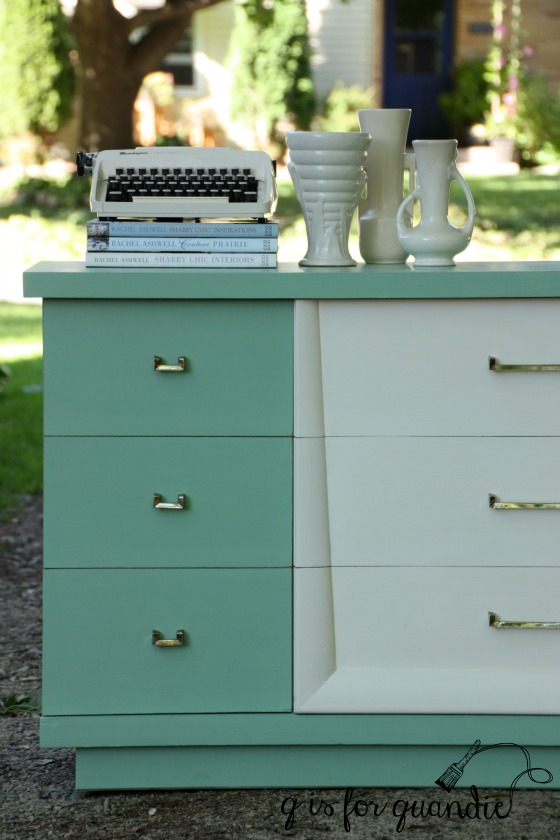
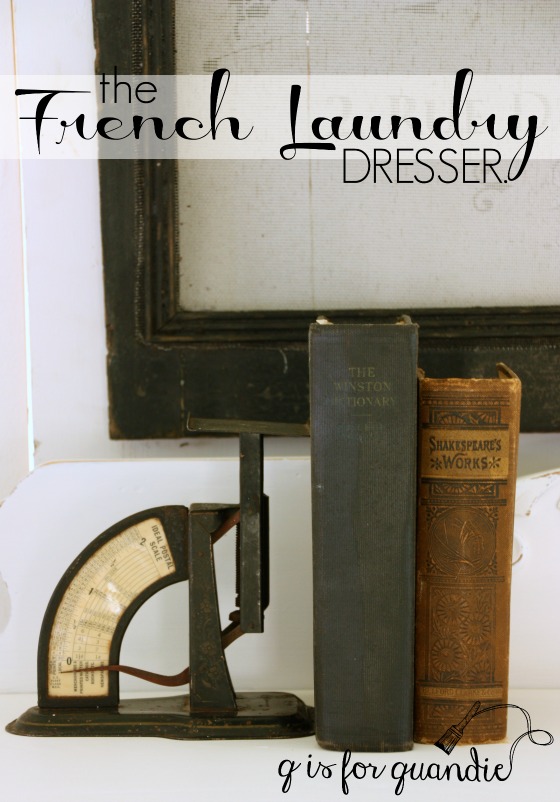
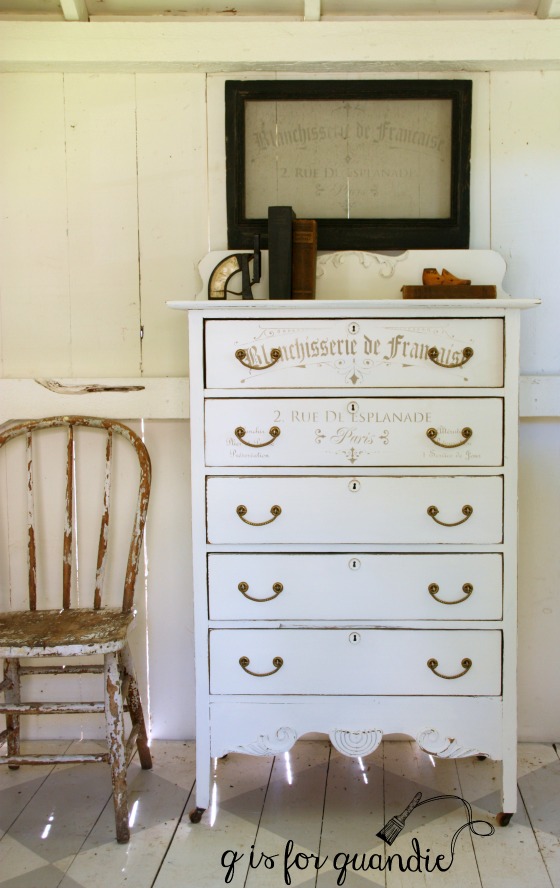
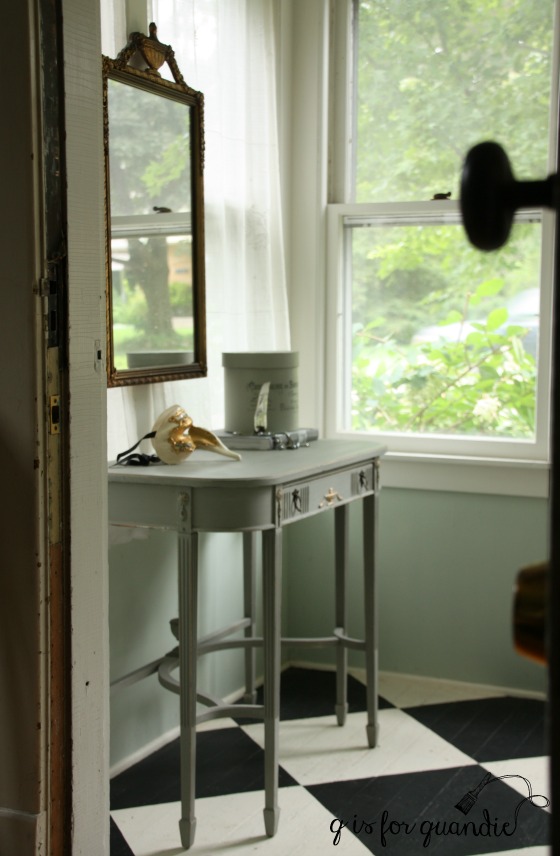
Whether or not I love it for travel remains to be seen, but so far I am getting some rather nice photos with it.

Sidebar:  this next photo is Hosta Sun Power.  It is a hosta that will not only tolerate a little more sun, it actually needs a little more sun to become this vibrant yellow-green.  It practically glows in the garden.

sunpower hosta

I’ll report back in a couple of months and let you know whether or not I continue to be happy with my camera choice.

Please note that this is not a sponsored post and there are no affiliate links for purchasing anything.  Both the camera decision website and the camera tutorial are free.  I paid for my new camera myself and all opinions are my own.  In addition, the camera I chose suits my needs but may not suit yours.  If you are in the market for a new camera, I hope you’ll find some of these resources helpful in choosing the best camera for you.  I know I did!
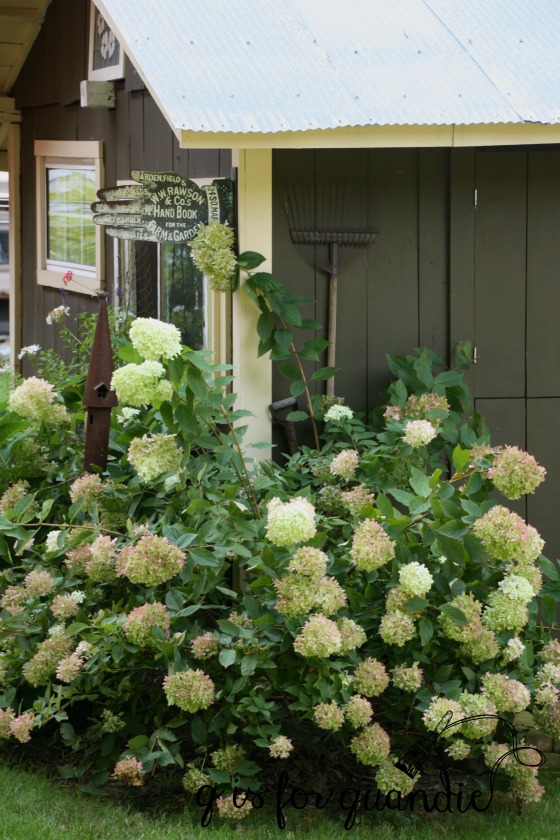
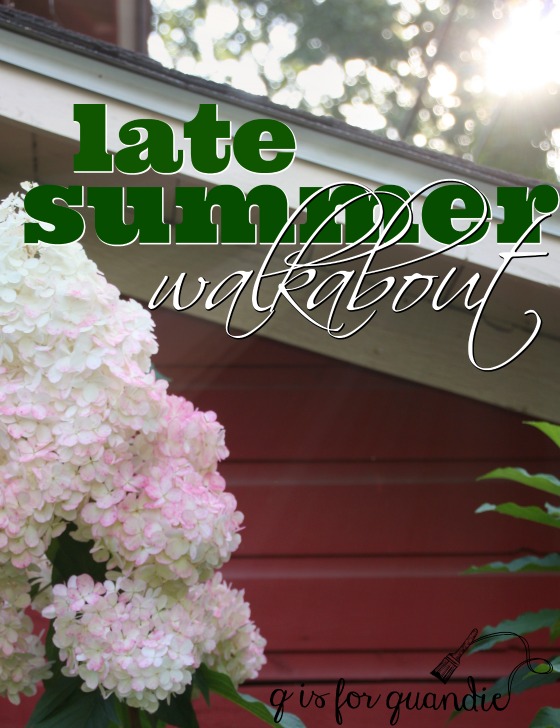
small projects.

small projects

I’m starting to gear up for my fall sale.  That means I am focusing a little bit more on finishing up some small projects rather than just working on furniture.  These are the sorts of items that sell well at the Carriage House Sale.

I thought I’d share a few of them with you today starting with this little stool.  It’s obvious that this little stool had been painted at some point in its life.

stool stripped

Although the top of the seat had been completely stripped, there were patches of paint still clinging for dear life to the legs and bottom of the seat.  I’m always a little sad when I see things like this because I know I would have loved the patina of the original old paint.

I decided not to cover up those legs, but to try and replicate the paint layers on the seat.  I wasn’t quite as successful as I hoped, so in the end I added a stencil to give it a little more personality.

farmers market stool

I’m glad I left the legs alone though.

stool leg closeup

I also painted this little stool at the same time, since I had some MMS Luckett’s Green already mixed up.

lucketts green stool

I worked on a couple of wooden totes too.  My sister and I each bought a few of these at a garage sale earlier this summer and we are dressing them up a bit for my sale.

This one got a paint job in MMS Flow Blue, followed by a stencil.

farmers market tote

And this one got the French Market stencil, and I’m using it to create a Paris themed gift basket.

french market basket

I added some stencils to the cute little ice cream parlor chairs that I picked up at MacGrove.

ice cream stools stenciled

And I also doctored up this little stool that I bought at MacGrove.

macgrove stool before

A little Prizewinner paint and a new faux grain sack upholstery job did wonders for it.

blue stool 2

So as you can see I have been busy, busy, busy in my workshop.

How about you?  Got any small projects that you’ve been able to cross off your list?