chalk it up.

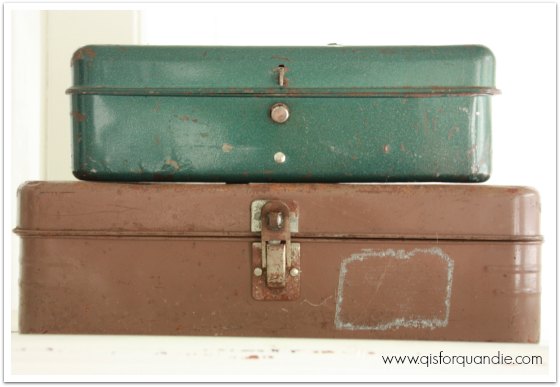
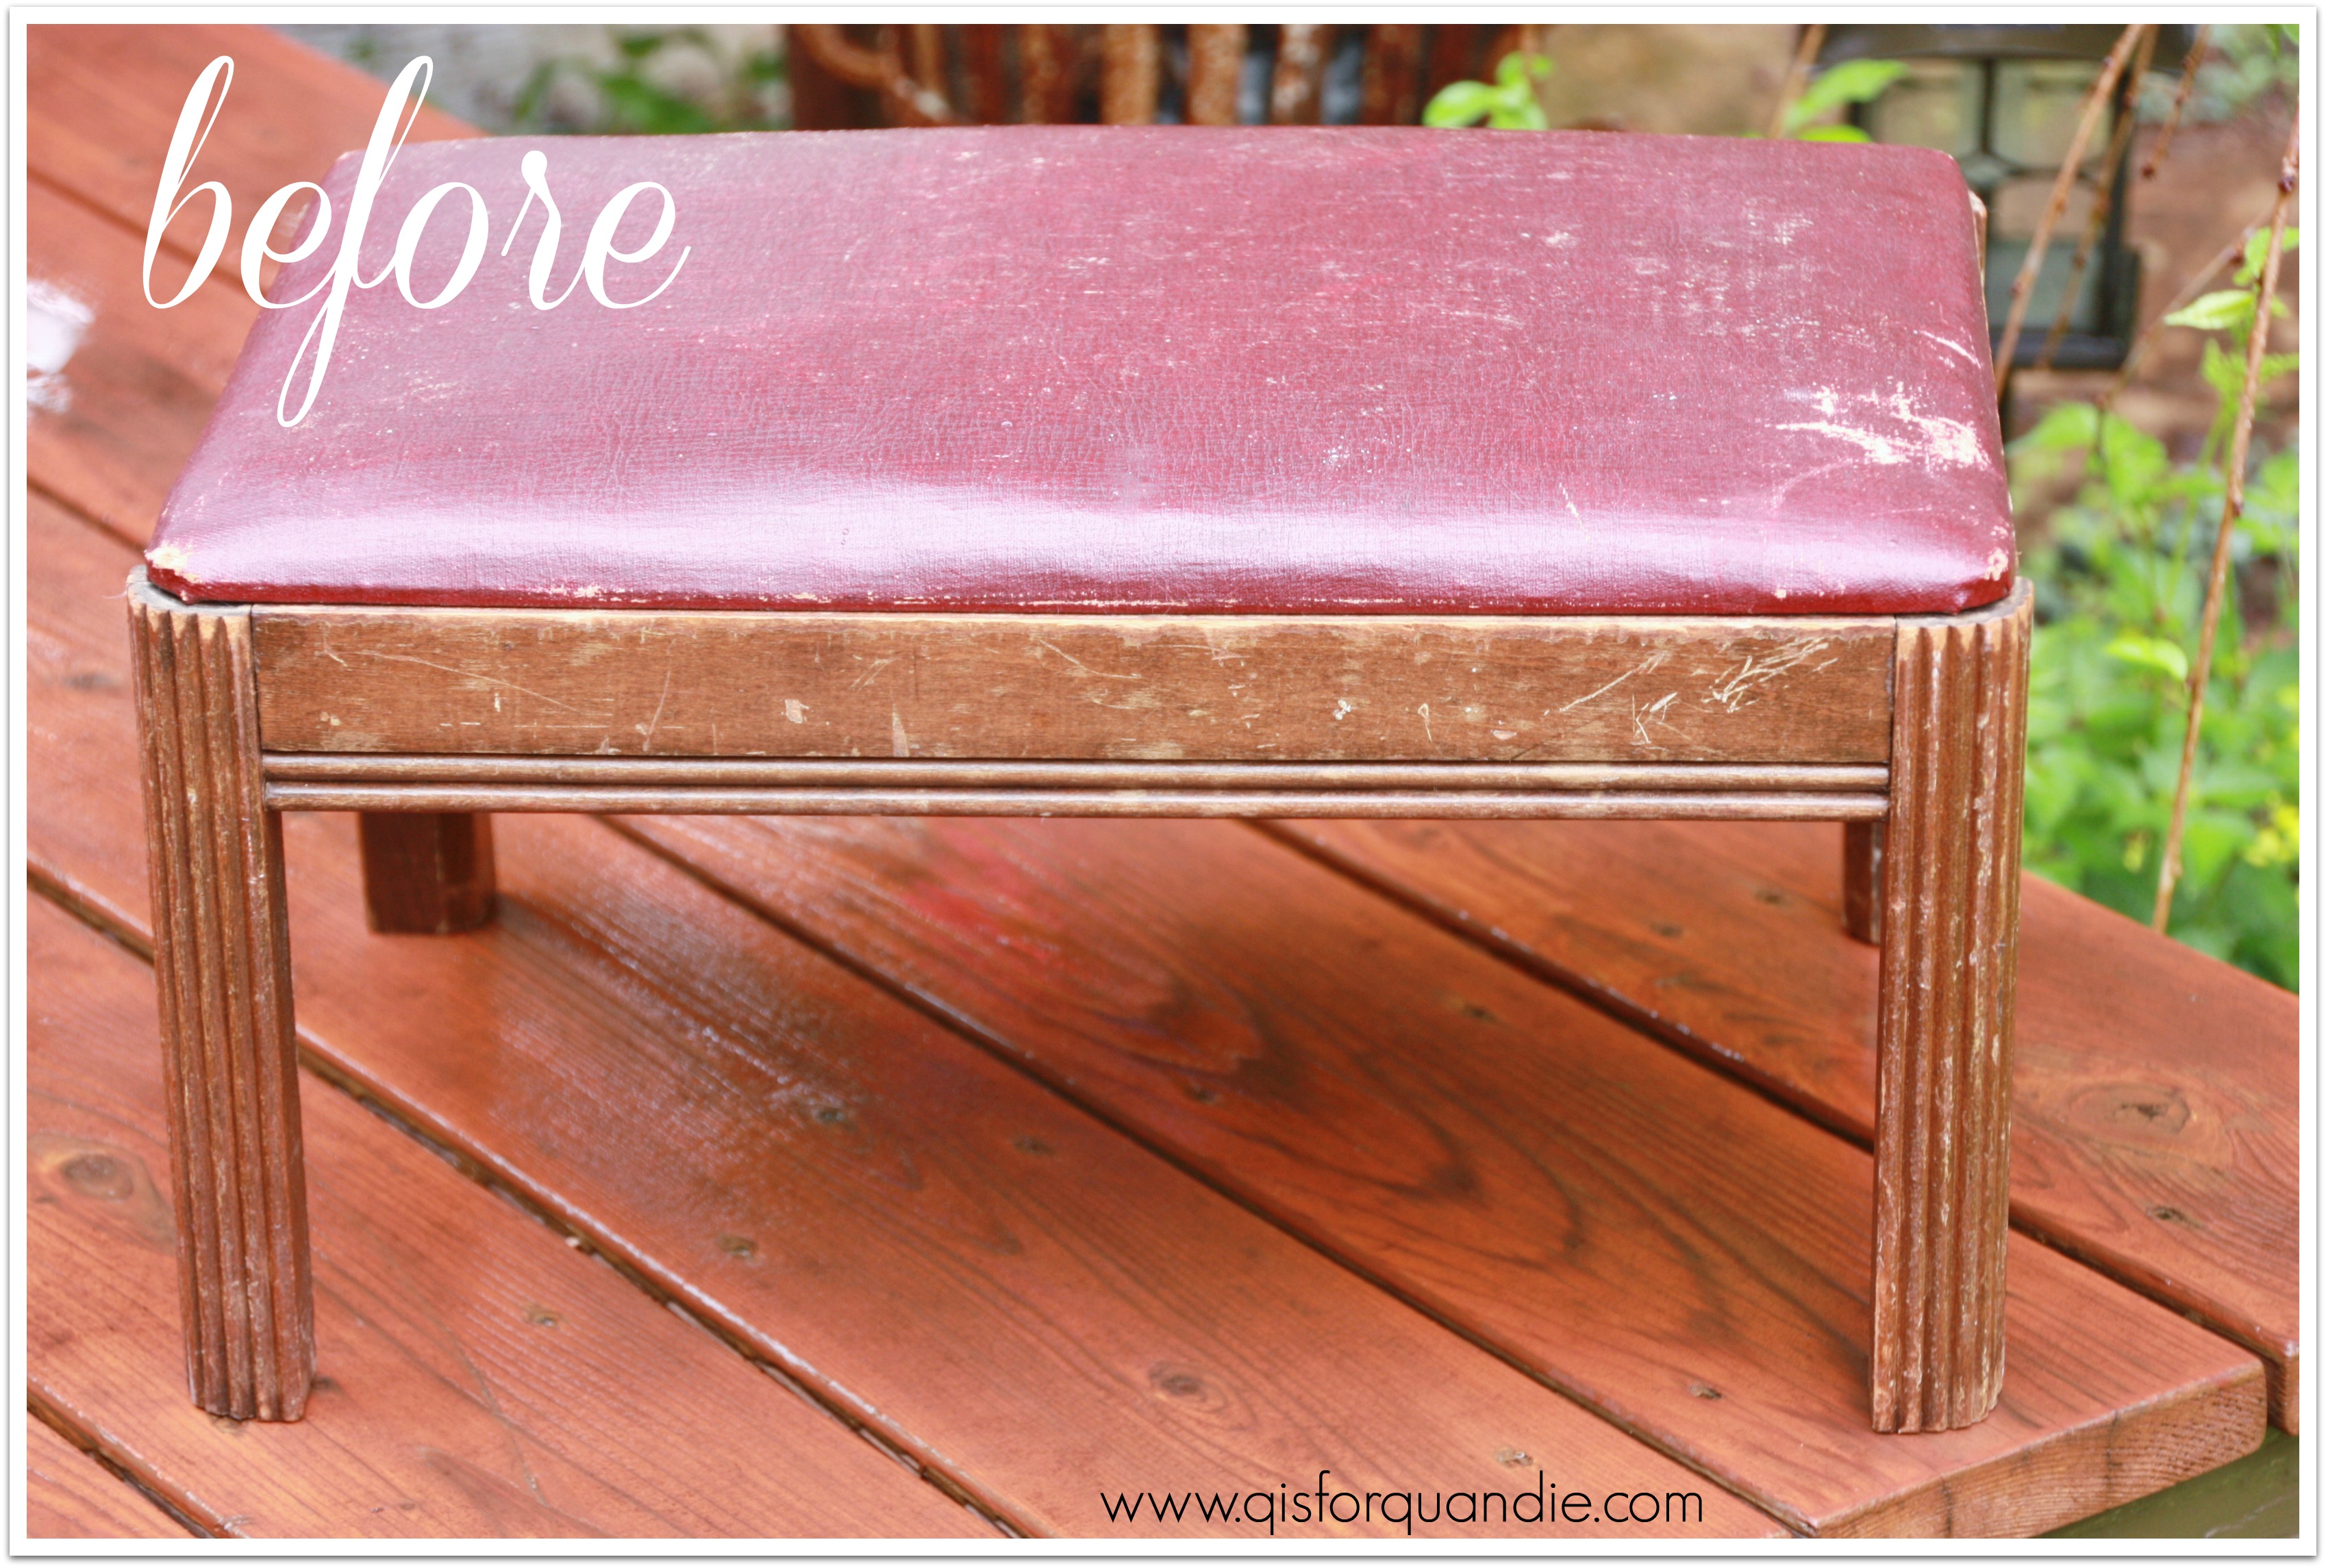
A while back my friend Sue told me she’d seen a new Martha Stewart product.  It’s a liquid chalk dauber that you can use with stencils on a chalkboard.  This sounded just perfect for me since I don’t have great skills when it comes to free-handing a chalkboard design.  Sue was kind enough to share a coupon for 40% off at JoAnn Etc with me, so I popped over there and purchased one (please note that this post is not sponsored in any way, I am just sharing my experience of this product with you).

chalk liquid

The directions were pretty minimal.  They just said to be sure and prime your chalkboard for best results.  Have you ever primed a chalkboard?  If not, it simply means to rub chalk all over it and then wipe it off.  You only have to do this to a freshly painted chalkboard that has never been used before.  Mine wasn’t new, but I primed it again anyway just to be on the safe side.

chalk it up title

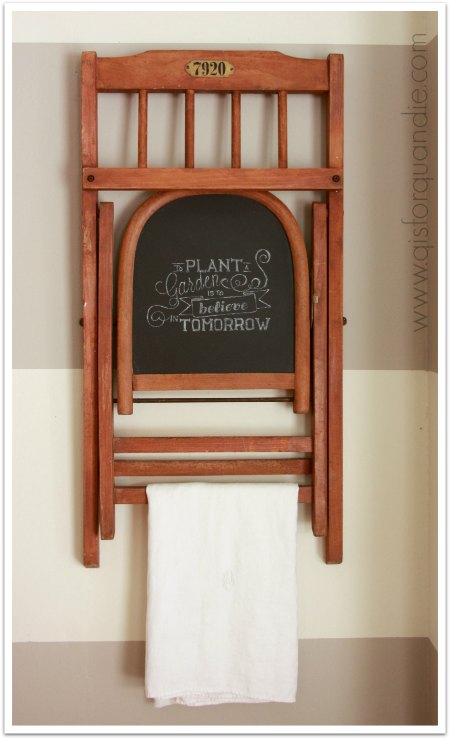
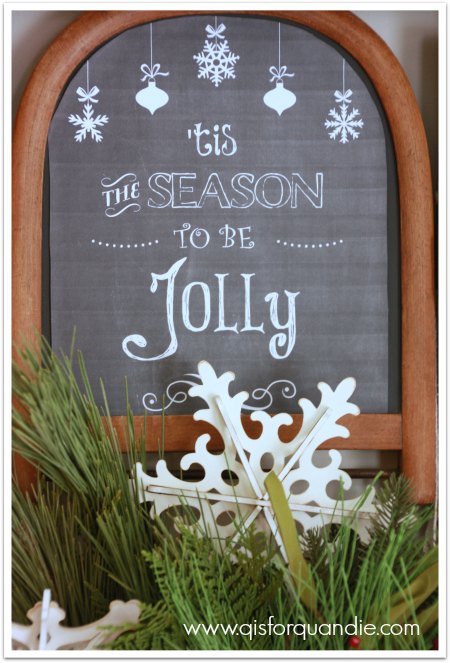
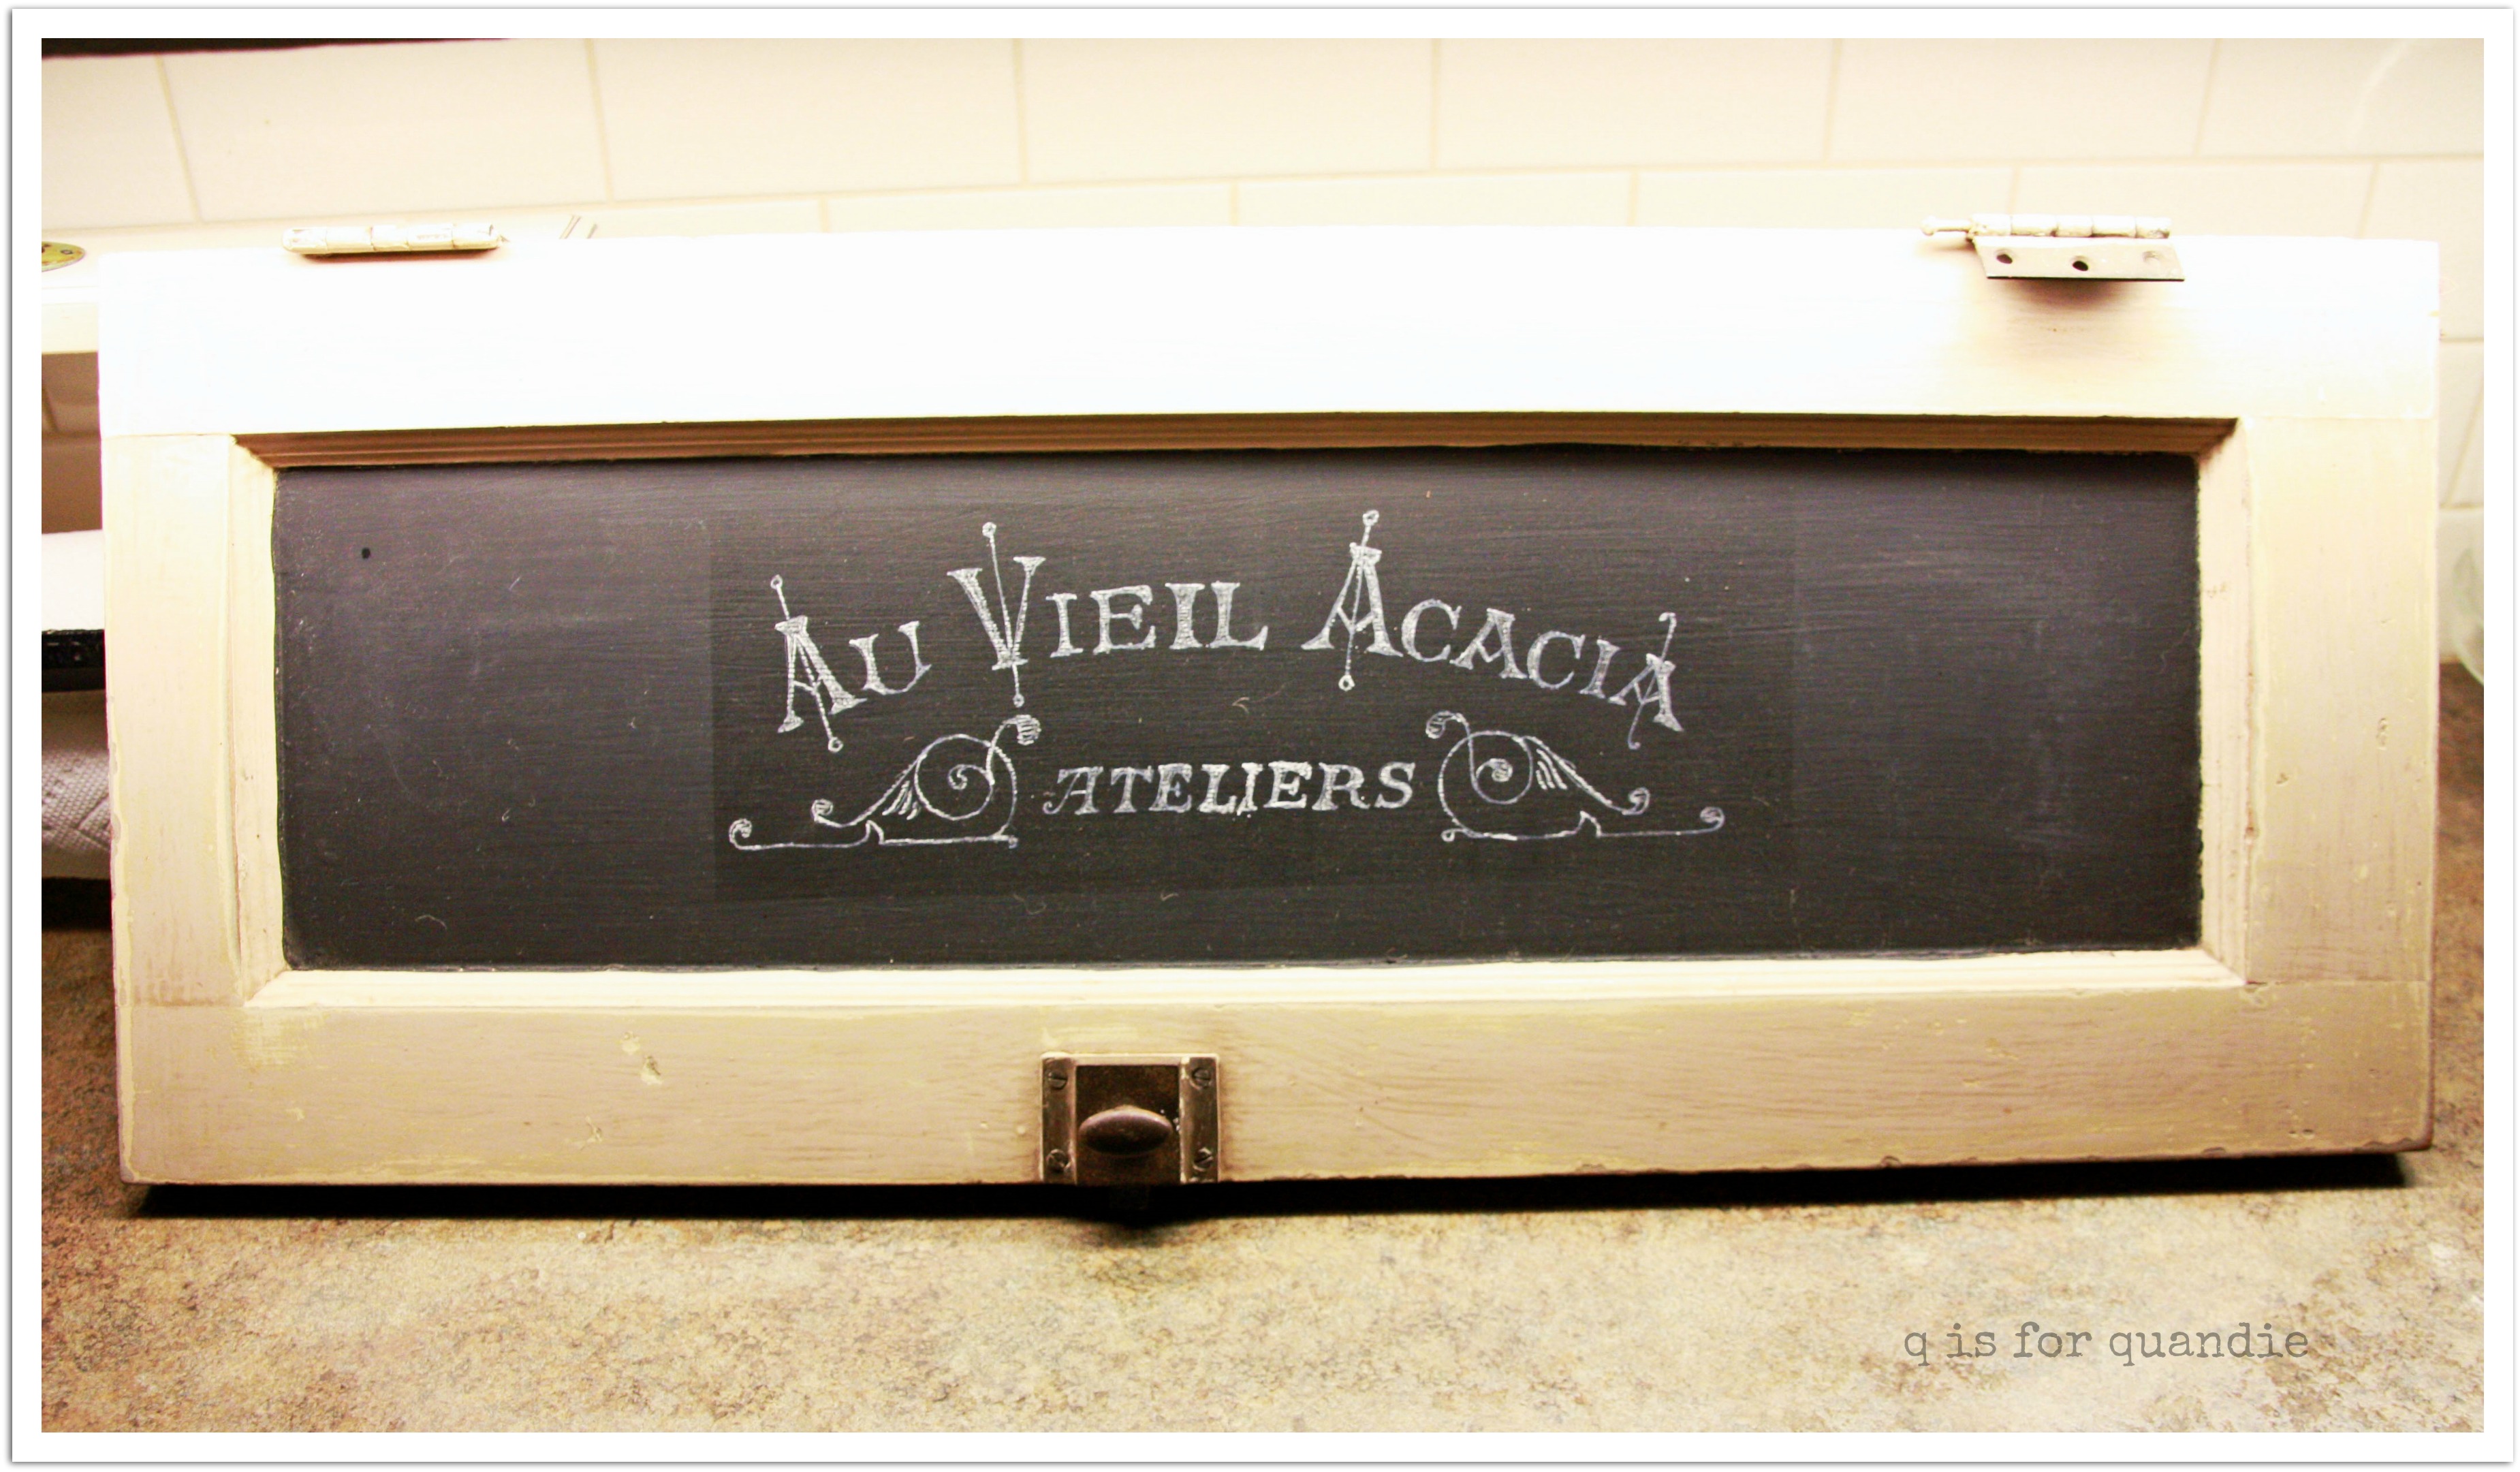
My ‘Family and Friends’ stencil fit the chalkboard perfectly, so I just taped it in place and was ready to start chalking.

chalk stencil

I started out stippling the paint on with an up and down daubing motion, similar to the technique I use when stenciling.  I didn’t really like how the texture of the stippling looked (on the ‘F” below), so then I tried using a sweeping motion instead (on the rest of the letters).

chalk look

And honestly, that looked even worse, so I went back to stippling with the rest of the design.  Once the stencil was removed, I just wasn’t impressed.  I tried to salvage things by filling in some of the letters with actual chalk.

chalk stencil close up

chalk board 1

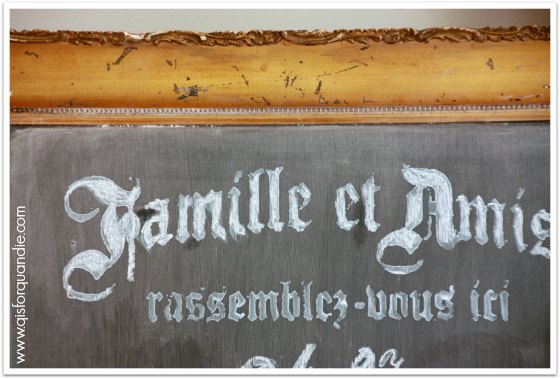
Hmmmm.  I have to be honest.  I’m not loving this at all.  It looks messy and it certainly doesn’t look chalked.  It looks more like a bad paint job.

chalk 2

It doesn’t look quite as bad from a distance, and it helps even more if you squint your eyes just a little.

chalkboard on wall

OK, well, I’m grasping at straws here.  It totally does not meet my standards.

I’m sure part of the problem lies with me and my technique, I went online to look for more instructions or even just some tips on how to use the product.  I found a youtube video, and it recommended ‘pouncing’ the liquid chalk on much like I did.  It also suggested wiping a little of the liquid off first, which I did not do.  That might have helped.   In the end, I think part of the problem is also the stencil I’m using.  It wasn’t designed for use with a product like this.  Using a stencil with skinnier lettering might work better (such as those made by Martha Stewart specifically for her liquid chalk).

Luckily, this product can be ‘erased’ with a damp sponge.  I’m going to test that out next, and then head back to the drawing board with this product.

another quandie quickie.

The quickies have been few and far between lately (I’m referring to quick projects here people, get your minds out of the gutter).  I’ve been doing a lot of BIG projects instead.  Making over a whole room, painting large pieces of furniture, etc.  But while I was waiting for a dresser to dry the other day, I decided to tackle (pardon the pun, you’ll get it in a minute) painting some metal boxes (tackle boxes, get it?) that I picked up last summer at a garage sale.

I am a big fan of old shabby metal containers of any kind, and I bet many of you are as well.  There are some great ones out there.  Then again, there are some that really aren’t all that fabulous.  The color is a bit blah, as it was on these two.

metal toolboxes before

But instead of passing these by when I saw them, I decided to nab them and then see if I could fab them up a bit.

I had recently picked up a sample pot of Cece Caldwell’s chalk paint in Sante Fe Turquoise.  It’s a fairly bright turquoise.  I don’t think I would be inclined to use it on a piece of furniture, but it was the perfect color for a small metal box.  So, I painted the smaller one with it.  Here it is once the paint was dry, but before I distressed and waxed it.

metal toolbox painted

Of course, you can’t leave it like this!  I sanded it, then waxed it with clear wax.  Then I added a little dark aging wax to some areas for a little more age.  Finally, I added a couple of Tim Holtz rub-on’s.

I painted the larger box using Annie Sloan’s Florence, and then gave it the same treatment with wax and rub-on’s.

Et voila!

metal toolboxes after

Now I have the most fabulous vintage metal boxes!

metal toolbox top

Aren’t the colors divine?

metal toolbox side view

Did you see my lucky number, by the way?  While cleaning out my craft room for its makeover, I came across a stash of vintage tickets that all have a ’22’ on them.  I purchased them at Oronoco Gold Rush a couple of years ago.  The vendor selling them had boxes and boxes of ticket stubs, all sorted by number!  I can’t imagine how long it took her to sort them.  I’m glad I found them, I’ll use them on my scrapbook page with all the photos of my lucky number from my Danube trip.

metal boxes 22

But maybe I’ll save one or two for future photo shoots.

Got any old metal boxes you can dig out and slap some paint on?  It’s a super fast and easy project for a winter afternoon.  Give it a try!

a Christmas quickie.

When I decorate for Christmas, I focus more on small touches all over rather than the big pop of an amazing Christmas tree.  This is mainly because I don’t really have a good spot in my house for a big tree.  This year I decided it would be fun to re-work the chalkboard chair that I have hanging on the wall in my kitchen.  You may remember it …

chalkboard chair

It was easy to add a pop of Christmas to this chair.  First, a confession.  I was going to re-do the chalkboard design, but when I went to erase the existing design I realized I pressed a little too hard with my chalkboard pencil the first time around and it was embedded too deep.  Drat!  I debated getting out the chalkboard paint and adding another coat, waiting for it to dry, then adding a new design, but I had no time for that.  So I cheated.  I printed out a chalkboard printable and then just taped it onto the chair.  You can find the free printable here.

chair chalkboard close up

It’s not too obvious from a distance, but up close it looks a little wonky.  Maybe if I find some spare time, I’ll re-do it the right way.  But for now, it is what it is.

I also removed the linen towel that was hanging from the chair and replaced it with my Reindeer feed sack filled with greens and wooden snowflake ornaments.  Were you wondering what Santa fed to Dasher and Dancer?  Well, now you know!

chair close up

And with just those couple of changes, I have a fun Christmas decoration for the wall.

chair after

Easy peasy.

happy thanksgiving.

Happy Thanksgiving!  I hope you are spending the day with family or friends enjoying good company and good food.

happy thanksgiving

Today Mr. Q and I are heading out to his mom & step-dad’s house in Wisconsin for a quiet dinner for 4.  We have been doing this every year since my in-laws moved back here from New Orleans.  After spending so many years far apart on the holidays, we are especially grateful for their company now.

While my sweet potatoes are baking, I took some time to package up some fun goodies that we brought back from our trip for them.  I really enjoy packaging gifts.  It goes way back to my high school days when I made a little extra spending money at Christmas time by running a gift wrapping booth at my local mall.  I always made the most money on Christmas Eve itself when all of the men came dashing in for last minute gifts that needed to be wrapped!

I have honed my gift packaging skills since then.  I have to admit, on occasion the wrap is better than the gift inside … shhhh … don’t tell anyone I said that.

For today’s gift for the in-laws, I just started with a plain brown craft paper bag and I dug out some of my fab vintage foreign language books.

thanksgiving books

I suppose the book purists out there might be appalled, but I regularly dismantle old books for craft projects.  I consider it a way to enjoy the beautiful typography and not just leave it tucked away in an old book.

I ripped a page out of the German book that I recently purchased at Carver Junk Co as a base for my design, then I added a copy of an old photo, some Tim Holtz rub-ons, and some washi tape.  Some brown satin ribbon and a vintage button top things off. And voila!

thanksgiving gift

thanksgiving gift close up

I’ve used a paper shredder to shred pages from the French Grammar book to cushion the contents.

thanksgiving gift inside

Are you wondering what’s in there?  Just a few little things … a wooden trivet set from Budapest, some chocolates from Austria and an Advent calendar card showing the Nuremberg Christmas market.

thanksgiving gift items

Now that the gift is ready, I must finish making my famous sweet potato casserole so we can hit the road.  Despite not having any pictures of it, I’ll share the recipe with you.  People rave about this dish every time I bring it somewhere, even the ones who don’t usually like sweet potatoes.

Sweet Potato Bake

  • 3 c. cold mashed sweet potatoes (w/out milk or butter)
  • 1 c. sugar
  • 1/2 c. milk
  • 1/4 c. butter, softened
  • 3 eggs
  • 1 t. salt
  • 1 t. vanilla extract

topping:

  • 1/2 c. packed brown sugar
  • 1/2 c. chopped pecans
  • 1/4 c. all purpose flour
  • 2 T. cold butter

In a mixing bowl, beat sweet potatoes, sugar, milk, butter, eggs, salt and vanilla until smooth.  Transfer to a greased 2-qt. baking dish.  In a small bowl, combine brown sugar, pecans and flour; cut in butter until crumbly.  Sprinkle over potato mixture.  Bake, uncovered at 325 for 45-50 minutes or until golden brown.

Yield:  8 – 10 servings.

Before I leave you, let me take a minute to say that one more thing I am grateful for on this day of thanksgiving is you!  Thank you for all of the kind comments and well wishes that have been sent my way since starting this blog a year ago.  I couldn’t do it without you!

another quandie quickie.

I haven’t done a quandie quickie in a while.  I’ve been so busy working on furniture this summer, that I haven’t done many small, quick projects.

Recently I had some extra MMS milk paint in Eulalie’s Sky mixed up, left over from a dresser I was painting.  I hate to let this stuff go to waste, so I looked around for something to paint.  I pulled out this cute little vintage child’s folding chair that I picked up while my sister was visiting.  The perfect candidate for a paint job.

quickie chair 3I don’t have a ‘before pic’ to share, but this was basically bare wood.  Old, dirty, bare wood.  I did absolutely nothing to prep it.  No sanding, no cleaning.  I just brushed off some dirt and called it good.  Since the paint was already mixed up, I just slapped it on.  Two coats.  Followed by a quick sanding to distress and then a coat of hemp oil.

I added a metal number 7 plate to the back of the chair.

quickie chair 2

How do you like the newest addition to my clock collection?  While my sister was here, we checked out a few shops in Minneapolis, including Junket:  Tossed & Found, which is where I found the clock.  A vintage clock with aqua in it was on my wish list, so I was thrilled to find this one for a mere $12.

I don’t know why I am obsessed with child sized chairs.  Something about them just appeals to me.  This one will likely get a price tag slapped on him for the October Carriage House Sale.

quickie chair

Isn’t he just adorable?

garden quickies.

You really can’t be impatient when it comes to gardening.  In general, I am mostly an instant gratification sort of gal.  I want results, and I want them quickly.  I love a quickie makeover.

plant a gardenBut gardening generally doesn’t work that way.  Peonies are a good example of this.  If you move them, it can take up to 3 years for them to bloom again!  And you know the old adage about perennials, the first year they sleep, the 2nd year they creep, the 3rd year they leap!  In other words, it takes a good 3 years for perennials to fill in.

(note:  Natalie, as you can see I still have this box, it’s yours if you want it, just email me)

plant peonies

But just because the plants move at their own pace, doesn’t mean we can’t come up with some fun and quick garden themed projects.

plant a garden manual

First up:  Remember the little chalkboard I purchased at my ‘breakfast meeting‘?  I’ve given it a new quote, and added it to a crate of vintage garden supplies.

plant a garden slate

Here is my tip for writing on a chalkboard, especially if you don’t love your own handwriting.  Print your design on a piece of paper first, rub chalk all over the back of the paper.  Place the paper on your chalkboard and trace the design using a pencil.  Then just fill in with chalk.  I used a chalk pencil for this one to get the fine lines.  Sometimes I use chalk pen also, but I rarely use regular chalk.

Next up:  Remember the buckets I also purchased at the ‘breakfast meeting’?  A couple of stencils, some black paint and 30 minutes gave me this.

stenciled buckets closeup

 There are many potential uses for these.  Add a pot of geraniums or other blooming annuals.  Use in your bathroom as a trash can.  Stash your cleaning rags inside and store in the pantry.  Use to tote your gardening tools around the yard.

stenciled buckets

The possibilities are endless for a fab stenciled bucket.

stenciled buckets in cupboard

Finally, one last quickie project.  I purchased a tiny vine that was originally intended for the fairy garden, but in the end there was no room.  So I decided to pot it up on its own.

tiny vine suppliesI felt like the clay pot wasn’t really ‘me’ though, so I gave it a paint job.  One quick coat of Annie Sloan’s Old White was all it took.

tiny vine after

Over time the vine will fill in and this will be a sweet little windowsill garden.

So, take an hour or so on a sunny summer morning while you are waiting for those perennials to fill in and complete your own quick garden project!

small projects.

I love doing small projects that take just a bit of time.  I think it’s the immediate feeling of accomplishment you get when you complete something so quickly.  It’s not very exciting for a blog post though, so I thought maybe I could group a couple together and this post would have a little more meat to it.  I’m not sure I succeeded, but here goes…

I think I bought this bench at a lunchtime garage sale.  It’s pretty tiny.  And it was kind of ugly.

fruity bench beforeBut, the price was right and I thought it would be a fun one to restyle.

First I picked a fabric.  You might remember this fabric because it was rejected for the last bench I painted.

fruity bench fabric

I had a lot of options for choosing a paint color with this fabric.  I thought about Mustard Seed Yellow, or maybe Luckett’s Green.  Then I thought maybe I would go with Annie Sloan’s Duck Egg.

In the end, I got out the MMSMP in Tricycle.  I loved this shade of red when I used it on a dresser, and the combo of red and aqua is one of my faves.

The end result is a charming little bench.

fruity bench top

Wouldn’t this be sweet in the kitchen, maybe as a spot to rest your feet while studying your favorite cookbook.

fruity benchThis tiny rocking chair was given to me by my friend Cathy.  It was a give away because it was missing the upper rung on the back.  Unfortunately, I didn’t get a real ‘before’ picture of this one, I just sent it straight over to Ken’s workshop.  And as usual, Ken just fixed it right up!  I did snap a picture before I painted it and you can see the new piece at the top of the rocker back.

small rocker beforeI wanted the paint job on this rocker to be nice and chippy and have a very aged patina, but I knew that new piece of wood would just soak up the MMS paint and not chip at all.

small rocker close up

So, I decided a two layer paint job was in order.  First I painted the rocker with MMSMP in Flow Blue, then I painted over that with MMSMP in Eulalie’s Sky.  The end result was just what I wanted.  A paint finish that looks genuinely aged, not just faked with sand paper, and the replacement piece blends in well.

small rocker paint job

This darling little rocker sold right away at the Carriage House sale!

small rocker 1

another quandie quickie.

It’s been a while since I’ve posted a quandie quickie.  What is it?  Just a quick makeover that you can do in no time.

In this case, it’s a fun mid-century magazine rack/drinks table that I updated with a quick spray paint job.

I picked this up at the Blaine garage sales, here it is before its makeover.  See it?  Down front, on the right.

magazine rack beforeIt was pretty blah as is, but I knew it would pop with a fabulous color.

So I just cleaned it up with some soap and water, let it dry, and then gave it a couple of coats of Rustoleum in Lagoon.

magazine rack 1Now it’s the perfect perch for a patio drink and some reading material.

magazine rack 3If you start seeing pink elephants after a couple of drinks, then this is the perfect shot glass for you.

magazine rack 2This magazine rack would add a fun pop to anyone’s mid-century style patio.  It will be available at the Carriage House Sale!


another quandie quickie.

I found this old cupboard door at a garage sale in the MacGrove neighborhood a couple of years ago.  I originally painted the inset with chalkboard paint, added a chalk pencil design and put it in my occasional sale for $22.

sign before

Nobody bought it the first year.

Nobody bought it the 2nd year.

I had a couple of people ask, is that design permanent?  No, it isn’t.  I think that was the wrong answer.  Or maybe it was the right answer, but they didn’t want chalkboard?  I’m not sure.

Either way, it didn’t sell.

OK, I can take a hint.  And I was bored last night so I decided to restyle it.  I sanded it down and casually slapped on a few layers of milk paint.  I don’t normally paint over existing paint, so this was an experiment for me.  I got a lot of chipping over the original paint, but not much at all over the chalkboard paint.  Interesting.  I had mixed the final coat of Linen a bit thicker than usual and dried it with a blow dryer to get some crackle going on.

But, I was aiming for super chippy, layers of ‘age’ and slightly grungy.  A little scraping, sanding and dark wax later, and that is pretty much what I got.

sign closeup

I added a French Market stencil and presto chango, a fab new sign.

sign 4

sign 2

 I’m kind of loving it in my own kitchen.  I might just have to keep it now.

sign 5

another quandie quickie.

Last summer I bought a sweet pair of child sized metal folding chairs at a garage sale.  I knew they would make great canvases for a chalkboard sign.  I also knew that they were an unfortunate shade of burgundy, one of my least favorite colors in the world.  Still, I know there are some burgundy lovers out there and they had a fabulously junky patina, so I painted the seats with chalkboard paint and added a design to them with a chalkboard pen and ended up with this.

chalkboard chair before full

But, despite my best efforts, they didn’t sell at my summer Carriage House Sale.  So, then I hung this one on the Carriage House.  It stayed there most of the summer, exposed to the elements.  As you can see, the chalkboard pen held up remarkably well.

I put them out for the October Carriage House Sale as well, and again they didn’t sell.  Was it the spring message?  Or was it the burgundy?  You might be thinking ‘maybe it was the price!’, but I can’t imagine it was, these were priced somewhere in the $28 range.  If someone had loved them, I don’t think the price would have been a factor.

So, as much as I love to retain an original junkalicious patina, I decided these would do better with a coat of paint.  I thought perhaps the Annie Sloan paint would work well on the metal, and I have those samples to use up, so I decided to do one in the Florence …

chalkboard chair Florence

And one in the Provence ….

chalkboard chair after

I can tell you that the Annie Sloan paint adhered nicely to the metal.  I did sand just slightly and wipe these down before painting, but that was it for prep.  I gave each chair two coats of paint, then sanded, then finished with the MMS antique wax.

chalkboard pair

These will head to Junk Bonanza with me in April to see if they can find a home.  Surely someone there will understand how fun it would be to hang one of these on the wall in the kitchen, or in a child’s room … or even outside on the garden shed door.  How cute would that be?