don’t have a dollhouse?

So you love miniatures, but you don’t actually have a dollhouse.  No problem.  There are lots of options for displaying miniature items that don’t involve having an elaborate dollhouse.

Of course, the simplest option is to just display your mini’s on a shelf.

I have several pieces of miniature furniture on the bookshelves in our living room.  Granted these aren’t 1:12 scale, but it’s the same general idea.

Another super simple option would be to create a mini vignette under a cloche.

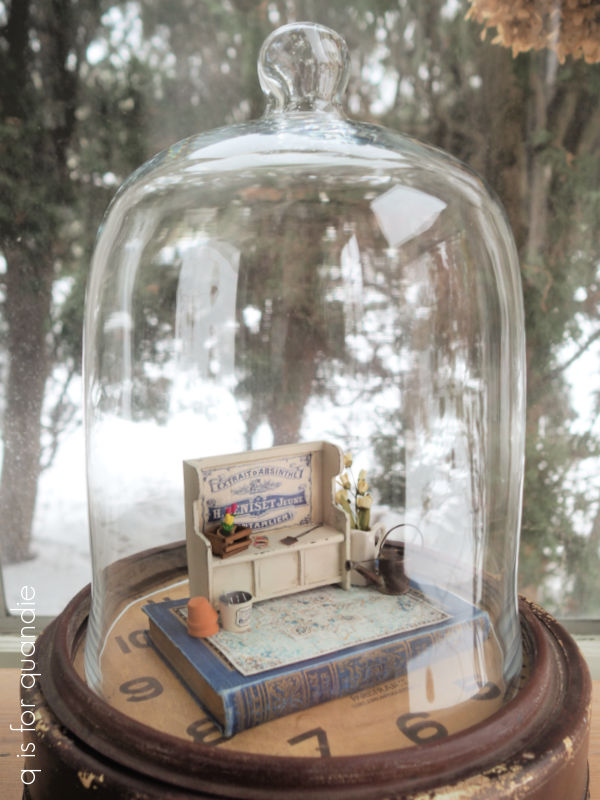
You’ll possibly remember my clock cloche.  I usually switch up the contents for the season or current holiday.  But it’s also perfect for displaying a miniature scene.

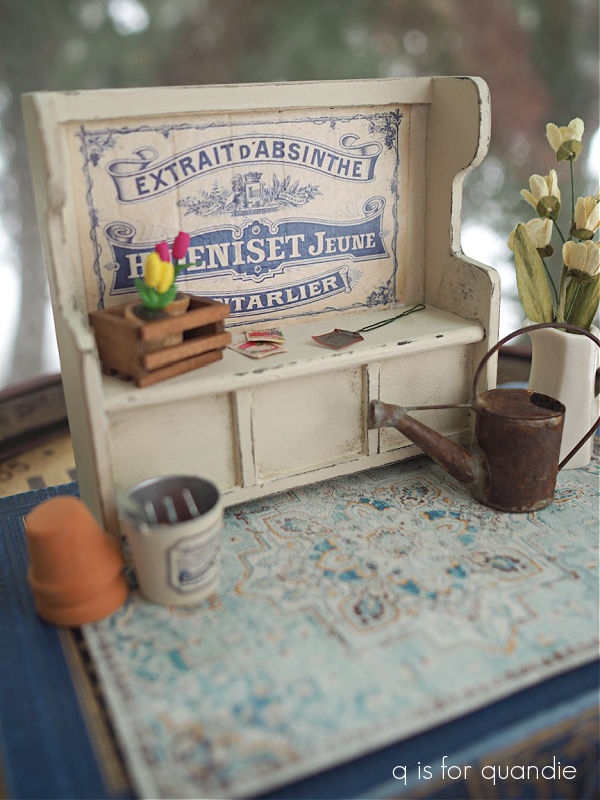
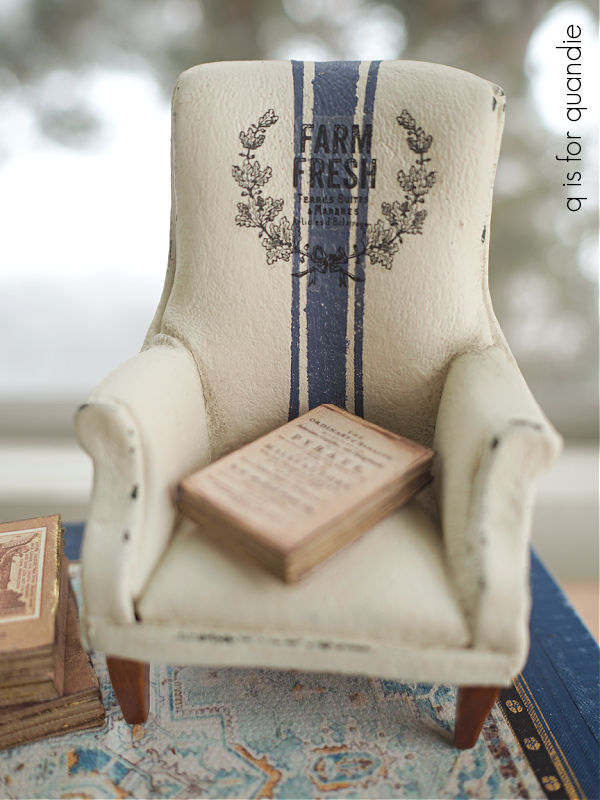
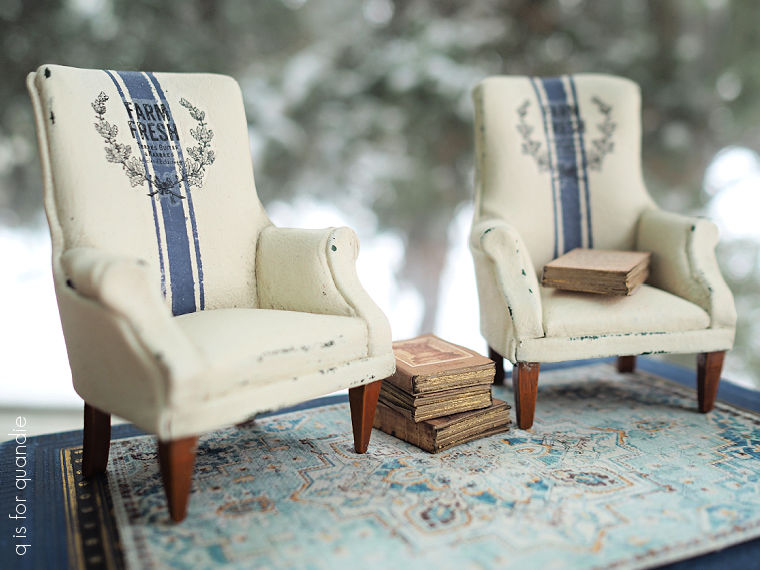
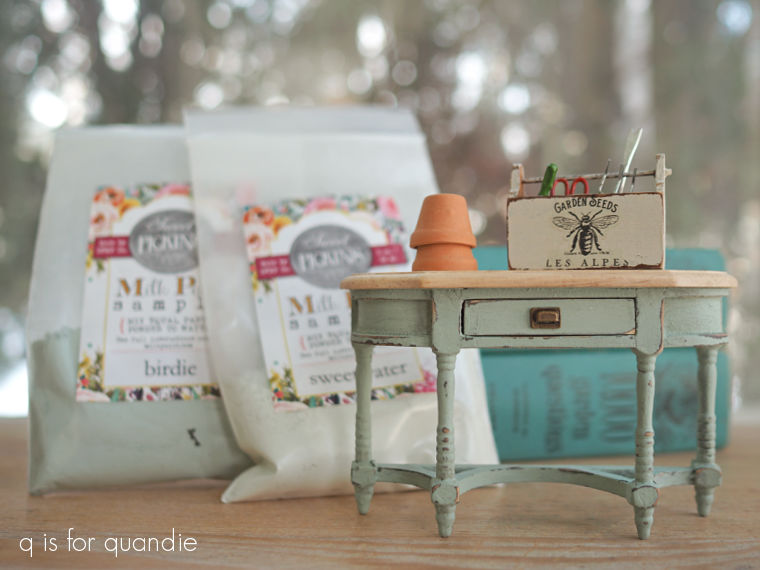
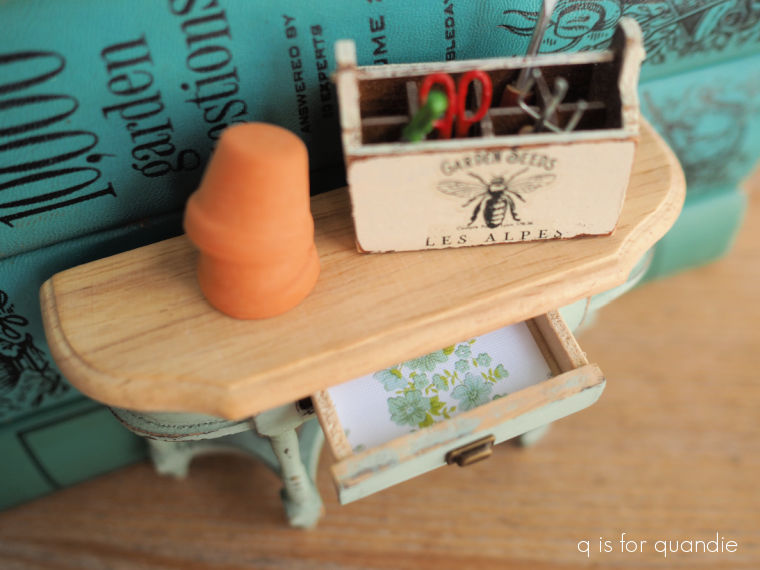
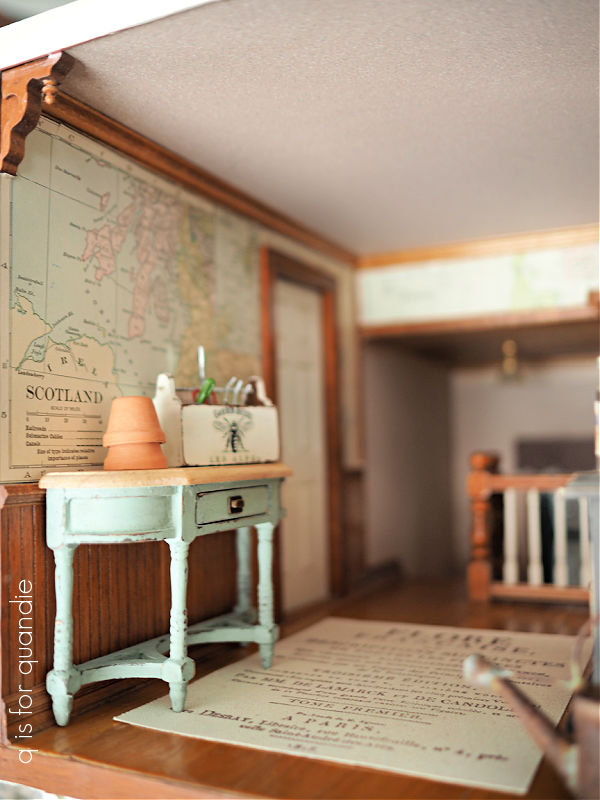
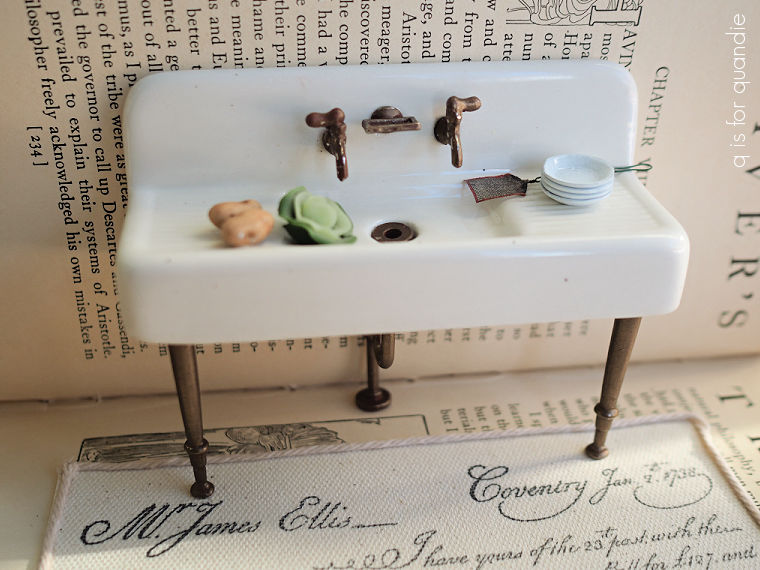
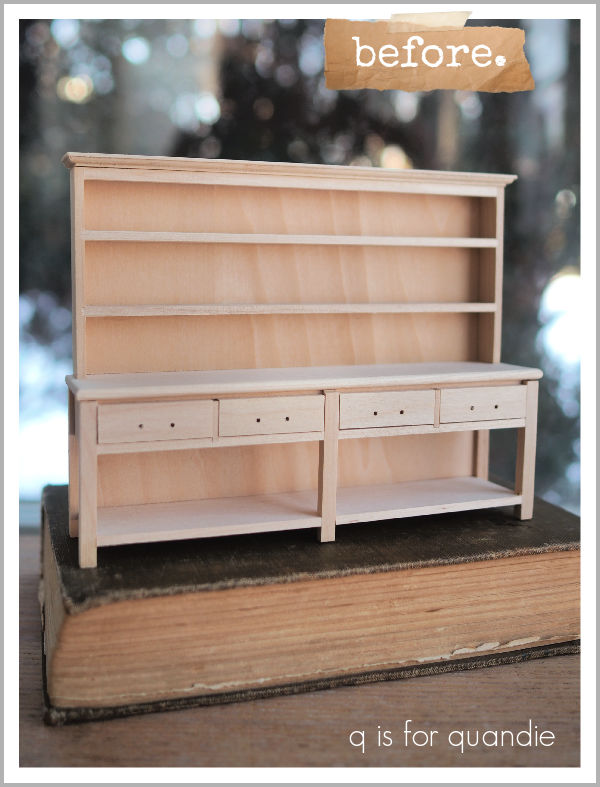
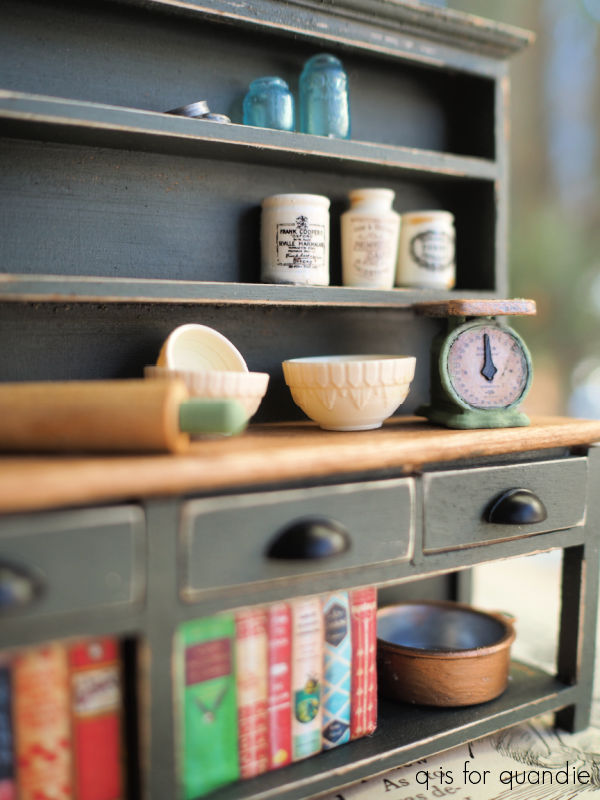
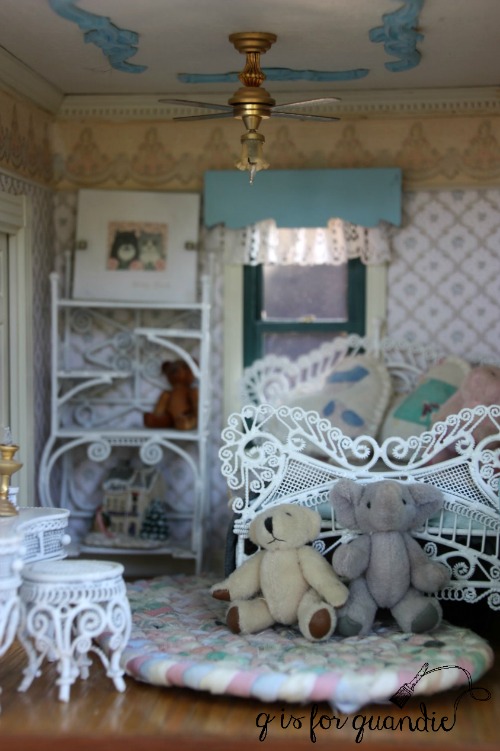
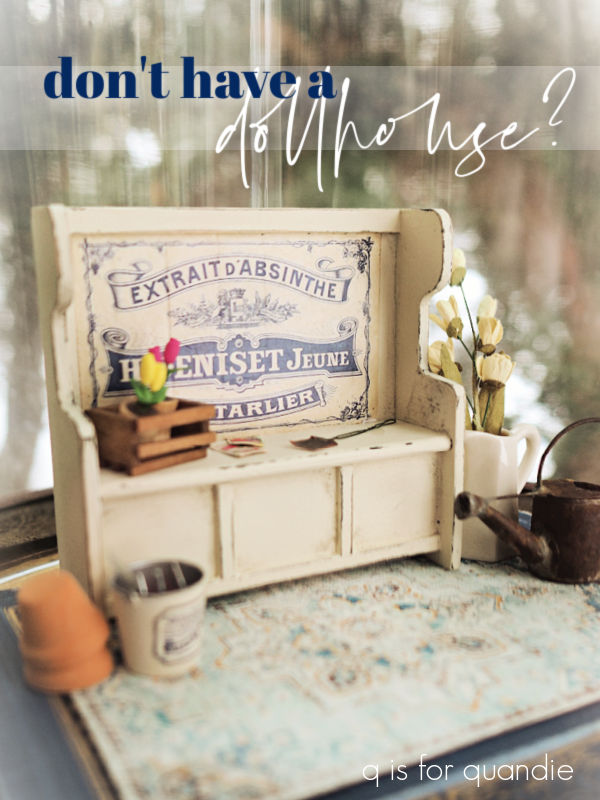
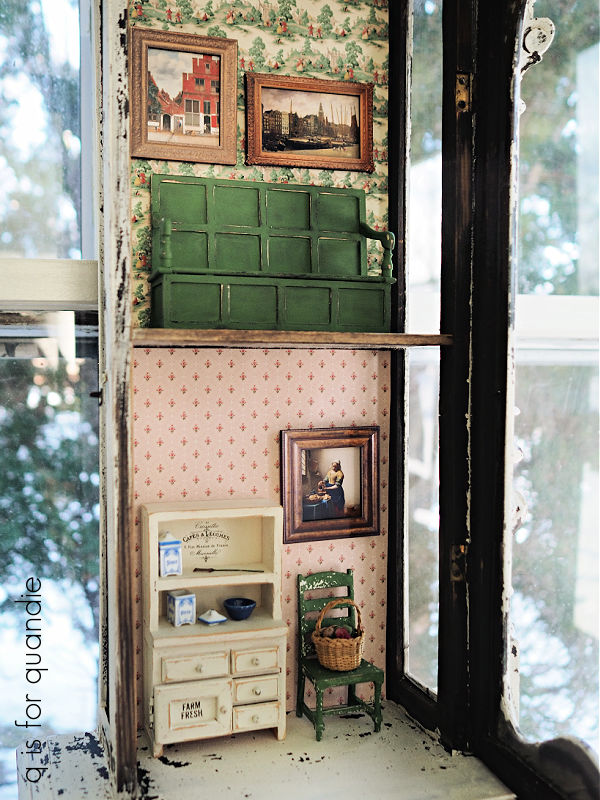
Can I mention that sweet little bench for a moment?  I purchased it unfinished from Miniature Crush.

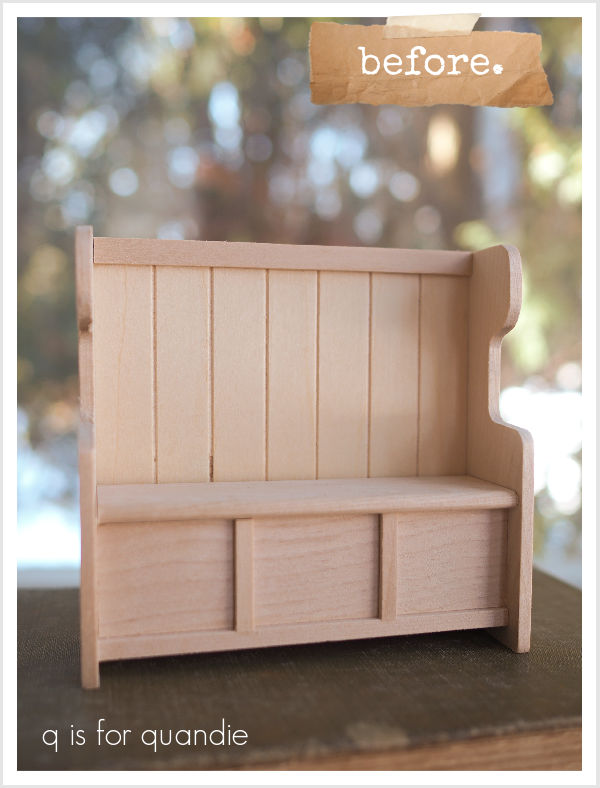
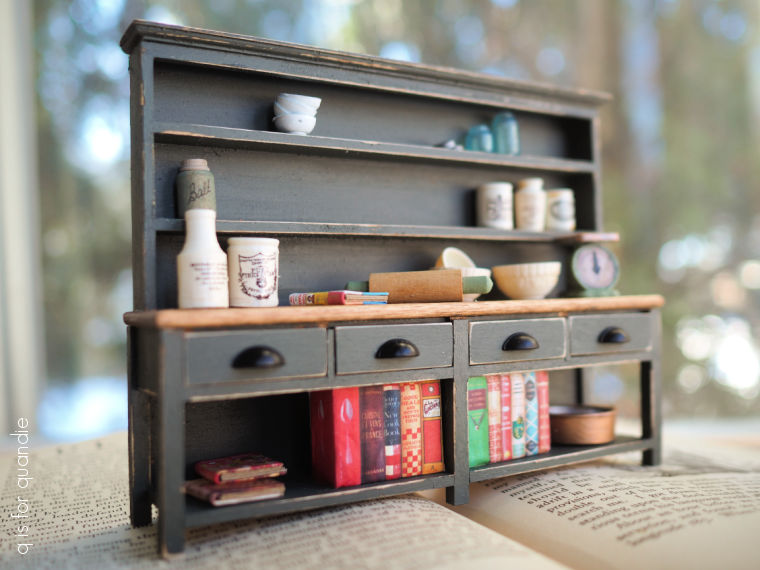
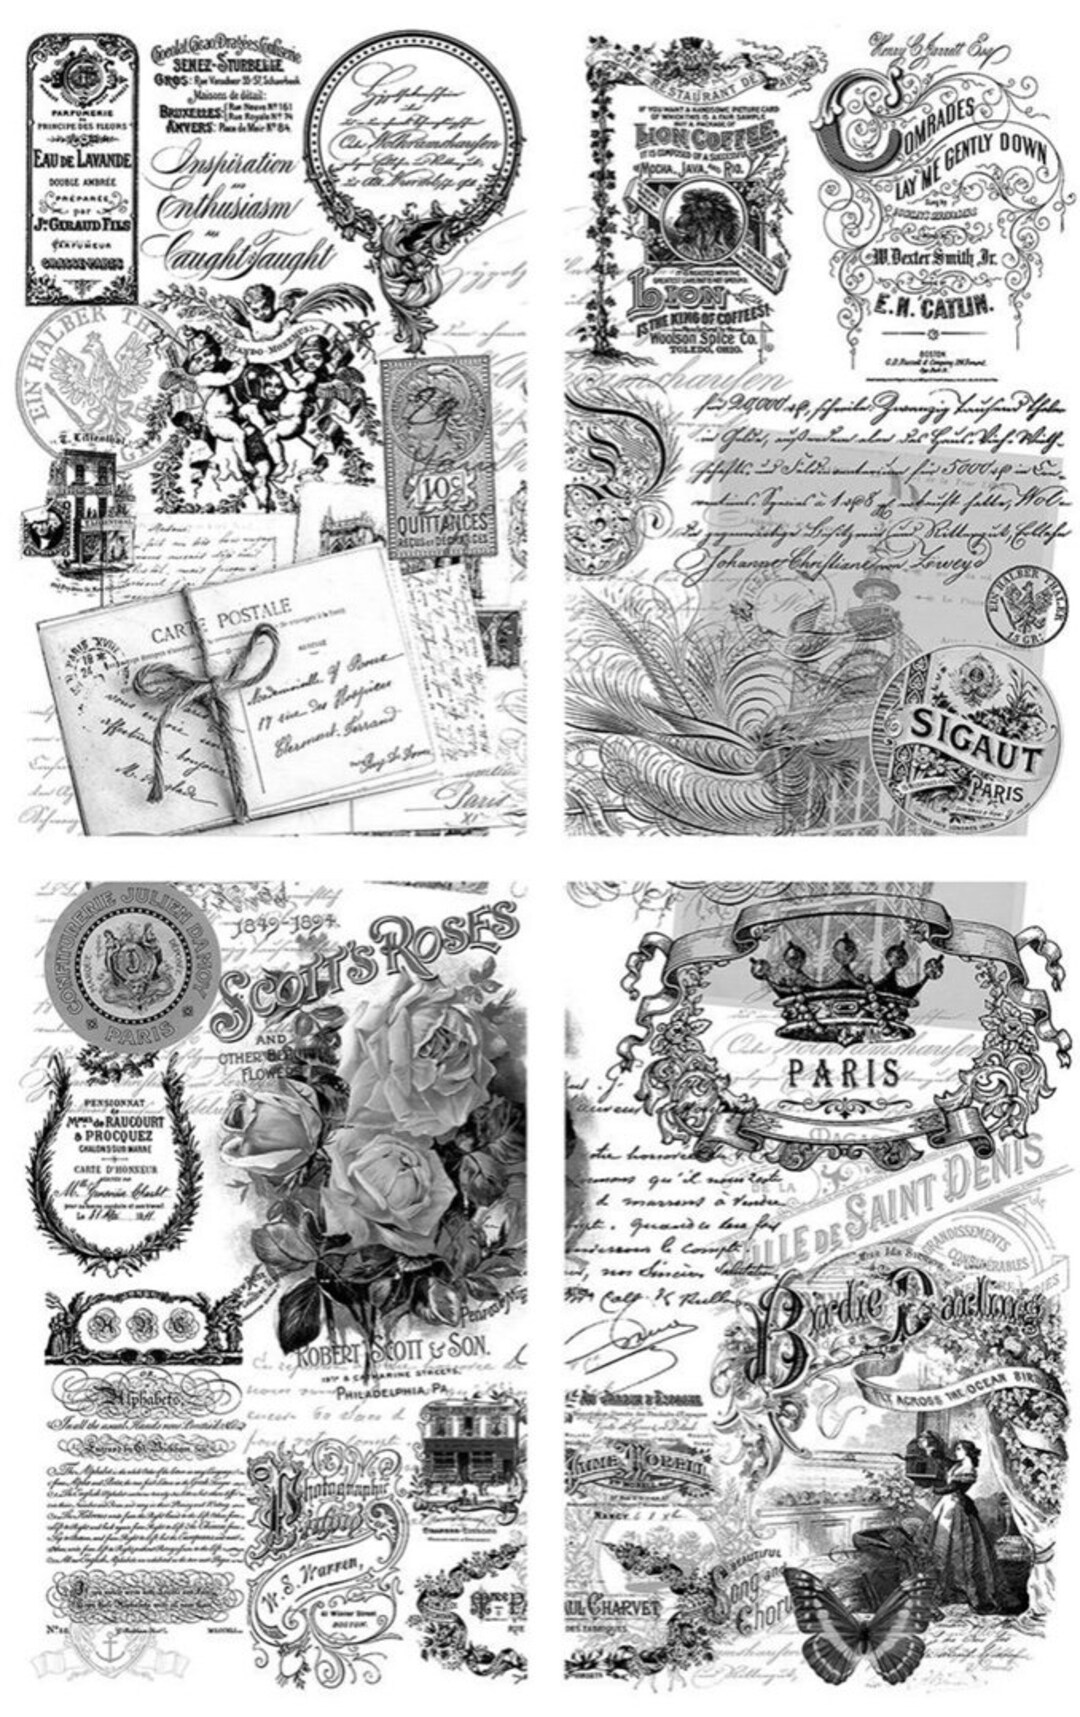
I chose it specifically because the back was the perfect size for that image from the Roycycled Label Masterboard decoupage paper.  I just loved the look of that blue and white label.  So, I painted the bench with a base coat of Dixie Belle’s Coffee Bean, then went over that with a couple of coats of Drop Cloth.  Then I used Mod Podge to decoupage that label onto the back of the bench.

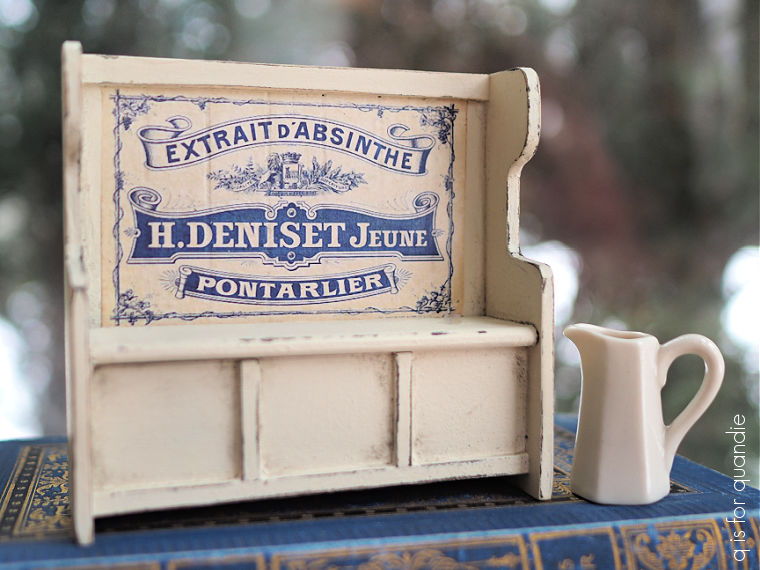
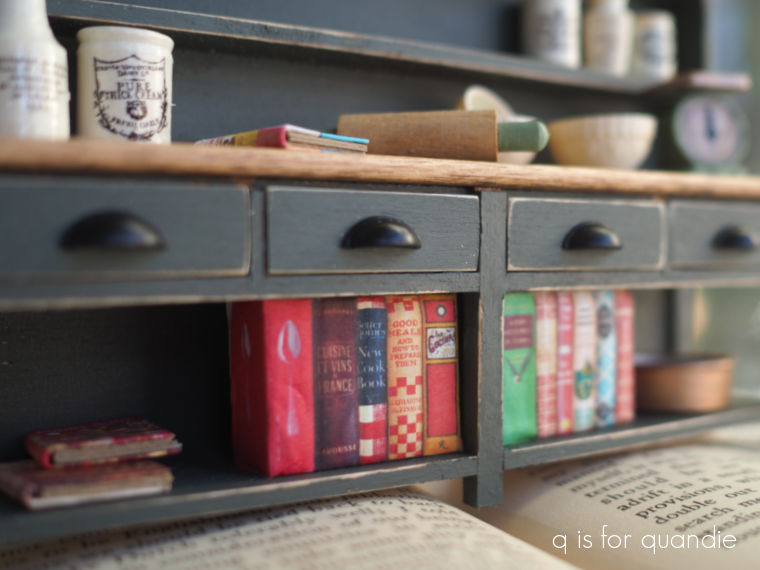
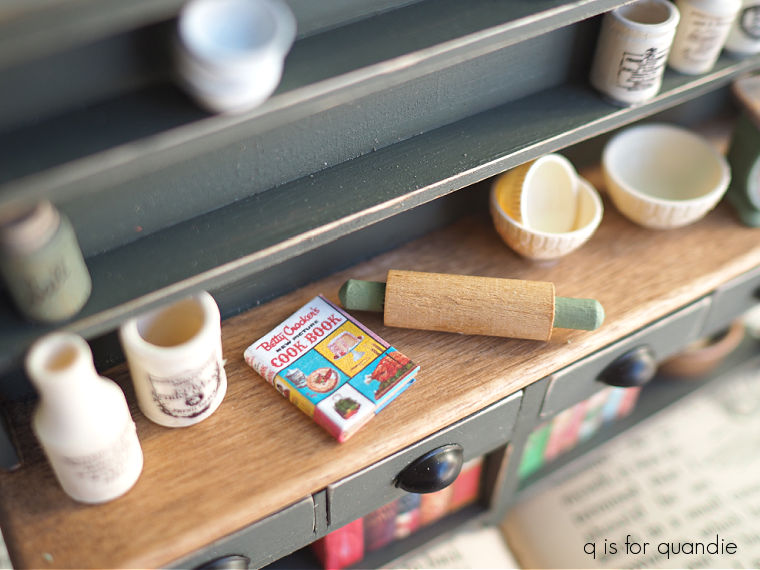
Once that was dry, I sanded the edges to distress the piece and then gave everything a coat of Dixie Belle’s clear wax.  I followed that up by adding a little bit of their Dixie Belle Dirt in Ash to the corners here and there to add a bit of dimension and age.  You can see that rather well in that close up photo, but in real life it’s a little more subtle.  After all, this bench is only just over 4″ wide.

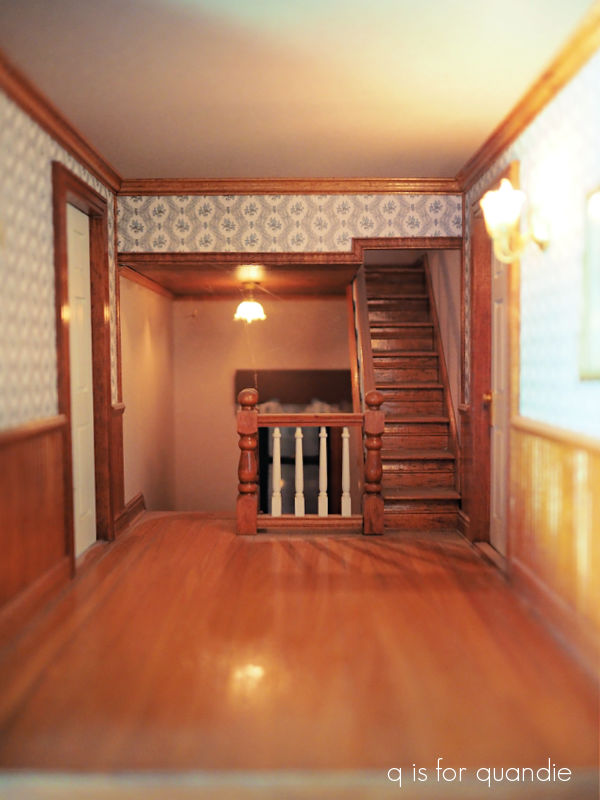
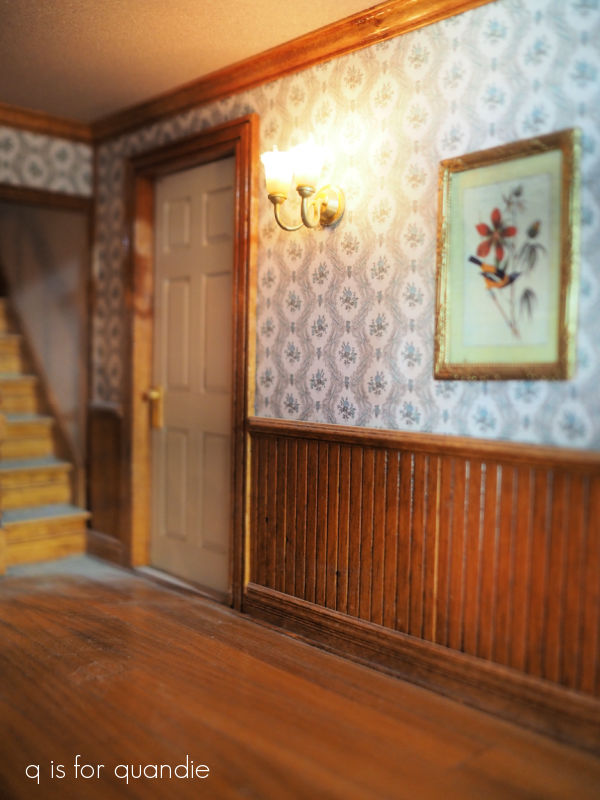
I had initially planned to put this bench in the 2nd floor hallway of my dollhouse, but in the end it didn’t work out for that spot.  After testing it out in a bunch of other rooms as well, I’ve come to the conclusion that I don’t have a good spot for it.  So I’ve listed it on my ‘available for local sale‘ page (although shipping to the lower 48 is also an option for this one).  So if any of you are interested, be sure to check that out.

OK, back to ideas for displaying miniatures without a dollhouse.

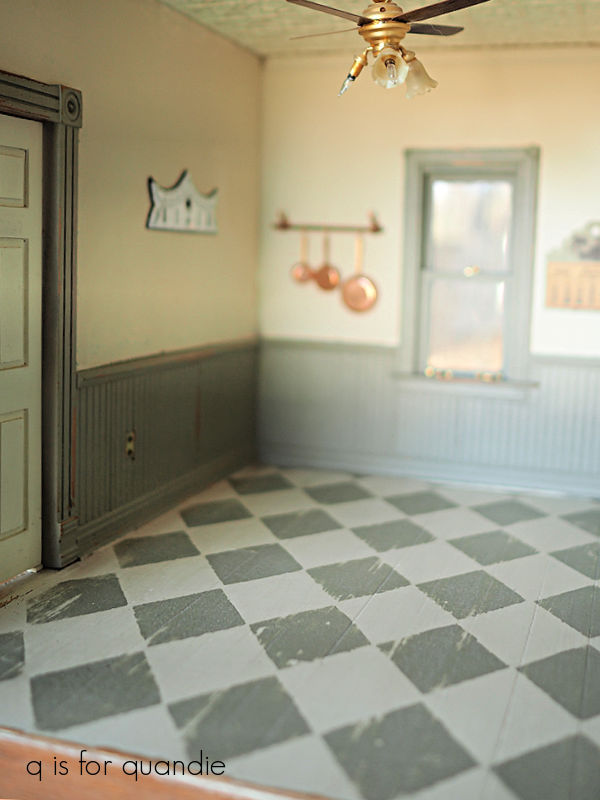
Another option is to create a unique shadowbox like my clock case.

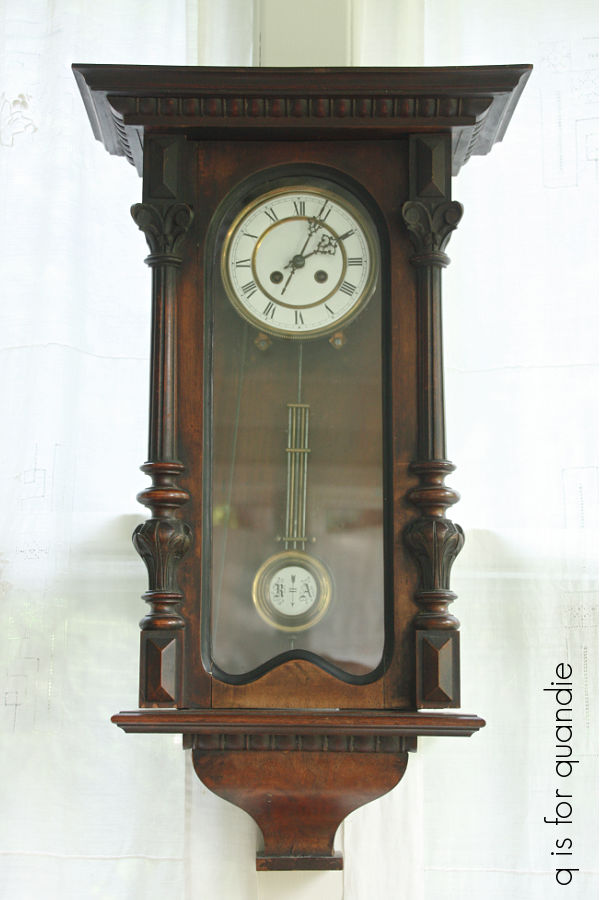
Once I gutted the clock parts out of that case and had my handman/neighbor Ken add a little shelf, it was perfect for a couple of mini room vignettes.

I just added some dollhouse wallpaper to the back and then furnished both spaces.

My friend Meggan recently shared a miniature scene inside a lantern with me on Instagram, and if you search online there are lots of examples of lanterns with mini vignettes inside.

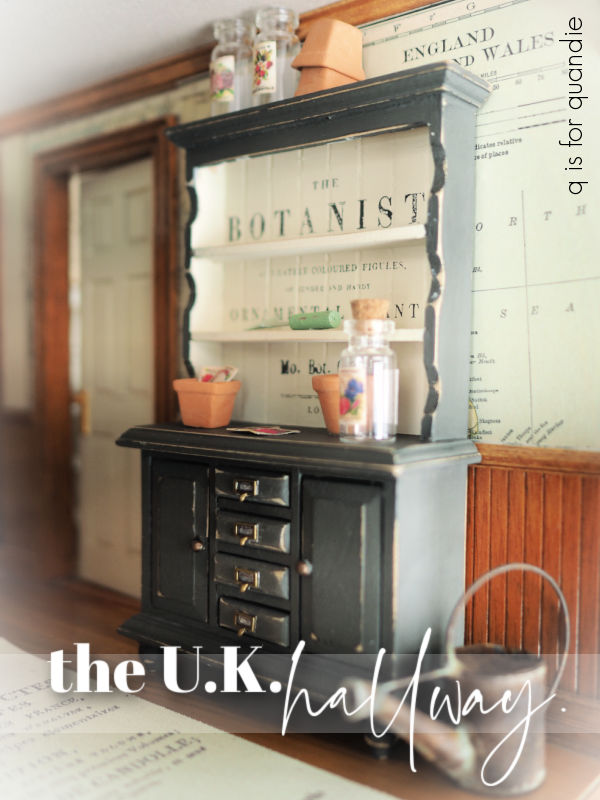
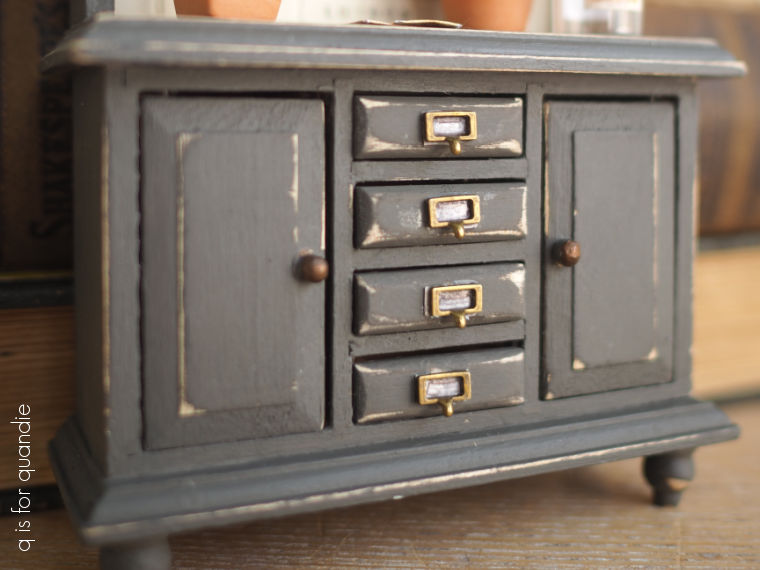
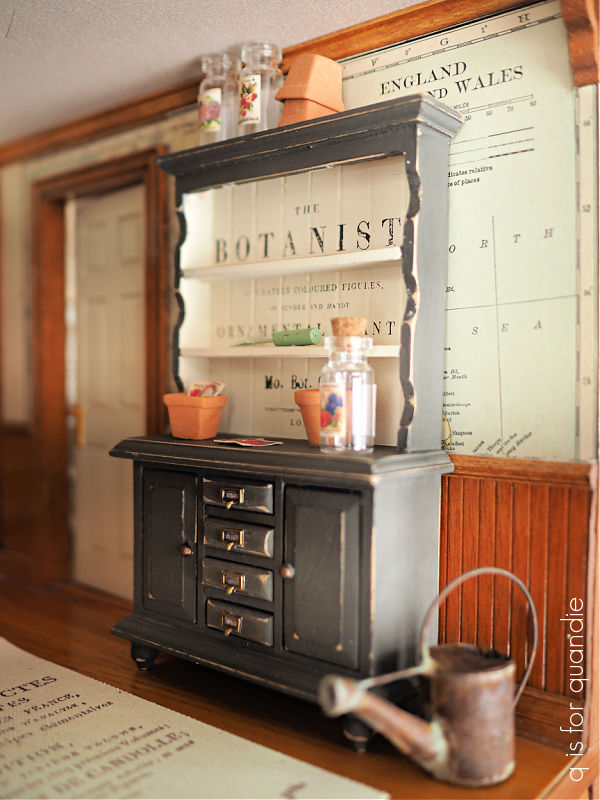
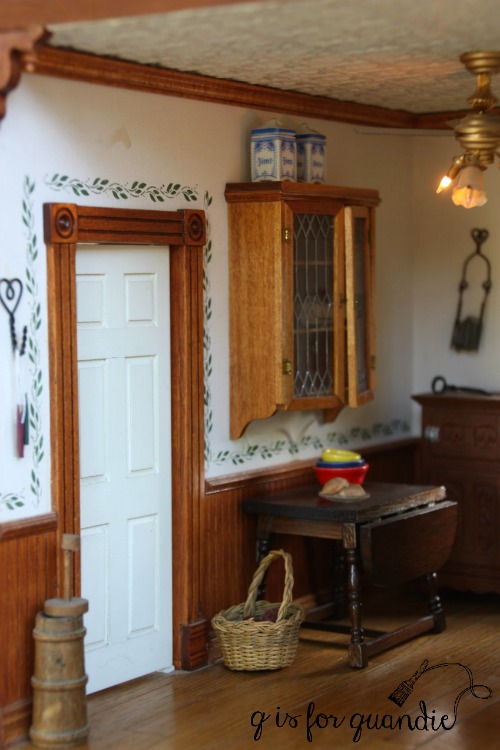
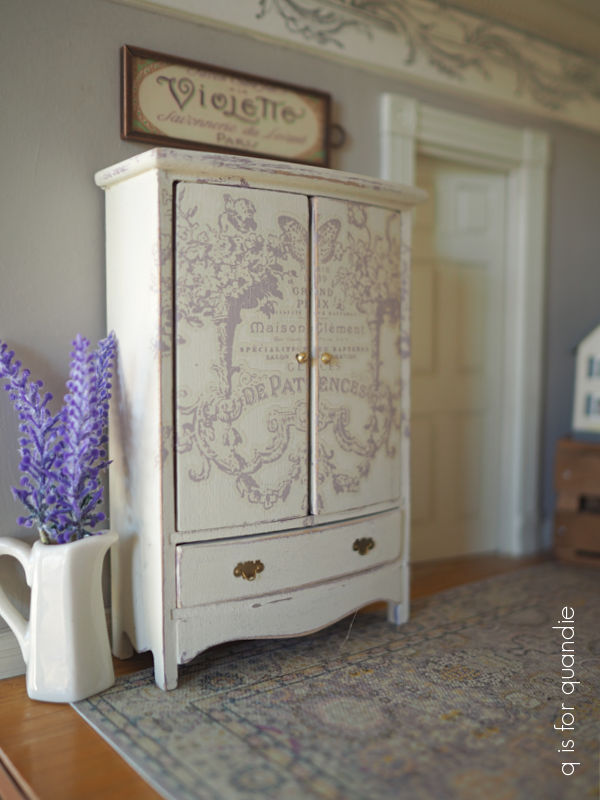
But you don’t have to have a cool old vintage clock case or a suitable lantern, you can also create shadow box style rooms in any sort of small cupboard.  I could see doing that with this little cupboard for example.

It has just enough space for a couple of miniature room vignettes.

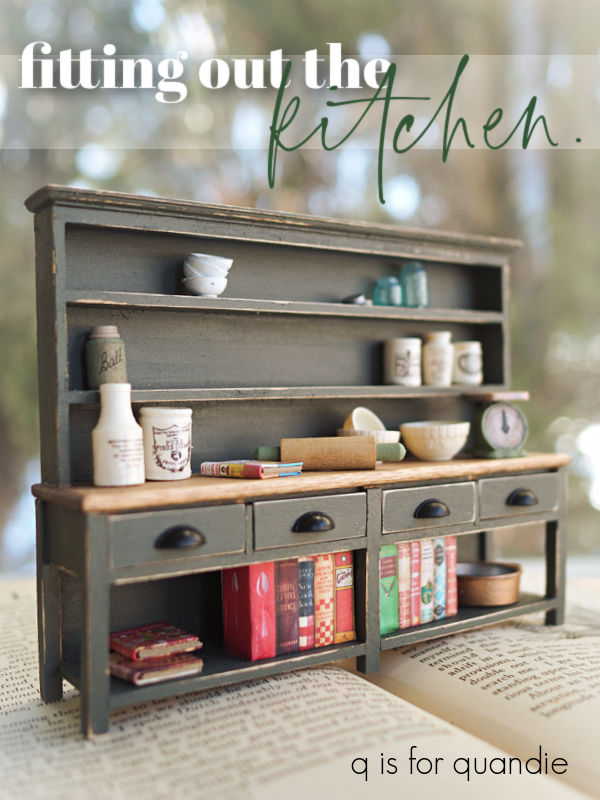
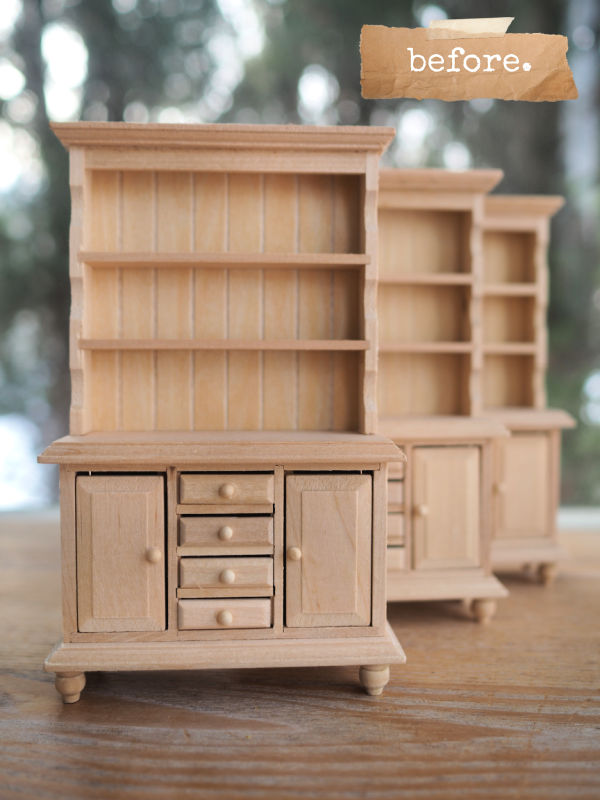
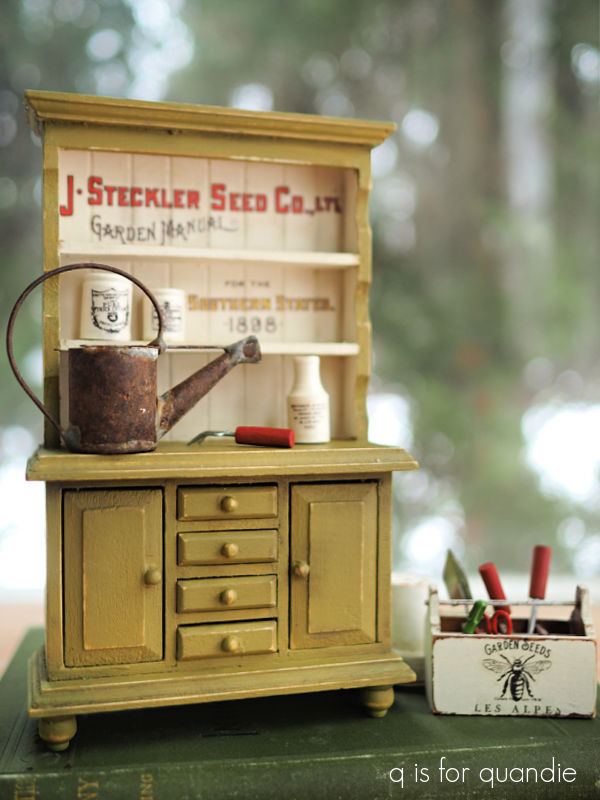
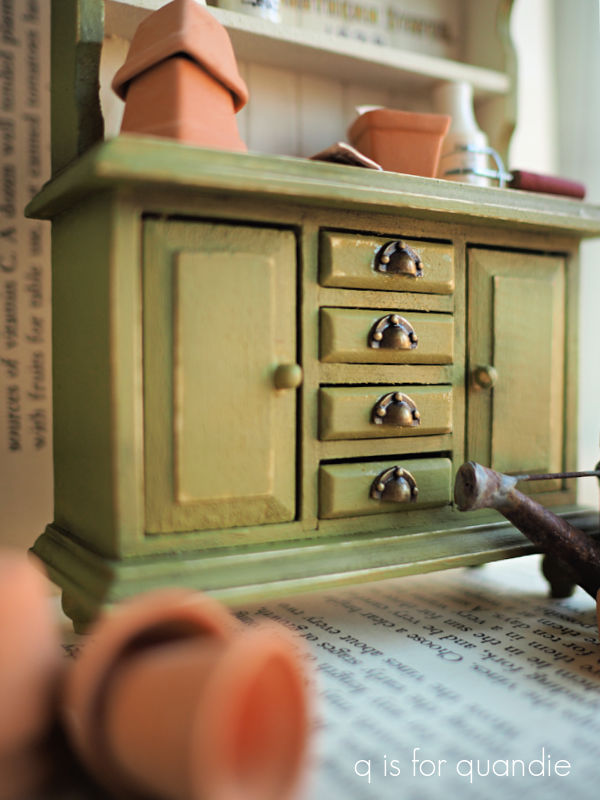
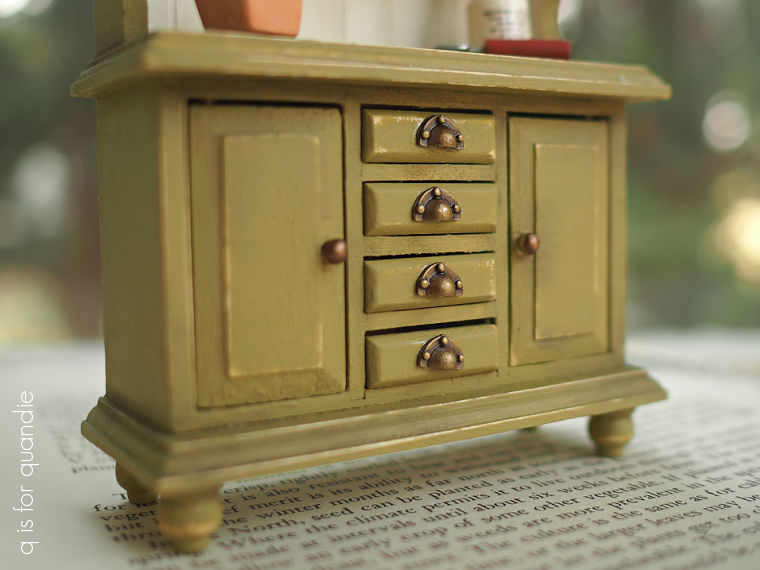
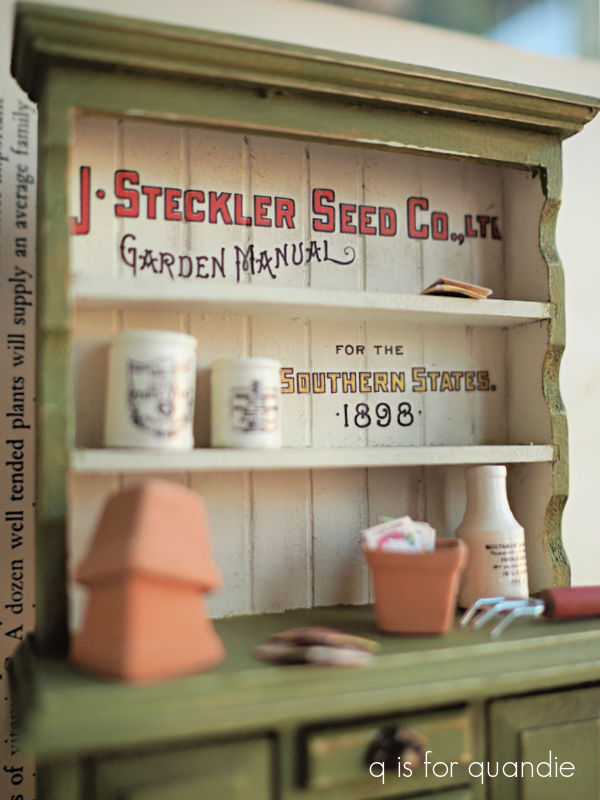
Or you could devote a shelf or two in your hutch to becoming miniature rooms.

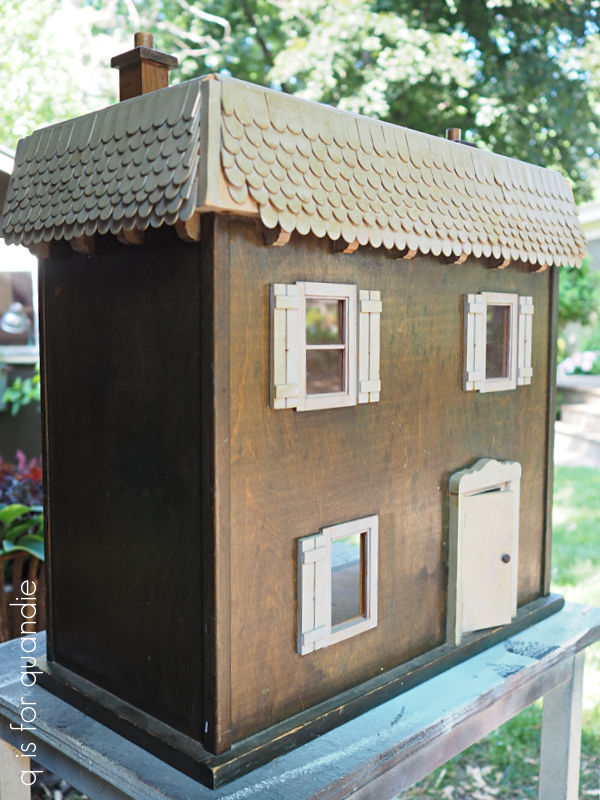
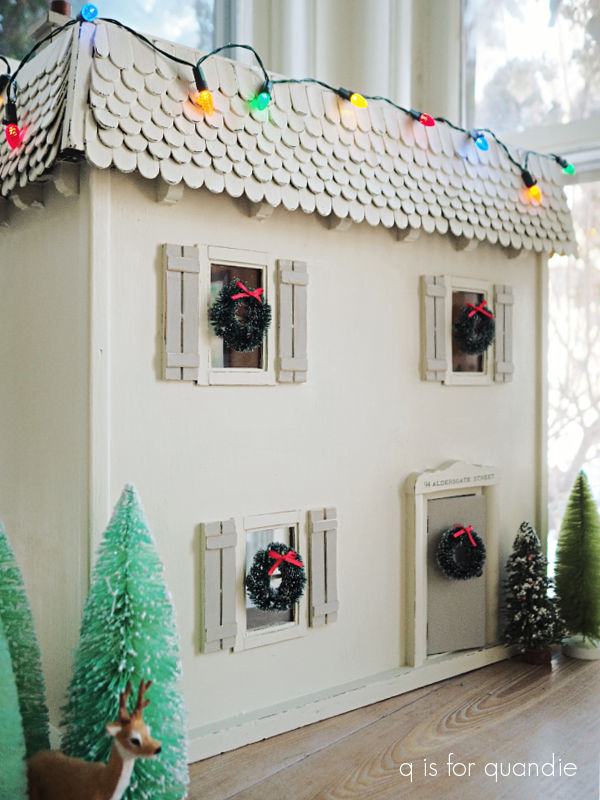
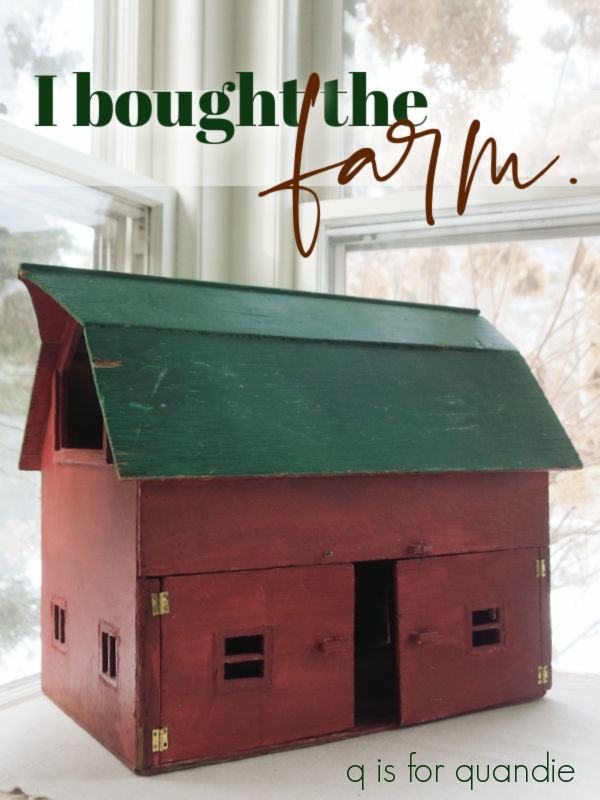
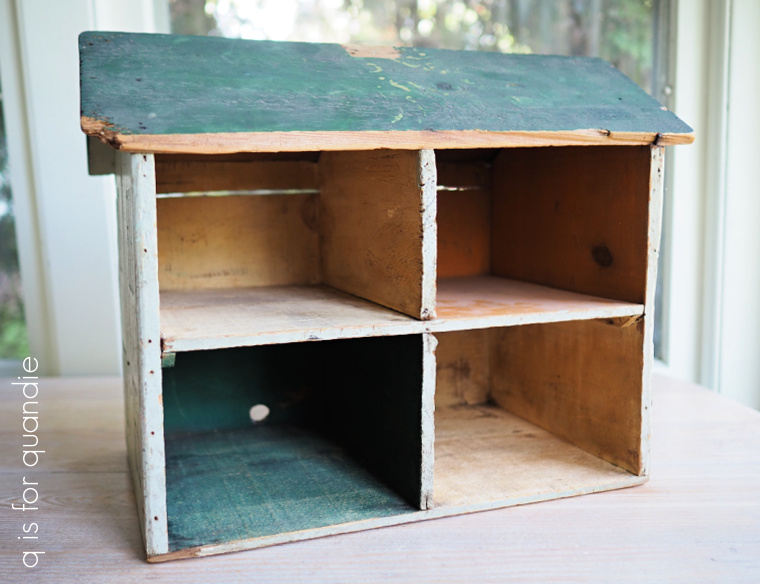
Simple shadow box rooms are all the rage right now too.  You can use just a basic shadow box kit from your local hobby store.  Or you could create something like the primitive dollhouse that I picked up at a garage sale.

You know, back in the 17th century miniaturists were housing their miniatures in cabinets, like that amazing apothecary cabinet I saw at the Rijksmuseum.

And then there is the famous ‘cabinet house’ of Petronella Oortman (also at the Rijksmuseum).

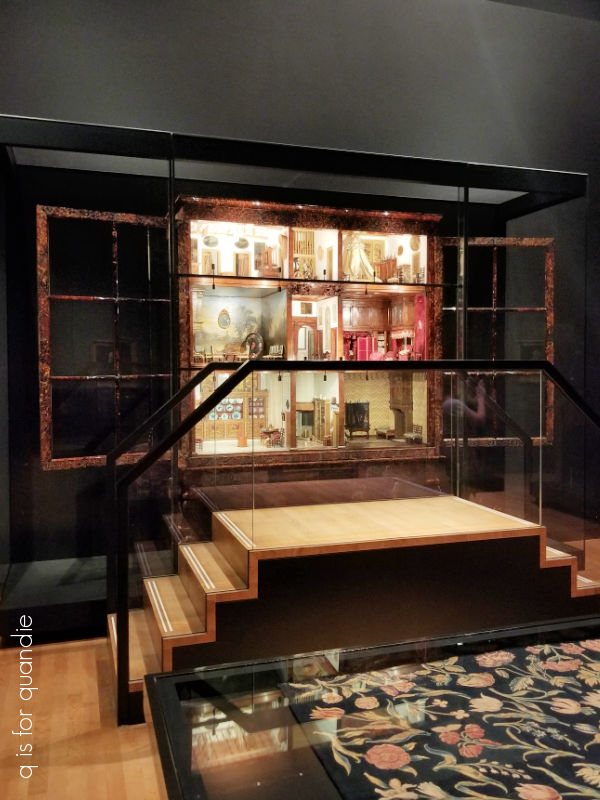
We don’t have to get quite that extravagant, but if you break it down, that’s just a bookcase with glass doors on the front.  Add a couple of vertical dividers here and there and voilà, you’d have a cabinet house.

Head out to Craigslist or Facebook Marketplace and just look for a cast off bookcase of some kind.  This one would have made a fabulous cabinet house after removing that fretwork from the doors …

Another clever idea that I’ve seen online is to create a little scene in a small case.  So the other day when I was out thrifting with opK, I picked up this little set of 3 nesting ‘suitcases’.

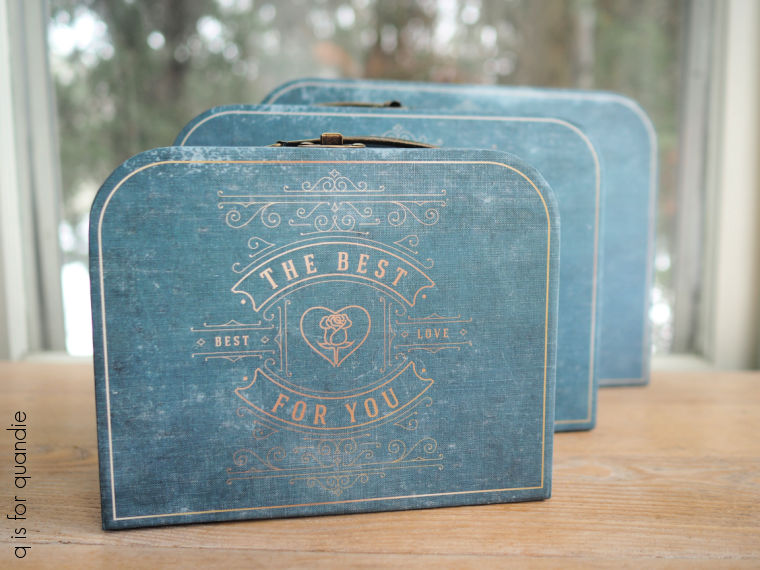
I decided to see what I could do to create a quick miniature scene inside one of them.

I added some bookpaper to the back to serve as wallpaper, and then glued a barn style sliding door in place.  It doesn’t really open, but that’s OK.

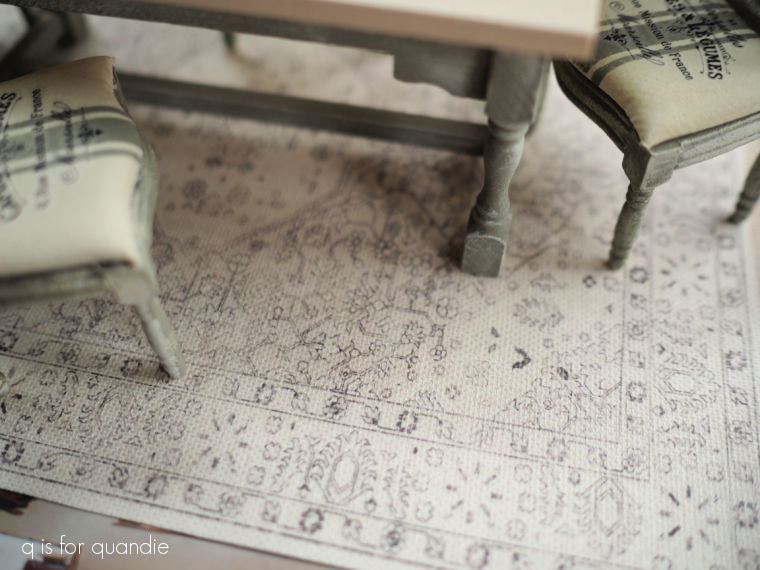
I added another printed rug and then ‘furnished’ the room with a roll top desk that I just picked up at a 2nd hand shop.

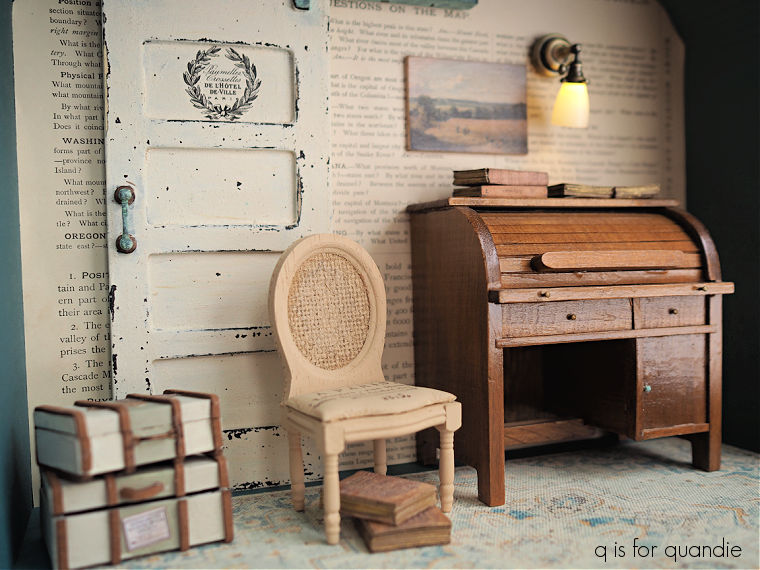
That’s just a very basic example, most of these sorts of things that I see online are much more detailed than mine.  So the sky’s the limit if you want to keep adding more and more to your scene.

If you have any fun ideas for creating a miniature vignette, leave a comment and let us know.

In the meantime, as I mentioned on Friday, I’m off visiting with my mom this week so I may not respond to comments right away.  But hang tight, I’ll be sharing some more miniatures for sale when I get back as well as the miniature artist’s studio that I’m adding to the attic space of my dollhouse.  I’ve also been invited to tour Miniature Crush’s facility in Savage, MN in a couple of weeks so I plan to share that soon as well.

So be sure to stay tuned!

a pair of farm fresh chairs.

Today I have an adorable pair of chairs to share with you.

I purchased these two chairs from … where else … Miniature Crush.  The were $25.50 each, so OK, not cheap.  But they are quite well made in their faux green leather.

As you can probably guess, that forest green color was not going to work in my dollhouse.  The beauty of these miniature upholstered pieces is that they are easy to paint, and they look great painted as well.  You don’t have any of the worries associated with painting full-sized upholstered furniture.  No one is going to sit in these.  So I don’t have to worry about how well the paint will hold up to frequent use or how comfortable it will be to sit on.

I initially gave the pair a coat of Dixie Belle’s Dried Sage which looked great.  However, in the end I thought that Drop Cloth would be a better option here.  I plan to put these in either the living room or the rec room of my dollhouse and the Dried Sage didn’t really work with the rest of the furniture in either spot.

Another benefit to painting miniature furniture is that you can easily change your mind and repaint a piece.

So I added two coats of Drop Cloth over the Dried Sage.  Once dry, I taped off some grain sack stripes and painted them in Dixie Belle’s Yankee Blue.

If you’re curious about what sort of tape I use for this process, it’s a super skinny roll of tape that I found at my local Menards store quite a few years back.

It’s a little under 1/4″ wide.  Here it is compared to a more typical width …

That width is perfect for creating the grain sack stripes on miniature furniture (FYI, the middle stripe is the same width as the tape, or just under 1/4″ wide).

Once the stripes were dry I added another re.design with prima knob transfer over them (those knob transfers are so perfect for miniature furniture!).

Next I wet distressed some of the edges of the chair to give it a worn look and then applied clear wax over everything.  I followed that up with some more of that Dixie Dirt in Ash.  As I’ve mentioned in previous posts, this is a powdered pigment that I apply with a small brush to the crevices to add a little more dimension and age.

I painted both chairs the same and plan to use them as a pair.

Now I just have to figure out which room will get them, and what else to put in said room.

But in the meantime, what do you think of my farm fresh chairs?  Leave a comment and let me know.

In other news, I am heading off to visit my mom and to escape the cold next week.  After a bitterly cold week here at home (it was -12° here on Monday with a ‘feels like’ temp of -38°, ugh!), it’s supposed to be in the 70’s and sunny at mom’s place (she lives in a suburb of Las Vegas).  While I do have some blog posts scheduled while I’m away, I may not be so good at responding to comments.

I’ll be back the following week with more miniature content though, so be sure to stay tuned!

the U.K. hallway.

Welcome to the 3rd floor hallway in my dollhouse in its original state.

And also, sadly, back when the electrical was still working.  I’m still contemplating what to do about that.

As you can see, there was a lot of wood in this hallway, and also some wallpaper that I didn’t love.

I rather surprised myself by deciding not to paint over any of that wood wainscoting and trim.  I thought it might provide a nice balance to have some warm wood tones in part of the house.  So I left the trim ‘as is’, but the wallpaper had to go.

I decided to duplicate the idea of using book pages as wallpaper in this hallway, much like I did in the 2nd floor hallway.  Only this time I used map pages from an old Atlas.

I put Scotland on one wall …

with England and Wales on the opposite wall.

And that’s why I’m calling it my U.K. hallway.

FYI, I did not strip the previous wallpaper, and this time I also did not paint over it before adding the new paper.  I just used Mod Podge to apply these books pages right over the old wallpaper and that worked out just fine.

This hallway is a bit wider than the 2nd floor hallway and thus could accommodate a piece of furniture on each side of the space.

For the Scotland side I purchased an unfinished hallway table from Miniature Crush.

I went back to my milk painting days for this one.  After first painting the bottom of the table in Dixie Belle’s Gravel Road to provide a base layer to distress back to, I then went over that with a custom mix of Sweet Pickins’ milk paint.

One of the really fun aspects of painting miniature furniture is that I can buy the inexpensive sample size pouch of milk paint (or any small sample size of other brands) and have way more than enough paint for my piece.  I purchased these sample bags from The Painted Heirloom for $7 each.

I originally thought I was going to use the color called Birdie on this table, but after mixing it up I decided it was far too dark (once again, colors look much darker on smaller items), so I just kept adding Sweetwater to it until I got the color I wanted.  I think my mix probably ended up about 25% Birdie/75% Sweetwater.

After applying about three coats of the milk paint, I let the piece dry fully and then sanded it to distress back the paint and give it that chippy look that I love so much from milk paint.

I then added one of the Craftsman style drawer pulls (also from Miniature Crush) to the drawer using Super Glue.  I followed that up with a top coat of Dixie Belle’s Clear Wax.

As for the top of the table, I was initially going to add a paint wash to it, but in the end decided that I liked it left in the bare wood with just clear wax over it.

I also lined the drawer with another of the Worn Wallpaper Scraps from Tim Holtz.

For the other side of the hallway I painted up another of the Welsh cupboards from Hobby Lobby.  As a reminder, here is what these look like unfinished.

I removed the knobs from the drawers and then painted the upper shelves in Dixie Belle’s Drop Cloth and the rest of the piece in their Gravel Road.

Next I added a section from I.O.D.’s Melange paint inlay inside the shelves.

That was a little bit tricky and involved cutting up the inlay, but I got ‘er done (for more detailed instructions on applying paint inlays, check out my how-to post).  If you read the fine print at the very bottom of the inlay, it says “LONDON” making it perfect for my U.K. hallway.

After sealing the paint inlay with some matte clear coat spray, I sanded the piece to distress it.  Then I replaced the knobs on the drawers with some apothecary label drawer pulls from Thumbwick via Etsy.

Never mind that those pulls cost more than the cupboard itself, or how putzy it was to glue little bits of paper behind each one first before then gluing them to the drawers.  I think it was worth it, don’t you?

I also added a bit of Dixie Belle’s Bronze Patina Paint to the knobs on the two side doors.

Then I finished all of that off with some of Dixie Belle’s clear wax.

After adding a few fun garden themed bits and bobs, I placed both pieces into the hallway.

I did create another ‘rug’ using one of the I.O.D. Ephemeral Type stamps, but I’m not sure that I will keep it in this spot.  Let’s call it a temporary place holder until I find something I like better.

The Botanist cupboard is on the England and Wales side of the space.

As I mentioned in my post about the finished kitchen, most of the spots for furniture in my dollhouse are along the side walls.  Unfortunately, that placement doesn’t allow for showcasing the details on these pieces head on.

But that just means that you have to take a moment with each room to study it from every angle and take it all in.  Right?

What do you think of my U.K. hallway?  Leave a comment and let me know!

fitting out the kitchen.

My niece stopped over the other day and after taking a look at the progress I’ve made on the dollhouse she decided that the kitchen is her favorite room so far.

Want to take a look and see if you agree?

Last week I shared the bones of the room including the painted floor.

Now let’s take a look at the furnishings.

I purchased a faux mini ‘AGA’ stove from Miniature Crush, and it arrived looking like this.

I borrowed that picture from the internet because I didn’t manage to take a ‘before’ picture of my actual stove.

Anyway, it looked a little too ‘molded’ to me when I got it (perhaps it is 3D printed?).  Plus that ‘cream’ color was way too yellow for my color scheme.  So I decided to customize it a bit with some paint.  I painted the bottom part in Dixie Belle’s Drop Cloth first.  Then I added a little of their Bronze Patina Paint to that front edge of the top that was originally silver, as well as to the hinges and handles on the doors to make them look a bit more realistic.

I also used more of the Dixie Belle Earth powdered pigment to add some shadows around the doors on the front to give them a little more depth.

What might be jumping out to you the most in that ‘after’ photo though are the adorable pot filler and the copper pot.

Aren’t they awesome?!

The pot filler came from Tease Miniatures via Etsy and was just under $12.  It was available in a bunch of different metallic finishes, but I went with gold because I thought it looked the most realistic.

The copper pot was another splurge purchase at $26 from dollhousechandeliers (also via Etsy), but it was worth it.  You can buy less expensive versions of miniature copper pots for sure, but these have an impressive level of detail.

I ordered the farmhouse style sink from The Modern Dollhouse.  Unfortunately, I paid $26.95 for it from them and I have since discovered that the exact same sink is available from Miniature Crush for $15.99.  Live and learn, right?  My advice is to shop around when purchasing miniatures.  Or if you’re too lazy to shop around (guilty as charged), then at least just check Miniature Crush first.

The sink arrives unassembled either way.

That made it easy for me to repaint the ‘chrome’ pieces before using super glue to attach them.  I sprayed them with a black primer first, then brushed on Dixie Belle’s Bronze Patina Paint.

I think the bronze looks a bit more aged than that shiny chrome.

By the way, the original sink that I put in the dollhouse back in the 90’s was quite similar to this one …

The legs on that one aren’t quite as good, and it didn’t have the drain pipe either.  But I have to say that a good farmhouse style sink never goes out of style.  In my opinion anyway.

Next up I purchased a Cosco style stool from Miniature Crush.

This time I left the shiny chrome alone, but I painted the shiny black bits in Drop Cloth and added a re.design with prima knob transfer.

You may be noticing the ‘rug’ under the sink and stool.  I made that rug by using one of the I.O.D. Ephemeral Type stamps and some of that printable canvas that I purchased for printing my own rugs.

I simply stamped the image onto the canvas using VersaFine Clair ink in a color called Morning Mist.  Then I glued some cotton twine around the edge to finish it off.

That brings me to the kitchen cupboard which was also purchased from The Modern Dollhouse.

This time I shopped around a bit first.  It turned out that I could get the unfinished version with cup pulls (which you’ll see below) from The Modern Dollhouse for $24, while Miniature Crush also had a couple of finished versions of this piece in white or walnut with different pulls for $28.99.  I wanted to experiment with using stain on the unfinished Basswood, and I also liked the cup pulls better than the pulls on the other versions, so I went with the unfinished one.

After a light sanding with 220 grit paper, I applied Varathane wood stain in Early American to the entire piece.  I have to say that it didn’t really stain evenly.  But the work surface looked good stained, so I kept that and just painted the rest.

I painted it in Fusion’s Everett.  In my post about my Welsh cupboards I mentioned having purchased a few samples of Fusion in some of their newer colors and this is one of them.  I really could have just used Dixie Belle’s Collard Greens and been just as happy though.

I still have a way to go when it comes to filling up the cabinet, but for now I think it looks good enough.  The cookbooks on the bottom shelf are another printable from Etsy, this time from Easy Print and Cut.

I paid $3.83 for the printable file and it came with two ‘stacks’ of books (those shown above) that I cut out and wrapped around some floral foam (because that’s what I had on hand, but Styrofoam would probably work better), and some individual books that I created using the same process as the books I shared a while back (here).

Most of the remaining items in the cupboard are from Woodland Trail Whimsy on Etsy including the mixing bowls, English crocks, blue ball jars and the scale.

You must be wondering at this point how it all looks in place.

One thing I’m noticing about my dollhouse is that the rooms are deep, and there are plenty of windows and doors.  So that leads to both having to put things in front of the windows (like the sink), and having to place things along those deep side walls rather than along the back walls.

But I don’t especially want to have everything just lined up down the sides, so I tried moving the sink to the back wall instead of along the side.

It sort of works like this, but it does feel like everything is crowded towards the back.

That give me a little space in the front of the room to potentially add a small table and chairs though.

I’ll have to work on that down the road, but for now I’m calling the kitchen finished.

What do you think?  Would you line things up along the side walls, or put that sink at the back?  Leave a comment and let me know.

a painted floor.

The next room up for refurbishment in my dollhouse is the kitchen.

Here’s a ‘before’ shot.  That is, before I gave the dollhouse to my in-laws (and then took it back again).

It was very country-fied, complete with a stenciled border, a cast iron stove, lacy curtains and that fab farmhouse sink.

Here’s the other side of the room.

After the dollhouse came back from my in-laws, the kitchen looked like this.

There were a few items left hanging on the wall like that coffee grinder to the right of the window, and that metal floor mat that was under the cast iron stove was still glued in place.

I began by removing those last remaining items and then painting over the stenciled walls with Dixie Belle’s Drop Cloth.  Next I painted the wainscoting and other trim in DB’s Dried Sage.

That left the floor to be dealt with.  Unfortunately, when I pulled up that metal floor mat the glue that held it in place had damaged the floor underneath.  But that’s OK, because I kinda wanted to paint that floor with a checkered pattern anyway.

After all, I’ve painted two of our ‘real life’ floors this way.  The front porch floor

And the potting shed floor

Our kitchen has a stained checkerboard pattern on the floor too (although I didn’t do this one myself).

So it seemed like a ‘must do’ to have at least one checkered floor in the dollhouse.

When painting my real life checkered floors, I drew pencil lines and painted the squares free-hand.

But I knew that wasn’t going to work within the tiny confines of the dollhouse kitchen.  I was about to bust out the painter’s tape and start taping off squares instead, but then I remembered the Harlequin stencil from Dixie Belle.

Granted, these are diamonds rather than squares.  But it would be SO much easier to use a stencil instead of tape, so I went with it.

I did have to cut the stencil down to the size of my floor so that it would lie flat inside the dollhouse (the full stencil is 14″ x 18″), so that may limit any future options for using the stencil again.  But it sure did make this paint job go a lot quicker than it would have if I’d had to tape off all of those squares!

I first painted the entire floor in Dixie Belle’s Drop Cloth.  Once dry, I placed my stencil down and then used the Smooth Roller from Dixie Belle to apply their Dried Sage over it.  The Smooth Roller is a small, 4.25″ wide, foam roller that worked perfectly for this application.  I did have to touch up a couple of spots near the walls using a small brush, but even so it took me less than 5 minutes to paint the pattern on this floor.

Once the Dried Sage was dry, I sanded lightly over the floor with 220 grit sandpaper to make it look a bit worn.  I finished off both the floor and the wainscoting with some of Dixie Belle’s clear wax.

I decided it would be fun to add a small transfer to the wall of the kitchen and I had the perfect Classic Vintage Label from re.design with prima for just that.

I added that old watch face above it to serve as the kitchen clock.

I also re-hung the coffee grinder.

I added a ‘pot rack’ to the back wall that I created using a copper rod that I found in my dad’s toolbox and a couple of the same hooks that I used in the bathroom.  Only this time I added some of Dixie Belle’s Copper Patina Paint to the hooks.

Those copper skillets are from dollhousechandeliers on Etsy and are made with the most amazing attention to detail.  They are definitely one of my splurge purchases.  You’ll see another copper pot from them in my final kitchen reveal.

Speaking of which, that is coming up next week so be sure to stay tuned!

embracing la violette.

In its previous incarnation, the 2nd bedroom in my dollhouse was set up as a girl’s room complete with faux white wicker furniture, stuffed animals and a doll themed wallpaper.

Here it is with all of the contents removed.

I zoomed in on this photo to try and show that doll wallpaper detail.

I’m sure I loved it when my dad and I first created this dollhouse, but it’s no longer my cup of tea.

After giving the room a good cleaning, I taped off the floor and then painted all of the trim plus the ceiling in Dixie Belle’s Drop Cloth.  Next I painted over the wallpaper in a lightened up version of their French Linen.  I just mixed it with a bunch of Drop Cloth.

Next I had to decide what sort of embellishment to add to the border around the ceiling.

I’d ordered a few I.O.D. products that I was hoping I’d be able to use in the dollhouse including a couple of their Trimmings molds as well as their Adornment stamp set.

That being said, you know I have trouble with stamps.  I attempted to stamp within that border near the ceiling with one of the Adornment stamps no fewer than five times.

I just couldn’t keep the stamp straight or get a crisp look, and the perfectionist in me just wasn’t having it.  I also really had no idea how I was going to deal with the corners of the room when I got to them.

But I just knew that stamp was going to be perfect for that trim.

So after painting back over that border multiple times, I finally decided to create my own wallpaper border by stamping on strips of paper and then applying them to the walls with mod podge.

And that worked quite well.

Still not precisely perfect, but good enough.

I also decided to stamp directly onto to the wall beside the window with one of the stamps from I.O.D.’s Ephemeral Type set.

That went a bit more smoothly!

As you can see, there is a dollhouse within the dollhouse.

This is one of the original pieces that I kept when I initially gave the dollhouse away to my in-laws, so I pulled it out to use again.

You may remember that I also painted up some new furniture for this room a few months back.

You can find the details on those pieces here (bed, armoire).

As much as I loved the way these pieces turned out, I have to admit that I’m not a huge fan of purple (I just really wanted to use those re.design with prima middy transfers).  That being said, of all the purples in the world, I do think the Secret Path color by Dixie Belle that I used inside the armoire is really pretty.

Even though I had the furniture finished back in November, and I had the room painted up and ready to go before  Christmas, I’ve put off finishing this room until now because I just wasn’t feeling particularly inspired by that purple.

But then this printable rug caught my eye on Etsy (more on printable rugs in a minute).

I thought it was so lovely, and the muted purples were perfect for the 2nd bedroom.

So I decided to fully embrace the violet.

I printed out the rug, added a pitcher filled with purple blooms, and a little framed ‘Violette’ soap label above the armoire.

And with that, I think the room is perfect.

Now, back to that rug.  Did you know that printable miniature rugs were a thing?  I didn’t.  But back in December I ordered a couple of rugs from an Etsy vendor.

When they arrived it occurred to me that they looked as though they were simply images printed onto a canvas-like material.  So I started doing some research and discovered that sure enough, I could purchase some printable canvas and print my own rugs.

You have a bit more flexibility this way, being able to alter the size of the rug to fit your space.  There is a pretty good selection of printable rug images available to purchase on Etsy.  I got the rug for this room from MiniatureMoo for around $5.  The nice thing is that I can print it over and over, and in different sizes if I want to.

I’m curious, have you tried printable rugs?  And what do you think of the violet bedroom?  Leave a comment and let me know.

for sale!

On Friday I shared my mini Welsh cupboard makeover.

I really enjoyed the process of painting up this little cupboard, and I had some ideas for other color combinations and transfers that would work perfectly for more of them.

But I can’t put four or five of these in my own dollhouse, right?

Well, I suppose I could, but I’m not going to do that.

Instead, I decided it was time to see whether or not I can find a market for my painted mini’s (and I’m willing to ship them!).

I figured I was comfortable with investing a few dollars in a stock of pieces that I could experiment with, so I went ahead and ordered four more of these unfinished Welsh cupboards online from Hobby Lobby.

For my 2nd Welsh cupboard makeover, after removing the knobs from the drawers, I gave it a light scuff sanding to smooth out any rough spots.  Next I applied a base coat of Dixie Belle’s Coffee Bean.  The purpose of this base coat was to provide something to distress my final paint color back to other than unfinished Basswood.

Then I painted the upper shelves in Dixie Belle’s Drop Cloth and the rest in their Dried Sage.  Once dry, I sanded the edges ever so lightly to distress them back to the darker color of the Coffee Bean.

I then pulled out the Vintage Post transfer from Dixie Belle.

Sadly, this is another transfer that has since been retired, but you can still find it online on Etsy or eBay.  There are a lot of bits and pieces to this one that can be trimmed out to fit a miniature piece of furniture.

Isn’t that just perfect?!

I also replaced the drawer knobs on this one with some fabulous miniature cup pulls from MforMiniatures.  FYI, I tried to order more of these a few weeks ago and they were out of stock in this color, but they did have them in black, silver and a shiny gold still.  I used some Dixie Belle Bronze metallic paint on the remaining door knobs, much like I ended up doing on my first Welsh cupboard.

To finish off the cupboard I applied some of Dixie Belle’s clear wax.

Today’s q tip, if you have anything to glue in place, like the cup pulls in this case, be sure to do that before applying wax or Butta to make sure they’ll adhere well.  Glue doesn’t always stick to a waxed surface.  I used a super glue to attach mine.

So that’s cupboard no. 2.  What do you think?

I used most of the same techniques to prep cupboard no. 3, except I skipped the base coat of Coffee Bean.  I still painted the upper shelves in Dixie Belle’s Drop Cloth, but then I decided to experiment with using Fusion paint on the rest of the piece.  I had been to a shop that sold Fusion recently, and they had lots of the little tester size jars for $4.95.  I really wanted to try out the color called Oakham, so I purchased one and used it on the exterior of cupboard no. 3.  Spoiler alert; Oakham is nearly the same color as Dixie Belle’s Gravel Road, so I needn’t have bothered.

Full disclosure, I was once a content creator for Fusion, so I’ve used lots of their paint on full sized furniture in the past (like this one, or this one).  That was back before they had this particular color though.

I have only good things to say about Fusion Mineral Paint in general and all of their products are very high quality.  Their wax is one of the nicest waxes on the market, in my opinion.  But their paint is an acrylic paint, not a chalk style paint, and ultimately I just prefer working with a chalk paint and I was reminded why when working with the Oakham.  I find that I get more visible brush strokes with an acrylic paint (even in miniature), and it doesn’t distress as easily as chalk paint.  You also need to distress it fairly quickly after it dries because after it starts to cure it becomes difficult to do.

This is all a matter of preference really.  Many furniture painters I know much prefer using an acrylic paint like Fusion or the Dixie Belle Silk line (also an acrylic paint), especially if they don’t distress their pieces.  One bonus is that acrylic paint has a built in top coat thus saving you that last step of adding clear coat or wax.  But for me, I always keep going back to the chalk style paint.

Anyway, enough about that, back to cupboard no. 3.

After my Fusion paint was dry and distressed, I added another section from the Dixie Belle Vintage Post transfer.

This piece would be adorable turned into a coffee bar for one’s dollhouse.

Next up, cupboard no. 4.  The upper shelves are painted in Dixie Belle’s Cottage Door, and the rest of the cupboard is in Drop Cloth.

With this one I tried something a little different and I simply removed the drawers turning them into little shelves at the bottom instead.

Once all of my paint was dry and distressed, I added some bees from a re.design with prima knob transfer to the doors.  Then I added one of the small roses from the I.O.D. Rose Botanical transfer inside the upper shelving area.  I finished that off with a little bit of wording from that Dixie Belle Vintage Post transfer.

I cut a few scraps of some floral bark cloth, folded them and added a little glue to help them lie flat so that I could add them to those lower shelves.

Sweet, right?

I mentioned that I purchased 4 more of the Welsh cupboards, but I’ve only shown you three, plus the original one I painted earlier.  That’s because I’ve decided to sell the earlier one, and will be painting up the last new one to keep for myself (you’ll have to stay tuned for that one).

To recap, I have four Welsh cupboards for sale, and the even bigger news, I’m willing to ship them!

This will be a bit of an experiment for me and I’m not at all sure how well it will work out.  Will anyone even want to buy these?  Will shipping them be a pain?  Is it worth the time and effort?  That’s what I’m hoping to find out.

For now I can only accept Venmo or PayPal as a form of payment for shipped items, and I can only ship to the lower 48 states.  The cupboards are $50 each if shipped, or $40 if shipping is not required.  Each cupboard comes with the items shown in the photos below.

Cupboard no. 1 (includes clay pot, seed packets & trowel):

Cupboard no. 2 (includes trio of mini books):

Cupboard no. 3 (includes trio of mini books):

Cupboard no. 4 (includes clay pot, seed packets and folded fabric):

I will be listing these on my ‘available for local sale‘ page (but they can be shipped this time!), and I’ll mark them sold once they are spoken for (first come, first served).  If interested in purchasing one, please email me at qisforquandie@gmail.com to make further arrangements.

P.S.  I also ordered several of the dining room sets that I used in my dollhouse dining room.

I’ll be painting these up and offering them for sale as well, so stay tuned for that!

So, let me know what you think of my Welsh cupboards.  Which one is your favorite?


the welsh cupboard.

As it turns out, working on my dollhouse renovation has been the perfect winter project.  I love nothing more than staying in my cozy warm house, wearing my fluffy slippers and painting tiny things.  Especially in January when sometimes the temperature didn’t get above zero.

So although I didn’t actually have a spot in mind for this next piece of mini furniture when I purchased it, I knew it would be a fun painting project that I could work on to avoid going outside.

This is another Hobby Lobby piece.

I kinda wish they had a bigger selection of dollhouse furniture, because the pieces they do have are pretty good.  And they are quite inexpensive.  I don’t exactly remember what I paid for it in-store, but I just looked it up on their website and it was $4.49 there.  That seems ridiculously cheap and makes me wonder how they can possibly produce it for that price.

But anyway … I digress.

I started out by painting the inside of the shelf area with Dixie Belle’s Drop Cloth.  Once dry, I chose DB’s Holy Guacamole for the rest.

I know this avocado (or pea soup green, if you prefer) color isn’t for everyone, but I really like it.  I’ve mostly used it on the insides of toolboxes, but I think it worked beautifully on this piece too.

But before we go further, I have to note that after completing the sideboard that I painted up for the dining room, and replacing the drawer pulls on that piece with some fun cup pulls, I decided to do the same with this piece.

So, if you’ll notice above, it originally had round knobs on the drawers and now (below) it doesn’t.

I just pulled off the round wooden knobs, and then glued the cup pulls over the holes they left behind.

And then, as I was sharing this updated look, I realized that I should also just dab a little of Dixie Belle’s Bronze Patina Paint on those two round knobs on the door to make them match.  Don’t know why I didn’t think of that sooner.

There, that’s better, right?

I’m not going to retake all of my photos though, so you may notice that I don’t have bronze knobs in any of the other photos.

The wording inside the upper part of the cupboard is from the I.O.D. Seed Catalogue transfer set.

If you aren’t familiar, this particular set comes with 8 pages of transfers with seed packet designs in varying sizes.

I grabbed just the wording from this one …

It worked out perfectly inside this cupboard.

After applying the transfer, I used 220 grit paper and lightly sanded some of the corners and high spots.  I’ve found that you really have to be careful to not go overboard when distressing these miniature pieces.

After sanding, I gave the piece a coat of Dixie Belle’s clear wax.  Then I took a step back and looked at it with a critical eye.  It needed something more to make it look a little less ‘new’.

So I pulled out the Dixie Dirt in Earth.

This is a powder pigment that you can use to add subtle shading to your painted pieces.

A little goes a long way, especially with miniatures.

I used a little brush to apply the ‘dirt’ to the crevices of my cupboard.  It’s a little difficult to see in the photos, but trust me when I say that it really does add dimension.

I hadn’t originally planned to stage this as a potting bench, but with the addition of the seed packet wording it sort of called out for it.  So I stole the rusty watering can from my fairy garden, and then I ordered a few miniature clay pots online (from MforMiniatures on Etsy).

I also tried my hand at working with some ‘printables’ again.  This time I purchased a downloadable file from LittleMaggieShop on Etsy.  I paid $2.99 to download a .pdf of tiny seed packets.  Then I printed them, cut them out, folded and glued them up and ta da …

The world’s tiniest seed packets!

I’m not precisely sure where this cupboard might end up, but I have an idea brewing.  You’ll just have to stay tuned until Monday to find out what it is.  But here’s a hint, it includes an option for shipping!

But in the meantime, what do you think of this Welsh cupboard makeover?  Leave a comment and let me know.

next winter’s project?

It’s probably obvious that I’ve been spending a lot of time refurbishing my dollhouse this winter.

So far I’ve finished the dining room

the main bedroom

the 2nd floor hallway

and the bathroom.

I’m also mostly done with the kitchen, just waiting on a last minute item to arrive before I share it.  The 2nd bedroom and the attic spaces are well on their way to being done as well.

And that leaves my friends and family asking ‘what are you going to do when the dollhouse is finished?’

That is definitely a valid question, and I have a couple of answers.

First, I don’t think the dollhouse will ever be ‘finished’.  For one thing, most of my rooms are really only minimally furnished compared to most dollhouses I’ve seen.  I still need some extras like bedside tables in the main bedroom, art for the walls, another piece of furniture for the dining room and so on.  For another thing, much like my actual house, I’ll probably never really be done.  I’ll always be tweaking things, adding new things here and there, changing things up and so on.  I plan to landscape the outside at some point too.

But the 2nd answer to that question is that maybe I’ll do another one next winter.

After all, I see dollhouses at garage sales fairly often.

You might remember this one …

I purchased that one at the Nokomis neighborhood garage sales back in 2016.  I cleaned it up a bit, and then sold it on … I believe to my friend Amy.  I wonder if she still has it.

In May 2022 I found this little number

It’s definitely a very primitive sort of dollhouse, simply made out of a box.

I’ve kept this one and am using it in my potting shed so hold clay pots and such.

In 2023 I paid just $5 for this dollhouse, also at the Nokomis neighborhood garage sales.  Seems like Nokomis is a great neighborhood for finding dollhouses!

I spruced this one up a bit more by replacing broken shingles, having Ken create a replacement shutter for the lower window, and then giving it a paint job.

In early 2024 I found this dollhouse … doll barn? … while out thrifting.

I gave this one a makeover with some paint.

Then I added some fun details like some barn lights, a couple of stencils …

and that fun weathervane.

Those are just the dollhouses that I did bring home, there were others at garage sales that I’ve passed by.

I guess all of those previous projects helped me gear up to tackle my own dollhouse renovation.

And now that I know I can do fiddly things, if I see another dollhouse at a bargain price this coming summer I’ll snatch it up to become next year’s winter project.

How about you?  How do you keep busy over the winter?  Or maybe where you live you don’t need to have something to occupy your time while waiting for spring to arrive.  Leave a comment and let me know!

a swiss cross stool.

Back in early November my friend opK and I found a couple of garage sales to check out on an unseasonably warm-ish Thursday.  I didn’t find much to buy, but I did bring home this metal stool.

The sale I found it at really wasn’t your typical garage sale.  It was held in someone’s garage, but they had a lot of antiques and the prices were more akin to a shop rather than a garage sale.

But that being said, this stool was one of the few bargains they had at $10.

I was really drawn to the industrial look of the casters, but I didn’t love the primer grey spray paint job that someone had given it.

It was a bit blah.

So after a good cleaning, I sanded the seat top to remove any flaking paint and rust.  Next, after wiping away any remaining dust with a damp cloth, I gave the stool a coat of Dixie Belle’s Bonding Boss in clear.  It will inhibit any future rust, and also improve the adhesion of my paint.  I like to use the clear version when I’m planning to distress a piece.  I definitely don’t want to see white underneath when I spot sand to distress it.

Next up I painted the stool in Dixie Belle’s Midnight Sky.  Then I taped off a Swiss cross, and painted it in Drop Cloth.

I used those holes in the top of the stool as a guide for centering my cross.  I also used a carpenter’s square to get my angles right.

I didn’t want the stool to look freshly painted, so I used some 220 grit sandpaper to sand back the paint in areas that I thought would be naturally worn over time.

This is where that clear Bonding Boss comes into play.

I finished the stool with some of Dixie Belle’s clear wax.

Now, you may have noticed that this stool is kinda short.  It’s not really the right height for sitting on it at a table, and of course it’s definitely not bar stool height.

Initially I thought that the height would make it perfect to use as a plant stand for a taller Norfolk Island Pine that I have.

But I quickly realized that there wasn’t much point in that Swiss cross design on the top if I was just going to put a plant on it.

In the end, this stool is really the perfect height for me to sit on while cleaning out lower cabinets, or while digging through my stash of scrapbook paper that I store on a lower shelf.  So for now I’m just going to hang onto it.

What do you think of this simple makeover?  Leave a comment and let me know.