Recently I’ve been telling friends and family that I have placed a moratorium on bringing home any more furniture. I don’t have a lot of space for storing pieces, so I have to be sending just as many out the door as I’m bringing in the door. And somewhere along the line the balance got thrown off. So for the last month or so I have been trying not to bring in any new pieces to work on until I get some of the ones that I already have finished.
But then I found an awesome desk at a garage sale for just $15. How do you pass that up?
And then there was a bedroom set that my friend Meggan’s husband’s co-worker (or something like that) was selling. Meggan had texted me about it a while back and I made an offer at the time. Then I basically forgot about it. So when they accepted my offer a few weeks later I felt like I should ignore the moratorium and bring the set home. I figured I could squeeze them in somewhere. So last week Mr. Q and I drove out to pick them up. The set includes a tall dresser, a dressing table and a full size bed.
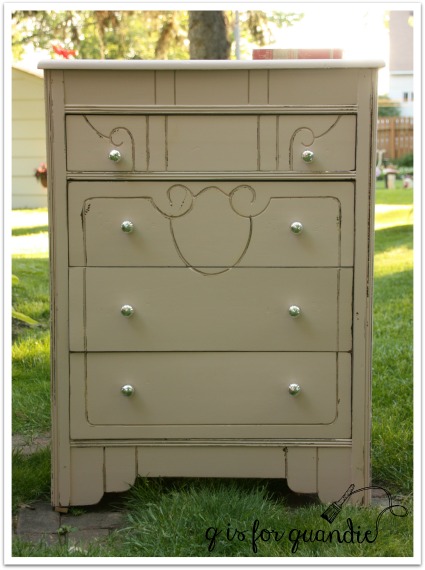
I decided to start with the tall dresser.

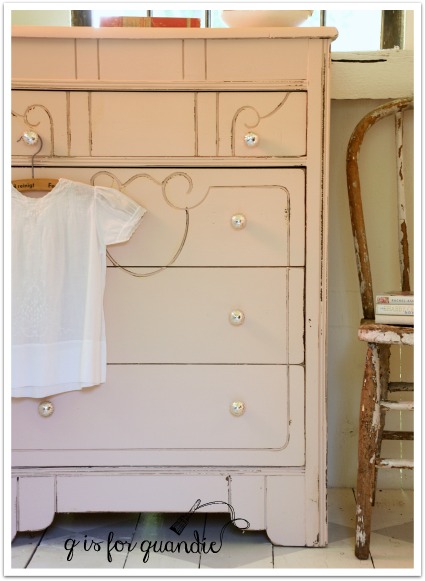
There was nothing terribly wrong with this dresser, it just needed to be lightened up.
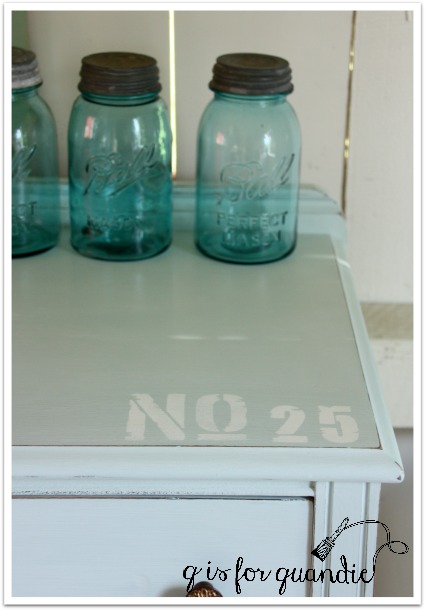
So I got out my Little Billy Goat paint in Momma’s Fridge, which is a lovely pale aqua blue.

I took just two coats to get good coverage. I like to water the paint down a little for the second coat because it goes on a little more smoothly.

Once the paint was dry, I added a stencil to the top of the dresser to give it a little extra personality using white acrylic craft paint.
I finished with a coat of Miss Mustard Seed furniture wax. Just so you know, you must seal Little Billy Goat’s paint with a top coat of some kind. Otherwise water will take the paint off. This is handy for distressing with a wet paper towel, but not so handy for daily use, so always seal pieces painted with Little Billy Goat.
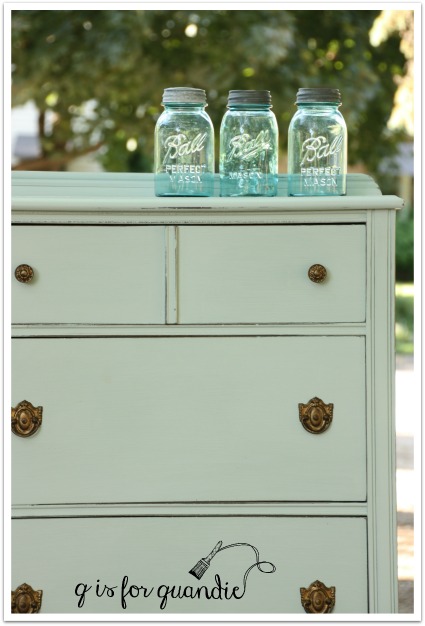
The hardware that came with this dresser is so pretty. I just added a little more gold to them using a Little Billy Goat Goat Stick in Gold Leaf.
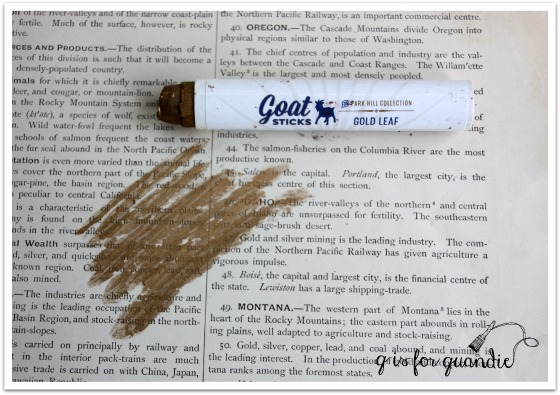
If you haven’t tried one of these, they are really so easy to use. Keep in mind that they are self-sealing, so you have to peel off the waxy coating, or rub the stick on paper until it comes off, each time you use it. It’s really pretty slick and so much more user friendly than the rub ‘n buff (which I find dries out in the tube, and then you have to toss half of it away). Here was my process for these drawer pulls; first I rubbed off the waxy coating on the stick, then I ran the stick lightly around the pull itself. I didn’t press hard or cover the whole thing, I just wanted to get some of it on there. Then I went back in with a q-tip and blended it. Think of it like blending your eye shadow.

I added the hardware back onto the dresser, and it was done.
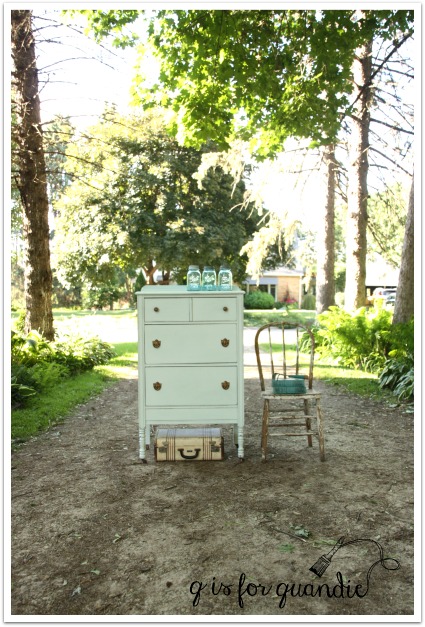
A super easy makeover.
Please check my ‘available for local sale’ tab to see if this piece is still available.
Please note that Little Billy Goat has supplied me with paint and goat sticks, but all opinions are my own and I am not compensated for this post. If you would like to try Little Billy Goat paint and you are local, you can find it at Reclaiming Beautiful in Stillwater. You can also find Little Billy Goat products online at piperclassics.com.