Every once in a while someone asks me that question. I imagine that they expect a simple one or two sentence answer. But no, there isn’t a simple one product fits all answer. There are so many things to consider such as what sort of surface are you painting? How much money do you want to spend? What look do you want to achieve? How durable does it need to be? How much experience do you have? Is environmental safety important to you? How about protecting yourself and your family from harmful toxins? All of these factors and more go into choosing which paint or other finishes to use, and the answer is not going to be the same for every project or every painter.
If you’ve read my blog for long, you’ll have noticed that I am not totally loyal to just one brand or type of paint. I love to use milk paint, but I also use chalk paint all the time. I often use Fusion’s acrylic paint too. And sometimes I even use spray paint, but shhhh, let’s let that one be our little secret. In the spirit of full disclosure, several different brands provide me with free product including Fusion Mineral Paint, Dixie Belle Paint Co, Miss Mustard Seeds Milk Paint, Homestead House Milk Paint and the Real Milk Paint Co. However, I make no promises to any of these paint brands other than that I will try their product and I will blog about my experience and opinions. Good or bad. None of them pay me to promote their product, and I also don’t make any money from sales of any of these products.
I like it that way. I don’t want to feel obligated to promote a product just because they pay me. And more importantly, I don’t want to be limited to using just one paint line.
So, let’s compare, shall we?
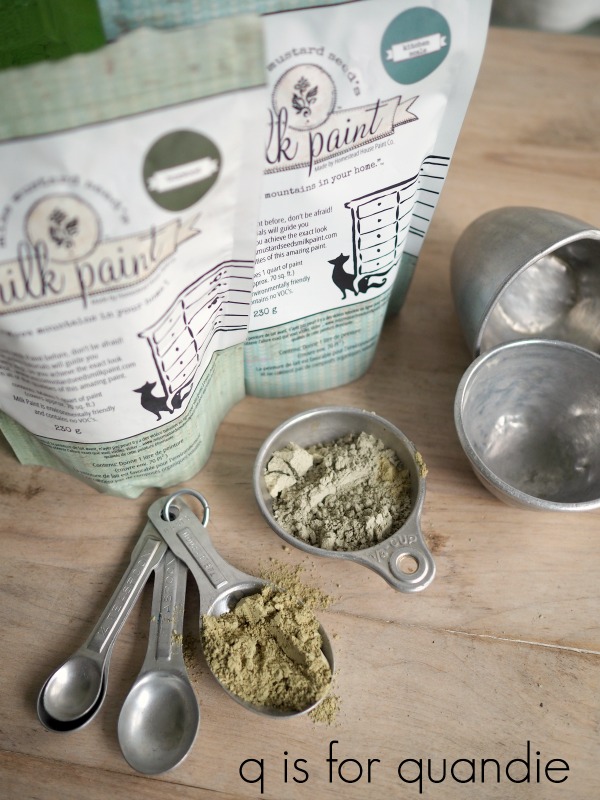
Milk paint. There are multiple milk paint lines out there, Miss Mustard Seeds, Homestead House, The Real Milk Paint Co and Sweet Pickins just to name a few. When I say ‘milk paint’ I am referring to the casein (the protein found in milk) based milk paint that comes in powder form and you mix it with water yourself. Milk paint is safe for both you and the environment. It is a non-toxic, zero VOC product.

When I use it: I use milk paint when I want to get a chippy, vintage farmhouse style finish. It gives that ‘aged in a barn for 80 years’ sort of look. In my opinion, a good chippy milk paint finish looks more authentic than a distressed chalk paint or acrylic paint job. This is my personal favorite ‘look’ for furniture. I have 17 pieces of furniture in my own home that are painted with milk paint, so it’s safe to say that I really love this stuff.

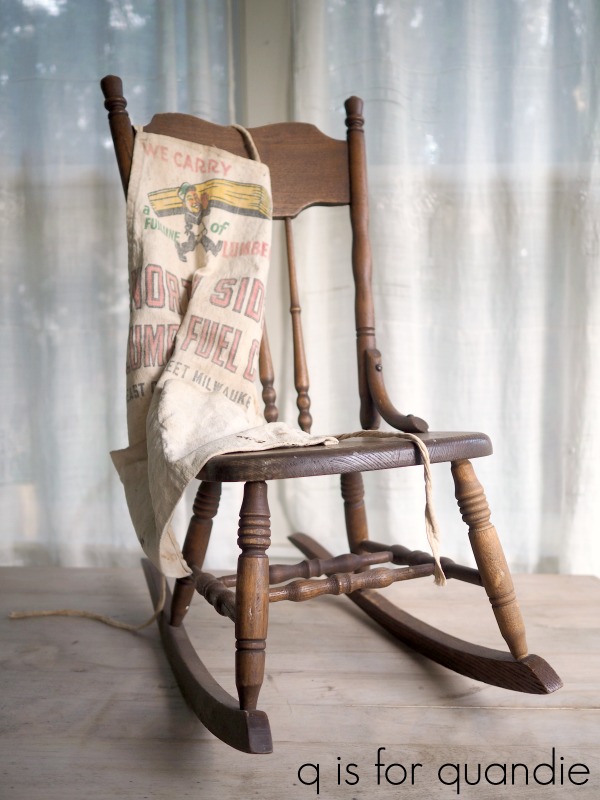
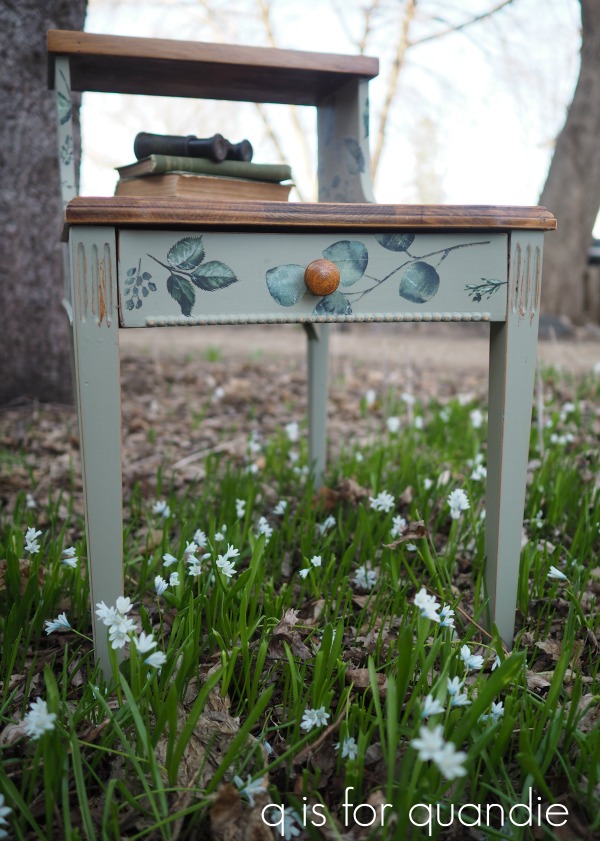
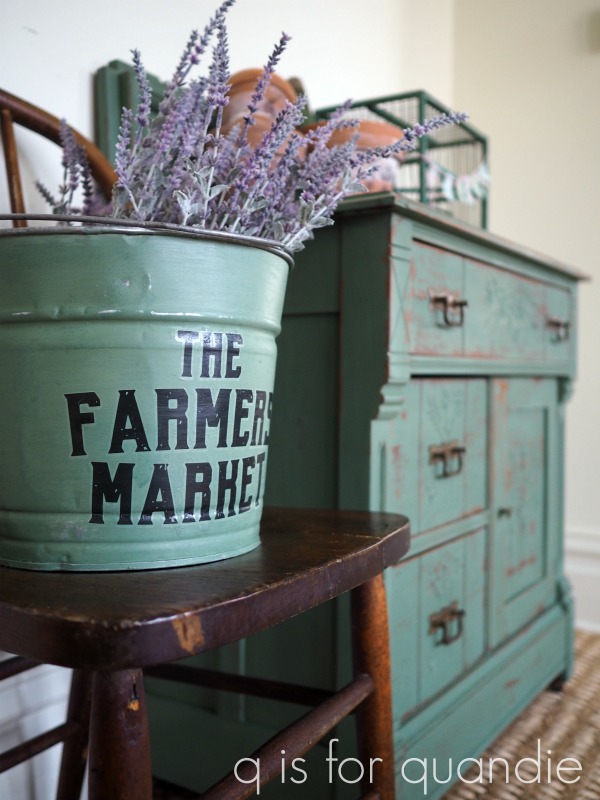
Prep required: It really pays to do at least some minimal prep on all of your pieces, but it’s especially important when using milk paint. By minimal prep I mean a light scuff sanding followed by cleaning with a degreaser such as TSP Substitute or Krud Kutter kitchen degreaser. This prep will just take 15 to 20 minutes and is a great investment of your time. Specifically with milk paint, proper prep will help control how much chipping you get. Milk paint will chip when the surface you are painting ‘resists’ the paint. A waxy/oily/shiny surface will resist the paint. The amount of prep you do can give you some control over that. Then again, if you’re OK with a massively chippy look, go ahead and roll the dice by skipping the prep (as I did with the chair shown above which is painted in Miss Mustard Seeds Aviary).
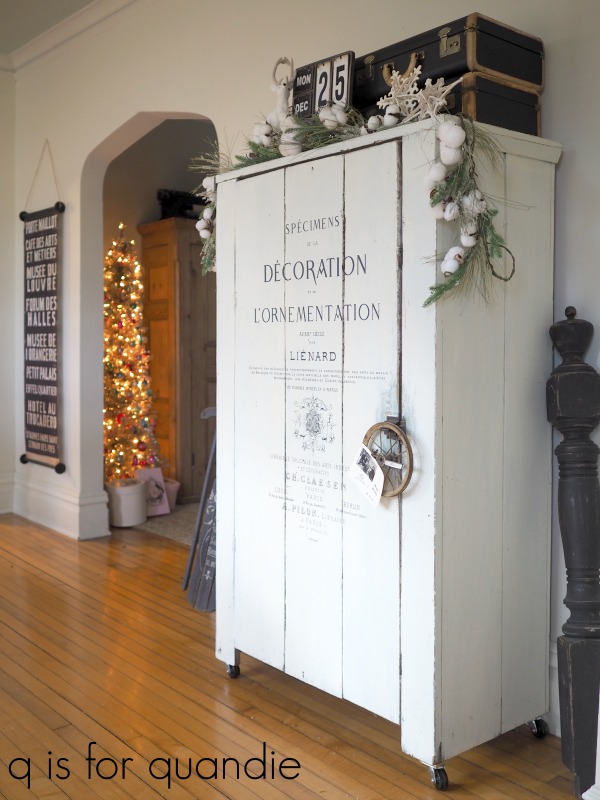
Topcoat options: Technically you don’t have to put a topcoat over milk paint. Several of my pieces painted in milk paint do not have one including my Specimens Cupboard. I painted this piece two years ago and it still looks fantastic.
I especially like the look of the lighter milk paint colors without a topcoat (although I prefer the look of the darker colors with a topcoat). Over time the milk paint will harden making it fairly durable, however, milk paint without a topcoat is not water resistant or washable. To achieve that you have to add a topcoat. Recommended topcoats include hemp oil, wax or poly. I love using The Real Milk Paint Co’s Dead Flat finishing cream over milk paint when I want a washable surface.

It barely changes the color of the milk paint, adds just the tiniest bit of sheen, is washable after 3 days and is easy to apply.
Cons: Milk paint can be tricky to use. It has a higher learning curve than other paints. You have to mix it yourself and it takes a little practice to get the right consistency. Making sure the pigments are well blended can also be dicey. The color can be inconsistent, not only just from package to package, but even within one mixed cup of paint, especially with the green shades. You have to pay attention and keep your paint well mixed as you are using it because some pigments are heavier than others and will settle to the bottom of your paint container. Whether or not you get a chippy finish can also be difficult to control and/or predict.

Pros: When it works right, milk paint can’t be beat for providing an authentic looking chippy finish! I also find this to be one of the easiest paints to apply from a purely physical stand point. It’s thinner than other paints and it just takes less hand strength to actually paint it on. I’m having a little trouble explaining this the way I want to, but there is a noticeable difference when you switch from painting something in chalk paint to painting with milk paint. The brush feels lighter in your hand and you don’t have to work so hard to apply it. Does that make sense? In addition, the thin consistency of this paint pretty much eliminates brush strokes and allows you to add multiple layers of paint without adding unwanted texture. I also enjoy creating my own custom colors with this paint. True, you can do that with other paints too, but somehow it’s more fun adding various powders to water and watching it turn into paint. Another plus to milk paint is that although the mixed paint has a limited shelf life, the powder itself has an indefinite shelf life if kept dry in an air tighter container (I keep my opened bags of milk paint in a Rubbermaid container).
Find Miss Mustard Seeds Milk Paint retailers here.
Chalk style paint.
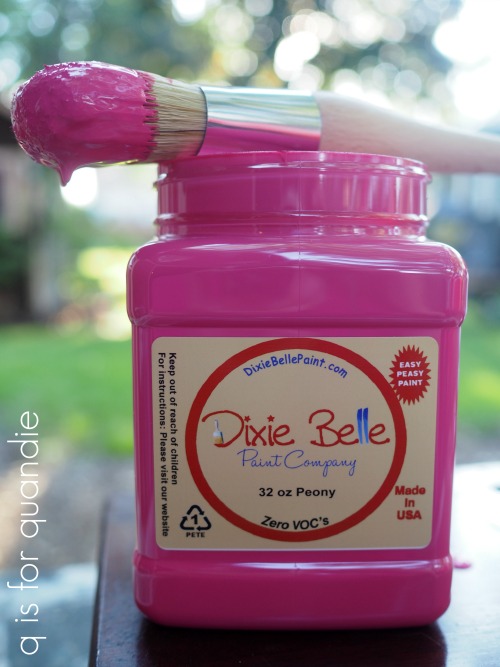
I think we all know that the list of paint manufacturers who have jumped on the chalk paint bandwagon is long. Actually I think I read somewhere that Annie Sloan has trademarked the term “chalk paint” so all of the others tend to call themselves things like “chalky paint” or “chalk mineral paint”, but I don’t know for sure if that is true. I’ve been using the Dixie Belle brand of chalk mineral paint for a couple of years now and I really love it. This brand of chalk paint is non-toxic and has zero VOC’s.
When I use it: I use chalk paint when I want a matte distressed finish, and I don’t want to worry about chipping or adhesion issues. If I’m going to paint vinyl, such as a chair or a suitcase, I get the best results with chalk style paint. Also, when painting something black my top choice is Dixie Belle’s Caviar or Midnight Sky with a wax top coat. This combo just creates the most delicious looking finish with minimal brush strokes. Dixie Belle’s Midnight Sky was perfect for my baby grand piano.

Prep required: You know what? I’m going to say the same thing for every kind of paint. It really pays to do minimal prep on your pieces. By minimal prep I mean that light scuff sanding following by cleaning with a degreaser. Many brands of chalk paint (including Dixie Belle) say that no prep is required, but I beg to differ. If you run into a particularly waxy or oily surface you will wish you had taken the time to do minimal prep.
Topcoat options: The Dixie Belle chalk paint does not require a topcoat. However, the finish will be very flat and chalky looking without a topcoat, so if you want even just a little bit of sheen you’ll need to topcoat it. For that reason I sometimes avoid using chalk paint on large pieces and also on areas that are more difficult to wax (like the inside of a cupboard for example).
Cons: Um. Yeah. I can’t really think of any except what I mentioned above about topcoats. You’ll need that extra step (and expense) of a topcoat if you want some sheen to your piece.
Pros: This stuff is kind of a no-brainer. Once you know the basics, you really shouldn’t run into to many problems using chalk paint. Therefore, this is a great choice for a beginner painter. The color will generally be consistent. It’s easy to distress. You can even just use a damp paper towel to distress chalk paint. It adheres well to almost any surface including metal and fabric. It is self-leveling and if you water it down a little you won’t have any issues with brush strokes.

Find Dixie Belle paint retailers here.
Acrylic paint.
Fusion Mineral Paint and General Finishes Milk Paint (a misnomer) are both acrylic paints. I’ve been using Fusion paint for years. I’m super impressed with this company’s commitment to providing products that are safe for both the painter and the environment. Their Tones for Tots line underwent rigorous testing to be sure it was suitable for use on children’s furniture. Needless to say, this paint also has zero VOC’s and is non-toxic.
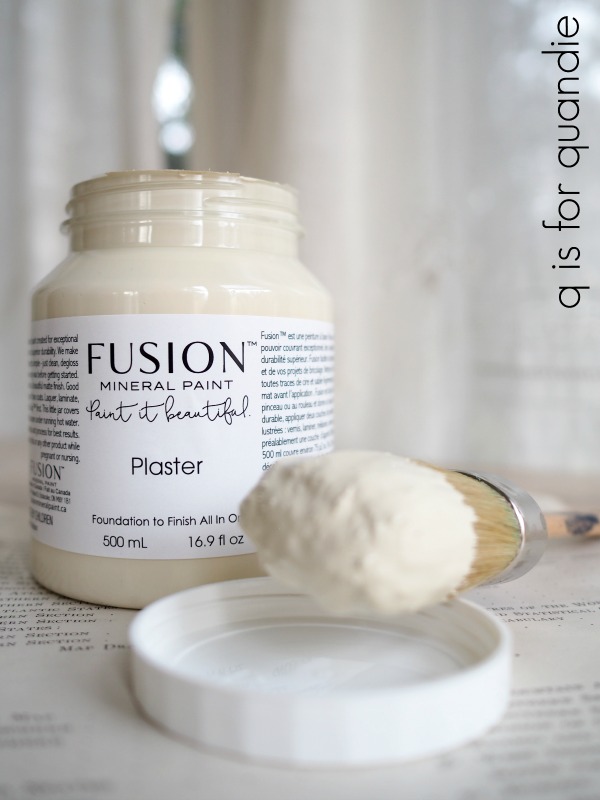
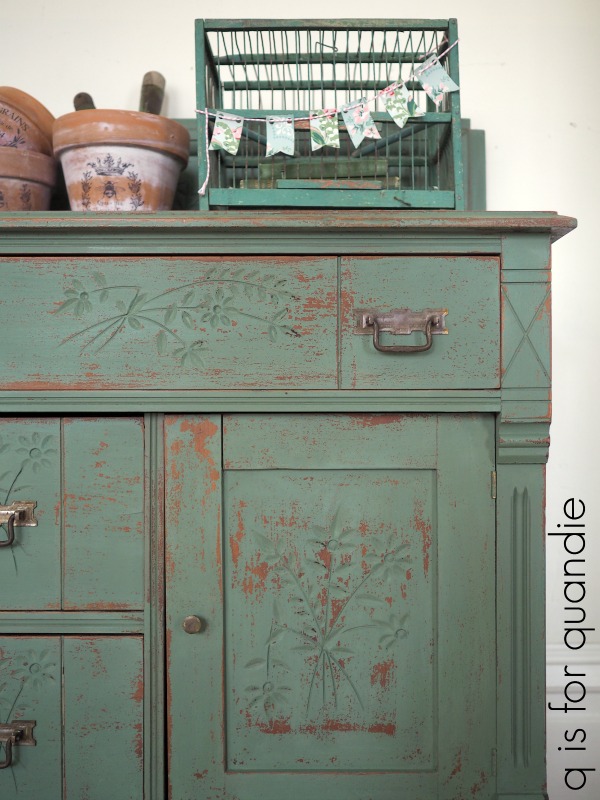
When I use it: First and foremost, I use Fusion when I’m feeling kind of lazy. It is hands down the easiest of these products to use. Here are the instructions; open jar, paint, let dry. OK, that may be a little bit of an exaggeration. You should do the same minimal prep that I recommend for every paint job when using Fusion paint, a light sanding and cleaning of your piece will do. But from there it really is that simple. I tend to choose Fusion for large pieces that I don’t want to have to wax. It’s perfect for the insides of cabinets, and I also like to use it on surfaces that need to be especially durable like the shelving in my living room. I also love to use Fusion on mid-century pieces that I am not going to distress. Their Park Bench (the green shown below) is perfect for mid-mod pieces.

Cons: The finish with Fusion is just a tad shinier than a waxed (or oiled) milk or chalk paint finish. I hate to even use that word ‘shinier’ because it’s still not shiny by any stretch of the imagination. It’s just not as matte as the other two. So if you’re looking for a really matte finish, you might not like the sheen. Fusion is also a little more challenging to distress. It can be done, but it takes a little more elbow grease. Distressed acrylic paint looks a bit like distressed latex. The paint sort of peels away rather than coming away as a powder like chalk or milk paint. This really is a fine distinction though and won’t matter to most painters.

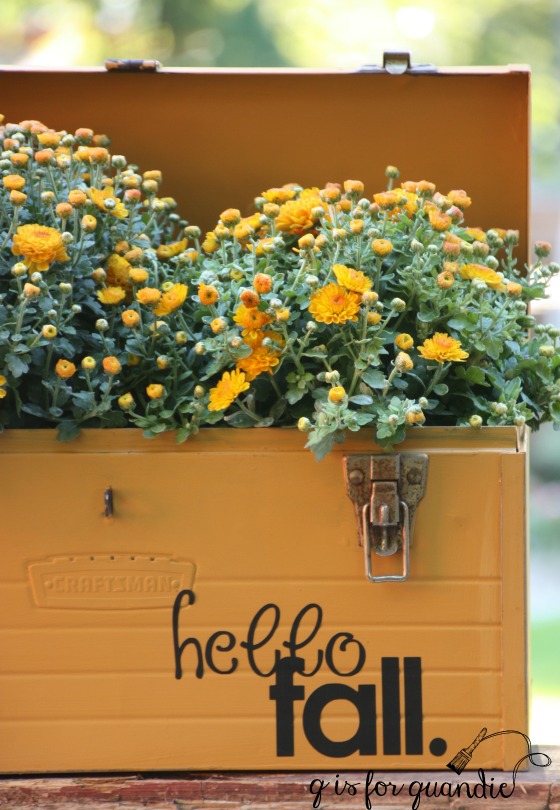
Pros: Fusion can definitely be the cheapest way to go, mainly because you don’t need to also purchase a topcoat. Not requiring a topcoat also saves you some time/labor since you can skip that step. Fusion is also fully washable once cured. That makes it a great choice for items going to a home with small children. Fusion also provides an ideal surface for transfers. Of course, you can put transfers over chalk paint and milk paint too, but in my experience they adhere best over Fusion. I have heard some transfer retailers recommend sealing a milk or chalk painted piece with a water based sealer first, then add the transfer in order to improve the adhesion of the transfer. Fusion is water resistant, so it’s also a great choice for pieces that might be exposed to water on a regular basis like a bathroom vanity or a metal toolbox that you might use as a planter.
Find Fusion retailers here.
Spray paint.
All of my previous selections are environmentally sound, non-toxic, zero VOC products. In general I stick with that type of product. I do a lot of painting, so I try to be cognizant of what I’m exposing myself and Mr. Q to on a regular basis. I also do a lot of indoor painting in the winter, so I need products that are safe and relatively odor free. But I do have a confession to make. Every once in a while I pull out the spray paint. I will only spray outside though, so this is definitely not a winter friendly choice for me. But if I’m going to paint wicker, cane, or something like a basket, I’ll spray paint it simply to save time and effort.

One of my favorite tricks is to spray paint the cane on a piece first and then go over that with the paint I’ll be using on the rest of the item so that it matches. I used this approach with my cane dining room chairs.

So, yes, spray paint does have its place.
I hope this post gave you some good information on the different types of paint available. Be sure to pin it for future reference!

But now I’m curious, what kind of paint will you be using on your next project and why? Be sure to leave a comment!