24 hour grocery.

I was digging around out in the carriage house a few weeks back and came across a pair of abandoned table leaves that I forgot I had.

24 hour before

I believe they came off the table that I’m using for a desk in the Q Branch.

Obviously it was time to turn these into some signs!

I had already painted a base coat of blue on one of them using paint leftover from farmhouse dresser no. 5, so that gave me a head start on that one.  The second one got a base coat of Boxwood (dark green).  Once dry, I rubbed some hemp oil around the edges of both pieces and then added two coats of Miss Mustard Seed’s Linen.

I had a feeling I would get some great chipping on these since I had also gotten gorgeous chipping on the table-turned-desk that they came from.

desk collage

And sure enough, much chippyness ensued.

24 hour grocery close up

The sign with the blue background chipped a bit more than the one with green, but they both got good and chippy.

24 hour grocery

Do you sometimes feel like your kitchen has a revolving door?  Is it nearly impossible to keep your pantry stocked?  Do your kids eat the groceries before you can even get them out of the shopping bag?

I don’t have any teenage boys in my house, but I have plenty of friends that do and they all tell the same story.  They can eat you out of house and home.  I was thinking of them when I decided to go with “24 hour grocery.”

I cobbled together four different stencils for the wording on the sign.  The “grocery” stencil is from Donna at Funky Junk, the “2” and “4” are from Maison de Stencils, and I cut the “hour” stencil myself on my Cricut.

24 hour grocery 2

You know, there are really a limited number of ways to take a photo of a flat sign!  I staged this one over my farmhouse table and filled the table with some typical pantry items.

24 hour grocery angle

I was wishing I could hang this in my own kitchen or pantry, but I just don’t have a wall large enough.  These signs are 42″ wide by 15″ tall.25 hour grocery angle 2

How about you?  Do you have the perfect spot for one?  They are both for sale.  If you are local and can pick it up, leave me a comment if you’re interested in more details.

happy holidays!

My sister and I visited the Marjorie McNeely Conservatory at Como Park last weekend to check out the Poinsettia display.

conservatory

We happened to go on the one day of sunshine we were allotted for the month of December.  OK, maybe that’s a little bit of an exaggeration but we have had some dreary grey days of late.

There weren’t very many people there, except for that one lady who simply would not get out of my shot!

conservatory poinsettias

But the poinsettias were beautiful, and I loved those succulent balls (that sounds really wrong, especially on Christmas, but what would you call them?) that are floating above the water.

conservatory water

Here’s wishing you and yours a festive day with family and friends.  And if you aren’t one who celebrates Christmas, here’s wishing you a relaxing day watching old movies and eating take out Chinese food 😉

happy holidays

(see, I’m telling you, that lady was in every. single. shot.)

Merry Christmas!

practice makes perfect.

For my birthday this year my sister gave me this book.

book

We were out shopping one day and I happened to see it and mention to her how much I would like to have it.  And then I believe I handed it to her and she put it in her shopping basket.  LOL.  Yet another benefit of having her live nearby!

She wrapped it up and gave it back to me on my birthday.

 I have quite a few chalkboards around my house.  I still love them.  I know some people consider them to be so ‘yesterday’ and they are over them.  Not me.  But my biggest problem is that I’ve never been happy with my attempts at making ‘chalkboard art’.  They have been pretty lame, to be quite honest.

Last Christmas I even resorted to ‘faking it’ on the chair chalkboard in my kitchen.

chair chalkboard close up

Which was a total failure when the double sided tape I used to attach the printed ‘chalkboard look’ art wouldn’t come off and I ended up having to repaint the chalkboard itself.

I also tried using Martha Stewart’s liquid chalk and a stencil, which was also pretty much a fail.

chalk stencil close up

Now that I have the book, I’m determined to improve my chalkboard drawing skills.  I started really small with adding this little flourish underneath the ornament wreath on the chalkboard door in my Q Branch.

tour ornament wreath

Don’t be fooled by the chalkboard design above the wreath.  I accomplished that by printing the design on paper, rubbing chalk on the back of the paper, placing the paper over my chalkboard and then going over the entire design with a pencil.  Thus transferring the design to my chalkboard door.  Then I went back over it with a white chalk pencil.  Rather time consuming and putzy, but it looks pretty cool.

But the design under the wreath is free hand and drawn using some of the hints from the book.

 I next moved on to the chalkboard in the kitchen.  I tried a couple of different lettering styles on this one with another free form flourish at the bottom.

tour kitchen chalkboard

Not too bad.  Still not gorgeous, which is what I’m aiming for, but OK.

So I’m going back to the old adage, practice makes perfect.  I need a lot more practice.  But luckily, as I mentioned, I have quite a few chalkboards to practice on.

mad skill with balls.

My sister Debbie is quite serious about her holiday baking.

baked cookies 2

This is no small undertaking.  She bakes more than a dozen different kinds of cookies, plus various quick breads.  Then she also makes fudge.  The crazy part is that she did all of this back in New Jersey in a kitchen the size of a small walk in closet.  Seriously, I don’t know how she did it.  She has a much more suitable kitchen here in Minnesota and I know she is enjoying it!

baking Debbie

She sets aside an entire weekend for her baking.  Since this is her first Christmas here it was also the first time I got to see the production first hand.  Her small dining table was piled high with supplies …

baking supplies

… nearly disguising my niece’s white tabletop Christmas tree.

baking supplies 2

Luckily Debbie’s new apartment has a good sized island which became the cookie cooling zone.

baked cookies cooling

It was also the measuring zone.

baking flour

I usually have to throw flour away at my house because it goes past the expiration date.  Yes, it’s true, flour has an expiration date.  I bet Debbie doesn’t even know that.  I believe she went through several jars of flour in one day.

baking flour jar

For the first hour or two I was fairly useless as a ‘baking helper’.  My main job was to retrieve supplies from the table as needed.

Debbie did all of the complicated stuff, like rolling these Stained Glass Cookies into long rolls and then slicing them into cookies …

baking stained glass

and spreading the dough out for Simple Sugar Cookies

baking sugar cookies 1

sprinkling them with colored sugar …

baking sugar cookies 2

and then slicing them into delicious diamond shaped cookies once they were baked and slightly cooled …

baked sugar cookies

I think these were my favorite cookie that we she made.  They had a faint almond flavor and were perfectly crisp.  Yum.

In addition to supply gathering, I was also given the task of crushing party mints which involved a hammer (since Debbie couldn’t find her rolling pin).  I’m pretty good with a hammer.  However, soon after my sister mixed up the Party Mint Cookies I found my niche.  Rolling balls.  Turns out, I’m good with balls.  Sometimes my balls got bigger than they were supposed to be and Debbie would admonish me to rein it in a little.

But just look at the Snicker Doodles that resulted from my mad ball rolling skill …

baked snicker doodles

Once Debbie had observed my ball rolling talents, she had me rolling balls for the rest of the day.  I produced a serious quantity of balls, like as in 100’s of them.  Balls rolled in blue sugar, balls rolled in green sugar, balls with a milk dud stuffed inside.

cookies 2

Turns out Debbie’s least favorite part of baking a million cookies is the ball rolling!  So now I have an official function in the cooking baking operation.  I hope to be rolling balls for my sister for many years to come.

How about you?  Is there a holiday baking tradition at your house?

who me? a collector?

I always try to tell people that I’m not a collector.  I don’t really collect anything in particular.  I don’t like a lot of clutter.  And all of that is totally bogus.  I am clearly in denial.

tree toppers

 As I sit here typing this post I can look at the cupboard next to me and see my collection of vintage silver salt & pepper shakers, behind me is my collection of tiny dressers.  And right next to that is the tree that contains my vintage Christmas ornament collection.

tree 1

I’ve been hoarding collecting vintage glass ornaments for many years now.

vintage ornaments

Long enough that I have been able to refine my collection to mostly pinks and aquas (oops, that’s kind of bogus too, the silver and gold ones are just in the dining room).  I really love the hand painted versions.  They are so charming with their little painted flowers and flourishes.

vintage Christmas ornaments

I have a couple of strategies for adding to my collection each year.  First and foremost, I visit a little second hand shop called La Garage in North St. Paul.  This shop is like a garage sale in a store.  I believe they get most of their inventory from estate clean ups.  Each year they close up for the week preceding Thanksgiving and they completely revamp the store for Christmas.  They open back up on Black Friday with tons of ‘previously loved’ Christmas decorations.  I’m always able to find quite a few vintage lovelies on their trees.

ornaments 3

I don’t do much shopping in antique shops anymore, but I will make an exception for this collection.  I can find ornaments a few dollars each, which is a pretty affordable splurge.

ornaments 4

In the case of my ornaments, I even have a sub-collection.  Vintage glass Christmas tree toppers.  A couple of you noticed these in the background when I posted about the sweet little mini dresser on Monday.

vintage Christmas tree toppers

I was able to add that tall silver one to my collection this year.  I found it at an antique shop for $15.  A splurge for me, but worth it I think.  Isn’t it gorgeous?  Prior to this acquisition, obviously the little aqua and silver one was my favorite.  Now it has competition for the top spot.

In case you are wondering, those tree toppers are not just precariously balanced on that window ledge.  I have added a little Stick Um Candle Adhesive to the bottom of each one so it is securely held in place.

This year my silver tree is in the Q Branch.

ornaments 5

If you look really closely, you can see a bunch of little reflections of me with my tripod taking these photos in the ornaments.  Ha!  Thank goodness it’s blurry because I’m pretty sure I was wearing paint splattered clothes and I hadn’t put on any makeup.

aqua reflection

Come back next week for a full tour of my house all decked out for Christmas!

Merry Christmas ornament

Linking up with:  French Country Cottage and Making Broken Beautiful at the Curator’s Collection.


sleigh ride.

Last summer my sister Debbie picked up this little oak sleigh on the cheap at a garage sale.  I think she only paid a dollar or so for it.  I didn’t get a ‘before’ snap of it, but it was basically that 80’s pale oak with a shiny poly on top.  Debbie painted it with Miss Mustard Seed’s Tricycle way back then and then it sat up in my carriage house for a few months.

debbies sleigh before

Both Debbie and I were keeping our eye’s peeled for the perfect stencil for it.  We saw a couple that we both liked, but they were either too big or too expensive.  Finally Debbie picked up an inexpensive snowflake stencil at Michaels, and I suggested we try cutting our own stencils for the rest using my Cricut machine.

We started with “Brrr…” on the side.

debbies sleigh side

And then we added “No. 25” on the front …

debbies sleigh close up front

The beauty of cutting our own stencils was that we could size them precisely for this project.

Once the paint was dry, we sanded lightly and then waxed.  We used hot glue to adhere some floral foam inside the bottom of the sleigh.  The we gathered up some things Debbie had been stocking up on to use inside.

debbies sleigh filled

The birch logs were gathered by the roadside when we were up north for our scrapbook retreat.  The single spruce top was free at Home Depot.  They don’t sell them singly, but when Debbie asked the garden center manager if she could buy just one he said “oh, just take this one!”  Some of the other greens are also free ones from Home Depot.  Did you know they keep a big bin of the branches that have been trimmed from the Christmas trees and you can just help yourself?  Jeesh.  Wish I had known that before I bought all the greens for my front window box!  Debbie did purchase the red and white candy decorations and the red twigs, as well as some of the nicer greens.

debbies sleigh close up side

All in, I think Debbie spent under $25 for everything needed to make this darling Christmas decoration.  She’s going to put it on the balcony of her apartment.  Unless she decides it just too darn cute to be outside!

a thanksgiving giveaway.

I have so much to be thankful for this year, but I’m sure you all know what tops the list.

courthouse group

I’m so thankful to have my sister Debbie and my niece Kris living here in Minnesota!  I honestly can’t even remember the last time I spent a Thanksgiving with them.  But I do have one very vivid Thanksgiving memory.  The year was 1986.  I was living in South Carolina with my parents and the three of us drove up to New Jersey for Thanksgiving.  At the time, Debbie was pregnant with Kris.  She was very, very pregnant, yet she put on a huge Thanksgiving dinner at her house for both sides of the family.  I still clearly remember getting up the next morning and finding Debbie cleaning up the kitchen.  She made a comment to me about how she thought maybe she was going into labor.  She said it so matter of fact-ly.  My only experiences with child birth were what I’d seen on TV, so I was pretty sure she should have been writhing in pain and rushing around to find her overnight bag and speed off to the hospital.  But no, she was very calm.  Several hours later, sure enough, she and Kris’ dad went off to the hospital where she gave birth to my niece.  It was pretty fabulous timing since it meant that my parents and I were there to greet the new addition to our family!  I’m pretty sure this Thanksgiving won’t be quite as eventful, but I’m very happy to be spending it with family.

In addition to Thanksgiving, I have one more thing to celebrate today.  It’s my blogiversary!  How appropriate that it should fall on Thanksgiving Day this year.  I’m so thankful for all of you who read my blog and occasionally take the time to leave a comment or two (or many!).  I’ve been blogging for two years now, but it weirdly feels longer.  It’s strange to look back at some of my earlier posts and to see how much my blogging style has changed.  And it’s hard to believe it was only two years ago!

As a way of showing my gratitude to all of you who follow q is for quandie and to celebrate my two year blogiversary, I’ve decided to host a Thanksgiving Giveaway!

giveaway

Here’s what is included:  the November Jeanne d’ Arc Living magazine, a bag of MMS milk paint in Bergere, a jar of Fusion’s Mathew Mead Studio Metallics in Bronze …

giveaway paint

Some Miss Mustard Seed brush soap (I swear by this stuff!) and a pretty vintage glass …

giveaway soap

A lovely vintage soup bowl that just wants you to believe …

giveaway bowl

And because I want the whole box to smell fabulous when it arrives at your door, I am also throwing in a bar of Thymes Frasier Fir soap.  This stuff smells amazing.

giveaway soap 2

All you have to do to enter your name in the drawing is leave a comment on this post telling me what your favorite part of q is for quandie is.  Are you a fan of chippy pieces painted in milk paint?

rooster cupboard

Or maybe you love just seeing the ‘before’ and ‘after’ pics.

french dresser before and after

Are the garage sale ‘find of the day’ posts your fave?

cameras

Or perhaps you really enjoy the gardening posts.

plant a garden

Do you get inspired by the room make-overs the most?

q branch carpet

Or maybe you love the quick and easy makeovers like these stenciled buckets?

stenciled buckets

Whatever it may be, leave a comment and your name goes in the hat for the giveaway!  You have until Sunday, November 29 at 6 pm to get your comment in.  The winner will be announced on Monday.

Mr. Q and I are off now to pick up Debbie and Kris and head out to my in-laws for Thanksgiving.  This year we’ll have quite the feast since my sister is adding 4 dishes to the mix.  I’m bringing my favorite sweet potato casserole (shared here last year).  I’m also bringing my camera because I want to get some pics of my father-in-law’s amazing workshop to share with you guys, so check back next week!

a Saturday post.

Do most of you know who I’m talking about when I say nnK?  nnK stands for ‘new neighbor Karen’.  She moved in … gosh, I’ve lost track now, 8 years ago maybe?  At the time I already had a neighbor named Karen, so I had to distinguish which Karen I was talking about and thus she became ‘new neighbor Karen’, then shortened to nnK.

cast - nnK

Even though the original neighbor Karen passed away quite a few years ago, nnK is still and always will be nnK.

You may not realize it, but you have seen plenty of nnK’s home here on q is for quandie.  It provides the backdrop to all of my driveway staged photos.

seriously studious desk

Yep, that’s her house with the blue door directly across the street from me.  You’ll see that distinctive blue door in quite a few of my photos.  Sometimes I have to yell at her to duck when she’s out working in the garden and I’m trying to stage some photos.  She does love a good photo bomb.

I featured her backyard water garden in August 2014.

nnk water plants

Before nnK moved in, my gardens were the ones that turned people’s heads as they rode by on their bikes or walked their dogs down our street.  But one of her early projects was to add a curbside garden along nearly the entire frontage of her property.  It’s a rock garden filled with lower growing alpine plants.

nnk's rock garden

Now passers by are drawn to her bright flowers that are right there next to the street.  They don’t even glance in my direction.  Seriously, it’s quite comical.  All I see are the backs of people’s heads now as they ride by.

Not only is nnK a great neighbor, but she has great family too.  I recently posted about the table her dad pulled out of a trash pile for me, and I’ve also posted about the time her mom let me drag a really dirty old farmhouse table home in her convertible!

Judy and the table

But really, the best part of having nnK around is that she loves to cook, and she frequently invites Mr. Q and me over for dinner.  You’ll probably have noticed by now that I do not love to cook.  You aren’t going to find any blog posts about cooking on this blog.

nnK frequently gives me a hard time because I never publish any blog posts on the weekend.  She seems to think that it would be nice to relax in her p.j.’s with a cup of coffee and a blog post to read.

I have a pretty good reason for not doing blog posts on the weekend and it is simply that I know I’ll be too busy to read comments and follow up with a response.  I like to respond to comments the same day that they are left.  Plus, I also assume that others are out having fun on the weekends, not reading blogs (that’s probably not entirely true, or is it?).

Well, anyway, nnK recently celebrated a birthday and her birthday wish was to see a Saturday blog post on q is for quandie.  So here is your birthday wish come true nnK!  Hope you enjoyed it with a cup of coffee!

my other hobby.

In addition to my usual furniture painting, garage saling and gardening, I have another hobby too.  Scrapbooking!  I don’t do nearly as much scrapbooking as I would like.  In fact, these days about the only time I work on it is when I can get away for a retreat weekend.

So last weekend my sister, my friend Terri and I headed off to Lindstrom for a weekend of cutting, glueing and goofing around.  Usually we go in February when the world outside our window is frozen solid and there is nothing better than holing up in a big room with a wood burning stove and all the scrapbook supplies you’d ever need in one place.  I’m not sure how we ended up going in November this year, but there was space available for three so we took it.

scrap hello

I was working on two projects.  The first was my photos from our recent trip to Duluth.

scrap lake

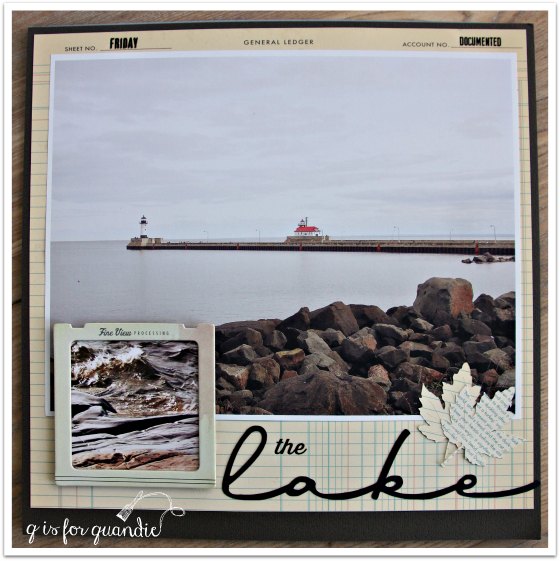
I tried to focus on letting my photos be the stars on the page instead of the embellishments.

scrap split rock

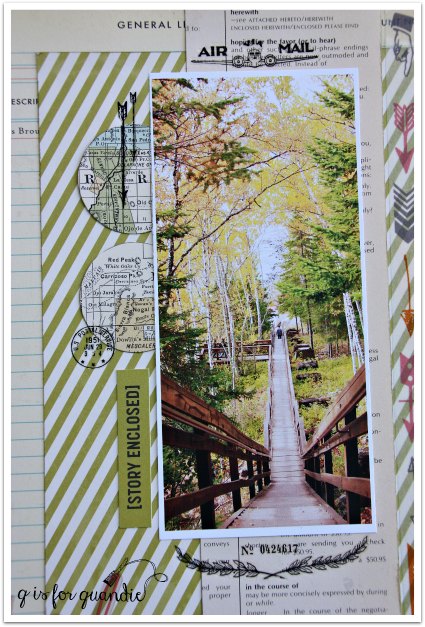
Which isn’t to say I don’t love to add some fab embellishments!  I use quite a lot of October Afternoon products.  All of the paper on this page is October Afternoon.  I’ve added some Tim Holtz rub-ons, a travel quote rub-on that I found at Hobby Lobby and some October Afternoon washi tape.

scrap split rock close up

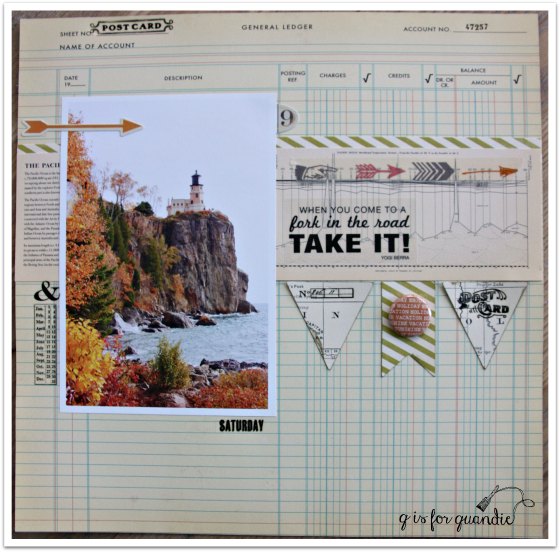
This is one of my favorite pages from the weekend.

scrap stairway

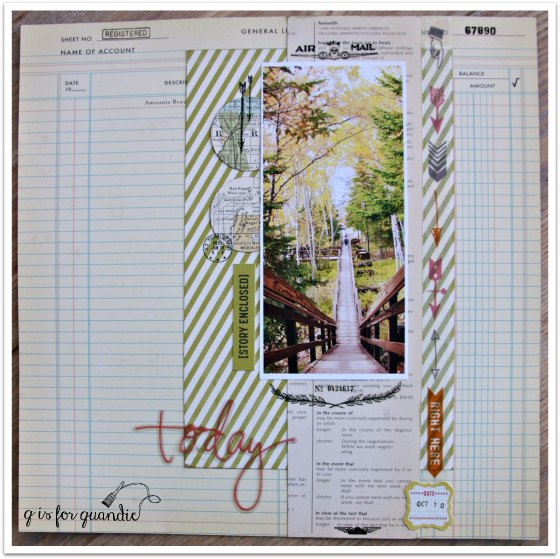
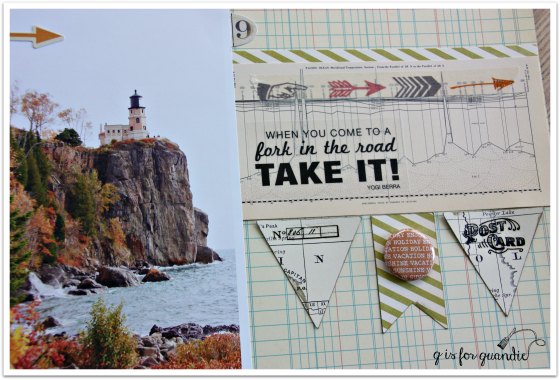
I print all of my own photos, by the way.  I talked a little bit about this when I posted some scrapbook pages from my Danube River cruise last year.  I’ve begun using a matte photo paper instead of the glossy stuff.  I love the results.  I did a little research on the matte paper and discovered that photos printed on it will last longer than those printed on glossy paper.  I’m not particularly interested in archival quality with my scrapbooks though.  I’m just prefer the matte paper for aesthetic reasons.  The other thing I like about printing my own photos is that I can vary the sizes.  This photo was perfect for a long, skinny print …

scrap stairway close up

My second project was working with photos that my dad took back in the 60’s.  When my dad passed away a few years back, my sister and I went through his boxes and boxes of slides and tried to pick some out that we wanted to keep.  I had them all turned into jpeg files so that I could try and clean them up with photo editing software and also so I could print them.  I’ve been slowly printing some out, and then scrapping them when I have time.

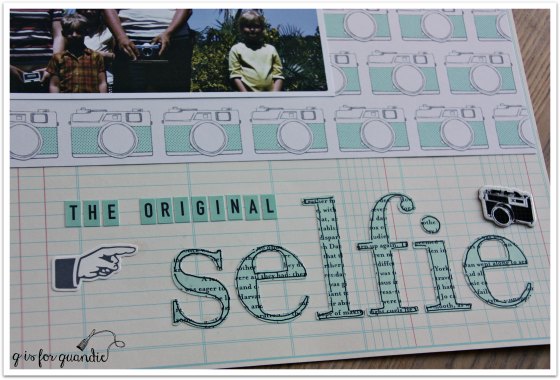
Some of them are quite hysterical, like this one that I have titled “the original selfie” …

scrap selfie

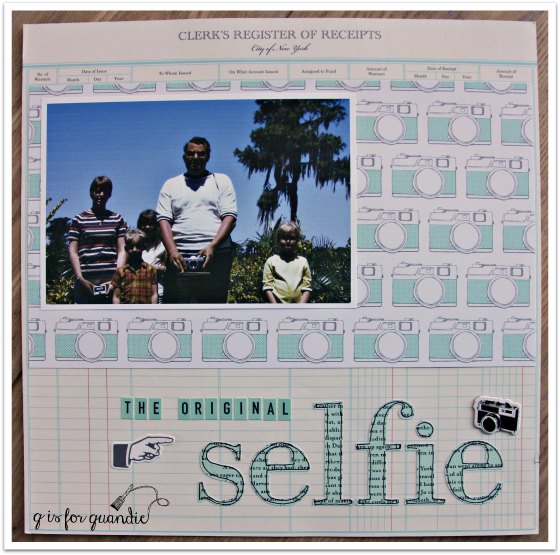
Get it?  My dad is taking a photo of our reflection.  He seems to have his camera on a little stand that I’m assuming was placed in front of the mirror (or whatever reflective surface it was) for precisely this purpose.  That’s me on the right.  I can’t believe my mom dressed me in yellow, I’ve never looked good in yellow.  My sister is tucked in the back at my dad’s elbow.  The tall girl in the striped shirt is actually our baby sitter (not my mom) Kris.  She traveled with us a couple of times, and my niece Kris is named after her.

The “selfie” is cut out of October Afternoon paper using the Cricut.  After I cut out the letters, I outline them with a fine point black pen to add definition.  This is really easy to do and it doesn’t have to be perfect to look good.

scrap selfie close up

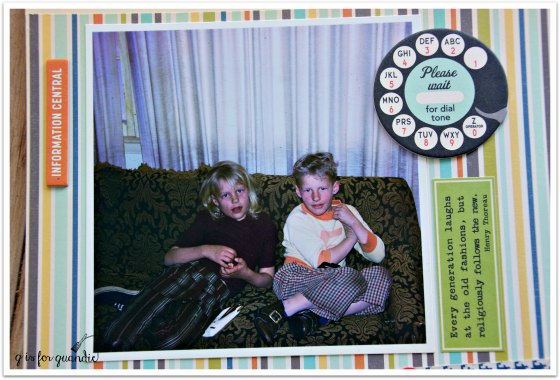
This next photo is not the greatest quality, but on close inspection I just had to share it because the clothes crack me up.  This is me and my brother.  Dig those nifty threads?

scrap nifty threads

I have to say, I think those striped pants I have on would be cutting edge stylish today.  They’ve come full circle.  I’m not so sure about my brother’s pants 😉

scrap nifty threads close up

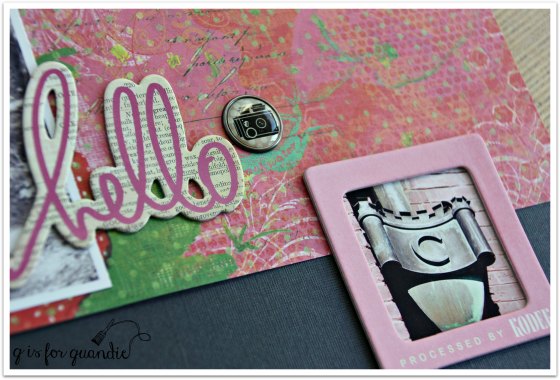
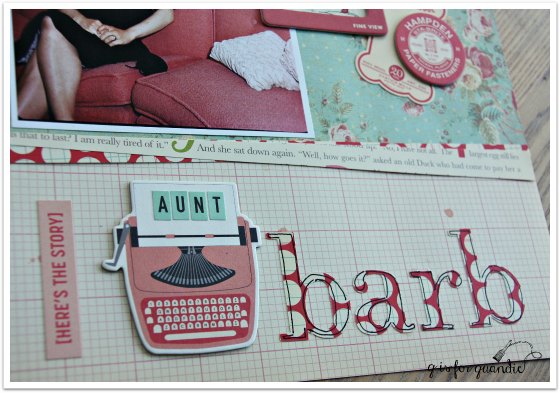
I have to admit, what I loved most about this next photo is that fantastic pink sofa that my Aunt Barb is sitting on.

scrap barb

When designing this page I looked through my embellishments and pulled out anything in that dusty rose color.  I was so happy to find a use for my pink typewriter chipboard (also October Afternoon).

scrap barb close up

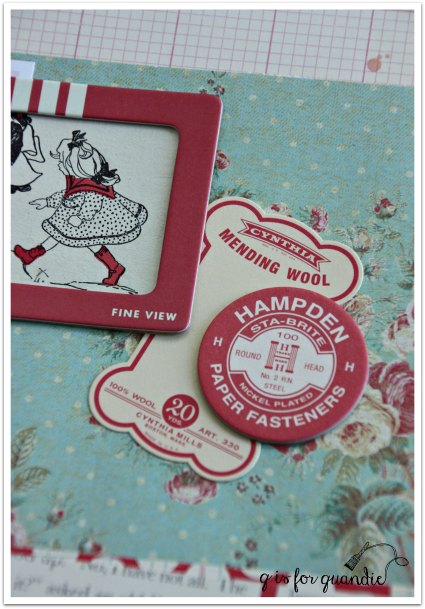
The illustration behind the pink slide frame is from an old children’s book.  I love to include vintage items even in my scrapbooks.

scrap barb close up 2

We had a great time on our weekend, and I finished up quite a few pages.  I hope you’ve enjoyed seeing some of them!


only 36 more days ’til Christmas.

I might be giving the impression that I’m really on top of this Christmas thing.  As you saw last week, I’ve got my winter window boxes all ready to go.  And the other day I gathered up all of my vintage Christmas stuff to send to Eye Candy ReFind.

xmas 1

I didn’t have a ton of stuff, but I was able to pull together some red and green.

The old jars full of vintage red Christmas light bulbs would look fab added to a shelf.

xmas 2

I love the idea of decorating with red and green vintage books for Christmas, even if they aren’t holiday books.

xmas 4

And as you can see, I whipped up some Christmas messages to add to some plates.

xmas 5

xmas 6

I got the idea for this mailbox from pinterest.  The words are also Cricut vinyl rather than painted on.

xmas 3

How cute would it be to have this on a shelf or table so you could tuck all of those Christmas greetings you receive inside?

Despite having my winter window boxes done, and all of my Christmas merchandise sent off to the shops, I have only just started to think about shopping for Christmas gifts and decorating inside the house.

Thanksgiving will be here a week from tomorrow though, oh, how time does fly!  Have you started to decorate yet?