Good morning from the garden!
Well, sort of.
My sister and I snuck in a quick trip to visit our mom last weekend. As many of you probably know by now, our mom lives in a suburb of Las Vegas. And as many of you probably also know, it’s hot there in the summer. July in particular is their hottest month of the year on average.
So why in the world did we plan a visit in July? Well … it was really the only time that my sister and I could go together until possibly next spring.
Plus, it has been super hot the last two times my sister and I visited. Last October they had record highs over 100° while we were there, and during our visit this past April the temps were in the upper 90’s (and average temps are usually in the upper 70’s to low 80’s in April). So we figured it couldn’t be much worse.
In addition, at least in July the pool at my mom’s townhome complex is open!
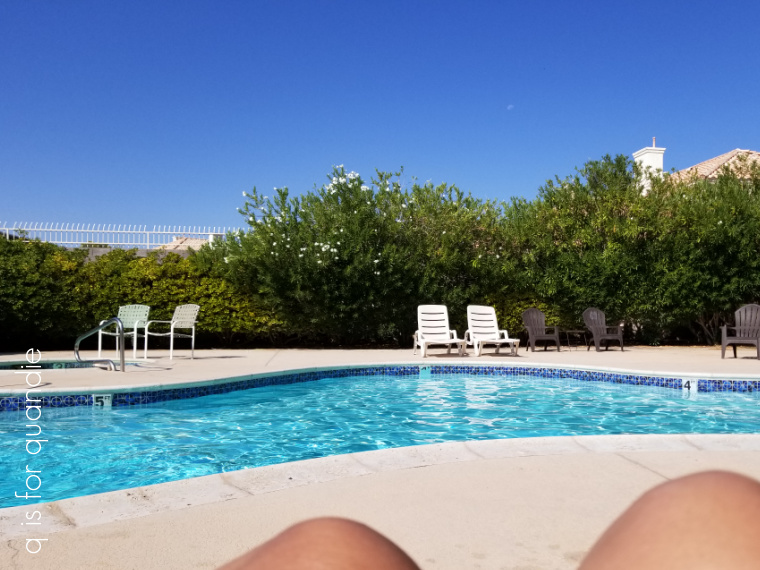
We knew we wouldn’t be able to do much outside other than float in the pool, but we could certainly visit with mom in the a/c when we weren’t in the pool.
As it turned out, once again we were there for another above average hot spell. The temps went from 109° on our first day to 112° on our last day. And sure, it’s a dry heat. But even a dry heat at 112° feels ridiculously hot! Although, to be fair, it was quite comfortable floating in the pool.
My sister and I also got up each morning around 6 a.m. and went for a walk on the Harry Reid Union Pacific Railroad Trail and that brings me to why I’m categorizing this post as a ‘sunday mornings in the garden’ post.

A couple of years ago, my sister and I stumbled across the one small segment of this trail that offers some shade.
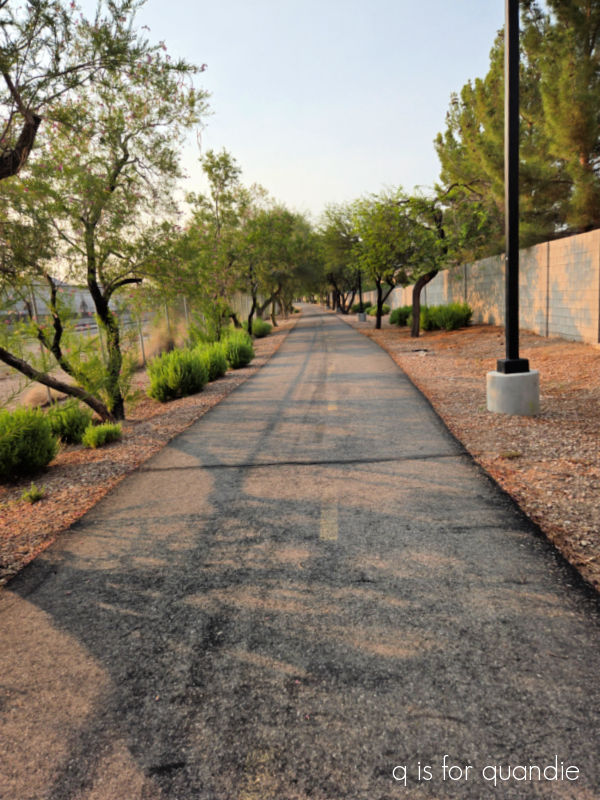
For any of you who may want to try and find this spot while in Henderson, NV, take Boulder Highway east to the Wagon Wheel exit. At the light for Wagon Wheel, take a right and you’ll be on Nevada State Drive. Head down Nevada State Drive towards the college. There will be a small parking lot to the right just before you get to the railroad tracks.
Park there and head to the right (ie. west) down the trail and you’ll find yourself in this area.
The trail here is lined with trees …

and this may have been the first time I’ve ever seen this particular tree in bloom.

I’m not very familiar with the plants that don’t grow in my zone 4b/5a garden, but I’m fairly sure this is a Chilopsis linearis, or Desert Willow. The hummingbirds seem to love this one, and looking around the area it appears to re-seed itself quite freely.
I have to admit I was amazed to find that there were quite a few other things in bloom along this section of the trail as well.
I saw what I thought was a buddleia, or butterfly bush, but it turns out that this is a Vitex, or Chastetree.

Proven Winners has a variety of this plant called Rock Steady, and I had to laugh when I read this about it on their website:
“Commonly known as the chastetree, Vitex agnus-castus was in ancient times thought to be an aphrodisiac. According to Wikipedia, the leaves and stems were once used in ladies’ bedding to “cool the heat of lust” when the men were off to war, thus the name chastetree. We’re not sure if this works or not, but we do know that it makes a wonderful landscape plant that is highly deer and drought resistant.”
It grows in zones 5 to 9 and is obviously heat and drought tolerant.
I also spotted this Angel’s Trumpet, or Datura innoxia.

And again, I’m pretty sure that’s what this is, but I’m not 100% certain.

But if so, this plant is extremely toxic so if you ever see it growing somewhere just leave it alone.
I think I was most amazed to find this though …
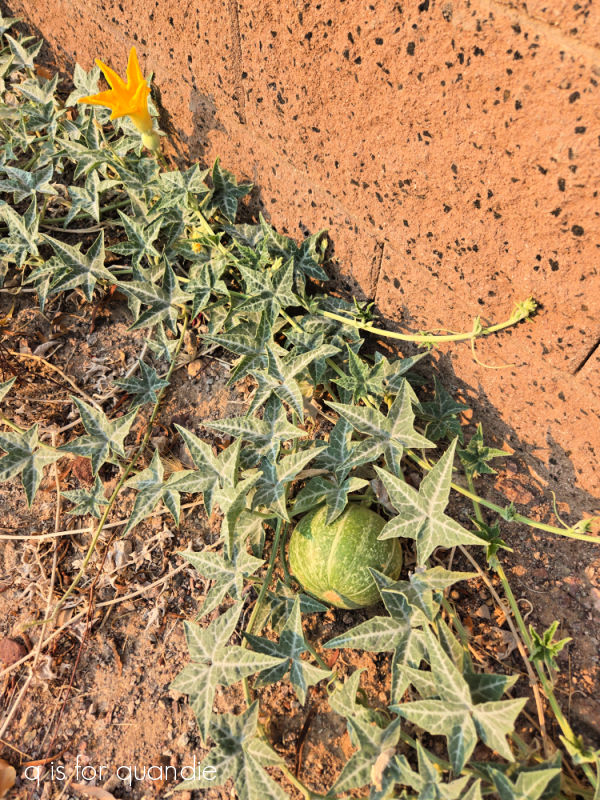
Is it a watermelon? Or some other type of melon? Or is it some kind of squash? I’m not sure, but how in the world is it growing in this dry climate?
I should note that there is dripline irrigation provided to the trees and plants along this section of trail, so perhaps there is an errant drip emitter that this plant is taking advantage of.
Clearly gardening in the hot, dry climate of the Las Vegas area is something I know little about. I came home last Tuesday evening, and when I woke up on Wednesday it was rainy and 50°. I have to confess, I prefer 50° to 112° any day (I’ll try to remember that in January when it’s 10° below here, and 50° there).
How about you? Are you a warm weather person, or a cool weather person? Leave a comment and let me know.