half fancy.

My garage sale hauls started out with a bang (and ended with a bit of a bust) last weekend. On Friday I went to my friend Lisa’s occasional sale, and then stopped off at Lowe’s on the way home.

OK, to be fair, Lisa’s sale is way too nice to be called a garage sale, and Lowe’s doesn’t really count at all.  But I did come home with some fantastic things at prices halfway between ‘garage sale’ and ‘fancy boutique’ at Lisa’s, and also some fun plants from Lowe’s that I wanted to share with you guys.

First up, I purchased a couple of plastic urn planters, a concrete pillar and an oval shaped galvanized bucket at Lisa’s sale.  I’ve already used the Dixie Belle patina paint on both of the urn planters to give them a rusty look.  I’m listing one for sale here on the blog, while making space for the other in my own garden.

Lately I’ve gotten really fond of placing planters like this right in the garden bed.

They are great for adding instant height where needed.  They also can be moved around to fill in a hole where a perennial has died back, where you’re waiting for a slower growing plant to fill in, or where you want a pop of color from annuals but don’t want to plant them in the ground.  The nice thing about these plastic pots is that they are lightweight and pretty easy to move around, even when filled with soil and plants.  And in my opinion, they totally pass for the real thing with the patina paint.

I use the Iron patina paint with the green spray to get my rusty results (the full process can be found in this post).  One thing to keep in mind is that the rust takes some time to develop, it’s not instantaneous.  I just finished rustifying these pots yesterday, so keep in mind that they will continue to get rustier.  But I thought you’d still like to see my results.

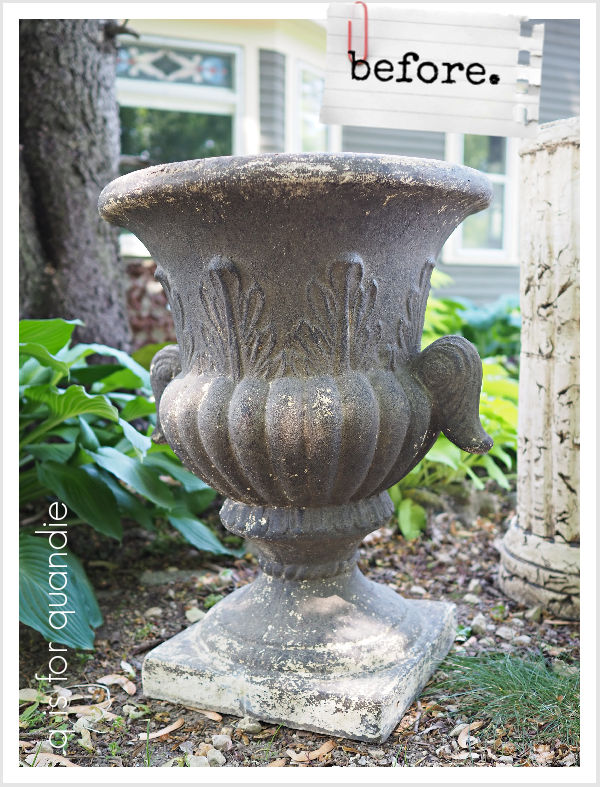
Here’s the first pot, before.

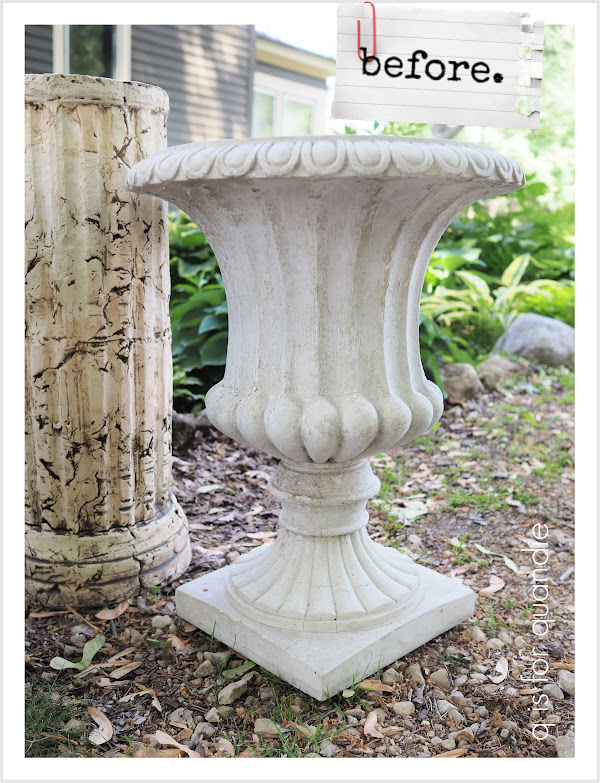
I have to say, it looks like legit concrete in the photo, but it’s plastic and had a lot of flaking paint.  You’ll have to trust me on that.

And here it is after …

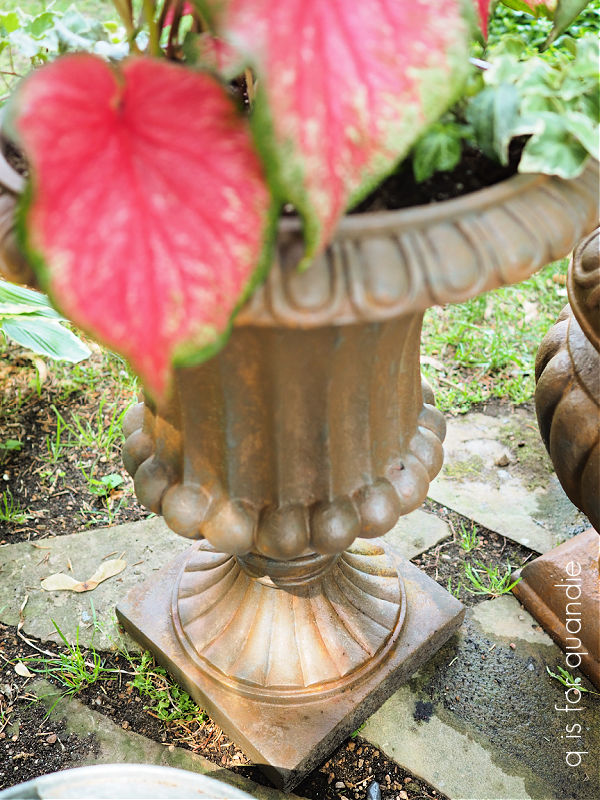
It’s starting to show some good rust.

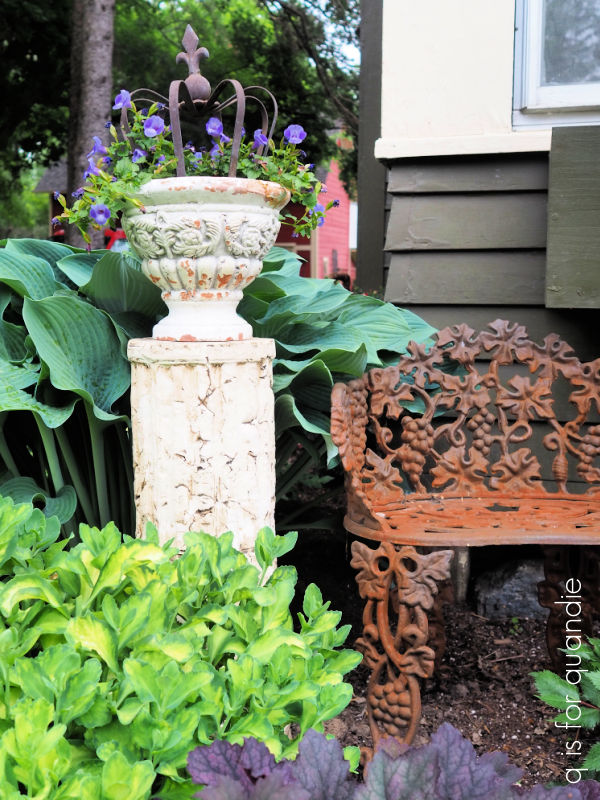
Here is pot number two, ‘before’ …

And here it is with it’s new rusty finish.

If any of you locals are interested, be sure to check my ‘available for local sale‘ page for that one.

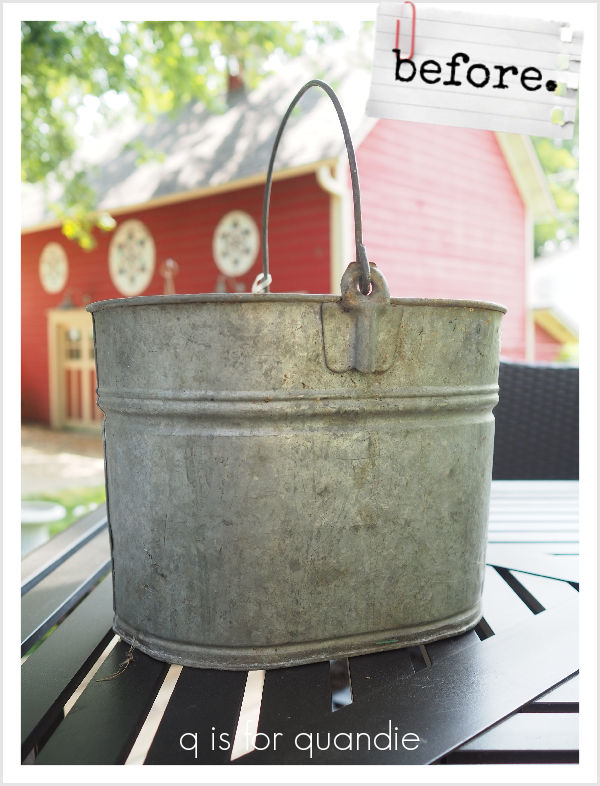
  I’m also planning a paint treatment for the galvanized bucket that came from Lisa’s sale, stay tuned for that.

As for the pillar in the back of my ‘haul’ photo, I left that ‘as is’ and put it in the garden.

You might recognize that spot right behind my Chelsea chopped sedum.

As for Lowe’s, well, although it’s obviously not a garage sale of any kind, I just had to share the gorgeous plants that I found there.  First up is an astilbe from Proven Winners called Dark Side of the Moon.

Isn’t that dark foliage fantastic?  I have to admit, I don’t even know what the flowers on this one are supposed to look like.  I’m planting it just for the foliage color.  I’m hoping to have more success with this plant than I did with the heuchera that I planted for its foliage.  Fingers crossed.

I also picked up three of the Proven Winners Heart to Heart caladium in Tickle me Pink.

You know I just can’t seem to resist caladium, even though we really don’t have the best climate for it.  They perform best if the nighttime temps don’t fall below 60°.  A week or so ago we were still having temps in the 50’s at night, and even got down to the 40’s a couple of times.  It’s great for sleeping with the windows open, but not so great for caladium.

Also, caladium are rather pricey annuals.  I purchased a couple of them earlier in the year for just under $20 each, but these from Lowe’s were only $10.98.  A bargain for a caladium!  I made an unsuccessful attempt to overwinter caladium bulbs last year, so I was happy to find some selling at a reasonable price.  I have to say that I was really impressed with both the quality and the price of the perennials at the Stillwater Lowe’s.

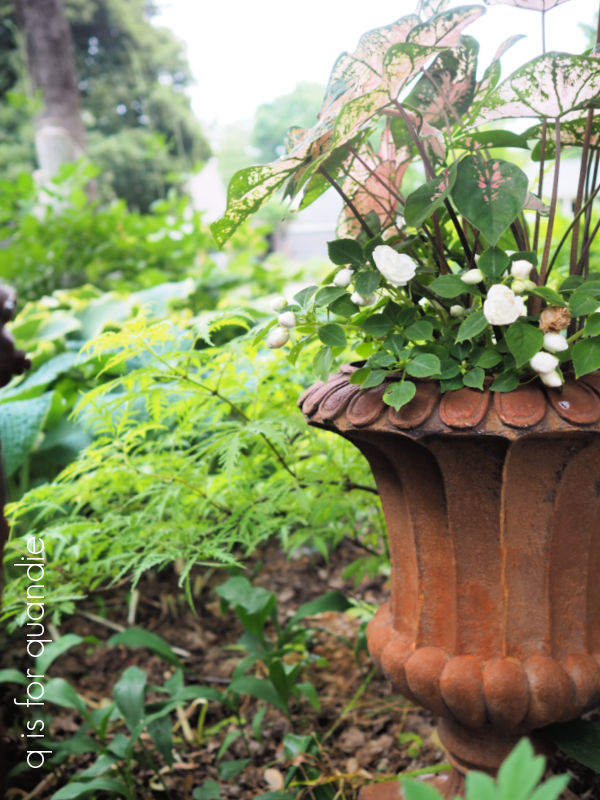
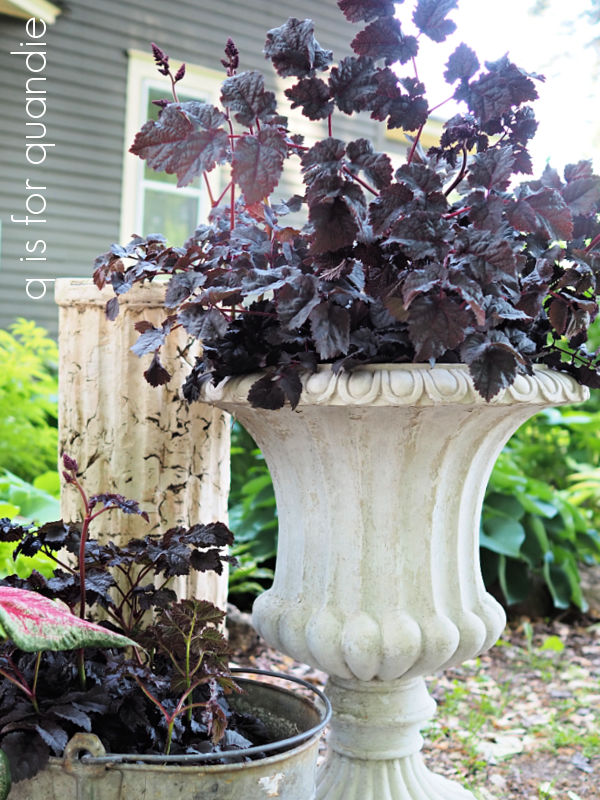
And here are those caladium in my new rusty urn, plus another shorter one that I rusty-ed up last year.

On Saturday, my sister, niece and I headed out to check out a neighborhood sale that was new to me, the NEighbors Sale Days in Northeast Minneapolis.  There were several neighborhoods participating, so it looked like it could be promising.

I have to admit, that part of Minneapolis can be a bit of a mixed bag.  There are areas that are filled with fabulous mid-century modern homes with lovely gardens, and areas that are a bit sketchy to be honest.  It also includes the Arts District, which is filled with artist studios and lots of trendy eateries.

The garage sales were really hit or miss … but mostly a miss.  My sister purchased some plants, and my sole purchase was this …

Yep, just one simple wooden recipe box.  It will go in the stash and be good for a winter project.

We called it quits early after not finding much and decided to drown our sorrows in a pitcher of mimosa’s.

We did a bit of googling and ended up finding a place called Half Fancy that was only a few blocks away from where we were.

Somehow, Half Fancy seemed like the perfect way to describe the neighborhood … and maybe us.  Although to be honest, we might be more like only 1/4 fancy.

I ordered the purple hash which was made from red potatoes, braised red cabbage, onions and carrots and I added a scrambled egg on top.

Delicious!

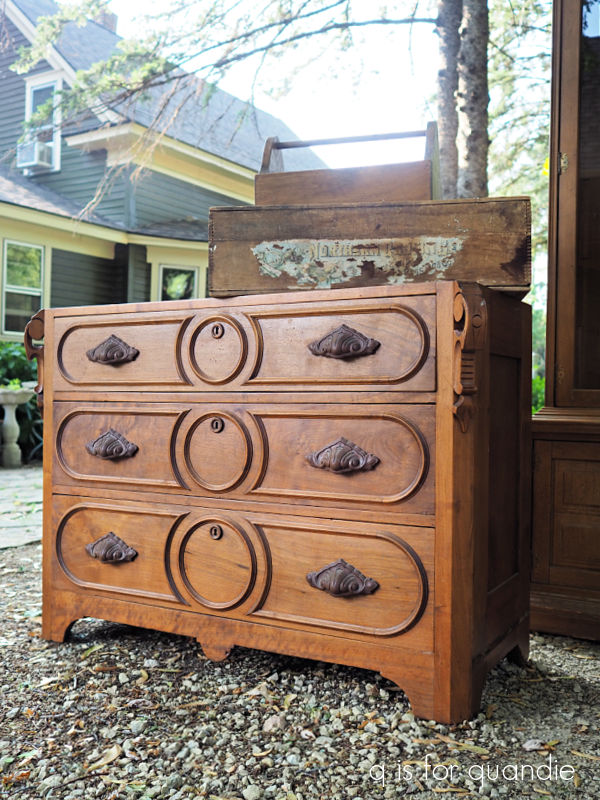
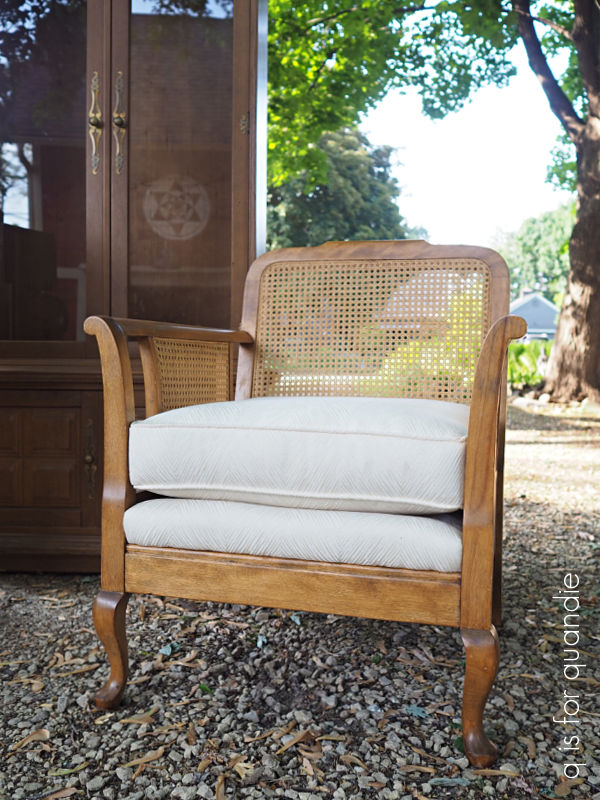
As we were finishing up with our brunch I got a text from my friend Sue who suggested we head to some sales in White Bear Lake.  So on the way home we stopped there and I picked up another piece of furniture.

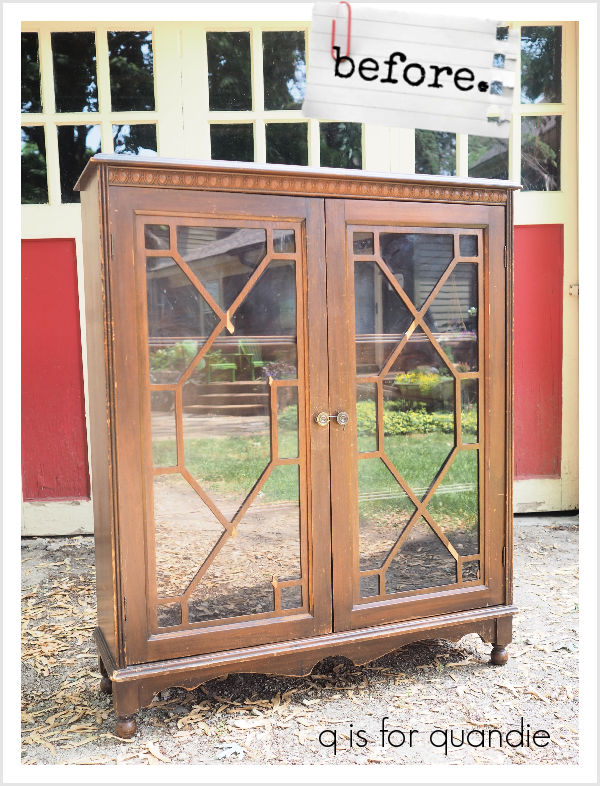
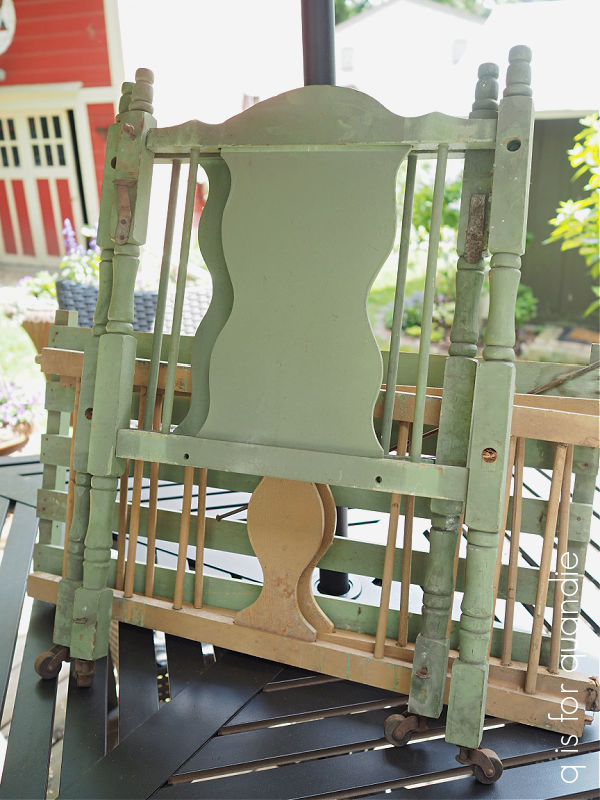
Seriously, I need to get going on some of this furniture I’m bringing home.  The summer is getting away from me!

Last, but not least, I also brought home this child sized vintage wicker chair.

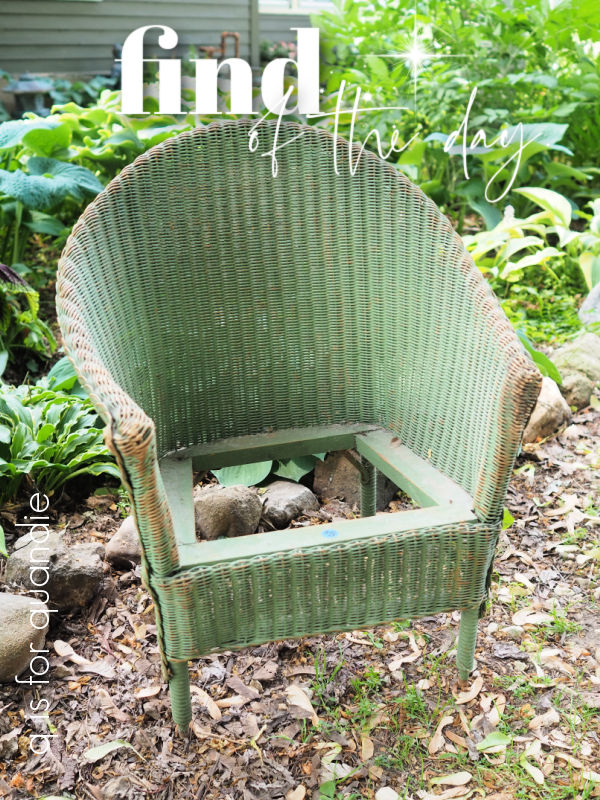
You know I can’t resist smaller than normal sized anything.  It seemed like the best option for find of the day, but really, that status should probably go to the mimosas!  Or maybe those rusty pots!  Or even the plants.  I don’t know, what do you think?

up a creek.

Remember the oars that I found at the MacGrove garage sales?

Well, if you read the comments on my blog posts, you may have noticed that a neighbor of mine mentioned that she’d be willing to trade me some toolboxes for the oars.

To be honest, I wasn’t really sure what I was going to do with all of those oars.  I just couldn’t pass them up at only $2 each and I figured I’d come up with something.

But would I rather have some toolboxes?  Yes I would!

So I loaded up the oars and headed over to Karen’s house (not nnK, my neighbor across the street, another Karen, I may have to start calling her onK, or ‘other neighbor Karen’).

Turns out, this was an excellent decision.  As it happens, Karen is a bit of an oar (or paddle) artist.

The one shown above is still in progress, but isn’t that a cool design?

Karen does some very precise work, and she starts by drawing out her pattern on paper.

Then she even tries out her color selections on paper before painting the actual paddle.

Such a great way to make sure your colors are going to work together.

I really like the abstract fish design that she’s adding to this one …

As you can see in the upper right of that photo, Karen uses regular ol’ latex paint.  She gets the sample size jars and has them mixed up in whatever colors she wants to use.  It’s pretty cost effective, and she doesn’t need much of each color of paint.

Here’s another design that she has just started working on.

I don’t believe she ever does the same design more than once.

She created the Canadian flag version below for her husband who is originally from Canada.

Karen displays a number of her paddles around the perimeter of her sun room (which happens to have really cool wood clad walls and a corrugated metal ceiling).

I think it’s fair to say that Karen will never be up a creek without a paddle!

I’m so glad that the oars went to someone who is going to do something like this with them.  I would never have come up with anything as special for them.

Unfortunately, Karen doesn’t have any sort of social media presence so I can’t send you anywhere to look at her work.  But I’m sure she’ll be reading this blog post so be sure to leave a comment and let her know what you think of her gorgeous paddles and oars!

stretching your transfers.

I’m sure that many of you saw that I.O.D. came out with a new summer release recently.  It included a couple of really pretty transfers.  Even though I’m trying not to buy new transfers, and instead use up the ones that I have, I just couldn’t resist this one called Elysium.

This transfer costs around $30 (plus shipping in most cases), so adding it to a smaller item, like a toolbox for example, that I am planning to sell for less than $50 doesn’t seem like a smart plan.

But I figured I could break it up and get at least 4 smaller projects out of just this one transfer, and suddenly the cost seems a lot more realistic.

So far I’ve used it on two pieces, so I thought I’d share those together today.

First up is the rustic box that’s underneath the wood tote in this photo …

It may once have looked pretty cool with that paper label on the front, but there wasn’t enough left of the label to salvage.  So I cleaned the box first, then sanded off most of that label.  As I was working with the box, I realized that it was pretty much falling apart.  So I did a little gluing and nailing too.

Finally it was ready for paint.  I first painted the interior in Dixie Belle’s Kudzu.

Other than paint, I left the inside quite plain.

I kept the pretty stuff on the outside.

After painting the exterior of the box in Dixie Belle’s Drop Cloth and sanding it well to distress the edges, I added just one sheet of the Elysium transfer to the top (this transfer comes in 4 pieces).

One thing to note with this transfer is that there is some typography in the background.  It’s subtle, but it’s there.  So you want to be careful to not place it with the words upside down.

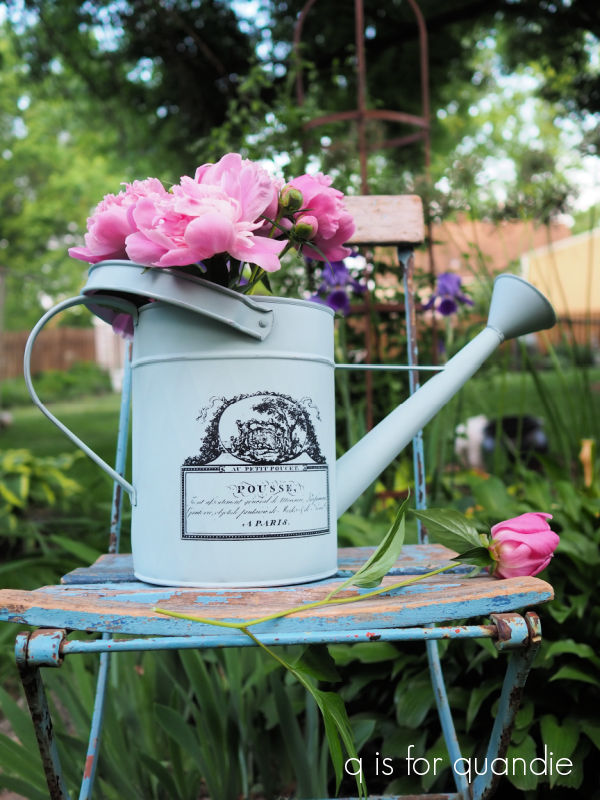
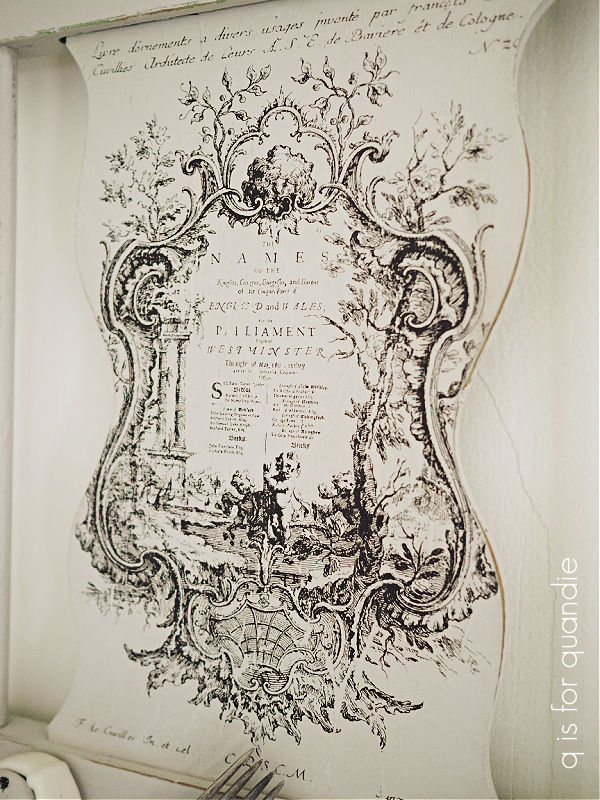
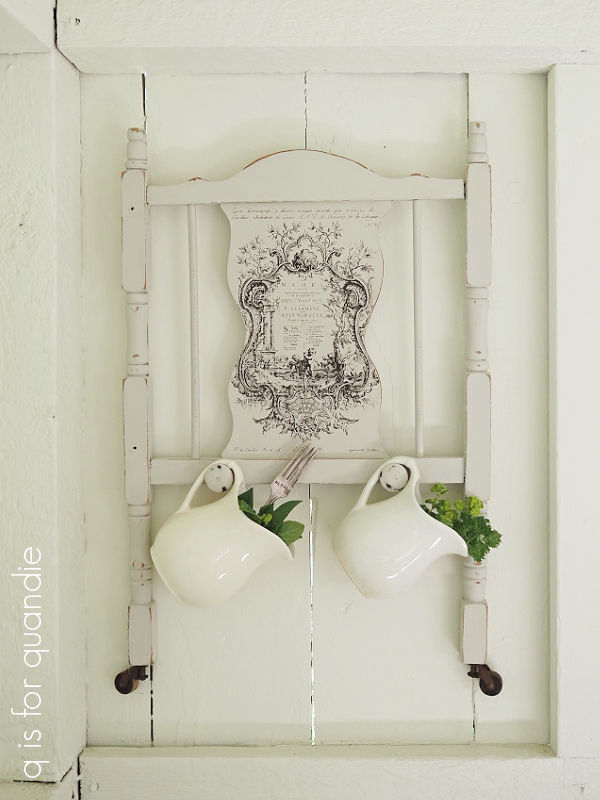
 Next I layered on some wording from the I.O.D. Label Ephemera transfer.

Once I had those in place, I decided that the box needed some rustic hardware, so I added this old rusty handle that I had in my stash.

And voila, a fun box that would be perfect for housing your stash of Jeanne d’Arc Living magazines (or any sort of magazine really).

The 2nd project using just one sheet of the Elysium transfer is this tackle box.

I picked this out of a ‘free’ pile on the curb in my neighborhood.  Mr. Q and I were passing by on our daily walk and there it was, so I grabbed it.

It didn’t look too terrible on the outside, but the inside was a gunky mess.

I actually ended up discarding the tray because I didn’t think it was worth the effort to save.  But for the rest of the interior I first soaked it in soapy water and then scraped off as much gunk as I could.  Then once dry, I sanded it down until it was mostly smooth.

Then I applied a coat of Dixie Belle’s B.O.S.S. to prevent any kind of bleed thru problems in the future.  I followed that up with two coats of DB’s Holy Guacamole.

Then I sealed it with two coats of DB’s flat clear coat.  My main goal here is to make the inside of the box suitable for use, whether that use is containing art supplies, storing old photos or holding your makeup.

I painted the outside in two coats of Drop Cloth, and then I added the Elysium transfer.

Once I had the floral in place, I again added some wording from the I.O.D. Label Ephemera transfer to the top.

With this section of the transfer, it would be much more apparent if the background typography was upside down.

So there you go, two projects down and I still have two more sections of the transfer to use on a couple more things.

Both of these items are for sale, so be sure to check my ‘available for local sale‘ page for more details if interested.

As always, thank you to Dixie Belle Paint Co for supplying their products used in these makeovers.

chop or flop.

Good morning from the garden!

Can I ask you a personal question?  Does your tall sedum tend to get floppy?  Does your phlox fall over?

Well, if so, I have the solution for you, and it’s free!  It’s called the Chelsea chop and the reason it’s called that is because the timing of this process in England usually coincides with their RHS Chelsea Flower Show, which is held in late May.  However, here in my northern, zone 4b garden, mid-June is a good time to Chelsea chop (you want to do it before you see any flower buds on your plant).

The Chelsea chop encourages branching, so the plants will be shorter and more compact thus reducing, or hopefully even eliminating, the flop.

So what is the Chelsea chop?  Basically you simply cut down the stems by 1/3 to 1/2.

  You don’t need to be precise, I’ve seen some gardeners just take a hedge trimmer and go to town.  Or, you can let the deer get in on the action.  They seem to be Chelsea chopping my neighbor’s asters!

But personally I like to be a little more discriminating, so I use my handheld pruners to do the job.

There are a few things you should know about the chop.  First of all, it’s only suitable for perennials that bloom in late summer or early fall such as phlox, bee balm, cone flower, asters, veronica and of course, sedum.

Second, the Chelsea chop will delay the bloom time of your plant by as much as a month or so.  If that thought bothers you, another option is to only prune every other stem on your plant leaving the other half of them long.  There are a couple of benefits to that option.  For one, you’ll still have flowers at the normal time, plus you’ll have more flowers several weeks later.  So basically, you’ve extended the bloom time of your plant.  In addition, the shorter, sturdier stems that have been chopped will help support the stems that you left long.

Another potential benefit of the Chelsea chop, at least with sedum in particular, is that you can easily root some of your trimmings to grow more plants.

I did this a couple of years ago, and they all took off like gangbusters.

I have to say, before I discovered the Chelsea chop this variegated sedum was definitely not one of my favorite plants.  It always tended to flop over and look pretty sloppy in the garden.  Now that it stays a bit more compact, I really love the way it looks in combination with the ‘blue’ upright hosta behind it, and the purple heuchera beside it.

By the way, I believe that is Palace Purple heuchera, in other words one of the older, more reliable varieties.  If you read my post about heuchera from a couple of weeks ago, you know that I have trouble getting any of the newer, more colorful, varieties of heuchera to perform well.  But I’ve had these two plants for years now and they continue to do well.

How about you?  Have you ever tried the Chelsea chop?  If any of your late summer or fall blooming perennials don’t have flower buds yet, it’s not too late to consider it!

almost perfect.

Remember the vintage doll crib that I found a few weeks back?

When I saw that pile of pieces, I immediately thought that the two end pieces would make fun ‘remnants’ to hang on the wall.

So I dug through all of my possible embellishments; stencils, transfers, and paint inlays, and came up with a couple of good options.

The next step was to paint each end piece.  I painted the first in Dixie Belle’s Sawmill Gravy, and the 2nd in their Midnight Sky.

For the Sawmill Gravy piece, I applied one of the paint inlays from the I.O.D. Melange set (see full instructions for applying a paint inlay here).

It fit on that center section almost perfectly, like it was meant to be.

I also decided to add a couple of wooden knobs under the inlay section and I painted those with the Sawmill Gravy as well.

After sealing the inlay with some spray clear matte sealer, I sanded everything to distress it and then finished it off with some clear wax.

You could hang anything from those knobs, but I chose to hang some small ironstone pitchers filled with herbs from them for my photos.

The original wooden casters were so charming that I opted to leave them in place.

The 2nd piece was painted in the Midnight Sky, and I decided to add the Farm Fresh Honey Bee stencil from Wallcutz.

Once again, an almost perfect fit.

I lost a little bit around the edges, but I still think it works.

I decided to forgo the wooden knobs on this version, but I may change my mind about that and go back and add them later.

For now I’ve decided that this piece looks really fab layered over the old chippy window that hangs on the wall in our dining room (but the Sawmill Gravy version is for sale).

What do you think?  Would you have put the doll crib back together again, or would you have repurposed those ends like I did?  Leave a comment and let me know.


a summer deck refresh.

I know it probably seems like I haven’t done much lately in the way of furniture makeovers, and that’s true.  It’s mainly because I’ve been busy with other things, like gardening, garage saling and a deck refresh.

Our deck was starting to look a bit shabby, and when I put my foot through one of the boards this spring I realized it was more than time to freshen things up a bit.

Just for fun, here’s what our deck looked like prior to 2009.

OMG you guys!  Does it look like a jumbled up mess or what?  I know I loved that pergola at the time, but looking back it was just too much.  In the end that grapevine that was trained up the pergola attracted both racoons and Japanese beetles.  It had to go.

Anyway, we replaced that with our current deck back in 2009.  Here’s how the replacement looked when it was brand new.

Phew!  Much cleaner.  We did make it just a tiny bit larger, but it looks so much more opened up without that pergola.

Fast forward 14 years and that brings us to me putting my foot through a board.  It was high time for a refresh.

I had already started with the English racing green paint job on the Adirondack chairs that Ken made for us.  The next step was to replace that rotted board, and some rotted boards on the steps.  Ken helped out with that task too.  The hardest part was getting the screws out of the old boards, they did not want to come out.

But we eventually got them up and pieced in the new board.

It’s going to stand out like a sore thumb for a while, but eventually it should blend in.

We have taken a couple of steps to prevent further boards from rotting.  The first was to have gutters installed all around the roofline over the deck when we did our roof last summer.  The spot that was rotted just happened to be right under the spot where an old gutter stopped short before the the end of the deck.  So when it rained, water poured down right on that area.

The next step was to add a protective coating to the wood this year.  You can sort of see how the decking was looking underneath the chair in this photo.

It was very grey, and very dirty.  I assume that black stuff is mildew.  In case you’re wondering, the last time we cleaned the deck was in 2019, so this is 4 years of dirt.

So we borrowed our neighbor, nnK’s, pressure washer and gave the deck a good cleaning.  Then after waiting a couple of days for it to dry out thoroughly, we applied a product called TWP, or Total Wood Protectant, in clear.

Sure, we could have chosen a tinted version of this product to help that new board blend in, but in the past we have found that those tinted options tend to look kind of awful pretty quickly as they get dinged up.  Our deck sees a lot of traffic year round because this is where we come and go from our house.  We wanted to protect the wood, but not add a product that would peel or show excessive wear over time (been there, done that).  And in addition, we really rather liked the natural color of the wood.

TWP is an oil-based product that penetrates the wood rather than forming a film on top that can peel.  At least, that’s what the paint guy at Fleet Farm said.  He claims that he put it on his parent’s deck three years ago and it still looks good.

I’ll have to report back on how it wears over time, but I can say that it looks fantastic right now.

We are planning to be more diligent about keeping snow cleared off the deck next winter in an effort to keep it looking good longer too, but we’ll see how that goes.  We certainly didn’t accomplish that last winter!

Next came sprucing up the table and chairs.  We’ve had this set since we replaced the deck back in 2009, so it’s 14 years old.  As you can see above, we don’t leave it out in the winter and I think that has helped prolong its life.

It was definitely starting to show its age though.  Step one was giving the tabletop a fresh coat of paint.  There were a couple of spots where the paint was starting to chip and bubble, so I sanded those down and then sprayed the table with Rust-Oleum’s Metallic Oil Rubbed Bronze spray paint.

It was almost a perfect match for the original color of the table, and now it looks like new again.

Next came giving the chairs a much needed refresh.  Over time quite a few of the vinyl straps that support the cushions had deteriorated.  So I ordered some replacement vinyl strapping via Amazon.

Now, I have to tell you, it was quite the production to replace these straps.

If I had read the directions before purchasing the strapping I’m not sure that I would have wanted to tackle it.  Basically, you have to heat the vinyl to get it warmed up enough to fully stretch out, then quickly attach it to the frame with those plastic rivets before it cools down.  As it cools, it tightens back up enough to provide the needed support.  The recommendation on the packaging for the heating process was to boil the strapping in a pot of water!  Then handle it using heat proof gloves of some kind so it doesn’t burn you.

Um, yeah, right.

This was another job that Ken helped out with, and instead of boiling water, we heated the strapping with a heat gun.  It took both of us to attach the strapping on one end, then heat it with the heat gun while also pulling it as taut as possible using a pliers to hold the other end, and then somehow wrangle it into place and attach it on the other end.  Honestly, it was a very frustrating process.

But we got ‘er done.  And really, what was the alternative?  Send these chairs to the landfill?  That seems like it would be a shame.

That left one final issue, the original cushions had gotten rather flat over time.  I looked and looked for replacement cushions that would be nice and full and never really found anything I liked.  So instead, I purchase some inexpensive cushions from Menards and simply added them to the existing cushions inside of the slipcovers that my friend Sue made for me years ago.

The slip covers were always a bit roomy, so fitting a second cushion in them was easy enough.  Now they are super thick and cushy.

The great thing about these slipcovers is that they are washable, so I threw them in the wash quick before putting them back on.  Same with the throw pillows.

You can read more about the slipcovers in this post from 2019 when Sue initially made them for me.

The Adirondack chairs were already painted and my new Flower Market sign was in place on the other side of the deck.

That just leaves the fun stuff, filling this year’s planters.  I’ve placed three of my faux rusty pots (learn how I created my faux rusty pots here) in the one corner of our deck that still gets a fair amount of sun so I can fill them with some sun loving annuals.

I once again chose to start with Proven Winner’s Mini Vista Indigo petunias.  I purchased them for the first time last summer and absolutely fell in love with them.

Isn’t that color gorgeous?

I added in this verbena …

Seriously, how could anyone resist a lilac and white striped flower?  That is another Proven Winners plant, the Superbena Stormburst.

I also have added some white bacopa, some purple salvia and a pink gomphrena.

I realized last year that the two pots that flank the stairs are mostly in the shade now, so I went with some more shade tolerant choices in those.

There is a heuchera, a small ivy and the purple flower is a Summer Wave torenia.  This is the first time I’ve used this particular annual and so far I have to say it looks great.

Now all that’s left is to mix up a Cosmo and enjoy a lovely summer evening sitting on the deck.

Phew!  It’s always good to have a big project like this tackled.

How about you, do you have any big summer projects lined up?  Leave a comment and let me know.

garage sale weight lifting.

Turns out, this past weekend was a really good one for garage saling.  There were multiple city-wide and neighborhood sales to choose from, including one of my favorites, MacGrove.

But first, my friend Sue gave me a heads up text about a sale that was just a few blocks from her house.  I popped over there quick on Friday morning and found some great furniture!

I purchased it all in the morning, but had to make two trips back later with Mr. Q and the van to pick it all up.

I was lucky to have his help because they were all fairly heavy pieces.  Even that cane back chair is surprisingly heavy!

The hutch was not only heavy, it was also cumbersome because of its size.

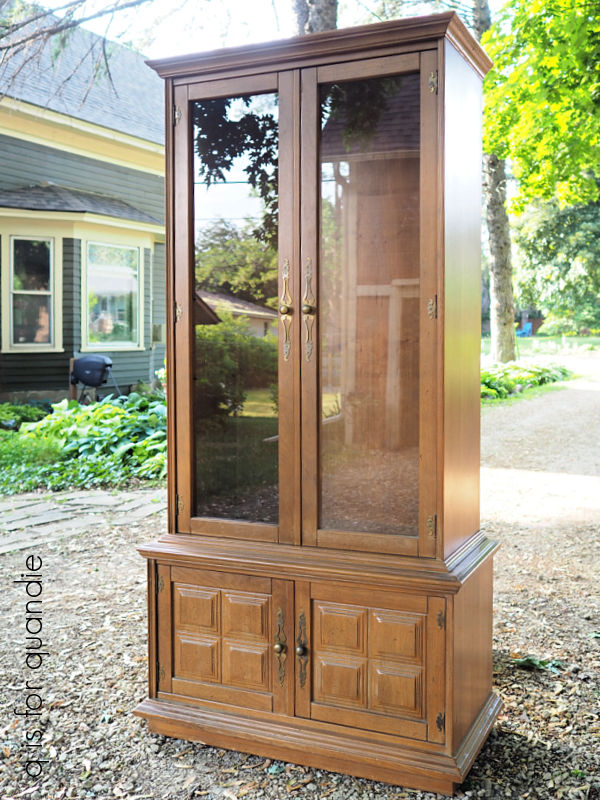
That’s going to be a fun one to paint up though.

Believe it or not, the dresser was the lightest of the three pieces.

Possibly because it doesn’t have a top.

Apparently it originally had a marble top, but it broke at some point and was discarded.  I’m not exactly sure what I’m going to do for a replacement top, but I think I can come up with something.

But seriously, that wood is gorgeous.  I am definitely not planning to paint this piece, although it’s possible it will end up with a painted top of some kind.  We’ll see.

I did purchase just a couple of smaller items at this sale as well.

Those will both become painting projects at some point down the road.

On Saturday my sister and I went to the MacGrove neighborhood sale in St. Paul.  I did not have high hopes for this one because it had started on Friday.  Oftentimes all of the good stuff goes on day one.  But I did come home with a few goodies.

There was definitely a garden theme to this haul, but several of the items fit into the ‘heavy stuff’ theme I already had going from the previous day as well, starting with those chairs.

They are made out of wrought iron and are much heavier than they look.

And these garden edgers are also heavy wrought iron.

The plant behind them is a Japanese iris.  I’ve gotten quite a few of the plants in my garden from garage sales.  You always know that when a gardener has excess plants to get rid of, that means they must do well in our particular zone.

In keeping with my garage sale weight lifting plan, one of the last sales we went to had a fantastic pricing strategy.  Anything that you could pick up with just one hand was $2.

As it happened, they had quite a few things that I could pick up with just one hand, like this watering can.

And this copper boiler.

It conveniently already has holes drilled into the bottom so it can easily be turned into a planter.  The one I have on the side of the carriage house is starting to rust out quite a bit …

so I think I’ll just keep this one waiting in the wings as a replacement.

I also grabbed a bunch of old oars that were pretty easy to pick up with one hand.

Last up from the MacGrove sales is the garden obelisk.

I have a few of these in my garden, all of which have come from garage sales.  This one felt ‘expensive’ by garage sale standards at $20, but I know they are quite a bit more new.  It’s a nice, quality iron and not a cheap knockoff version.

All in all, I definitely think I got my workout in lifting all of these heavy (and some not so heavy) items.  Also, I’m just realizing now that nothing really stands out for me as the ‘find of the day’, so maybe I’ll let you guys pick.  Which of these items would you call ‘find of the day’?  Leave a comment and let me know.

the cutting garden.

I know I’ve mentioned it here before, but for those of you who don’t know, I have a cutting garden out behind our carriage house.

A cutting garden is full of plants grown specifically for harvesting fresh flowers for arrangements.  It’s usually in an inconspicuous place where it won’t matter if you cut all of the blooms off of your plants (hence, behind the carriage house which is the big red, barn-like building in the photo below).  It’s really just a good place to grow things that don’t look that great in the garden except when they are in bloom, like peonies.

I know, I know, some people think that peonies are pretty plants even when not in bloom, but I don’t.  And they only bloom for maybe two weeks tops.  Plus, mine always end up with powdery mildew by the end of July and then really start to look terrible.  So I’m happy to have them tucked away out of sight.

There are really only two periods in the growing season when my cutting garden looks good.  One of them is later in the summer when the huge Annabelle hydrangea I have back there is blooming.

And the other was this past week or so while the peonies and Siberian iris were blooming.

Somehow, this year it looked particularly fabulous, but I’m not sure why.  Maybe just because everything back there is firmly established now and can pretty much be left alone.

The Siberian iris are super tall, and full of flowers.  Last year I got relatively few flowers, this year it’s loaded.

I am hoping you can sort of judge the size of them in this next photo.

That is them on the left, then I have a white peony in the middle and the big mass on the right is the Annabelle hydrangea.  That thing has gotten huge this year as well.

The peonies back there all did really well this year too.

Another thing you can see in if you look closely at my photos is that I barely bother to weed back there.  Mr. Q and I usually go through once or twice a year and pull out the big weeds but we haven’t done that yet this year.  So far it doesn’t seem to be impacting the plants.

I have two top favorites amongst my peonies.  The first is this one …

It’s the most beautifully pale, blush pink in the center that gradually turns white towards the edges.  I love how delicate the color is.  I’m fairly sure that this one is called Raspberry Sundae, but don’t quote me on that.

Then, in direct contrast, my other favorite is this one.

The color on that one is so vibrant that my camera doesn’t even know what to do with it.  It ends up almost looking fake.  It practically glows out in the garden.

I’ve come to realize lately that I much prefer the double peonies over the singles.

Single peonies have one or more rows of the larger petals, known as guards, or guard petals, surrounding a center of stamens.

I currently have two single peonies; the one shown above and a bright pink one that I purchased without reading the fine print (I thought it was a double).

They look surprisingly like a tulip before they open …

But once they open up I don’t particularly like them.

I’m planning to dig up both of my single peonies in September and give them to my neighbor, nnK.  FYI, September is the best time to move established peonies if you must.  But be warned that peonies do not like being moved and it will take them a couple of years to bounce back afterwards.

I much prefer the double peonies with their many layers of petals and relatively insignificant stamens.

I’ve decided that life is too short, and my garden space is too limited, to have plants that I don’t like in my garden, so once the single peonies have gone I’ll replace them with more doubles.

Since I’m sharing peony photos today, I just had to include this peony that I saw growing in a MacGrove alley during their neighborhood garage sales yesterday.

Isn’t that something with its pink guard petals, white inner petals and pink stamens?

There are so many incredible options to pick from out there!

Speaking of peonies, some of you may not have been following me back when I experimented with keeping unopened buds in the fridge for a few weeks (or a couple of months), and then taking them out to use in an arrangement.  It worked out great when I did it correctly and you can read all about that process here.

Then last year when I attempted to do this again I messed up.  I wrapped the buds in damp paper towels inside the ziploc bags, and I ended up with a gross, moldy mess.  So follow that first process that I linked above if you want to try it.

Rather than save any of my peonies this year, I decided to just enjoy all of them right away.

So I’ve been cutting them and bringing them in the house to enjoy their wonderful scent.

Unfortunately, peony season is short and most of mine are already done blooming.  There will be a few stragglers left here and there for a few more days, but that’s it.  I did my best to enjoy them while they lasted though.

How about you?  Do you grow peonies?  Do you have any favorite varieties that I should know about?  Leave a comment and let me know.

a pair of camp-ish buoys.

Remember the buoys that I found while thrifting way back in March?

I have to admit, they look pretty good in that photo.  And they were pretty good.  Except that up close and personal they looked a little too fake to me.

I had tucked them aside for summer, and when the shop where I sell (Reclaiming Beautiful in Stillwater, MN) decided to have a Ralph Lauren-ish summer camp sort of theme in their window this weekend, I decided to give them a quick makeover.

When I hear Ralph Lauren, I automatically think red, white and blue.

I don’t know, is that just me?

Well, either way, that’s what I decided to go with on my buoys.

I painted one of them in Dixie Belle’s Honky Tonk Red

and the other in their Deep Sea.

After two coats of paint were dry, I sanded well to distress them.

Today’s q tip:  Always, always, always sand a dark color first before adding a white detail over it.  I’ve learned the hard way that if you sand a dark color (and especially red) and a white at the same time, you’ll end up smearing the dust from your color into the white.  And that never looks good.

So I sanded, wiped the dust away, and then used painters tape to add some stripes in Dixie Belle’s Endless Shore.  I then also stenciled some numbers onto the taller buoy with that same paint.

I have to admit, in hindsight I’m guessing that quite a few of you would have preferred I left them alone.  But they definitely have more of a hand-painted look now.

I’m also wondering if I got Ralph Lauren mixed up with an Americana sort of theme.

But then, Ralph Lauren and the American flag kind of go hand in hand.

And the shop certainly turned out fabulous …

There are my buoys, see them in about the middle of the frame?  I think they fit right in.

And here’s what’s in the window.

Lots of stuff that would be fabulous in your lake cabin, or on your three season porch.  Or maybe even just in your cabin themed guest room.

If any of you locals are looking for something fun to do this weekend, I recommend heading into Stillwater and checking out Reclaiming Beautiful (open 10 a.m. to 5 p.m. Thursday, Friday and Saturday, not open Sunday).

Thank you to Dixie Belle Paint Co for supplying the paint used for today’s project.

cecelia’s watering can.

A friend reached out to my husband the other day asking if I’d like to have a watering can that she was getting rid of.

Most of you know that I have a thing for watering cans, and I have quite a few in my non-collection (so called because I’m in denial that I collect things).

But I usually stick to vintage watering cans, and Cecelia was discarding a new watering can.

Still, she was giving it away, and Mr. Q was happy to go pick it up from her.  We hadn’t seen Cecelia in quite some time.  So I said yes.

Cecelia had purchased this can planning to actually use it for its intended purpose, but in the end it wasn’t really very functional.  The water sort of trickled out and dripped all over.  I know how she feels, I purchased a new (and rather expensive) watering can myself last year intending to use it for fertilizing my flower pots with a water soluble fertilizer and it also doesn’t really work very well.

I know, I know, you are now wondering why in the world I would purchase a new watering can rather than using one of my many vintage ones.  Well, that’s because most of those don’t actually hold water anymore.  The bottoms have rusted out, or the seams have deteriorated.

That being said, I did find one at a garage sale last year that works beautifully.

In fact, I considered it my find of the day back then because it’s perfect for my fertilizing needs.

So now the expensive new one is gathering dust in my workshop.

But I digress, back to Cecelia’s watering can.

As you can see in the ‘before’ photo, the finish was pretty slick and shiny.  So rather than attempting to paint it with my usual Dixie Belle paint, I decided to spray paint it.  Spray paint will do the best job of sticking to a surface like this one.  Plus, I happened to have a can of the Rust-Oleum Chalked paint in Serenity Blue on hand.  I have to admit, if I’d had to purchase the paint I probably would have come up with another option.  Have you seen the prices on the Chalked spray paint these days?  The cheapest I’ve found is $10.39/can at Target, but most places are charging nearly $12 per can.  And one can doesn’t go that far.

Once the paint was dry, I added one of my favorite Classic Vintage Labels transfers from re.design with prima.

I did a little light sanding on the edges to add some slight distressing, and then finished it all off with a coat of clear wax.

Next I filled it up with some of my earliest peonies.

I took these photos last Saturday morning, and as of then only my old-fashioned pink peonies were open.  These are peonies that came with the house, so I have no idea what variety they are.  Plus, they are at least 34 years old, and likely much, much older than that.

As seems to be the case nearly every year, the opening of the peonies coincided with a hot spell, which speeds up the peonies.  By Monday morning I had flowers open on almost all of my peony plants.  I’ll be sure and post a peony update sometime later in the week.

But for now, how do you like this quick and simple watering can makeover?  It may not work well for actually watering things, but it makes a great vase for peonies!