happy thanksgiving.

Happy Thanksgiving!  I hope you are spending the day with family or friends enjoying good company and good food.

happy thanksgiving

Today Mr. Q and I are heading out to his mom & step-dad’s house in Wisconsin for a quiet dinner for 4.  We have been doing this every year since my in-laws moved back here from New Orleans.  After spending so many years far apart on the holidays, we are especially grateful for their company now.

While my sweet potatoes are baking, I took some time to package up some fun goodies that we brought back from our trip for them.  I really enjoy packaging gifts.  It goes way back to my high school days when I made a little extra spending money at Christmas time by running a gift wrapping booth at my local mall.  I always made the most money on Christmas Eve itself when all of the men came dashing in for last minute gifts that needed to be wrapped!

I have honed my gift packaging skills since then.  I have to admit, on occasion the wrap is better than the gift inside … shhhh … don’t tell anyone I said that.

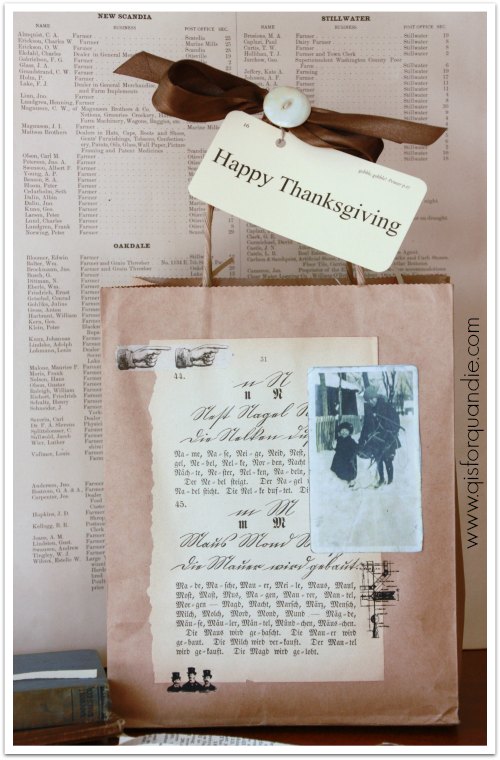
For today’s gift for the in-laws, I just started with a plain brown craft paper bag and I dug out some of my fab vintage foreign language books.

thanksgiving books

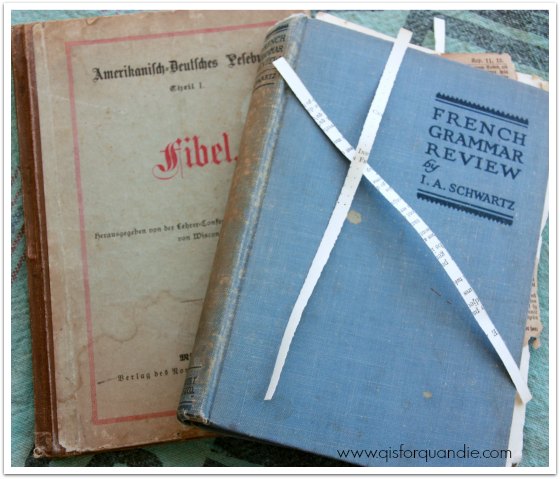
I suppose the book purists out there might be appalled, but I regularly dismantle old books for craft projects.  I consider it a way to enjoy the beautiful typography and not just leave it tucked away in an old book.

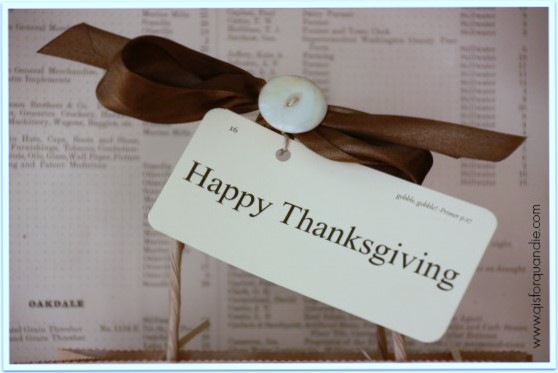
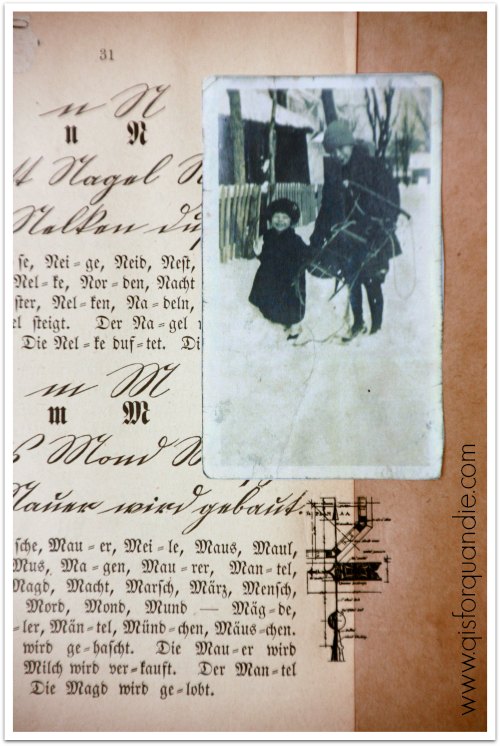
I ripped a page out of the German book that I recently purchased at Carver Junk Co as a base for my design, then I added a copy of an old photo, some Tim Holtz rub-ons, and some washi tape.  Some brown satin ribbon and a vintage button top things off. And voila!

thanksgiving gift

thanksgiving gift close up

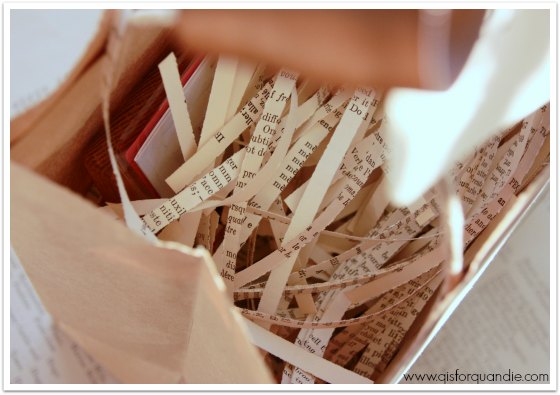
I’ve used a paper shredder to shred pages from the French Grammar book to cushion the contents.

thanksgiving gift inside

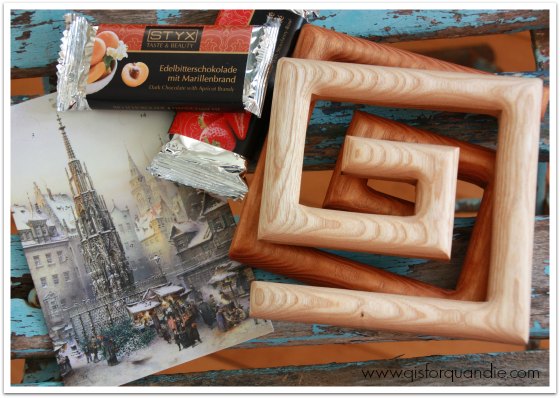
Are you wondering what’s in there?  Just a few little things … a wooden trivet set from Budapest, some chocolates from Austria and an Advent calendar card showing the Nuremberg Christmas market.

thanksgiving gift items

Now that the gift is ready, I must finish making my famous sweet potato casserole so we can hit the road.  Despite not having any pictures of it, I’ll share the recipe with you.  People rave about this dish every time I bring it somewhere, even the ones who don’t usually like sweet potatoes.

Sweet Potato Bake

  • 3 c. cold mashed sweet potatoes (w/out milk or butter)
  • 1 c. sugar
  • 1/2 c. milk
  • 1/4 c. butter, softened
  • 3 eggs
  • 1 t. salt
  • 1 t. vanilla extract

topping:

  • 1/2 c. packed brown sugar
  • 1/2 c. chopped pecans
  • 1/4 c. all purpose flour
  • 2 T. cold butter

In a mixing bowl, beat sweet potatoes, sugar, milk, butter, eggs, salt and vanilla until smooth.  Transfer to a greased 2-qt. baking dish.  In a small bowl, combine brown sugar, pecans and flour; cut in butter until crumbly.  Sprinkle over potato mixture.  Bake, uncovered at 325 for 45-50 minutes or until golden brown.

Yield:  8 – 10 servings.

Before I leave you, let me take a minute to say that one more thing I am grateful for on this day of thanksgiving is you!  Thank you for all of the kind comments and well wishes that have been sent my way since starting this blog a year ago.  I couldn’t do it without you!

and I’m back.

I feel a little bad about keeping it from you, but last week I was off in Europe floating down the Danube River.  I kept the actual timing of my trip on the down low for security purposes.  Before I left, I scheduled a bunch of pre-written posts to keep you all entertained during my absence and to make it seem as though I was home.  Were you fooled?

Well … I hope you’ll forgive a little subterfuge on my part and understand the need for it.

budapest lights 2

And all of that aside, I am back!  After 10 days touring Hungary, Austria and Germany, I must confess it feels really good to be home.  I missed my cat, my own cozy bed, my time zone and my paint brushes!  Now that I am home, I am wide awake at 4 a.m. and completely out of it by 6 p.m.  But I’ll recover soon and hopefully be back to painting furniture.

budapest ceiling

In the meantime, I will bore you with stories and pics (I took nearly 1,000) from my travels.  I have only just begun to start sorting through my pictures and deciding which ones I like (which will probably be about 20).

I may have previously mentioned my love for good graffiti.  I have some great graffiti door pictures from Barcelona and Prague, and now I can add some from Budapest.

budapest doror

We floated past some gorgeous little towns in the Wachau Valley of Austria, including this one.

river town

If I have to pick a favorite city, it would be Budapest.

budapest building

But each place we stopped on our journey had its own character, and they were all magnificent.  I’ll share them with you one by one and let you be the judge.  Stay tuned!

P.S.  Are you wondering which bag I chose to bring along?  Well, I chose the cheap one from Target.  And seeing as I somehow managed to get green gum stuck all over the front of it on the plane ride home, I am glad I did!  I don’t feel as bad about ruining a $30 bag.

P.P.S.  Today I get the bad blogger award for being completely oblivious to my own blogiversary!  I began my blog precisely one year ago today.  I am cutting myself some slack for not having a blow-out blogiversary extravaganza by blaming it on jet lag.  I had some grandiose ideas for a celebration, but none of them came to fruition.  Maybe later …

humpty dumpty.

Remember the dresser that fell apart?  I’m fondly calling it Humpty Dumpty.  Well, it didn’t take all the king’s horses or all of the king’s men … although I think some horses of a different kind were involved … it just took handyman Ken and his clever know-how to put Humpty together again.

Yep, he’s already got it done!

As a reminder, here is how it started out.  In a pile on the floor.

hd1

Somehow Ken managed to sort all the pieces and start putting them back together again.

hd2

This time it didn’t fall off the horses.

hd3

These photos of the repair process were all taken by Ken in his workshop, which is far tidier than mine.

hd4

And now, Humpty Dumpty looks like this!

hd5

This is now one solid, well functioning dresser, thanks to Ken!

Next up, a new paint job.  I’m trying to decide what to do about the handles.  These are obviously new replacement handles designed to look old.  Should I keep them?  Or replace them?

All three of the keyhole escutcheons are missing.  Should I find replacements?  Or leave them as is?

Should I strip and wax the top, and just paint the rest?  Or paint it all?

What do you think?

buried treasure.

Back before I started q is for quandie, I dabbled for a bit with a Facebook page.  I eventually mostly gave that up because there just wasn’t enough flexibility and I couldn’t tell the stories the way I wanted to.  That’s what motivated me to start a blog instead.

So anyway, those of you who were readers of my Facebook page have already heard this story … but for everyone else, it’s brand new!

A couple of summers ago, Mr. Q and I decided it was high time to go deep inside the lean-to on the back of the Carriage House and clean out whatever we found there.  Now, you might be thinking to yourself, ‘hey, haven’t they lived in that house for like 27 years or something?  how can they possibly not have done this sooner?’  And to that question, I really don’t have a good answer.  Fear of spiders and mice comes to mind.  Out of sight, out of mind is also a good one.  Even I shake my head over this one.  There could have been a big chest full of gold doubloons back there, and we wouldn’t have known about it (unfortunately, there wasn’t).

So, yes, high time to clean it out.  Fortunately, Mr. Q took this job on while I was off at the day job (no spider worries for me!).  When I got home, he said “well, there wasn’t much back there, just this bunch of old doors, what should we do with these?”

doors before

Well, if you know me at all, you know that this was nearly as good as a trunk full of buried treasure!  Just look at these babies!  The patina!  The style!  The vintage hardware!

doors close up

First, I hosed them all down and gave them a good scrubbing with my trusty magic eraser.  Then, I developed a plan for each one.   The grey two-paneled door got a coat of white paint, then chalk board paint inside the panels.  I also added an enameled metal number tag.  The yellow door just got a really good cleaning and sanding.  The door with the glass window got stenciled with “OFFICE”.  I used my Cricut to cut the letters out of contact paper.  I adhered them to the window, masked off around the outer edge of the window and sprayed a couple of coats of Krylon Frosted Glass Finish over the entire glass.  Once dry, I peeled off the contact paper letters to leave “OFFICE” in clear glass.

doors after q

The green six-paneled door was originally a pocket door.  It had the classic pocket door handle and hardware.  I am guessing that at some point there was a pocket door in my house because the style of the door matches all of my other doors.  I really wish I knew where it was.  Maybe between the kitchen and the dining room?  Or perhaps between my study and the dining room?  I don’t think I will ever know.

I turned the pocket door into a headboard of sorts.  Really, all I did was turn it on its side and add the rub-on sentiment.

headboard door

All that remained was to mount it on the wall at the appropriate height for a headboard.

In hindsight, this is another piece that has come and gone and I kind of wish I had hung on to it.  But, because of my 1/2 story walls upstairs, this would only have worked in the master bedroom, and it just didn’t even occur to me that I could ditch my current sleigh bed in favor of this.

So in the end, all of these doors found new purposes and new homes.  I may not have found gold, but I did find buried treasure of the vintage kind!

quandie’s cast of characters.

If I sometimes give the appearance of doing it all myself, you should know that in reality I have a lot of help.   With my one year blogiversary coming up soon, I thought I would officially introduce you what has become the cast of characters on q is for quandie.

First and foremost, of course, is Mr. Q.  My hubby of 25 years.  I’m pretty sure I couldn’t live without him. He is the brawn behind q is for quandie, helping me move furniture here and there.  He runs all over tarnation picking up craigslist buys.  He has also started doing a lot of the prep work for me; sanding and removing hardware.  He also is very understanding about my total obsession with refurbishing old stuff.  Really, he is just an all around good guy.

cast - mr q

My sis (on left, that’s me on the right).  She lives in New Jersey (bummer!), but you’ll still see her mentioned all over the place on my blog.  She is always supportive of everything I do!  She visits as often as possible, and we travel together frequently.  Thank goodness for modern technology because we can text, call, email and just basically pretend like we don’t really live way too far apart.

cast - debbie

Handyman Ken.   Several of my readers have gotten confused and think that Ken is Mr. Q a.k.a. my husband, but no, Ken lives next door.  He’s retired, so he has a little spare time on his hands for fixing stuff.  He is one of those guys who just knows how to make stuff work.  I think it’s a dying breed really.  I truly couldn’t do what I do without Ken.  He makes sure that the furniture I revamp functions the way it should.  He likes to sneak over during the day while I am at work.  Then, like magic, I come home from work to find that the furniture in my Carriage House has been magically transformed while I was off at the day job.  And best of all, he accepts payment in the form of wine!

Ken

New neighbor Karen, a.k.a. nnK.  She lives across the street from me and is my numero uno craigslist spotter.  She is always on the lookout for great pieces.  She’s also available at the drop of a hat to help me move furniture when Mr. Q isn’t home.  I can text her, and she’ll pop right over to lend a hand.  How fabulous is that?  nnK and her mom, Judy, are also there at every Carriage House Sale to help man the check out.

 cast - nnK

Sue (on left) is the other half of the Carriage House sale.  Sue and I have worked together at our day jobs for over 27 years (dear lord, how can that be possible I wonder).  We started hosting our sale together over 15 years ago and we are still going strong.  We’ve added other vendors here and there over the years, but in the end we find that we really only have enough space for stuff from just the two of us.  In the center of this picture is Sue’s sister Jan who always keeps me fortified with triscuits and cheese in a can while we garage sale! Cathy (on right) is the finder of free, or almost free stuff.  When she spots a cheap piece of furniture that she knows I can revamp, she grabs it for me every time!

mac grove crew

And finally, there is me.  The creative mastermind behind qisforquandie.com (ha!  I say that with a big smirk on my face).  My real name is Linda, in case you didn’t know.  I started this blog nearly one year ago to share my furniture makeovers with the world, or really just the very small group of people who might be interested.

quandie

So, that is my fabulous cast of characters.  Hope you’ll continue to join us for another year of adventures!

blast from the past.

I was going through some old photo files the other day.  A couple of things struck me.  The first was just how long I’ve been doing furniture make-overs.  I started in the 90’s when shabby chic was at its height.  How is it even possible that this was more than 20 years ago?  Have I really been doing this that long?  Crazy!

Next, I was reminded of some really fun pieces I had done.  So I decided to share some of them with you.  I don’t have extensive before and after photo shoots of any of these.  Most of them were just photographed for a Carriage House sale ad.  So, no judgments about the quality of my photos, ok?

Let’s start back in 2008.  Look!  The photo cottage exterior was barn red back then.  And I painted this fab potting bench and used a rusty old child’s shovel as the drawer pull.  I was using a lot of vintage tablecloths to reupholster chairs back then.  I was also doing a fair amount of decoupage (on the bucket under the chair, the galvanized pot under the bench).  If memory serves, I believe my fab customer Jenny bought this potting bench.  Am I right Jenny?  Do you still have it?

blast 2008

In addition to containers, I also decoupaged on furniture.  Many of my favorite pieces back then were decoupaged.  Like this desk.

Black desk with decoupaged book pages

Here is a close up of the drawer.  Those black swirly bits are rub-ons.

Decoupaged book pages on drawer

In 2009, I painted this gorgeous white buffet.

white buffet

Fast forward to 2012.  The always classic Union Jack dresser.  This was the first one I ever did, and honestly, I think the best.  I’ve struggled with getting them right every since.  Maybe it was just beginners luck.

blast 2012

I’ve always been a fan of both white and aqua.  So fresh and lovely.  That little aqua and white table originally belonged to my grandparents.  I kept in my own home for a long time, but it was time to say goodbye to it.  So I gave it a darling makeover and sent it on its way.  That sleigh bed was one of my favorite pieces too.  How fantastic would that be in a young girl’s room.  Actually, that is where it ended up.  I remember the woman who bought it was going to put it in her daughter’s room.  I wonder if she still has it.

blast white and aqua

This darling little aqua and white nightstand was one of my faves.  I’m quite sure that it was originally half of a vanity/dressing table that someone took apart.

1914 nightstand

When it comes to the Carriage House sale, I am not the only one coming up with fabulous furniture.  Sue occasionally knocks one or two out of the park herself.  This was one of my favorite pieces that she did.  Isn’t it deliciously chippy and fabulous?  It sold in about 2 seconds flat!

blast Sue's cupboard

So, there you have it, a little walk down memory lane.  Hope you enjoyed it as much as I did.

it’s in the bag.

I am so looking forward to my trip to Budapest and the cruise on the Danube River, but I am a little nervous about traveling in winter.  But, heck, I’m a Minnesotan for gosh sakes (you betcha).  I should be able to handle it.  I definitely have plenty of winter gear.  The real trick for me is figuring out which things to bring.

I recently purchased a new coat for the trip that meets all of what I consider to be the necessary requirements; waterproof, warm, comfortable, has good pockets, covers my butt.  All important factors.  I also got a great deal on it on the sale rack at Macy’s.  I also have a North Face fleece hoodie that I can add under it for even more warmth, not to mention some long undies just in case it is really cold.

I plan to style it up with some fabulous scarves, hats and gloves.  But I’m also debating about a suitable bag.  I like to use a cross body type bag when I travel, and it needs to be big enough to hold my digital SLR camera, maybe an extra lens, a bottle of water, definitely a collapsible umbrella, plus all of the usual suspects that go in your handbag.

I’ve narrowed it down to two choices.  I thought maybe you guys could help me pick.

Option 1 is a suede Crown Vintage bag that I picked up at DSW for $119.95.

opt 1 furry scarf

I really love the look of this bag, but the drawstring top makes it a little tricky getting the camera in and out easily.  I take a lot of photos when I travel, so easy access to the camera is important to me.  Plus, the color of this bag kind of leans towards the khaki green side of grey.  It looks great here with my new furry infinity scarf that I bought at Carver Junk Co though.

But it doesn’t work quite as well with my aqua scarf and gloves.

opt 1 aqua scarf

Option 2 is an inexpensive Mossimo bag from Target that cost $29.99.

opt 2 furry scarf

This bag is totally faux leather, but it has a distressed look that is almost believable.  The camera comes in and out a little easier with this bag.

It also looks better with the aqua ensemble (and I do plan to bring both the aqua and the furry scarves).

opt 2 aqua scarf

And let’s not ignore the fact that it is $80 cheaper than option no. 1.  However, it does look cheaper to me, and I doubt it will hold up as well as the more expensive bag.  I probably won’t use this bag at home at all, it will likely only be pulled out for traveling.  And only winter traveling at that, so it’s not going to get a ton of use.

There are definitely pros and cons to each bag.  I haven’t take the tags off either one yet, so both are still returnable.  So, tell me, which bag would you choose?

a do-over.

Every winter a magical thing seems to happen.  Just when it gets too cold to be taking photos either outside or in the photo cottage, the leaves all fall off the trees and suddenly I have this fantastic light in my piano room.  This also happens to be the only room in my house with a wall that works as a suitable back drop for furniture photos.  It’s like kismet.

I was never really happy with the outdoor photos I took of this petite dresser that I painted in MMSMP in Kitchen Scale.  The fall leaves are gorgeous, but I didn’t like the way the color looked on the dresser.

Small dresser painted in MMSMP Kitchen Scale

So, once all of those yellow leaves fell, I decided to stage a ‘do-over’ inside the house.

do over close up

I think this gives you a better idea of the true color.  As we all know, Kitchen Scale is my fave, so I want to do it justice.

do over

Maybe it’s my imagination, and it doesn’t really look all that different.  Maybe I just prefer the color when paired with white and grey rather than yellow.

do over with chair

Either way, I’m glad I allowed myself a do-over for this one.

I had planned to add these photos to my craigslist ad for this piece, but there was no need because it sold without them!  I had a lot of interest in this one, so I am on the lookout for similar pieces to make over.  It seems that lots of people out there would love to have a Kitchen Scale nightstand/dresser!

whatever happened to …

I thought perhaps some of my regulars would like an update on various subjects that sort of got left hanging on my blog.

Danube cruise header

My cruise on the Danube is still ahead.  We are going during Christmas Market season, which means we will get to enjoy this …

Vienna Christmas market

And maybe even this …

Budapest winter

I don’t usually choose winter travel, but I’m getting prepared (more on that later) and am really looking forward to it.

Remember the Curtis Jere wall sculpture?  Or as Mr. Q fondly calls it, the deathstar?

Curtis Jere

Yep.  I still have it.  Here’s an update.  I sent inquiries to two auction houses that specialize in mid-century modern.  Palm Beach Modern Auctions would love to take it.  They estimate it would sell for $800 to $1,000.  But, I would have to ship it to them, and then they take a 20% commission.  I also contacted Wright in Chicago.  They estimated its value at $2,000, but they felt it wouldn’t be worth it to ship it to them and pay their auction fees (they did not elaborate on what those are) so they suggested I try to find a local buyer.  I have also contacted two MCM dealers in the Twin Cities, and so far neither of them have followed up with me.  I plan to continue trying to find a local dealer that specializes in mid-century, but meanwhile I am storing the death star!

Remember my grandiose plans for my front hallway?

hallway collage

Well, we got as far as ripping off the carpet and then the whole project was derailed by my decision to have  a booth at Junk Bonanza, and then spring came and I was so busy, and then summer came and I was still busy.  Now fall is here, and guess what?  I’m still busy.  Hopefully I’ll revisit this project over the coming winter!

Now, who actually remembers this one?

Cambridge before

This goes way back to last March.  Mr. Q and I picked it up north of the cities on a frigid winter’s night.  I still have this piece, but I haven’t worked on it.  The plan was to deal with it over the summer when I would have some space to spread out in the Carriage House.  Instead, it keeps getting shoved to the back of the list in favor of pieces that need less work.  Plus, the more I look at it, the more I think it’s a dresser that was “married” to two halves of a dressing table.  Right?  And once you have that visual in your head, you just can’t get it out and the whole piece just looks weird.  I think I need to consider taking these pieces apart again.  What do you think?

Finally, there is this bed.  This came as part of a set.

workshop bed

I already refurbished and sold the dresser and the vanity that went with this bed.  But the bed needs more work.  I have it pulled out front and center in the workshop.  I hope to get to work on it soon.

I think I’ve touched on everything that is left hanging.  Did I miss anything?

I’m not making any promises on any of this stuff … well, except the cruise on the Danube, I’m definitely doing that one!

easy upholstery.

A while back my friend Cathy offered me a vanity bench.  I initially thought it would work with my stenciled vanity/dressing table.  However, when I put them together, they just didn’t suit each other.  The bench is too wide for the vanity.  Nonetheless, it is a fabulous little bench, and I’m sure it will find a good home with another vanity, or maybe just on its own at the foot of a bed.

I painted it with Miss Mustard Seed milk paint in Trophy, and then reupholstered it in a simple linen with a stencil added.

This is so simple to do, and the linen stencils beautifully.  Here are my tools.

bench supplies

A stencil, some craft paint, a stencil brush, paper plate, paper towel, some new batting and some plain inexpensive linen (not pictured).

The original seat to the bench is underneath my supplies.  As you can see, all that was left was a remnant of the original fabric.  I ripped that off, and then cut my linen about 2″ bigger than the seat all the way around.

Now, this next tip is important, so I hope you are paying attention.  You should stencil the fabric on a hard flat surface before you upholster the bench.  You won’t get crisp lines on your stencil if you try to stencil over the batting.  I’ve learned this the hard way.

stenciled fabric

I just laid my linen flat on a table.  I squirted some paint onto the paper plate, swirled my brush in it, and then blotted it on the paper towel.  You don’t want your paint to go on thick and goopy or runny.  You could tape the stencil in place, but I like to live dangerously, so I just hold it in place.  Then, just stipple the paint on.

The Martha Stewart paint I used dries pretty quickly.  I probably only waited about 10 minutes before continuing on to staple the fabric over a couple layers of new batting onto the seat.

stenciled bench close up

The trickiest part of this process was being sure the design was straight before I stapled the fabric in place.

bench no 3

I just came to the realization that I did a pathetic job staging this one.  I meant to go back and add in some accessories, but I got distracted by laundry and then some gardening.  With the end of daylight savings time, it was getting dark out before I remembered and then it was just too late.

Let’s just imagine there is a lovely rug under this bench instead of my dirty photo cottage floor.  Or maybe a cute pair of shoes stashed under there.

stenciled bench again

Try to focus on the pretty upholstery and paint job, OK?