the queen’s glory chalkboard.

Chalkboards, are they in or are they out?

I’ve heard others say that they are definitely out, but I still love them.  I have five of them decorating my house.  My favorite still being the one that hangs over my sofa.

I’ve made quite a few of them in the past because they are my favorite way to upcycle a mirror that isn’t being returned to its dresser.

Recently one of my readers, Suzy, came across a mirror that she thought I might like to have and she dropped it off for me.

Initially I was planning to keep it a mirror.  But as I started working on it I changed my mind.

To begin with, it had a bit of water damage at the bottom.  The damage was worse on the particle board backing, so that got ripped off and thrown away.  At that point the mirror came right out, which made the frame much easier to paint.  I simply sanded it down a little, cleaned it with a damp rag and added two coats of Dixie Belle’s Drop Cloth.

Next I added the bottom section of re.design with prima’s Parisian Letter transfer to the space at the top of the frame.

Once I had that in place I realized that it would really pop with a black chalkboard in the frame rather than the mirror.

So handyman Ken cut a piece of hardboard to fit and I painted it with some black chalkboard paint and voila!

You have some options when it comes to creating a chalkboard.  You can use milk paint to create a chalkboard

You can also just use chalk style paint, like Dixie Belle paint.

But I already had some of the Rustoleum black chalk board paint on hand so I just used that.

It made for a quick and easy afternoon project.

I’ve got a couple of more detailed projects underway that I hope to complete this weekend.  How about you?  What’s on your agenda this weekend?

back to back barn sales.

I’m sure most of you have been hearing about the civil unrest that started in Minneapolis last week and has now spread to many other cities as well.  I’m not going to comment on that situation here on my blog because I like to keep this space positive.  Usually I’m a ‘glass half full’, ‘look on the bright side’ kind of person.  But I truly can’t find anything positive to say about what is happening in the Twin Cities.  The entire situation is simply heartbreaking.

After watching things go from bad to worse over several days, my sister, niece and I decided to literally put the city in the rear view mirror and head out into the country on Saturday.  It was a gorgeous, although a bit cool, sunny day.  We grabbed sweatshirts and hopped into my convertible VW bug and headed east.  We then drove north along the St. Croix River to Mr. Q’s home town, Marine on the St. Croix, where we stopped off to score some snacks at the general store.  Restaurants are still not open here in Minnesota, so we have to improvise.

Next up was The Garden Gate at Crabtree’s, a cute little shop with lots of garden ornaments.  From there we headed back west to the Gammelgården Museum in Scandia.

If you’ve followed me for a while, you know how much I love open air museums.  I’ve visited them in Stockholm, Oslo, Aarhus and of course there was The Beamish, in County Durham, England.

The Gammelgården in Scandia doesn’t really hold a candle to any of those, but it’s still fun to check it out.  Unfortunately, although we escaped from rioting and looting, we couldn’t escape from COVID.

The giant Dala horses all wore masks, and none of the historic buildings were open.  We were able to wander around the grounds and admire them from the outside though.

The Präst Hus was built in 1868 and I find the construction fascinating.  Just look closely at the corner of the building …

It’s dovetailed, like a giant piece of furniture!

After leaving the Gammelgården, we stopped at another historic site, the Hay Lake School.

Once again, the site was not open due to COVID, but we did peek in the windows.

This one room schoolhouse was built in 1896 and was in use until 1963!

As we started to make our way back home, we spotted a sign for a barn sale.  I can’t tell you how excited I was to see that!  A barn sale!  Of course we had to stop.

We followed the signs, made our way down a dirt driveway, and behold …

A legit barn sale!

I found a few goodies to purchase including a set of 4 old cupboard doors that I’ll turn into signs …

Some old buckets that I’ll dress up with transfers to be used as planters …

And this fab old shoe form.

And then, as if that wasn’t good enough, the proprietors of this sale told us there was a 2nd barn sale just up the road.  Back to back barn sales!  It was our lucky day.

This 2nd sale was actually more of an occasional sale, although it was technically in a barn.  They were selling pieces that have already been given a face lift, lots of painted furniture and other goodies.  As the guy at the first barn sale put it, he was the K-mart of barn sales and they were the Macy’s of barn sales.

None the less, I found a few things to buy including a glass jar and an old coffee pot that will both get dressed up with transfers.

Also, I had been looking for something to perch my Lunch Menu planter on and this $10 stool looked just about right.

I know it won’t hold up well outdoors forever, but for $10 it’s OK if it just lasts a season or two.

Our escape to the country on Saturday provided a much needed getaway for all of us.  We were able to forget about the world’s problems for a while and just enjoy some peaceful scenery on a beautiful sunny day.

Capping it off with back to back barn sales was the cherry on the sundae.

While normally Debbie and Kris would have stayed at our place afterwards for a bonfire, or a game night, they had to get home before the 8 pm curfew that was in place over the weekend.  That being said, we are all safe and healthy and I hope you are all the same!

sizing up your drawers.

Back in March when our governor issued a Stay at Home order, I decided to forgo making Craigslist or other online purchases for a while.  Of course, back at the beginning we all thought that was going to last just a few weeks.  Now, here we are in week 9 and although the official order has loosened up a bit, things are most definitely not back to ‘normal’.  Recently our State Fair (which takes place in late August) was canceled, and that has led me to realize that there very likely won’t be any neighborhood garage sales this summer.

Sure, there will be a handful of sales here and there, but I don’t think many local governing bodies will want to publicly endorse large gatherings by organizing a neighborhood sale.  And usually there are some pretty huge turnouts for those sales.

I would admit that I’m in mourning over the loss of my beloved neighborhood garage sales, but of course I know that in the scheme of things that are important in this world, this is pretty insignificant.

So instead, I’m continuing to dig deep looking for projects to share with you guys.  I suppose I should face facts at this point and admit that I may have a few more piles of stuff in my carriage house than I realized because I seem to keep hauling things out of there to ‘improve’.

This past weekend I pulled out two orphaned drawers …

For the life of me, I couldn’t remember which piece of furniture these came from so I did a little searching in my blog history only to discover that I purchased a pile of random drawers at a garage sale back in 2016.

Good grief, that means these have been sitting around out in the carriage house for almost 4 years!  Yikes!

I started out by asking my handyman, Ken, to cut them down to half their original size … depth-wise.

He basically removes the back, cuts down the sides and bottom, and then reassembles with the back.  For someone with the proper tools and skill (Ken, not me), this is fairly simple.  He had them finished and back to me in an afternoon.

Next I sanded them lightly, cleaned them up with a damp rag and then painted one in Dixie Belle’s Sawmill Gravy (top) and one in their French Linen (bottom).

For some reason the hardware would not come off easily.  I’m not sure if it had been glued in place somehow or what, but I decided that rather than fight with it, I’d just paint over it.

The Sawmill Gravy drawer was missing its keyhole escutcheon so I added an unpainted one from my stash at the end.

I had some fun dressing each of these up with some scraps of transfers leftover from previous projects.

The French Linen drawer has a section of the Cosmic Roses transfer that was left over from the bed I painted back in March.

I pulled out the Paris Valley and the Classic Vintage Labels transfers to use on the Sawmill Gravy drawer.  I simply cut out each element I wanted to use individually and then placed them on the drawer where I wanted them.

I just love playing around with transfers in this way, and I especially love being able to use up leftover scraps whether it be transfers or drawers.

Now, at this point you might be thinking to yourself ‘well, that’s all well and good, but what in the world are you going to do with a re-sized drawer?’

I have a few ideas.

First up, use it as a planter box for a row of faux topiaries, these are from IKEA.

Or how about using it to corral your collection of blue canning jars.

Fill it up with a bunch of ironstone …

or some old books …

Or maybe just fill it up with some of your favorite flowers.

Although I took that photo outside, I should clarify that this drawer would not really hold up well outside.  Mainly because it’s made of wood, the inside is not sealed at all and I used wax as the topcoat which isn’t suitable for outdoor items.

However, you could use it this way on a covered porch.  You would need to keep the plants in liner pots and take them out to water them though.

Do you have any ideas for using a re-sized drawer?  Be sure to let me know in a comment!

As always, thank you to Dixie Belle Paint Co and to re.design with prima for providing the products used for today’s projects.

If you’re looking for Dixie Belle products you can find them here.

If you’re looking for re.design with prima products you can find local retailers here, or online sources here.

a trio of milk cans.

A few weeks back my neighbor, nnK, spotted some old milk cans that were being given away, so she grabbed them for me.

I feel like milk cans often come dangerously close to looking like bad 80’s decorating.  Like if they are painted in a black and white cow hide pattern, or maybe with a goose or something on them.

But I think I was able to give these a bit of an update, and now they’d be perfect in the garden.

To start out, I scrubbed them up with some dishwashing soap and then left them to dry.  Once dry, I sprayed all three of them with some clear, matte finish spray sealer to seal any remaining flaking paint and rust.

Next, I started with the black can and simply stenciled it with a stencil from Maison de Stencils and some Dixie Belle paint in Sawmill Gravy.

I moved on to the smaller, really rusty can.  This time I used a white transfer from re.design with prima.  This is just a section from their Beautiful Home transfer.

I recently discovered that quite a few of their transfers are being ‘retired’ and this is one of them.  You may still be able to get it from a retailer who has it in stock, but once they are gone there will be no more.

The white really popped on that rusty can.

The final can had some great chippy remnants of green and blue paint.  To dress it up a just a little, I added a section from one of my all time favorite transfers, Everyday Farmhouse.

Sadly, this transfer is being retired as well.  Boo hoo.  I’m definitely going to miss it.  It added just the right touch to the final milk can.

For all three of the milk cans, I added another coat or two of the matte spray sealer after stenciling/adding a transfer.  I wanted to give them just a little extra durability for use outside.

So, what do you think of my upgrades?

As always, thank you to re.design with prima, Dixie Belle Paint Co and Maison de Stencils for providing some of the products used on today’s projects.

simple details.

Last summer I snagged this trio of galvanized buckets at a garage sale.

Admittedly, they aren’t really anything special.  They aren’t vintage, but they are heavy, good quality galvanized metal rather than the flimsy, cheap stuff.

Plus, I thought I could dress them up simply and quickly using some re.design with prima transfers.

And bam!

Just by adding that simple detail they have a lot more personality.

I used two different sets of transfers.  The Sky Valley Farm transfer is from the Everyday Farmhouse set.

While the other two buckets have sections from the Paris Valley transfer.

You can just pop a hanging basket into these and have an instant fabulous flower box.

Or you could punch holes in the bottom for drainage and then plant directly in them.  Wouldn’t they be fab with just some simple geraniums?

I’m often asked if I add a sealer over transfers, or whether or not they will hold up outside without being sealed.  In my opinion, you only need a sealer if the surface you put your transfer onto needs a sealer.  For example, if it’s painted wood or metal.  I’ve never sealed a transfer that has been applied to glass, mirror or unpainted metal.

Last year I experimented with a transfer on an old metal picnic basket.

I left it out all summer and the transfer never budged.  That being said, the metal container itself rusted quite a bit, but the transfer held up great without any kind of sealer.

I took these buckets, along with a huge pile of other stuff, in to Reclaiming Beautiful this week.  They are open today and tomorrow, so if you’re local and you feel the need for some retail therapy be sure to stop in.  They will be implementing the following safety measures:

* No more than 10 people in the store at a time
* Hand Sanitizer will be available
* Card transactions will be done by customers with no
signature required (we will clean between each use)
* Curbside pick up is still an option

Also please note that they have new hours! They will be open every Thursday through Saturday from 10 am to 5 pm, but will no longer be open on Sundays.

As always, thanks to re.design with prima for providing the transfers used on today’s project.

planter chairs.

I know I’ve shared planter chairs before, but I whipped up a couple of them last weekend and I couldn’t resist sharing these with you as well.

If you aren’t familiar, a planter chair is basically a chair turned into a plant holder.  I particularly like them for holding big baskets of flowering annuals, as you’ll see in a minute.

But first, I start with chairs that have seen better days.

Typically they are chairs that have ruined cane seats and I can usually pick them up super cheap at garage sales.

Let’s face it, repairing cane is probably best left to the professionals.  Or at least to people with far more patience than I have.

It takes all of my patience just to remove the bad cane, I can’t imagine sticking with it long enough to also replace it with new cane.  So instead, I turn them into planter chairs.

Once I’d removed the cane from both of these chairs (using a utility knife and a pair of needle nose pliers), I painted one in Dixie Belle’s Bunker Hill Blue and one in Kudzu.

Once the paint was dry, I sanded the chairs to distress and then added a topcoat of Dixie Belle’s Gator Hide.

Gator Hide is their most durable topcoat option, so it’s a great choice for outdoor pieces.  I will point out that the Gator Hide has a bit more sheen than I normally like for furniture, which is why I tend to stick with either clear wax, hemp oil or the flat clear coat.  But in this case, I thought I’d go for durability.

Here’s a  q tip for you on finishes.  The more shine to your finish, the harder it is to achieve perfection.  Drips, brush marks, streaks and imperfect coverage will all show up more readily in a satin or semi-gloss finish.  Shhhh … don’t tell anyone, but this might be the real reason why I usually go for a flat finish.

For these planter chairs though, I wasn’t concerned about perfection.  The gorgeous flowers will draw attention, not any possible flaws in the finish.

These chairs would be perfect as is for peony cages, much like the non-painted chair in my own garden that I shared last week.

But they also make great plant holders.  Just buy a big hanging pot of your favorite flowering annuals and pop it in the hole where the seat once was.

If your pot is smaller than the hole, you can staple a strap in place to hold it.

I added a big pot of Wave petunias and one of my wordy plates, and ta da …

I add words to pretty plates using adhesive vinyl and my Cricut machine (for more details on this process, check out this post).

It works great on old enamelware pot lids too.

And if you don’t happen to have a Cricut machine, the Classic Vintage Labels transfers from re.design with prima work beautifully for this purpose as well …

This pair of planter chairs, and some more wordy plates and enamelware lids are going into the growing pile of stuff that I’ll be taking in to Reclaiming Beautiful this week.  I’m so glad they’ll be able to open back up again on Thursday!

With some warmer weather finally here, and lots of plants coming up in the garden, it’s finally starting to feel like summer is coming this year after all.

As always, thanks to Dixie Belle Paint Co for providing the products used on my planter chairs.  If you’re looking for Dixie Belle products you can find them here.

old shovels.

There’s just something about worn, old garden tools that really appeals to me.

I have quite a few of them around my yard.  I’ve even used one as the handle for the door on my photo cottage …

I often use them as props in my photos too.

So when I see old gardening tools at garage sales, I generally snap them up.  Last summer I accumulated a few old shovels …

They don’t look like much there, do they?  I’m sure I didn’t pay more than a dollar or two for each one, but I thought they had potential.  After giving them all a good scrub with some soapy water, I experimented a bit to see what I could do with them.

Let’s start with the one in the back that looks more like a snow shovel, rather than a garden shovel.  It’s my least favorite, so it goes first.  The wooden shaft and handle were quite dried out and any finish they once had was completely worn off.  I decided to paint them black using Dixie Belle’s Midnight Sky.  Once dry, I distressed them heavily with sand paper and then added a nourishing coat of Dixie Belle’s Big Mama’s Butta, which is sort of like a mix between hemp oil and wax.  Finally, I added a re.design with prima transfer to the blade.

In hindsight, the blade was a bit dark for using a black transfer.

So let’s just quickly move on to the next one.  This one had a bit of red paint left on the blade, but again a very dried out wooden shaft and handle.  I darkened up the shaft with some Dixie Belle No Pain Gel Stain in Walnut, then I painted the handle with their Honky Tonk Red.

Once again I distressed it heavily and coated it with Big Mama’s Butta.

Then I added one of the sections of re.design with prima’s Vintage Seed transfers to the blade.

Wouldn’t that be fun hanging on the side of your potting shed?

This last one is my favorite, mainly because the wood had such a beautiful patina already.  I just brightened it up a bit with some of Dixie Belle’s Howdy Do hemp oil.

Then I added a transfer from the Classic Vintage Labels set to the blade.

It doesn’t show up quite as much as I would like, but it adds a little subtle detail.

Does anyone else use old seat-less chairs as peony cages?  They work great to keep your peonies from flopping over when the flower heads get heavy.  I have a couple of them that I found at garage sales for a few dollars.  They only hold up for a few years in the harsh Minnesota weather, but I pay so little that I don’t mind if they get ruined.

I’ll be adding these shovels to the pile of goodies that I’m bringing in to the shop where I sell on consignment, Reclaiming Beautiful in Stillwater, MN.  Now that our governor has switched us from a ‘Stay at Home’ order to a ‘Stay Safe’ order, retail shops can re-open next week.  So those of you who are local, if you’re ready for some much needed shopping therapy, be sure to stop by and shop safely by wearing masks, physical distancing and not congregating in groups.

As always, thank you to Dixie Belle Paint Co and to re.design with prima for providing the products used for today’s projects.

If you’re looking for Dixie Belle products you can find them here.

If you’re looking for re.design with prima products you can find local retailers here, or online sources here.

ancient findings.

OK, maybe I’m the oddball here, but how many of you have contemplated whether or not COVID-19 is going to have an impact on gardens this year?  I keep thinking that people have so much time on their hands that their gardens are going to be spectacular this season.  Gardening is one activity that is mostly COVID safe.  There aren’t that many activities that feel safe these days, so we may as well work in the garden, right?

It will be interesting to see whether or not we notice a difference as the season progresses.

But in the meantime, I’ve been breaking out the re.design with prima moulds and the Dixie Belle patina paint and creating a few treasures for my own garden.

I started by digging out some clay pots and other garden ornaments.

All of them had been used, so before I got started I washed them in soapy water and made sure they were completely dry.

Next I pulled out one of the newest moulds from re.design with prima called Ancient Findings.

Aren’t they fun?  Sort of like coins and medallions.

I used prima’s Modeling Material to make up a few to glue to my pots (you can read more detailed instructions on how to make the mould here).

When applying a mould to a curved surface, be sure to glue it in place before it dries.  The molds are pliable at first and can be manipulated, but once dry they are quite hard.  I used regular Elmer’s wood glue to attach these.

I let the moulds dry for a couple of days to make sure they were fully dry before moving on to the next step.

Then I pulled out all of my Dixie Belle patina paints and sprays.

I just realized my photo above doesn’t include the Copper paint, and I used that one as well.  I thought it would be fun to try a few different combinations of the paint and spray.

I hadn’t used the blue spray yet, and I was wondering how much of a difference it made to use green spray v. blue spray.  To test that I pulled out a resin acorn finial that I had on hand.  I painted it using the Bronze paint, then sprayed one side with green …

and one side with blue …

Yep, you definitely can see the difference between the spray colors.  In this case, I prefer the green … but that’s going to totally be a matter of personal preference.

Next I moved on to my pots.  I first painted them all using the Prime Start.  Technically, the Prime Start is only required if you are painting over metal.  With other materials like wood, or clay in this instance, you can just prime your piece with any Dixie Belle paint.  I often just use a coat of Midnight Sky because it creates a nice blank canvas for the patina.  But this time I used the Prime Start.

Next I painted a couple of pots with the Iron paint, one with the Bronze paint and one with the Copper paint.

The combination of Iron paint and green spray creates a rusty finish.

These pots aren’t looking terribly rusty yet though.  I find that the rusty finish in particular takes more time to develop.

The candlesticks I shared back in March are a good example of that.  Here’s a comparison showing how much rustier they are after six weeks.

So keep this in mind if you are disappointed with the initial results of your rusty finish.  You have to give it some time to develop.

The combination of the Bronze paint and the green spray gives you a gorgeous verdigris patina, and this develops much more quickly than the rust.

I think this is my favorite look overall for the pots.

The Copper paint with the green spray lends itself to a tad more dramatic look.

If you’re going for that classic verdigrised copper look, this will give it to you.

You’ve probably already noticed this, but I just can’t get enough of the Patina Paints.  It’s so much fun taking an old, tacky thing and making it look like a genuine ‘ancient finding’.

How about you?  Have you tried any of the Patina Paints?

As always, thank you to Dixie Belle Paint Co for providing the Patina Paint products, and to re.design with prima for providing the Ancient Findings mould and Modeling Material used for today’s project.

If you’re looking for Dixie Belle products you can find them here.

If you’re looking for re.design with prima products you can find local retailers here, or online sources here.

the seed store rocker.

First, under the heading of ‘whatever happened to …’, here are some updates in case any of you are even remotely interested.

  1. Princess officially canceled our European Capitals cruise this week.  Of course, I didn’t really think there was much chance of that still taking place, but it was a little disappointing to have it made official.  At this point I think we are all realizing that it’s going to take a lot longer than we thought before we can return to traveling the world.
  2. My progressive bi-focals came back in and work much better than the first version.  I still can’t really wear them for computer work, but I think they’ll be great for garage saling … if we ever get to do that again.  I’m also pleasantly surprised to find that they work quite well for working on painting projects, as well as for gardening.  Again, thanks to all of you who left comments suggesting I should take them back in for adjusting.
  3. After a couple more visits to the Endodontist, I think I might finally be recovering from my 2nd round of root canal problems.  Phew.  I’m glad to put that behind me (although I still have to get the crowns done, my regular dentist is not opening until June).

I know that compared to much of what’s going on in the world, these were all very minor things.  I feel a bit guilty even mentioning them here.  Everyone in the q is for quandie family is healthy including handyman Ken (who I do worry about with this COVID thing, since he is 80+), and I’m very grateful for that.  I hope all of you are staying safe and are also staying well.

Hopefully I can take your minds off world problems for just a few moments today by sharing a small project I worked on.

While I had the Dixie Belle Sea Glass paint out for the piece I shared on Monday, I decided to also use it on this little vintage rocker I purchased ages ago at a garage sale.

I’d been waiting for inspiration to strike before painting it.  I thought it might be fun to use another of the Vintage Seed transfers on it.

I started by painting and distressing the rocker.

Then I added a section of the Vintage Seed transfer to the seat.

But I felt like the chair back was crying out for a little something too, so I pulled out the Classic Vintage Labels transfer and found the perfect thing.

Once the transfers were applied, I waxed the entire thing with clear wax.

I feel like I could create an full back story on how this little rocker came from a seed store in Pella, Iowa.

Can’t you just picture it in the window of an old fashioned Main Street general store?  One that not only has basic goods, but also has a full section of gardening implements and seeds?

Maybe one like the old general store in Marine on the St. Croix that my husband’s ancestors owned in 1907.

I’m planning on taking this little chair in to Reclaiming Beautiful to sell once it re-opens.  In fact, I’m building up quite the pile of smalls waiting for the Stay at Home order to be lifted.  I feel a little bit like we’re going to totally miss the spring/garden season this year and I have all kinds of fun goodies waiting in the wings.  Fingers crossed that shops can open up again soon!

In the meantime, as always, thanks to Dixie Belle for providing the paint and to re.design with prima for providing the transfers for this project.

If you’re looking for Dixie Belle products you can find them here.

If you’re looking for re.design with prima products you can find local retailers here, or online sources here.

the flower collector secretary.

Finally, I have a piece of furniture to share with you guys today!

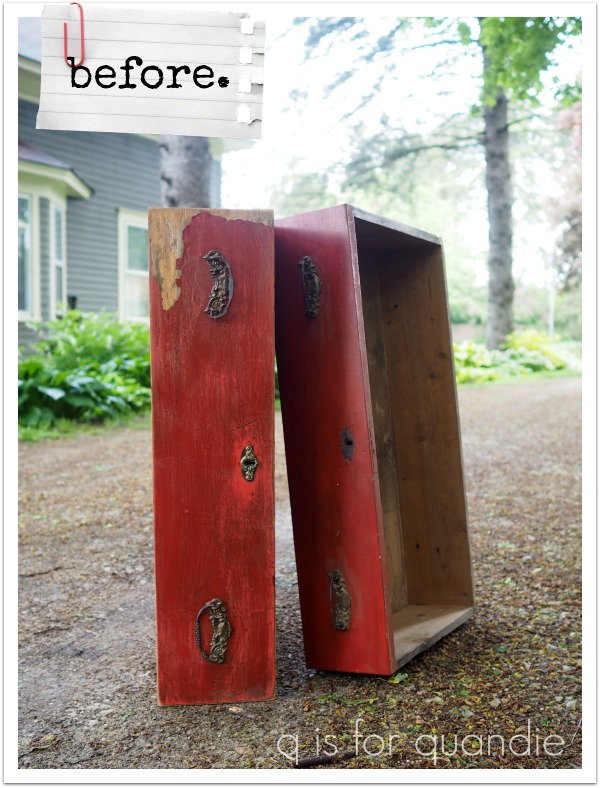
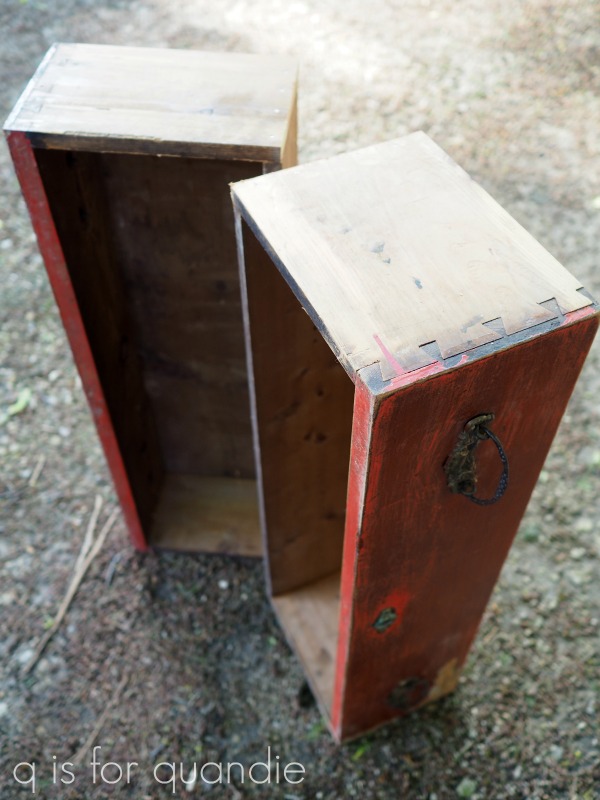
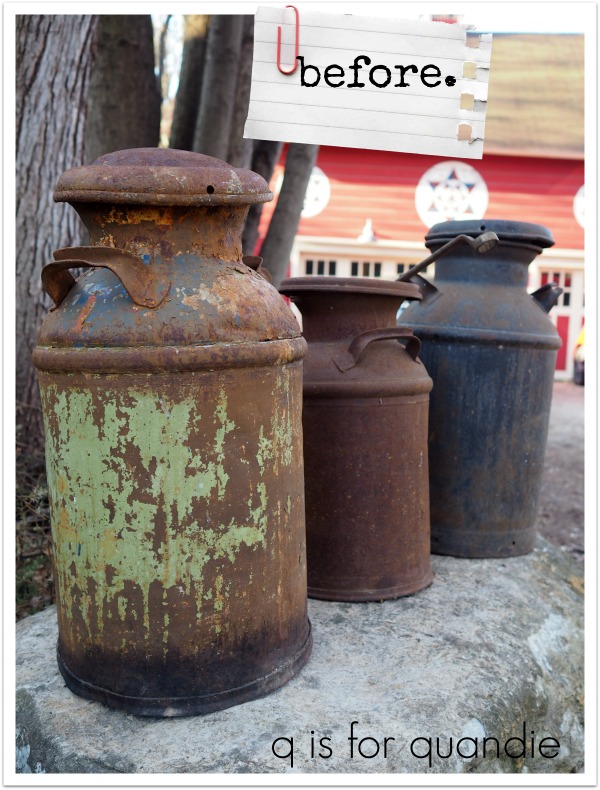
I purchased this secretary desk/hutch last fall, as evidenced by the fall colors in the ‘before’ photo which I took right away when I brought it home …

I partially chose this piece because the price was right, but I also thought it would be a fun challenge to totally change it up.

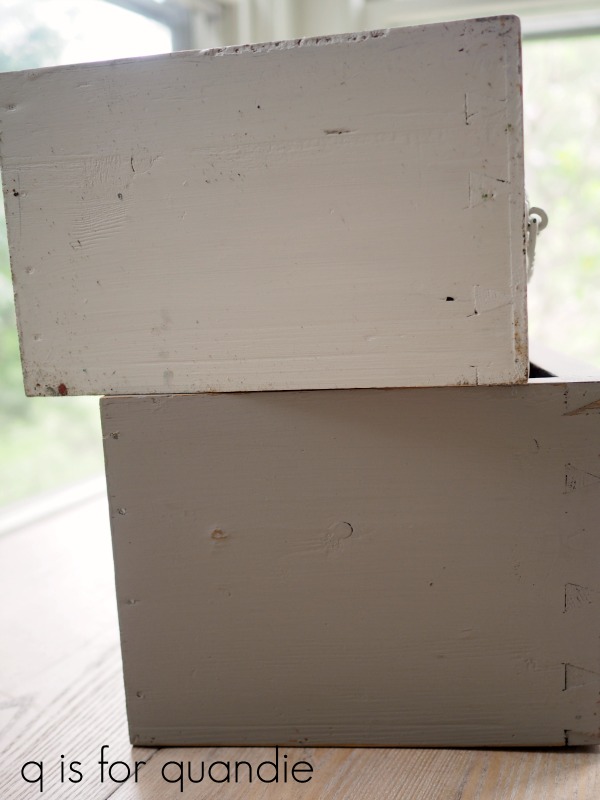
I’ve been storing this one in the carriage house all winter, so it feels good to have it out of there now.  When I first started to work on it, I pulled out the little drawer inside the drop down desk section to find that the previous owners hadn’t emptied it out.

Once again, I was disappointed when I didn’t find a wad of cash or maybe a lost Van Gogh.  Instead I was gifted with Hannah Montana tattoos and some questionable film negatives.  But I did find it slightly magical that the owner of the handmade drivers license and I share the same birthday.  It feels meant to be.

Step one with this piece was to remove that header on the top.  I think this may end up being a controversial approach, but I feel like that colonial sort of look is pretty dated … and not in a good way.  I also removed the fretwork in front of the glass, the faux key hole escutcheons and the drawer pulls (also decidedly colonial in style).  Finally, I removed those very 80’s looking round ball wheels.  I’ll admit, they worked really well … but they looked totally out of place on this piece.

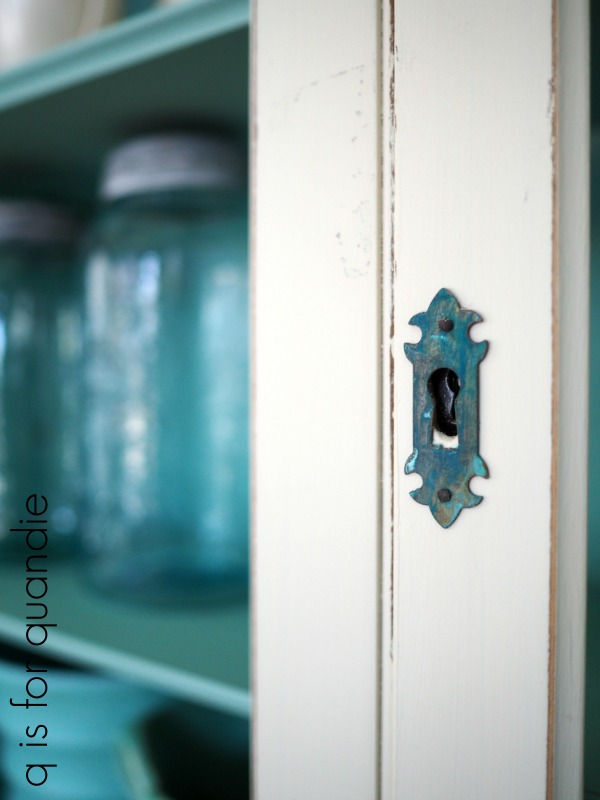
I painted the interior of the piece in Dixie Belle’s Sea Glass, and the exterior in their Drop Cloth.

This is such a pretty combination.

It was seriously putzy to paint the interior of the drop down desk portion using a brush.  But back when I started on this piece it was only in the 30’s outside, so I had to paint inside the house which meant I couldn’t spray it.  If only I had known that it was going to warm up to the 70’s within a week or so.  I may as well have waited just a bit longer to work on this one.

By the way, I’ve totally cheated on these photos by taking them before putting the glass back in those doors.  I always get so much glare from glass doors.  But I will be putting the glass back in before listing it for sale.

Once two coats of Sea Glass were dry, I added a small section from one of the newest re.design with prima transfers called Paris Valley to the little drawer.

The Paris Valley transfer is a collage style mix of various graphics …

Once again, this is one that you could use as is, but I’ll definitely be cutting it up to use various bits and pieces on lots of different projects.  I circled the little bit that I used on that drawer above.

Then I coated it all with Dixie Belle’s flat clear coat.  I chose to use the clear coat rather than my usual wax for more durability on both the writing surface of the drop down desk and the shelves.

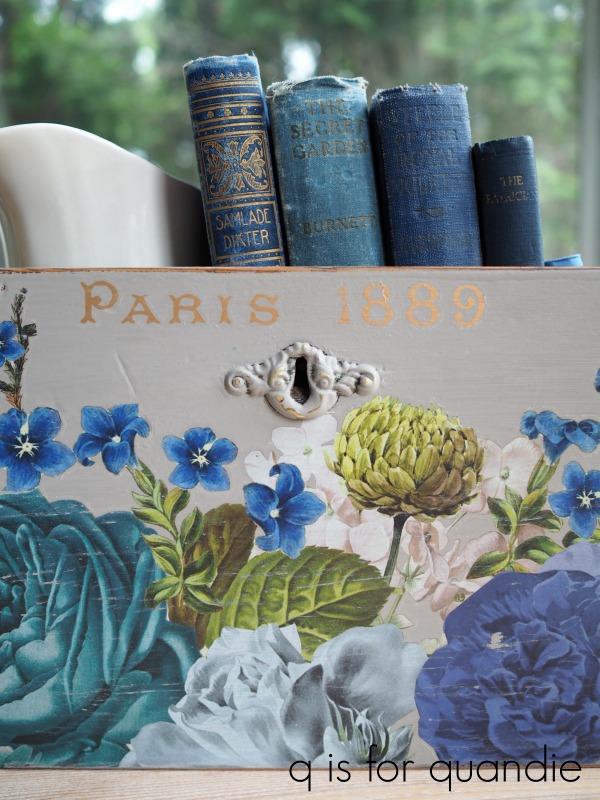
Next I pulled out another of the new Spring 2020 re.design with prima transfers.  This one is called Flower Collector, and I’m fairly sure it’s going to end up being one of my favorites.

It’s another gold transfer, and for this piece I chose to put it over the Drop Cloth for a more subtle look.  These gold transfers also look amazing over dark colors (like this piece).

I’ll point out that I switched up the layout of this transfer, using the bottom section of it on the drop down desk and the rest on the drawers.

That was a much better fit for my piece.  Always keep in mind that you don’t have to use a transfer ‘as is’ out of the package.

Once the transfer was applied, I added a coat of clear wax to the exterior (all of the Drop Cloth parts).

I was planning to put clear glass knobs on the drawers, but then I discovered these knobs in my stash.  I had just the right amount, and they were the perfect color.  I’m pretty sure I bought these at Hobby Lobby, but it was at least a year ago or more.

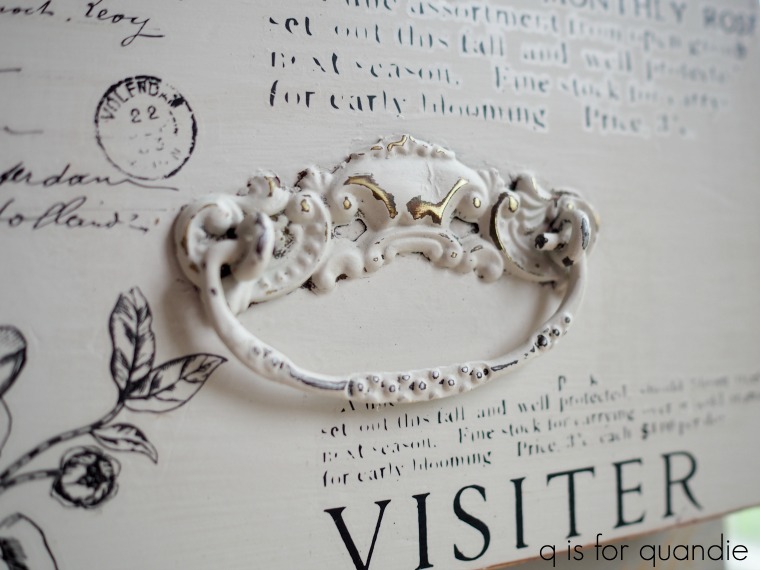
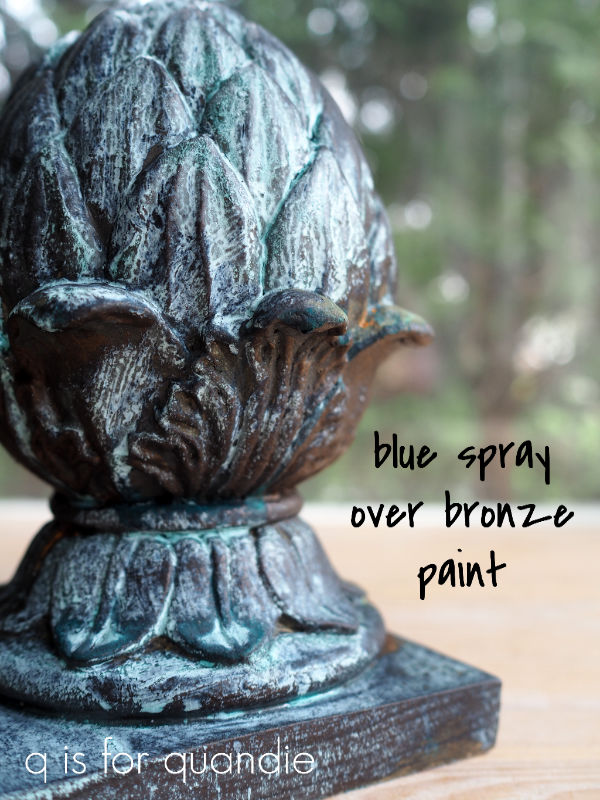
One last little detail to share, I did put the brass key hole escutcheon back on the upper door.  But first I used Dixie Belle’s patina paint in Copper with their blue spray to give it a verdigris sort of finish which worked beautifully with the Sea Glass color.

It feels so good to have this piece finished at last!

I absolutely love how it turned out.  I’m tempted to keep it for my front porch.  If it doesn’t sell right away, I might just have to do that.

So, now I’m curious.  How many of you wish I had left those original colonial elements in place?  And how many of you prefer my slightly modernized version?

As always, thanks to Dixie Belle Paint Co for providing the paint and to re.design with prima for providing the transfers for this project.

If you’re looking for Dixie Belle products you can find them here.

If you’re looking for re.design with prima products you can find local retailers here, or online sources here.

And if you are local and in need of a flower collector’s secretary desk, check out my ‘available for local sale‘ page.  Although our ‘Stay at Home’ order has now been extended another two weeks, I am willing to set up a physically distanced appointment if anyone local is interested in this or any other pieces I have for sale.