a summer porch refresh.

Last Friday I mentioned that we’ve been doing a lot of furniture shuffling around here lately.  So, while we were on a roll, I decided to give the front porch a refresh.

As much as I have loved the look of the wicker chaise lounge on the front porch (and I have to confess it has been out there for over 30 years!), I haven’t found it comfortable for a few years now.

I used to sit there and read in the evening, but my back just won’t tolerate that for long anymore.  So as a result, we never sit out there these days.

So when handyman Ken made another of his fabulous Adirondack chairs for me, I decided to use it in that spot.

They may not look it, but these chairs are super comfortable.

So as much as the chaise looked better out there, the Adirondack is the better choice if we actually want to use the space.  Yep, I’m going function over form for this one.

In case you’re wondering about the paint on the chair, it’s Rust-Oleum spray paint in Heirloom White.  These chairs can be rather tedious to paint (and trust me, I’ve painted many of them, many times), so I took a short cut with the spray paint.  Plus, the 2nd chair that was already out there was also already painted in Heirloom White.

After putting the new chair in place, it occurred to me that it was time for a makeover on the trunk that sits between the chairs.  Here’s how it started out …

I added that stencil way back in 2015 (you can read about that here), but I had grown tired of it.  Plus that original chippy white was just too bright of a white for me.  I like warmer shades of white like my favorite Dixie Belle Drop Cloth, or even the Heirloom White spray paint.

I did first consider painting it black, but I already have a couple of other touches of black out there that tie in to the floor such as the throw pillows that I purchased from H & M several years ago.

And the black cupboard.

Last week I said that I was going to sell it, but after this refresh I’ve decided it needs to stay.

I also considered painting the trunk with straight up Drop Cloth, but in the end I decided to darken it up just a tad so I mixed in a little bit of Dixie Belle’s Dried Sage.  You may remember that I lightened up the Dried Sage with some Drop Cloth when I used it on the checkered floor in my potting shed last summer.

As a sidebar, I am really loving the Dried Sage lately.  You’re going to see another piece painted in this color later this week.

But back to the trunk.

After painting it with my custom mixed color, I added a design from the I.O.D. Melange paint inlay to the front.

Isn’t that pretty?

After sealing the paint inlay with some matte spray sealer, I sanded the trunk well to bring back that chippy, worn look.  I followed that up with a topcoat of Dixie Belle’s Big Mama’s Butta.

I love how it turned out.

What do you think, was this an improvement for the trunk?  And how about the form over function question?

Would you have gone for adding a more comfortable chair that you’d actually use rather than a piece that you thought looked better?  Leave a comment and let me know.

As always, thank you to Dixie Belle Paint Co for providing the Dried Sage paint and Big Mama’s Butta used in this makeover.

it won’t hold water.

I purchased this galvanized bucket at my friend Lisa’s occasional sale.

I was mainly drawn to it because of its unique oval shape.

But I pretty much love old galvanized buckets in general, regardless of shape, and have several myself.

Back in the beginning, let’s call it b.f., ‘before transfers’, I used to stencil on them.

I still have one of those French Market buckets serving as the trashcan in our bathroom.

Sometimes they were painted first, and then stenciled.

And then I discovered transfers.

Most of the buckets I’ve kept have wordy transfers added to them, like this one …

I use them for flower arranging, or for containing a small Christmas tree.

However, it seems that when I leave them unpainted and just add words they don’t sell very quickly.  So perhaps it’s just me that likes them that way?

The painted ones, on the other hand, tend to fly off the shelves.  This one originally just had some wording and it never did sell, so I painted it and added a transfer and it sold quickly …

So I decided to go ahead and paint the oval bucket in Dixie Belle’s Drop Cloth.  Then, rather than adding a transfer, I thought it would be fun to try an I.O.D. paint inlay this time around.

I added a section from the Melange inlay that has three wildflowers in a row, at least I think they are wildflowers.

Wait a minute, upon review, no they are not wildflowers …

That one seems to be a hyacinth, so let’s go with just ‘flowers’.

Some previous owner of this bucket added drainage holes to the bottom so that it could be used as a planter.

So it definitely won’t hold water.

But I added several coats of spray sealer so that it could be potted up with plants and used outside or in.  Wouldn’t it look great filled with herbs?  Or even just simple geraniums?

I went ahead and filled it with whisk brooms for my photo shoot, because, well, why not?

You wouldn’t have to use it for plants.

I’ll be bringing this one into the shop, so we’ll just see how well it sells with a paint job.

What do you think?  Do you prefer the painted buckets over those with just words over the galvanized metal?  Leave a comment and let me know.

a summer garden tour.

Good morning from the garden!

I was so excited when I saw that the St. Anthony Park Garden Tour was taking place this year.  This tour is put together by the St. Anthony Park Garden Club and usually takes place every other year, however, like so many things, it was halted during Covid.  So it has been 4 years since the last tour.

St. Anthony Park is a neighborhood in St. Paul, Minnesota.  I’ve gone to their neighborhood garage sales many times over the years, and the last time I did that was back pre-Covid as well.

The neighborhood was developed in the late 19th century as a streetcar suburb (ie. you could commute to the city via streetcar) for the wealthier residents of Minneapolis/St. Paul (wikipedia).  It’s full of large 100 year old homes and each one is unique (unlike more modern developments).

Last weekend my sister, niece and our friend Annie all joined me for the tour.  There were 11 gardens in total, but I’m just going to share some of the highlights with you.

The first garden we visited was really colorful.

Isn’t that a pretty combination of sedum and heuchera?

The back yard slopes down into a ravine and is filled with flowering plants that are bursting with yellows, reds, oranges and purples.

There is also a little pond that is guarded by a very colorful frog.

In contrast to that fairly wild look, this next garden was somewhat formal and very tidy, and I absolutely loved the house itself.

I’m not normally a fan of the combination of grey and black, but it was certainly working on this place.

I also came away from this house with an awesome idea for making some supports for my peonies.

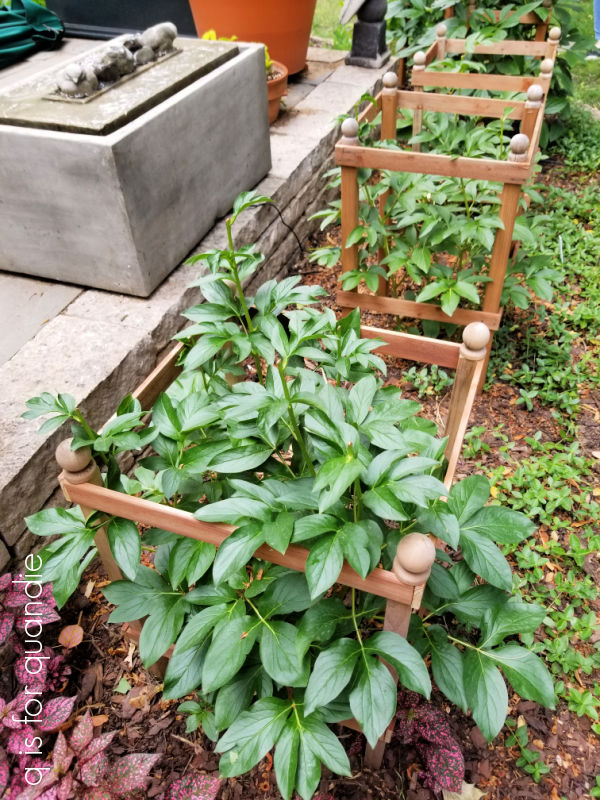
I spent a bit of time this spring searching for attractive peony cages that weren’t too expensive (since I have about 10 peonies), and I came up empty handed.  But these would be fairly simple to make.  They are just furring strips, 2″ x 2″ strips on each corner and 4 wooden finials.  My sister and I are going to attempt to make some of these for our gardens.

The next garden I want to share was the most difficult to get to because it involved heading up this staircase.

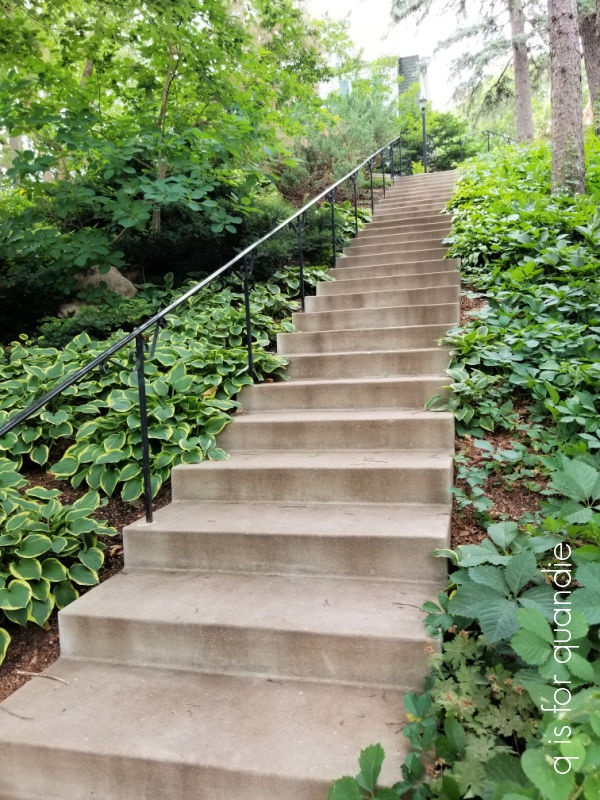
This is the path between the street and the house.  However, there is an alley behind the house and I’m betting that the homeowners barely ever use this staircase, especially not in the winter!

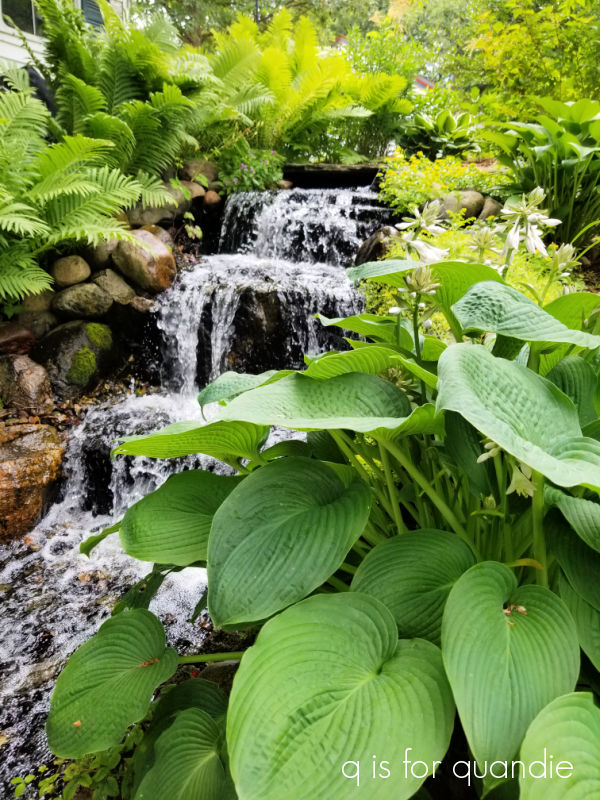
But these home owners definitely took advantage of their sloped location, because here’s what they also have out behind the house.

That stunning waterfall was worth the hike up that staircase.

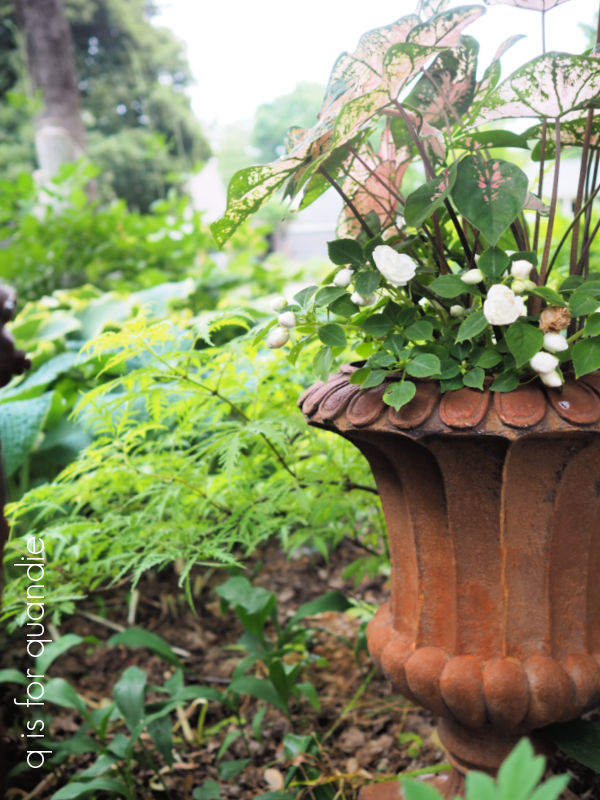
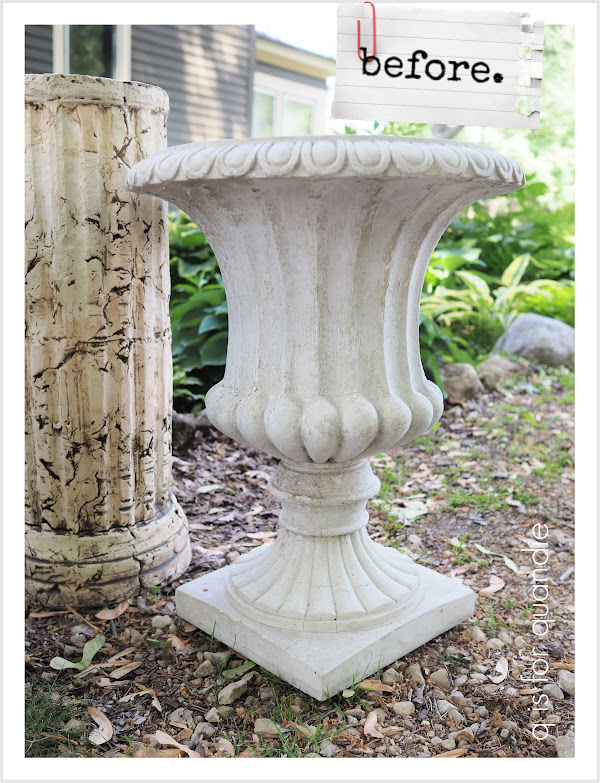
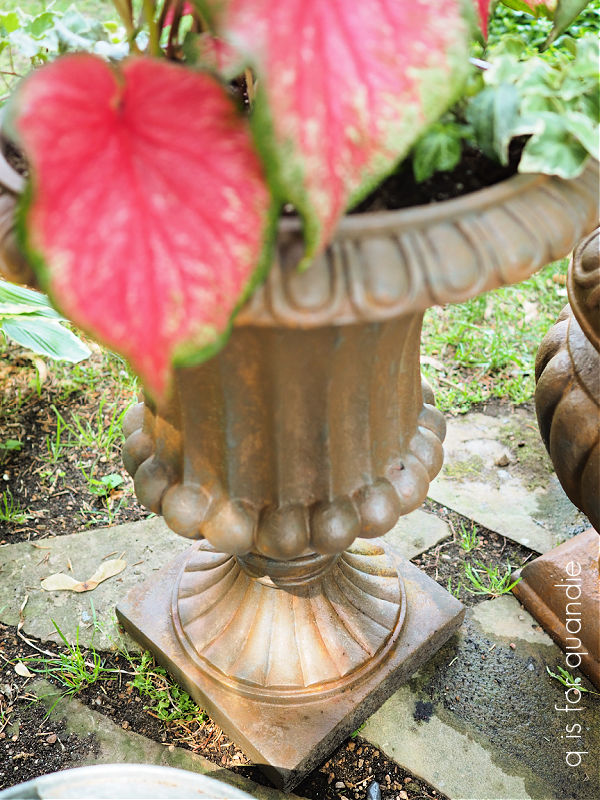
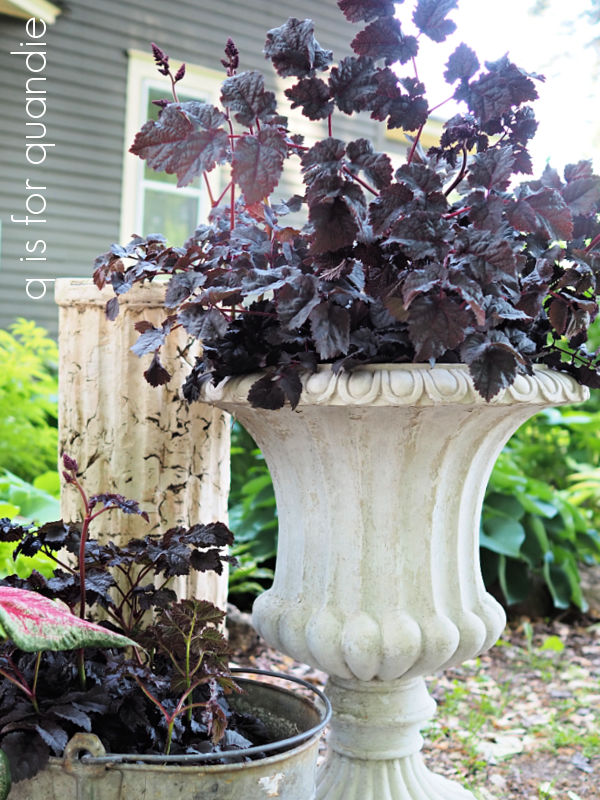
I totally coveted the iron planters in this next garden.

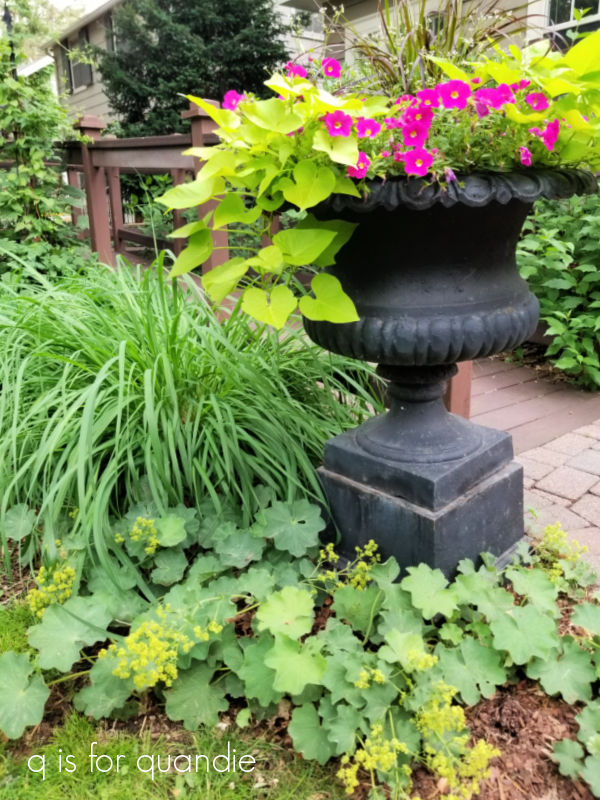
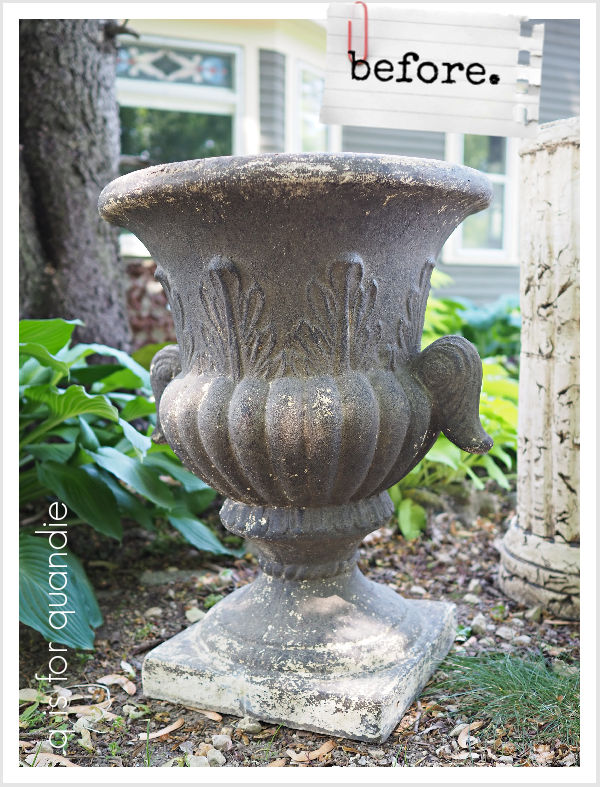
I have to admit that I probably won’t ever have the real thing in my garden, but instead I’ll just stick with my faux rusty urn planters.

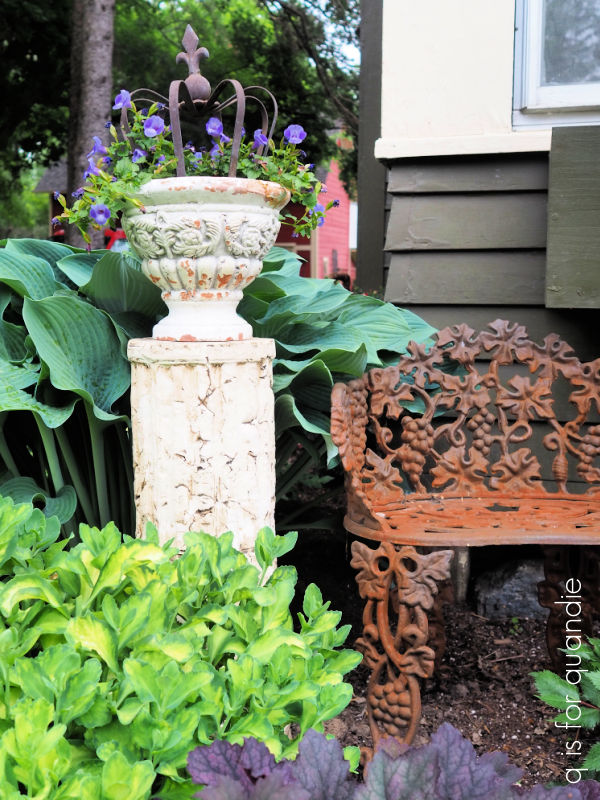
If you’re into a more modern look for your planters, the pair flaking this porch should be right up your alley.

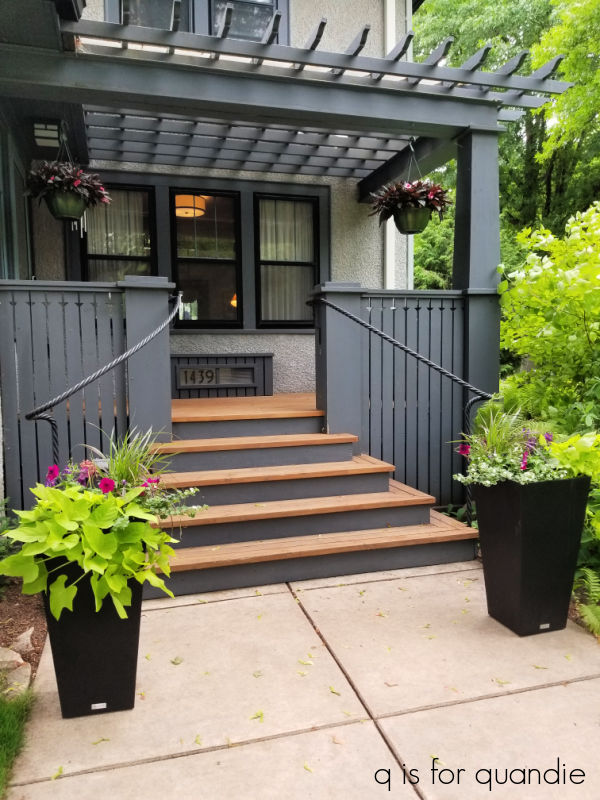
And just take a moment to admire that porch, especially that twisted wrought iron railing on the steps.

One of the gardens had an interesting combination of ground covers planted in a small bed.

It certainly is a pretty combination of creeping jenny, sweet woodruff, ajuga, dianthus and I’m not sure what that plant with the silver foliage in the back is.  It almost felt like this was a spot where they were testing out different ground covers to see how they would do.  It was a fairly small area, and as you can see the plants have totally filled it out.  Now they are probably going to start fighting for space.

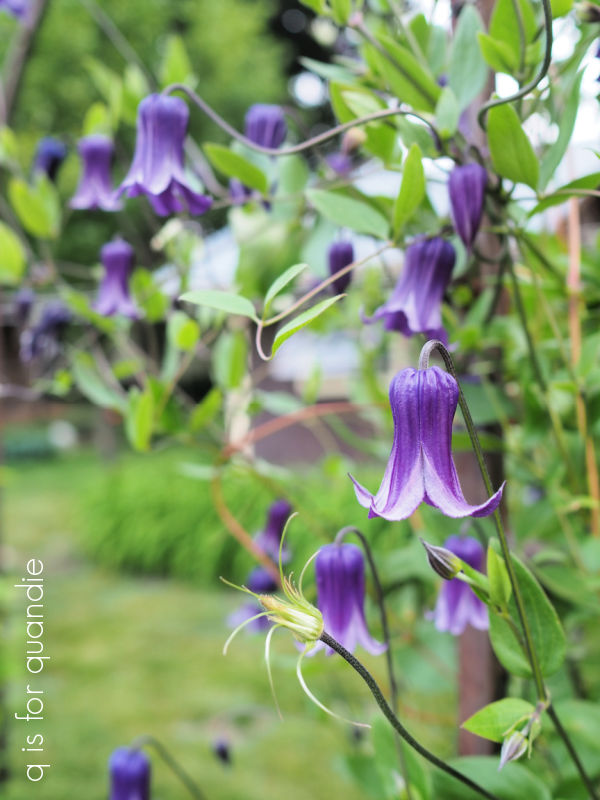
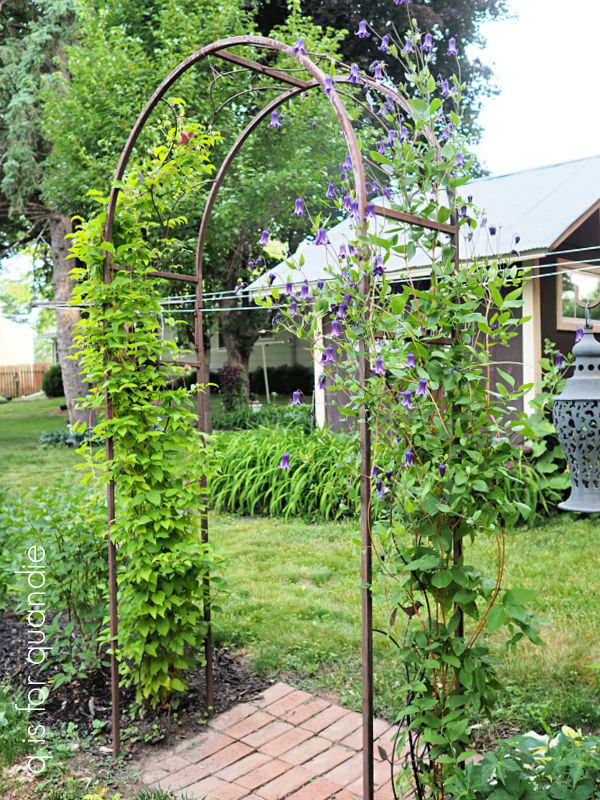
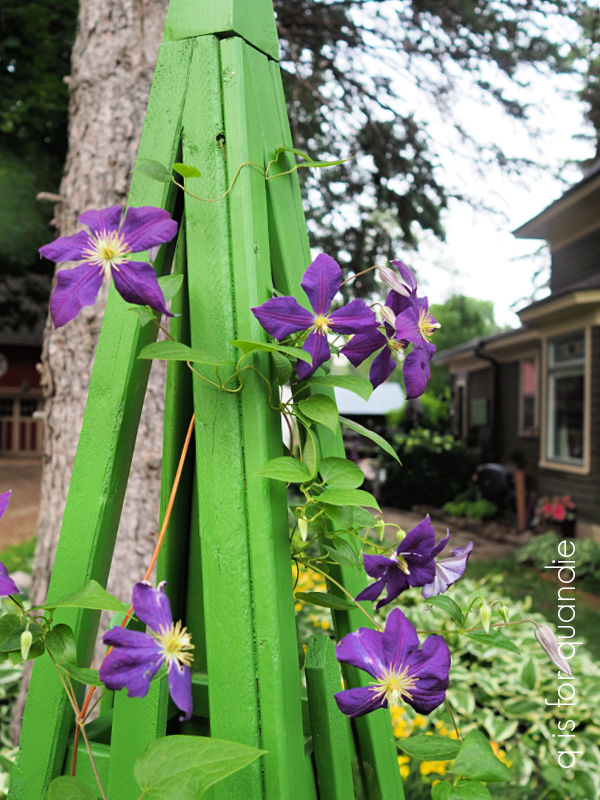
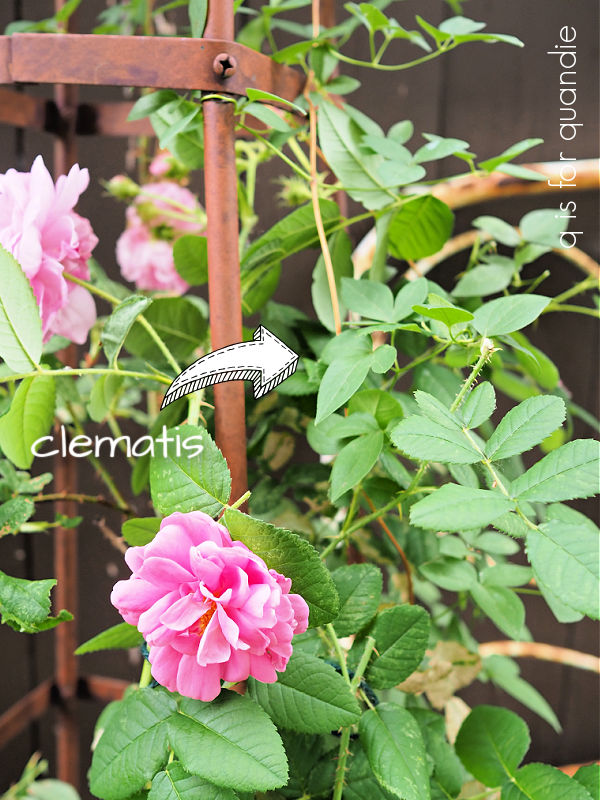
I wanted to be sure and share this clematis with you guys …

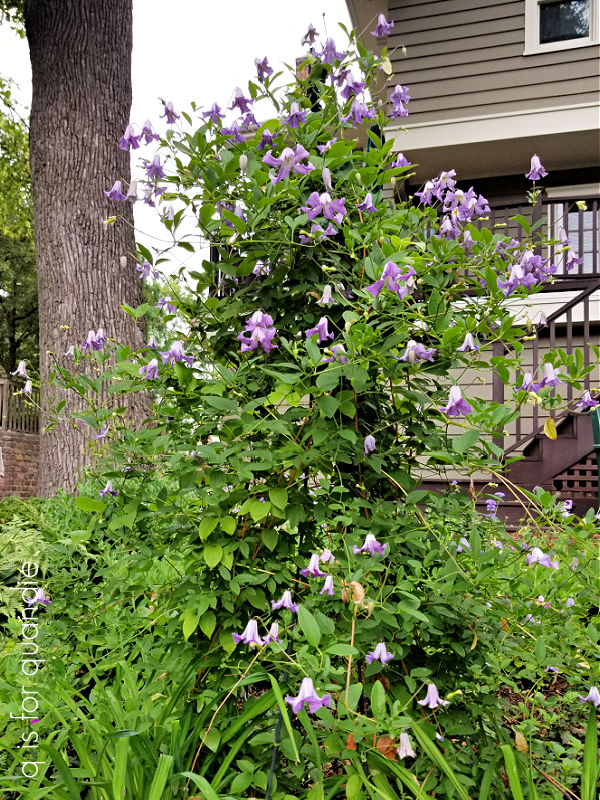
The home owner was fairly sure that this is a Betty Corning.  I just planted this variety in my own garden, and I am hoping it will be as prolific as the Roguchi that I planted last year.  If this one is any example, I think it will be spectacular.

I’ve saved my favorite garden for last.  First, lets just check out the house.

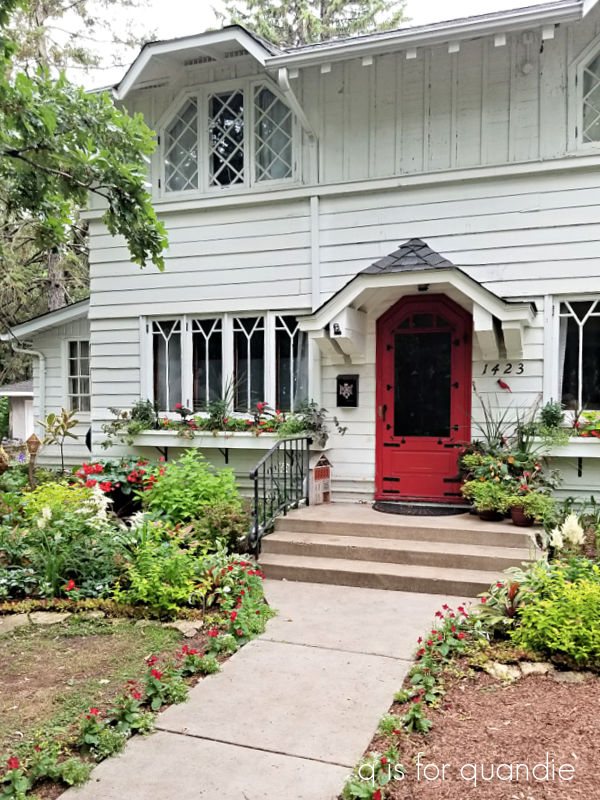
Aren’t those windows fabulous?  See what I mean about all of the houses in this neighborhood being totally unique?

But the real showstopper for me was the sloped front border which is divided in half by the sidewalk.  I chatted with the owner of this garden, Shawna, and she explained that the two sides are meant to be mirror images of each other.

They are filled with shade loving plants chosen for their beautiful foliage colors, textures and shapes.

Shawna also explained that she gardens year ’round, which is quite the feat in Minnesota.  She brings many of her rex begonias and other plants indoors for winter.  She also told me that her indoor plant real estate is limited, so she also just takes cuttings from many of her plants and propagates new plants for the next year that way.

You can certainly see why she wants to save them.

In addition to these beautiful plants, she also had some really lovely copper garden ornaments scattered here and there.

And isn’t that carpet of sedum alongside her dry creek bed just fantastic?  Let me get you a little closer to that …

We all really enjoyed the tour, it’s always inspiring to see what other gardeners are doing.  I’ve been keeping an eye out for other garden tour possibilities in my area, there used to be lots of them (again, pre-Covid) and so far I haven’t seen too many coming back.  If any of you locals know of any, please leave a comment and let me know!

But before I let you go, I want to share what I’m calling the ‘plant of the day’.

That honor goes to the Aralia cordata ‘Sun King‘.

Ironically, somehow I didn’t manage to get a decent photo of one, even though I would say that almost every garden we toured had one … well, more than one actually.  They were everywhere.  I borrowed this photo from the internet so that you can get a good look at this plant.

I had seen it more than once recently on gardening YouTube videos (sorry, can’t remember which ones exactly), so when I saw them in these gardens they really jumped out at me.

The ‘Sun King‘ was the 2020 perennial of the year, and I can see why.  It provides a vibrant pop of chartreuse in a shady garden.  It grows 4′ to 6’ tall and wide.  It dies back to the ground in winter, but is fast growing and fills out quickly in the spring.  It’s hardy in zones 3 to 9, so can easily handle my zone 4b.  It’s also deer resistant.

One of the gardeners I spoke with mentioned that the color is definitely brighter if it gets some sun, but it will grow in full shade.

So now I’m off to figure out the best spot in my garden for the one I found at Abrahamson’s Nurseries in St. Croix Falls (but if you locals are looking for one too, don’t count on them, my neighbor and I bought the last two that they had!).

Do you have garden tours where you are?  Leave a comment and let me know!

a virtual garage sale.

I’m doing something a little bit different today!

I’m having a bit of a virtual garage sale.

We’ve been doing some re-arranging here at our house.  It’s one of those chain reaction sort of things.  We’re turning the guest room into a studio for Mr. Q, and he’s gotten a bigger table for that space, thus freeing up his old desk to become my desk.  But a bigger desk for me means getting rid of my small farm table desk, and also moving the rooster cupboard out to the porch and thus getting rid of the black cupboard on the porch.  You get the idea, things are being shuffled around and as a result I have several pieces of furniture to sell at garage sale prices.

After listing a few of them on Facebook Marketplace, and then getting multiple spam messages about them (argh!  so annoying!), I decided to try a blog post.

Now, be advised, I’m not willing to ship any of my items, so you have to be within driving distance of St. Paul, MN to purchase any of them.  But maybe some of my local readers will be interested.

First up, the former guest room twin Jenny Lind headboard and bed frame.

The ancient mattress and box spring have already been picked up by my trash hauler, I’m just selling the headboard and the metal bed frame with wheels that I used with it.

All for $45, the headboard is 41.5″ wide by 40″ tall.

Next up, the wicker chaise lounge from my front porch.  It is 41.5″ tall, 64″ long and 40″ wide.

I’ve decided to replace that with another of Ken’s Adirondack chairs, so it has to go.  The cushion is slip covered in a basic beige linen, and the cover can be removed and washed, which is nice.  This is for sale at the same $45 price tag (throw pillows not included).

I’m considering spray painting it black and then asking a little more for it, but if you’re interested in it ‘as is’ be sure to leave a comment (or email me at qisforquandie@gmail.com) a.s.a.p. before I get out the spray paint!

I’m also selling the black cupboard from the front porch.

It’s an antique piece that I painted black a long time ago.  I added the Beautiful Botanist transfer to the inside back in 2019.

You can read all about that here.

I’m letting this one go for $195.  It is 79″ tall x 16.5″ deep x 38″ wide.

I also still have this square farmhouse style table for sale at $40.

The base is painted in Dixie Belle’s Kudzu.  These photos make it look just a bit brighter than it really is.  The top is finished with white wax.

It is 31″ tall and 34″ x 39″ wide, so not quite exactly square.

I added some casters to the feet after taking these photos, so this would be a great piece to use in a craft room, sewing room or studio since it can easily be moved around.

If any of you locals are interested in these pieces, leave a comment or email me at qisforquandie@gmail.com!

buyer’s remorse.

Last Friday I headed out to a neighborhood sale that was fairly new to me, with a companion who was totally new to me, Karen, the painter of the oars.  I think I’m going to call her opK, or ‘oar painting Karen’, to distinguish her from nnK (new neighbor Karen).

We headed out to the city wide sales in Fridley, MN.  I’d been to the Fridley sales before, but it was a long time ago … probably before I started blogging, so at least a decade or more.  Certainly long enough ago that I felt like it was new.  Fridley is one of the older Minneapolis burbs with many of the neighborhoods having a distinctly mid-century, or post-WWII feel.  There is also a smattering of really nice houses along the Mississippi River, which flows through Fridley, and pockets of newer homes here and there.

We did a pretty good job filling up opK’s SUV.

There are a few smaller items not in the photo above, which I’ll share in a minute.

But let’s start with those chairs.  To be honest, I’m having a bit of buyer’s remorse over those chairs.  They certainly aren’t my style at all, and I have no idea if there will be a market for selling a pair of modern looking chairs.

But they were only $2 each.  So in the end, I’ll only be out $4 total if I have to donate them to the Goodwill when they don’t sell.  Well, technically it will be $5.75 because I also purchased some new batting for 75¢ and some fabric to cover the seats with for $1.

I’ll need to do a bit of gluing on the chairs, but I’m not going to paint them, so that should be a fairly quick makeover.

And speaking of the fabric, I also purchased two other pieces of fabric for $1 each.

I’m going to try the one on the top of the pile with all of the bugs on that green wicker chair that I brought home last week.

The yardage on the bottom of the pile is pretty funky, opK and I both thought it might be fun on that pair of chairs.

But as we looked closer we realized it was sort of a Halloween fabric.

As we were studying it, the seller asked if we were fans of ‘the ghastlies’.  Um, the what now?  Apparently this is from a line of fabric by Alexander Henry called The Ghastlies.

It really is kind of fun.  I don’t know, would there be a market for a pair of chairs with this fabric on them?  Maybe in the fall?  What are your thoughts on that?

I grabbed the painting because I absolutely love the colors in it, and I liked its sort of mid-mod vibe too.  It’s a genuine oil painting, but I was totally unable to read the signature so I have no idea if it’s at all valuable.  I’m guessing not, since it is very cheaply framed.

And I really don’t love that frame.  I could paint it.  Or I could just take it off.

Hmmmm, not really sure about that either.

How about a few finds that I am sure about?

This ironstone pitcher and vintage cookbook were both a steal.

And this vintage lunchbox will be a fun makeover.

I purchased a pair of these iron crosses too.

And speaking of pairs, I purchased three pairs of vintage pillowcases.

You can always tell when these have been tucked away in someone’s linen closet for 50 years and never even used.  They are often yellowed, but not at all worn looking.  A little soaking in some OxyClean, followed by a day in the sun on the clothesline, will totally take care of that yellowing.

I tend to hang onto the all white versions because I love sleeping on these, and they work with our bedroom décor.

There is something about the quality and weight of the fabric that is so much better than modern linens.

And for that reason, I’m awarding them with ‘find of the day’ status.

Plus, believe it or not, these were only $2 per pair.  Where else can you get beautifully hand-worked pillowcases for $1 each?!

In the end, I may have a bit of buyer’s remorse over those chairs, but it is outweighed by my other fabulous finds.  But tell me, have you ever had buyers remorse over a garage sale purchase?  Leave a comment and let me know.

a french country rooster.

Remember this little cabinet that I found at the Linden Hills garage sales?

It’s just a simple, rustic sort of wooden cabinet that once had a door (you can see where the hinges were).

I thought it would be a fun little makeover.

I started by simply painting it in my usual Dixie Belle Drop Cloth.  Then I added the rooster from the I.O.D. Melange paint inlay (see this link for full instructions on applying a paint inlay).

He was an almost perfect fit for the back of the cupboard so it seemed meant to be.

Once the inlay was applied, I sprayed the interior of the cabinet with some Rust-Oleum matte clear spray to seal it.  Then I added some random French wording from the I.O.D. Label Ephemera transfer to the edges of the cabinet.

Actually, full disclosure, I first added the “FRESH FARM TO TABLE’ wording from the old Delicious Menu transfer from redesign with prima to the edges.  But I really didn’t like the way it looked.  The font was too harsh and just didn’t jibe with the rooster.  I don’t know, he really kind of has a French country vibe don’t you think?

Not to speak ill of the Delicious Menu transfer, because I have used it successfully on a number of pieces, like this stool

and this coffee pot …

It just wasn’t working on this piece, so I sanded it off, repainted the edge with some more Drop Cloth, and then added the French wording.

Finally I sanded the edges to distress and then applied a coat of clear wax.

You’re probably thinking that once the cabinet is full you won’t be able to see the rooster, and sure, that’s true if you fill it to bursting.

But you could artfully arrange a few favorite pieces in a way that lets the rooster still shine.

I added a couple of small books, a couple of my favorite little McCoy planters …

and some old flower frogs.

You could hang this cupboard on the wall, or place it on a tabletop or shelf.  I painted the back of it, so it doesn’t have to be up against a wall.  It’s perfect for displaying a small non-collection!

I think a little paint, a paint inlay and a few scraps of transfer gave this cupboard a fabulous new French country look.

What do you think?  Leave a comment and let me know.

This little cupboard is for sale, check out my ‘available for local sale‘ page for more details.


don’t get attached.

Good morning from the garden!

Since I seem to have eight of them, I have to say that clematis is one of my favorite plants.  I have several of them blooming right now so I thought it would be a good time to post about them.

There are so many different varieties,  allaboutgardening.com says over 350!

There are different flower sizes from huge and showy to tiny and delicate.  And different flower shapes from star shaped to bell shaped.  They come in plenty of different colors; whites, reds, purples, blues, yellows and pinks.  Apparently there is even one called ‘Orange Peel’ that has flowers that start out yellow but gradually darken to orange.  You can find different varieties that bloom at all different times during the season from early to late.  And even some that bloom all summer long, like my Roguchi.

I planted this last year and found that it bloomed continuously from the time I planted it in late May to September.  It has come back strong this year and is already over the top of my arbor (on the right side).

The clematis on the left side of the arbor is one whose name has been lost to time.  It blooms a bit later than some of my other ones and although it has lots of buds, they aren’t quite open yet.  But here’s a photo of how it looked last year when it bloomed.

One thing to know about clematis if you want to grow them successfully are that there are three pruning groups.

Group 1 are the spring bloomers.  They should be pruned back immediately after blooming.  They bloom on last year’s growth, so if you prune them in the spring you won’t get any flowers that year.  Luckily I don’t have any of clematis from this group because the rabbits eat my clematis to as high as they can reach in the winter.  So, in a sense, my clematis is all ‘self-pruning’ … or rabbit pruned anyway.

Group 2 are the mid-season hybrid bloomers with large flowers.  You should avoid heavily pruning this group, only pruning out the weak or dead stems in late winter or early spring.

Group 3 are the ‘late’ bloomers and I have quite a few of them.  They call them late, but several of my group 3 clematis are blooming now, and I wouldn’t call the end of June ‘late’.  The beauty of this group is that they can be cut back hard in the spring (or over the winter, by rabbits) and they will flush back with vigorous growth and plenty of flowers.

Unfortunately, I never kept track of the name of that one either, but it’s the prettiest deep violet color and it’s filled with flowers right now.

I have most of my clematis growing up structures like an arbor or garden obelisk.  Last year I planted a Jackmanii  on the pyramid that Ken made (and I painted with my English racing green earlier this spring).

I think this variety is one of the most common, you see them everywhere.  It has been around since its introduction in 1862.  I’m hoping that one day it will entirely cover that pyramid with flowers, but it’s just a bit sparse yet this year.

You can also use a shrub, or even a tree, as a ‘trellis’ of sorts for clematis.  My neighbors Ken & Arlene have one growing over a tree stump.

Many people also combine them with climbing roses.  I have a shrub rose that I pretend is a climbing rose.  The rose itself won’t attach to a structure, but I let the canes grow long and tie it onto an obelisk.  Last summer I planted a Huldine clematis to intertwine with it

So far the Huldine hasn’t bloomed, and I don’t see any buds on it.  I’m hoping to see it bloom later this summer though.

I have what I think is a variety called The President on a trellis right outside our back window.

It’s not blooming all that well this year, which would make sense since The President is in pruning group 2 and shouldn’t be heavily pruned.  But of course, mine was rabbit pruned right down to the ground along with all of my other clematis.

A few weeks ago I planted a Betting Corning clematis next to it.  It hasn’t bloomed yet, but it’s another bell shaped clematis like the Roguchi.

You’ll often hear that clematis like to have their feet in the shade and their head in the sun, and many of us planted lower growing plants around the base of them to ‘shade’ the base of the plants.  But really, what they want is moist soil.  So they don’t have to be shaded, but it’s a good idea to mulch around the base of the plant well, and also to keep it watered.

I think my biggest piece of advice when it comes to clematis is to not get too attached.  I’ve had more than one that is huge and beautifully covered with blooms one year, and then just simply doesn’t come back the next.

For example, this gorgeous clematis used to grow on that pyramid from Ken …

It was there for years, and then one spring … nothing.

I once had a spectacular white clematis growing on the side of the carriage house.  It was huge, and absolutely covered in big white flowers every year.  Until one year, it just never came back.  So disappointing!

Theoretically a clematis can live upwards of 50 years, so perhaps it’s just our harsh Minnesota winters that sometimes do them in.  Or maybe it’s those pruning rabbits!

I guess in the end, losing one just provides the opportunity to try a new variety next time, right?

How about you?  Do you have a favorite clematis?  Or do you have rabbits that provide a free winter pruning on yours?  Leave a comment and let me know.

half fancy.

My garage sale hauls started out with a bang (and ended with a bit of a bust) last weekend. On Friday I went to my friend Lisa’s occasional sale, and then stopped off at Lowe’s on the way home.

OK, to be fair, Lisa’s sale is way too nice to be called a garage sale, and Lowe’s doesn’t really count at all.  But I did come home with some fantastic things at prices halfway between ‘garage sale’ and ‘fancy boutique’ at Lisa’s, and also some fun plants from Lowe’s that I wanted to share with you guys.

First up, I purchased a couple of plastic urn planters, a concrete pillar and an oval shaped galvanized bucket at Lisa’s sale.  I’ve already used the Dixie Belle patina paint on both of the urn planters to give them a rusty look.  I’m listing one for sale here on the blog, while making space for the other in my own garden.

Lately I’ve gotten really fond of placing planters like this right in the garden bed.

They are great for adding instant height where needed.  They also can be moved around to fill in a hole where a perennial has died back, where you’re waiting for a slower growing plant to fill in, or where you want a pop of color from annuals but don’t want to plant them in the ground.  The nice thing about these plastic pots is that they are lightweight and pretty easy to move around, even when filled with soil and plants.  And in my opinion, they totally pass for the real thing with the patina paint.

I use the Iron patina paint with the green spray to get my rusty results (the full process can be found in this post).  One thing to keep in mind is that the rust takes some time to develop, it’s not instantaneous.  I just finished rustifying these pots yesterday, so keep in mind that they will continue to get rustier.  But I thought you’d still like to see my results.

Here’s the first pot, before.

I have to say, it looks like legit concrete in the photo, but it’s plastic and had a lot of flaking paint.  You’ll have to trust me on that.

And here it is after …

It’s starting to show some good rust.

Here is pot number two, ‘before’ …

And here it is with it’s new rusty finish.

If any of you locals are interested, be sure to check my ‘available for local sale‘ page for that one.

  I’m also planning a paint treatment for the galvanized bucket that came from Lisa’s sale, stay tuned for that.

As for the pillar in the back of my ‘haul’ photo, I left that ‘as is’ and put it in the garden.

You might recognize that spot right behind my Chelsea chopped sedum.

As for Lowe’s, well, although it’s obviously not a garage sale of any kind, I just had to share the gorgeous plants that I found there.  First up is an astilbe from Proven Winners called Dark Side of the Moon.

Isn’t that dark foliage fantastic?  I have to admit, I don’t even know what the flowers on this one are supposed to look like.  I’m planting it just for the foliage color.  I’m hoping to have more success with this plant than I did with the heuchera that I planted for its foliage.  Fingers crossed.

I also picked up three of the Proven Winners Heart to Heart caladium in Tickle me Pink.

You know I just can’t seem to resist caladium, even though we really don’t have the best climate for it.  They perform best if the nighttime temps don’t fall below 60°.  A week or so ago we were still having temps in the 50’s at night, and even got down to the 40’s a couple of times.  It’s great for sleeping with the windows open, but not so great for caladium.

Also, caladium are rather pricey annuals.  I purchased a couple of them earlier in the year for just under $20 each, but these from Lowe’s were only $10.98.  A bargain for a caladium!  I made an unsuccessful attempt to overwinter caladium bulbs last year, so I was happy to find some selling at a reasonable price.  I have to say that I was really impressed with both the quality and the price of the perennials at the Stillwater Lowe’s.

And here are those caladium in my new rusty urn, plus another shorter one that I rusty-ed up last year.

On Saturday, my sister, niece and I headed out to check out a neighborhood sale that was new to me, the NEighbors Sale Days in Northeast Minneapolis.  There were several neighborhoods participating, so it looked like it could be promising.

I have to admit, that part of Minneapolis can be a bit of a mixed bag.  There are areas that are filled with fabulous mid-century modern homes with lovely gardens, and areas that are a bit sketchy to be honest.  It also includes the Arts District, which is filled with artist studios and lots of trendy eateries.

The garage sales were really hit or miss … but mostly a miss.  My sister purchased some plants, and my sole purchase was this …

Yep, just one simple wooden recipe box.  It will go in the stash and be good for a winter project.

We called it quits early after not finding much and decided to drown our sorrows in a pitcher of mimosa’s.

We did a bit of googling and ended up finding a place called Half Fancy that was only a few blocks away from where we were.

Somehow, Half Fancy seemed like the perfect way to describe the neighborhood … and maybe us.  Although to be honest, we might be more like only 1/4 fancy.

I ordered the purple hash which was made from red potatoes, braised red cabbage, onions and carrots and I added a scrambled egg on top.

Delicious!

As we were finishing up with our brunch I got a text from my friend Sue who suggested we head to some sales in White Bear Lake.  So on the way home we stopped there and I picked up another piece of furniture.

Seriously, I need to get going on some of this furniture I’m bringing home.  The summer is getting away from me!

Last, but not least, I also brought home this child sized vintage wicker chair.

You know I can’t resist smaller than normal sized anything.  It seemed like the best option for find of the day, but really, that status should probably go to the mimosas!  Or maybe those rusty pots!  Or even the plants.  I don’t know, what do you think?

up a creek.

Remember the oars that I found at the MacGrove garage sales?

Well, if you read the comments on my blog posts, you may have noticed that a neighbor of mine mentioned that she’d be willing to trade me some toolboxes for the oars.

To be honest, I wasn’t really sure what I was going to do with all of those oars.  I just couldn’t pass them up at only $2 each and I figured I’d come up with something.

But would I rather have some toolboxes?  Yes I would!

So I loaded up the oars and headed over to Karen’s house (not nnK, my neighbor across the street, another Karen, I may have to start calling her onK, or ‘other neighbor Karen’).

Turns out, this was an excellent decision.  As it happens, Karen is a bit of an oar (or paddle) artist.

The one shown above is still in progress, but isn’t that a cool design?

Karen does some very precise work, and she starts by drawing out her pattern on paper.

Then she even tries out her color selections on paper before painting the actual paddle.

Such a great way to make sure your colors are going to work together.

I really like the abstract fish design that she’s adding to this one …

As you can see in the upper right of that photo, Karen uses regular ol’ latex paint.  She gets the sample size jars and has them mixed up in whatever colors she wants to use.  It’s pretty cost effective, and she doesn’t need much of each color of paint.

Here’s another design that she has just started working on.

I don’t believe she ever does the same design more than once.

She created the Canadian flag version below for her husband who is originally from Canada.

Karen displays a number of her paddles around the perimeter of her sun room (which happens to have really cool wood clad walls and a corrugated metal ceiling).

I think it’s fair to say that Karen will never be up a creek without a paddle!

I’m so glad that the oars went to someone who is going to do something like this with them.  I would never have come up with anything as special for them.

Unfortunately, Karen doesn’t have any sort of social media presence so I can’t send you anywhere to look at her work.  But I’m sure she’ll be reading this blog post so be sure to leave a comment and let her know what you think of her gorgeous paddles and oars!

stretching your transfers.

I’m sure that many of you saw that I.O.D. came out with a new summer release recently.  It included a couple of really pretty transfers.  Even though I’m trying not to buy new transfers, and instead use up the ones that I have, I just couldn’t resist this one called Elysium.

This transfer costs around $30 (plus shipping in most cases), so adding it to a smaller item, like a toolbox for example, that I am planning to sell for less than $50 doesn’t seem like a smart plan.

But I figured I could break it up and get at least 4 smaller projects out of just this one transfer, and suddenly the cost seems a lot more realistic.

So far I’ve used it on two pieces, so I thought I’d share those together today.

First up is the rustic box that’s underneath the wood tote in this photo …

It may once have looked pretty cool with that paper label on the front, but there wasn’t enough left of the label to salvage.  So I cleaned the box first, then sanded off most of that label.  As I was working with the box, I realized that it was pretty much falling apart.  So I did a little gluing and nailing too.

Finally it was ready for paint.  I first painted the interior in Dixie Belle’s Kudzu.

Other than paint, I left the inside quite plain.

I kept the pretty stuff on the outside.

After painting the exterior of the box in Dixie Belle’s Drop Cloth and sanding it well to distress the edges, I added just one sheet of the Elysium transfer to the top (this transfer comes in 4 pieces).

One thing to note with this transfer is that there is some typography in the background.  It’s subtle, but it’s there.  So you want to be careful to not place it with the words upside down.

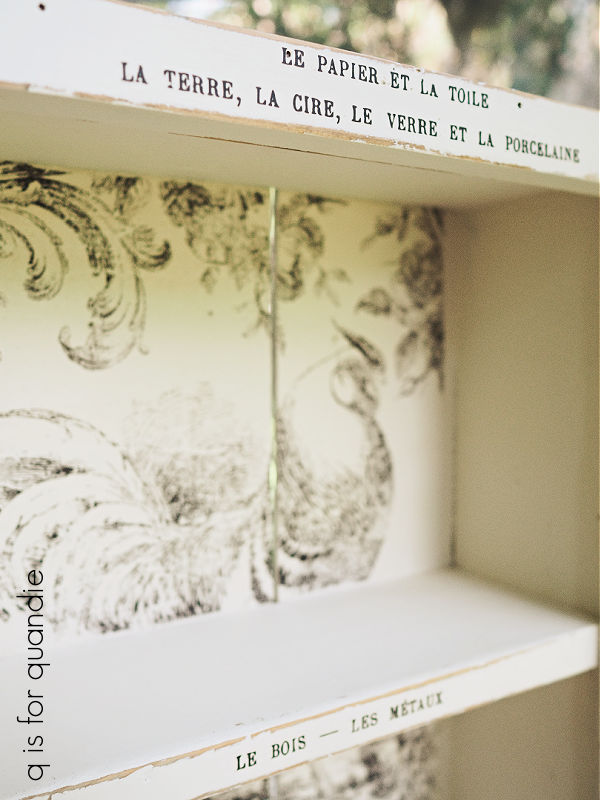
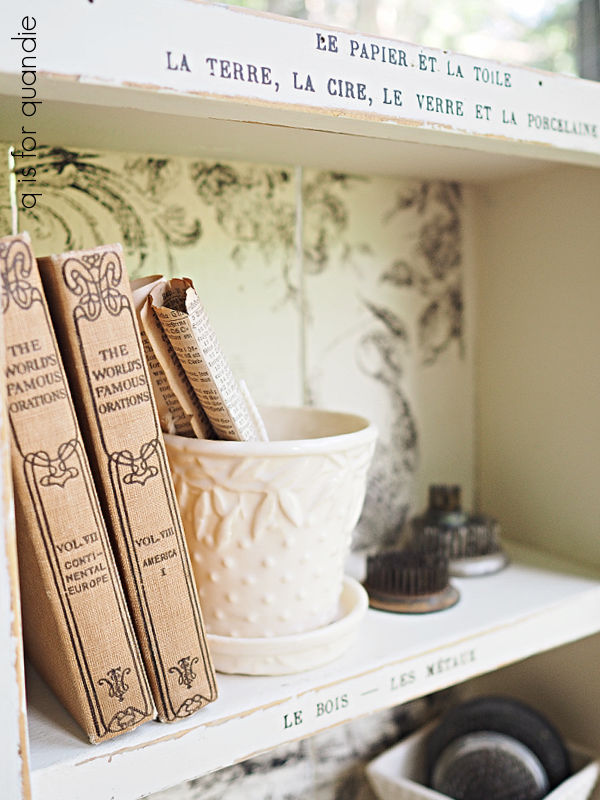
 Next I layered on some wording from the I.O.D. Label Ephemera transfer.

Once I had those in place, I decided that the box needed some rustic hardware, so I added this old rusty handle that I had in my stash.

And voila, a fun box that would be perfect for housing your stash of Jeanne d’Arc Living magazines (or any sort of magazine really).

The 2nd project using just one sheet of the Elysium transfer is this tackle box.

I picked this out of a ‘free’ pile on the curb in my neighborhood.  Mr. Q and I were passing by on our daily walk and there it was, so I grabbed it.

It didn’t look too terrible on the outside, but the inside was a gunky mess.

I actually ended up discarding the tray because I didn’t think it was worth the effort to save.  But for the rest of the interior I first soaked it in soapy water and then scraped off as much gunk as I could.  Then once dry, I sanded it down until it was mostly smooth.

Then I applied a coat of Dixie Belle’s B.O.S.S. to prevent any kind of bleed thru problems in the future.  I followed that up with two coats of DB’s Holy Guacamole.

Then I sealed it with two coats of DB’s flat clear coat.  My main goal here is to make the inside of the box suitable for use, whether that use is containing art supplies, storing old photos or holding your makeup.

I painted the outside in two coats of Drop Cloth, and then I added the Elysium transfer.

Once I had the floral in place, I again added some wording from the I.O.D. Label Ephemera transfer to the top.

With this section of the transfer, it would be much more apparent if the background typography was upside down.

So there you go, two projects down and I still have two more sections of the transfer to use on a couple more things.

Both of these items are for sale, so be sure to check my ‘available for local sale‘ page for more details if interested.

As always, thank you to Dixie Belle Paint Co for supplying their products used in these makeovers.