the mystery cabinet.

Don’t you just love a good mystery?  Here is a furniture mystery for you.

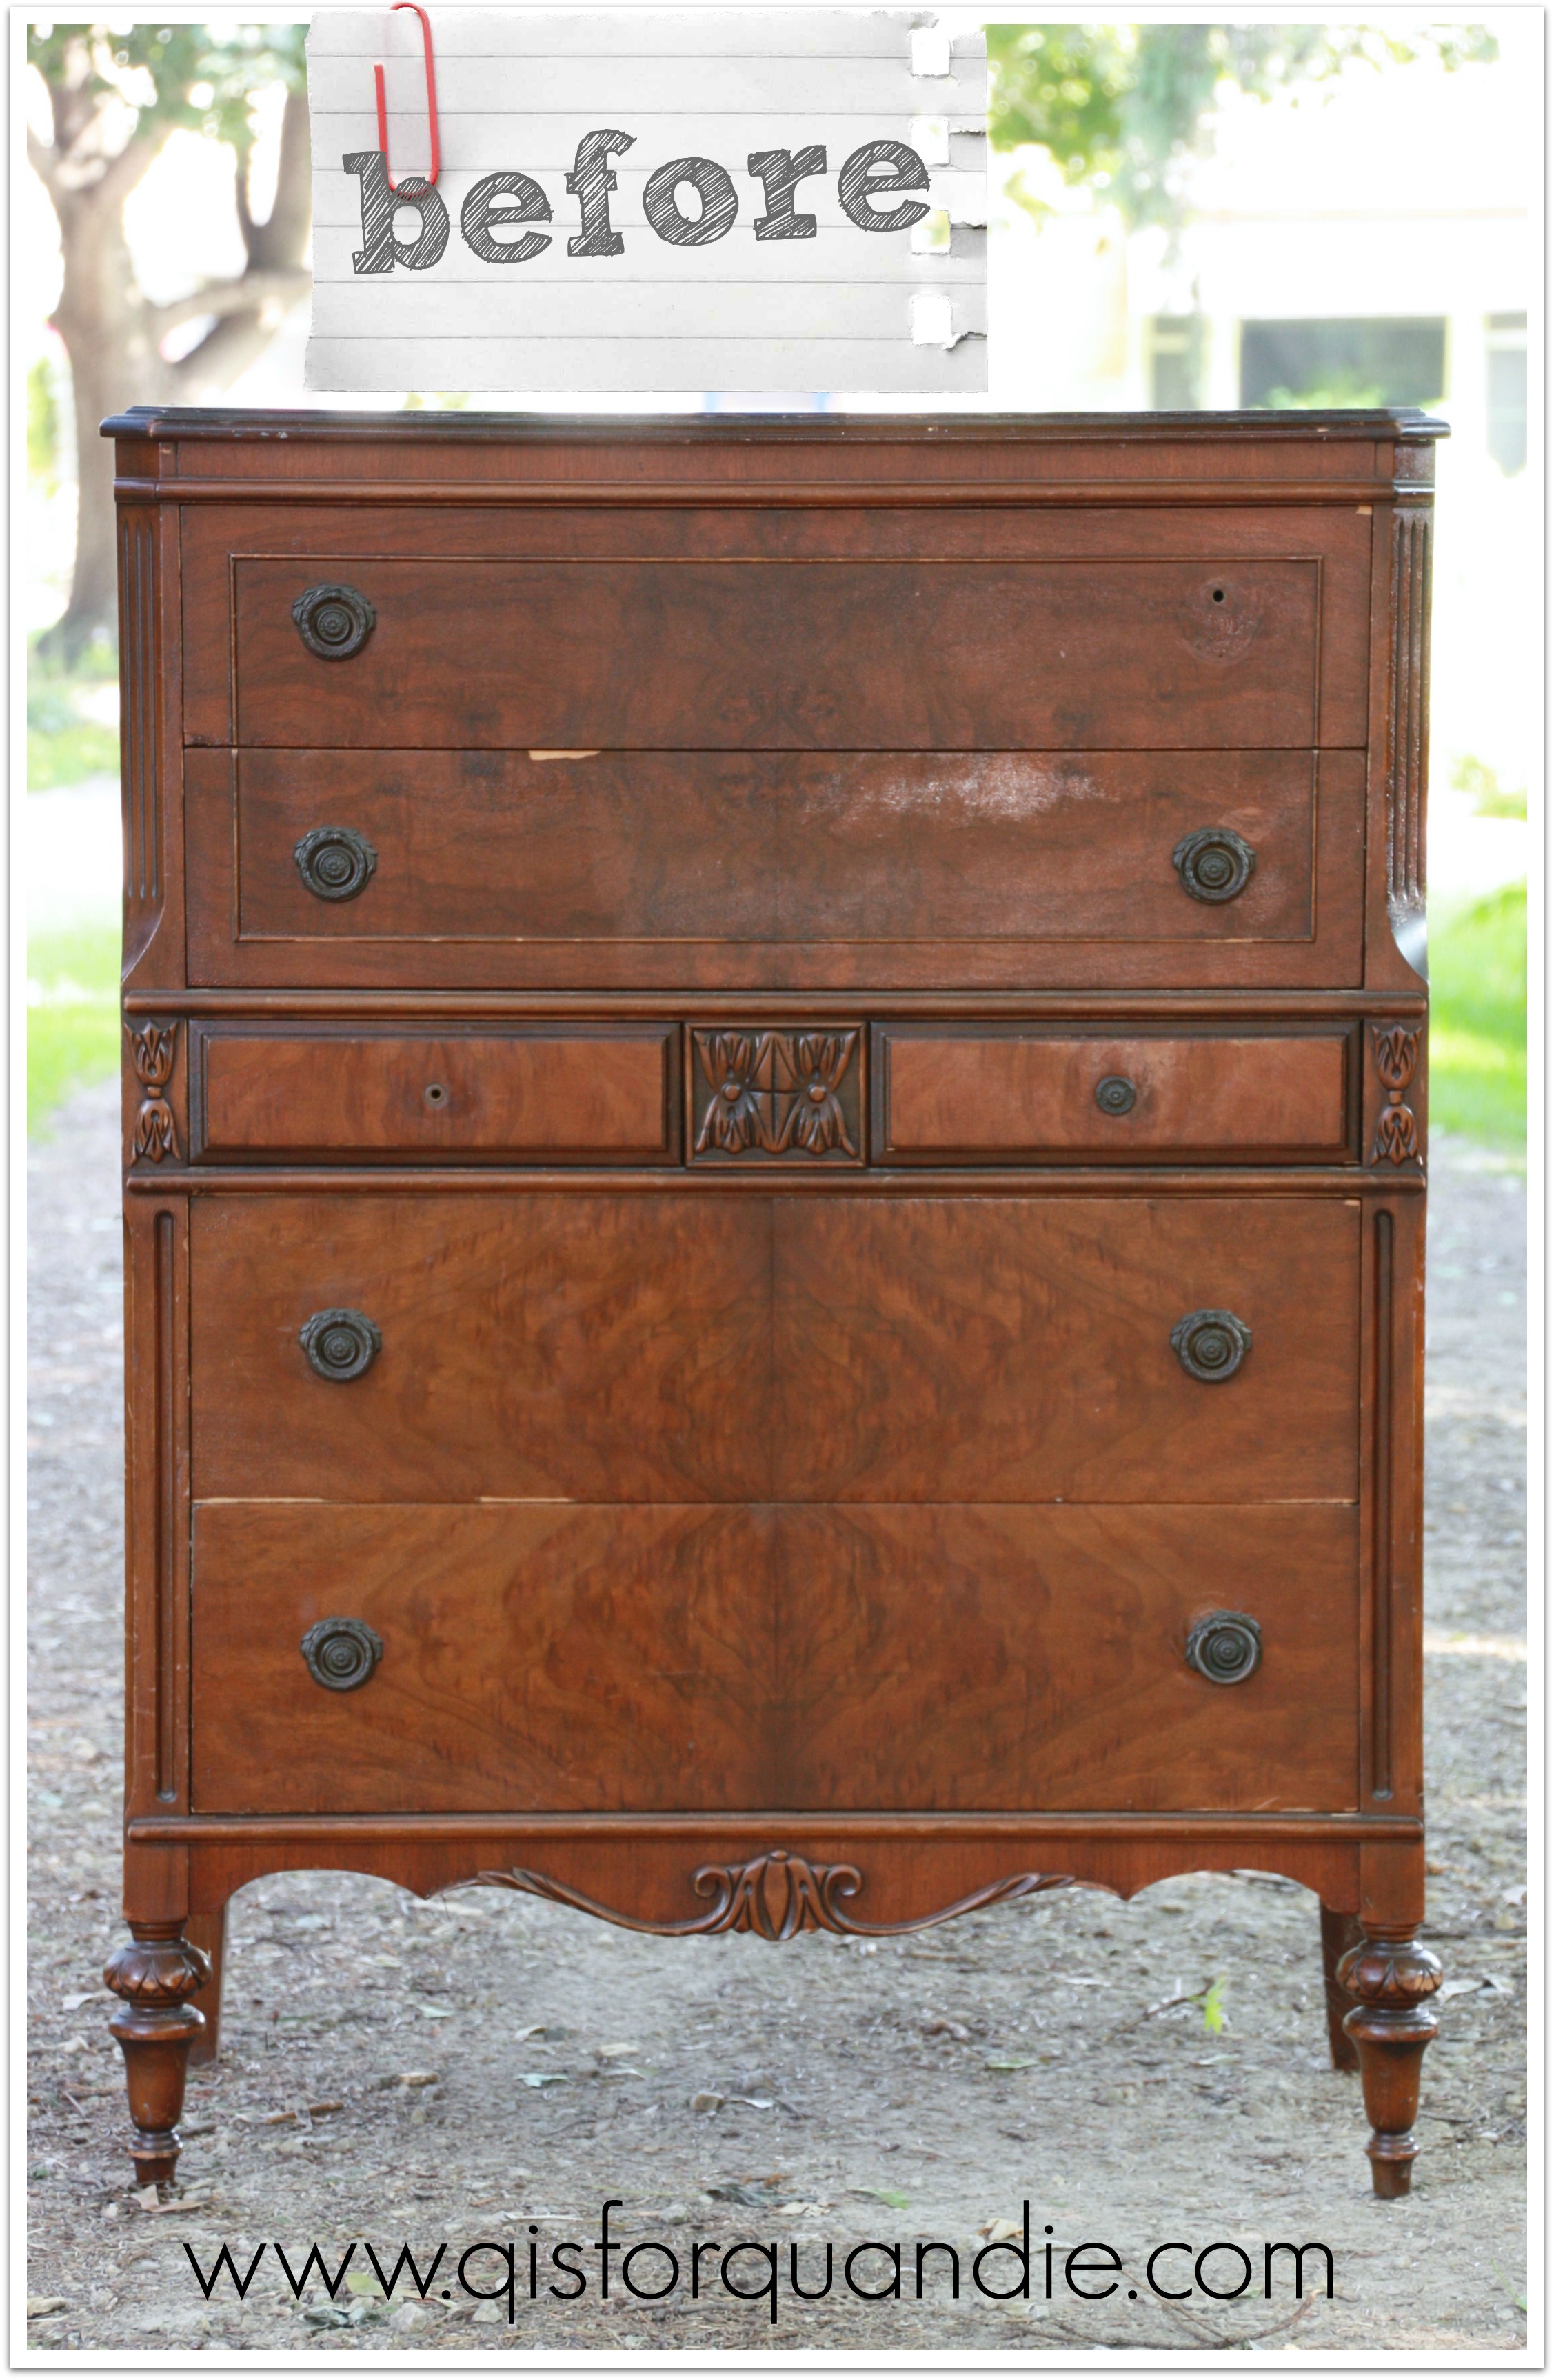
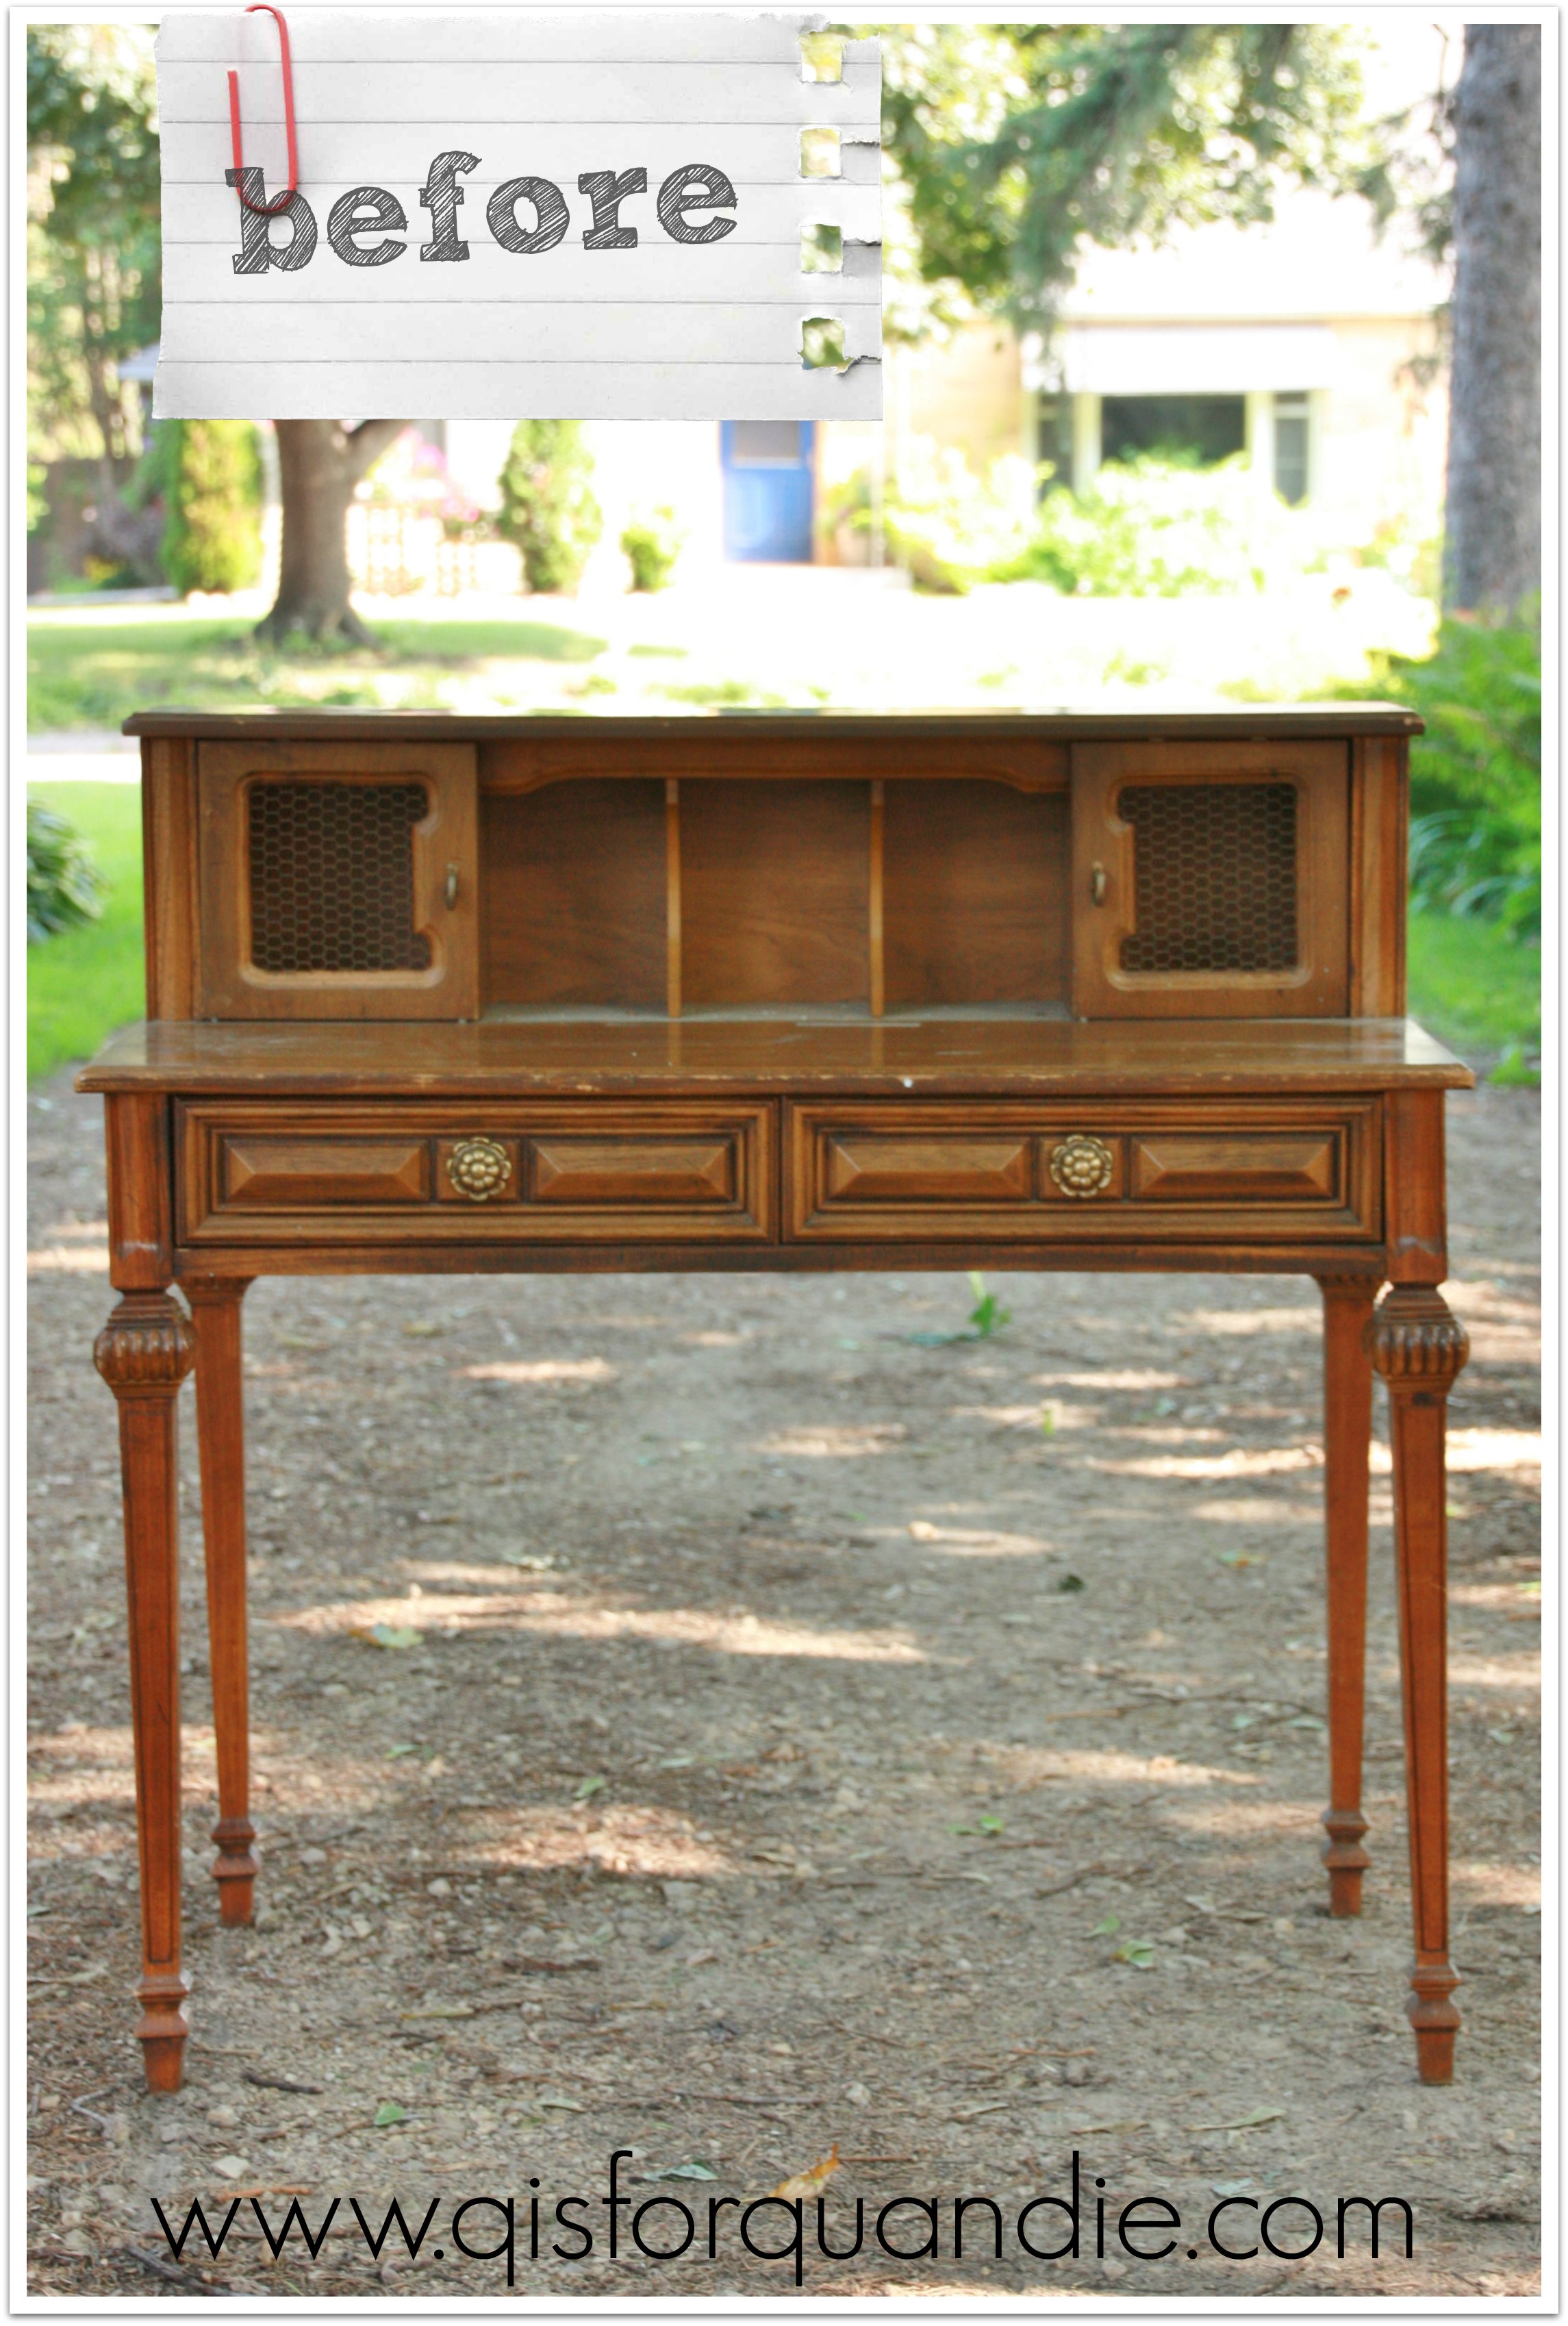
I picked up this cabinet at a lunchtime garage sale a few weeks back.  It was being sold by a darling little old lady (don’t tell her I called her old).  She said that she had bought it years ago and attempted to strip it, and just never finished the job.  Unfortunately, I have been a bad blogger again and neglected to take a ‘before’ shot.

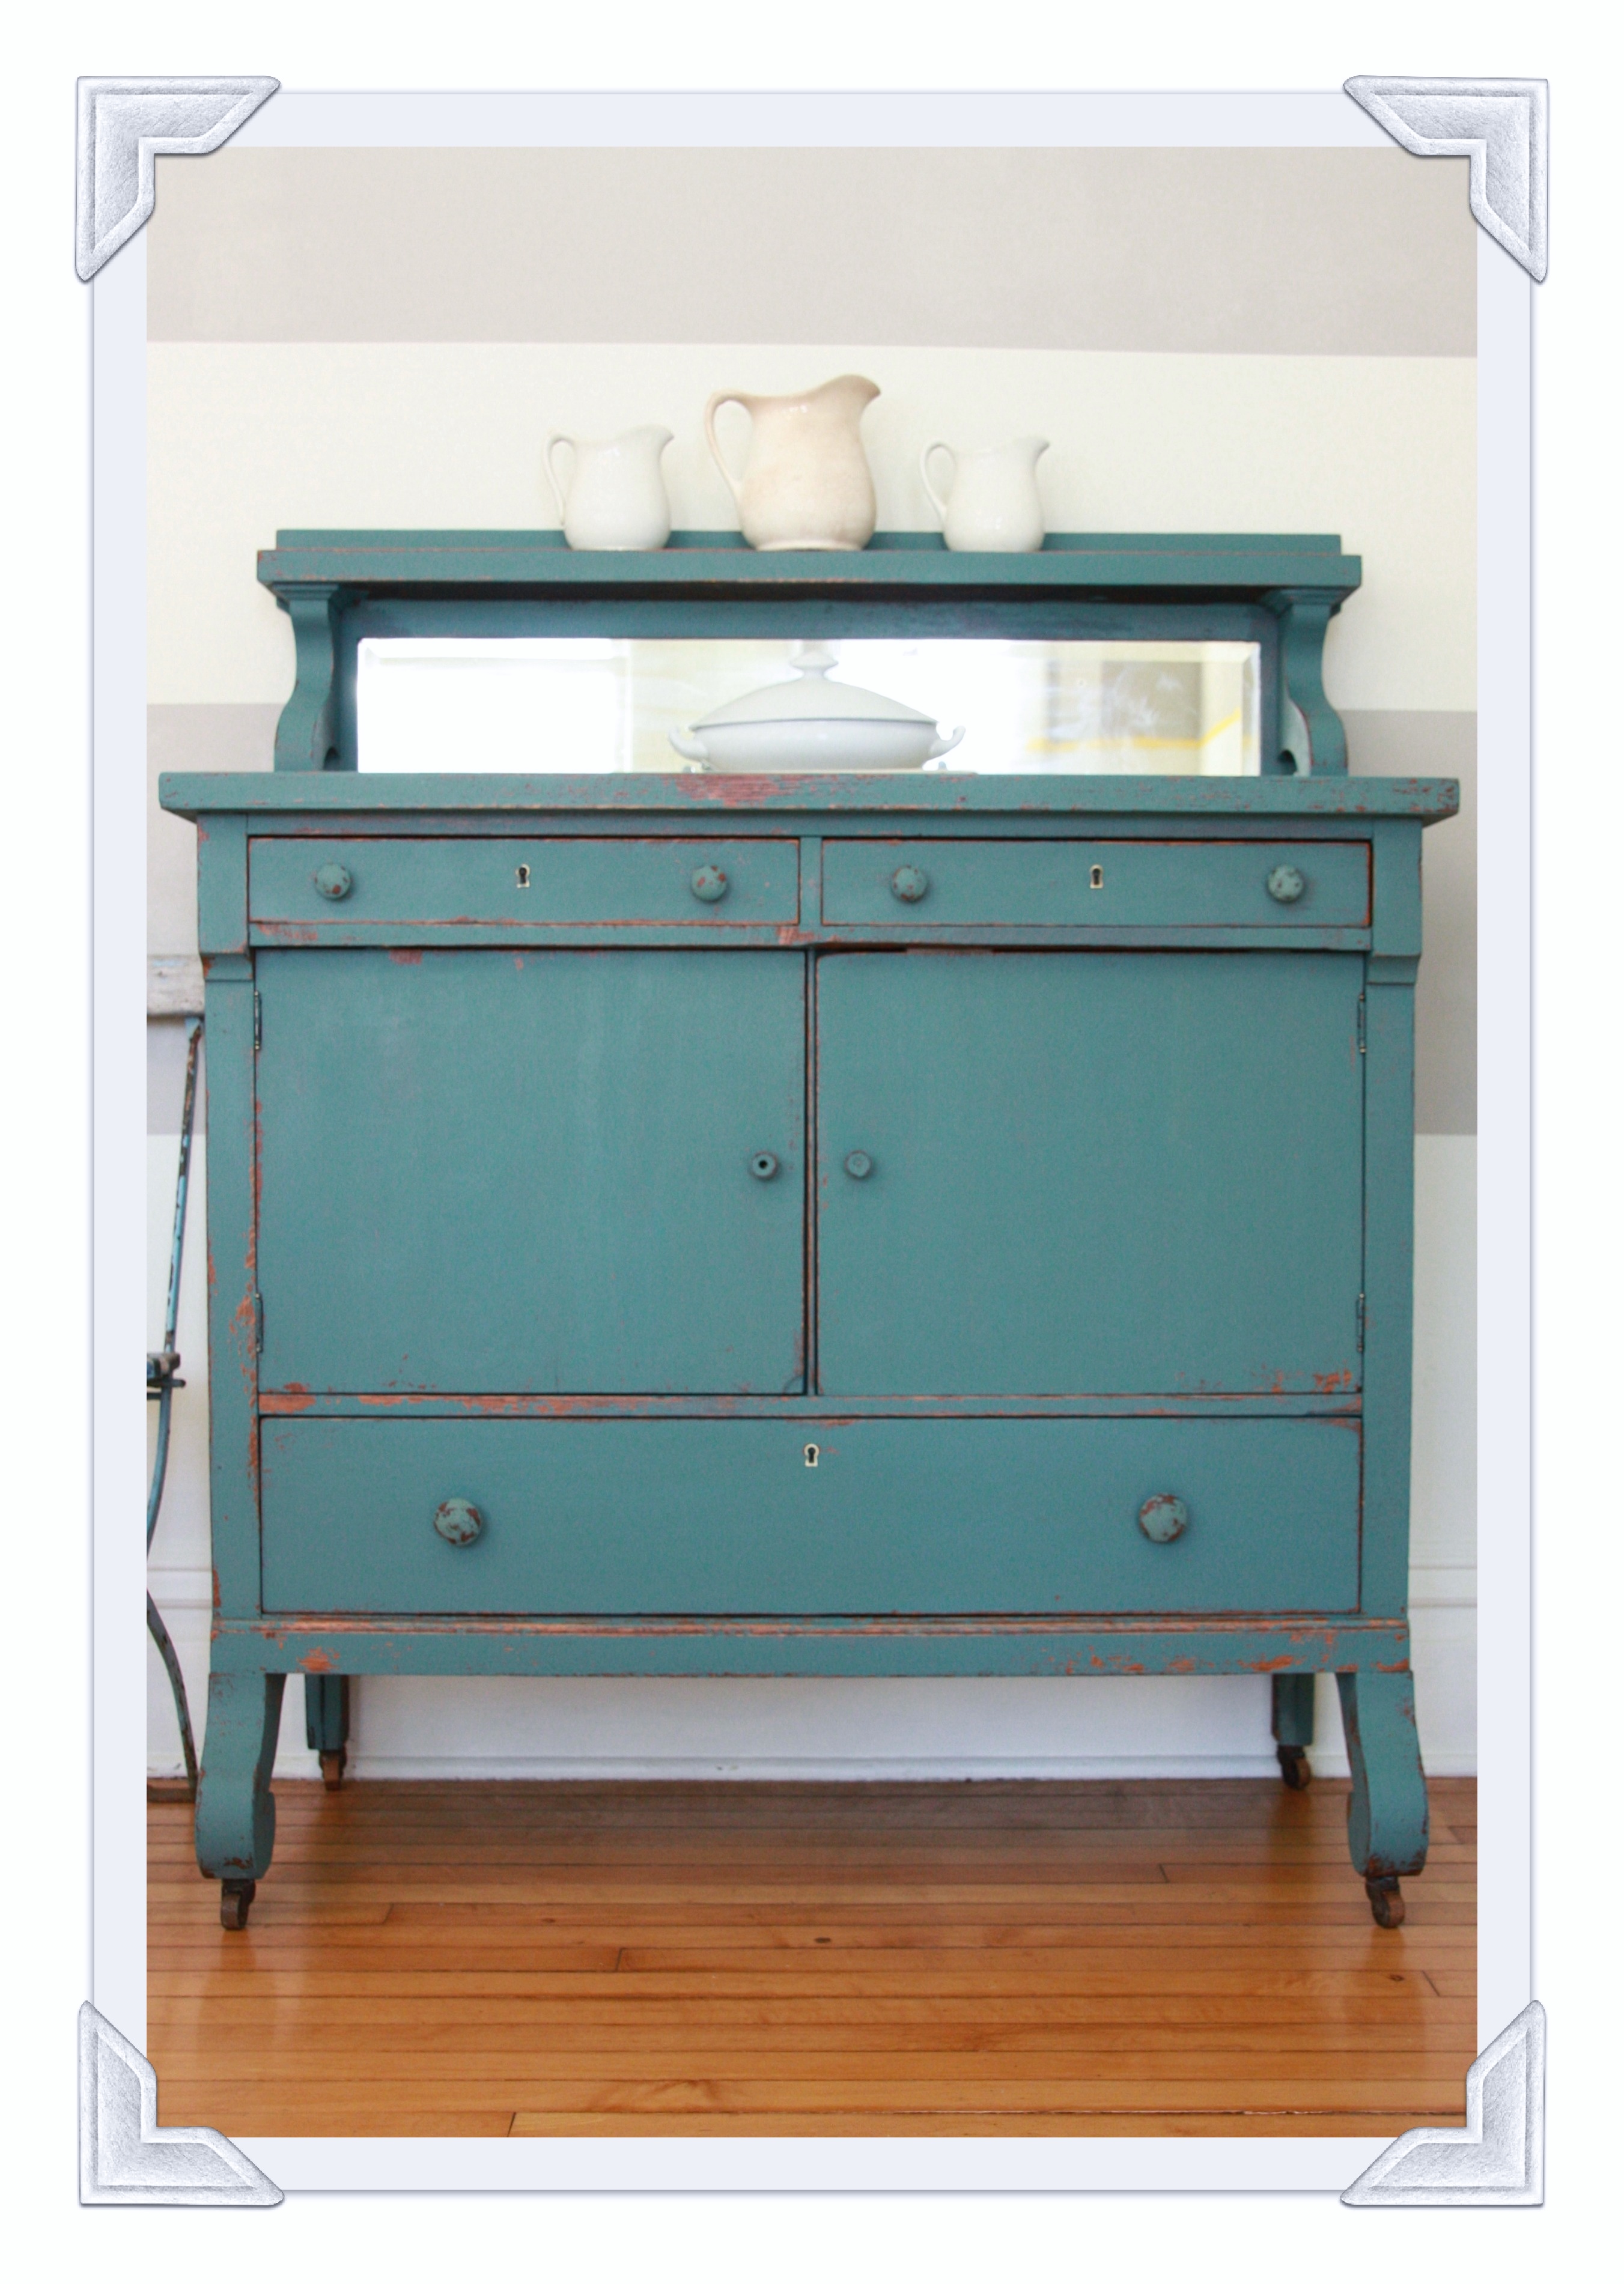
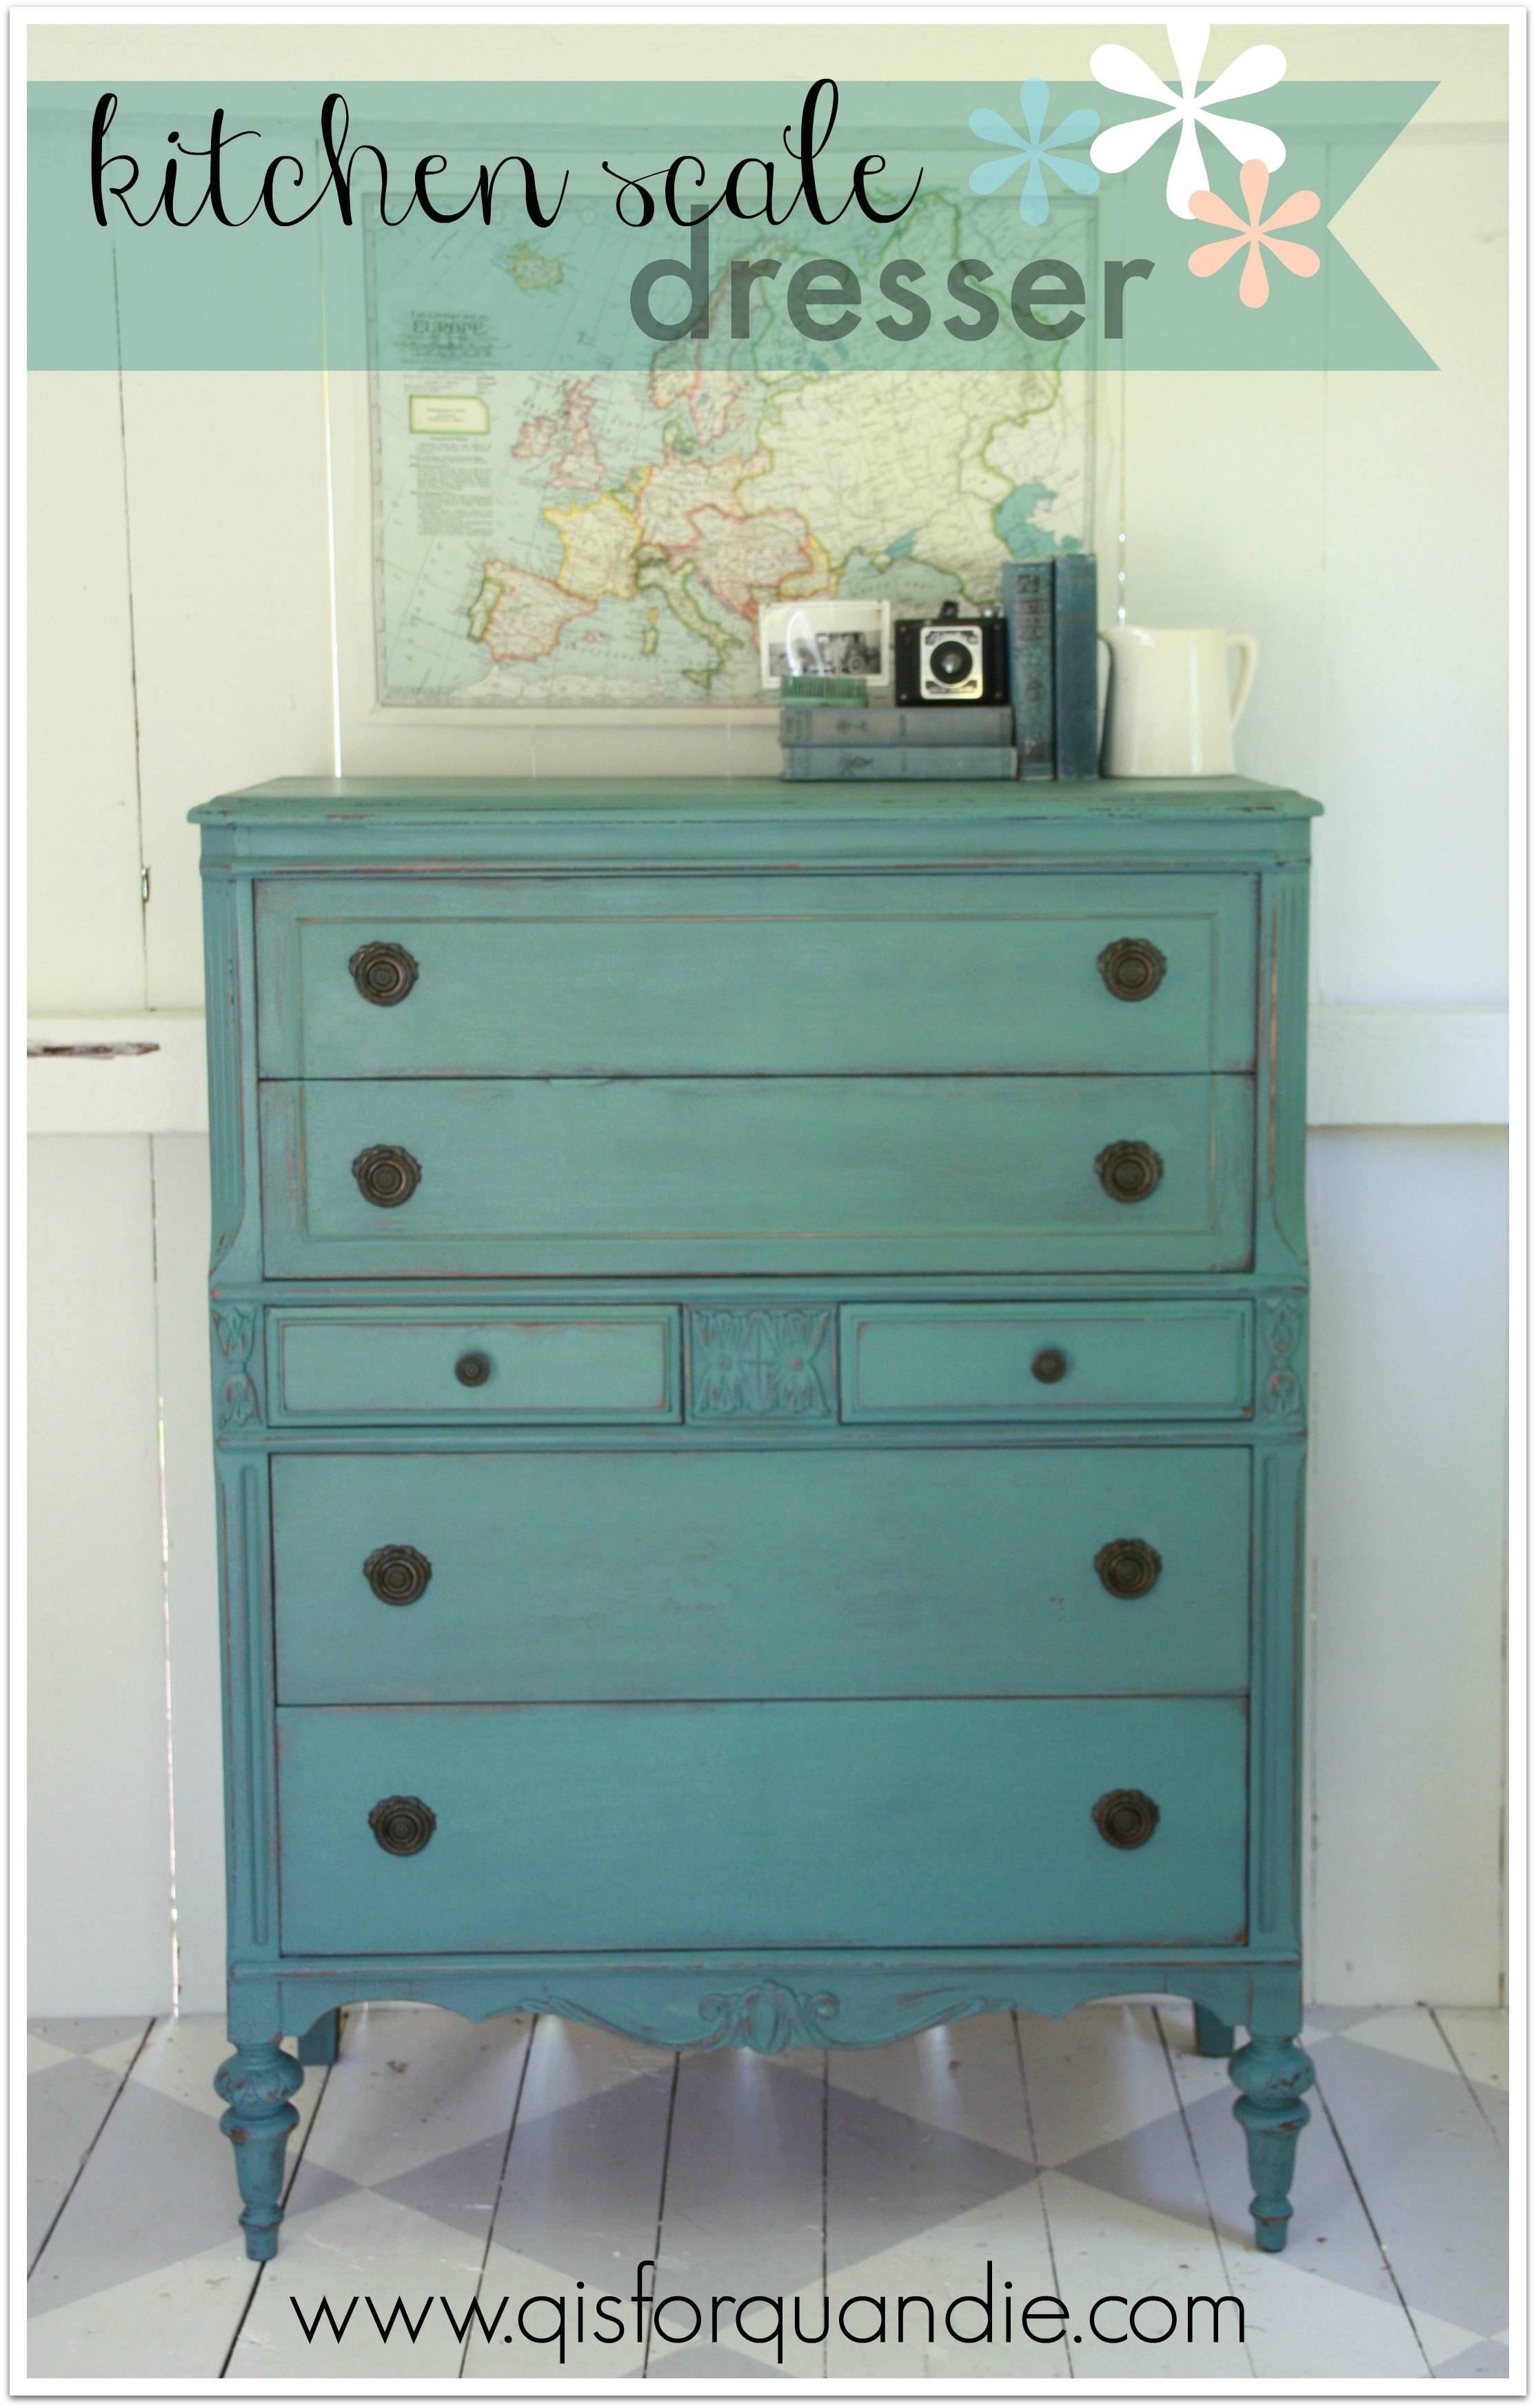
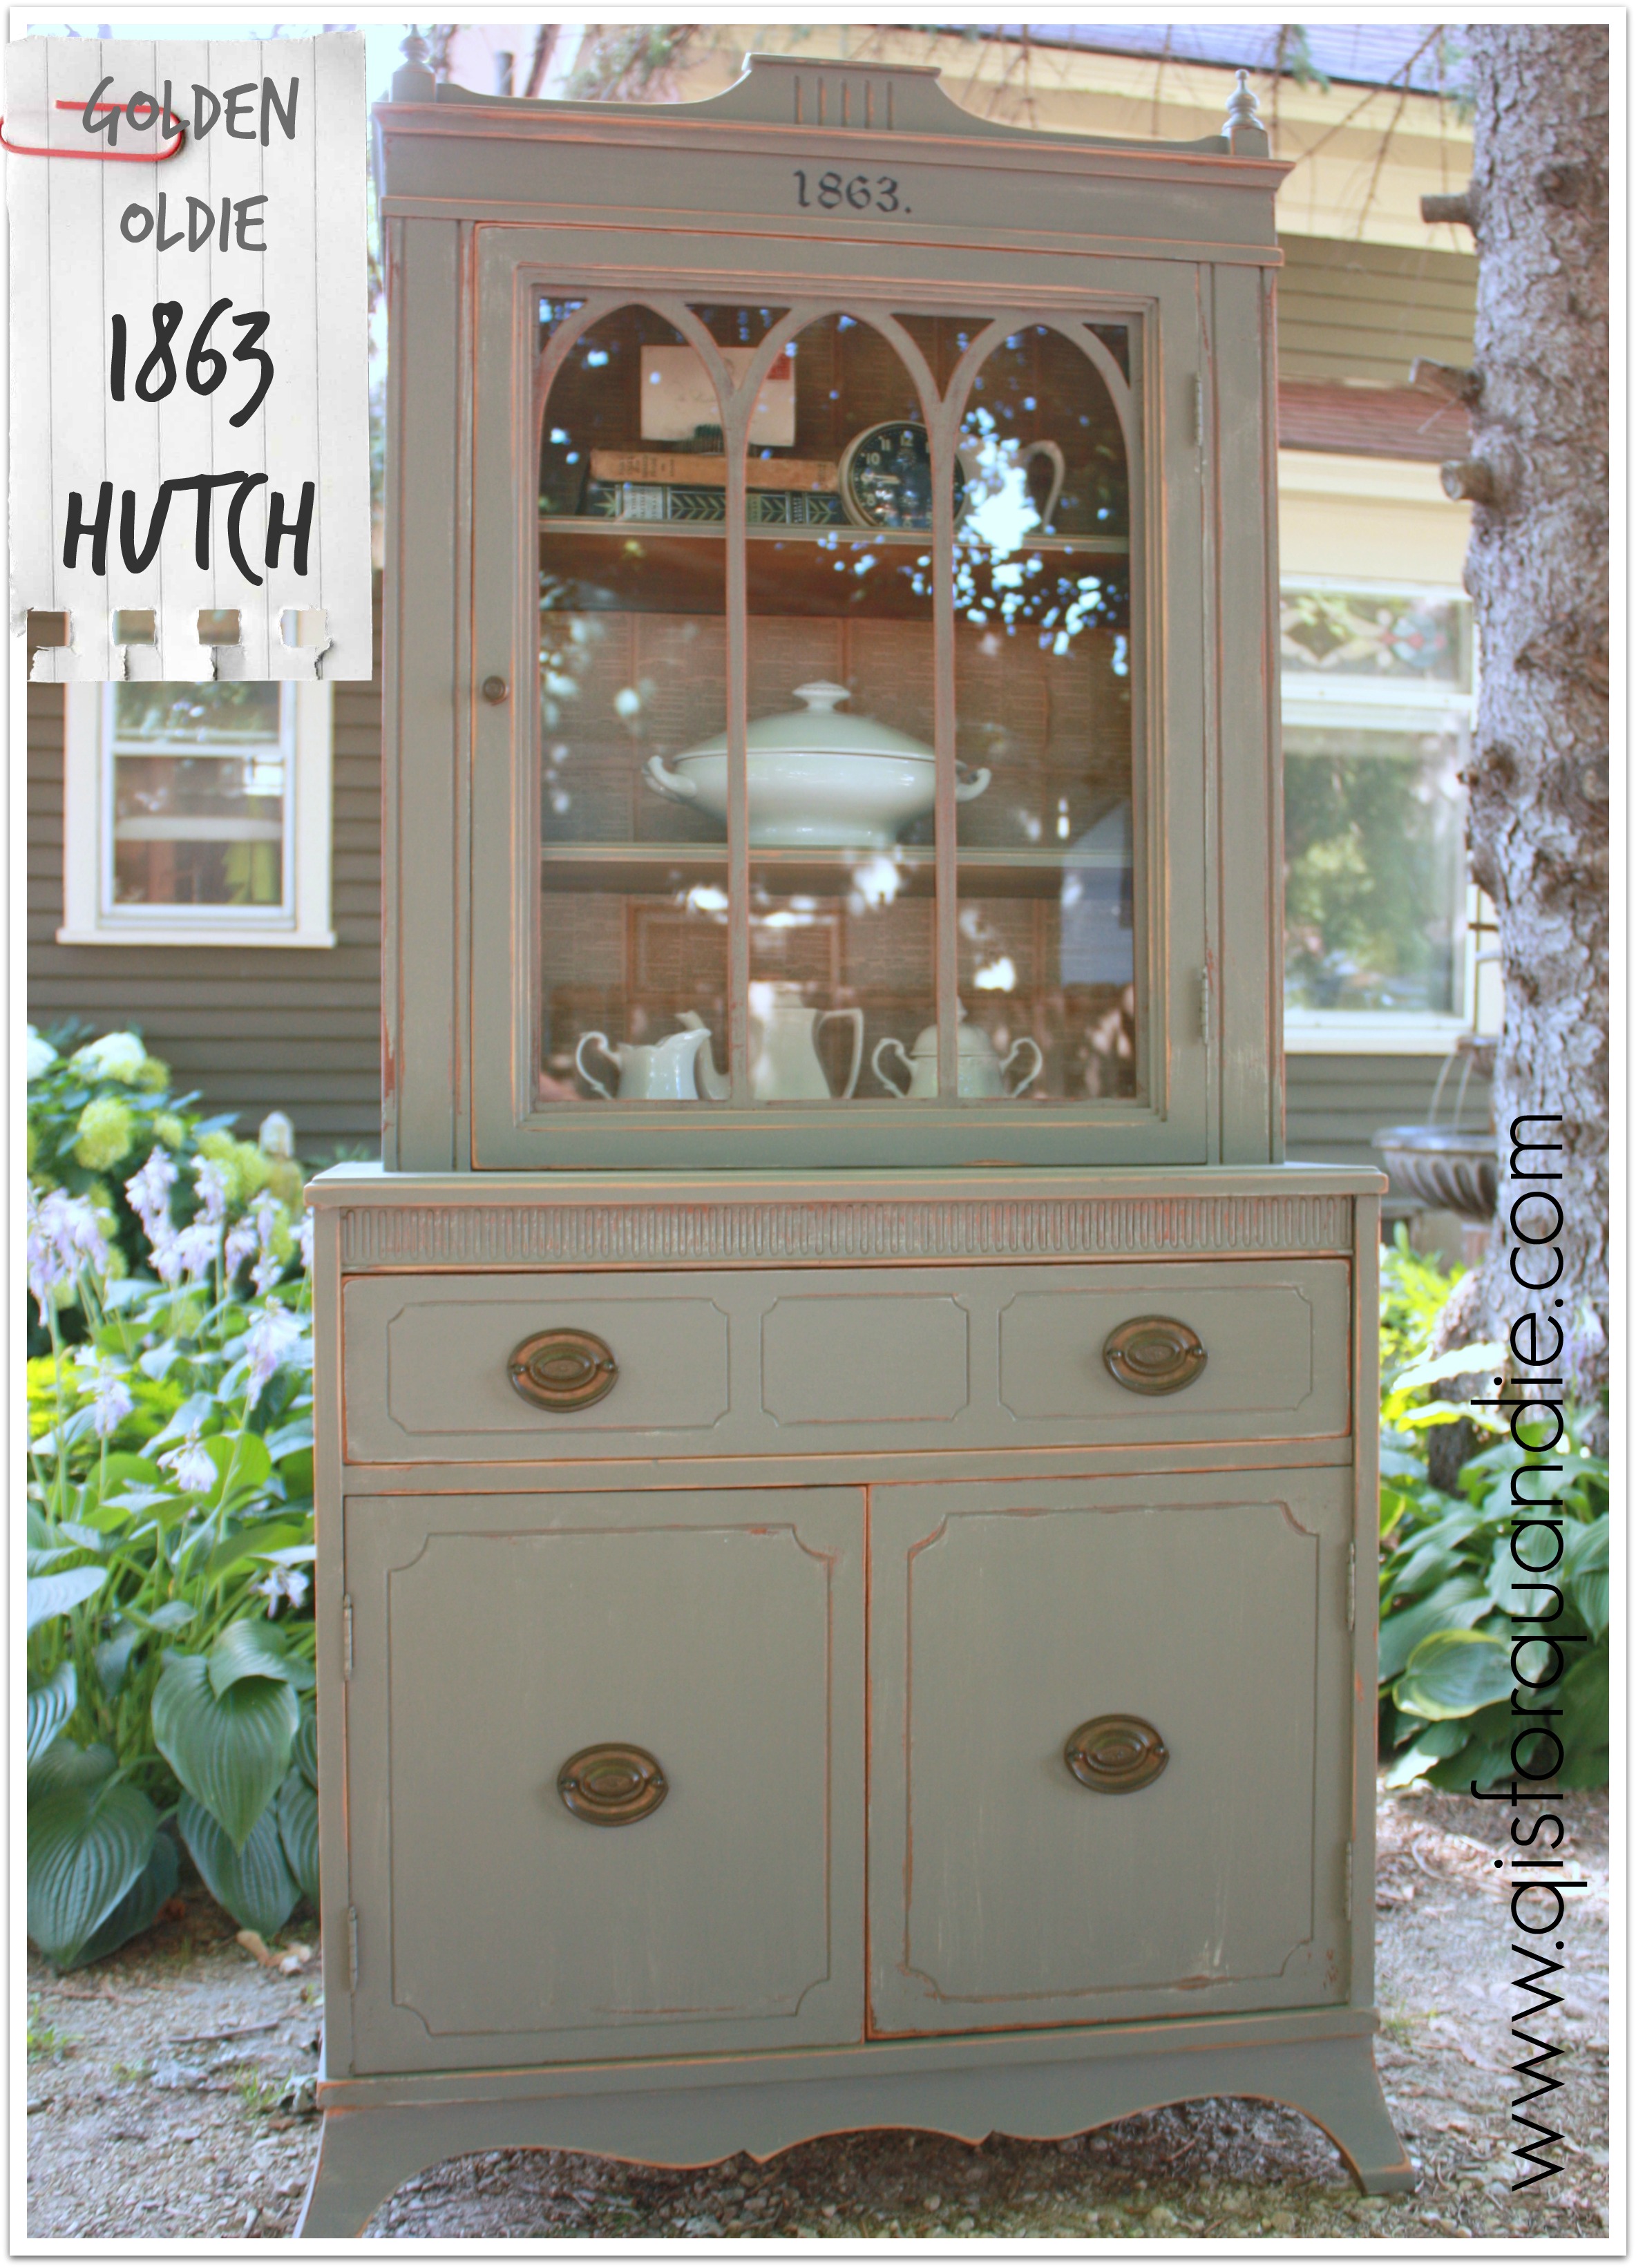
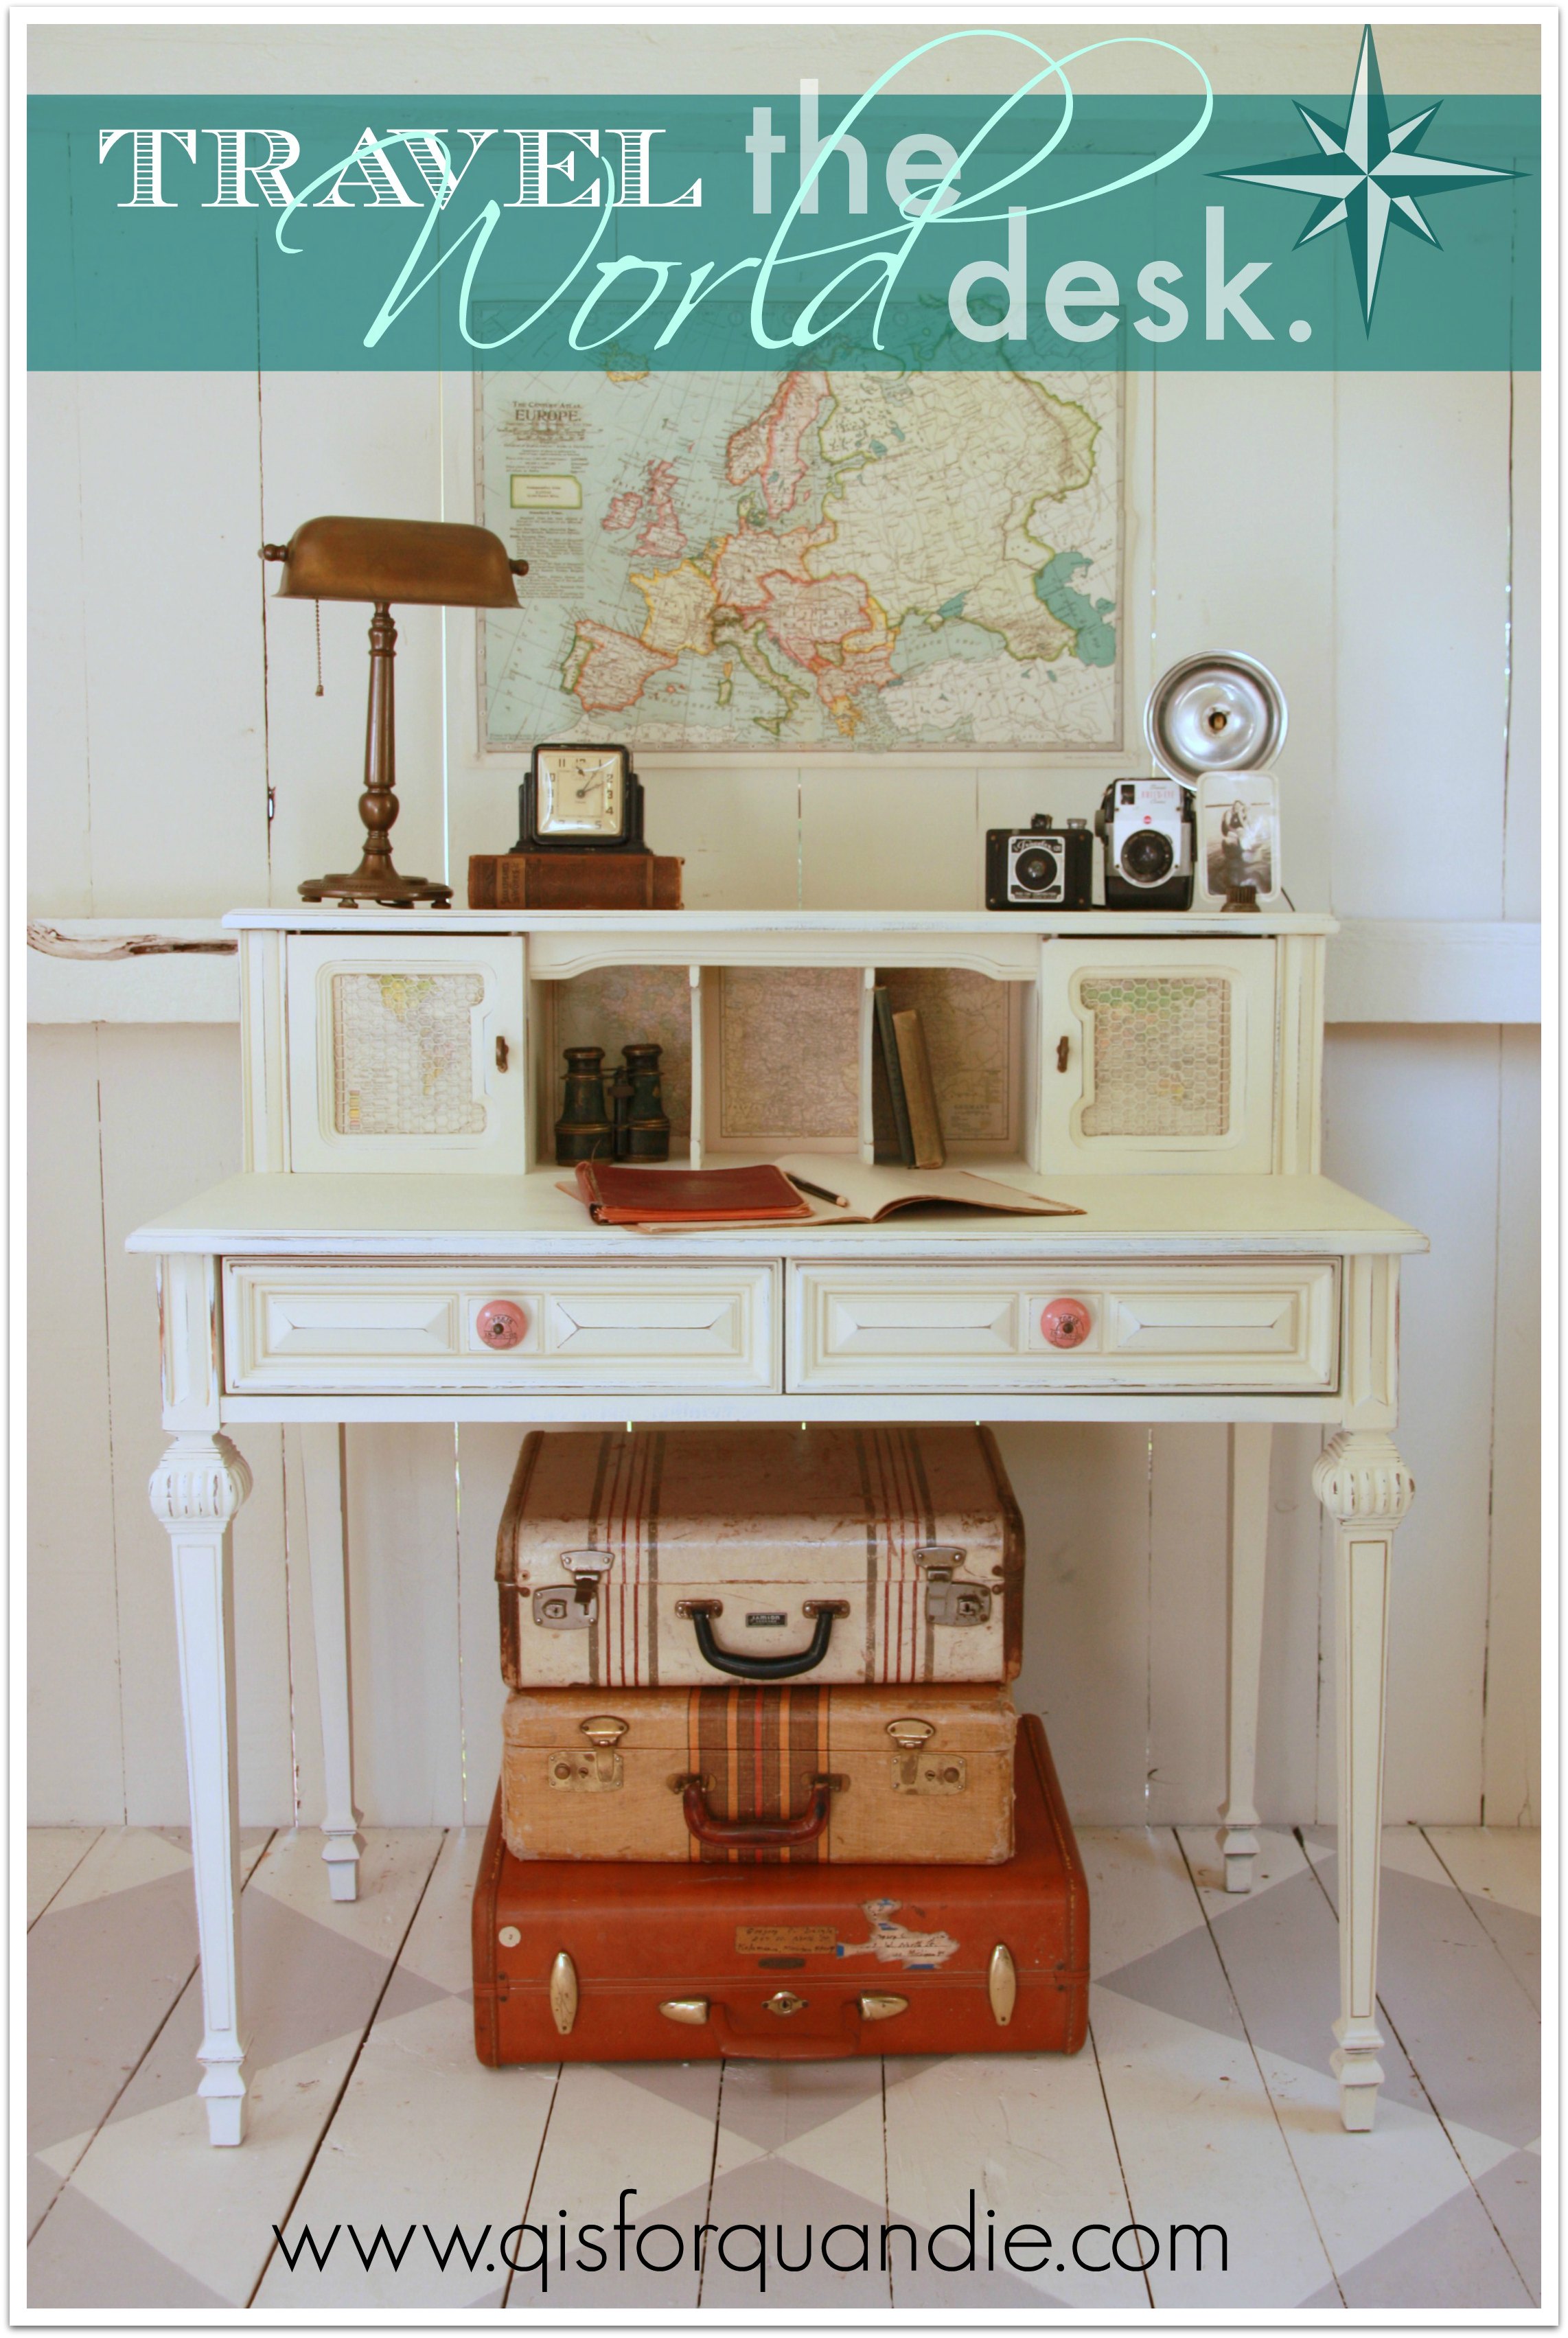
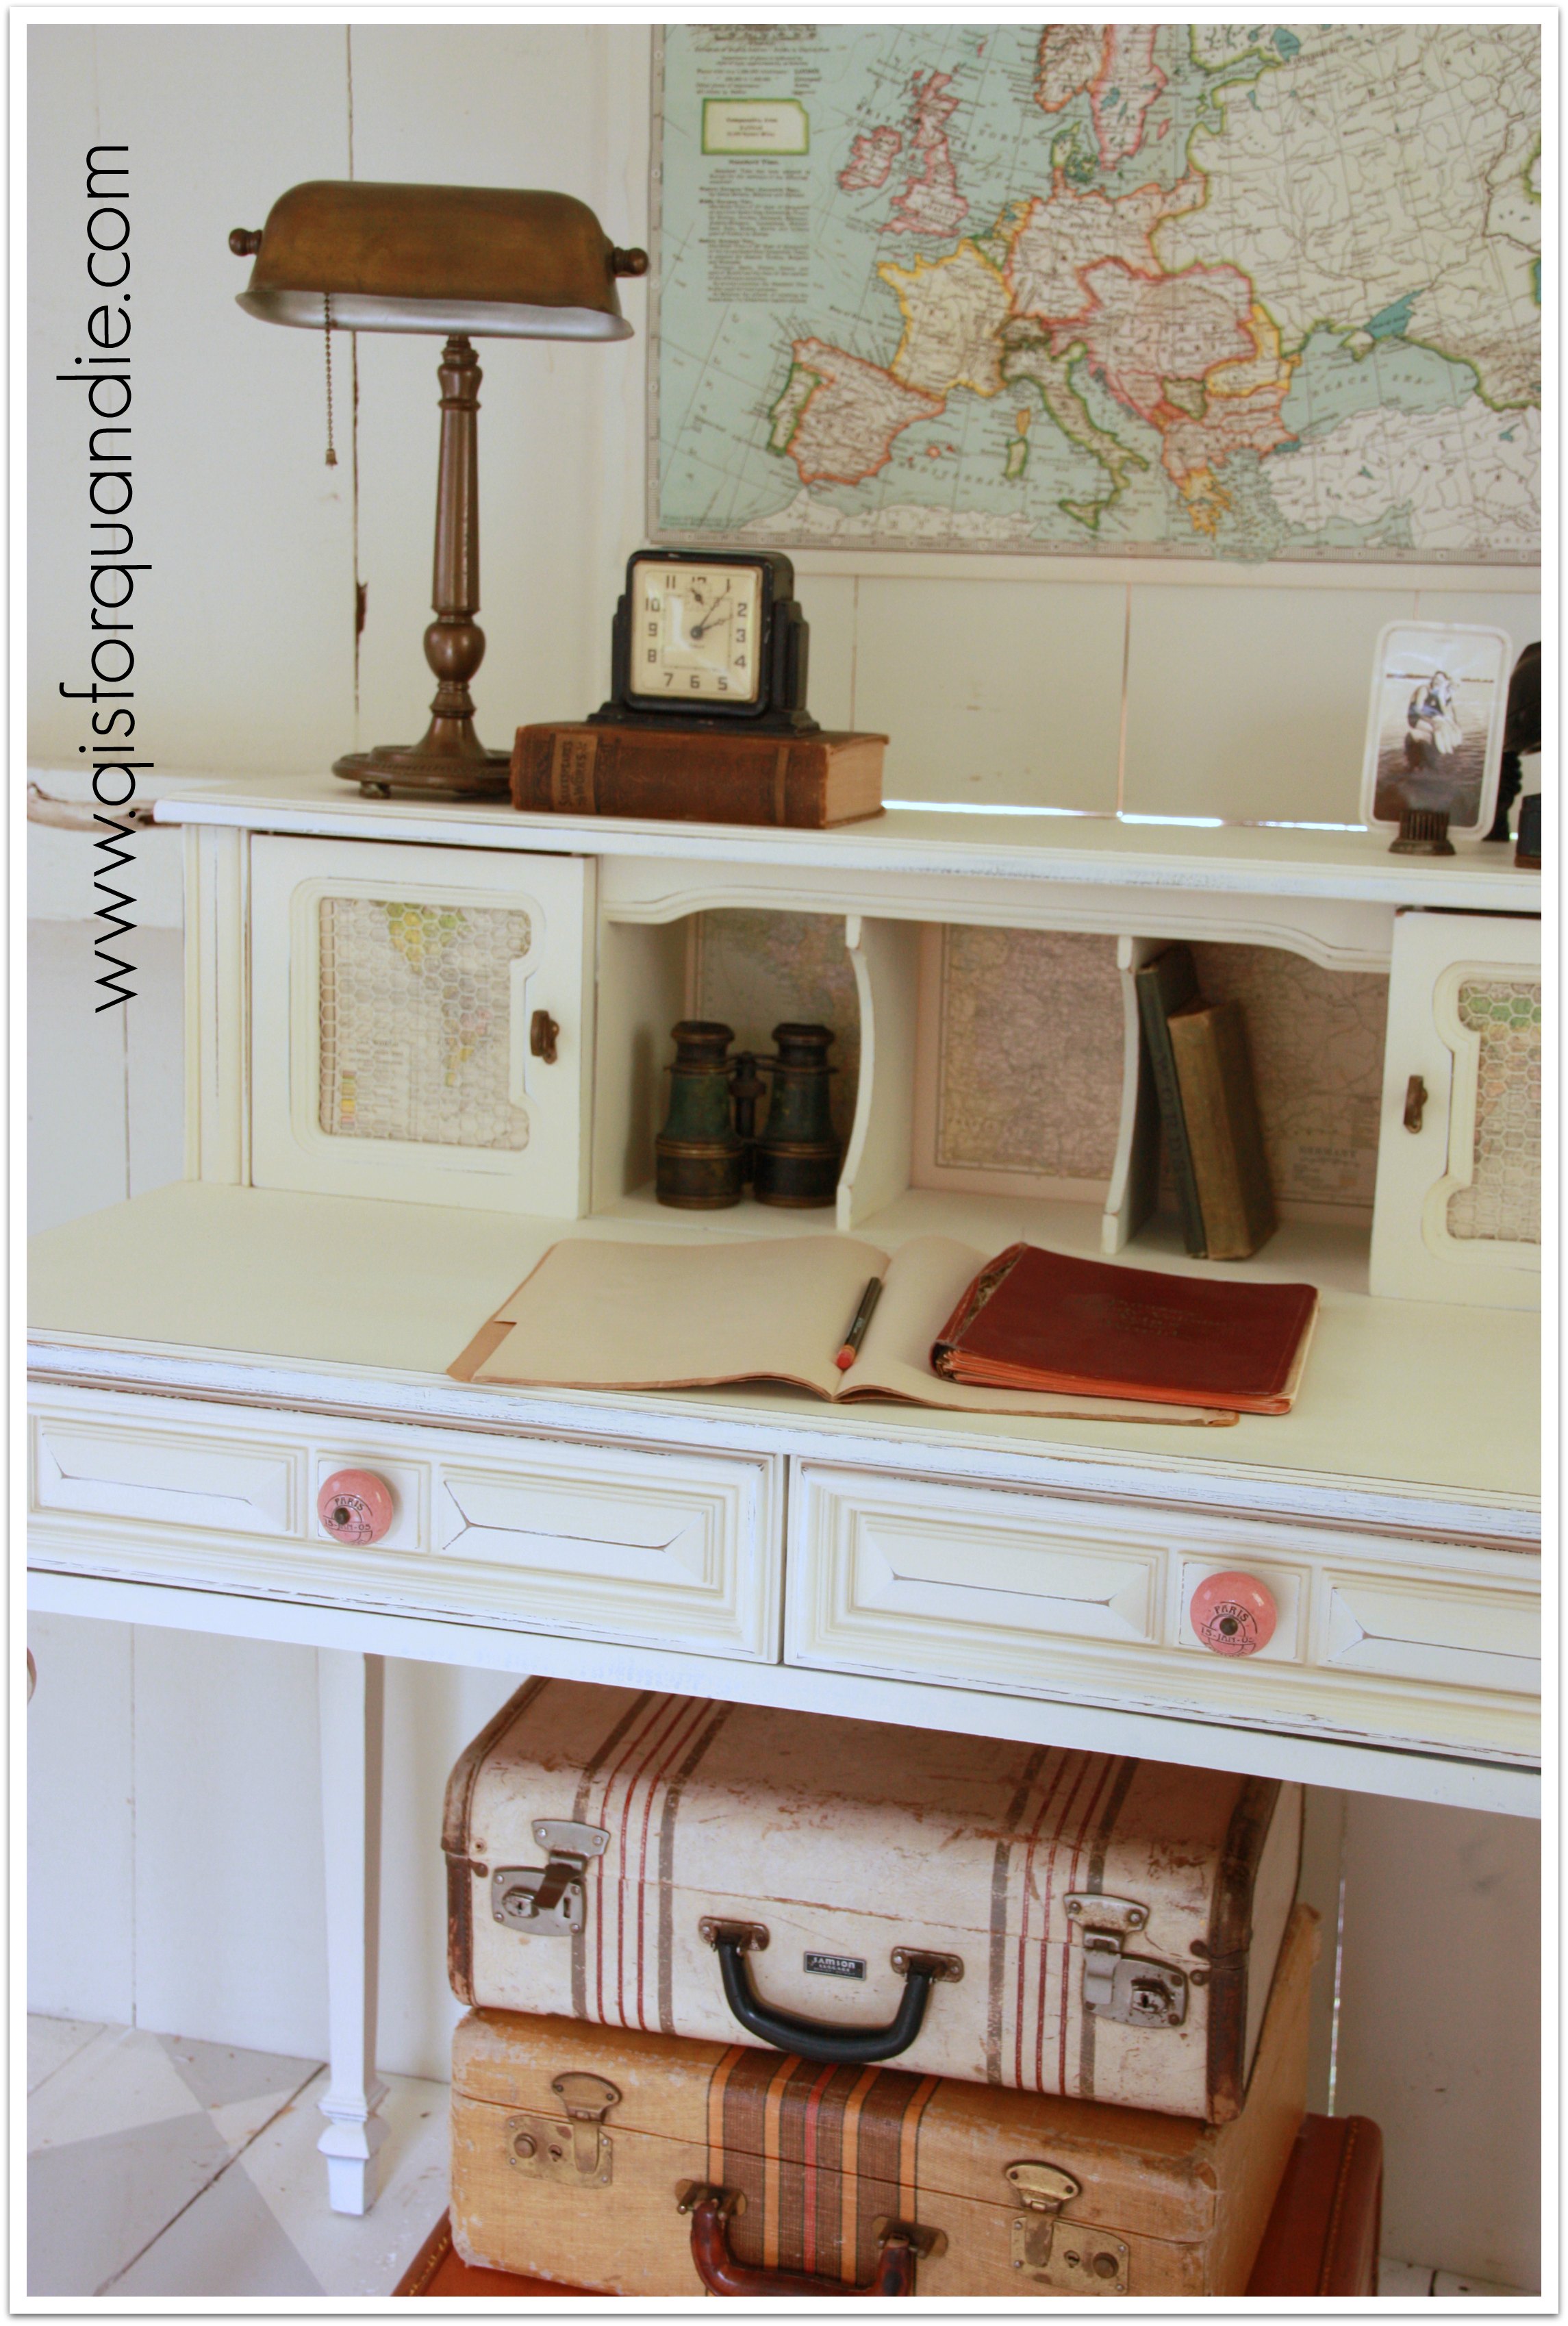
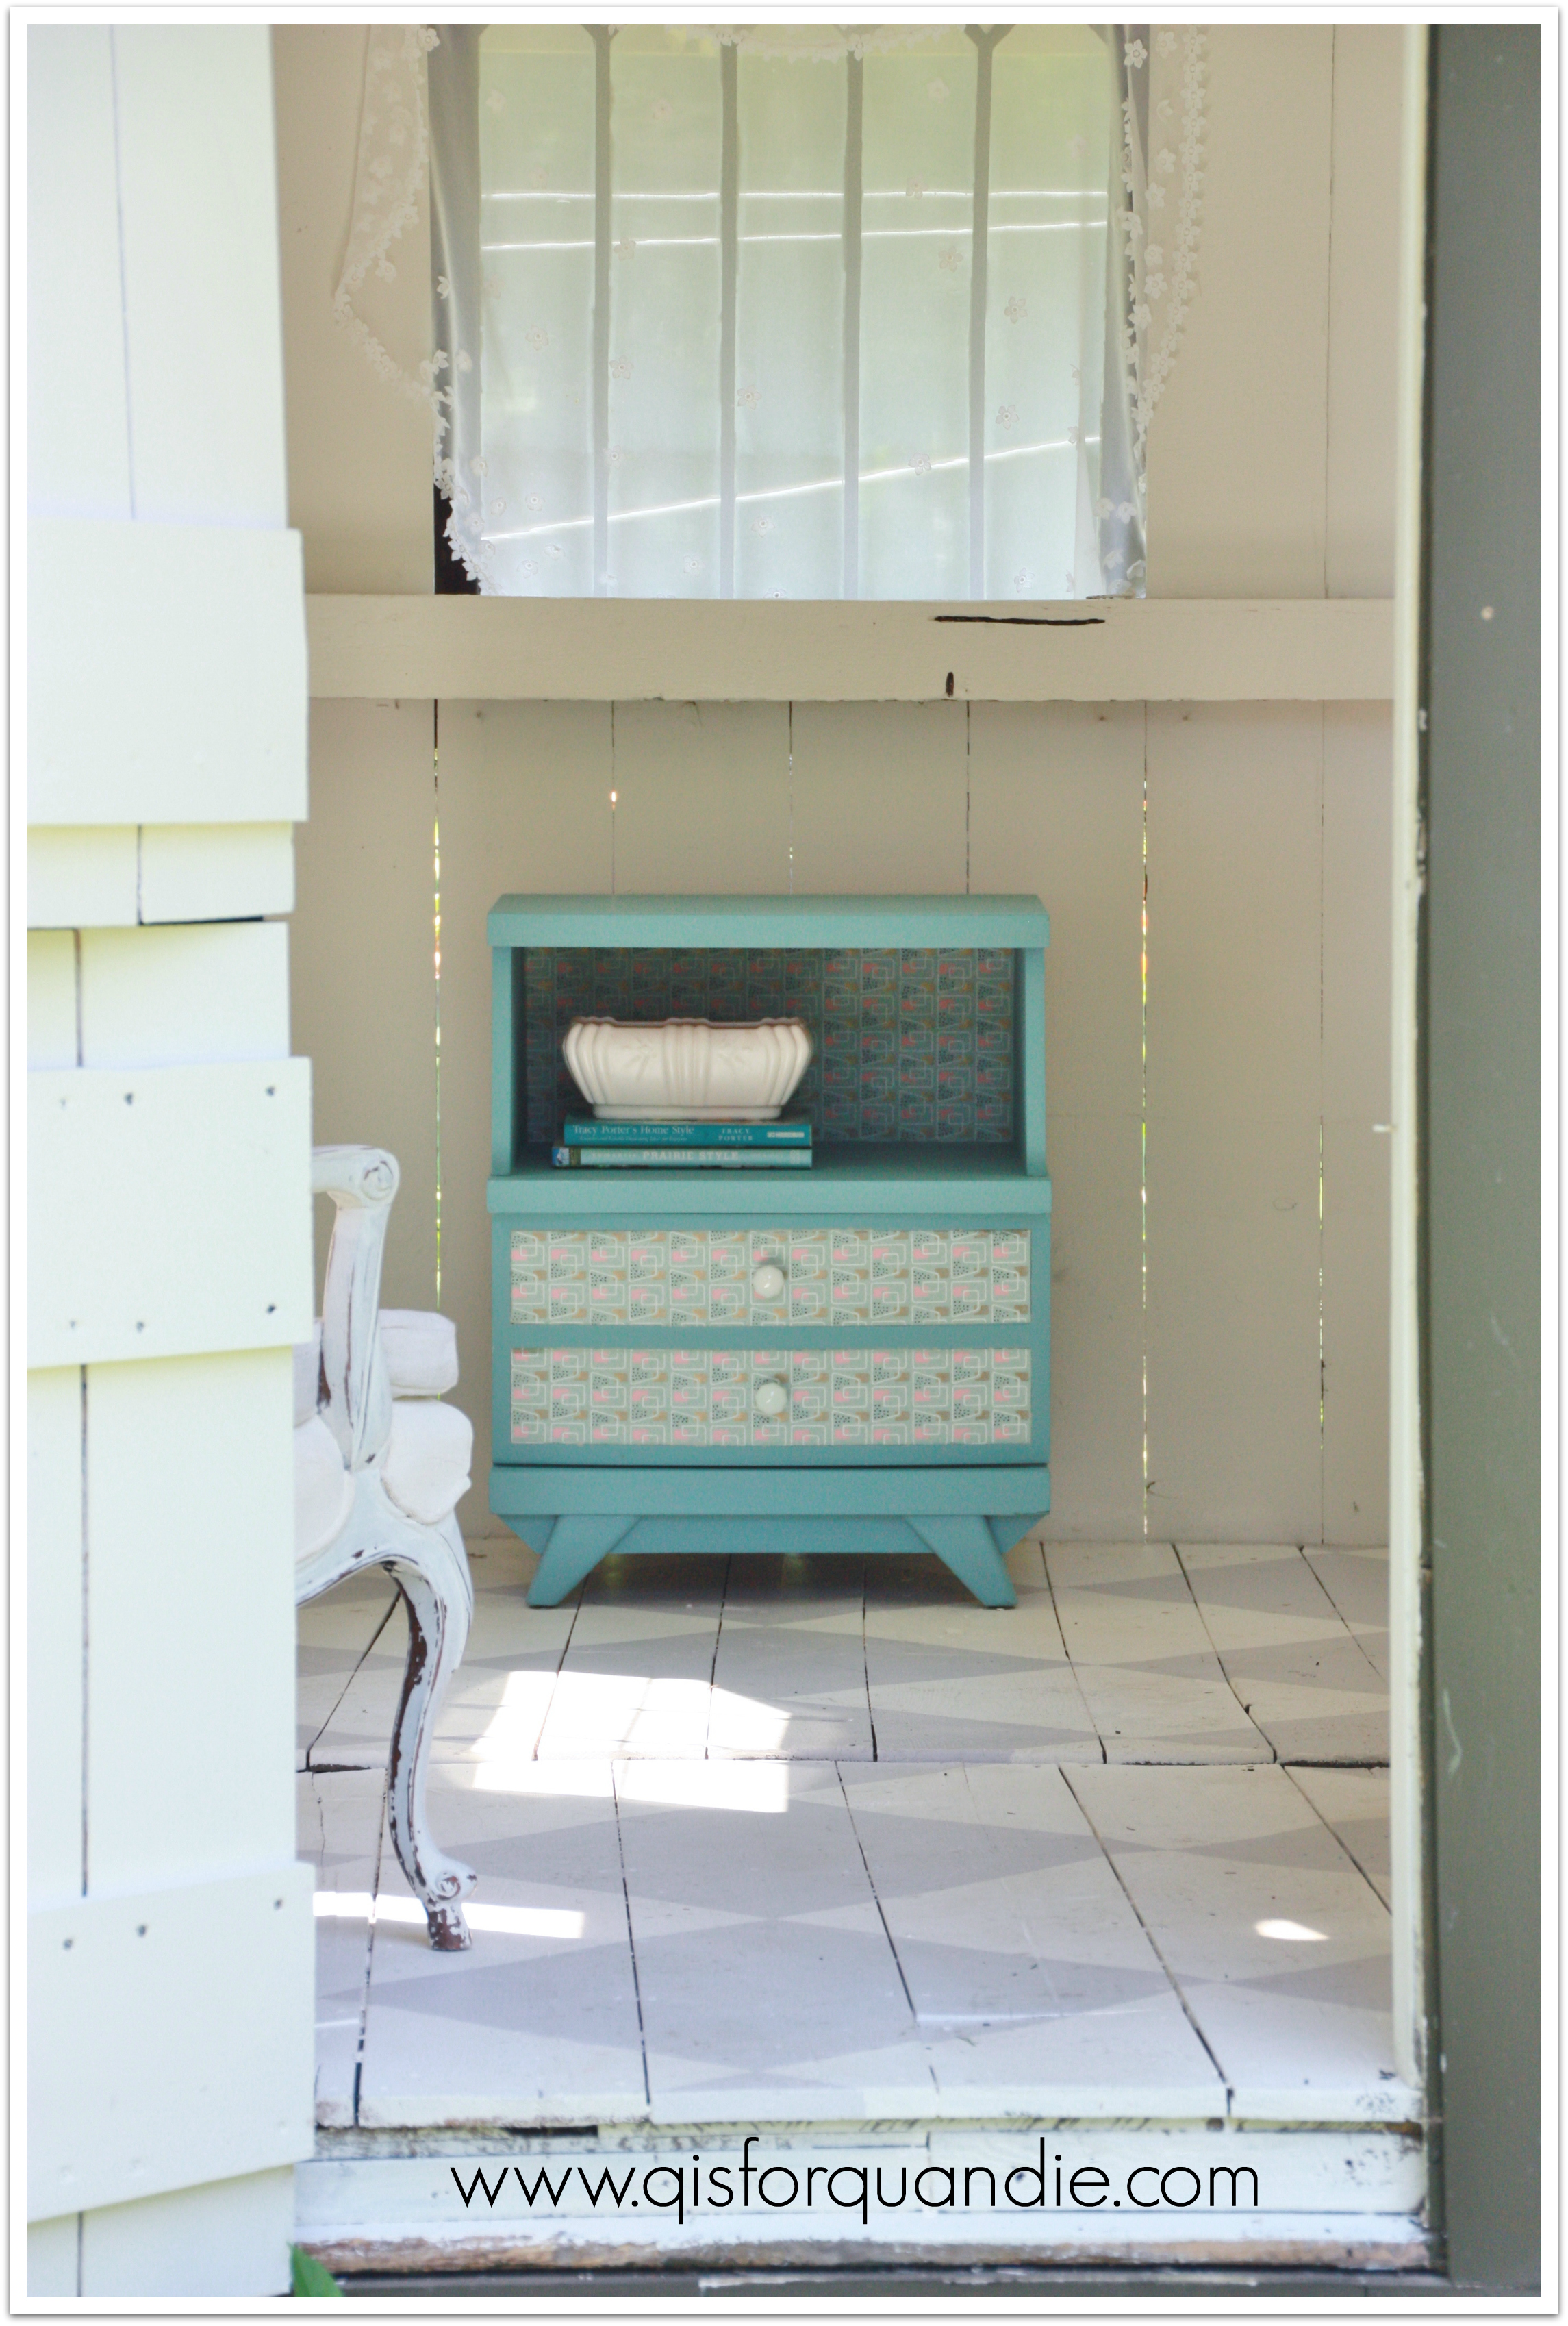
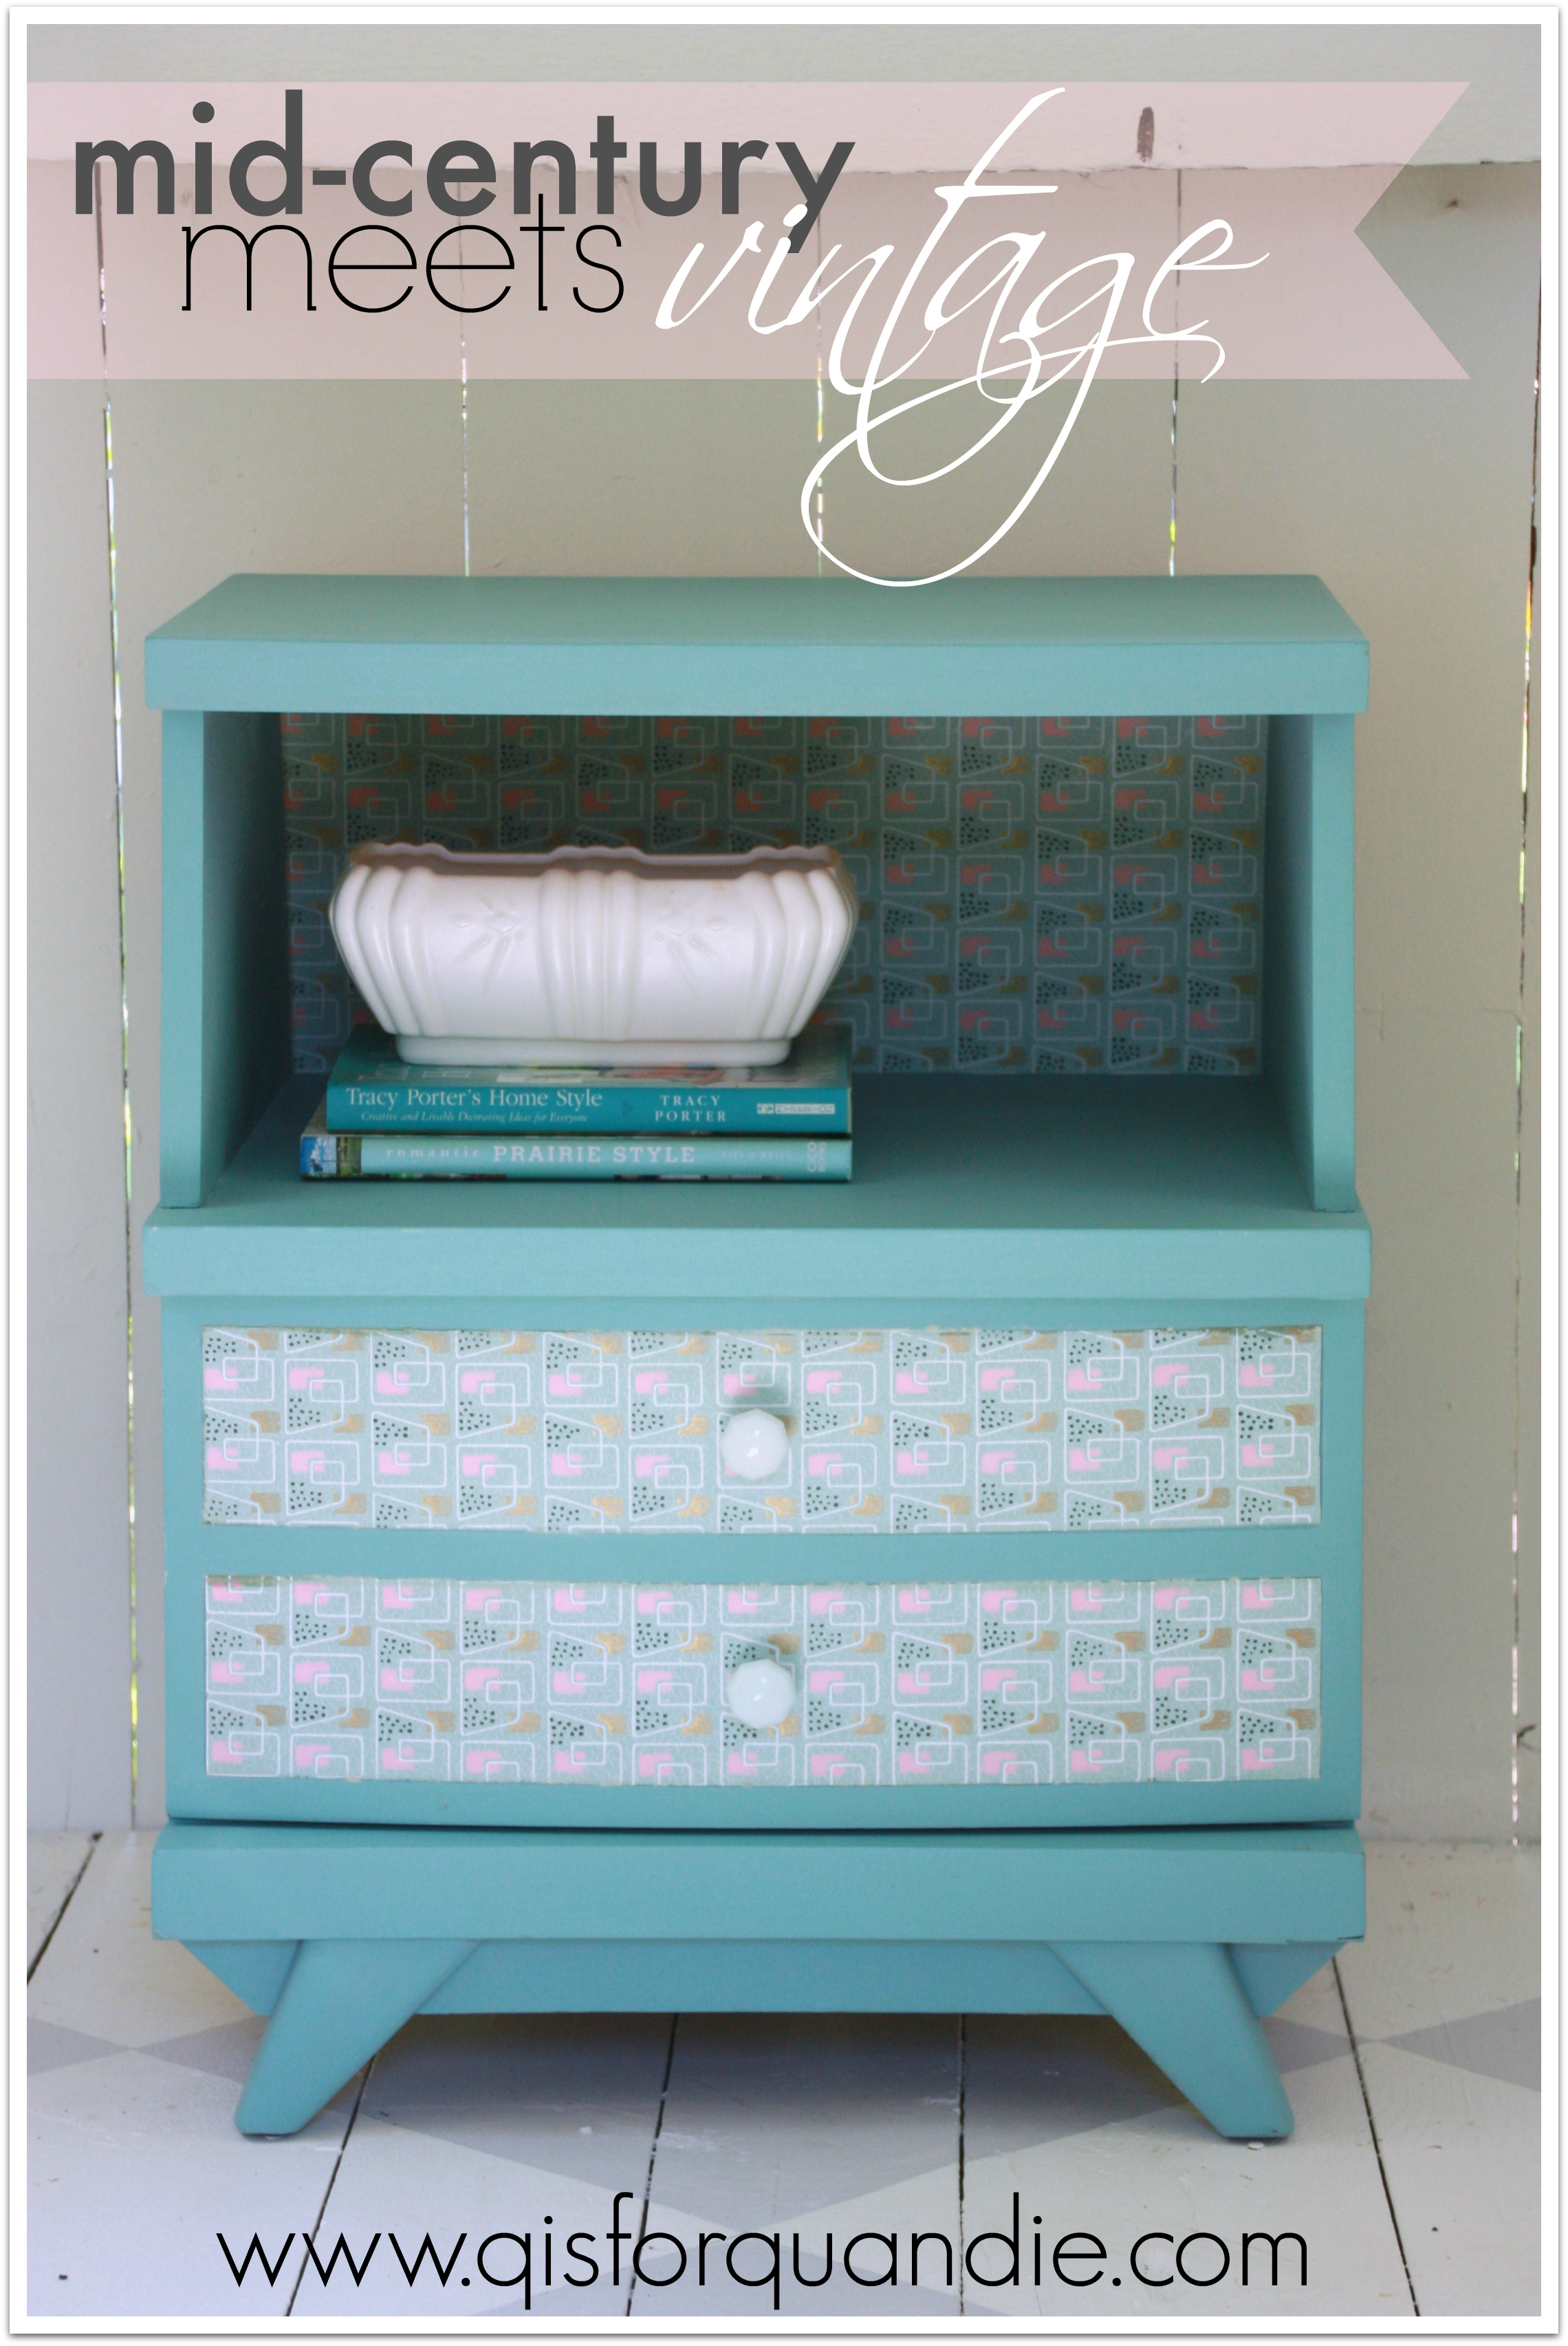
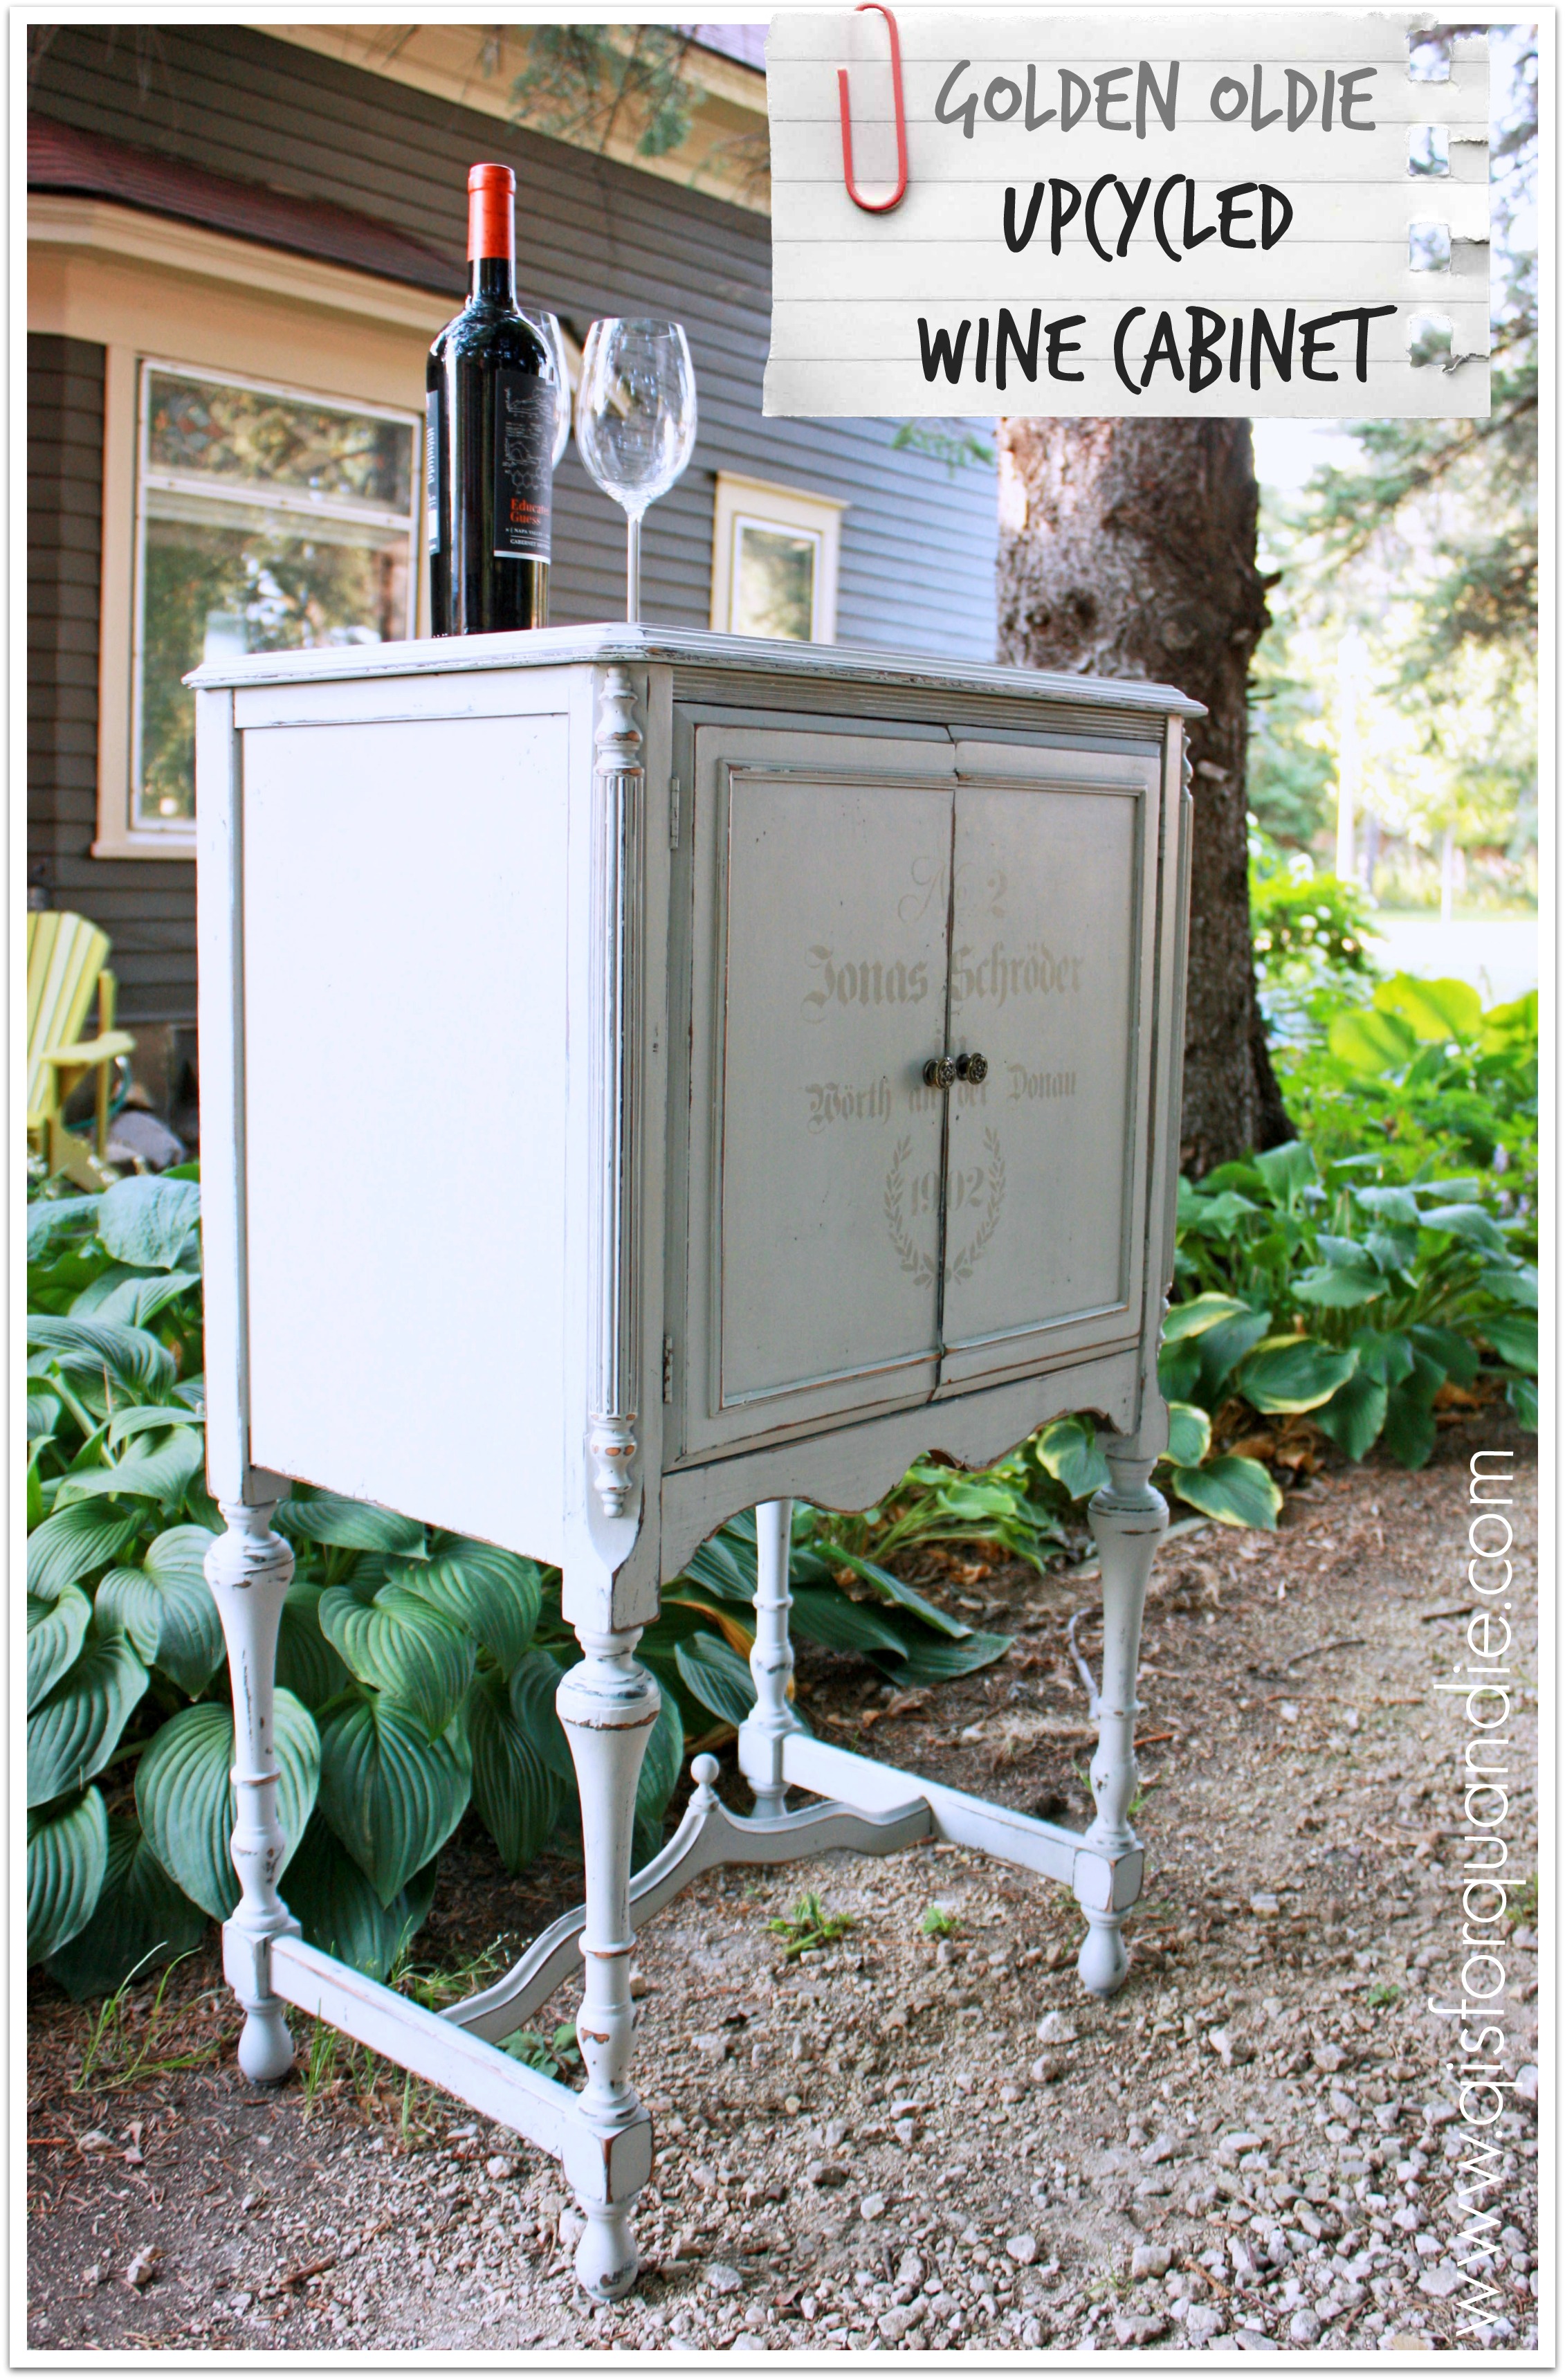
But here is the ‘after’.

mystery cabinet full

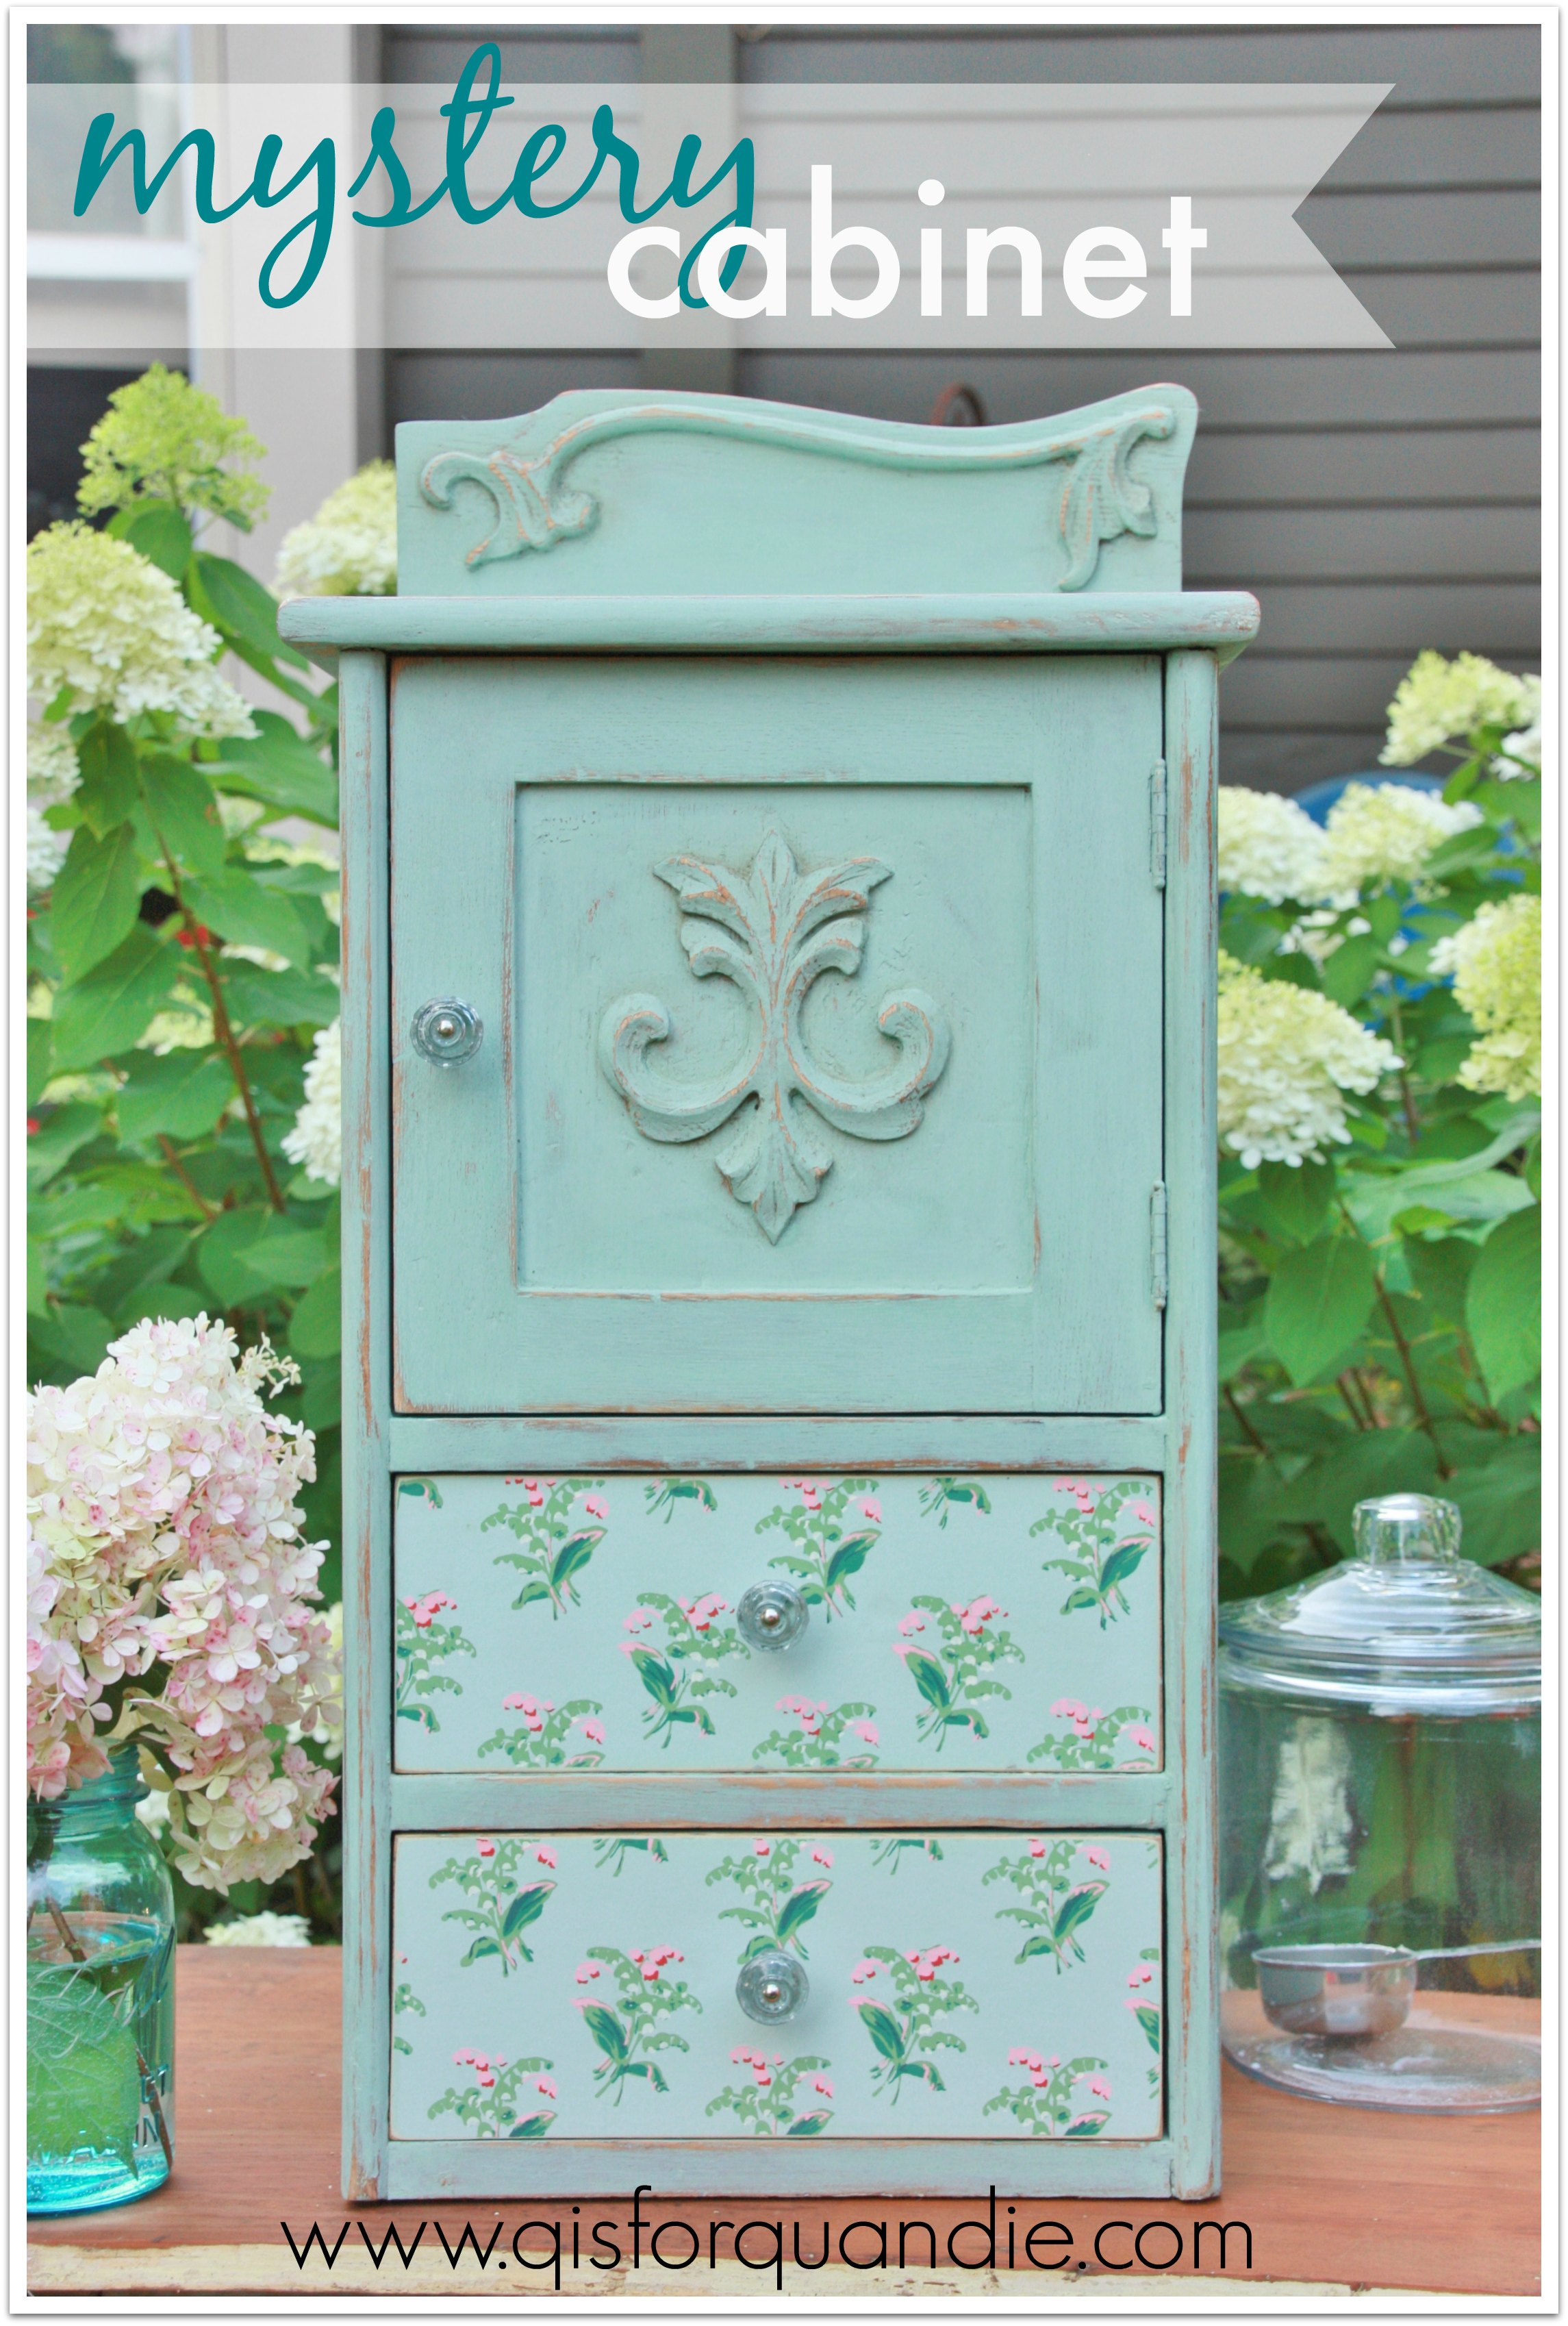
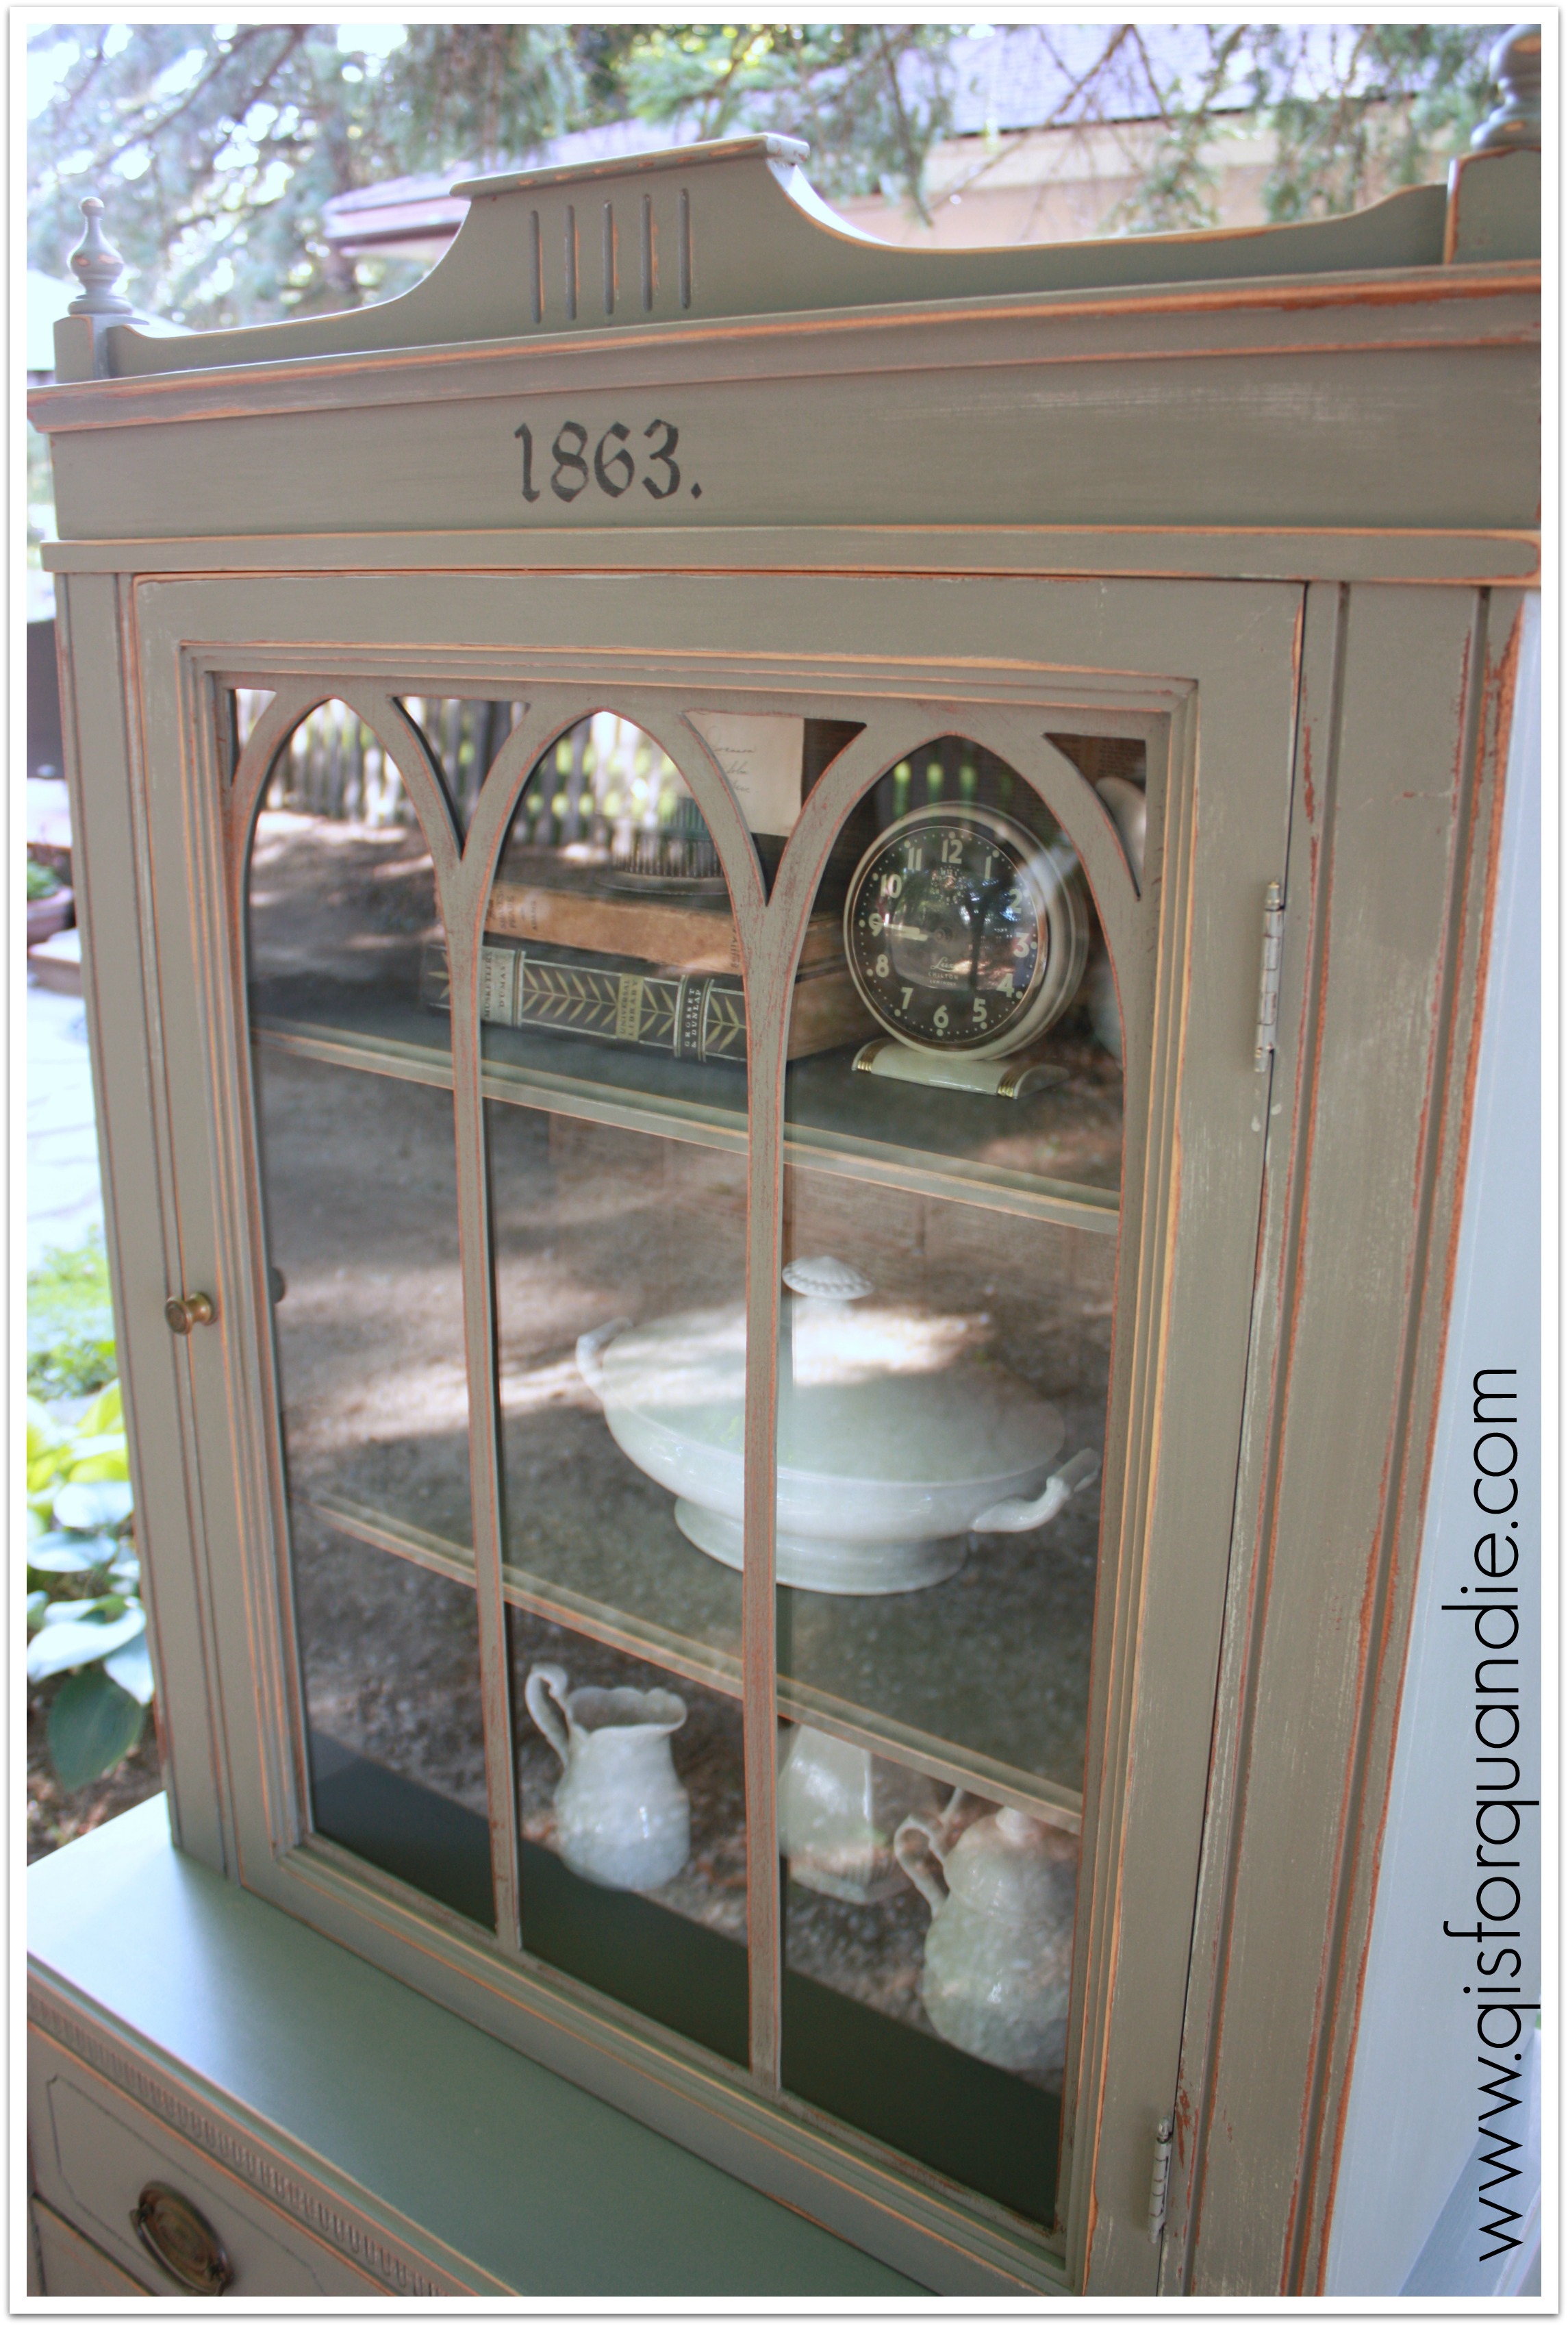
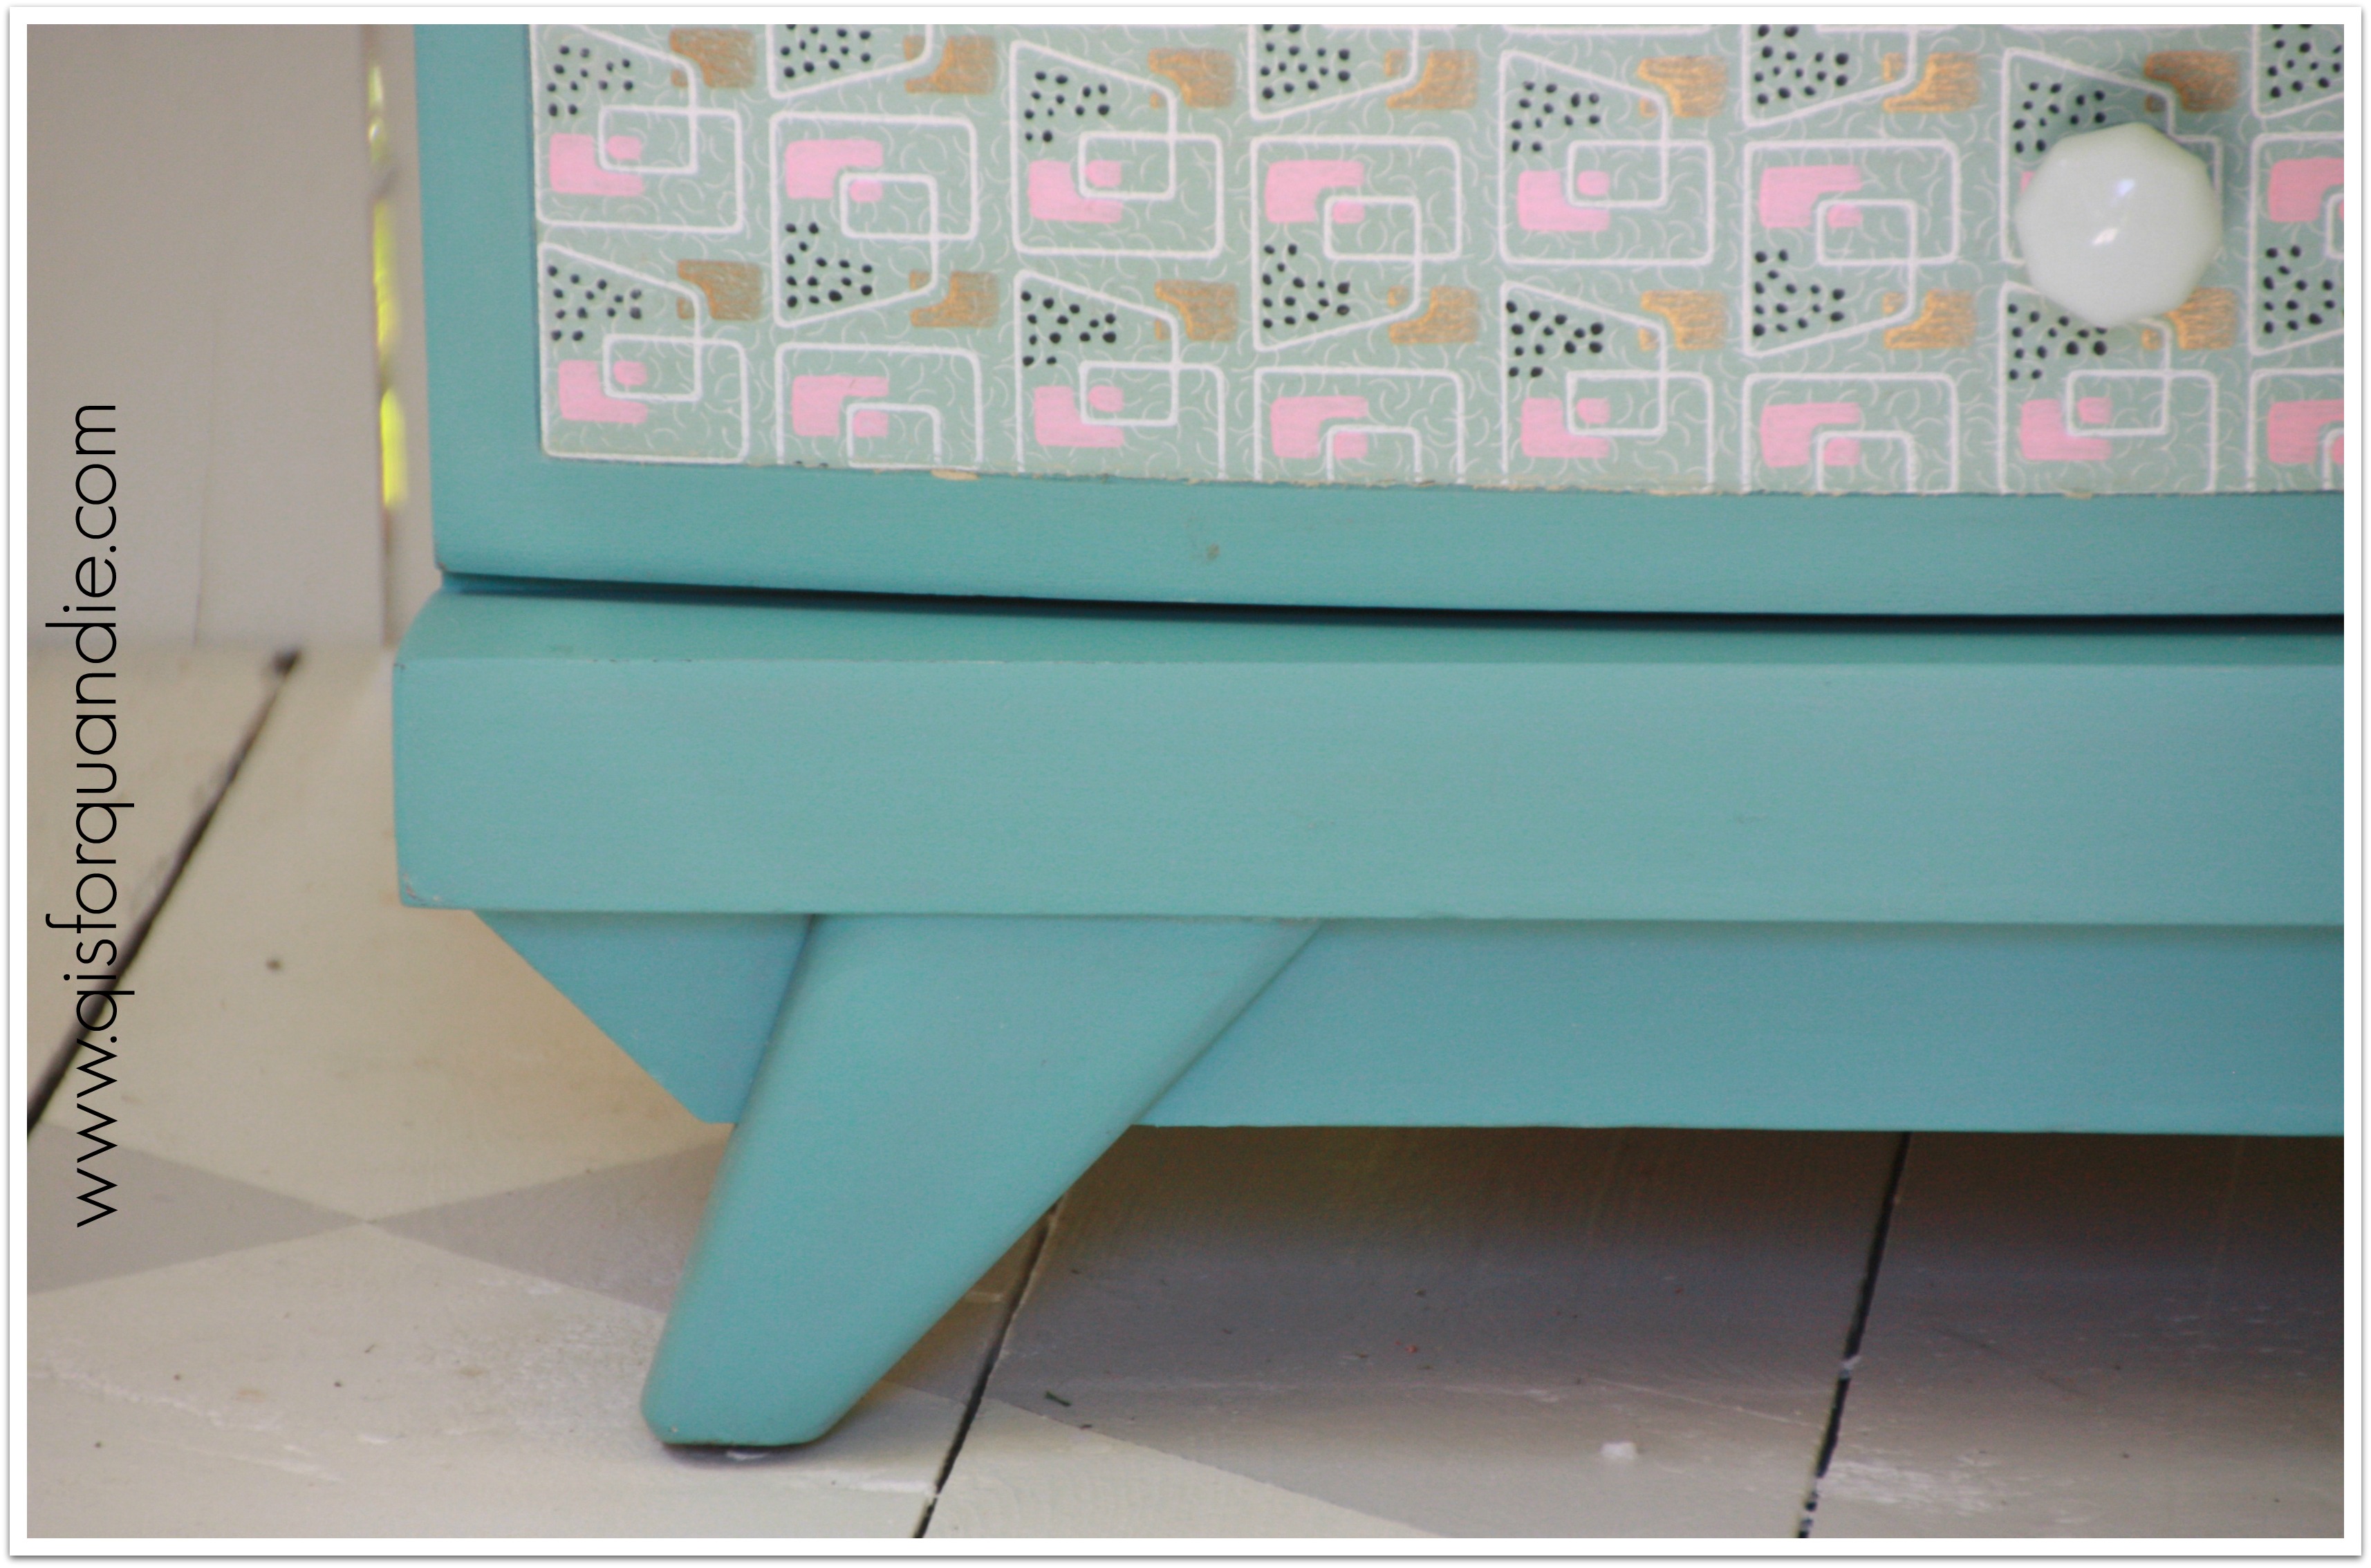
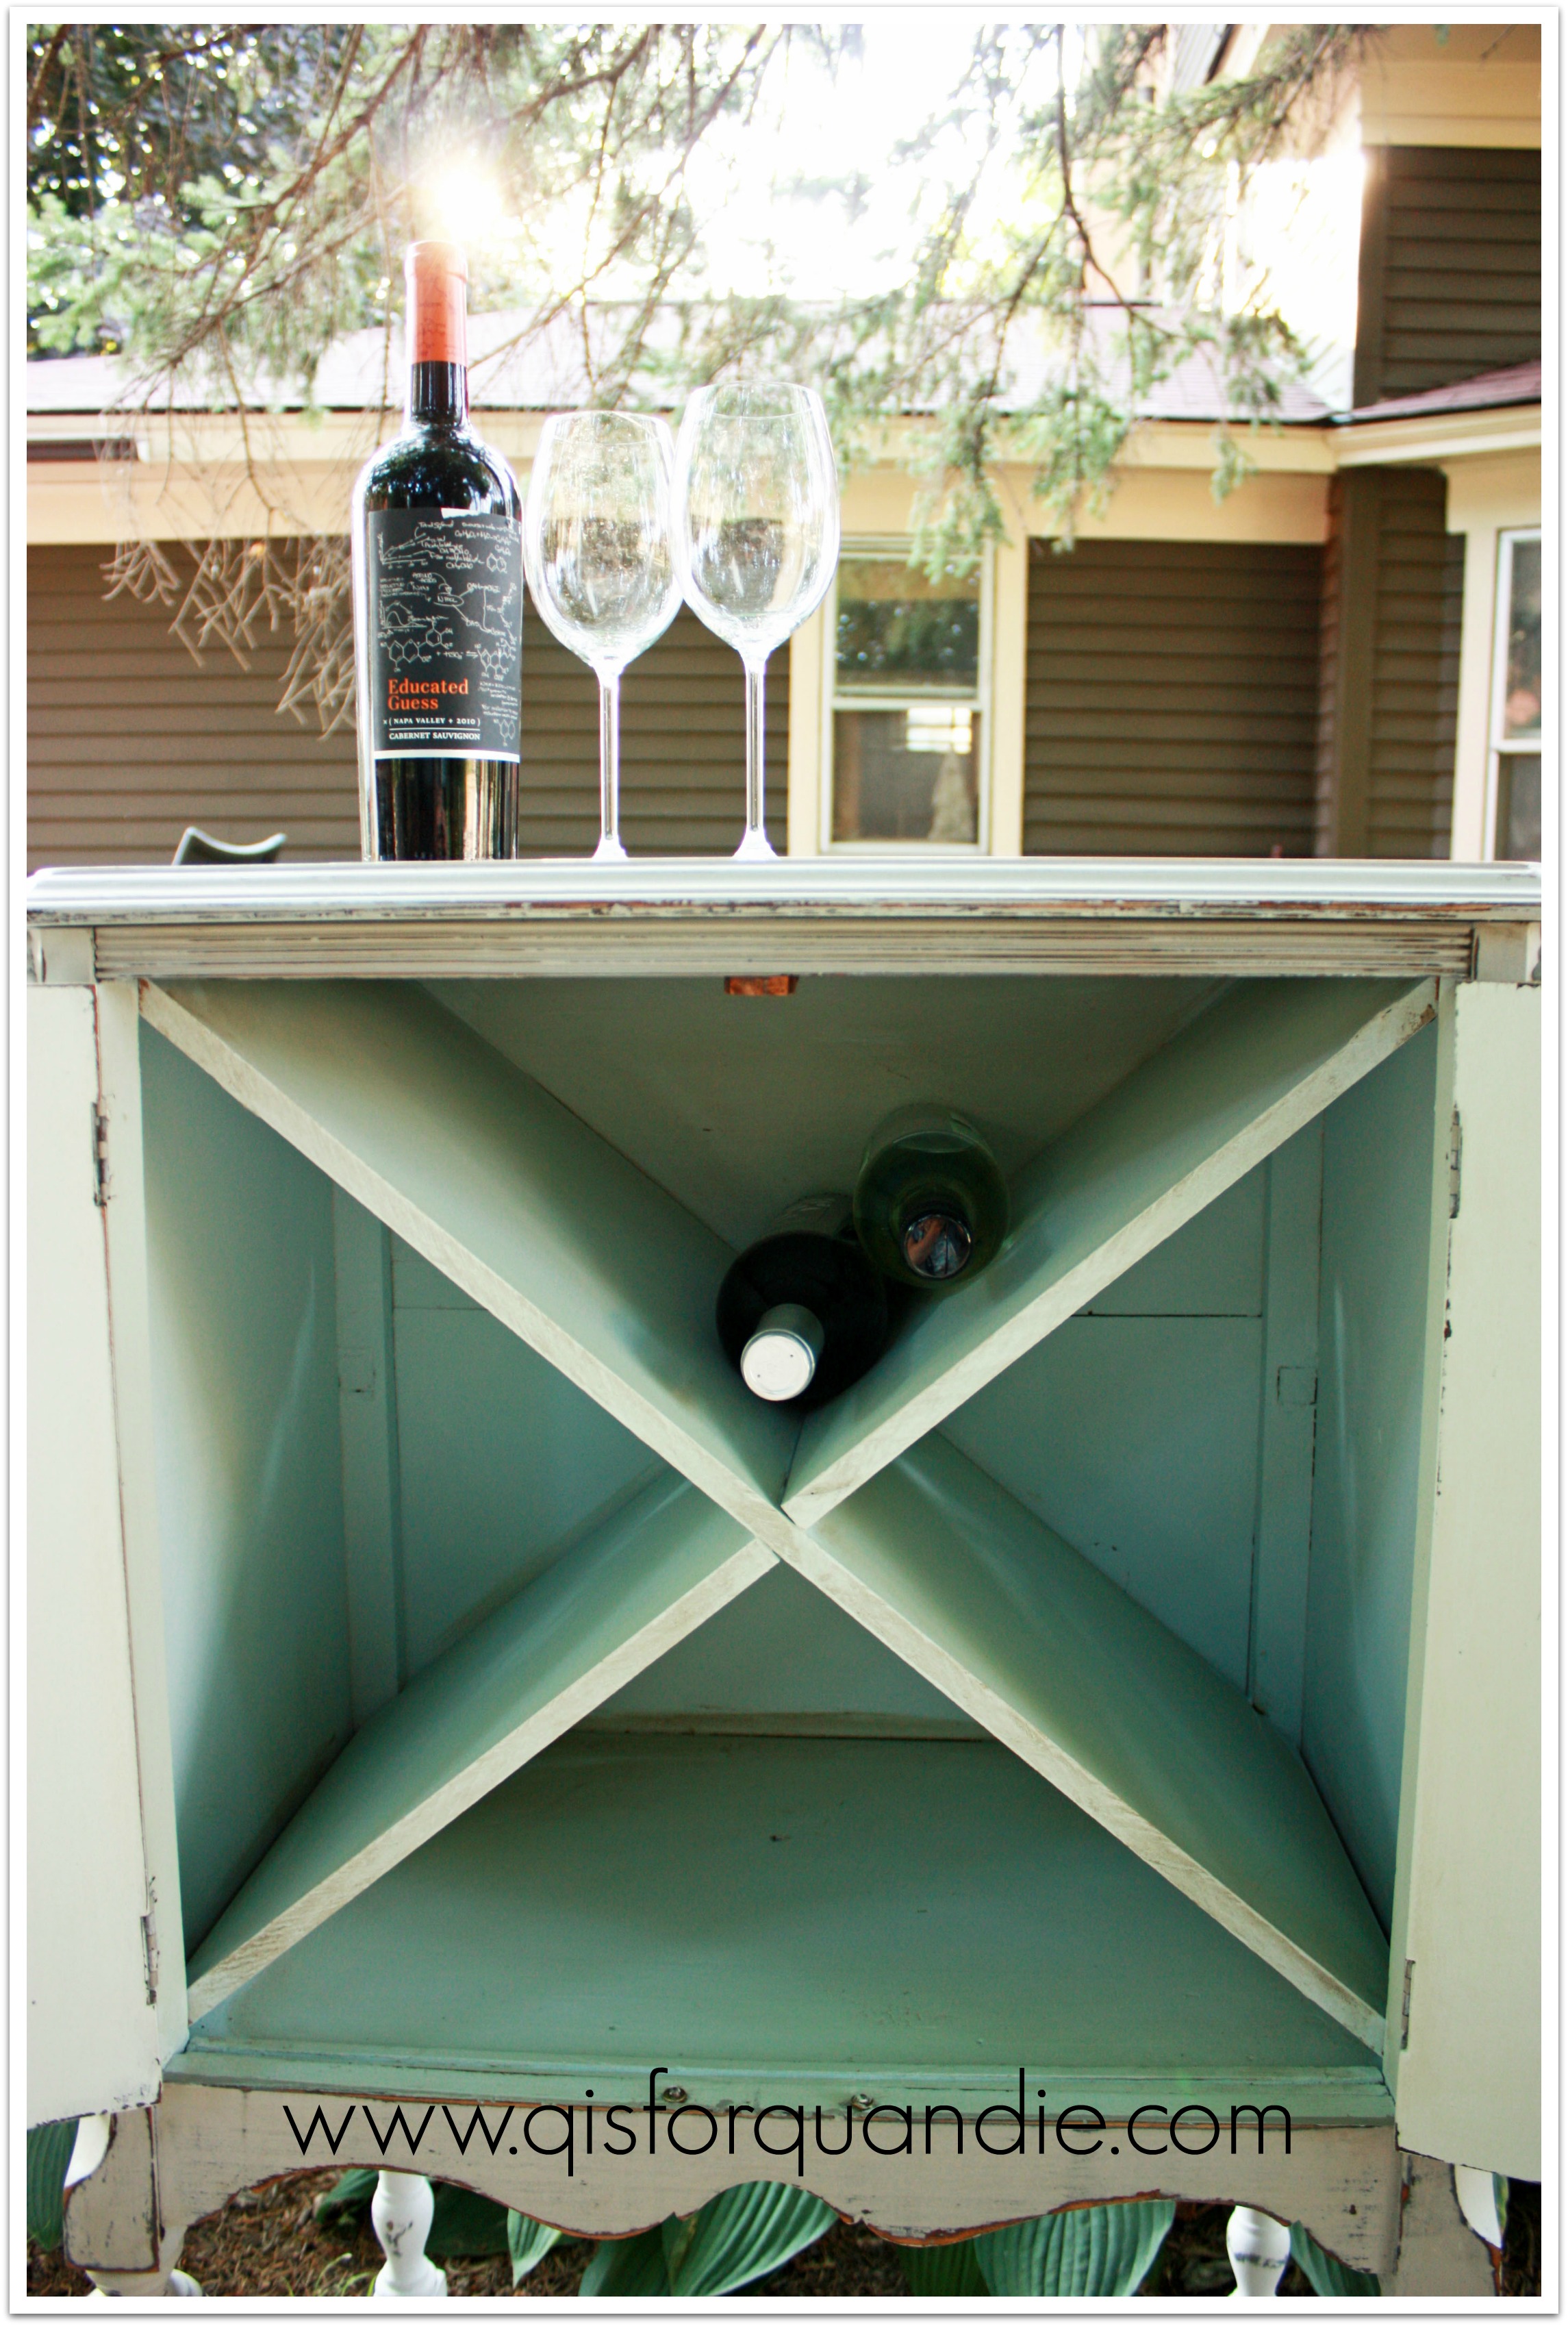
I’m calling it a mystery cabinet because I simply can’t fathom what its original purpose was.  It doesn’t seem to have much of a bottom, which makes me think it originally sat on top of something else.  Or perhaps it hung on the wall like a cabinet?  Or maybe it had legs.  And the back splash trim at the top is asymmetrical.  Why?  Was this part of a pair?  Does anyone out there have a clue what this might be?

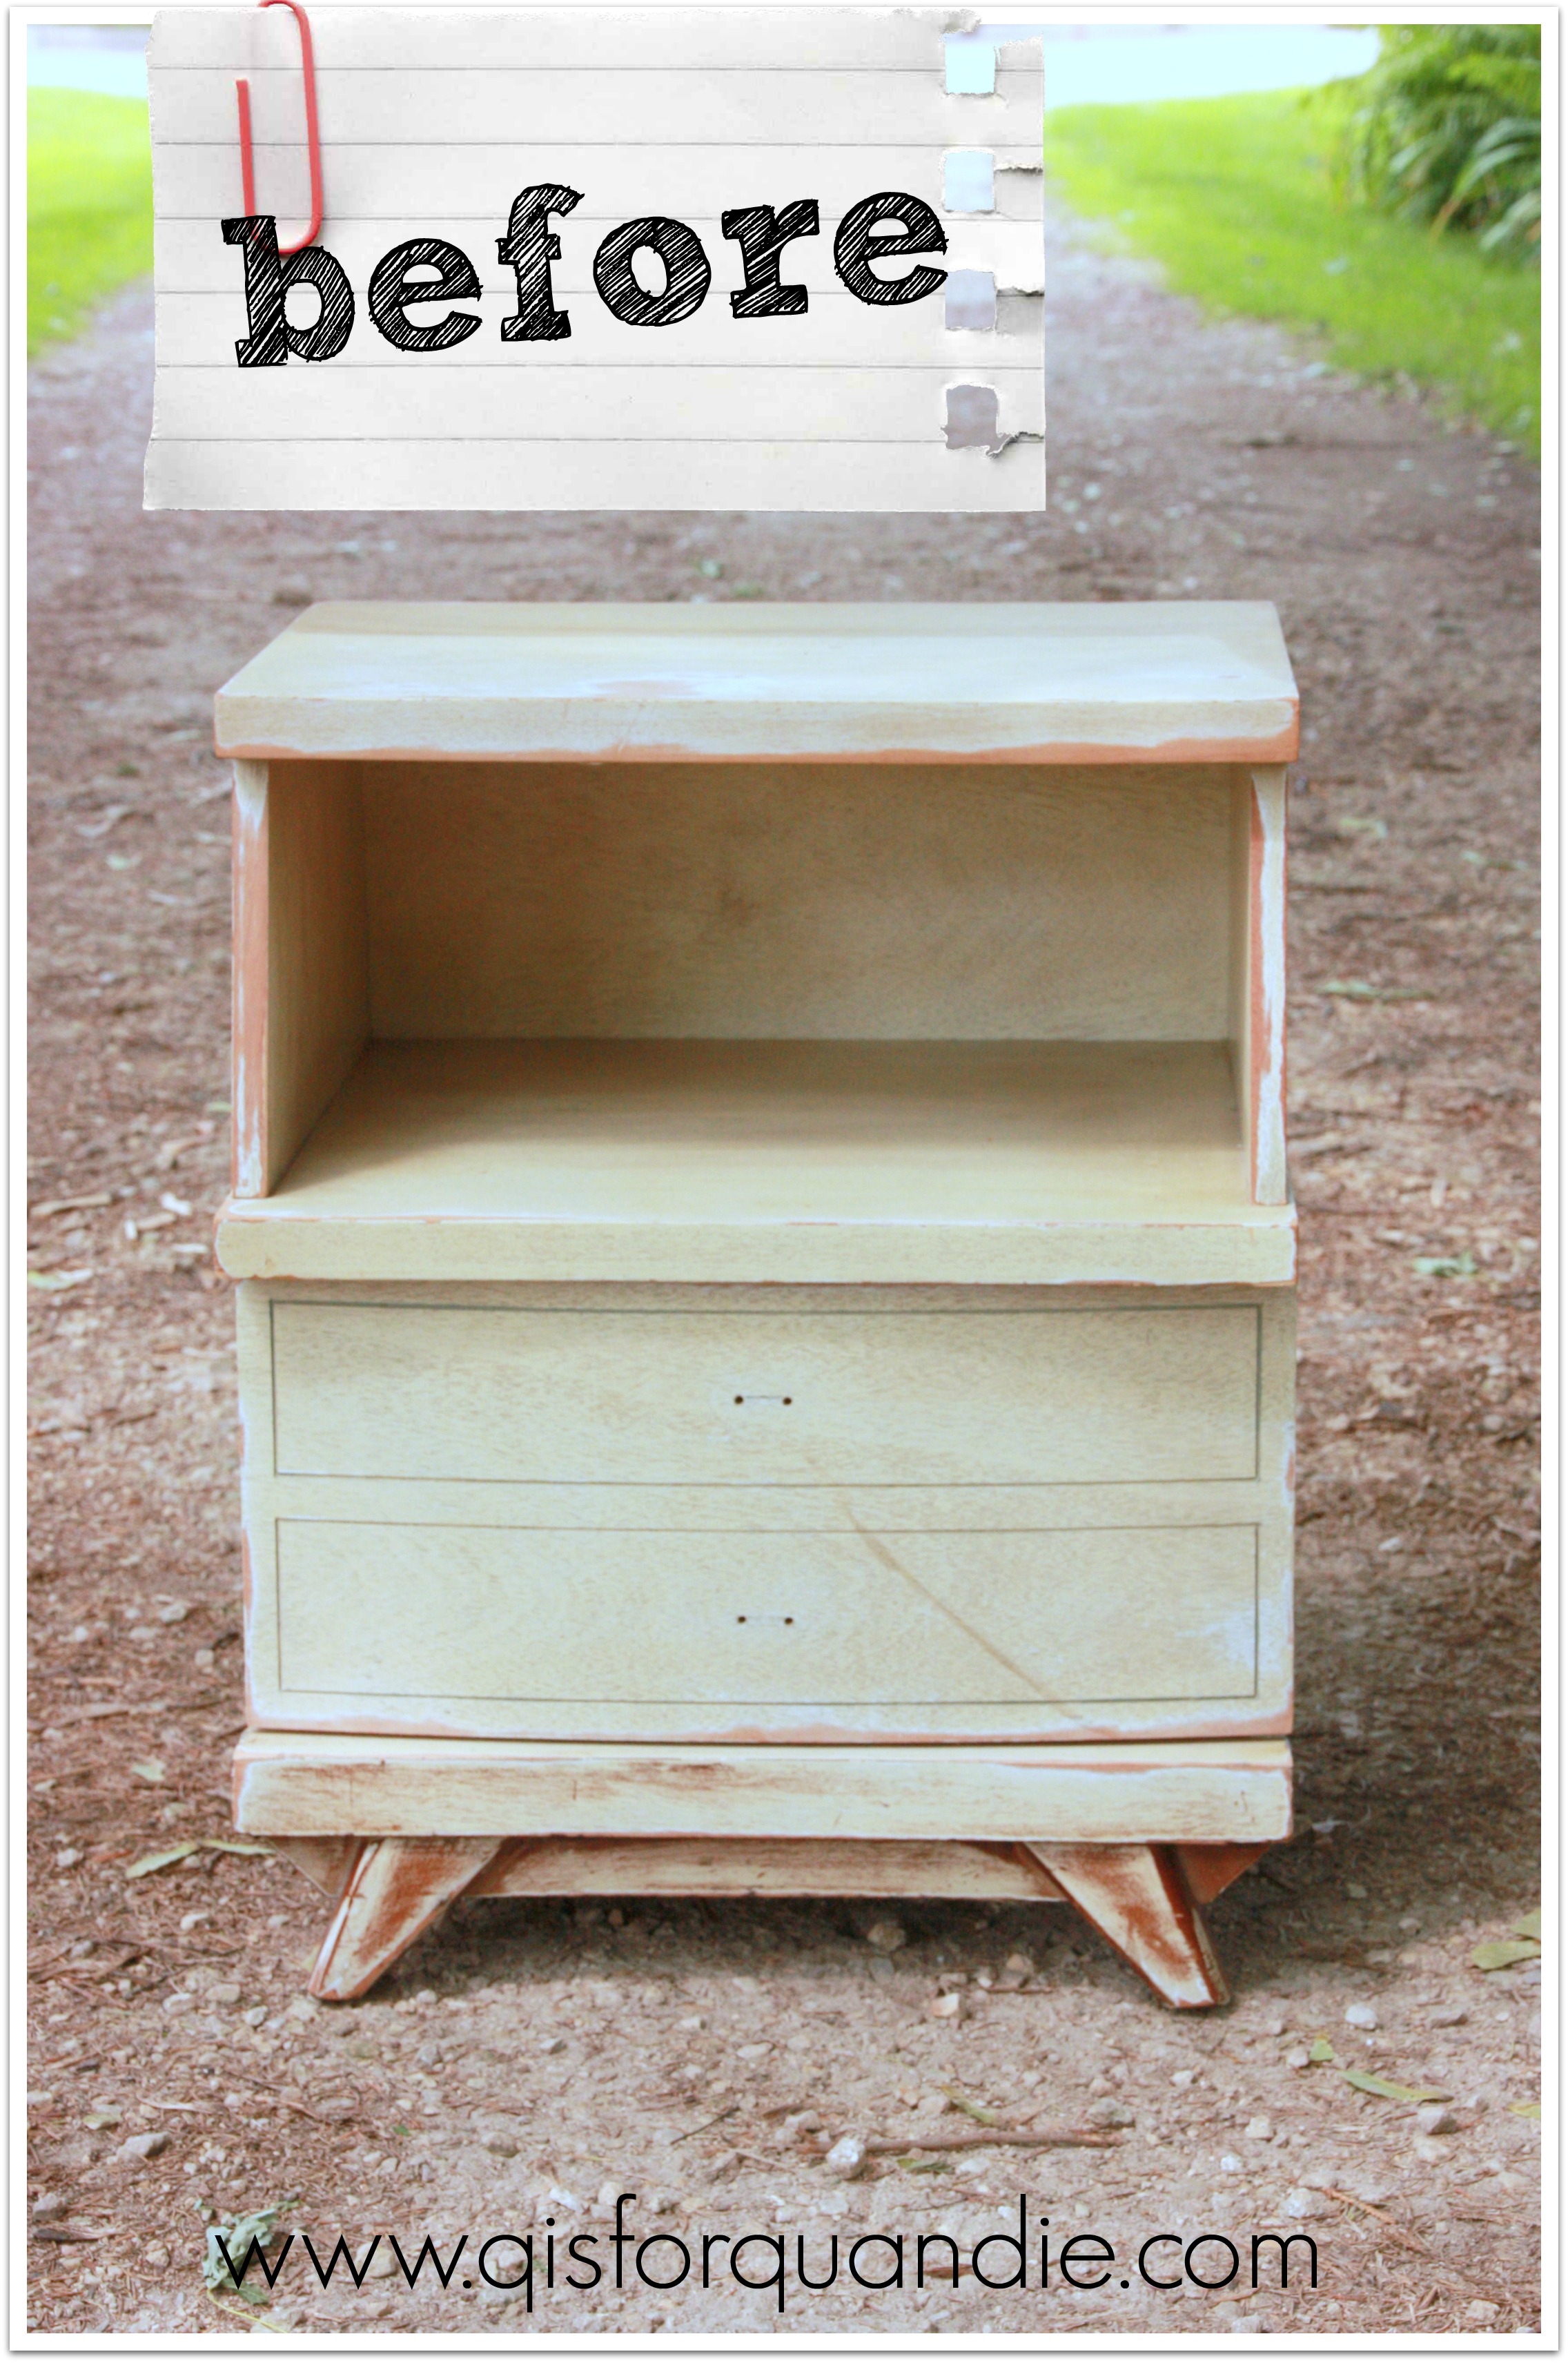
In one of the world’s strangest coincidences, someone has a very similar piece listed on craigslist at the moment.  Here is the picture from their ad.

matching mystery cupboard

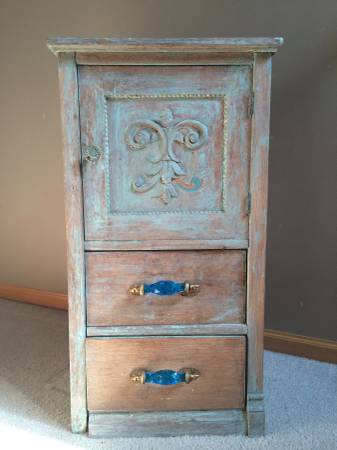
The ‘before’ condition of my mystery cabinet was very similar to this one.  A sort of mostly stripped off paint look.  Obviously this is not an exact match to mine, but the similarity is striking, don’t you think?  And FYI, the seller is asking $175!  Wowza.  According to their ad, their cupboard is about an inch larger than mine in every direction.  They speculate that it was part of a larger run of cabinets.  You can see that they don’t have the same trim piece at the top that mine has.

Well, despite not knowing what it is, I decided it would be fabulous with a Quandie style makeover.

2014 summer blog26

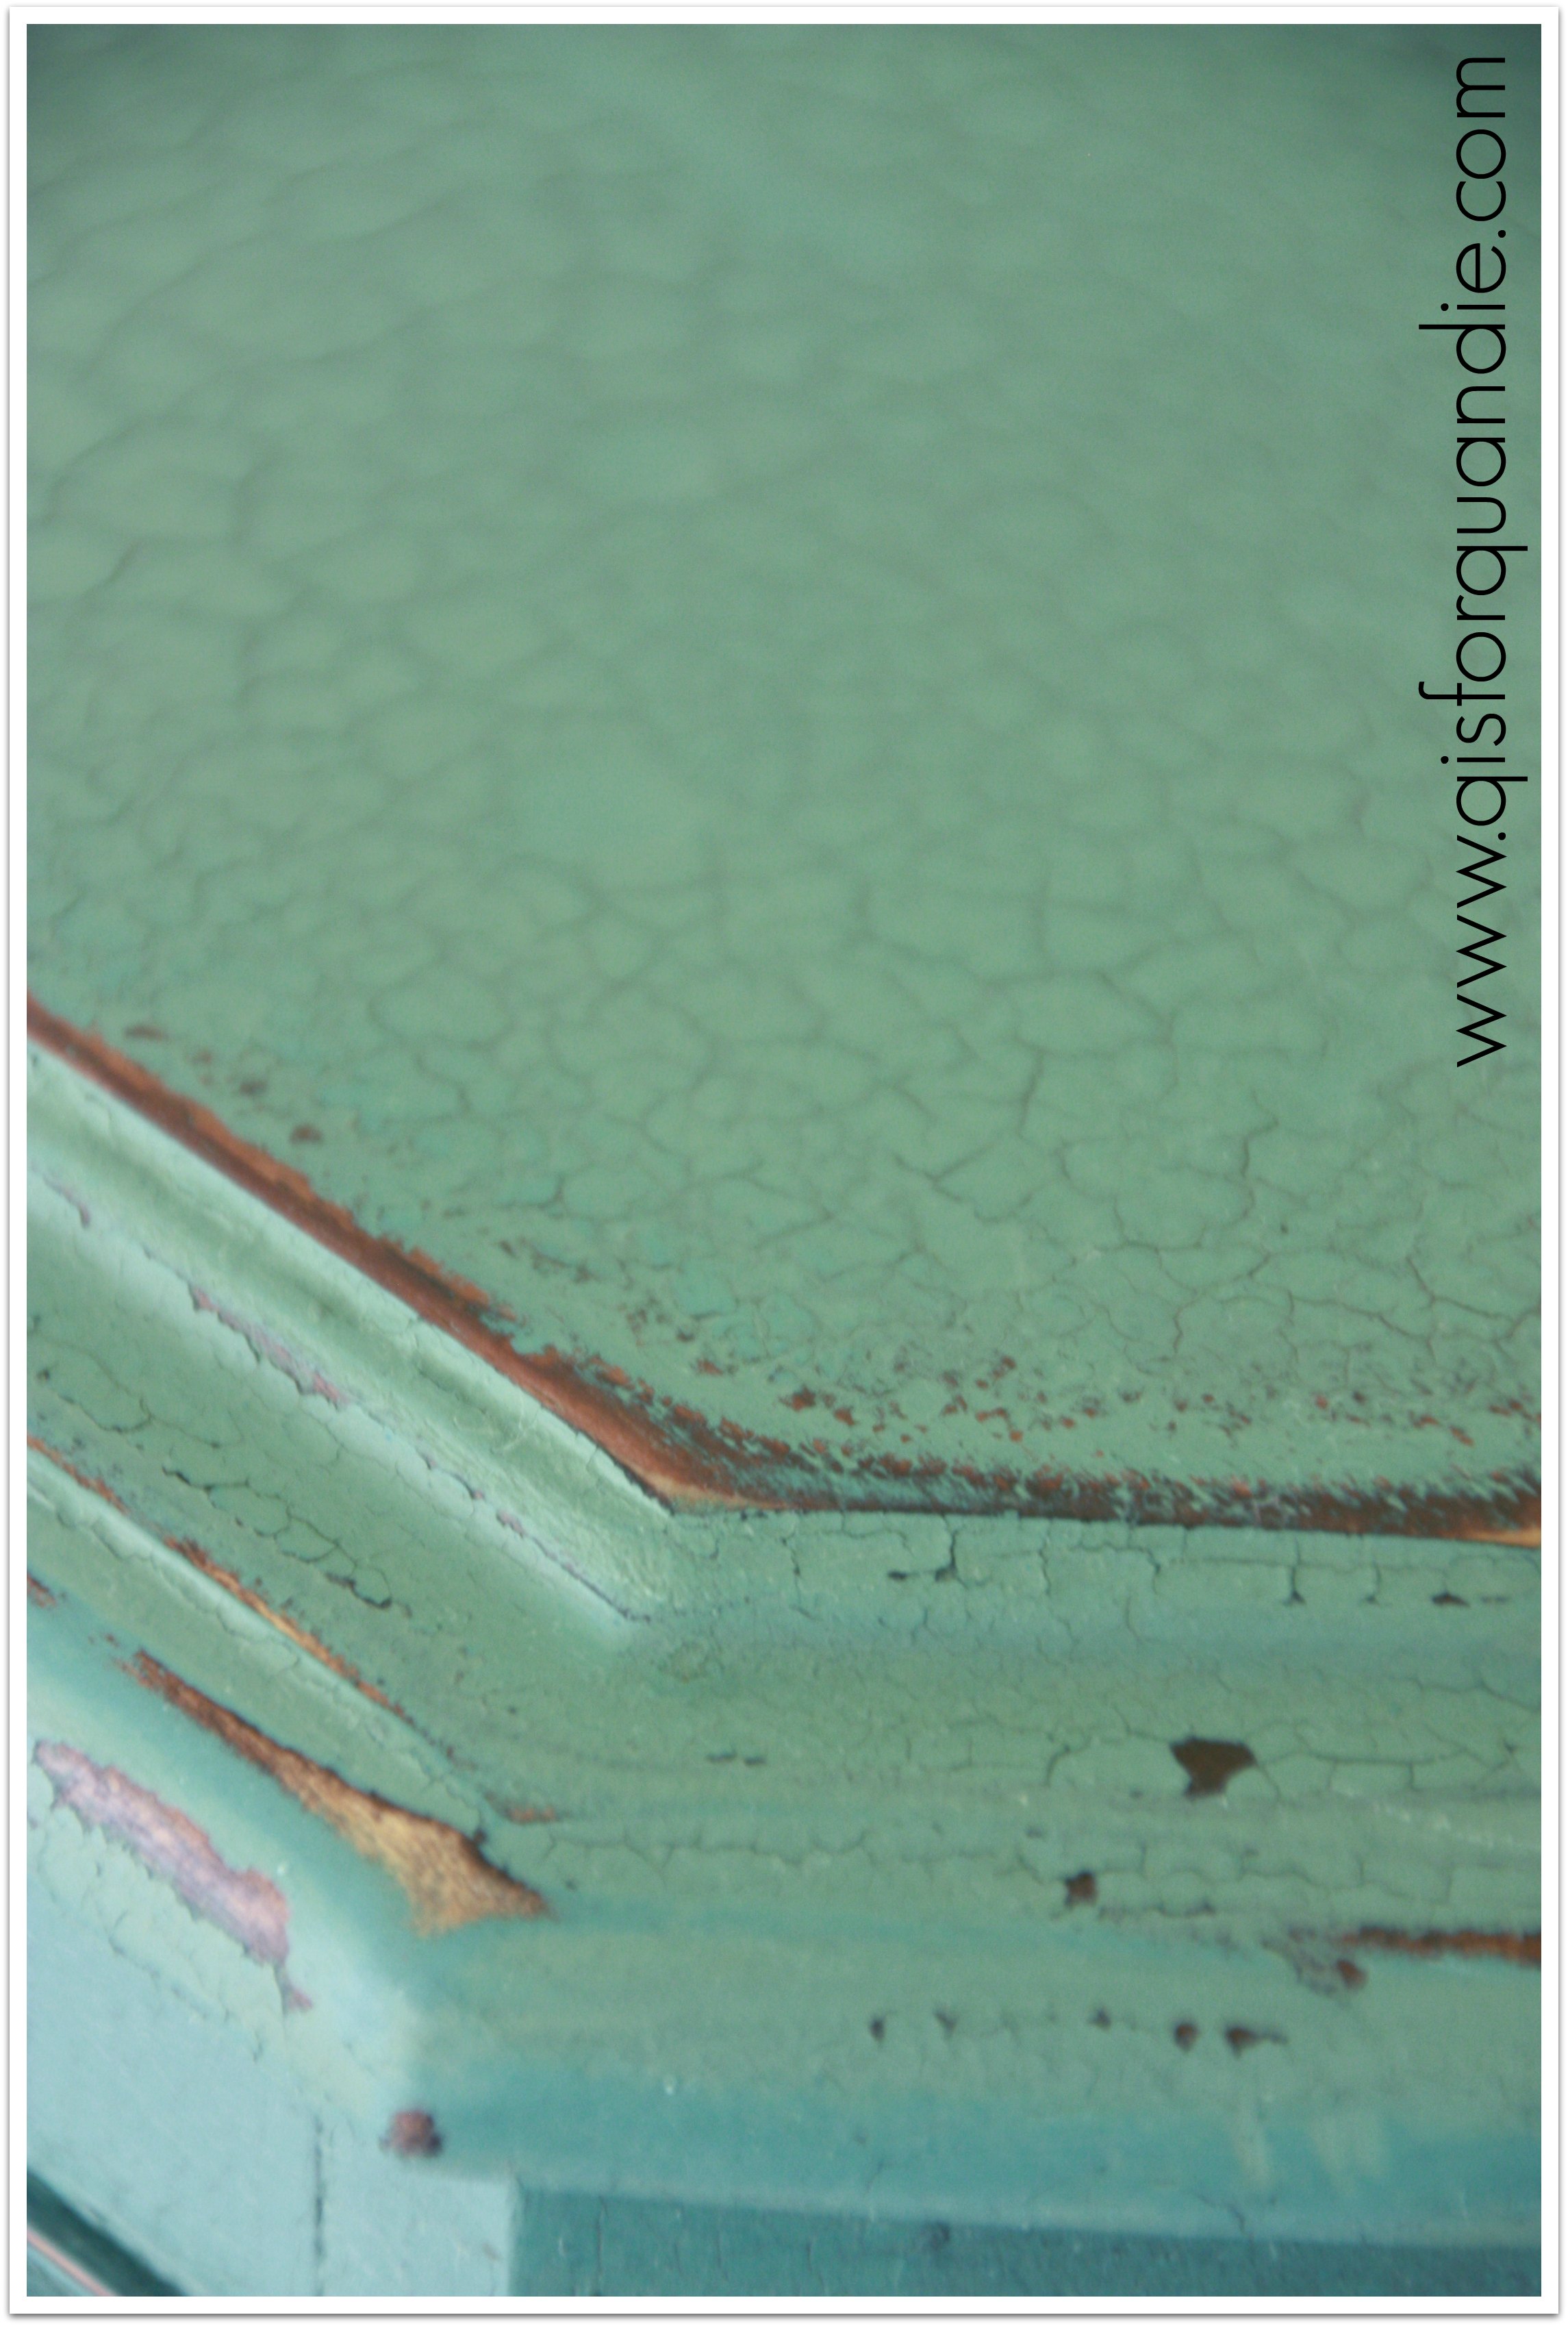
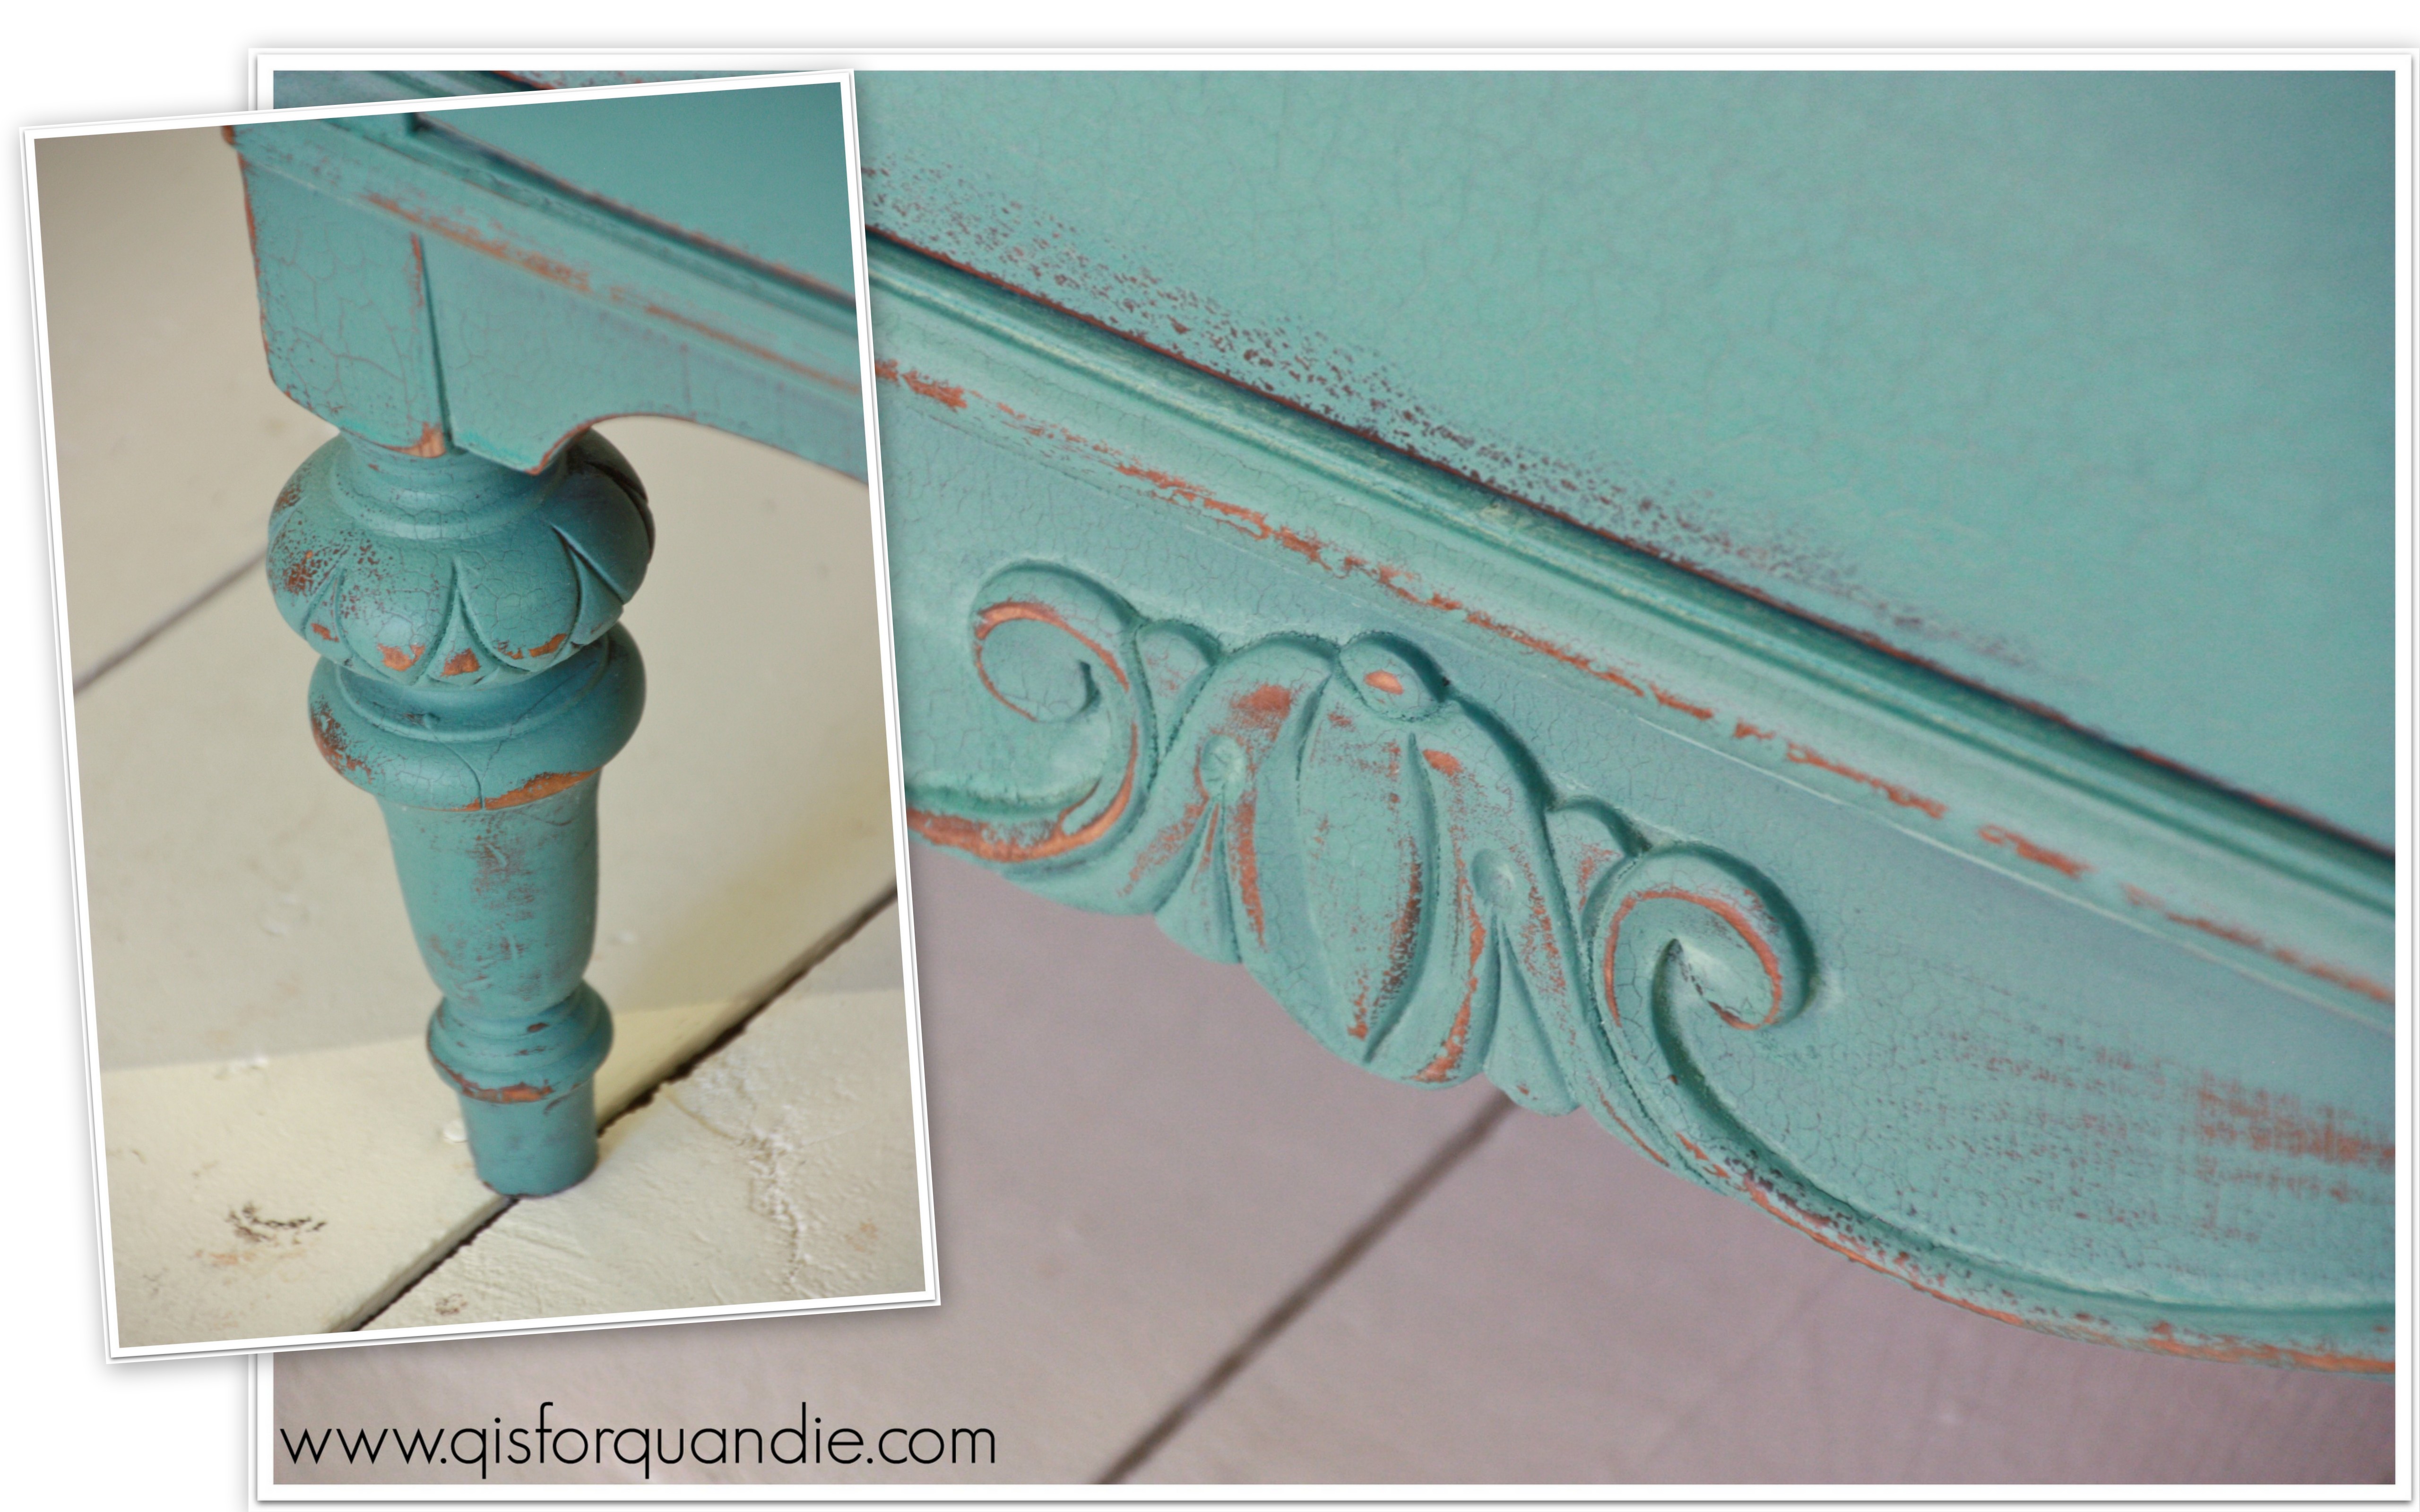
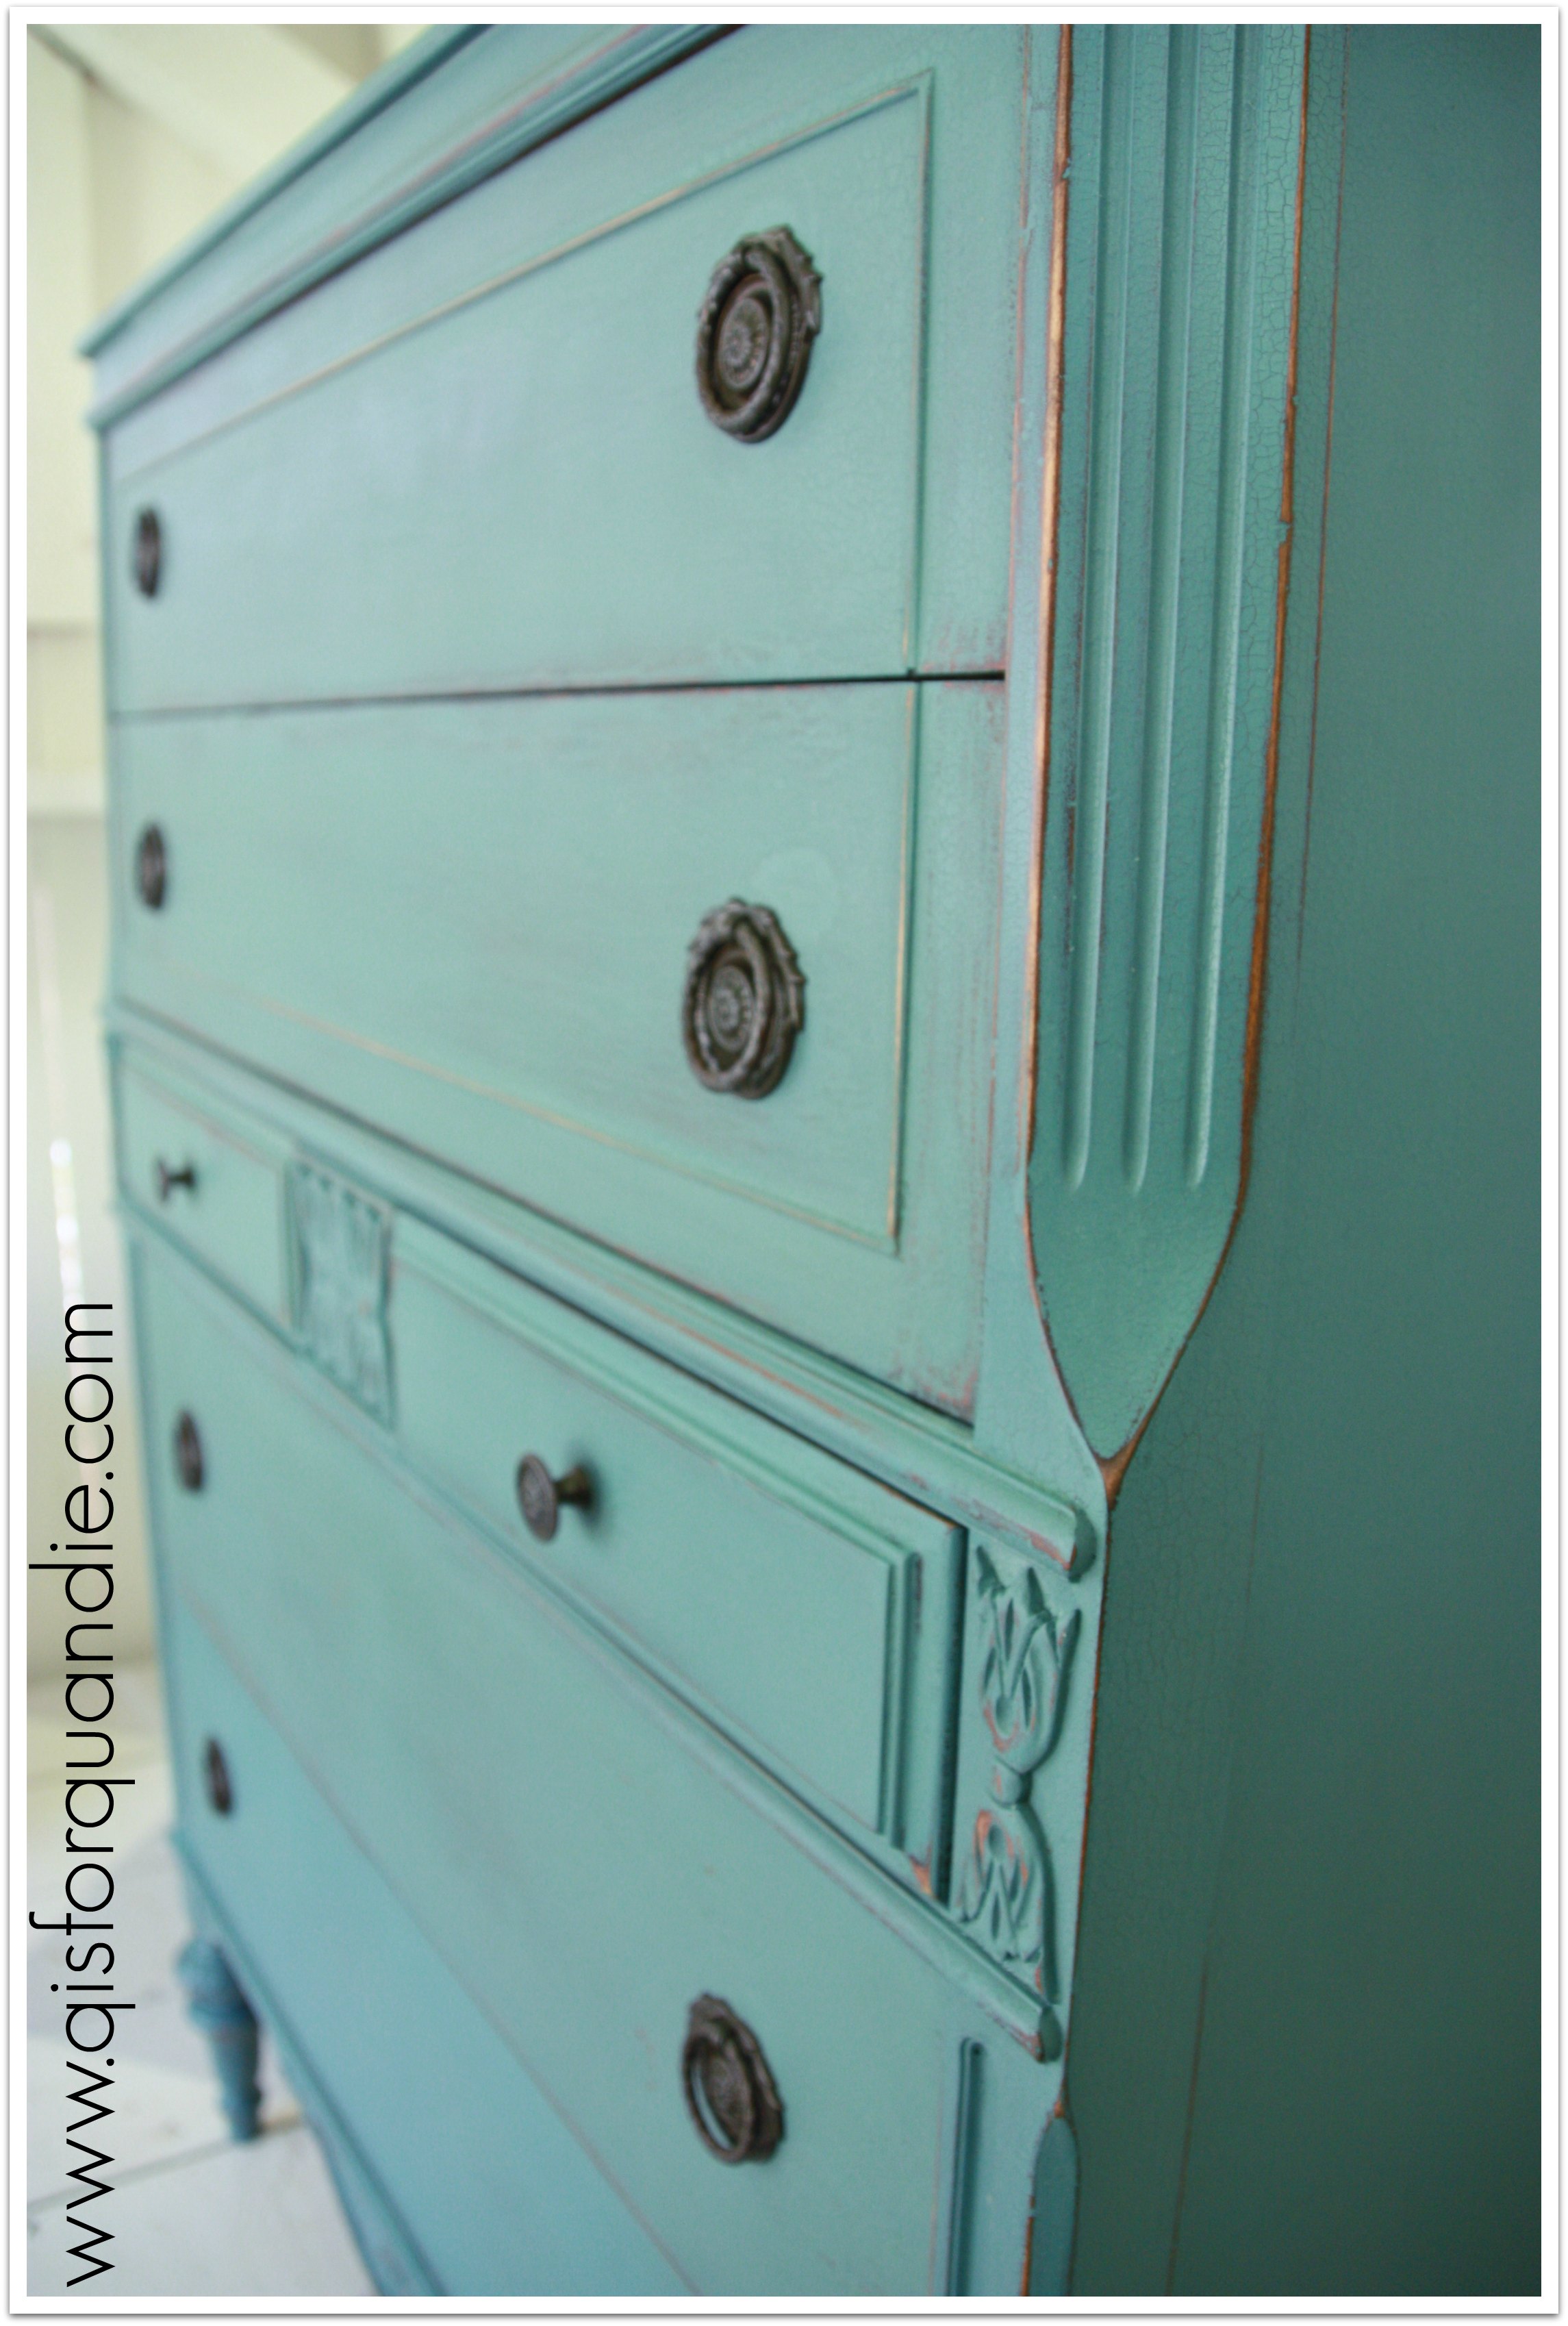
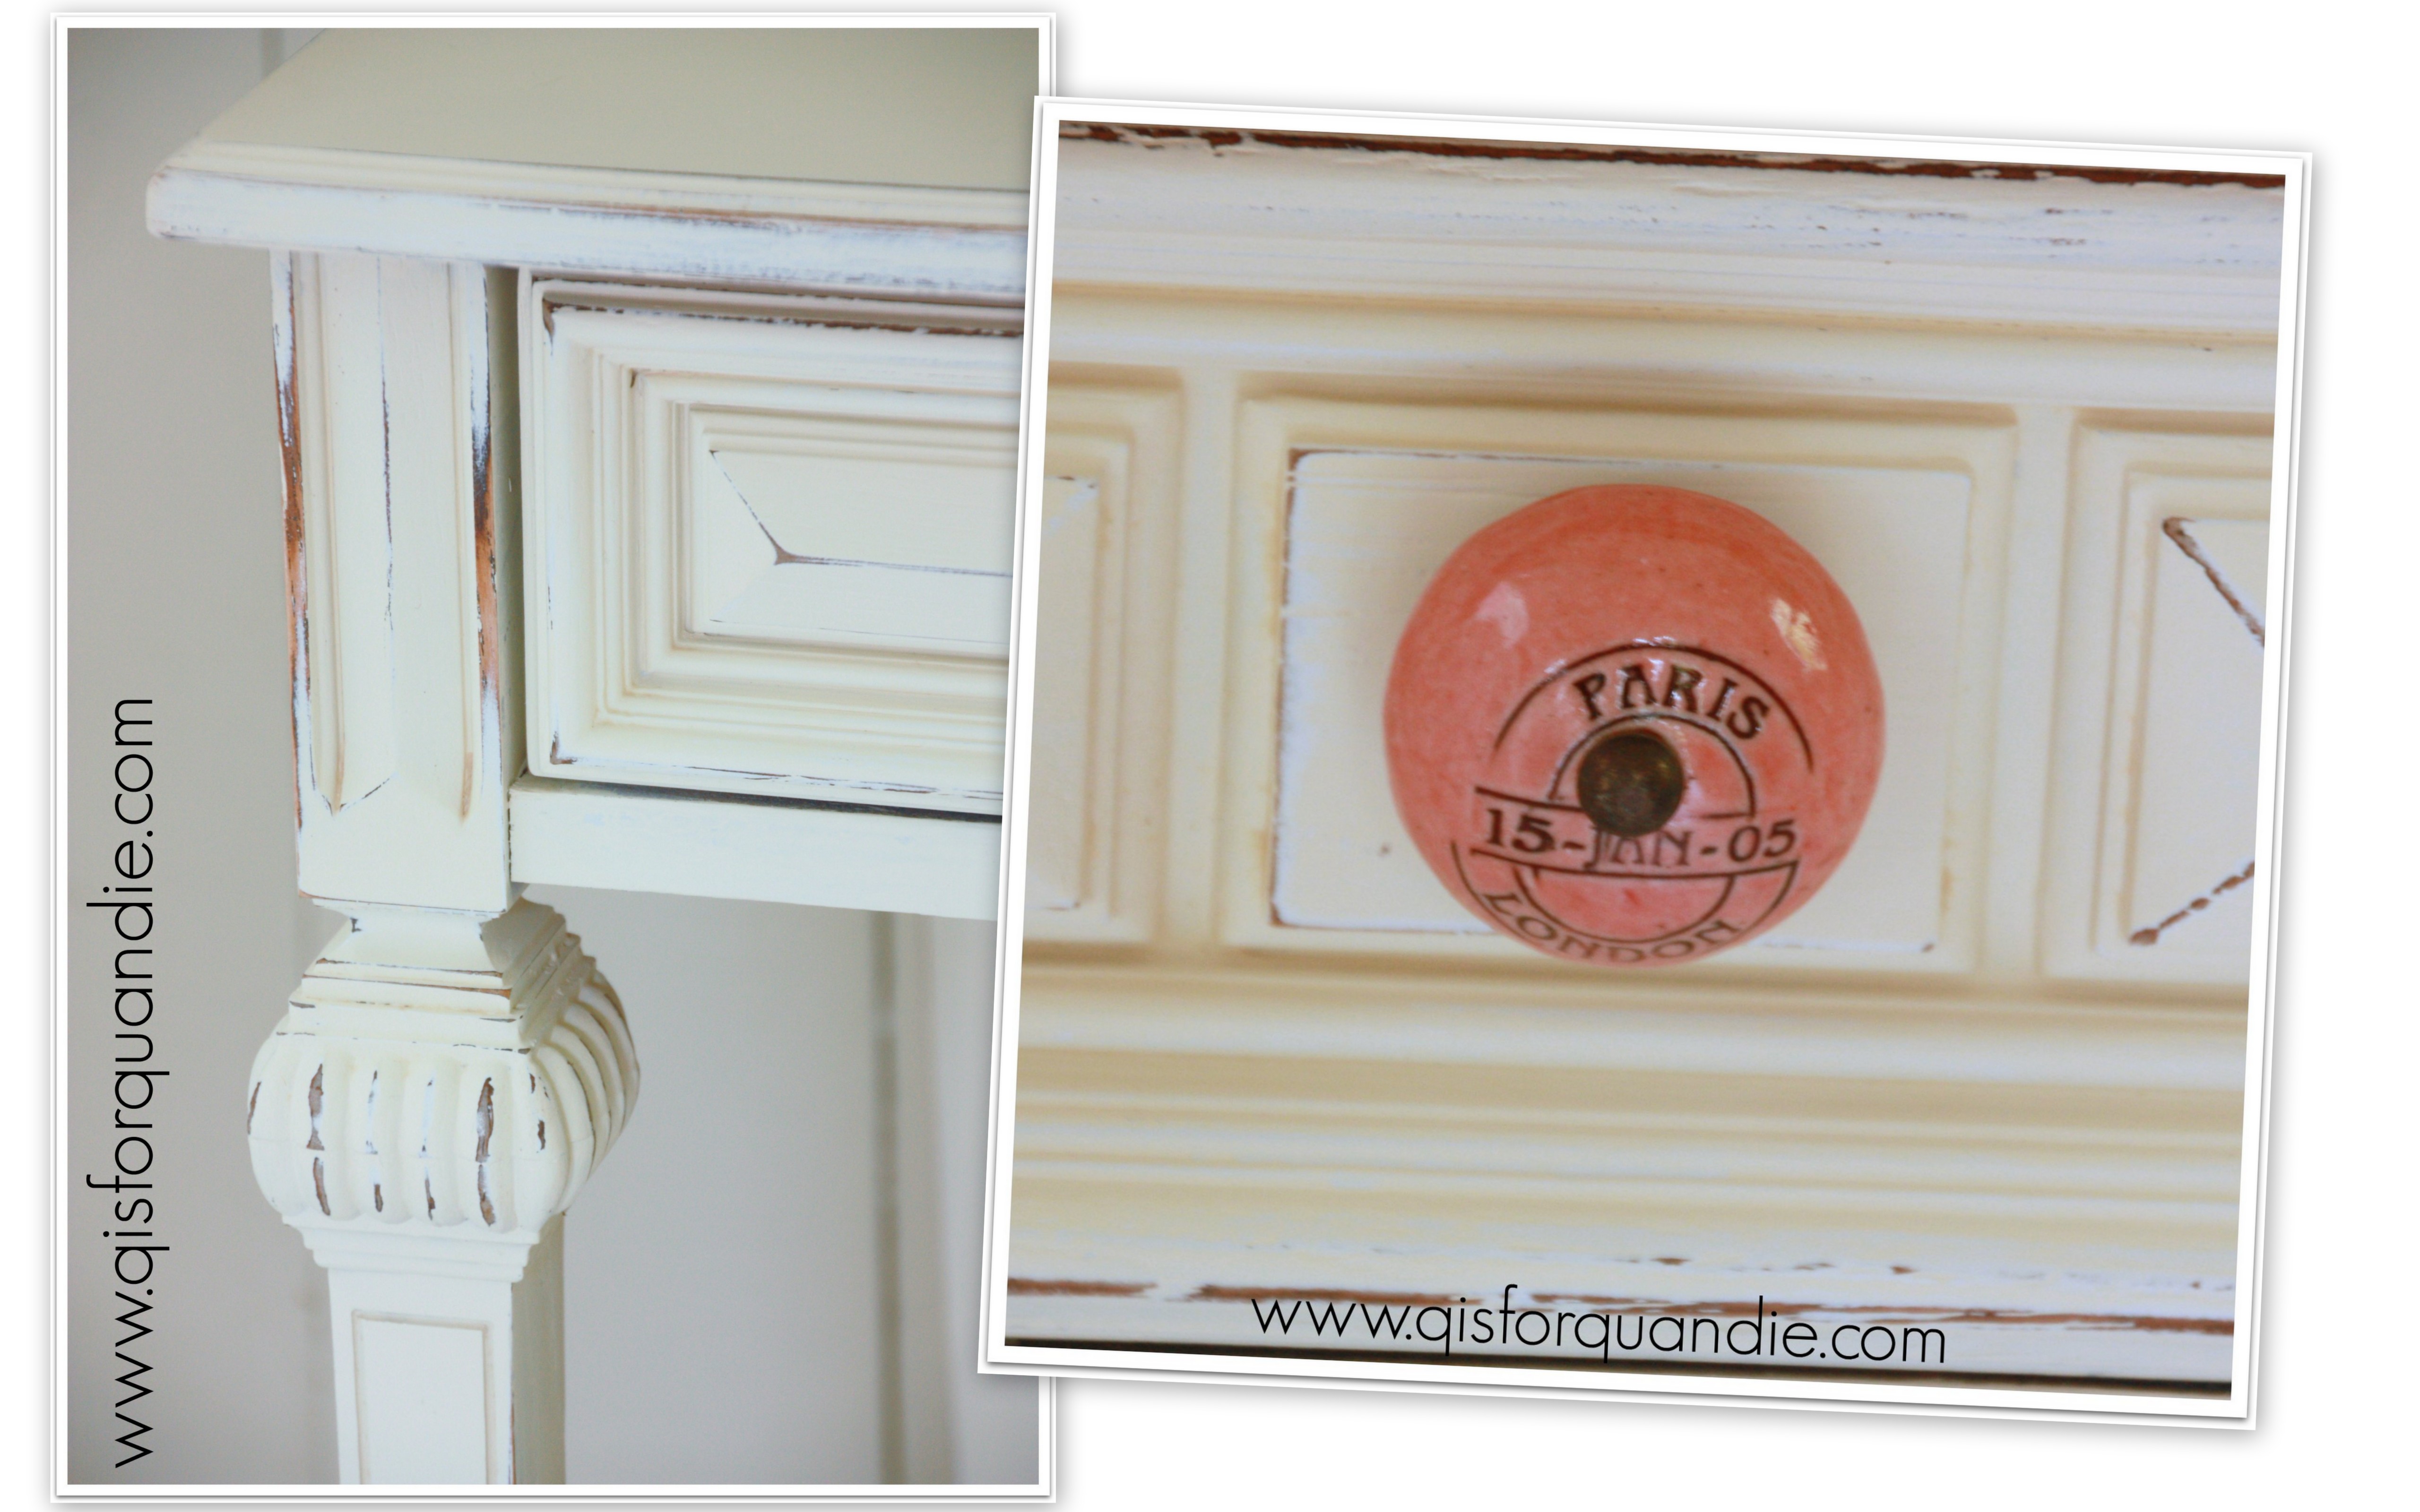
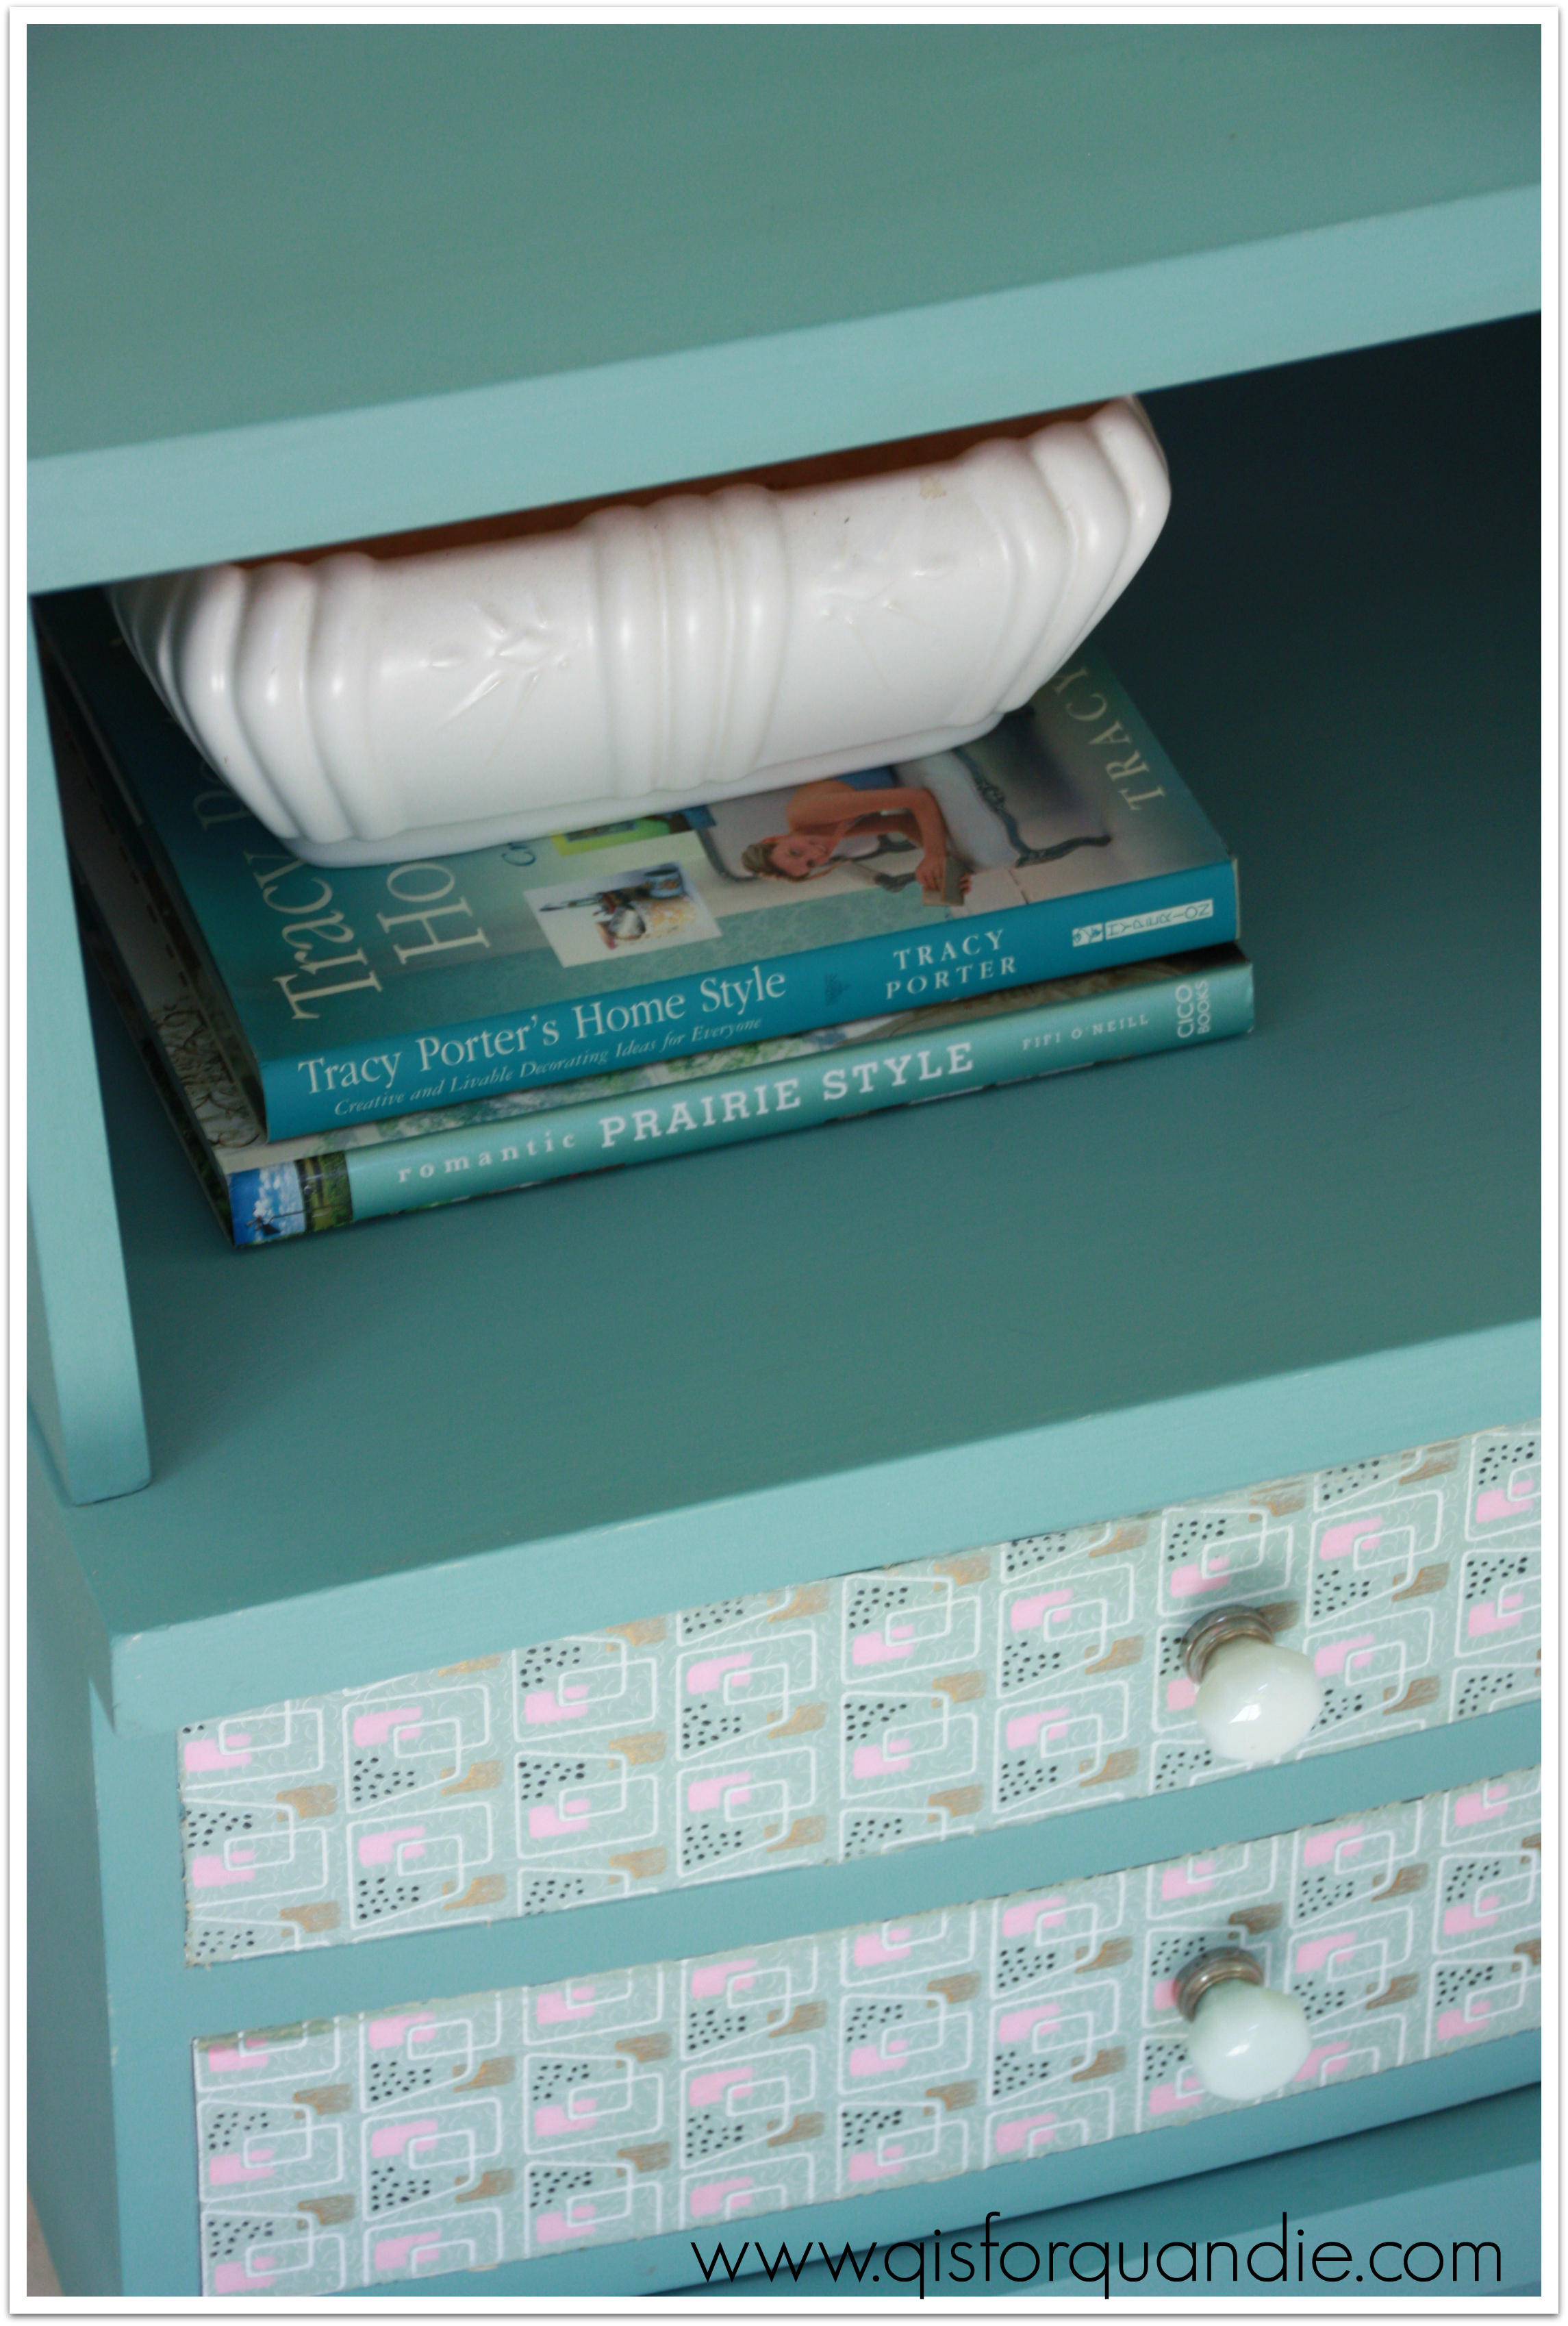
So I painted it with Sweetie Jane milk paint.  I was inspired by what appeared to be the original paint color that you can still see in spots.

mystery cabinet original color

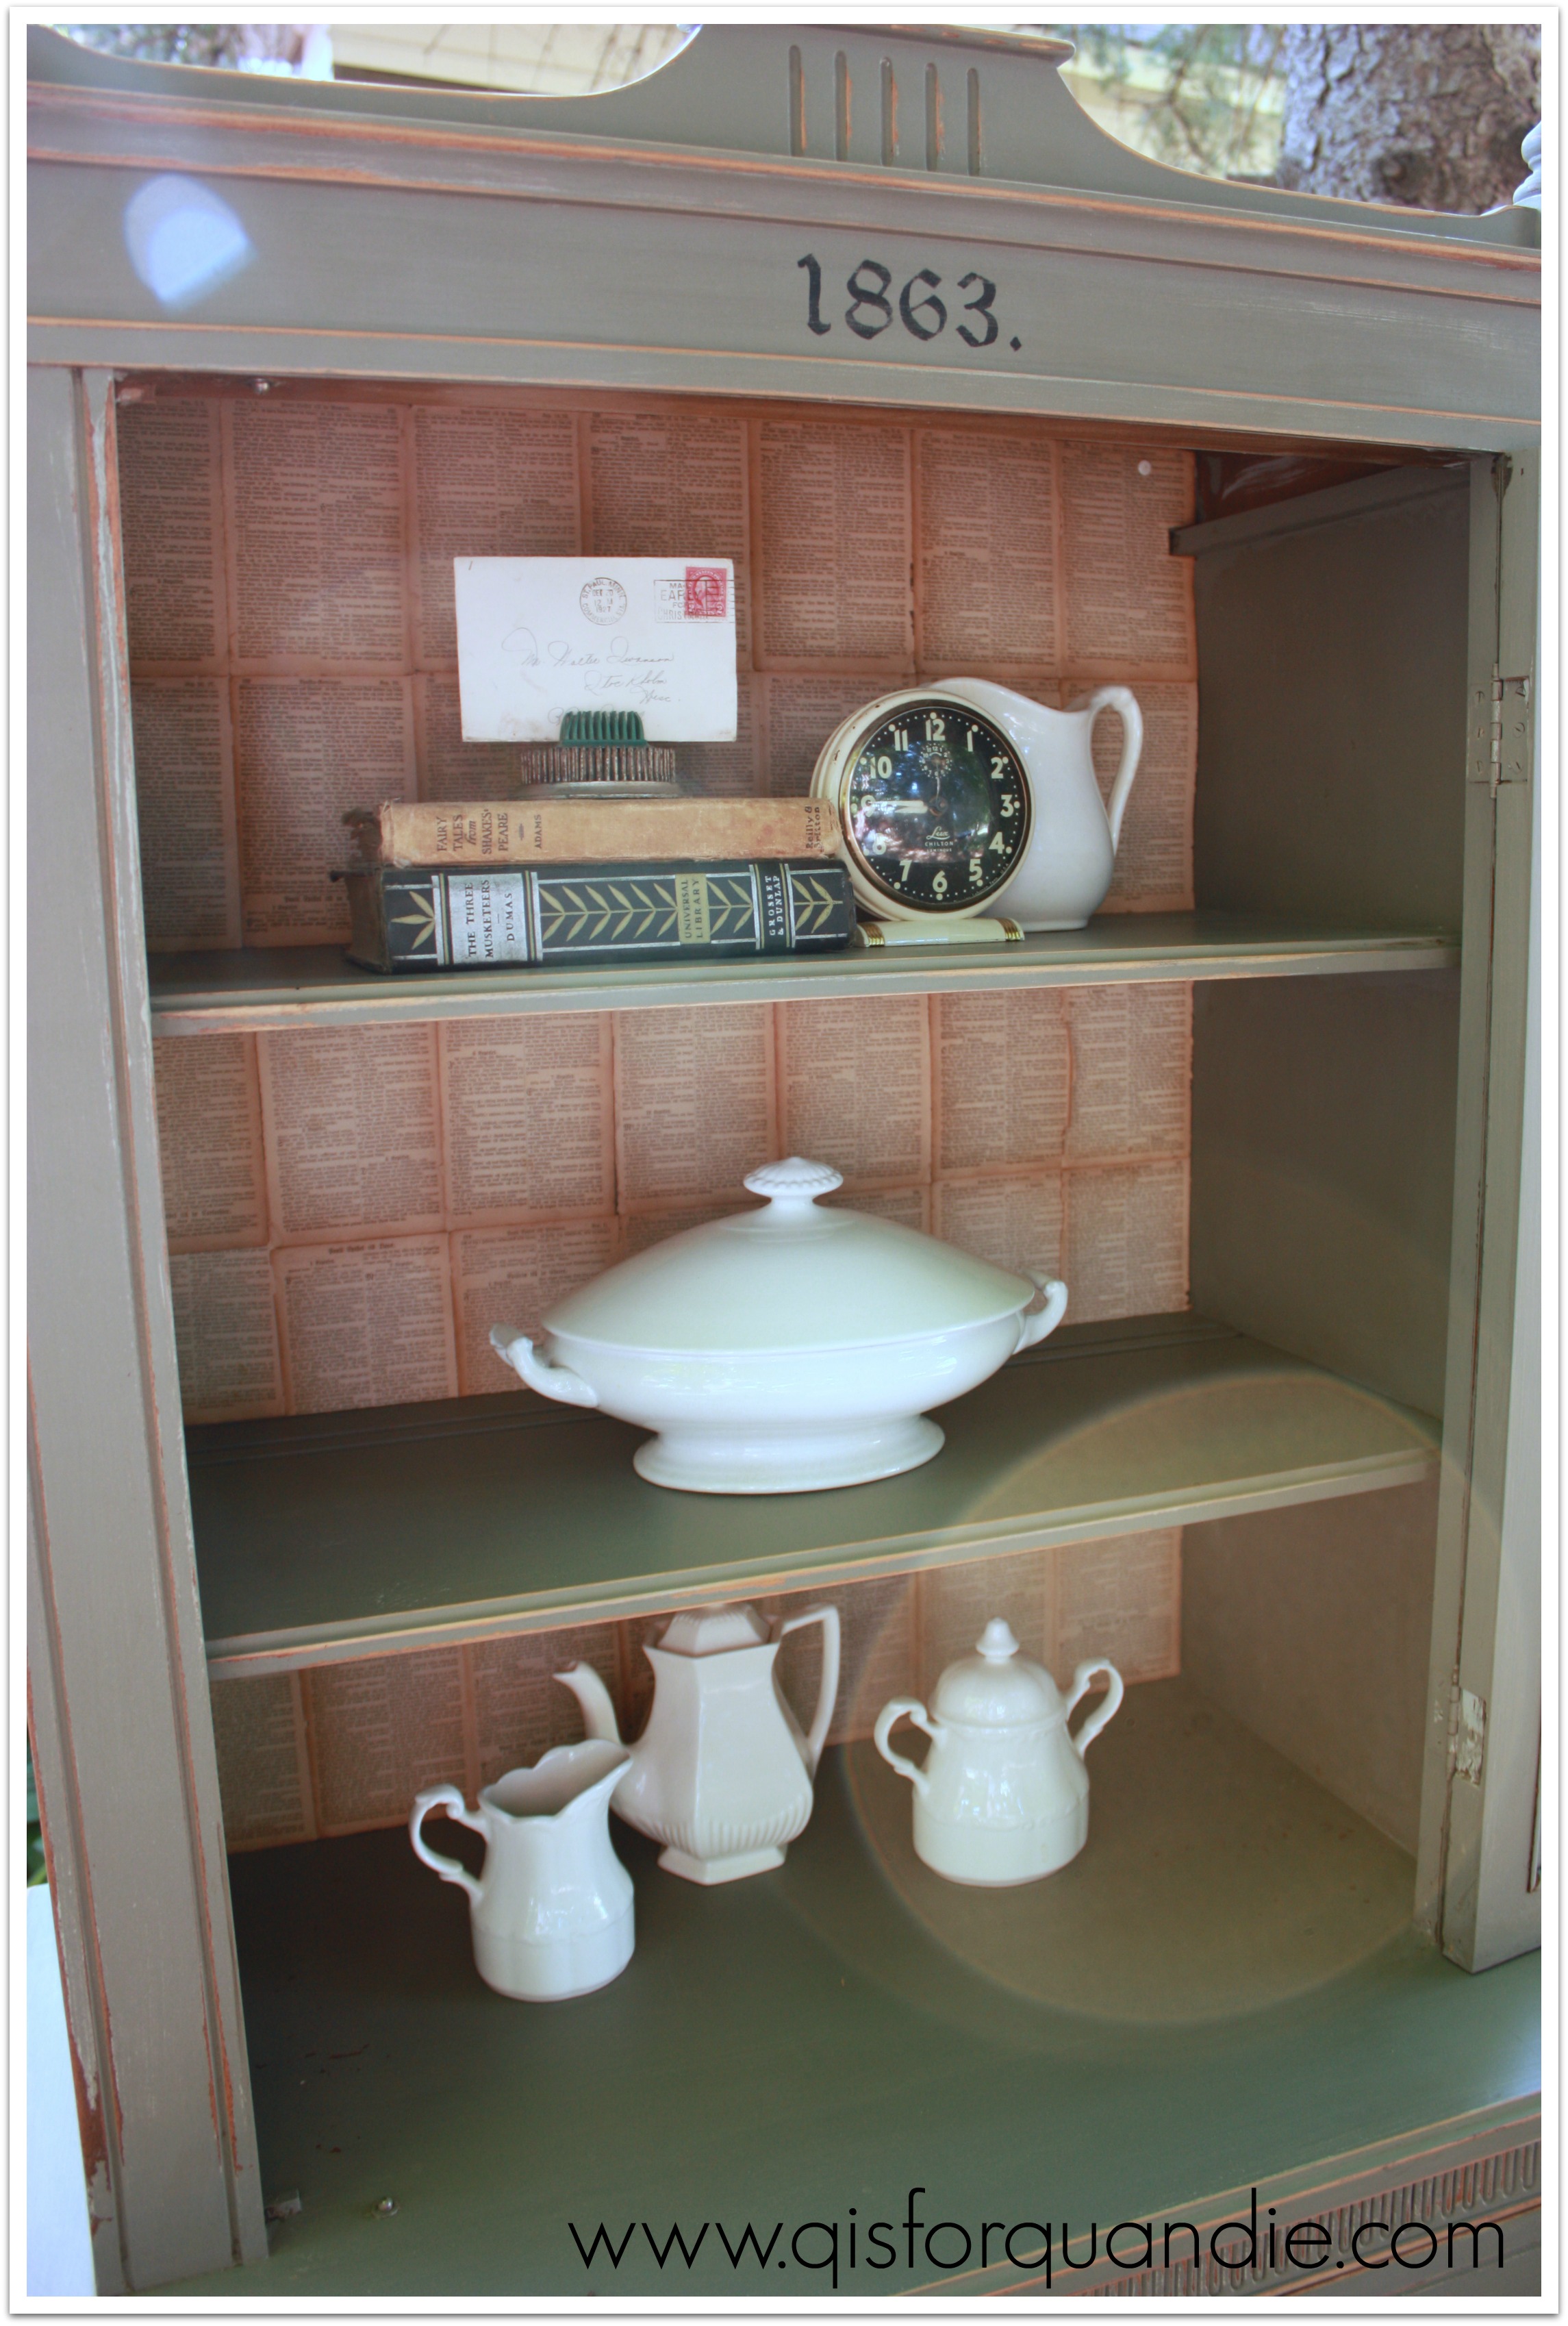
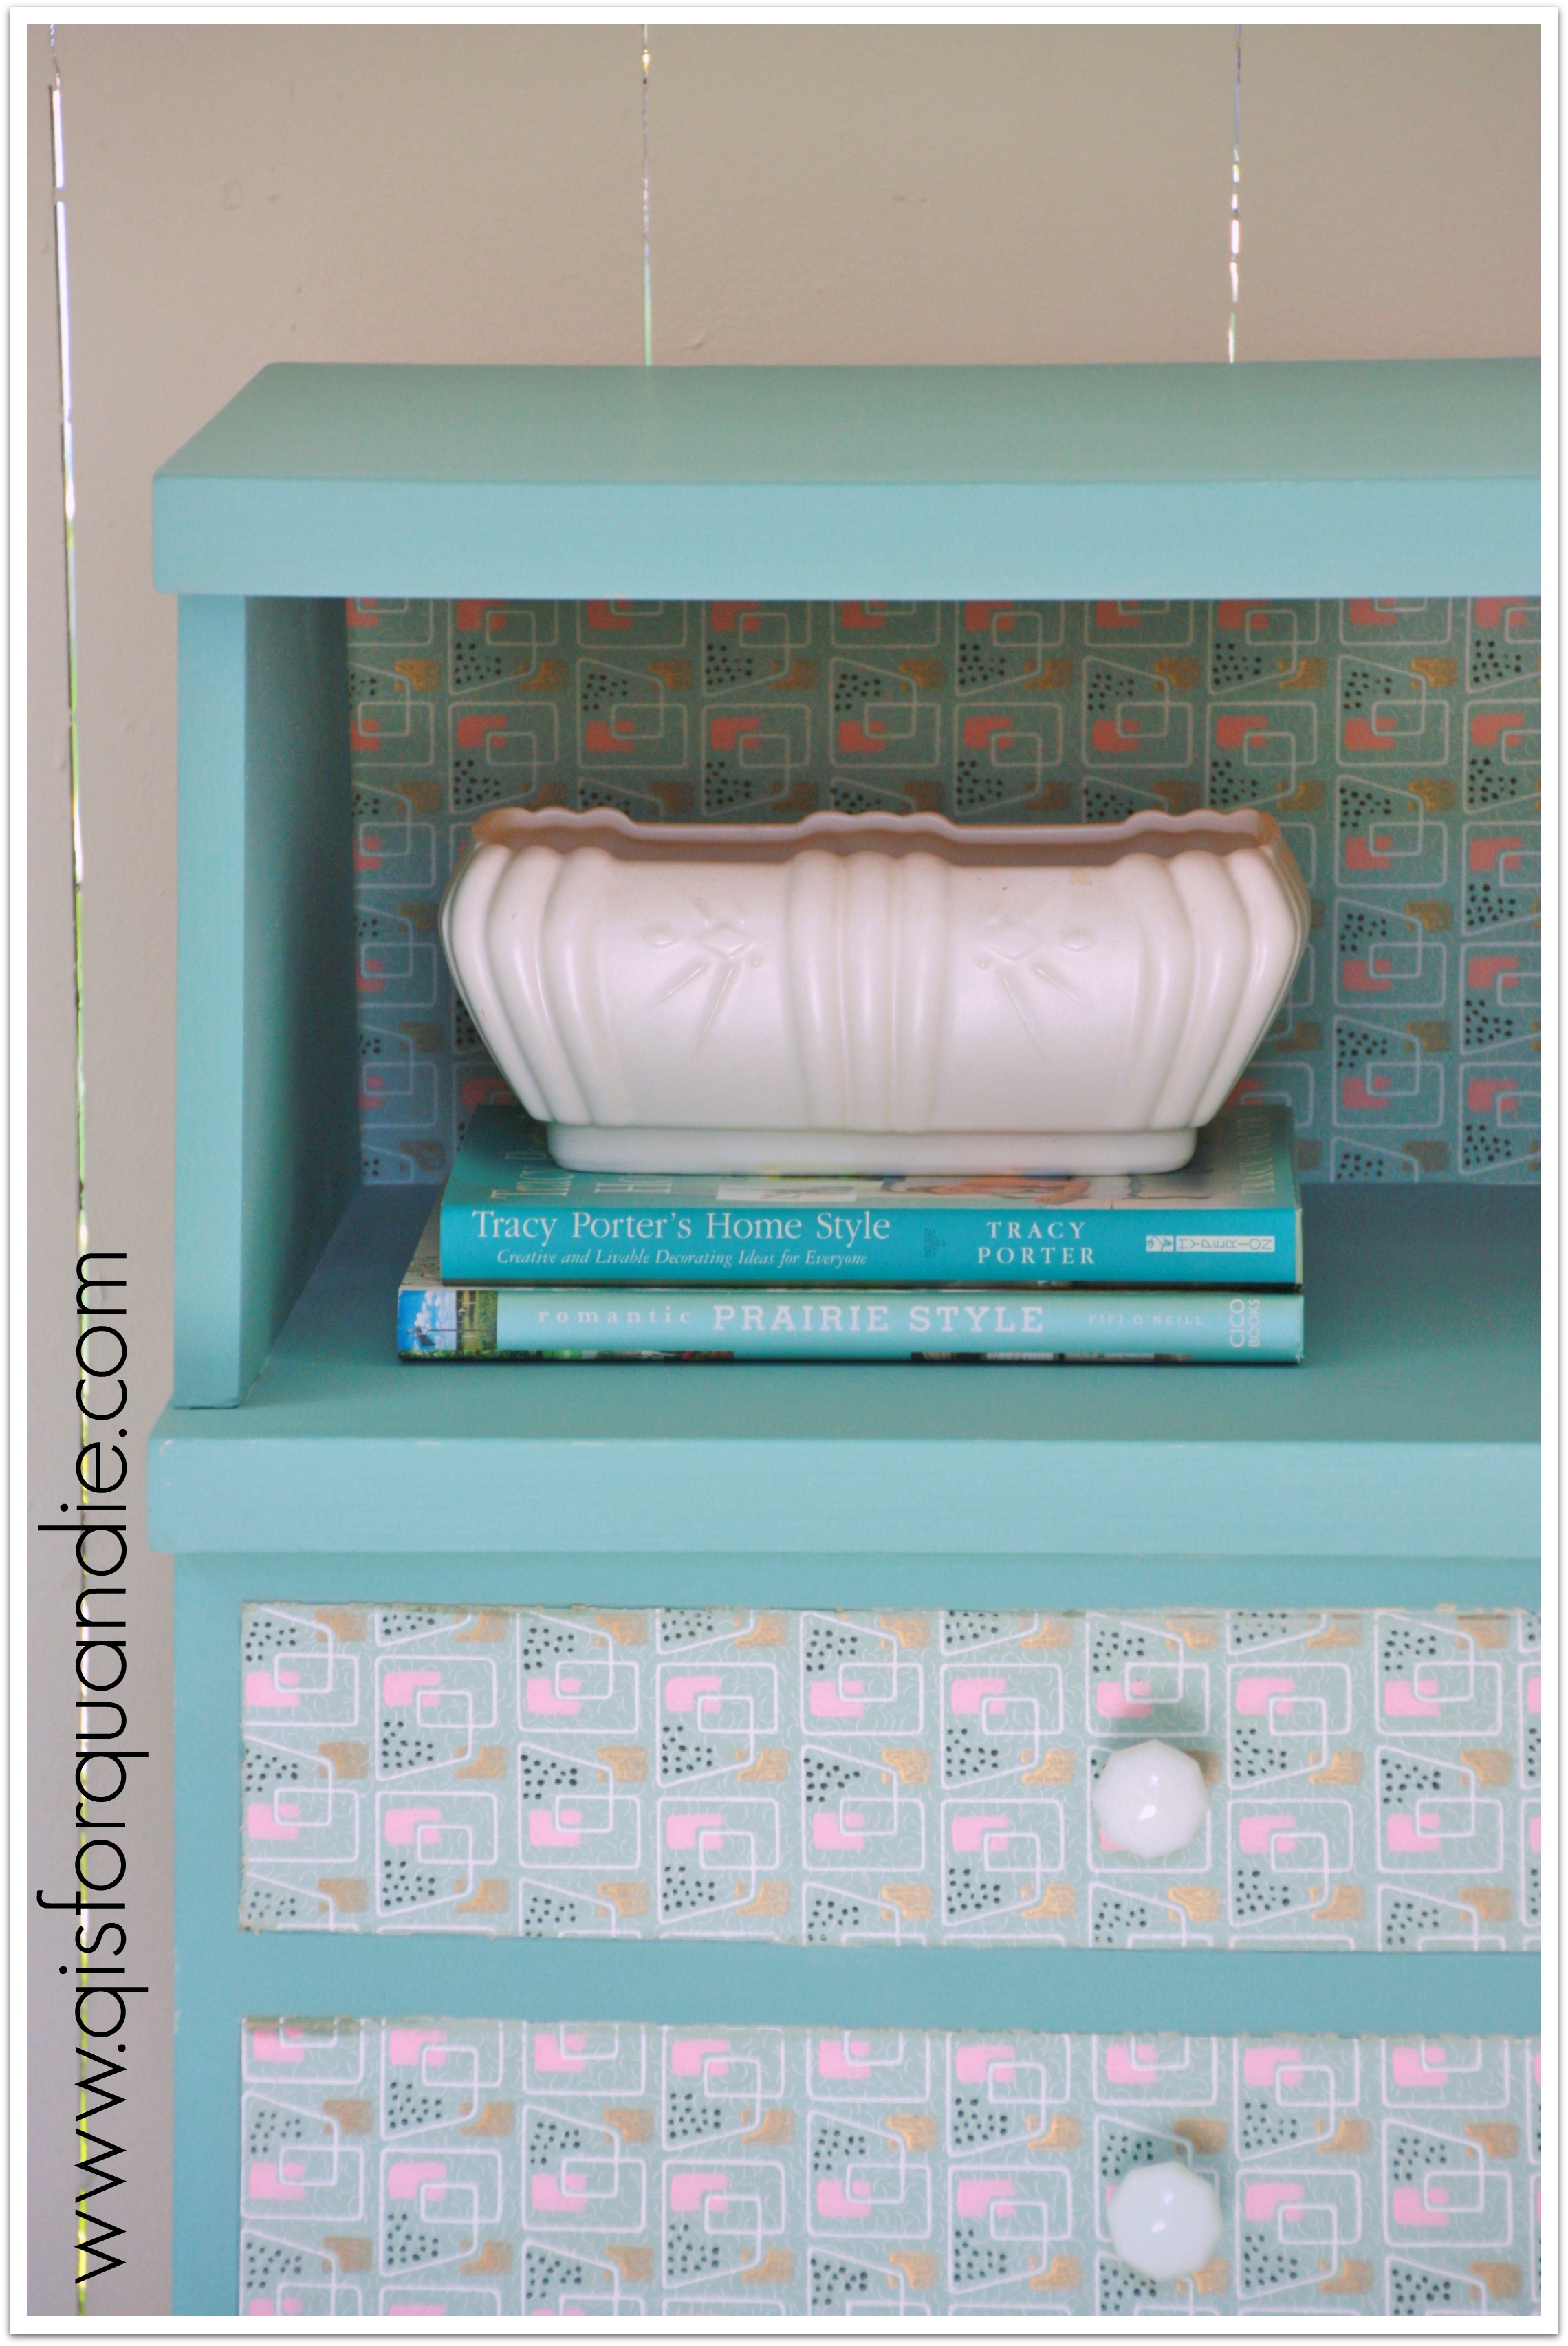
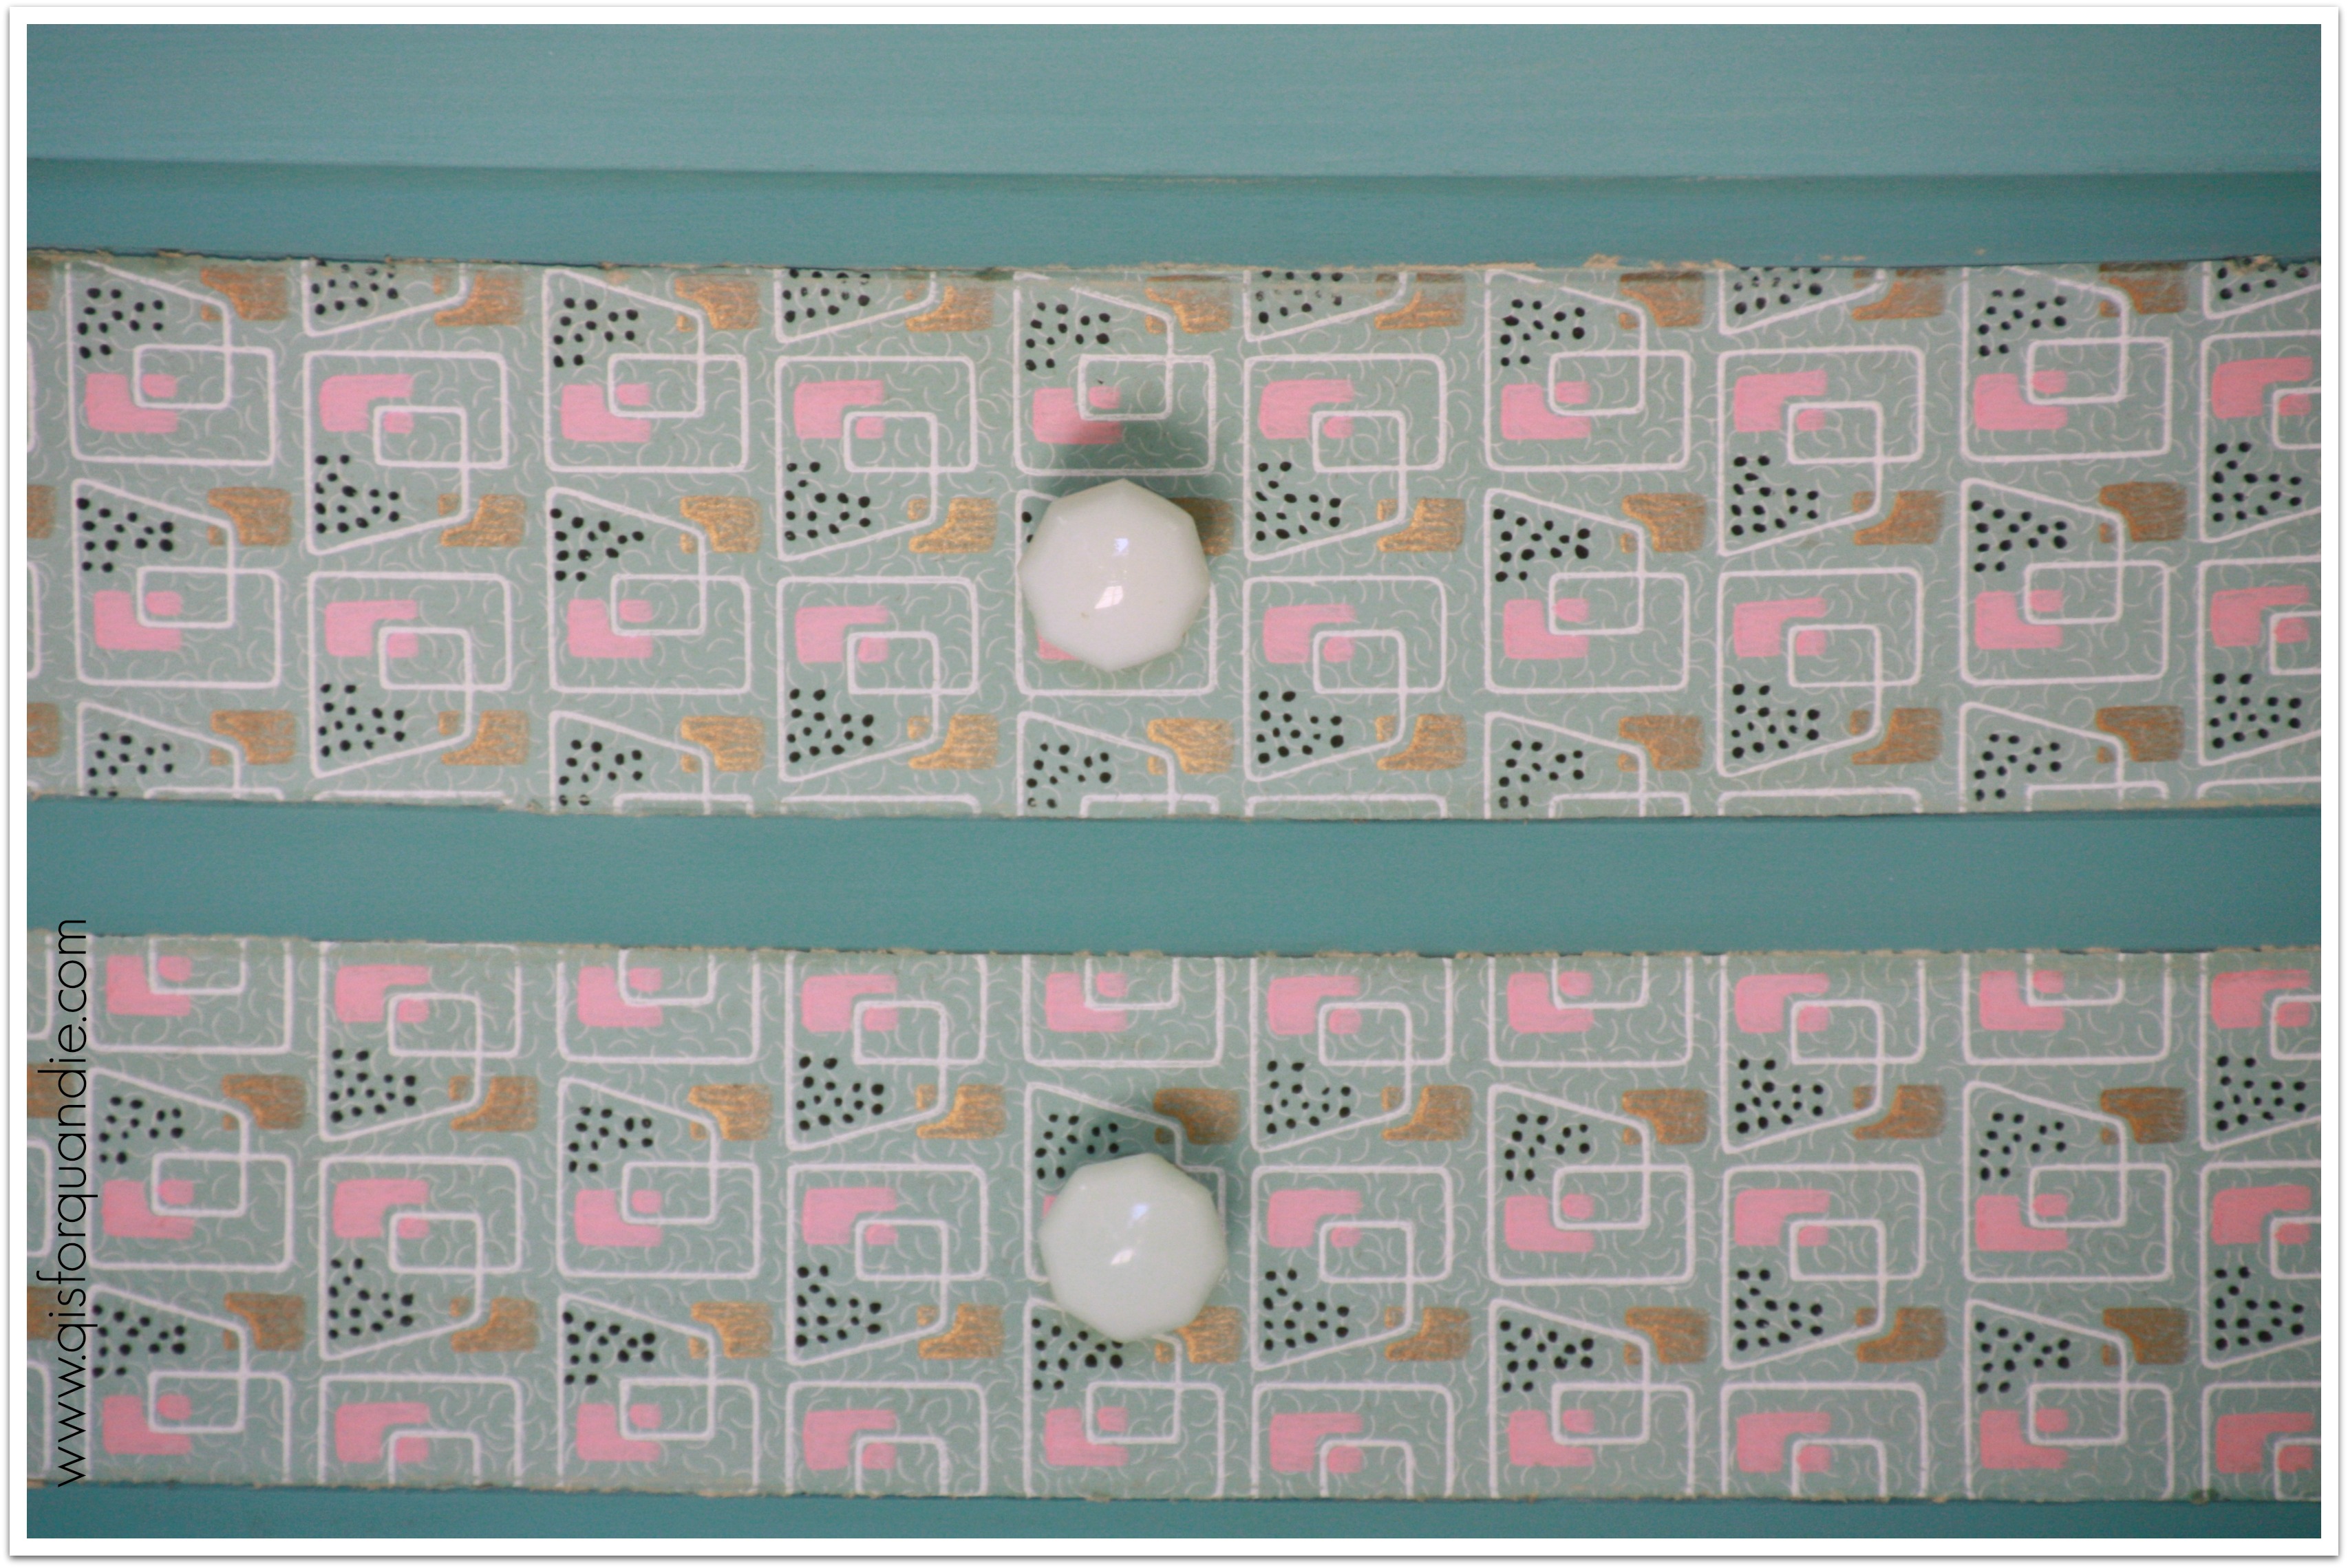
Next I wallpapered the drawers using the same fab vintage wallpaper that I used inside my photo cottage cupboard drawers.  Do you guys love this stuff as much as I do?  It’s just so darn sweet.  I still have a bit left for another project coming soon.

mystery cabinet drawer
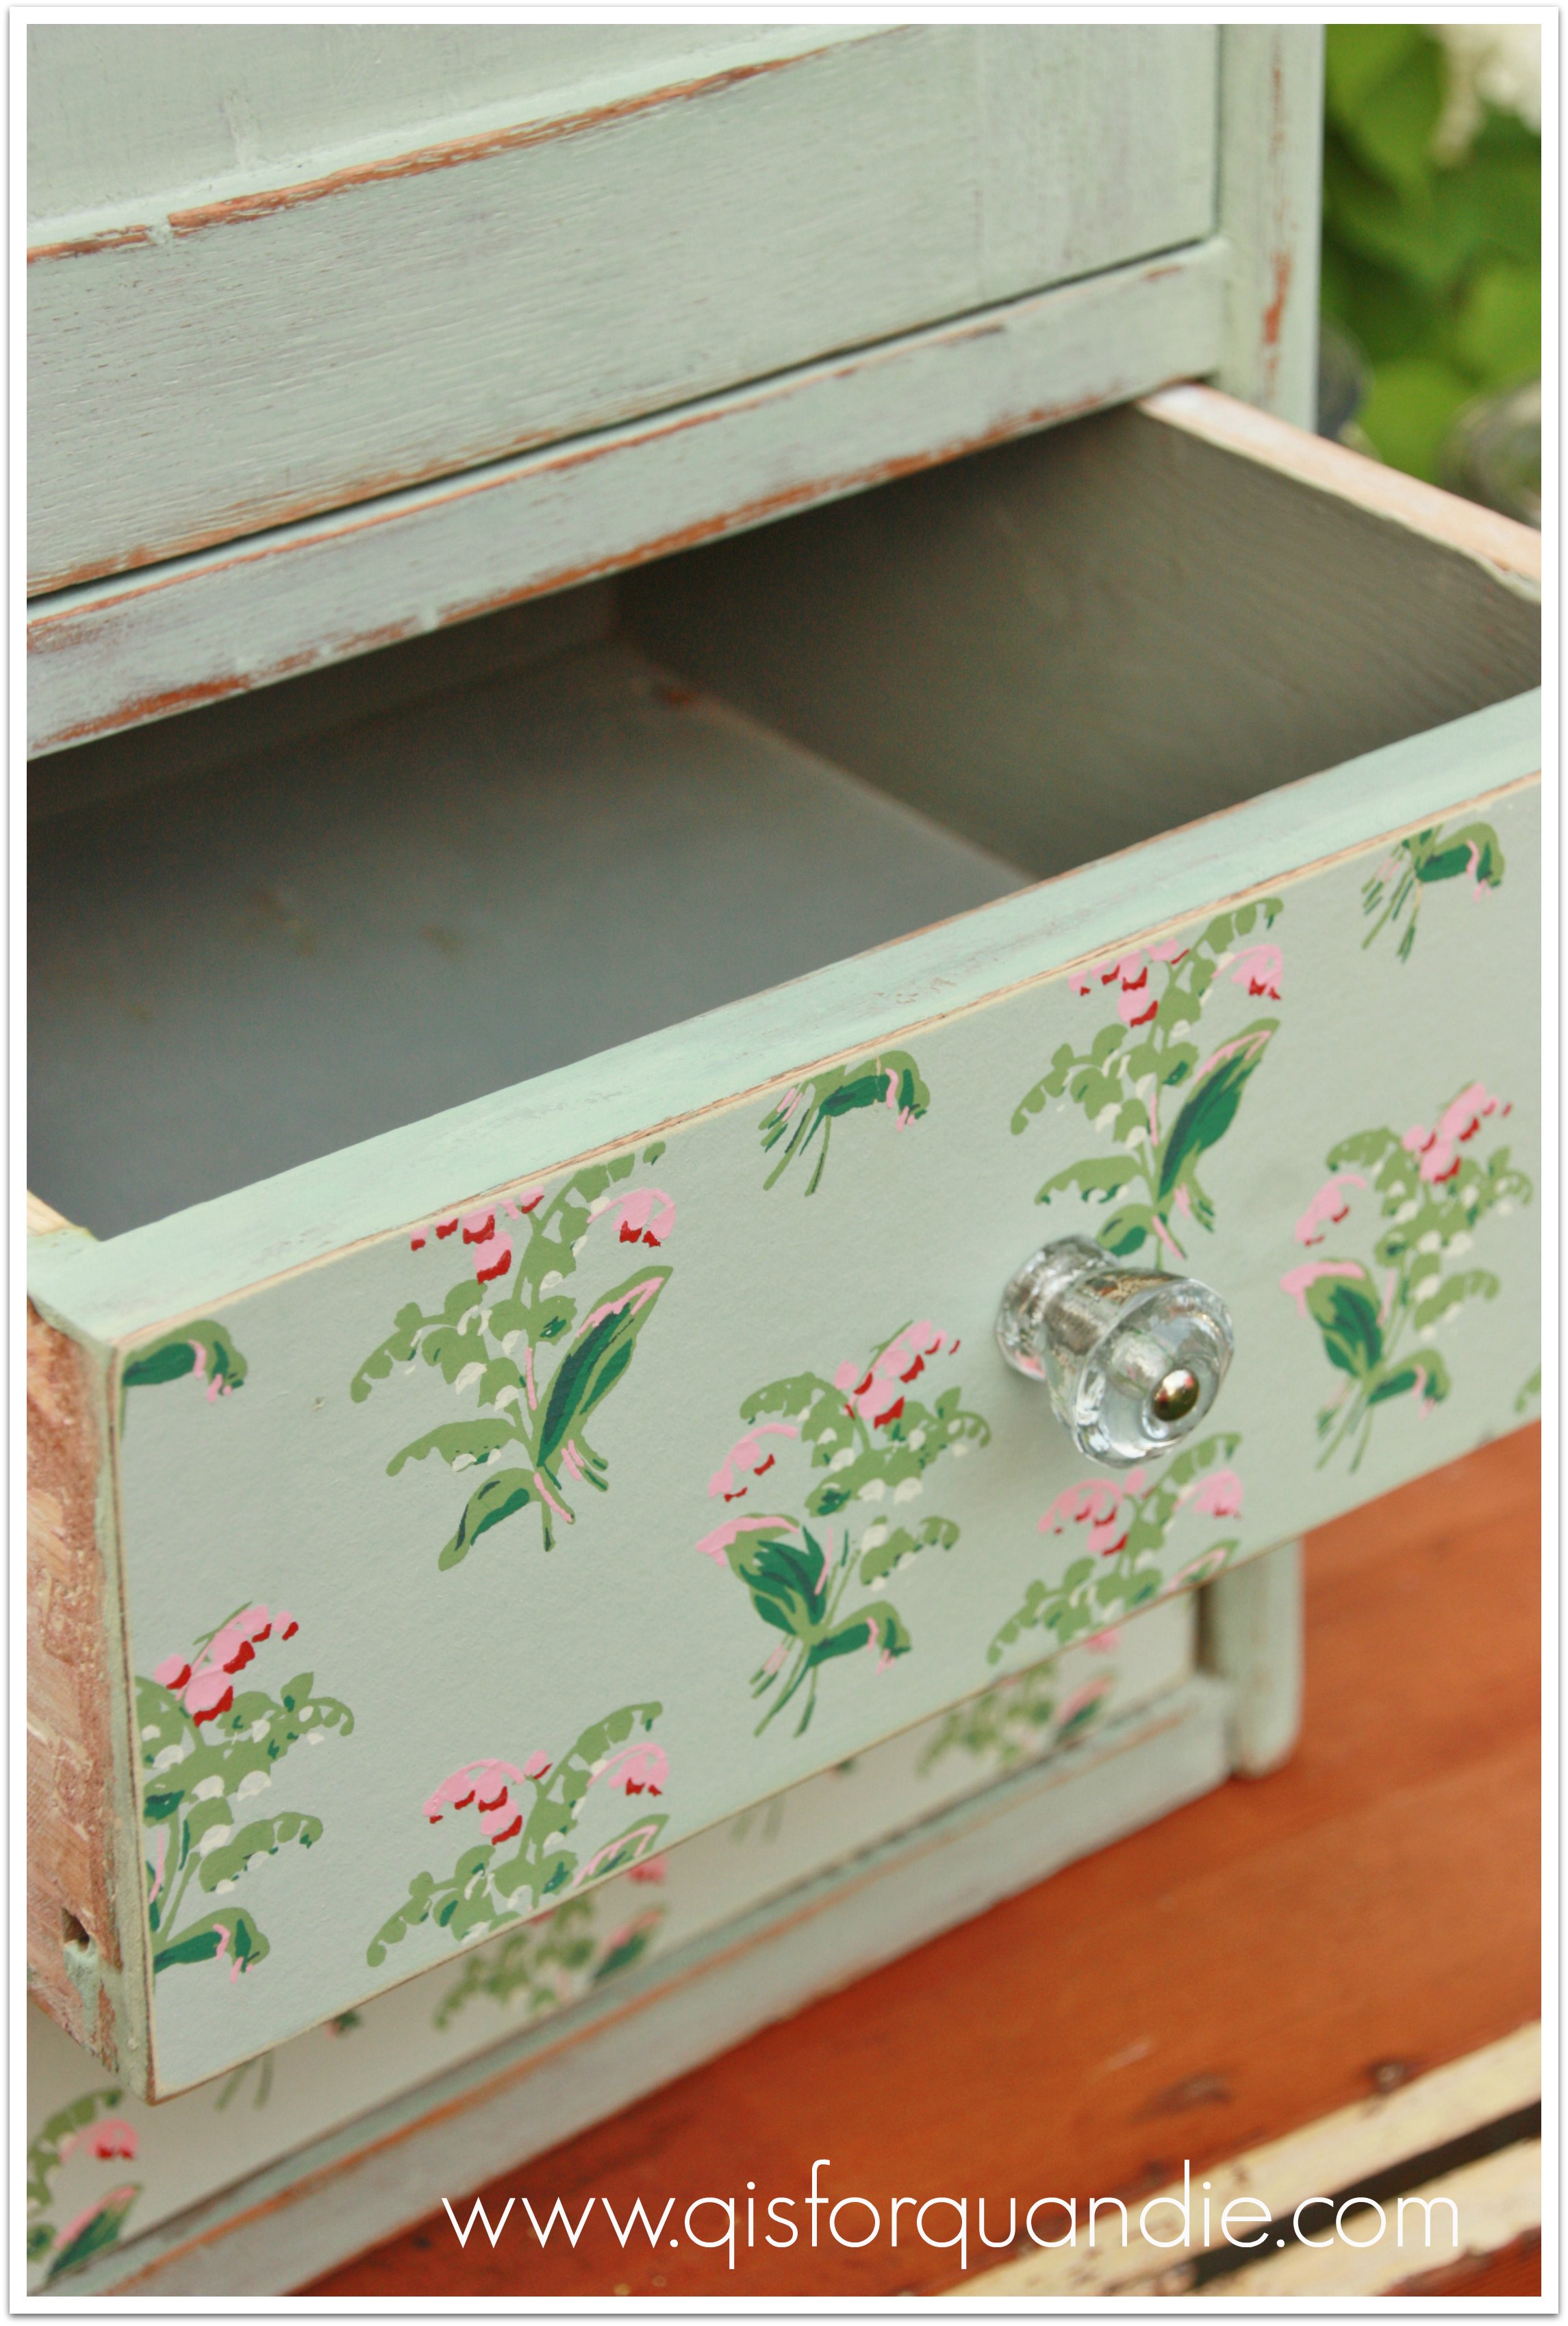
Quick sidebar about the wallpaper because I’ve gotten questions on it before.  I adhered it with wallpaper paste that Mr. Q picked up at Home Depot for me.  I put the paste on the paper, book it for a couple of minutes (booking = folding pasted sides together lightly), apply it to the drawer, smooth it out with a squeegee, wipe off excess paste, let it dry.  I came back the following day and sanded the edges gently.  The paper seems to adhere quite securely.

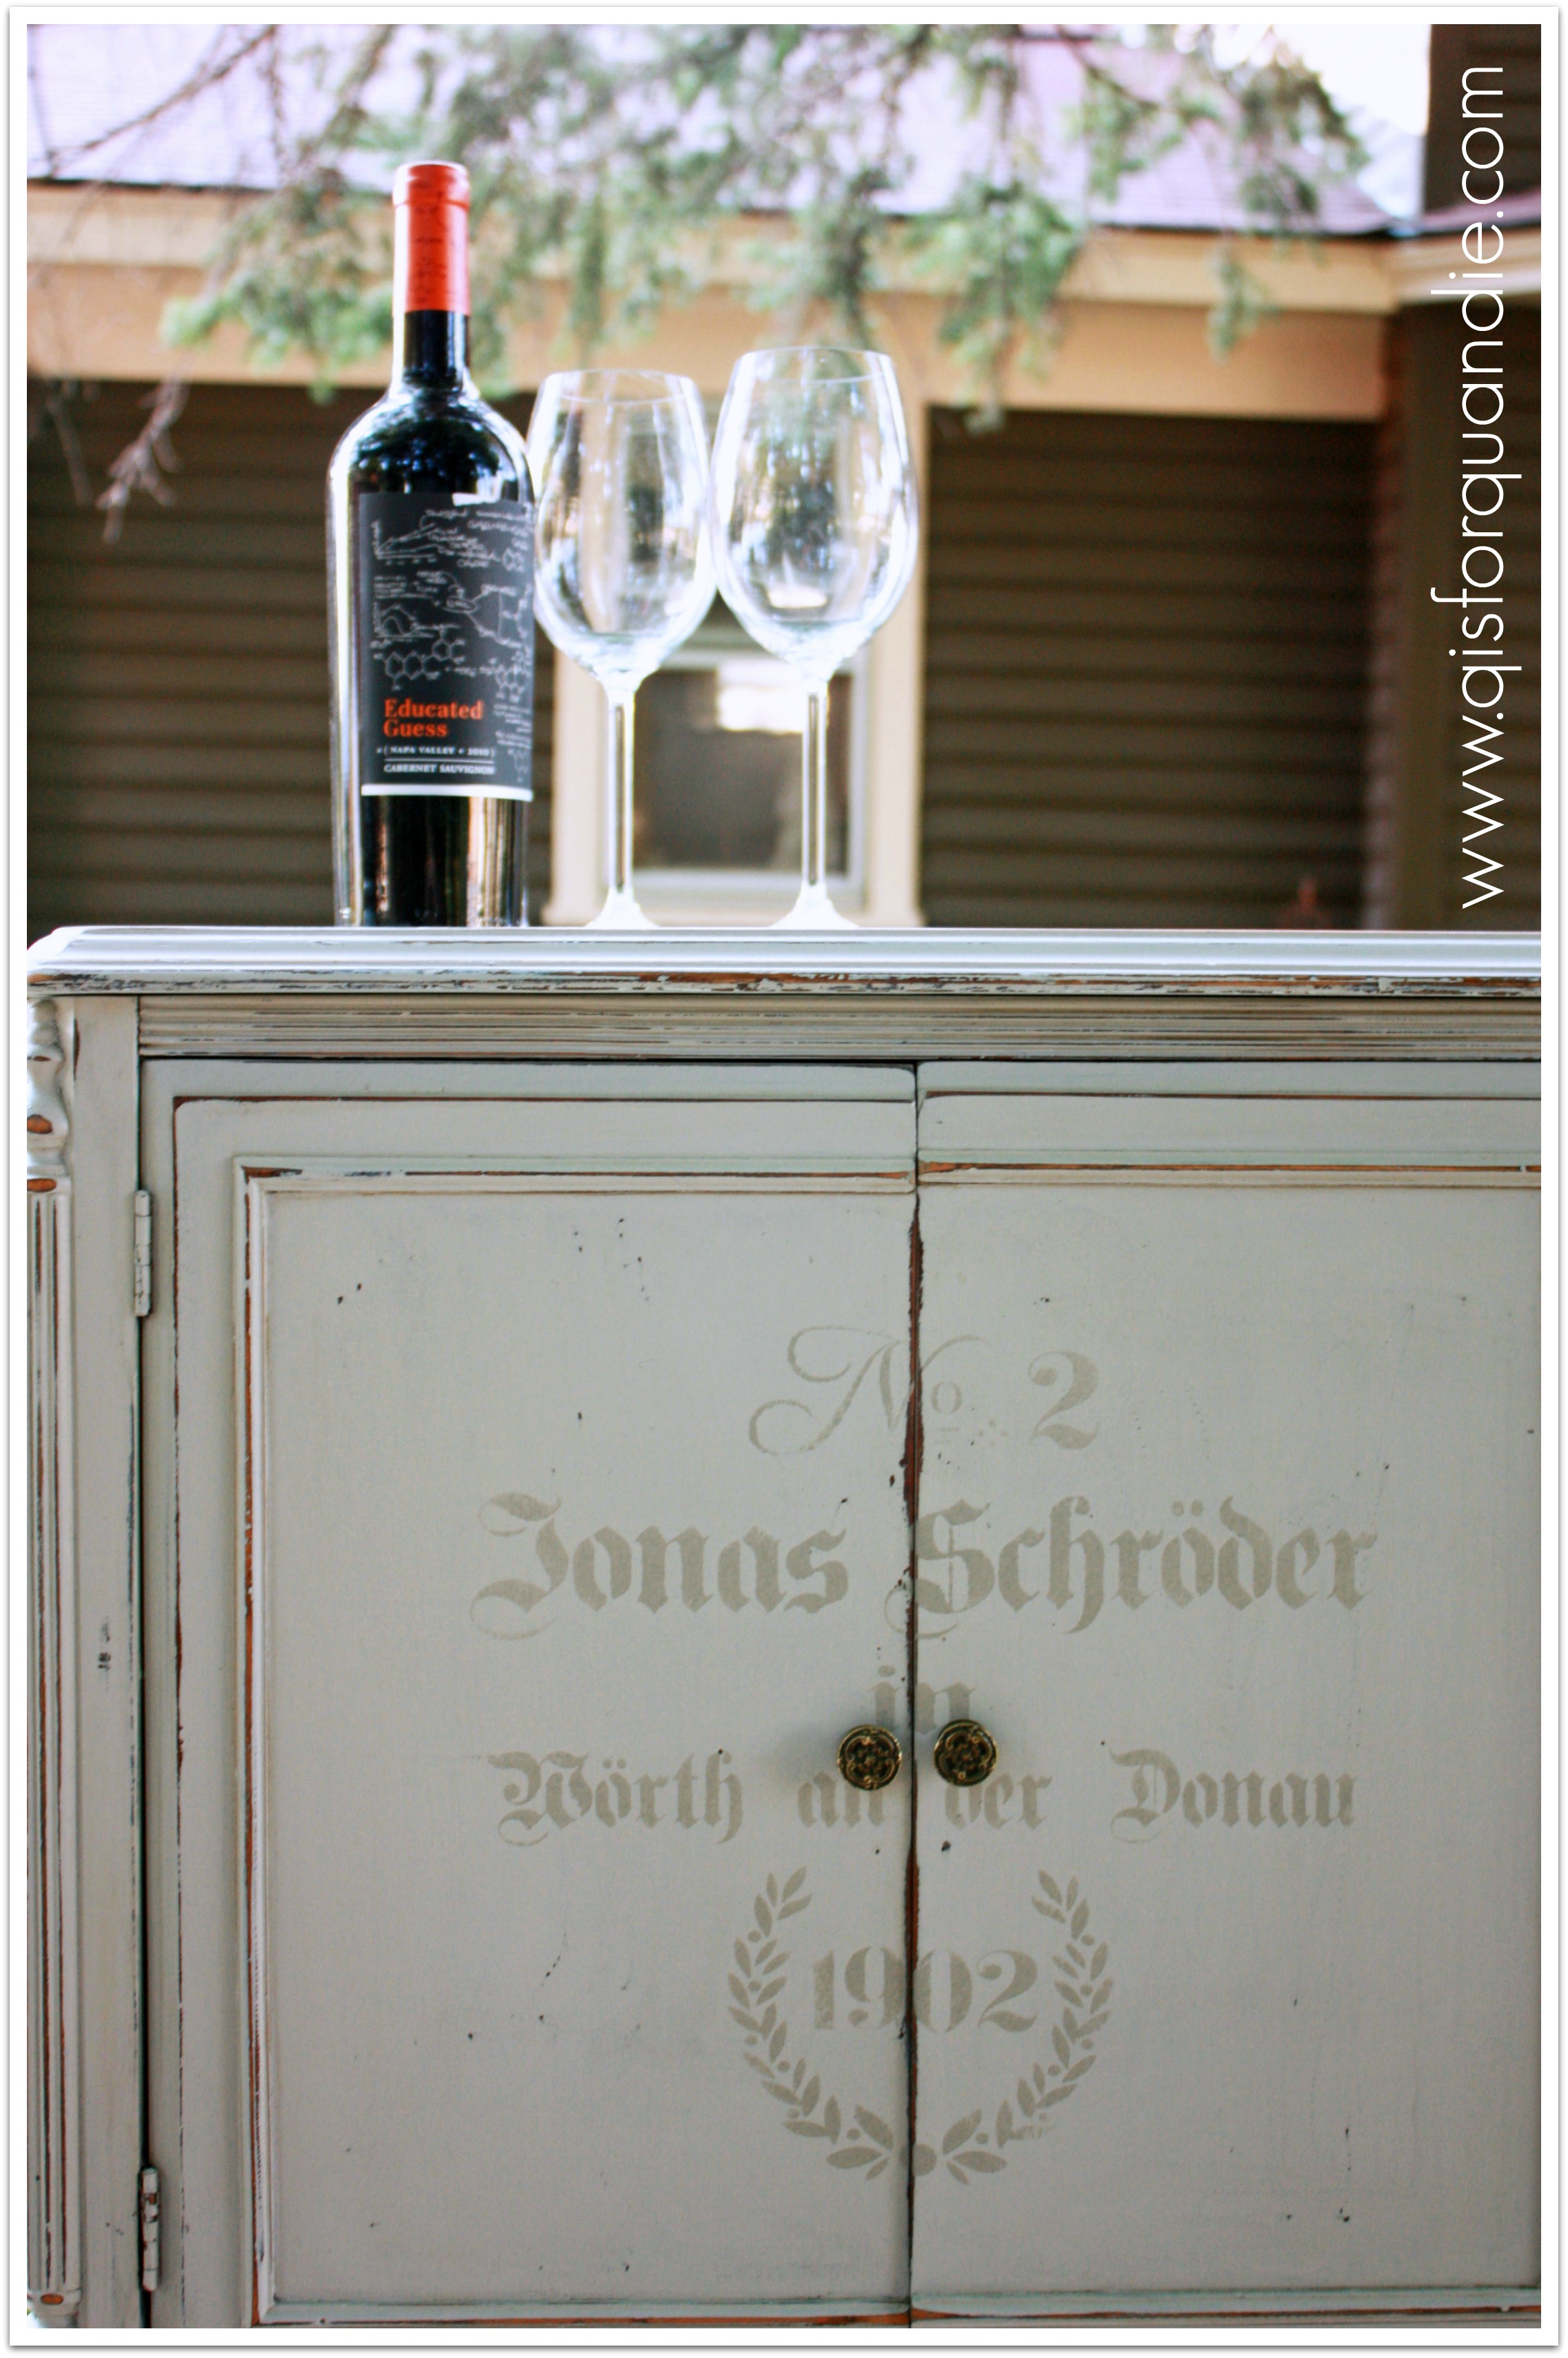
I added new glass knobs because the piece came without any hardware.  Just between you and me, I like these a lot better than the deep blue anthropologie knobs on its $175 cousin, how about you?

A previous owner had painted the inside in a dark grey.  I left that as is, but also added some wallpaper to the inside of the door.

mystery cabinet interior
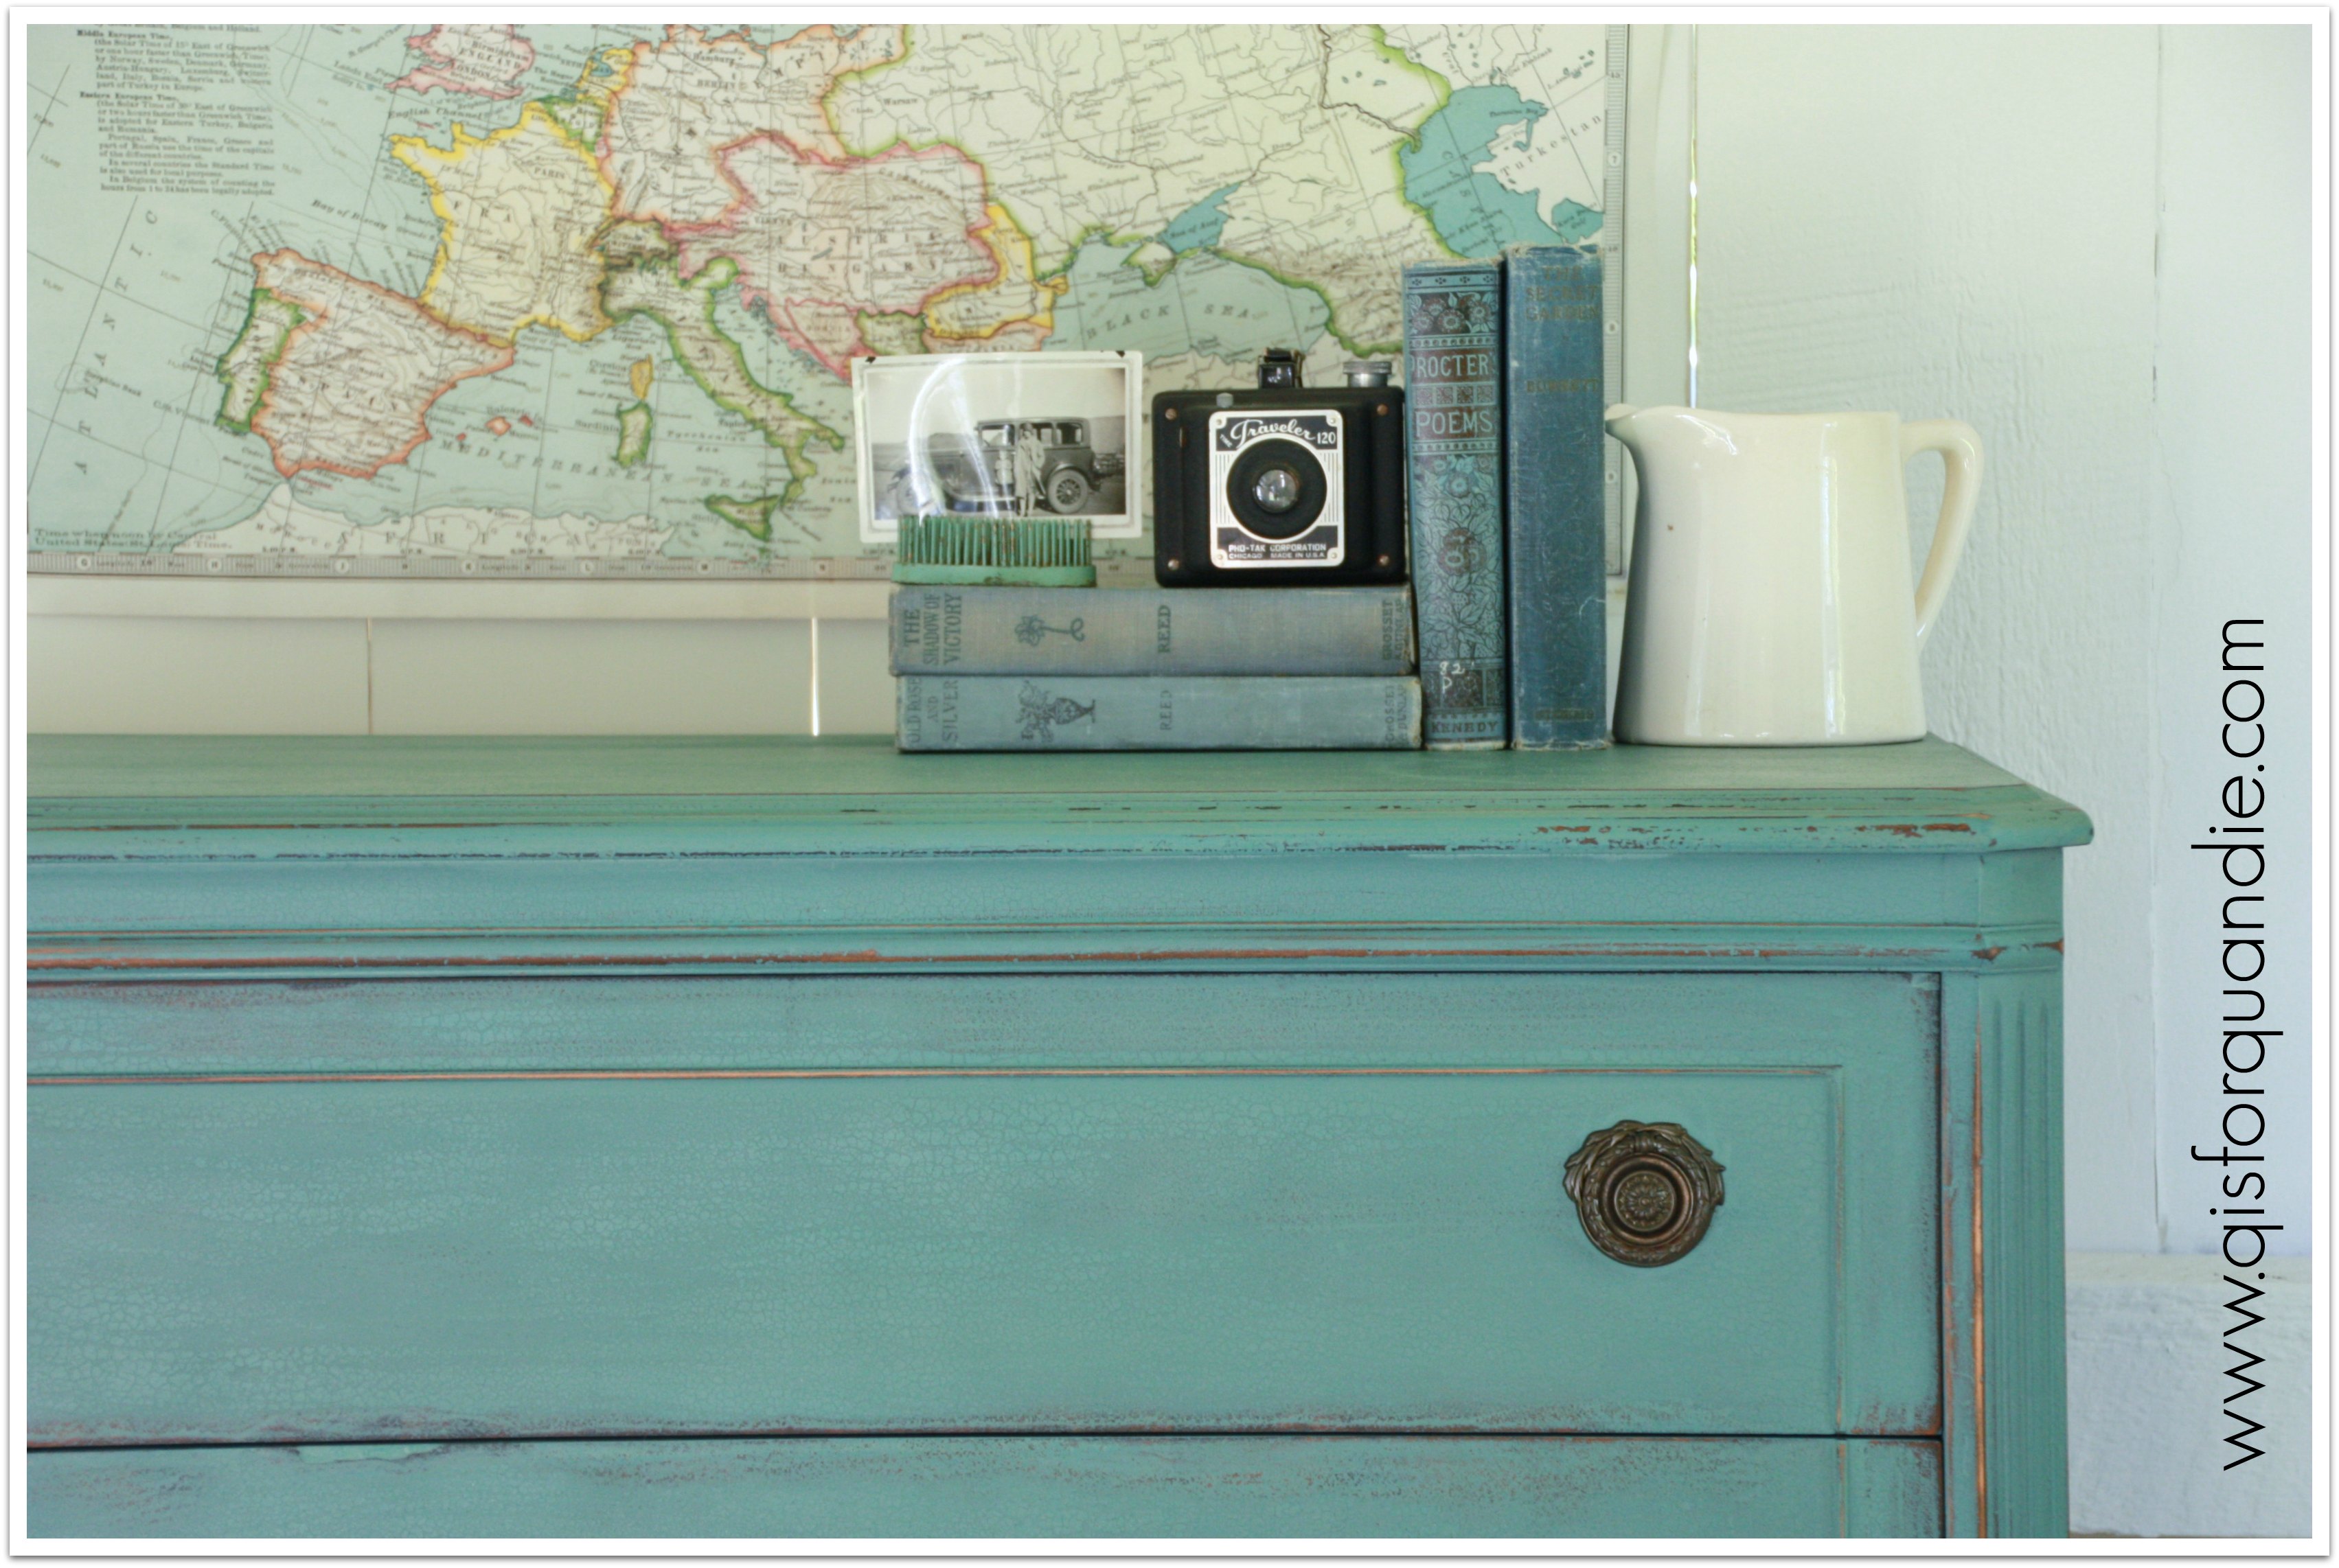
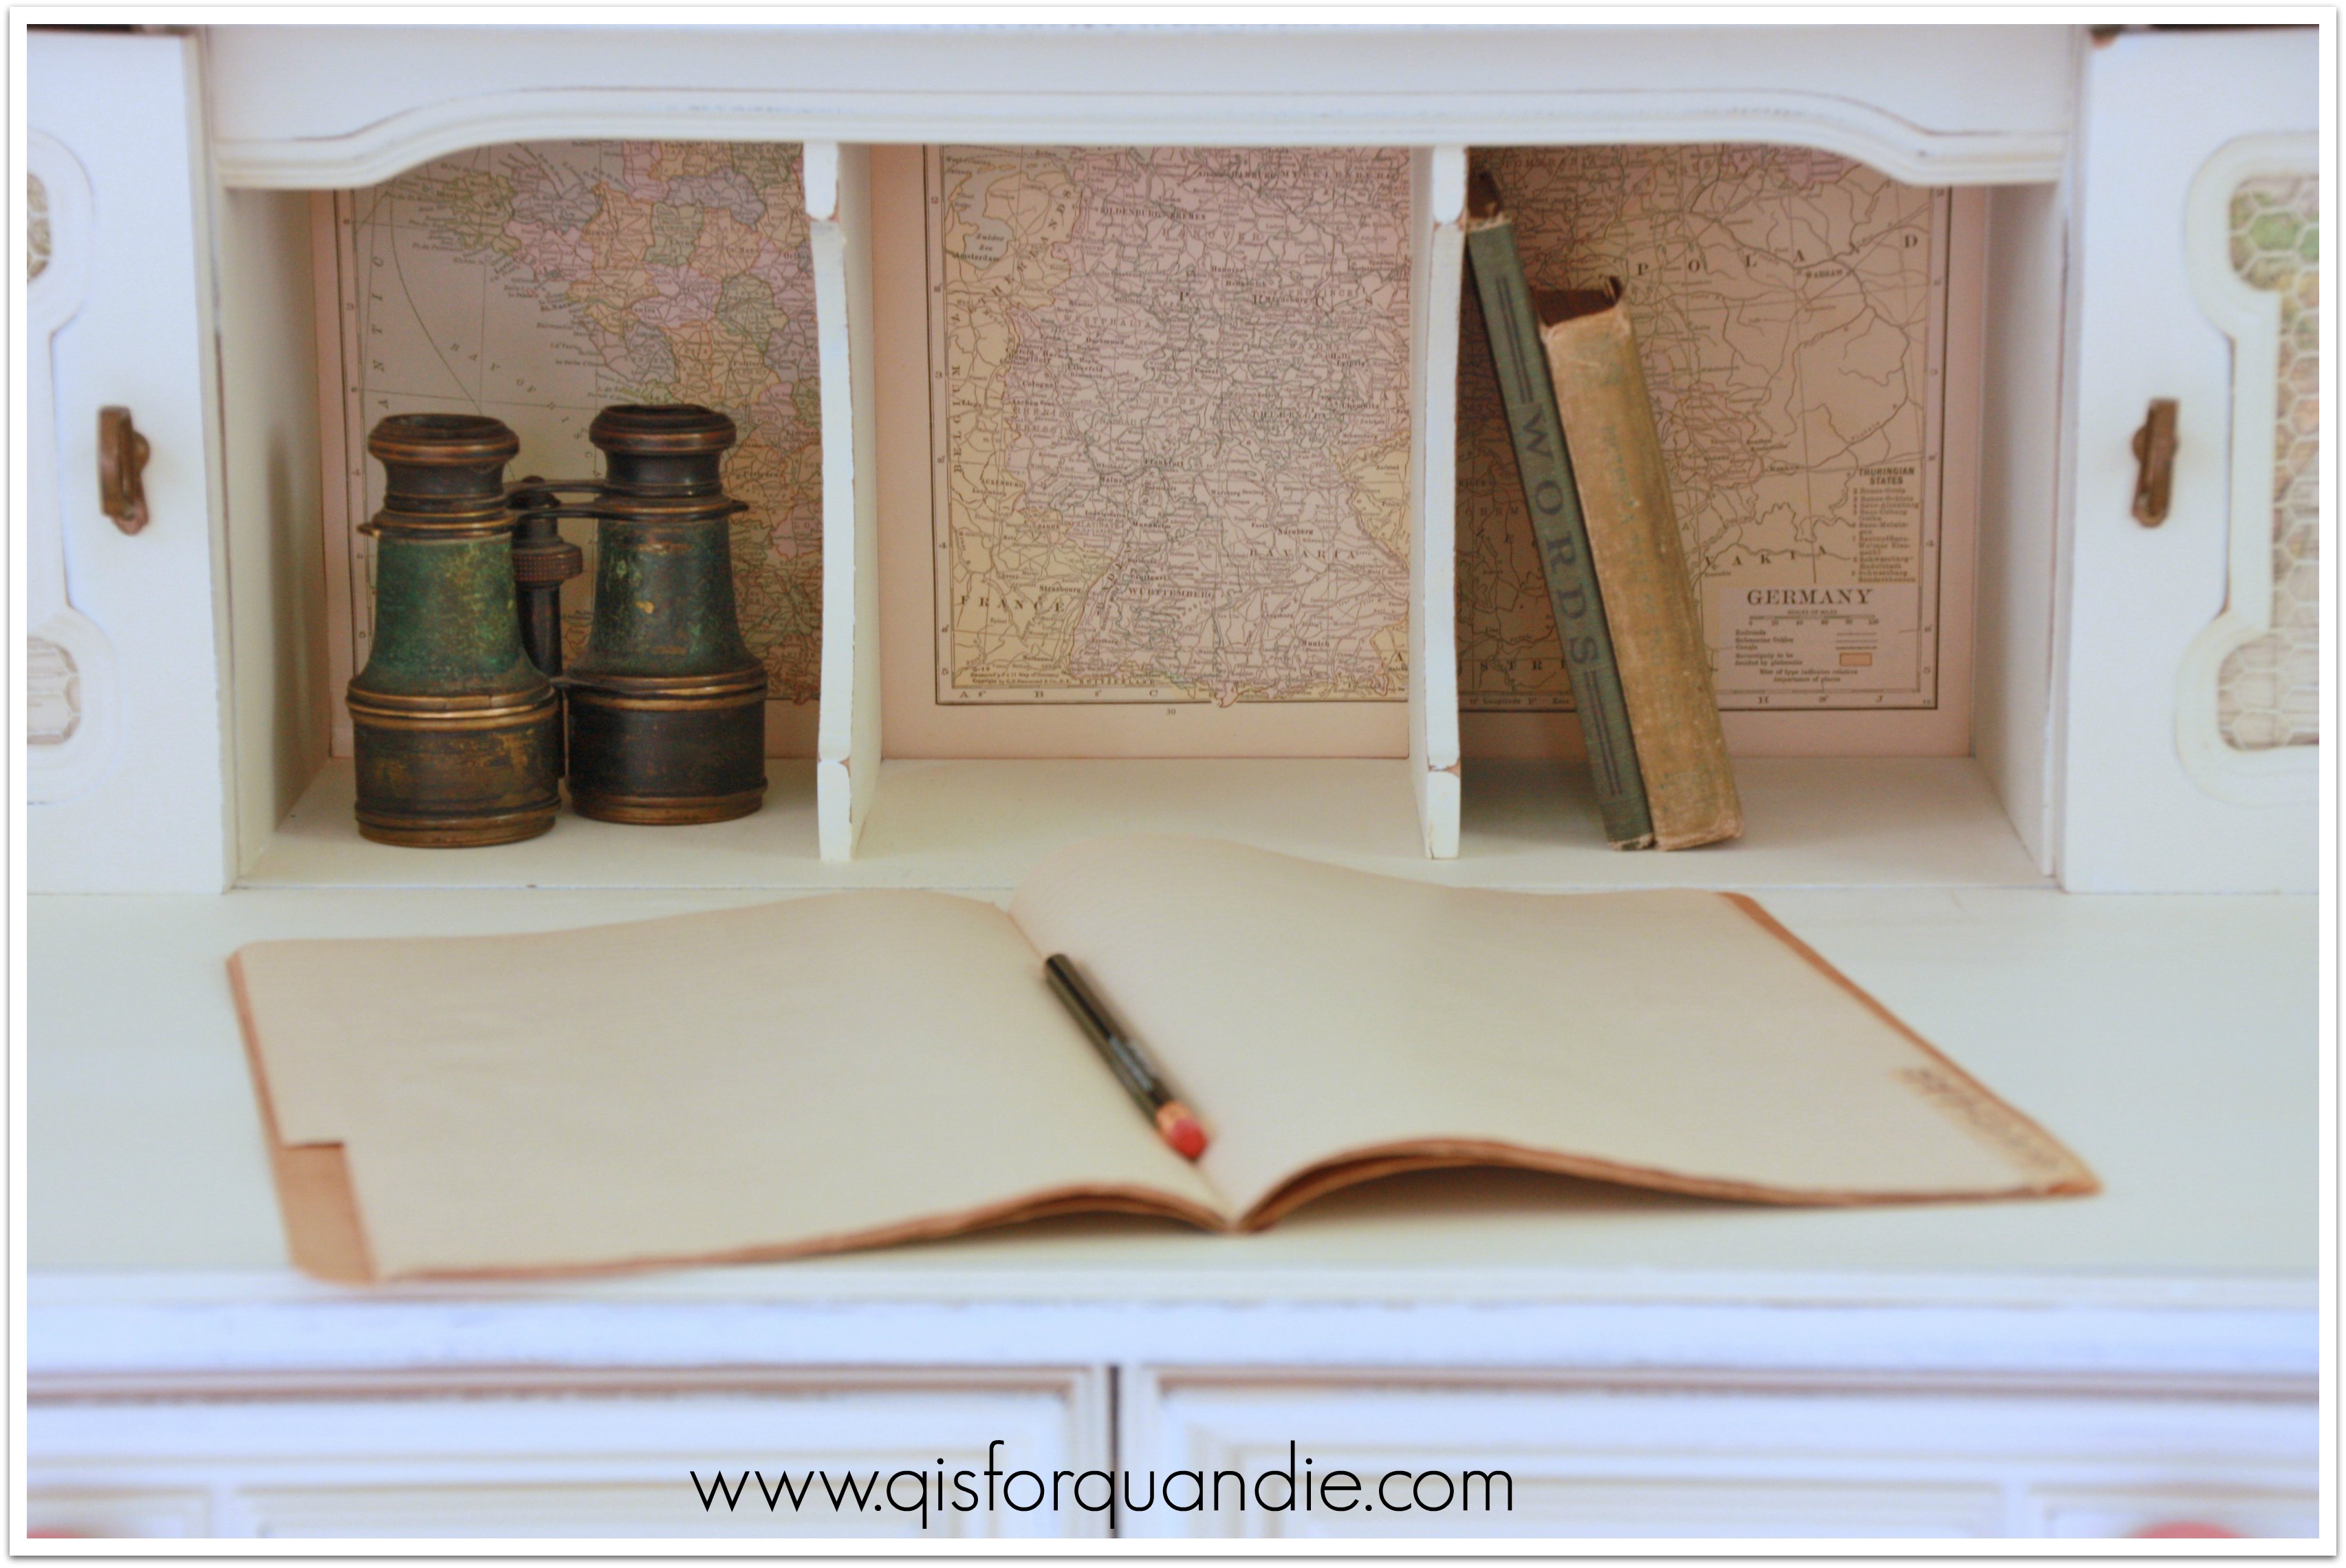
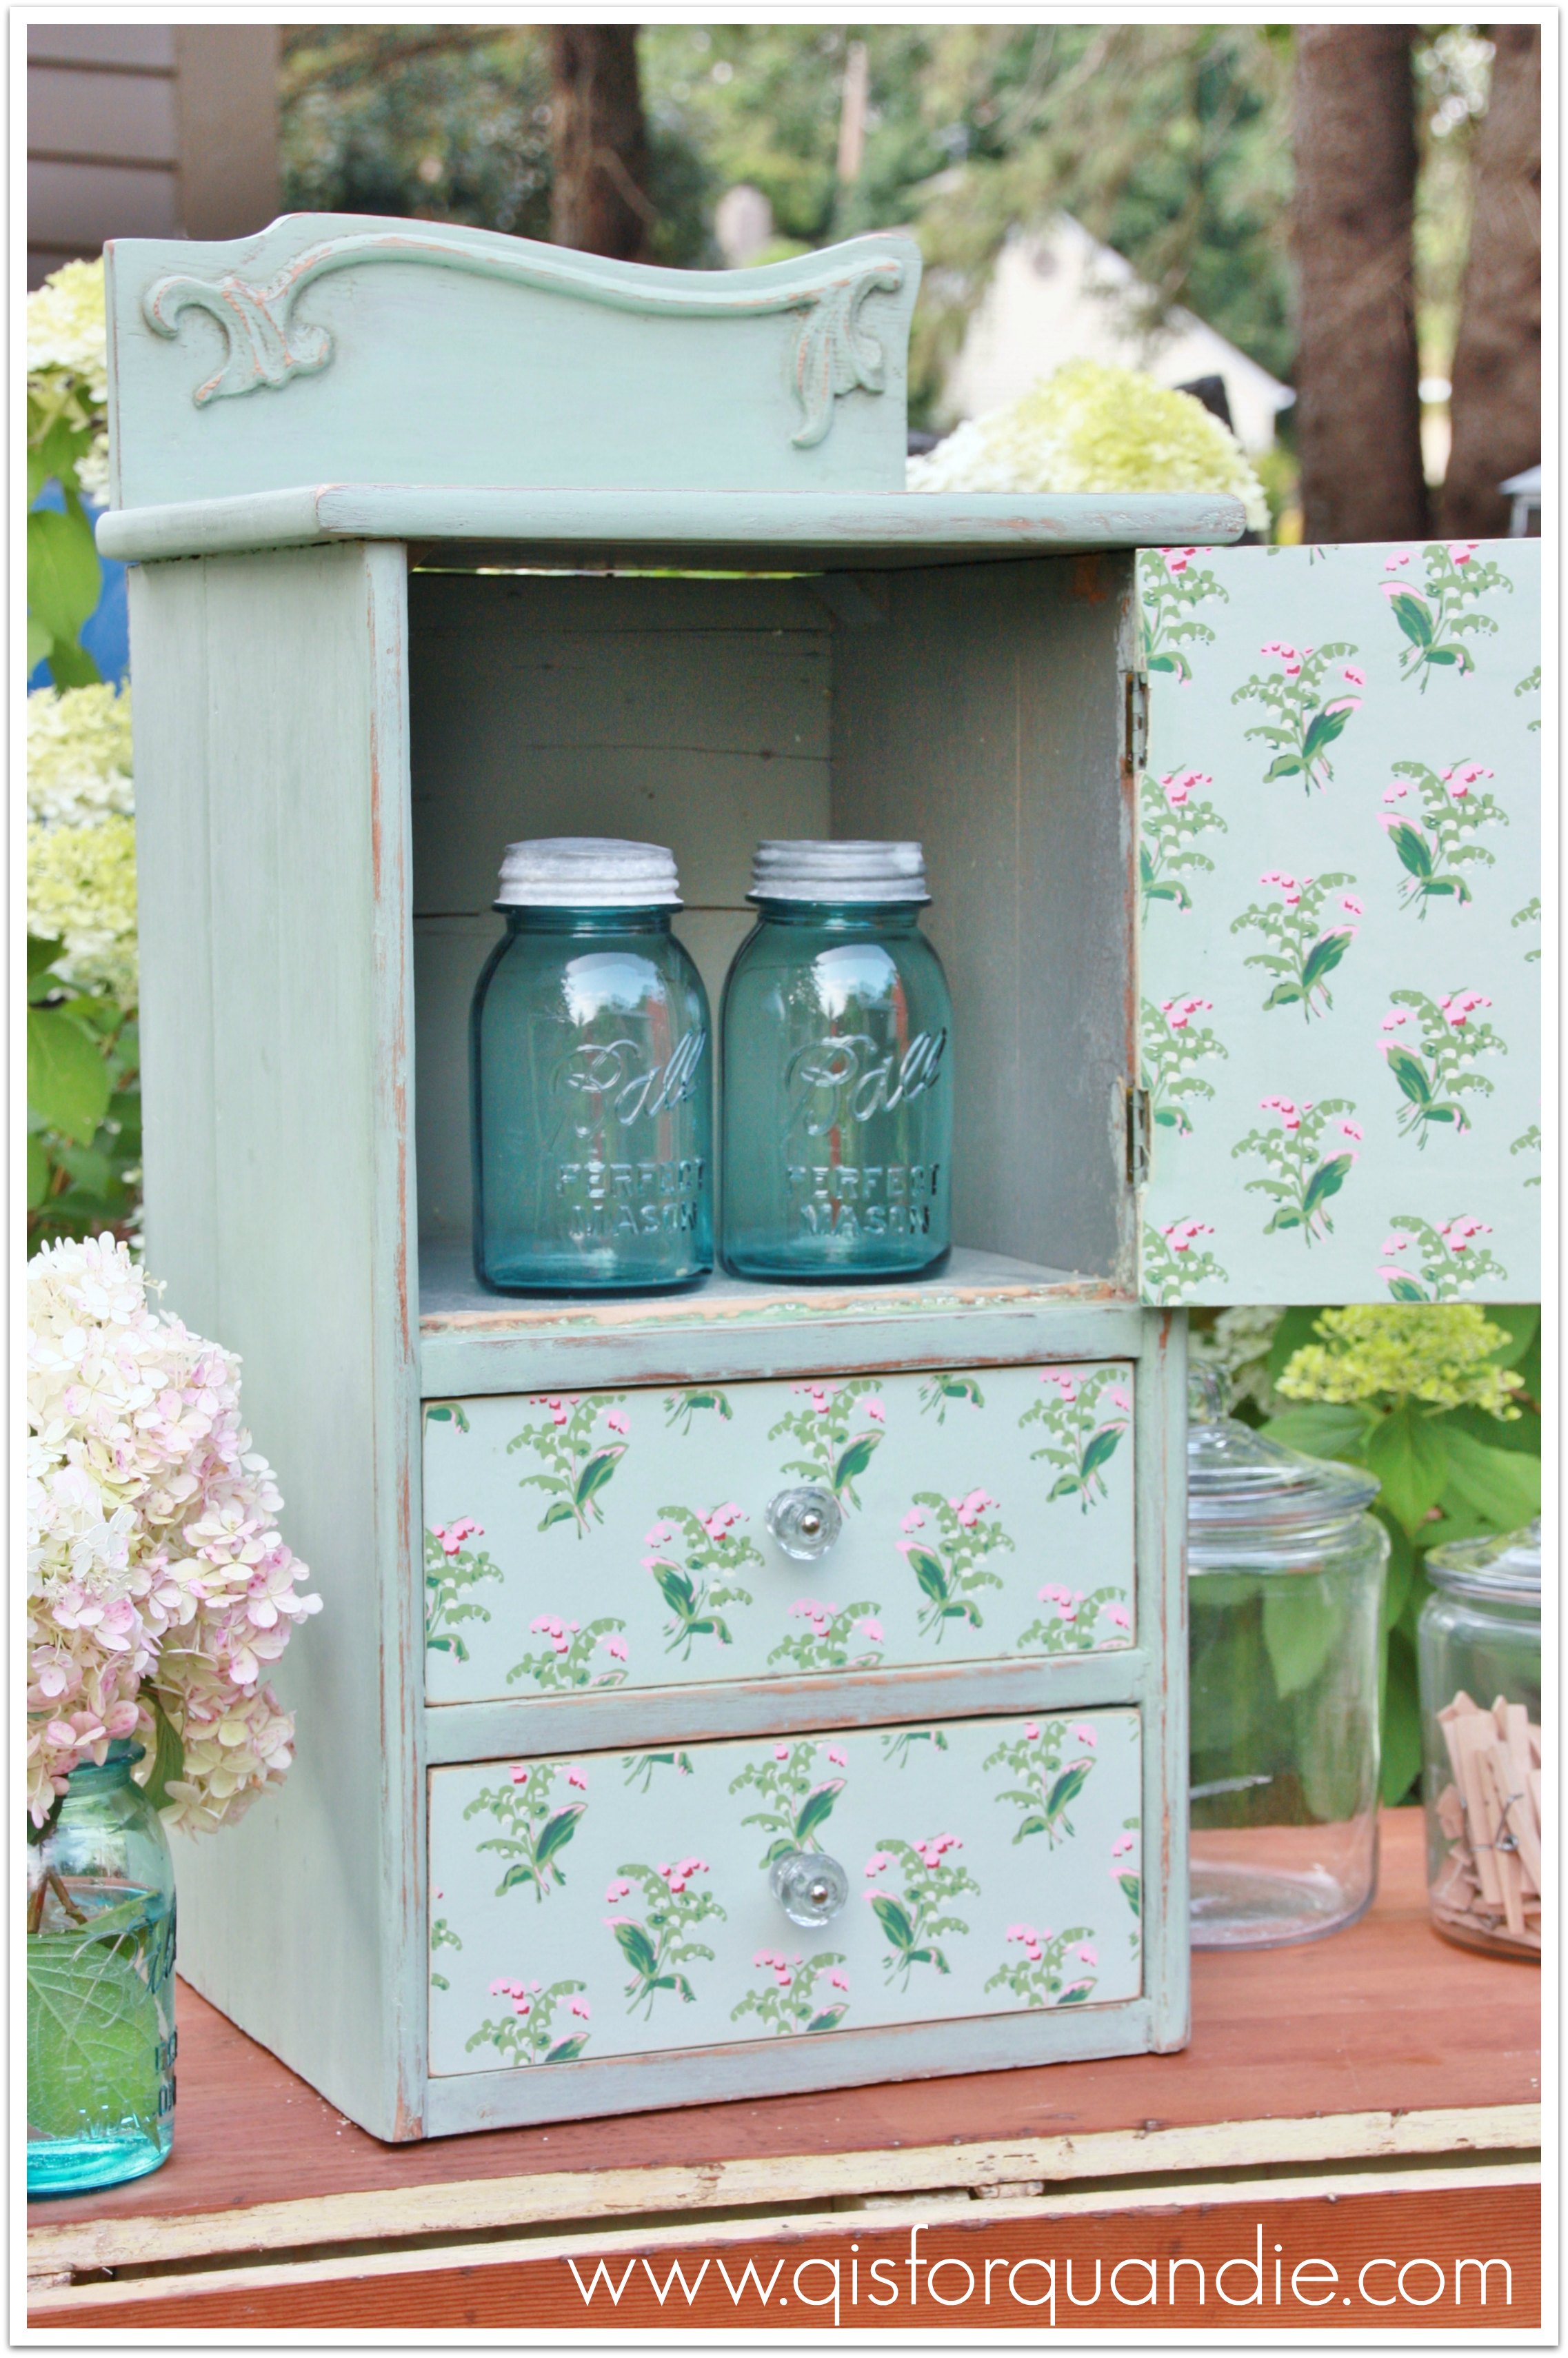
I staged the little cupboard with some glass jars and clothes pins.  I think it would be fabulous in a laundry room to hold your supplies.  Dryer sheets in the drawers, your laundry soap in a glass canister behind the door.

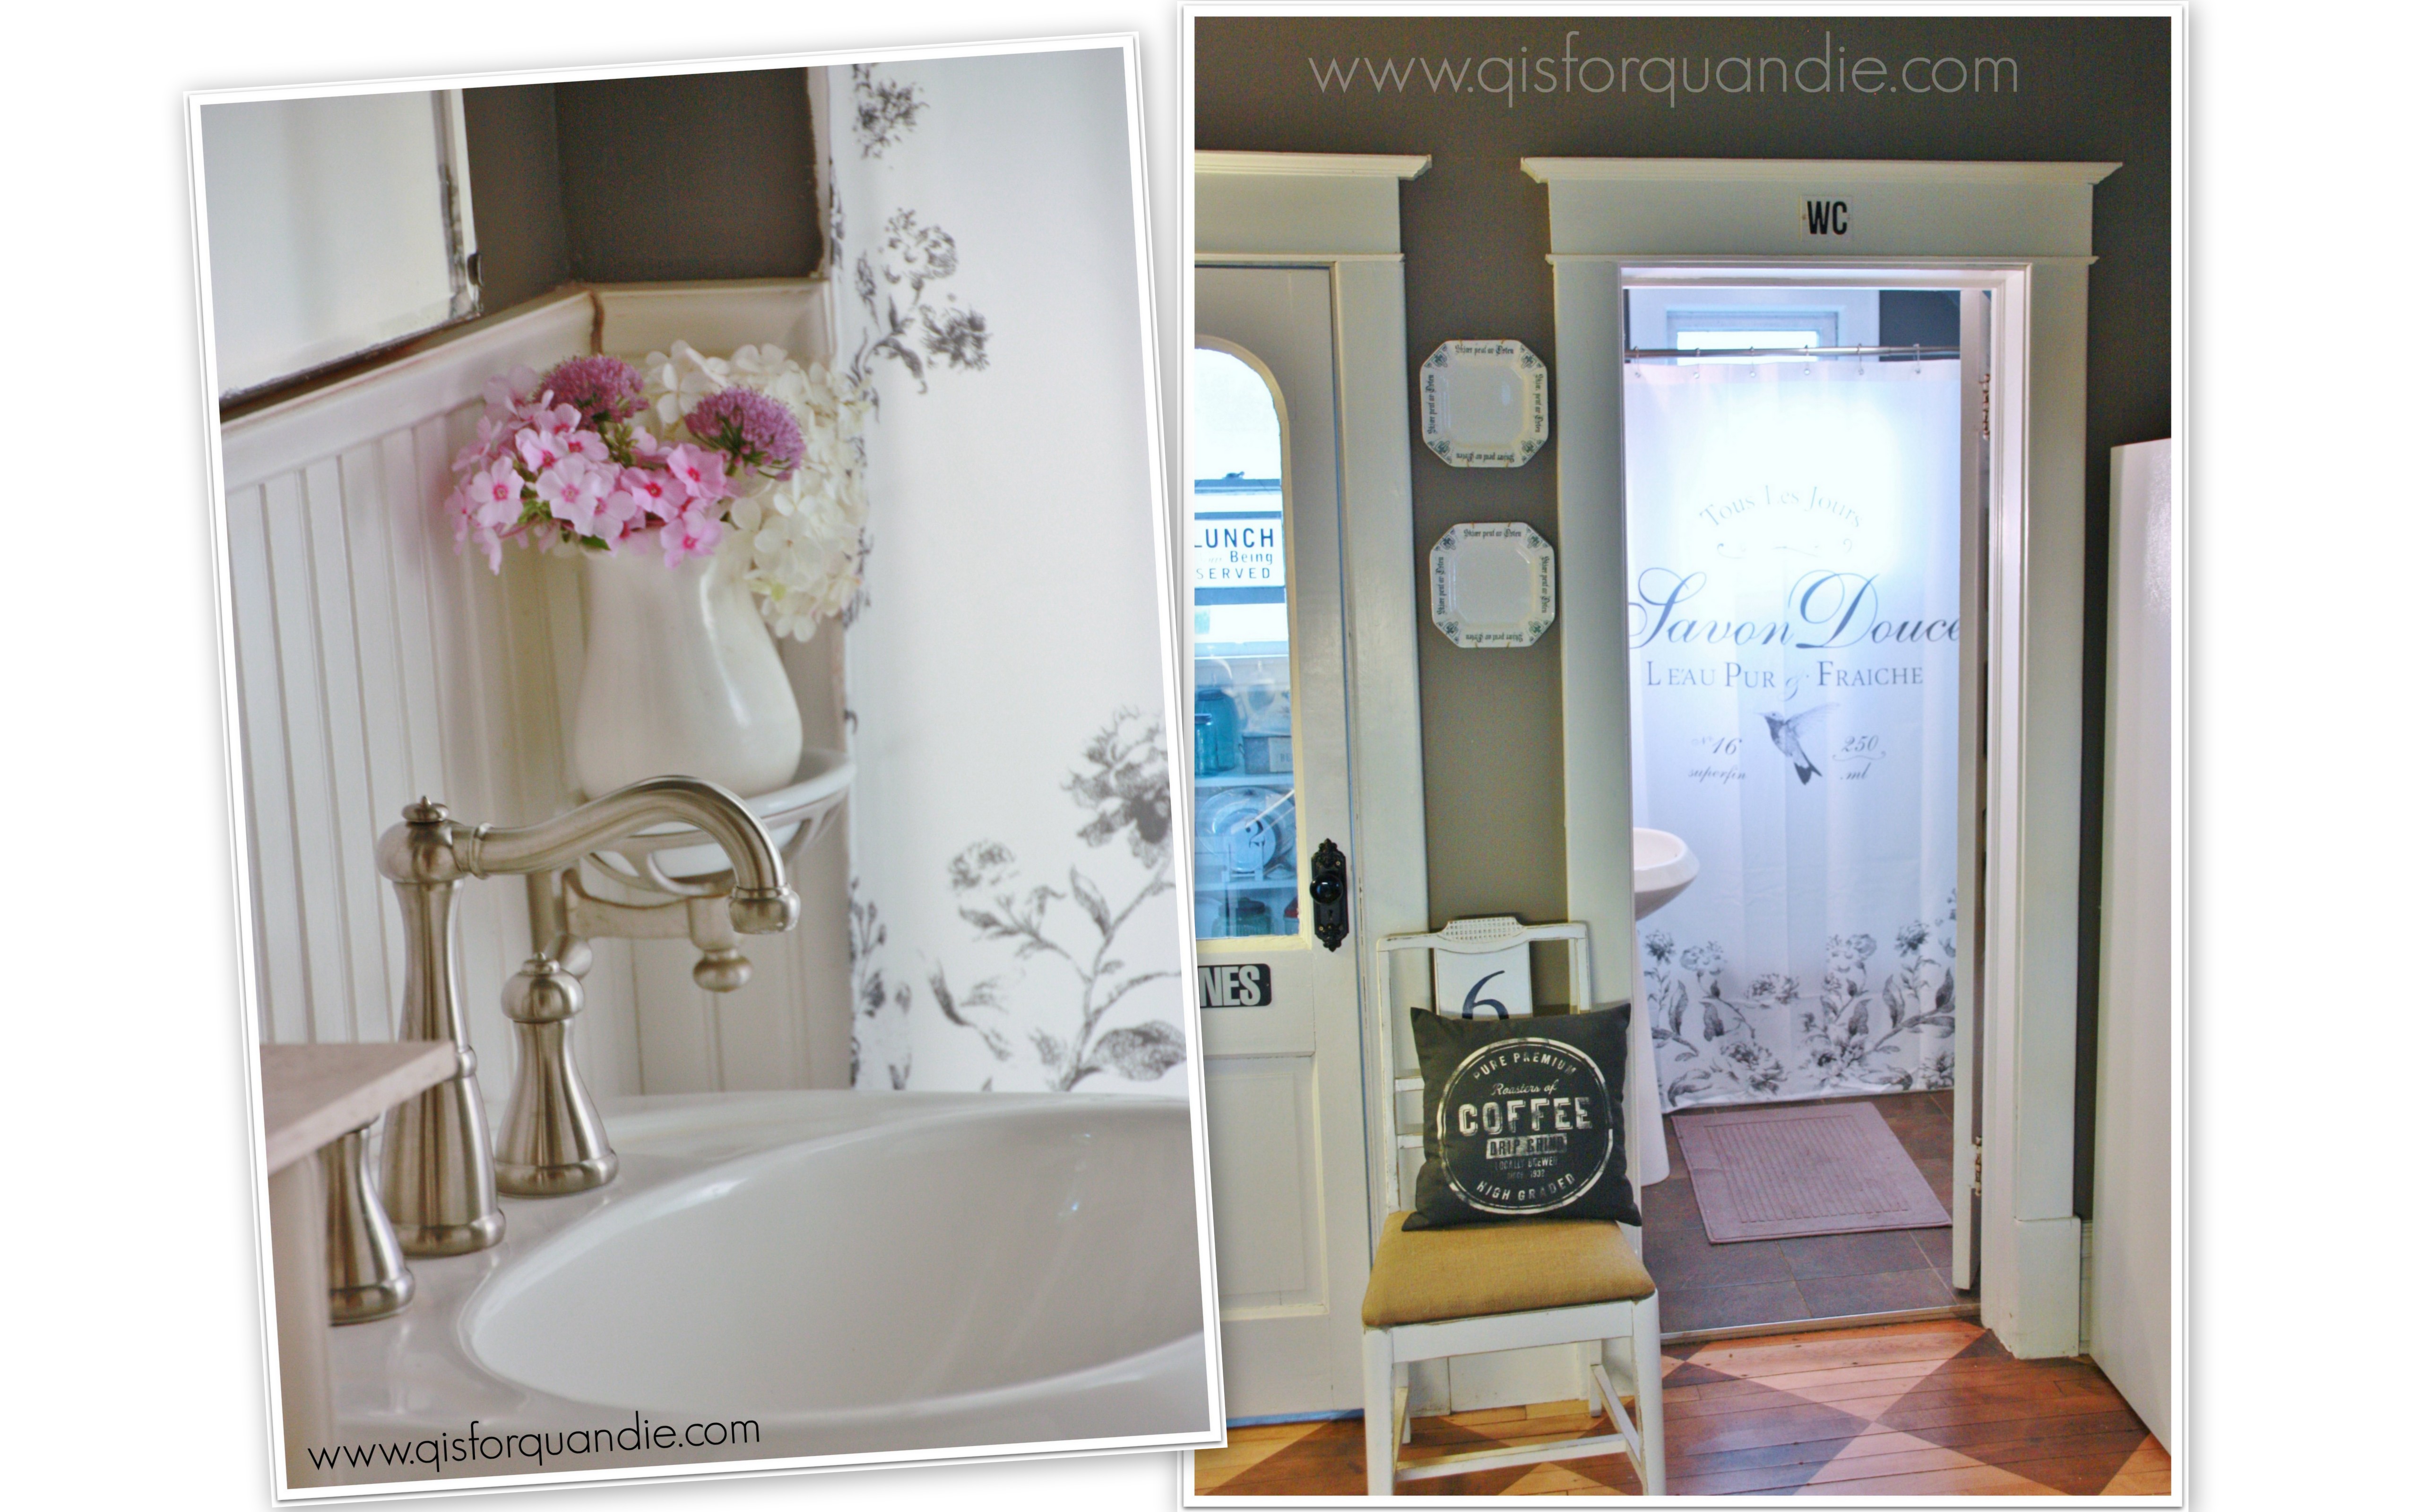
But then again, I could also see it in a bathroom holding the extra t.p. and other sundries.

Or maybe in your craft room?

The possibilities are endless if you use a little imagination.

Here’s one last picture of it so you can get a better feel for the size.

mystery cabinet with charm

I’ll likely sell this one at the October Carriage House Sale, unless one of you wants to snatch it up first?

P.S.  my price will be no where near $175!

kitchen scale dresser.

I have been struggling a bit with the milk paint lately.  I know it’s unpredictable, and it’s hard to control the chippy factor.  I know all about the color variations.  But this summer I seem to be getting one unexpected result after another.  This dresser is a case in point.

Let’s start at the beginning.

kitchen scale beforeThis one has lots of potential, right?  It has a little bit of veneer damage, and a chunk of the trim is missing at the bottom.  It’s the perfect candidate for a paint job.

I decided to go with my absolute fave MMSMP color, Kitchen Scale.  I hadn’t used this color for a while.  My own mirrored buffet is painted this color and I absolutely love it.

header hutch

 It works fantastically with grey, the neutral of the moment.

So I decided it was time for a Kitchen Scale dresser.  I sanded this one quite vigorously because it was in rough shape, and I didn’t want a ton of chipping, just a subtle chippyness.  I have to note here that I did mix the paint a little bit thicker than usual.  I ignored the little voice in my head that was telling me to thin it down a bit more, which may have been a mistake.  I painted my first coat and closed up shop for the evening.  When I went back out the next day, I found a massive amount of crackling.  On every surface except for the sides of the dresser.  The sides didn’t crackle at all, go figure.  Massive, bad, over the top, too much crackling everywhere else.  I should have taken a picture for you, but I didn’t.  When I have issues like this, it generally puts me in a bad mood and photography doesn’t happen.

I will note here that I did not apply heat to the dresser, and it was not all that warm outside and I did not paint under the full sun.  Why the giant crackles?  Was it just the thickness of the paint?  No idea.

I decided to sand the heck out of it again, and try adding another coat of thinner paint.  It had the desired result.  It toned down the crackle.  Oh, it’s still there, for sure, but now it’s at an acceptable level.

kitchen scale close up

Am I the only one who considers this an acceptable level?

2014 summer blog23

Often people wonder if milk paint will continue to chip away down the road, and the answer is no, it shouldn’t.  As long as all of the loose chips were removed as part of the finishing process.  In this case, I sanded the dresser pretty thoroughly and then vacuumed it to remove any loose chips.  I put a final coat of hemp oil on it which also helps the paint remain adhered.  I can run my hand across this dresser pretty vigorously and no paint chips off.

Alternatively, some people choose to leave the chipping paint in place and seal it with a poly finish.  I’ve never tried this approach, but I can see where it would be a fabulous look in some cases.  Maybe down the road, if I get a good chipper, I’ll give this a try.

In the end, I think the dresser is quite lovely.  It has some fantastic details like the angled sides and the carved bits that really pop now.  I kept the original hardware because it is quite charming.  This dresser is definitely distressed and has an aged appearance, but there are plenty of us out there who love that look, right?

kitchen scale front

Please say yes.

kitchen scale staging landscape

The moral to my story, if at first you don’t succeed, try, try, again.  You can always sand something down and add a little more paint.

After all, ending up with something that looks like this is not an altogether bad thing.

kitchen scale angleAnyone out there in the market for a gorgeous distressed dresser in my favorite shade of milk paint?

kitchen scale title

 If so, leave me a comment and I will get back to you.  Ooops!  Sorry, this one is SOLD.

the world’s smallest bathroom.

It is possible that I have the world’s smallest bathroom.  I haven’t checked with the people at Guinness, but I wouldn’t be surprised.  This is the price I pay for living in a charming 1904 farmhouse.  They weren’t real big on bathrooms back then I guess.

Actually, I have always suspected that the plumbing in my house was added after the original part of the house was built.  For this reason, not only is my bathroom amazingly tiny, but it’s also right off the kitchen.  Ewwww, right?  It’s also the only bathroom we have, and it’s a long way to go in the middle of the night.

2014 summer blog16

Obviously we did not buy our house for the bathroom.  But we’ve tried to make the best of it.  Over the years we have changed things up.  I made choices along the way that I would not make again.  For instance, I wish I had gone with a vintage looking floor, instead I went with large tiles that were popular at the time but not really in keeping with the era of my house.  However, we also added heat under the tiles and that was an awesome decision.  In Minnesota, a heated bathroom floor is a very good thing.

Another good choice I made was to keep the original etched medicine cabinet in place.

bathroom mirror 1

 My tub is situated in an arched nook that has a window in it.  Originally there was no shower in our house, but we added one shortly after moving in.  Showering with a window is a challenge.  We have a privacy film on the window, then some white curtains, then a clear shower curtain over that.  I hope my neighbors can’t see us in the shower, I’m pretty sure they don’t want to.  I’m not going to show you what is behind the curtain, it’s not exactly picturesque.  Re-doing the tile and plumbing in the shower is at the top of my wish list.  The shower curtain by the way is H & M.

bathroom arch 1

The last time I made over the bathroom I chose this dark wall color for the walls and ceiling.  I still like it, but I think I’d prefer a little bit lighter grey.  I’ve debated just repainting quick, it wouldn’t take more than an afternoon to do, but I haven’t taken the time yet.  The bathroom gets a lot of light from the window, so the dark color works for now.

There is a tiny linen closet tucked in beside the tub.  It is quite deep and we fit a lot of supplies inside.  It also has a handy laundry shoot at the bottom.

2014 summer blog15

None of the light fixtures that were in place in our bathroom were original to the house.  They were all kind of awful.  I replaced the wall sconces with reproduction lights from Rejuvenation.  I was somewhat limited because these lights are not hardwired to a wall switch.  The fixture must incorporate its own on/off switch, and these did.  And in fact, when we moved in, there was no wall switch in the bathroom at all.  The ceiling fixture was operated by a pull chain.  We added a wall switch for that when we remodeled the kitchen.  The ceiling fixture is from Schoolhouse Electric.

2014 summer blog21

 Having a tiny bathroom forces you to be creative.  I have a tiny little shelf on top of the radiator that is next to the sink.  The lidded metal box contains all of my makeup, and the metal boxes hanging on the wall hold my makeup brushes and q-tips.  My super magnification mirror (essential for makeup application at my age) is a wall mounted model to save space on the counter.  His and hers towels hang on the back of the door.

bathroom towels 1

 You may recognize my trash can that gets tucked next to the pedestal sink.  My towel/magazine rack is a rusty old crib rail turned on its side.

2014 summer blog14

You can see more of it in this next picture, along with my favorite thing in the bathroom which is my giant photo of a Parisian street scene from the 50’s (or maybe 60’s?).

bathroom artwork

Mr. Q says he always feels like he is peeing in Paris.  Is that TMI for a blog post?

Somehow our bathroom doesn’t feel quite so small when there is a view of Paris to admire!

my barbie wore chanel.

Or at least I thought it was just as nice, if not nicer, than Chanel.

barbieMy grandmother knitted these Barbie outfits for me.  I had several, but this is the only one I preserved.

It was the 60’s.  I thought I had an incredibly chic wardrobe for my Barbie.  Heck, I still think this is an incredibly chic ensemble.  Can’t you just picture it on Jackie O?

A little back story about my grandparents on my mother’s side; my grandmother was 42 years old when my mother was born.  Yikes!  Right?  I believe my grandparents considered her quite the surprise. Anyway, by the time I came along my grandmother was already 66, and she passed away while I was still in school.  We lived in Chicago when I was younger, my grandparents were in Minneapolis.  All of these factors meant that I didn’t really know her that well.

But I do know that she was very handy with a needle, whether it was knitting, crochet or needlepoint.

In addition to my fantastic Barbie outfits, she made this darling crocheted dress for my mom when Mom was little.

2014 summer blog24

Look at this picture of my mom, doesn’t she look like she is about to get into some mischief?

so sweet mom in sepiaMy mom was born in 1940, so these photos had to be taken right around WWII.  I know that my mom remembers rationing from those days.  I’m sure that the easiest way to come up with a special dress for my mom was to make one from nothing more than a ball of yarn.

These pictures were probably taken a little earlier, when my mom was just a toddler.  Can you see her peeking out of the window behind my grandparents?  And on the right is my mom with her older sister, Marilyn.

2014 summer blog25

I’m afraid that grandma’s skill with a needle was not passed down to me.  I did a little cross-stitch back in the day, but I never learned to knit or crochet.  I’ll hang on to these mementos as they remind me of a much simpler time when Barbie’s wore home made Chanel and people made do with what they had.

another golden oldie.

I painted this gorgeous hutch last summer.  I wish I had a ‘before’ pic for you!  I knew the moment I saw the craigslist ad that this would be gorgeous painted.  It wasn’t horrible, but it was rather outdated looking in its original state with a rather orange-y stain.

1863 hutchI loved the Gothic arches in the glass door and the detail at the top of the cabinet.  I have to admit, this is still one that I look at and think “why didn’t I keep that?”

1863 hutch door

You can see that I lined the inside with pages from an old Swedish bible.  I hand painted the ‘1863.’ at the top.  It’s not a stencil, I just printed the image off my computer, traced it onto the cabinet using tracing paper, and then painted it in with a small brush.

1863 hutch interiorYep, she was a beauty.  I sent this one up to the Round Barn and it is long gone.  Sniff, sniff.

travel the world desk.

I didn’t plan to carry on with the travel theme, it just sort of happened.

travel desk quoteAnd I don’t normally do custom work, but this particular job was obviously meant to be.

One of my fave customers came by to pick up the Duncan Phyfe buffet, and as she was getting ready to leave she just happened to ask if I had any desks.  She was looking for a specific style, and showed me a pin from pinterest.  It is a unique style, and it was just an amazing coincidence that I had a very similar desk on hand.  I’m sure she totally expected me to say no.

It was tucked away in the creepy lean-to storage area of the Carriage House waiting for inspiration to strike.

travel desk before

As you can see, she had to have amazing powers of imagination to see that this could turn into something fab.  She also had to brave potential spiders and bad lighting.

She told me that I could do what I wanted with it as long as I painted it white.  I had been thinking of white anyway, so I was more than willing to bend my ‘no custom work’ rule.  And here is the result.

travel desk title
I’ve had the pair of pink knobs around for a while, and I thought they’d be a nice pop of color on the desk.  If you look close, you can see that they say PARIS and LONDON on them.

2014 summer blog18

I knew I wanted to put some sort of vintage paper at the backs of the cubbies, and the knobs inspired me to use old maps.

travel desk cubbies

2014 summer blog17

The maps came out of the Putnam Handy Volume Atlas of the World from 1922.

I picture a young woman from the 1920’s sitting at this desk planning her grand tour of Europe.  She has her Europe map hanging on the wall, and her luggage is piled up and ready to go.

2014 summer blog19

She’s making notes about the Doge’s Palace in Venice and Notre Dame de Paris in her journal.  Perhaps she’ll visit the Leaning Tower of Pisa, and hopefully the Tower of London.  Handsome Italian men will try to sweep her off her feet at the Spanish Steps in Rome.

She has plenty of film and her cameras are ready to go.

travel desk cameras

I hope that this desk inspires some travel, or at least a sense of adventure in its recipient.

travel desk on angle

 Don’t you sort of wish you had a trip to plan now?

my travel gallery.

Everybody loves a good gallery wall, right?

I like the mixed media type walls, with items other than just framed stuff.  Like a giant letter or maybe some ceramic antlers.  But for my own gallery walls I just went with my own travel photos and a related wall quote.

travel gallery quote

My upstairs hallway was the perfect location, but it is fairly narrow so I couldn’t add anything that would stick out too far.  Encountering ceramic antlers in the middle of the night could be quite dangerous in this spot.

travel gallery

The door on the right leads to Mr. Q’s study, the door on the left is the master bedroom … and behind door no. 5?  The guest room.  Why is the door numbered?  I numbered all of my doors on a whim one time.  The upstairs doors still have their numbers.  And can I just take a moment to say, I love my doors.  Super heavy, original six panel doors.  Over time I have switched out most of the knobs to black or white vintage enamel.

Anyway, when I decided to do this, I began by stockpiling black frames at garage sales.  They are easy to find, and usually pretty cheap.  I still have more black frames on hand and hope to get more pictures soon to add to my gallery.  You could also find basic black frames at Goodwill on the cheap.

travel gallery doors wallI suppose I could have done something fancy, like lay all of the frames out on newspaper first and arrange and re-arrange until I was happy with the layout and then use the newspaper to line up the nail holes on the wall.  But no, that would be way too much work for me.  Instead I just started in the center and worked my way out.  Not perfect, but I’m happy with the outcome.

All of the pics were taken by your’s truly.  I love, love, love travel photography.  Did I mention, I love it?  Thank goodness Mr. Q is up for wandering around a foreign city without a goal in mind other than finding fab things to photograph.  As long as we occasionally stop for coffee, he is game.  Mr. Q and I put a lot of miles on our feet when we travel and we know from experience that getting lost is the best way to see a new city.

2014 summer blog12

 Both Barcelona and Copenhagen are fantastic cities to get lost in.  We were in Copenhagen in springtime and these fabulous trees with hanging yellow blossoms were everywhere.  I don’t know what they are, but they were amazing and they looked gorgeous behind this verdigrised statue.

travel gallery doorsThese doors were all in Barcelona.  I love graffiti, it has such a raw, urban feel to it.  And I also love taking photos of doors, so these doors were perfect for me.

2014 summer blog13

Tangier has some great doors too, and it also had this fantastic motor scooter/cart.  We hired a private guide in Tangier, because the Medina in Tangier is probably one place you really don’t want to get lost.

We went to a wedding in this church in Puerto Vallarta.  One of Mr. Q’s co-workers was from there and he invited us down for his wedding.  The church was fantastic and filled with history and the reception was a blast.  It was held in a big park, but there were tables with linens and candles right out in the open and it was a gorgeous night in February.  Each table had several bottles of tequila and bowls of limes and we were serenaded by a mariachi band.  As you can imagine, much fun was had by all!

travel gallery wall

The red mailbox with the “GR” on the front is in Gibralter, and the fruit stand is in the Cinque Terre.  The photo with the canal in it at the upper left was taken in Prague.

Although I didn’t keep track of how much this gallery wall cost, I am sure I never paid more than a dollar or two for each frame.  I printed the photos myself, so yes the paper and ink cost me something.  But overall, this was a pretty budget friendly way to make a big impact as long as you don’t factor in the actual cost of the travel!

As you can see, I have filled the walls nearly right down to the baseboard.  I think this helps up the fabulousity factor.

travel gallery window

If you are a budding photographer, I recommend you do your own gallery wall.  Take some great shots, print them out and fill up a wall in your house!

succulents are the new black.

In the last couple of years it seems like succulents have become very trendy.  There are so many varieties, and the colors and textures are pretty fab.

succulents

So I admit it, I jumped on the succulent bandwagon, but in a small way.

succulent toolboxI love rusty old metal toolboxes, don’t you?  I decided this one would make the perfect container for some succulents.  First, I stenciled my house numbers on it.  I used my Cricut machine and made my own ‘stencil’ using contact paper.  After cutting out the numbers, I just removed them and kept the rest of the contact paper.  I adhered it to the metal toolbox, and then just used white spray paint to paint the numbers.  I thought it would hold up well against the elements since this planter stays outside in the summer.  This is its 3rd summer, and as you can see it’s getting pretty rusty, but the paint has held up well.

succulent toolbox closeup

I punched some holes for drainage in the bottom of the toolbox using a large nail and a hammer.  I just pounded the nail through the metal in several different spots.  Fancy people might use a drill for this part of the process, but the nail and hammer worked pretty well.  Your planters especially need drainage if they are going to be outside.

I keep this on the deck between my lounge chairs (and that is one of my Annabelle hydrangeas back there behind the chairs).

succulents on the deck

This is an awesome spot to sip a glass of wine and look at some of my favorite decorating books.

succulents with bookThe pillow covers came from Restoration Hardware, and I bought them on clearance.  I don’t usually pay Restoration Hardware prices for stuff unless it’s on sale.  This patio furniture came with some very blah pillows when I bought it, so it was nice to upgrade them to something a little more ‘me’.  I’m a little embarrassed to admit that I am completely obsessive about not leaving the cushions out unless we are using them.  But hey, we’ve had this furniture at least five years now and the cushions still look great and this is why!

succulents on deck close up

How about you?  Have you jumped on the succulent bandwagon and planted some of your own?

mid-century meets vintage.

I picked this nightstand up at the Highland Park garage sales.  It was pre-prepped for me, meaning the person selling it had intended to refinish it herself, but she never completed it.  She had sanded it and removed the knobs (unfortunately, she didn’t have them anymore).

highland park mid-century before

It was so nice of her to take care of the boring parts of the process for me!  All I had to do was focus on the creative, ie. fun, part.

A while back I made a trade with my friend Michelle.  I found some darling mid-century Italian tole wall sconces at a garage sale that I knew would be perfect for Michelle, and I had been admiring a roll of fab mid-century wallpaper that she had stashed in her studio.  An easy trade.

Provence wallpaper

What I love about this wallpaper?  The colors are perfect, aqua, pink and white with that little touch of metallic gold and black.  Feminine, without being flowery.  Geometric all-over pattern that isn’t difficult to line up.  It’s perfect for my needs.  I was hanging on to it just waiting for the right mid-century piece to use it on.  And I knew this nightstand was it.  So let’s pop into the photo cottage and see how it turned out!

Provence nightstand in cottageYep, pretty fab, right?

Provence nightstand close up

I painted this with Annie Sloan’s Provence.  Then I added the wallpaper to the back of the cubby area, and the front of the drawer.

Provence nightstand on angle

A couple of my friends really pushed me to find a more classically mid-century knob for this piece, but after perusing Etsy and finding the knobs I liked to be rather pricey, I opted to go with some vintage milk glass knobs that I already had on hand.  They aren’t typical mid-century.  They were not stark white, but had a bit of an aqua tint.

Provence nightstand knobs

Classic mid-century base.

Provence nightstand base

 I think the combination of the very mid-century style of the nightstand, the mid-century wallpaper and vintage milk glass knobs comes together nicely to create a ‘mid-century meets vintage’ look.

Provence nightstandI’ll leave you with one last b & a.

Provence nightstand before and after

 What do you think?  A good combo of mid-century and vintage?

golden oldies.

Since deciding to spend Saturday sitting beside my bff’s pool drinking special Fresca’s (that’s Fresca with vodka, don’t knock it til you try it, it is very refreshing), I’ve been feeling guilty because I don’t have any fabulous new content for the blog.  I have several projects underway in the Carriage House, but none are quite finished.  I didn’t want to bore you with another gardening post (although I do have one coming soon).  So I came up with a brilliant plan!  I’ll begin a new ‘column’ on the blog sharing some of my furniture rehabs from the pre-blog days.

I’m starting with this darling radio cabinet that became a wine cabinet.

upcycled wine cabinet

Unfortunately, prior to the blog I often neglected to take before pics.  But this was your basic gutted radio cabinet.  It was empty inside and was open in the back.  Originally there would have been a huge radio inside (‘cuz back in the day, they were huge.  Remember when we thought boomboxes were portable, ha!)?  I think there may have been a turntable inside as well because the top opened.

I bribed Ken into helping me with this one, probably with wine.  He built the shelves which were modeled after the wine storage in my pantry (which he also built).  He was able to tuck them into place with the top off.  Once that was done, he attached the top permanently using dowels and glue.

upcycled wine cabinet interior

I tested this out and one could store over two dozen bottles of wine in here.  Not bad.

I used one of my fave stencils on the front.

upcycled wine cabinet close up

Back in the day, I mainly painted with homemade chalk paint.  Basically flat or satin latex mixed with Plaster of Paris and a little water.  I had great success with it, and I still use it some times.  It won’t give you the chippyness of milk paint, but it is budget friendly and you have endless choices for color.

I love the detail at the bottom of this cabinet.  It needed to be glued up a bit when I got it.

upcycled wine cabinet bottom detail

So the next time you see a beat up radio cabinet at a garage sale (or heaven forbid, at the curb), think outside the box and turn it into wine storage!

upcycled wine cabinet collage