a tropical island.

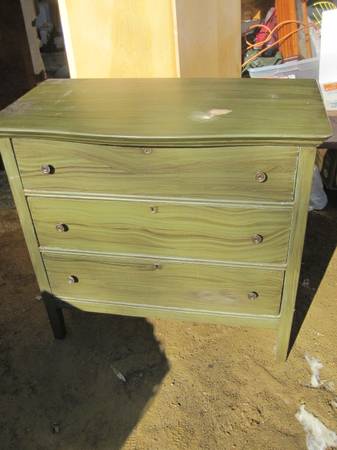
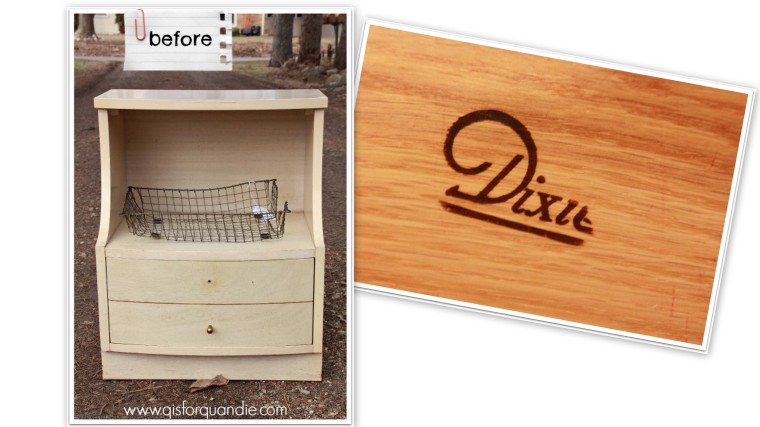
This poor dresser has been wasting away out in the carriage house all winter.

island before

 Somehow its plain straight lines just weren’t inspiring me.

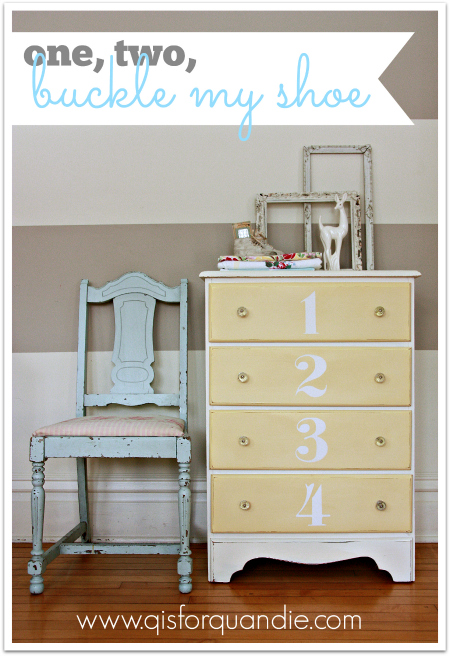
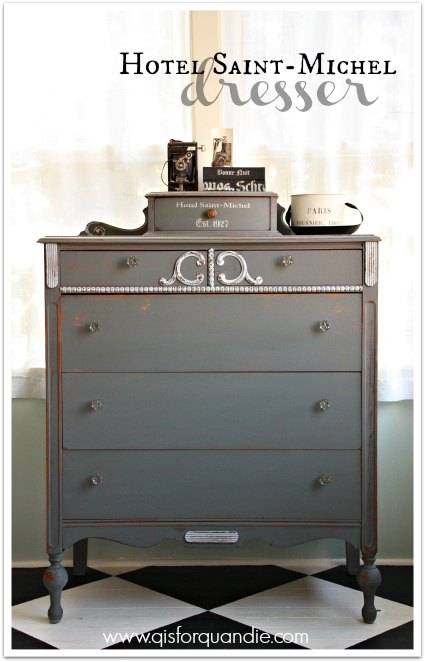
But I have made a commitment to get to all of the pieces that are waiting for me out there, and this one was next up on the list.  It is a great example of how my plans change as I begin working on a piece.  My original plan was to paint it grey with white horizontal stripes on the drawers, much like this inspiration photo from pinterest.

sophiasdecor dresser

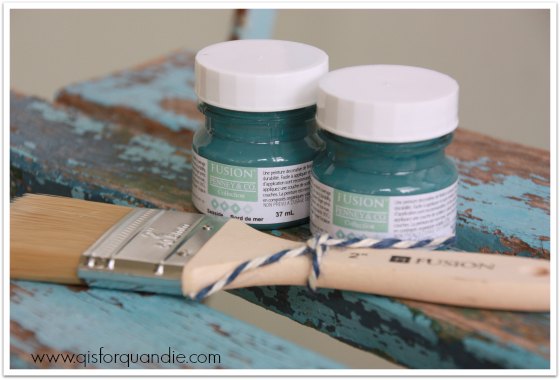
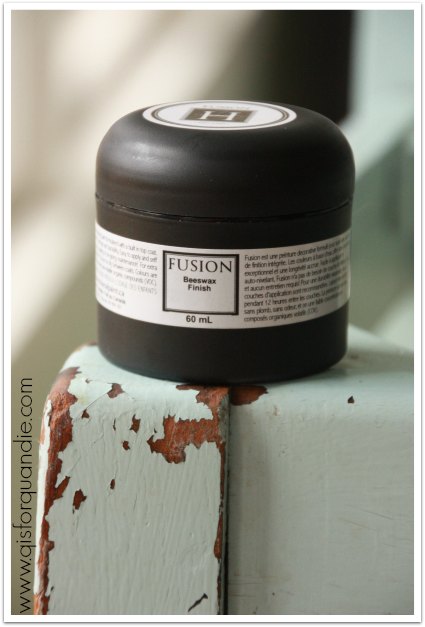
I was going to use Fusion paint, because I knew that would handle the taping of the lines quite well.

I even ran to Hobby Lobby and bought some really pretty crystal knobs that I thought would work well with this rather more formal look.  However, while picking up those knobs, I also grabbed some glass pulls just to see how I liked them on this piece.  Since it already had two holes for each pull, I thought maybe, just maybe, the glass pulls would work.

Sure enough, they were exactly the right size.  To me, glass drawer pulls give a very ‘vintage farmhouse’ feel to a piece, which meant I had to change gears and go with milk paint.  Also, after taking a closer look at the dresser, I decided it would be the perfect piece for stripping the top and refinishing it with my favorite wax for that, the Cece Caldwell Aging Cream.

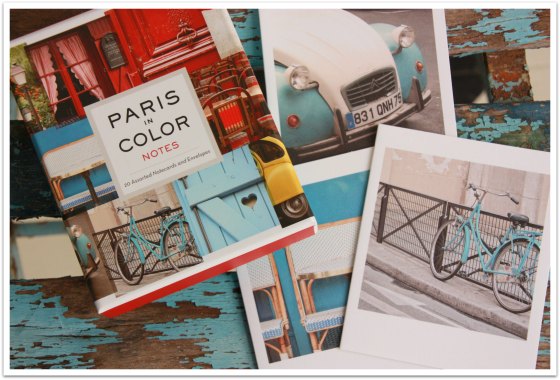
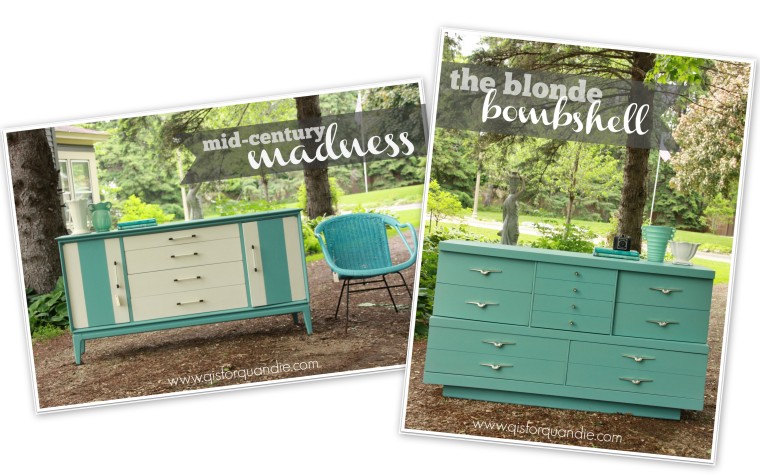
All that remained was to pick a color.  I debated several Miss Mustard Seed colors, but in the end I realized I was kind of bored with the “out of the bag” colors.  I needed something custom mixed.  I went to my favorite place for inspiration, pinterest.  I keep a pin board for MMS colors and I try to pin custom color examples whenever I see them.  I considered using a color that Dear Emmeline created called Eucalyptus.  It is a mix of Boxwood and Ironstone.  But I wanted more blue in my color.  Then I saw a dresser painted by Abbe Doll and decided it was perfect!  A mix of 3 parts Luckett’s Green to 2 parts French Enamel, and I just happened to have plenty of both colors.  I don’t think that she named her color, so I’m calling it Tropical Island.  It’s a beautiful shade of blue green, like the waters surrounding a tropical island.

tropical island dresser title

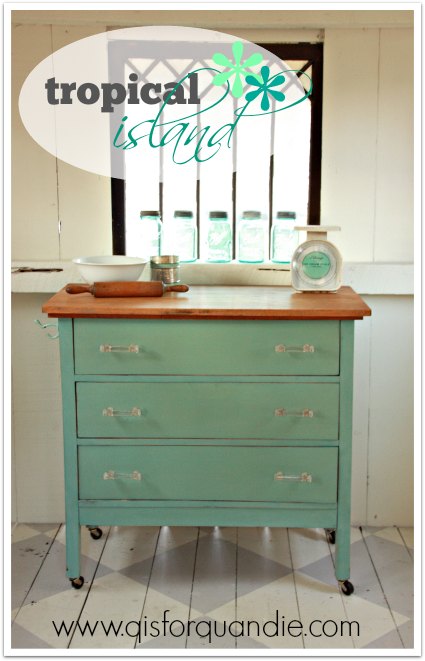
And since I was on a roll with the whole ‘island’ thing, I decided to turn the dresser into a kitchen island!

Ken and I worked together to add new casters.  Why new?  I wanted them to be functional.  The vintage casters tend to look pretty, but you wouldn’t really want to roll your pieces around on them too much.  These larger casters also added the perfect amount of height to bring the top up to counter top height.

I staged the piece in my own kitchen first to see how it would look.  I thought it would be perfect to take photos in the early morning when the light is flooding in.  I forgot to factor in that the light would be flooding in behind the island.

kitchen island

Hmmm.  Not the best plan.  Although I like that you can now easily picture this piece as an island.  And since it is intended to ‘float’ in the room like this, I did paint the back.

kitchen island back

You can see that I added a little hook to the side for hanging a towel.

kitchen island hook

In the end I hauled the tropical kitchen island out to the photo cottage to take advantage of better lighting.  I staged it with a lovely French ironstone bowl and some other pretty vintage kitchen items.

kitchen island stagingkitchen island staging 2

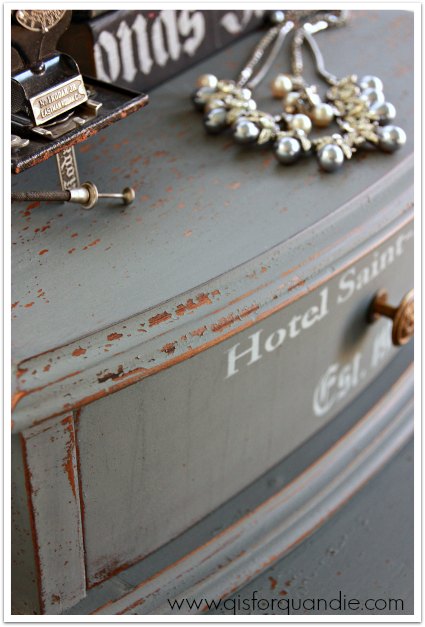
As is typical with MMS milk paint, there is some slight color variation in the paint.  You can really see it more clearly in this close up.  The drawers are a little more green than the body of the dresser.  But in this case, the drawers are all the same, and I think this look works on this piece.

kitchen island close up

After having the island in place in our own kitchen, Mr. Q and I have decided we really don’t have room for a kitchen island.  So, this one is for sale?  How about you, do you have space to fill in your kitchen?

kitchen island collage

progress.

Remember the cane back chairs I picked up a while back?

chair before

Well, they are promised to one of my favorite customers, Nikkii.  We once added up all of the pieces she has purchased from me, and it was in the double digits.

I think the very first piece she purchased from me was this bed, back in my pre-blog days.

French bed

 She also has the Duncan Phyfe sideboard …

french linen sideboard

and this sweet white dresser …

le petit gateau

Not to mention the footboard chalkboard.

foot board turned chalkboard

Plus a bunch more!

So I am happy to be working on these chairs for her.  I know they will be right at home along with the other pieces she has!

However, they are turning into one of those projects.  The ones where you just keep running into snag after snag.  And they still aren’t done, but I thought I would give you an update (mainly because I don’t have anything else to share today!).

My original plan was to start with removing those arm rest patches so that I could just paint the arms.

chair arm covers

Easier said than done.  The Velcro slipcover thingie came right off, but the upholstered arm cover had about 400 million staples holding it in place.  I spent over an hour on the first one, and still had about 20 firmly embedded staples left in the arm that I simply could not get out.  It was time to consider a plan B.  I am going to attempt to re-upholster them.  Miss Mustard makes it look so easy, I hope it is.

Once I made this decision, I decided to go ahead with the painting.  I painted one coat of chalk paint on the first chair, and quickly realized that it was going to be a challenge to cover all of that cane with a brush.  Time for another plan B.

spray paint

I decided to spray paint the cane first, then cover it with a final coat of chalk paint.  I generally avoid spray painting indoors though, so I had to wait until the weather cooperated so I could haul them outside for this step.  I am not a big fan of spray painted furniture, but when it comes to both cane and wicker, it can often be the best option.

While manhandling the chairs for spray painting, I realized that one of the arms was really wobbly.  I thought I could shore it up by just tightening the screw that holds it in place.  No dice.  I called my handy man/neighbor/furniture miracle worker, Ken, for a consultation.  He decided he could work some magic with glue and by adding an additional screw where the arm meets the chair back.  Since I’m going to paint these, he knew I could patch and paint over the screw head.  Thank goodness for Ken, but of course this was another delay in getting the chairs painted.

Meanwhile, I was working out a plan for the cushions.  Luckily my friend and Carriage House Sale partner, Sue, is a fabulous seamstress who doesn’t mind tackling the occasional sewing job for me.  I sent the cushions home with her along with some drop cloth fabric.  She whipped up some slip-covers for me in no time!

chair cushions

She made them with an unstructured pillow sham-like design, so they could be slipped off and washed.  Since Nikkii has some little ones at home, I know she will appreciate this feature.  Here is the underside, with two ends that overlap so the cushion can be slipped out.

chair cushion slipcover

And here is how one looks on a partially finished chair.

chair with cushion

Nice, right?

So … progress is being made … but I’m not quite done.

chair progress

I still need to add another coat of white, distress and wax, then re-cover the arm patches.  I’m hoping to get all of that done this coming weekend.  Wish me luck!

On a related note, for you Fixer Upper fans, remember when I first posted about these chairs and I mentioned that Joanna had used similar chairs in one of her fixer uppers?  Well, she did it again.  In the most recent episode, Asian Ranch, she used them again …

fixer upper chairs

Does she re-use furniture for staging the homes for the show, and then take them back and use them again?

Or does she have a supplier of these chairs that she just goes back to for more?

Does anyone else wonder about this?

And while we’re on the subject of Fixer Upper, did anyone else notice the piano in the Asian Ranch episode?  It came with the house and looked like this …

fixer upper piano before

And they kept it in the house …

fixer upper piano

See it tucked away back there behind the table?  It’s a little difficult to see in this photo, you can see it a little bit better in the episode, but I think they painted it black.

And I love it.

So now I’m tempted …

piano room

What do you think?  Black piano?  I could use MMS Typewriter milk paint.  Do I dare?

sisters.

I believe I’ve mentioned it before, but my family moved around a little when I was young.   I was born in Chicago, as was my sister Debbie (right).

Sisters (2)

We later moved to Minnesota, and then to Florida.   Both Debbie and I attended high school in Florida, and my sister, who is 2 1/2 years older than me, got married there.  I believe I was 17 at the time, and she was 20 (yep, a young bride).  Or maybe I am off by a year, but don’t worry, if I am I know she will be sure to correct me in a comment.  She likes to correct me.

Anyway, the year was 1981 and my sister married a guy from New Jersey.

deb wedding photo

Can you tell that her favorite color has always been blue?

Within a year of her marriage, my sister’s husband asked her to move back to New Jersey with him to be closer to his family.  What is a young bride (with a brand new baby, by the way) to do?

Fast forward about 33 years and my sis and I have lived in different parts of the country ever since.

cast - debbie

We’ve gotten creative about staying close in spirit, even though we were far apart in body.  We both got bluetooths for our phones and we would walk ‘together’ every Sunday.  She’d walk in her local park, I’d walk in mine and we’d chat.  I’m sure a bunch of my neighbors now think of me as the crazy lady that talks to herself in the park.

But, better yet, we regularly met up for some pretty awesome trips, including our river cruise down the Danube last fall.

bad Danube selfie

Here we are in Lucerne, Switzerland in 1998, another off season European vacation that our mom talked us into.  I still remember how cold it was that day.

deb and I in Lucerne

We’ve taken quit a few cruises together too.  Here we are on a Baja Mexico cruise that we took for our mom’s 70th birthday.

cruise pic

You can see that Mr. Q joined us, as did my niece Kris.

Honestly, I always figured it was a pipe dream to imagine that my sister and I would ever live near other.  After her eventual divorce, my sister stayed in New Jersey because she had young children.  As her children got older, she talked about potentially moving to Las Vegas to be near our parents.  After my dad died, she got even a little more serious about moving to Las Vegas.  But the economy in Vegas really suffered after the recession.  She wanted to transfer within her company, but there were never any openings out there.

Cheeseheads 2

I have always had a campaign going to get her to move to Minnesota.  At first glance, you might think Minnesota doesn’t have much going for it.  It’s really cold and snowy in the winter.  And we have a lot of mosquitoes.  We are really far from an ocean too (a downside in my mind).  However, Minnesota is known for its high quality of life.  Really, it is.  I swear.  As long as you have some decent long underwear and some snow boots.  And I am happy to announce that my long standing campaign has finally come to fruition!  Not only is my sister moving to Minnesota, but my neice is joining her!

While they were here visiting in early March they went apartment hunting and found an awesome place that is only about 10 minutes away from me.  Both of them handed out resumes at various places as well.  As a result, my sister was just offered a lateral transfer to a job here.  She starts on May 4!  She’ll actually be moving in with me for a bit until her apartment is ready, and I plan to put her to work painting furniture.  My niece will join her on July 1.

So yes, it is truly official!  I still can barely believe it myself.  I knew they were serious about moving, but I also knew that my sister needed to have the right job lined up to really make it work.  Now she does!  And I am over the moon with excitement.  Plus, not only am I getting my sister, but I’m also getting my neice Kris.  Life is good!

and the winner is.

Judging by the comments, it looks like a lot of you could use a good book!  Unfortunately I only have one to share.  So without any further ado, the winner of the drawing for Ordinary Grace is …. Ruthie Henderson!

But I didn’t want to just mail one lonely little book!  So in addition to the book, Ruthie will also be receiving some magazines …

prize magazines

 The Upcycled Style has a great article in it about Danielle Driscoll of Finding Silver Pennies.  If you follow Miss Mustard Seed’s blog, and especially her Furniture Friday link parties, you’ve probably seen Danielle’s work.  She has a great blog, and is a super lovely person to boot.  She was kind enough to answer some questions for me when I was new to using milk paint.

I’m also including some Fusion paint samples and a paint brush.

prize paint

Plus, a set of Paris in Color notecards.

prize cards

Mr. Q drew the lucky winner’s name out of our trusty metal colander.  Ironically, the winner is one of my students from my painting class.  She painted the minty green stool.

painted bench

That also means she is local.  I know, right?  What are the chances?  When Mr. Q drew the name I told him that he had to vouch for me, it really was drawn fair and square.

Congrats to Ruthie!  I hope she enjoys the book as much as I did.

a chippy blue chair.

I purchased this chippy blue chair many years ago at a garage sale.  I no longer remember what the seat looked like at the time, but I’m sure it was gross.  I’m also sure that the seller thought this thing was ready for the dumpster.  But you know me, I love that chippy factor.  And this one is authentically chippy.

chippy blue chair close up

 I recovered the seat with some pretty vintage pink and white fabric and for many years the chair lived in the ‘potting shed’, which became the ‘summer house’, which became the ‘photo cottage’ last year.  At that point, the chippy blue chair became homeless.  I’ve shuffled it around, but it hasn’t really found a spot.  I used it in the photo shoot for this dresser I painted a few months ago.

pale yellow and white dresser

But it ultimately ended up stashed on the front porch, so during last weekend’s clean up I pulled it out of there.  Taking a close look at it, I realized it was really dirty from all of those years in the cottage out back.  It deserved some attention.  I pulled off the seat, removed the fabric covering and sent it to the washing machine.  Then, I vacuumed off the surface dirt.  Finally I pulled out the magic eraser, and that made all the difference.

Look how much dirt came off, ewwwww …

chair dirt

That was a brand new magic eraser when I started!  Are you now wondering how it is possible that 90% of the time I neglect to take photos of my process, but somehow I managed to get a photo of dirty water for you?  Yeah, I don’t know what’s wrong with me either.

After cleaning the chair, I re-glued some of the cross pieces at the bottom that had come loose.  Finally, I wanted to add a little protection to the finish so I pulled out the sample of Fusion Beeswax Finish that Homestead House was kind enough to send to me.

chippy blue chair beeswax

I used some torn up flannel sheeting and rubbed the beeswax over the whole chair.  It added a little more sheen to the painted areas, and some much needed moisture to the chipped areas giving the chair a fresher look. I don’t know if you’ve used a magic eraser before, but it does tend to remove the shine from things.  So the beeswax added a really nice lustre back to the chair. This stuff is made with pure natural beeswax and hemp oil.  You could quite literally eat it because it is food safe quality, but honestly, it doesn’t look that appealing as a snack.  I did feel quite comfortable using it indoors with no ventilation though, and now my chippy chair has a little more protection from all that dirt.

Next came deciding what fabric to use on the seat.  I had a couple of options in my stash.  The first was this H & M tea towel.  I liked that it had a blue border, but once I fitted it to the seat, I realized that not much of the blue border would show.

 chair seat option 1

Next I tried a dyed grain sack.

chippy blue chair grain sack seat

I liked this idea in theory, but when I put these together I felt like the richer color of the grain sack overpowered the pretty blue of the chair.  It’s not a bad combination, just not the one I wanted.

Finally I tried an H & M pillow cover that I had on hand.

chippy blue chair seat 1

Ding, ding, ding.  We have a winner folks!

I like how the blue pops with the white fabric on the seat.  And a bunch of french writing?  What’s not to love?

So, a tip for you here.  These 20″ x 20″ pillow covers from H & M are the perfect size for the average chair seat like this one.  They are a mere $5.95 each (plus shipping though).  The problem with H & M is that their inventory seems to go fast.  They still have this style, but only in pink and pale green.  Another style they have that would look great on some chairs is this one:

H and M cushion

So, my chippy chair is cleaned up and re-covered and now I just need to decide what to do with it!

chippy blue chair title

 I’m sure I will find a home for it somewhere, and it will probably make its way into future furniture photo shoots.  Wouldn’t it look great paired with a chippy desk?  Maybe I’ll keep it on the front porch for now, it certainly looks nice next to the white hutch.

chippy chair

a book recommendation, and give away.

Aside from clearing out the front porch and working on a couple of small projects last weekend, I really didn’t get much accomplished.  Which means, I don’t have a fabulous furniture transformation to share with you today.  I seem to have fallen into a groove with my blog, and I generally post something on Monday, Wednesday and Friday.  As a result, not having a post at all on a Wednesday just feels, well, wrong somehow.  The truth of the matter is that I spent a good deal of last weekend just chillin’.  Every once in a while, I need some downtime to just be lazy.  This often includes staying in bed on a rainy Sunday morning with coffee and a good book.  So today, you’re getting a book recommendation!

I know, weird right?  And no, this isn’t an April fools joke!

So, if you aren’t a reader, feel free to ignore this post as a blip on the radar and come back on Friday when I plan to post about a quick chair makeover.

But if, like me, you are always in the market for a good read, then keeping reading …

First a little background.  I LOVE to read.  I watched an interview (on Ellen) with Jim Parsons (plays Sheldon on Big Bang Theory) the other day, and he admitted that he factors in reading time every night before bed.  Well, he and I have this in common.  I read every night for at least a little bit.  I look forward to weekends when I can read late into the night and not have to worry about getting up the next morning.

The main thing that I look for in a book is the author’s ability to immerse me in their story, whatever it might be.  I crave books that are so good I can’t put them down.  The kind where I keep reading until the book falls forward and hits me in the nose because I’m dozing off despite myself.  For some reason, I have found such books hard to come by lately.  I’ve started lots of books, only to give up on them because I just don’t care what happens next.

However, recently I was in the Valley Bookseller in Stillwater (Mr. Q was promoting the latest Chicken Soup book that he has a story in) and the gal there recommended a book by William Kent Krueger, Ordinary Grace.

ordinary-grace-200

Krueger is a local writer from the Twin Cities.  He might be better known for his Cork O’Connor mystery series, but this particular book is not part of that series.

Here is how his website describes Ordinary Grace:

“New Bremen, Minnesota, 1961. The Twins were playing their debut season, ice-cold root beers were selling out at the soda counter of Halderson’s Drugstore, and Hot Stuff comic books were a mainstay on every barbershop magazine rack. It was a time of innocence and hope for a country with a new, young president. But for thirteen-year-old Frank Drum it was a grim summer in which death visited frequently and assumed many forms. Accident. Nature. Suicide. Murder.

Frank begins the season preoccupied with the concerns of any teenage boy, but when tragedy unexpectedly strikes his family—which includes his Methodist minister father; his passionate, artistic mother; Juilliard-bound older sister; and wise-beyond-his-years kid brother—he finds himself thrust into an adult world full of secrets, lies, adultery, and betrayal, suddenly called upon to demonstrate a maturity and gumption beyond his years.

Told from Frank’s perspective forty years after that fateful summer, Ordinary Grace is a brilliantly moving account of a boy standing at the door of his young manhood, trying to understand a world that seems to be falling apart around him. It is an unforgettable novel about discovering the terrible price of wisdom and the enduring grace of God.”

I’ll admit, this description didn’t immediately grab me.  Young boy, coming of age, yada, yada.  Whatever.  But, the book won a bunch of awards, so I figured I’d give it a whirl.

Once I started reading, what really hooked me was how I could practically hear the crickets chirping on a balmy summer evening and smell the river flowing past its weedy banks.  I could feel the sun on my head on a hot July day and taste that ice cold root beer after a Saturday of yard work.  I remember that feeling of lying in bed on a hot summer night before air conditioning was something that everyone had.  The book transported me to a hot Minnesota summer and a time when things seemed just a little bit simpler (even if they really weren’t).

cindyrella gardens

I enjoyed the book so much, that I was inspired to tell you all about it.  Then, I thought, gee, I’m done with the book, why not offer it up as a giveaway?

If you would like to have my copy of the book, please leave me a comment by Friday, April 3 at midnight.  I’ll draw a name from the comments and mail the book off to that person.

So,  good luck if you are hoping to win, and even if you don’t, I highly recommend that you pick up a copy of Ordinary Grace.

And if you’re really just looking for an awesome chippy chair makeover, come back on Friday!

refreshing for spring.

This past weekend I spent some time revamping my enclosed front porch.  You see, I kind of spent the entire winter shoving stuff out there to get it out of the way.  It was a mess.  With spring officially here, I felt the need to get it cleaned out.  I also took advantage of the situation and decided to swap out some furniture.  Remember the black cabinet from my former craft room?  Well, I wasn’t quite ready to get rid of it after all.  So, I moved it into the spot that was formerly occupied by a little pale green painted washstand.

front porch cabinet

So now, the washstand is for sale (SOLD!).

washstand ad

And then, it obviously would be silly to have two display hutches out on the porch …

front porch with two hutches

so I decided the white one had to go.  So now, it is for sale also (SOLD).

front porch hutch

And since I was getting rid of the white hutch, I also decided to move on from my chintzware collection that was formerly housed in this hutch.

chintz collection

So I posted an ad for it on craigslist.  I have no idea if things like this sell on craigslist, or really even at all.  Floral china is no longer terribly popular.  Hopefully I can find another collector out there who wants to add to their collection.

For the moment, I’m not sure what I’m going to put in the space where the white cabinet sat.  I am quite sure that I will come across the perfect piece at some point though.  I’ll know it when I see it.

But meanwhile, the black cabinet turned out to be the perfect spot to display my vintage cameras.

front porch display

front porch vintage camera

And some of my other black and white stuff.

front porch hutch display

I added some new H & M Home throw pillows into the mix.

front porch pillow

I don’t think I’ve ever pointed out the reading light over my chaise lounge.  I cobbled it together using an old clamp on shop light with half of an old minnow cage for a shade.

front porch reading light

And now the front porch is spruced up and ready for spring.

front porch spring 2015

If you are interested in the washstand, the chintzware or the hutch, please feel free to leave a comment or email me directly at oakdalecarriagehouse@gmail.com.

picking pieces.

Recently someone asked me how I pick the pieces I paint.  I didn’t come up with a very good answer on the spot because I really haven’t given much thought to my process.  I just pick what I like.  But I do realize that choosing the right piece to paint is nearly as important as the painting itself.  So I decided to try and pin down my process a little for all of you.

In winter, most of my pieces come from my local craigslist.  We have a thriving craigslist community here in the Twin Cities.  So a while back I headed out to craigslist and picked out a few examples of what was out there to share with you.

First let’s talk price.  I generally set a maximum of $100 for a dresser.  I use the craigslist search tool to limit my search, otherwise I will be distracted all day by gorgeous pieces of furniture that are listed at $400, which is a total waste of my time.  Although $100 is my max, I will only pay that much for a piece that has all of its hardware, is in great shape, doesn’t need repairs and has something unique or special about it.  Otherwise I like to stick to a price range from $40 to $75 for a dresser.

Let’s start with a dresser that I would not pick.

dresser, 100, pass

The first problem with this dresser is the hardware.  Gack!  It is just plain ugly and would have to be replaced, and there are 8 handles.  That is going to add up.  Not to mention, these handles have two holes each, so I’d either be filling holes, or trying to find replacements that fit these existing holes.  But the real problem with this dresser is that it just doesn’t have any personality at all.  If this dresser were dirt cheap, let’s say around $25, and I didn’t have to go far to pick it up, I might consider it.  It could be dressed up with some number stencils on the drawers.  But it was listed at $100.  No way.

Here is another “no” for me.

dresser, olive green

This dresser was listed for $50.  Great price.  It has something I always look for, key holes.  To me key holes usually indicate a well made, antique piece of furniture.  The ad claims this piece is solid wood, another plus.  So, why don’t I want it?  It’s painted a weird olive green.  I hate stripping paint.  It’s time consuming and messy.  So my choice on this piece would be to either paint it something that works with the green and allow the green to show as an undercoat, paint it a solid coat of chalk paint (or even Fusion!) and not distress it at all.  But the fact of the matter is, I’m a distressing sort of girl.  I reserve the non-distressed look for mid-century pieces.  But that’s just me.  Maybe you’d be OK with any of these options, in which case this dresser is a great deal!  I generally steer clear of previously painted pieces though.

Let’s move on to a distinct ‘maybe’.

dresser, apple valley, 75

These are often called a “chest on chest” dresser because they have a wider lower section of drawers with a slightly narrower section on top.  I find this look really appealing.  The Seven Seas dresser that I painted recently was a chest on chest. The trim around each drawer on this one adds a lot of detail.  The legs in front are pretty sweet.  They aren’t turned, but they still have some personality.  This dresser was listed for $75, which is a decent price but not great.  One glaring problem is the missing drawer pull.  As I’m fond of mentioning, one missing drawer pull is the equivalent of not having any hardware at all.  You’re never going to match that.  You’d have to replace all of the hardware on this piece.  But, it still might be worth it.  Honestly, if I didn’t already have a bunch of unfinished pieces lined up in my garage, I’d follow up on this one.

Here is another dresser that I would seriously consider:

dresser, otsego, 75

This dresser was also listed at $75.  Look at that charming detail on the top two drawers, and the lovely turned legs in front.  It has a mirror (it was shown in a separate photo), but I often leave these mirrors off.  Especially when they are mounted on two turned supports like this one is.  I just don’t like that look very much, and I find the turned supports annoying to paint.  This is a style of dresser that can work really well for a wide screen TV when there isn’t a mirror.

I do have one concern about this one though.  It could be a ‘bleeder’.  Are you familiar with that term?  Basically some of the orange to reddish colored stains will bleed through paint.  No matter how many coats of paint you use to cover them up, that orange/pink color will just keep coming through.  There are methods you can use to deal with the dreaded bleed thru, which usually involve sealing the piece somehow, but that adds another step to your process and can really be frustrating.  So, I usually avoid those pieces.  They can be hard to spot though.  This one looks like it has the potential to be a ‘bleeder’ although it may not be.  I would have to see this dresser up close and in person before making a decision on it.

This last example is right up my alley.

dresser, minnetonka, 75

It was listed at $75.  What do I love about it?  The turned legs, the beaded trim below the first pair of drawers, the fabulous hankie drawer at the top.  I can picture in my mind how this piece will look painted.  I know that I can play up those details with some distressing, or contrasting colors.  I can’t really see what the hardware looks like in this picture, but I can see that it is all there.  But even if I have to replace it, I think this piece is worth it because of that charming hankie drawer.

In fact, I liked this one so much that I did send Mr. Q out to pick it up.  Here is the ‘before’ photo I took when we got it home.

hotel dresser before

And here it is after its make-over.

Dresser painted in MMS milk paint in Trophy

I painted it in Miss Mustard Seed milk paint in Trophy.  I used MMS Ironstone on the trim details, and I finished with hemp oil.

I added a little stenciling on the hankie drawer just to give it a little extra personality.

hotel dresser stencil

I got some really fantastic chipping on this piece.

Chippy milk paint close up

hotel dresser details

I really wanted the details on the dresser to pop, so I painted them in Ironstone for contrast.

hotel dresser front

As you can see, I did end up changing out the hardware on this one.  The original hardware was pretty, and it was all there, but it was a very yellow brass and I didn’t like the way it looked with the grey of the Trophy.  I just left the original knob on the hankie drawer.  I’m not really sure why, but I tried that one both ways, and just liked the original better (the other drawer pulls are bigger and brassier than this little knob).

hotel dresser staging

I hope this post gives you some ideas of your own about re-fabbing a dresser or two.  Head to your local craigslist and see what you can spot for yourself!

hotel dresser collage

And meanwhile, yes, this lovely dresser is for sale.  Let me know if you are interested.

Linking up with:  Finding Silver Pennies.

a shoe in.

I’ve been working on some small painting projects lately as a part of spring cleaning.  I had various piles of thrift store and other finds and I needed to get them painted and out of the Q Branch.

After finishing some more hatboxes as well as a set of wooden shoe trees, it occurred to me that these projects would make a great comparison study for Fusion paint v. Miss Mustard Seed milk paint.

Shoe forms and hat box

Can you guess which is painted in MMS milk paint and which in Fusion?  It’s kind of a no brainer due to the chippy factor.  Yep, the shoe trees are painted in MMS Grain Sack, and the hatbox is Fusion’s Champlain.

Let’s start with the shoe trees.  My friend Cathy passed these on to me.

shoe in before

Even though they are really just beat up shoe trees, not fabulous vintage shoemaker forms, I knew I could make them fab with the addition of some paint and some rub-ons.  I also thought ‘the chippier, the better’, and these had the sort of semi-shiny wood finish that would be conducive to chipping.  I used a mere tablespoon of milk paint powder to one tablespoon of water for these and did have some paint left over.  Once they were dry, I sanded them and added clear wax.  Then I added a variety of 7 Gypsies rub-ons to them.

shoe forms close up

I added some picture hangers to the back of each so so they can be hung on the wall as decor, or as a place to hang your necklaces or maybe your bathrobe.

shoe tree upcycled

In between painting the shoes trees, I also worked on some more hatboxes.  I wanted to try doing some with the Fusion paint.  I painted my first hat box with chalk paint and that ended up being a little dicey when it came time to wet down the transfer.  I had to be really careful to not remove too much paint along with the paper backing of the transfer.  But here is what Fusion’s manufacturer says about their paint:

“FUSION is made up of 100% acrylic resin and is unlike any other product on the market. This results in one consistent and cohesive surface across your piece. So what exactly does that mean?

It is a water proof, non-porous surface which is why you do not need a top coat for water-permanency! Using 100% acrylic binder results in the strongest adhesion and durability once cured.”

The ‘water-permanency’ part was key for me.

I started with a coat of Bedford on my hat box so that when I distressed the edges the grey would show through.  Then I ran a block of canning wax around the edges to make them easier to distress later.  Next came two coats of Fusion’s Champlain.  I let that dry overnight.  The next day I added my transfer design using the same process I used on my previous hat box, letting it then dry overnight.  Turns out I was right, it was easier to wet the paper without taking off any paint.

Once I had removed the paper to reveal the transfer, I used some 220 grit sandpaper to rough up the entire box.

painted hat box

Easy peasy.  This hatbox was so much fun that I did another one.

hatboxes

and then another small one …

small hatbox

hatboxes 3

To recap, let’s compare the results.  When it comes to the chippy factor, milk paint wins hands down.  But, that really only works on certain surfaces.  Mainly wood or other more porous materials.  If you need a paint that will stick to non-porous materials, or become more waterproof for things like these gel medium transfers, then Fusion is a better choice.  If you want an authentic looking distressed finish, you can’t beat milk paint but the results can be unpredictable.  You can distress the Fusion paint, but I find it more difficult than with other products.  If you want to paint straight out of the can and not mess with mixing and measuring, Fusion is for you.  But I haven’t forgotten my old friend chalk paint.  For painting straight out of the can, and the ease of distressing, it is still an excellent choice.  Just remember you’ll still need to add that top coat of wax or some other sealant.

I’m pretty sure I will continue to paint most of my vintage cottage style furniture pieces in milk paint.  But I will definitely go with Fusion for mid-century modern pieces, metal, glass and pieces that I want to add gel medium transfers to.  Both are great products and as you can see with my shoe trees and hatboxes, if you work with them you can get an awesome vintage look out of either one!

Shoe forms and hat box

whistling dixie.

During the recent miraculous spring warm-up here in the Twin Cities, my co-workers Sue and Cathy and I headed out to our first lunch time garage sale of the season.  Woo hoo!  Mid-March, and sales are already popping up.  So exciting!

We didn’t find much, but I did come home with a Dixie blonde mid-century nightstand and a really fab old wire ‘in-box’ (which now lives in the Q Branch).

2015 spring blog

The nightstand was bargain priced, and I knew it would be the perfect candidate for another Fusion makeover.  Why?  Well, when I paint MCM pieces I always feel like they shouldn’t be distressed.  Normally I am all about the distressing, but not with these pieces.  Obviously, milk paint is out of the running when you don’t want to distress.  True, you could add the bonding agent and get a non-distressed look, but seriously, why bother?  That’s going to get expensive, and putzy, and unnecessary.  In the past chalk paint was always my go-to for MCM pieces.  And, don’t get me wrong, they did turn out lovely.

2014 summer blog2

vintage blonde dresser painted in Aloe

But now that I have tried Fusion, I am pretty sure it’s going to be my paint of choice for MCM pieces and I’m not just whistling dixie!

I painted the body of the nightstand in Fusion’s Champlain and the drawer in my new favorite color, Laurentien.  The color reminds me of my favorite shade of McCoy pottery.

MCM tulips

I let the paint dry overnight, and then I added some of my fav MCM vintage wallpaper to the inside of the cubby hole.  As I was working with the wallpaper, it was nice to not have to worry that I was taking off any paint while wiping off excess paste.

MCM wallpaper

The wallpaper has little touches of gold in it, so I decided to add some gold Rub ‘n Buff to the knobs to bring that out.  When I purchased this piece, Cathy assumed I was going to replace those knobs.  Nope.  The knobs are perfect for this piece and are part of its personality.  What do you think of them now Cathy?

MCM knobs

I love how the gold works with the turquoise.

MCM nightstand painted in Fusion's Laurentien

Since I felt like the little nightstand would be lonely in a photo shoot all by itself, I also decided to paint up a chair that was waiting for a makeover.

MCM chair before

I used the same colors on the chair, and then added some vintage barkcloth to the seat.  The aqua in the barkcloth was a perfect match for the Laurentien.

MCM chair upholstered in barkcloth

Didn’t it turn out sweet?

MCM nightstand and chair

Almost makes me want to add a few mid-century pieces to my own home.  How about you?