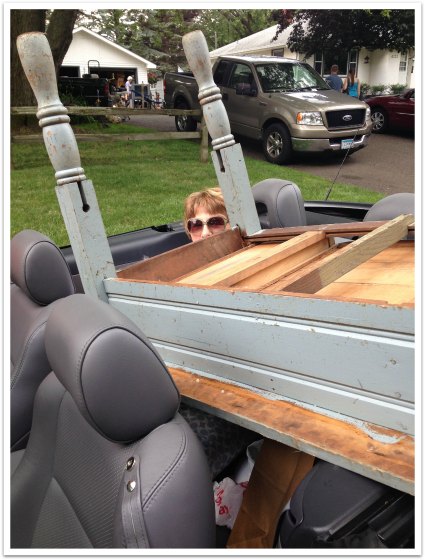
Imagine my delight on Christmas Eve when I found this under the tree!
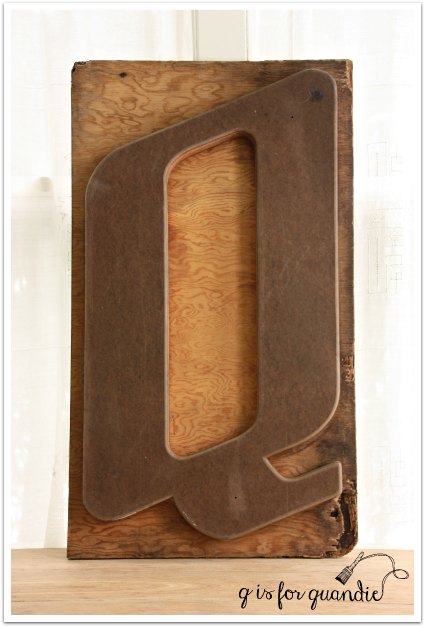
Well, it wasn’t quite ‘under’ the tree because it’s a little too big for that. This guy is a bit over 3′ tall. And seriously heavy.
My sister got it for me. She saw it way back in August at the Grand Opening for Eye Candy ReFind, and she decided it would be the perfect Christmas gift for me. How fab is that? I’m so touched that she remembered it and went back for it later.
Of course, it needed a little ‘quandification’.
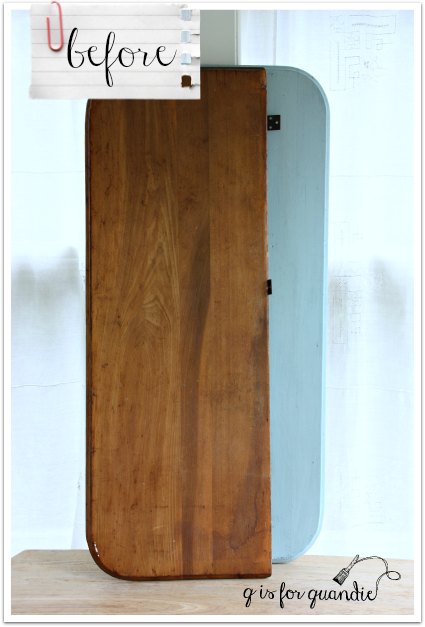
First of all, as I mentioned it was really, really heavy. And the Q was mounted on some pretty unattractive plywood. It was a no-brainer to start with removing that backing. I thought this would be easy. Ha, silly me! It’s never easy, is it? There were about a dozen screws holding the Q to the plywood and every single one of them was rusted tight. After attempting to loosen them up myself and failing miserably, it was time to call in the professional, my handy neighbor Ken.
He started by attempting to drill out the screws from the back. No dice, the drill wouldn’t stay on the screw. Next he decided to just drill the plywood all the way around each screw. Once he’d done that, we were able to pull the Q away from the plywood and then go back with a vice grips and remove all the screws.

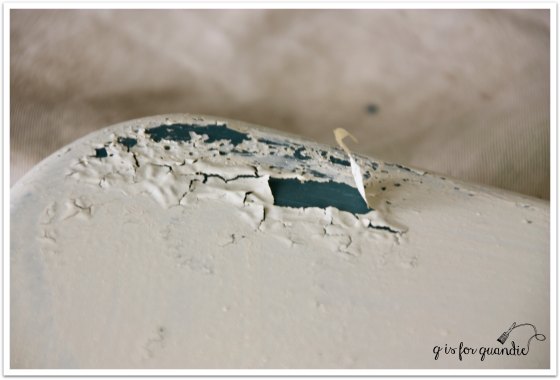
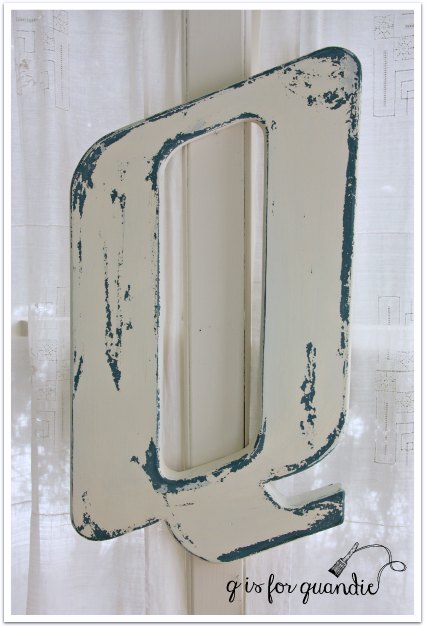
Once I had the Q free from its backing I painted it with a base coat of Miss Mustard Seed’s Flow Blue.

I suspected I wouldn’t get much chipping. I’m not really sure what kind of material the Q is made out of, but it’s not real wood. It seems sort of like layers of hardi-backer board glued together. Whatever it is, I had a feeling it would absorb the paint, and it did.
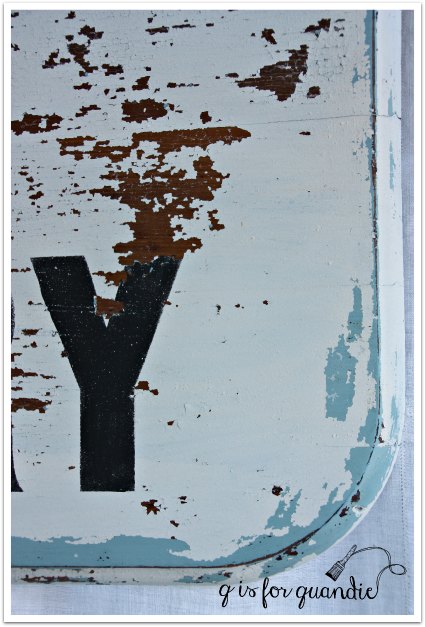
Once the Flow Blue was dry, I rubbed hemp oil into it wherever I wanted to get chipping after applying the final color which is MMS Linen. I painted three coats of Linen, and then since I wanted lots and lots of chipping I got out my trusty blow dryer. I have found that adding heat usually results in more chippyness. Here is how that starts to look as you’re blow drying.
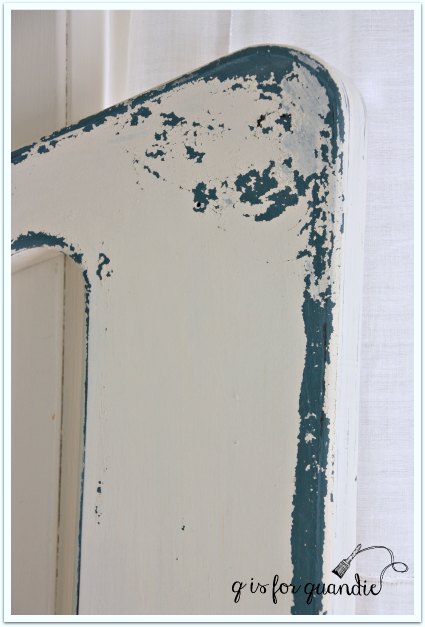
Once I lightly sanded, vacuumed off the chips and then added wax, the finish looked like this.
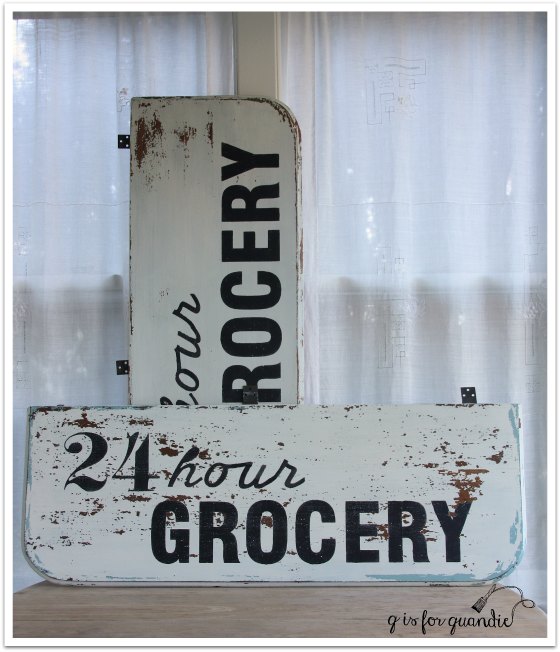
Initially I was going to stop here. But the more I looked at my Q, the more I realized it needed just a tiny touch of something more. Like maybe some stencils.

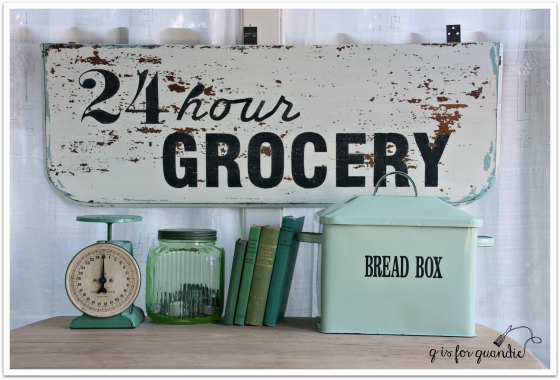
After I added a couple of stencils, I hung it in its new home in the Q Branch.
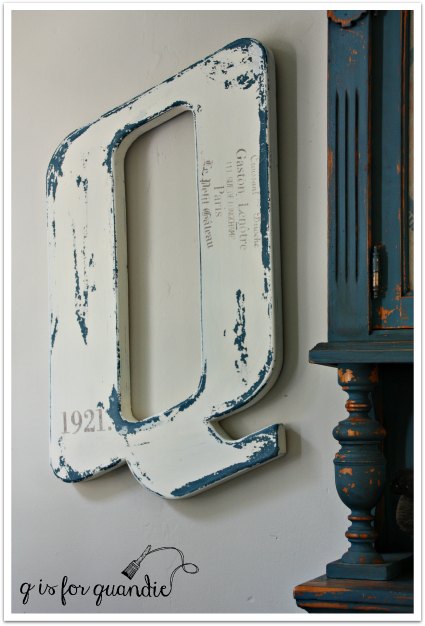
And I just love it!
After hanging it, I realized there were a couple of other small details that I needed to finish up in the Q Branch. I’ve got those all pulled together and later this week I’ll share an update on those. Check back on Wednesday as well for a fun announcement.