keep it clean.

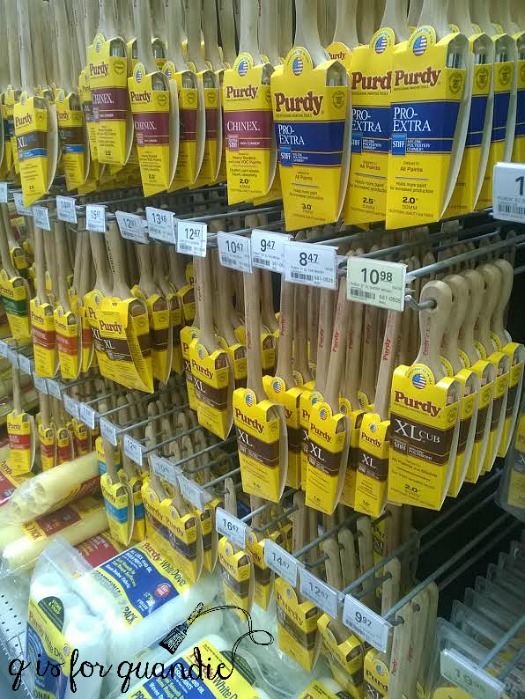
I am about to give you some advice about taking care of your brushes, but first I have to admit that I tend to be fairly bad about that myself.  This is partly why I prefer working with the more affordable Purdy brushes.  If I end up ruining one I don’t feel quite so bad about it.  But it’s not hard to clean your brushes, especially with the right products.

keep-it-clean

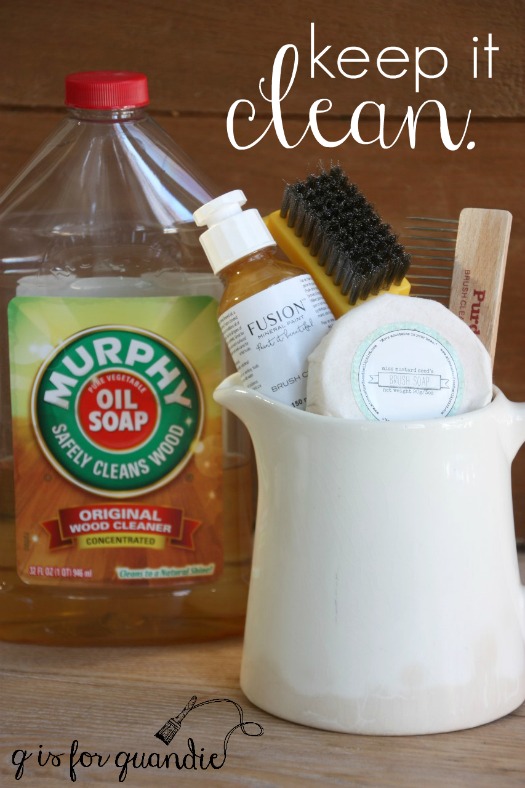
I have a few favorite non-toxic products that I keep on hand for cleaning my paint brushes.

My first go-to product for quick everyday cleaning of a freshly used paint brush is the Miss Mustard Seed Brush Soap.  This soap will clean and condition your brush.  A while back I wrote about the pretty ironstone covered soap dish that I purchased just for my brush soap.

ironstone-soap-dish

This dish with the MMS soap inside sits right next to the faucet on my kitchen sink for easy brush washing.  My theory is that if I have the brush soap right there ready to go I’ll be more likely to get my brushes cleaned promptly.  Obviously getting your brush cleaned before the paint has time to dry and harden is the best option.  To clean my brush using the MMS Brush Soap I simply rinse the brush first in running water removing most of the paint, then I swish my wet brush over the cake of soap a few times.  Finally I massage that soap into the brush using my fingers and get it nice and sudsy, working it into the bristles.  Then I rinse well and hang to dry.

But, I gotta be honest, that’s what happens in a perfect world.

In the real world I keep a supply of cheap plastic sandwich bags on hand (the fold over kind, not the zip lock kind) and when I am in between coats of paint I wrap my brush in the sandwich bag so it doesn’t dry out.  Unfortunately, sometimes I get distracted and that brush sits in the sandwich bag overnight.  When this happens I pull out some slightly more serious cleaning tools.

brush-cleaning-tools

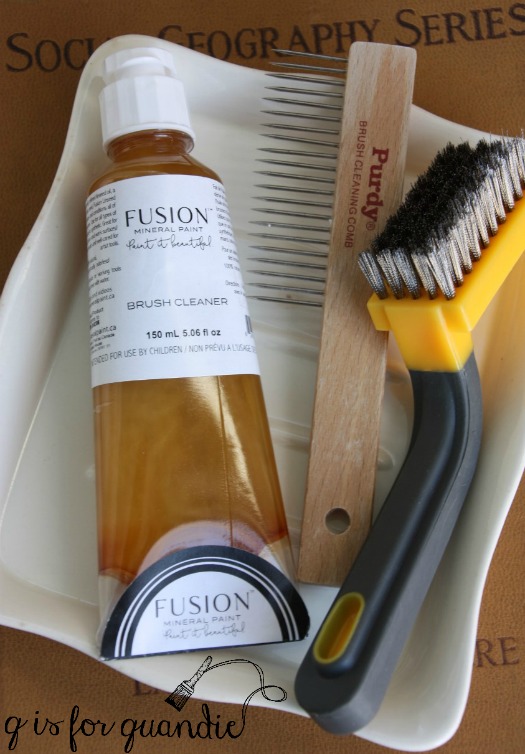
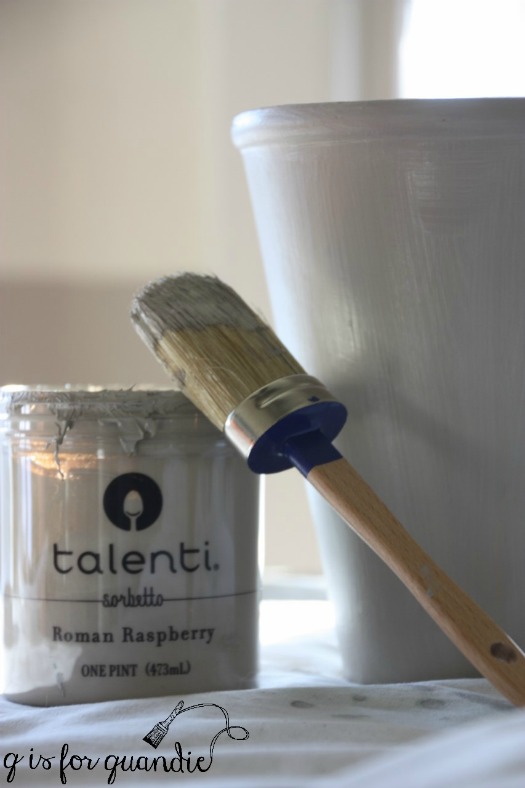
I really like the Fusion Brush Cleaner.  It’s 100% natural, non-toxic, made with linseed oil and I like the mild scent.  There are just two reasons I don’t just use this product every time I clean a brush.  First, it doesn’t fit in my adorable ironstone soap dish and second, it’s a little hard to squeeze out of the tube.  So, it’s just slightly less convenient than the MMS Brush Soap.  However, when I have a bigger brush cleaning job I pull it out of the cupboard.

  I just purchased that pretty new tube shown above at Reclaiming Beautiful (so locals, you can find it there if you want to try it) because the tube I had looks like this …

fusion-brush-soap

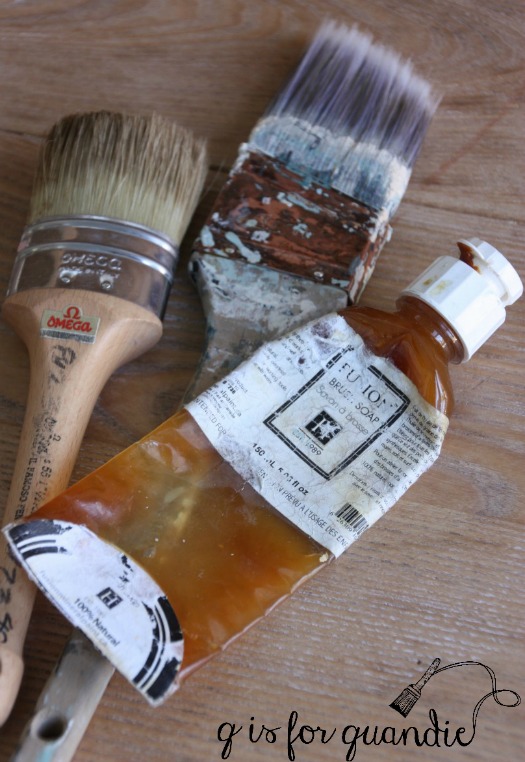
Yep, it’s almost gone and it’s totally beat up and well used and that’s because … well … I forget to clean my brushes promptly with some frequency.

To use this product I again rinse my brush under running water and then squeeze a dab of the brush cleaner onto my fingers and massage it into the brush.  If your brush has lingered in a plastic sandwich bag overnight you are likely going to find some globbier bits of dried paint on it, so while the brush is still all sudsy from the brush soap you can use a small steel brush to remove hardened paint bits from the outer bristles.  I got mine for less than $3 at Menards.  A brush cleaning comb will help remove residue from the center of the bristles.  Once clean, rinse the soap off your brush and hang it to dry.

By the way, the Fusion Brush Soap is also great for cleaning paint off your hands or off your sink.  Just rub the soap on and then rinse with water.  I’ve heard you can also use it to get paint out of carpet, but I don’t have any carpet so I’ve never tried that.

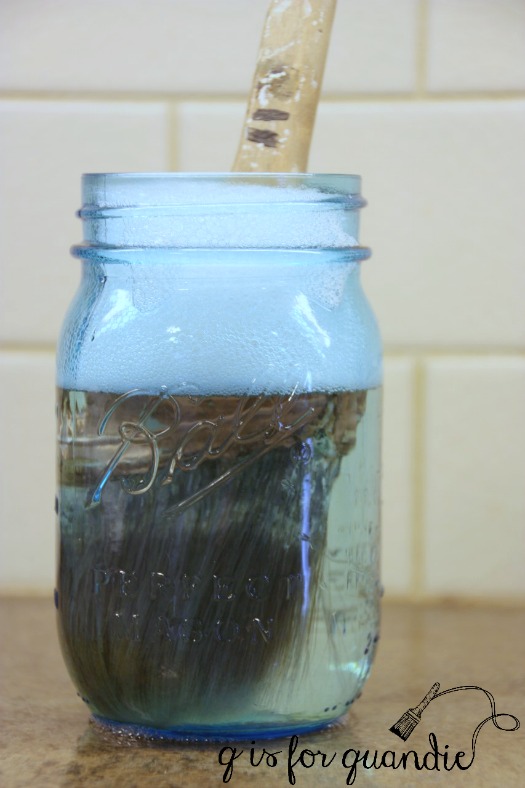
Now, sometimes things get really out of hand and I totally forget about that paintbrush in its sandwich bag for several days.  Ugh.  This is a great way to ruin a paintbrush.  This is the only time I will resort to soaking a paintbrush.  Soaking your brush is not a good practice.  It will loosen up the glue that holds the bristles in place.  Not only that, but just leaving your brush standing bristle end down in a jar for very long will bend your bristles ruining the shape of your brush.

But if you’ve completely forgotten about your brush and you are at the point of either soaking it or throwing it away, you can try soaking it in a container with a capful of Murphy’s oil soap and warm water.

soaking-brush

This will help, but it won’t work miracles.  All of the products I’ve mentioned so far are safe, natural, non-toxic cleaners.  That’s where I draw the line personally.  You could resort to using things like mineral spirits or one of the toxic heavy duty brush cleaners out there but I prefer to work with products that can be washed down the drain rather than products that have to go to the hazardous waste facility when I’m ready to dispose of them.

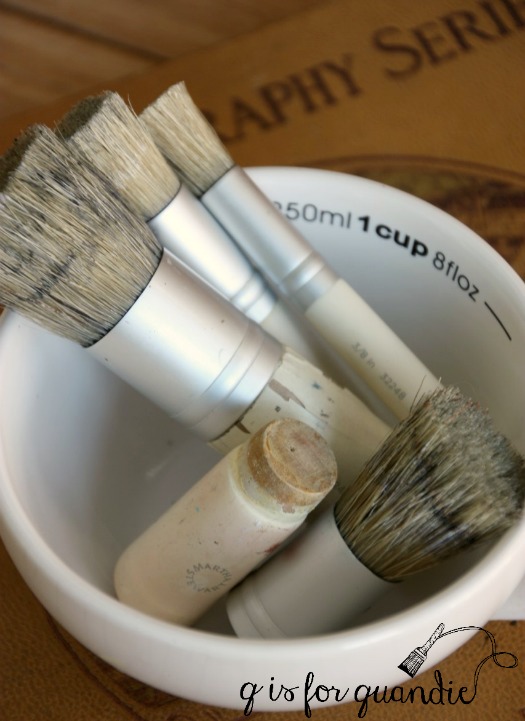
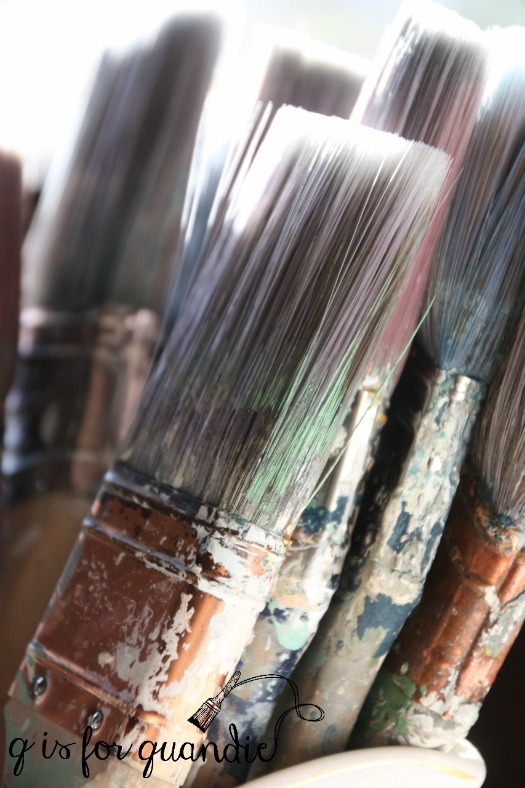
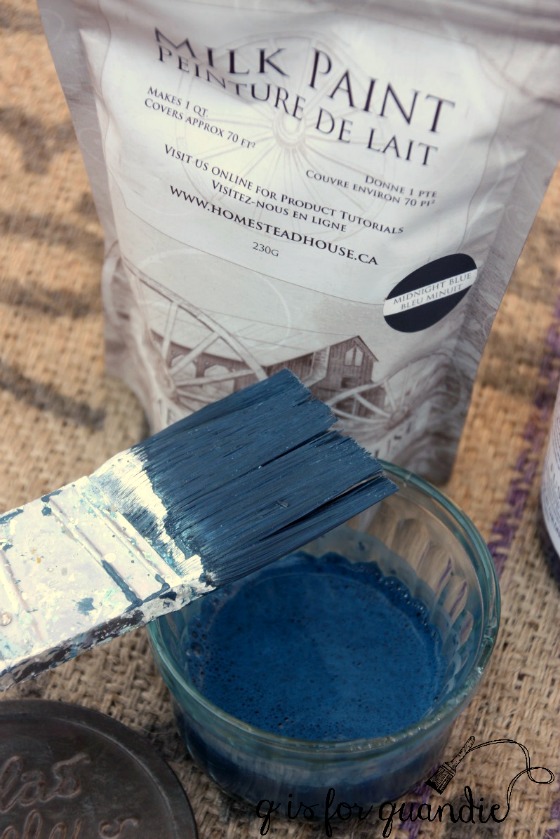
One thing I’ll note here about working with milk paint specifically is that if you don’t clean your milk paint brushes thoroughly and promptly, the paint starts building up near the metal ferrule of your brush and it will harden like concrete.  Here’s an example of what that looks like …

bad-brush

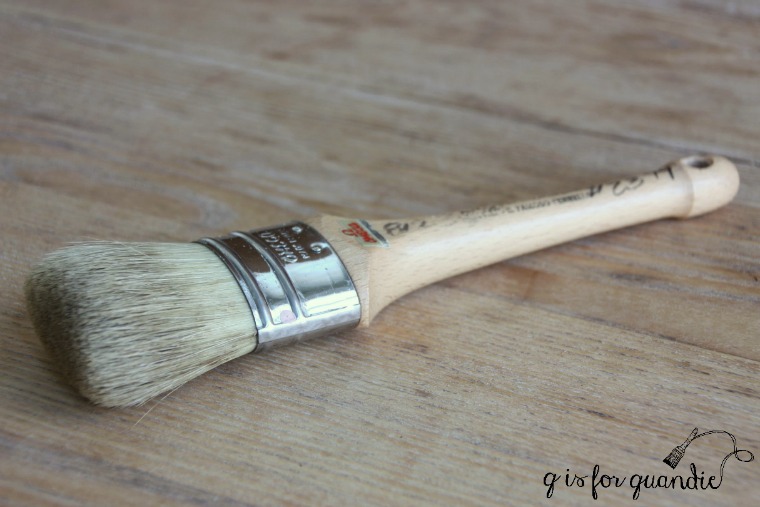
For this reason you should especially try to be more conscientious about getting your milk paint brushes cleaned promptly.  Unfortunately I do not take my own advice and I’ve ended up with a few brushes like this.  This brush was a good candidate for an experiment on how well these cleaning methods work.  I started with Fusion’s Brush Cleaner and my wire brush.  After cleaning with those two items, that same brush looked like this …

brush-cleaning-step-1

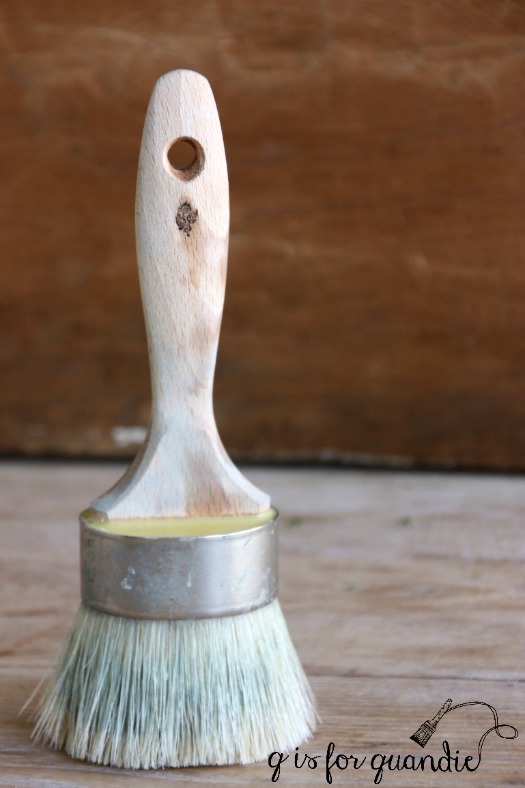
It certainly looks cleaner and I got a good bit of the hardened paint off the outside of the bristles, but deep inside the bristles it’s still hard as concrete.  So next I soaked the brush overnight in the Murpy’s Oil Soap.  The next day I took it out and cleaned it again with my steel brush and some Fusion Brush Cleaner and it looks like this ….

brush-cleaning-step-2

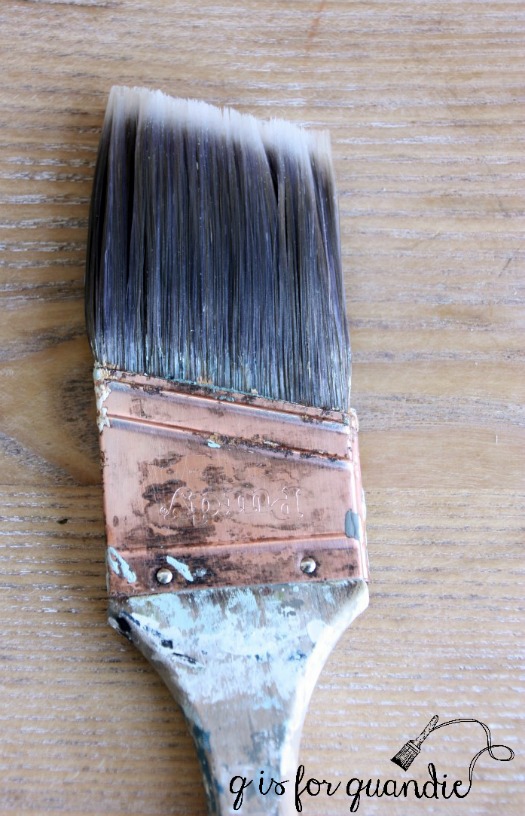
You can see that it’s gotten a little bit cleaner with each step.  The metal ferrule is definitely cleaner, and the outside bristles have cleaned up fairly well.  But there is still a hardened clump of milk paint inside the bristles up near the ferrule.

But this brush isn’t a total loss for me.  I definitely got it cleaned up well enough to continue to use it for milk paint until it’s a complete goner.

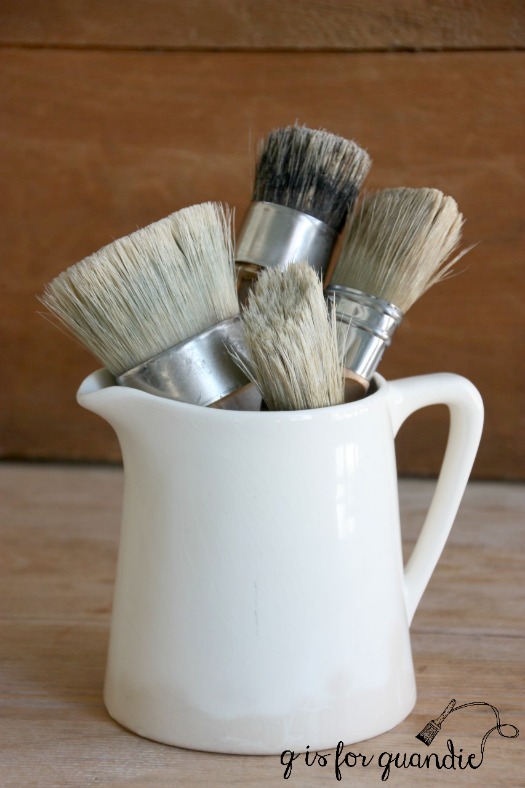
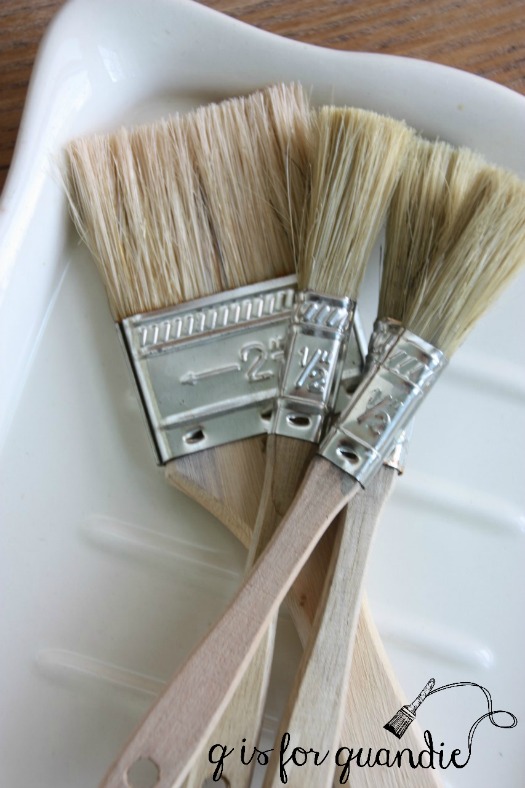
By the way, you can also use the Fusion Brush Cleaner to clean your wax brushes.  I don’t bother with cleaning my wax brushes every time I use them.  That’s probably a bad practice too.  They do harden up a little, but if you work them a bit with a clean cloth the bristles will become pliable again and the old wax will mostly flake off.  But especially for this post I decided to go ahead and clean mine.

Here they are before cleaning.

dirty-wax-brushes

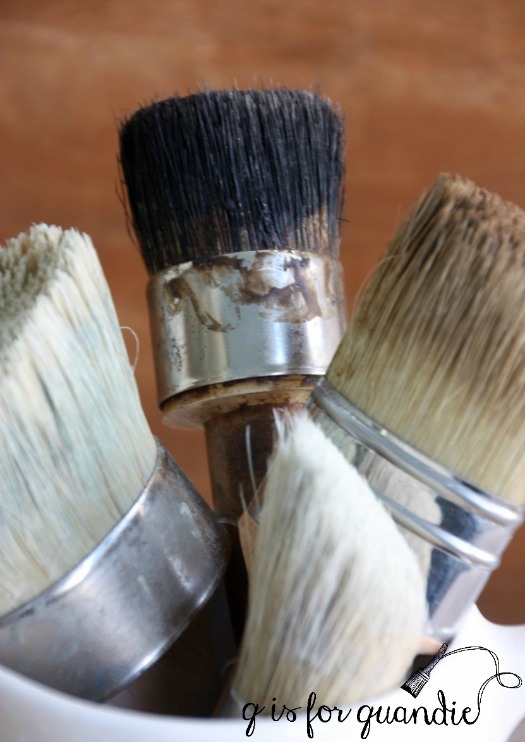
To clean them I just ran them under warm water, massaged some Fusion brush cleaner into the bristles and then rinsed.  For the black wax brush I had to rinse and repeat with a second washing.  Here are my nice clean wax brushes.

wax-brushes

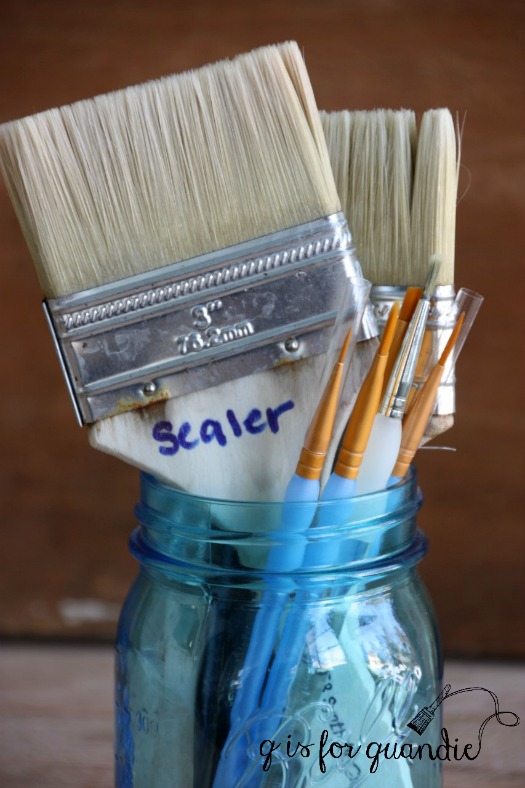
Once your brushes are clean, you should always hang them to dry.  That’s why they have that hole in the handle.  Hanging them to dry serves two purposes.  First, any excess water can drain out of the brush rather than being trapped in the ferrule.  Second, the bristles won’t get misshapen.

Finally, once dry you should go ahead and put them back into the protective sleeves that they came with (if indeed they came with one).  Yeah, don’t throw those sleeves away!  This is the best way to protect your brush and help it keep its shape when you’re not using it.  
stored-brushes

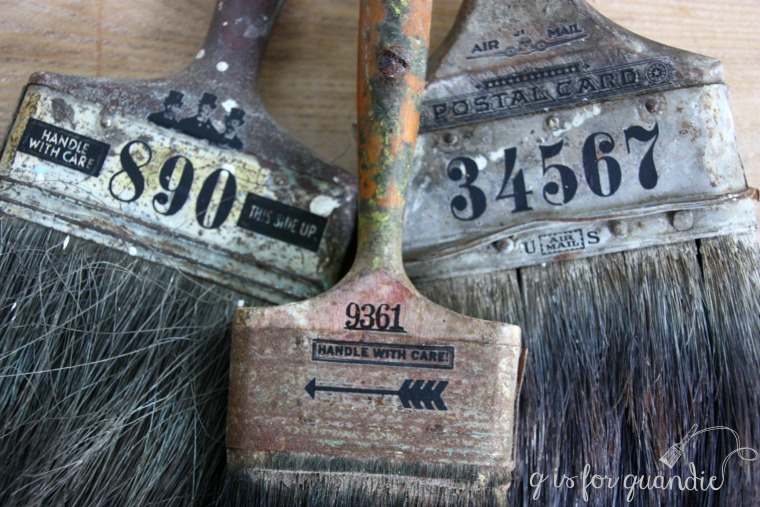
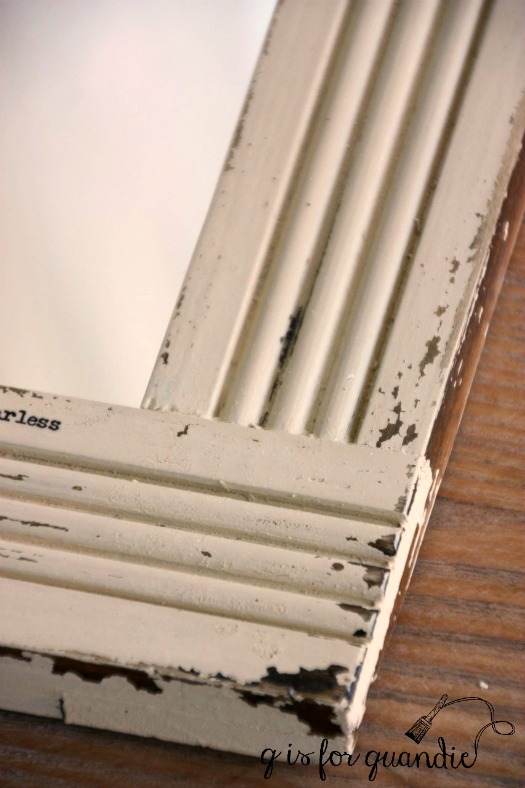
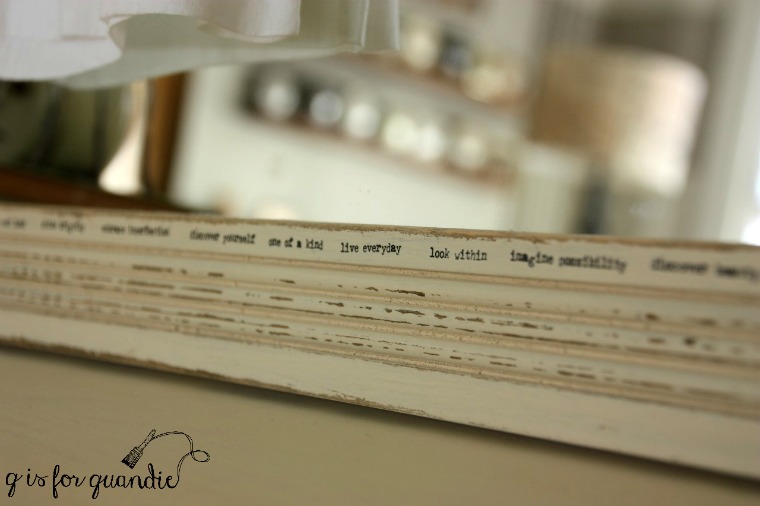
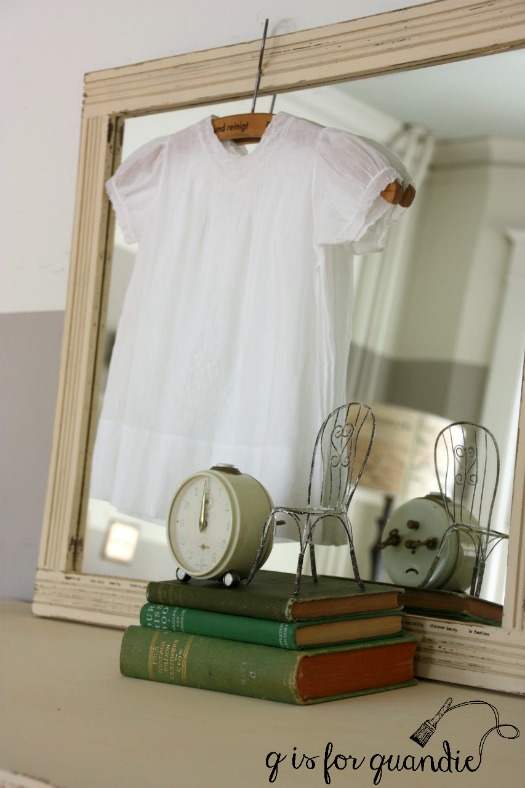
If all else fails and you’ve ruined your brush but you just hate to throw it away, you can always add some rub-on graphics to your ruined brush and hang it on the wall as decor 😉

altered-brushes

To summarize, do as I say, not as I do and clean your brushes promptly.  Or, go ahead and do as I do and don’t lose sleep over the occasional ruined brush.  We all need an excuse to periodically buy a fresh new paint brush, right?

brush week, part two.

Welcome back to part two of brush week (still not a clever name)!

brush-week-part-2

On Monday I wrote about the brushes I use for painting furniture, today I’ll share some info on brushes I use for other things like waxing, stenciling and applying a sealer.

Using a brush for waxing.

When I first starting using wax I always applied it with a rag and it does work out perfectly well to do so, but there are a couple of downsides.  First of all, you’ll waste some wax that will be absorbed into your rag.  Then you’ll throw that rag away (I have found that they don’t wash up well).  We all know that a good wax isn’t cheap, so I prefer not to be tossing any of it in the trash.  Secondly, it’s hard to get into creases and crevices with a rag, a brush works much better for that.  On the plus side, an old rag made from your worn out t-shirt is free and a good wax brush isn’t.  If you are only ever going to wax one or two things in your lifetime, don’t bother investing in a brush.  But if you do a lot of waxing, I highly recommend getting a brush.

I have four different wax brushes.

wax-brushes

My wax brush collection is sort of a Goldilocks and the Three Bears situation.  The first brush I purchased was this one …

wax-brush-1

I purchased this at a local paint shop, Hirschfields, because I wanted it ‘right now’.  I suspect that this brush is meant more for painting than for waxing.  It’s not really big enough for waxing a large piece of furniture and the bristle are just a tiny bit too long and not quite stiff enough for a good waxing.  Now I mainly use this brush for white wax, and recently for the grey wax that I custom mixed.

Next I purchased this Purdy brush for waxing.

wax-brush-2

I thought the angled bristles would help get the wax into crevices more easily.  In reality the bristle are far too soft for waxing.  This brush is pretty much useless and I never use it anymore.

My next wax brush purchase worked out a little bit better.

wax-brush-3

Unfortunately, I don’t remember where I got this one or what brand it is and there are no markings on it.  This is like Mama Bear’s brush, it’s almost right but it isn’t perfectly right.  It’s a little smaller than I would prefer for waxing a piece of furniture, but I still use it exclusively for antiquing or black wax.

I finally found the wax brush that is ‘just right‘ with the large Miss Mustard Seed wax brush.

mms-wax-brush

It’s the perfect size for waxing a piece of furniture efficiently, and it’s also the perfect size for dipping it right into the larger jar of Miss Mustard Seed wax.  It has shorter, stiffer bristles that work really well for applying your wax in a circular, scrubbing sort of motion.  You have to use some pressure to work the wax into your painted finish and this brush is perfect for that.

If I had to do it all over again I would skip wasting my money on all three of the former brushes and just buy more of these.  For any of you locals, it sells at Carver Junk Co for $26.  If you do a lot of waxing, it’s worth every penny.

Using a brush for stenciling.

I always use a brush to stencil.  I have tried both a small roller and a sponge applicator in the past, but in the end I prefer a brush.  In my opinion it gives you the most control over the amount of paint you are using and that is crucial if you want your stenciled design to be nice and crisp.  Remember to dip the brush in your paint, and then remove most of the paint on a paper towel giving you a nearly dry brush for stenciling.

stencil-brushes

It’s also important to have a variety of brush sizes available when you are stenciling.  With a big openings in your stencil you’ll want a big brush to cover that large area more quickly.  If your stencil is smaller or has tiny details, you’ll want a smaller brush.

You definitely want to use a brush that is intended for stenciling.  You need a brush with short stiff bristles and a completely blunt end for pouncing or stippling the paint on.

I purchased my set of Martha Stewart stencil brushes a few years ago and as you can see they are beginning to fall apart.  But I’ve done a lot of stenciling with them and I’ve also forgotten to wash them out right away and had to resort to letting them soak overnight which really is hard on a brush.  So this is not entirely the fault of the product, more my own user error.  I would definitely buy these again.  They aren’t expensive and are available at most craft stores.  In fact I may need to buy another set soon since this one is on its last legs.

Other brushes.

I do have a mishmash of other brushes on hand for some miscellaneous uses.

other-brushes

I like to use inexpensive flat brushes for applying sealers such as the Rachel Ashwell Clear Coat or the Miss Mustard Seed Tough Coat Sealer.  Let me specify that I mainly use both of these product to seal pieces before I paint them to prevent bleed thru of some kind.  At that point I’m not too worried about the quality of the finish, so an inexpensive flat brush will do.  I will also use this sort of brush to apply Fusion’s Ultra Grip or Transfer Gel or to coat a piece with stripper.  I write the use on each brush (sealer, stripper, ultra grip, transfer gel) and keep a separate brush for each product just to be on the safe side.  These brushes don’t last forever, but I don’t spend much on them so I’m OK with tossing them and starting fresh every now and then.

Let me warn you here against using the really super cheap ‘chip brushes’ that you find at most hobby stores for less than a dollar.

chip-brushes

These things are awful.  They are not even worthwhile as a ‘disposable’ brush because they just lose too many bristles.  You’ll be constantly picking bristles out of your project with these.  Don’t waste your money.  When purchasing an inexpensive flat brush be sure to give the bristles a good tug first, if lots come off in your hand then pass that one by.

Finally, I’ll mention tiny detail brushes.  I always keep these on hand for a couple of uses.  First of all, I use them to touch up details on stencils.  Basically all stencils leave gaps in certain letters in order to hold the stencil together.  For example a “D” will have some gaps because otherwise that middle would fall right out of the stencil.  Does that make sense?  Well, I usually fill in those gaps to make the design look less stenciled and more hand painted.  This is a personal preference sort of thing.  And of course some designs are meant to look stenciled.  But sometimes you want to fill them in.  You can see an example of that here …

stencil-example

See how the A’s, the P and the D in Esplanade don’t have any gaps?  I filled them in with a small detail brush like the two on the left…

fine-brushes

I use small flat brushes like the two on the right for painting details like the spoon carving on this dresser which is painted in a brighter white than the rest of the dresser to help it stand out …

spoon-carved-detail

These sorts of brushes are nice to have on hand and easy to find in any hobby shop.

You’ll notice that I’m not sharing any information about what kinds of brushes to use for applying a poly finish.  I rarely do a poly finish, but when I do I use a wipe on poly rather than applying something with a brush.  So I have no knowledge to share on what kinds of brushes to use with poly.  You’re on your own with that one.  Unless any of you want to chime in with a comment about your preference for a finish brush.

Otherwise, I hope you’ve found some of today’s information useful!  Be sure to check back on Friday to learn more about cleaning your brushes.

tools of the trade.

Recently I’ve had several requests for a post about brushes and what kinds work best for which tasks or products.  At first I demurred because I don’t consider myself an expert on brushes, and in fact don’t really have any technical knowledge about them.  But then I realized that I could certainly do some research, much like I did with my post about waxes.  Plus, I really have to give myself credit for the fact that I have painted well over 200 pieces of furniture … all with a brush!  Surely that experience counts for something.

tools-of-the-trade

As I started to think about it, I realized in fact that I had way more info to share than I could include in just one post so welcome to brush week!  Yeah, that’s a terribly lame name, but I really couldn’t come up with anything more clever.  Maybe you guys have some suggestions?  Anyway, today we’ll be talking about paint brushes.  Wednesday I’ll dive into brushes for other tasks such as stenciling and waxing.  And finally on Friday, the best ways to clean your brushes.

My goal is to keep this information completely unbiased so I’m not including any links for purchasing products, etc.  I’m sure that if you want to try something I’m writing about you’ll be clever enough to figure out where to buy it, right?

OK, so let’s get started.

I don’t know about you, but when I walk into my local hardware store to buy a new paint brush I am quickly overwhelmed by my options.

brushes

For goodness sake, look at them all!  And that’s just the Purdy’s.  There are so many options, so let’s talk about a few of them.

Natural v. synthetic bristles.

Somehow it seems like natural should always be better than synthetic, right?  That’s not necessarily so with paint brushes.  When using water based products like Fusion paint, chalk paint, milk paint or even just latex paint, you need to go with synthetic bristles.  Natural bristles will absorb the water in these products causing the bristles to swell and lose their shape.  Natural bristles are best reserved for use with oil based products.

Phew, that one was easy.  Just choose synthetic.

stiff-or-soft

Nylon v. polyester.

Now that the synthetic decision is made, of course there is more than one type of synthetic bristle.  Nylon or polyester.  Both will work fine with water based products.  Nylon bristles will be softer than polyester.  When working with heavier paints, like a chalk paint, I like to use a stiffer bristle (ie. polyester).  I also prefer it with milk paint because I feel like it gives me more control over the paint.  In fact I really prefer a good stiff brush overall (wink, wink).  Except when using Fusion paint, then I reach for the softer Purdy Nylox brushes.  They give a smoother finish and are less likely to leave brush strokes.

brushes-2
 Angled v. flat.

Another choice you’ll have to make with a traditional paint brush (we’ll talk about those round brushes in a bit) is whether you want an angled brush or a flat brush.  I use an angled brush about 99% of the time.  It’s easier to get into those corners on the paneled side of a dresser like this one with an angled brush.

dresser-side

I do own one flat brush, but the only time I use it is when I’m painting something with lots of big flat expanses, like maybe a table top or a large chalkboard.

Does size matter?

Of course it does!  If your brush is too small it will take forever to get your piece painted, and if it’s too big you’ll have trouble with those little detail-y bits.  Plus the larger your brush, the more paint it holds and the heavier it gets.  In the end, my hand just gets too tired wielding a larger brush.  So I mainly use just two sizes of paint brushes.  I’ll use a smaller 1.5″ brush for painting narrow things like a mirror frame for example.  For most pieces of furniture I use a 2″ brush.  I almost never use anything larger than a 2″ brush for furniture.  I do have a couple of bigger brushes, but I use them for painting the house.

And what about those fancy round or oval brushes that are all the rage?

Yep, that brings me to the big round or oval brushes that you see so many furniture painters using.  They look so appealing in those youtube videos or in those really pretty pictures on blogs, don’t they?  I’ve tried to find some definitive data on whether or not they are preferable to a traditional paint brush for applying paint to furniture but the only reason I have found for using them is that they hold more paint and thus reduce the numbers of times you have to dip your brush to reload.  Theoretically they shorten the time needed to paint your piece, and perhaps that is true.  But as I mentioned above, the added weight of that paint on the brush is a problem for me.

I’ve never painted with these brushes, but I have used them for wax (more on that Wednesday).  However, I have this smaller 1.5″ version that Fusion sent to me quite some time ago that I’d never used (mainly because the 1.5″ size seems a bit small for painting furniture).

round-brush

So I opened it up, got out some Fusion paint and painted this small clay pot just to try it out.

clay-pot

This is a mix of Fusion’s Algonquin and Casement that I happen to have stored in a Talenti sorbetto container.  The brush does live up to my expectations regarding the quantity of paint that it holds.  I was able to paint the entire outside of the pot with one dip of paint.  However, as soon as I started using this brush I felt like it was too stiff for Fusion paint.  It gave me a lot more brush strokes than I’m used to.  It was also tough to get into the interior bottom corners of the pot with that big round blunt end, an angled brush would have worked better for that.  Bottom line, I think these round brushes are best reserved for use on projects where you want to see some texture (ie. brush strokes) and/or are using a heavy bodied paint such as chalk paint.  If you want a smoother look, stick with a traditional synthetic brush.

One last note.  You might be wondering why I use Purdy brushes and not some other brand.  The honest answer is that the first brush I bought was a Purdy and I loved it.  So now I just keep going back to them without really trying any other brand.  They aren’t overly expensive and they are a nice quality brush.  I have lots and lots of brushes.  In the summer I’ve been known to have half a dozen projects going at once, which means I need 6 brushes unless I want to wash a brush between each coat.  And on the other side of the coin, I am also not very good at caring for my brushes properly so I don’t want to spend a lot of money on a brush and then have to toss it because I forgot to clean it (more on that Friday).

I hope you found some of this information helpful.  I can sum everything up by saying that if I had to pick one brush that I use the most it would be a 2″ angled polyester brush for chalk and milk paint, or the nylon version for Fusion paint.  You can get a good quality brush for $12 to $15.

  Be sure to check back on Wednesday for a post about brushes used for other tasks.

how to get the perfect chippy finish.

chippy-finish-title
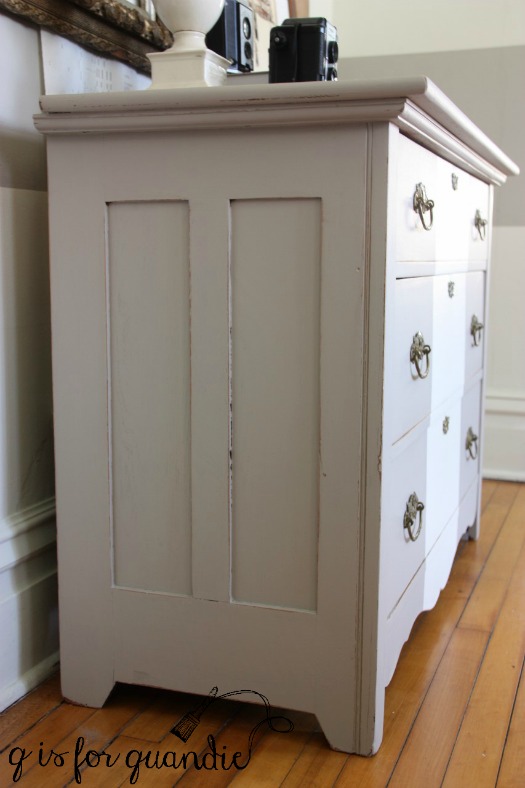
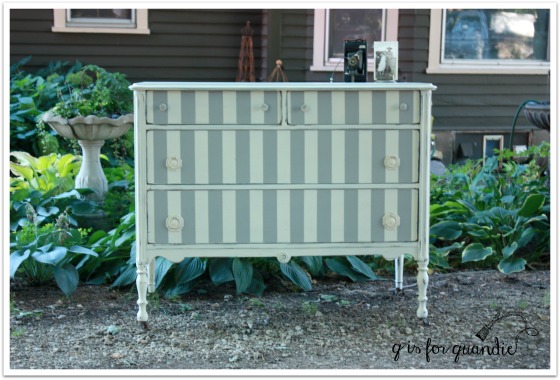
When I posted the farmhouse chippy cabinet on Monday, I mentioned that I ran out of paint and had to request more from Homestead House to complete my project.  When I sent in that request I included a photo of my original chippy mess and explained that I had it nearly under control, but had run out of paint!

When Jennylyn, the president of Homestead House, responded she suggested I try her foolproof method for perfect chipping on my next project and she offered to send me the product she was suggesting I try.  To be fair, she didn’t call it ‘foolproof’, I’m adding that adjective on my own.

salad-bowl-finish

But wait, what?!  Back up a minute.  There is a method?  And it doesn’t involve clicking your heels together 3 times, or crossing your fingers, or knocking on wood?  Sign me up!

Here is what Jennylyn told me to do.  First, prep the piece properly, then apply a very thin layer of Homestead House Salad Bowl Finish (you can also use Miss Mustard Seed 100% beeswax which is the same thing) to the areas you want to chip.  Then paint as usual.

Sounds pretty simple, right?

So I pulled out an old framed mirror that I had salvaged from a dresser to do a little experimenting with this method.  I remembered back to my high school science class and decided I need a ‘control group’ of sorts, so I used my old method on the outer sides of the frame and just sanded them lightly and wiped them with a damp cloth.  On the front of the frame I sanded a little more thoroughly, vacuumed away the dust, and scrubbed it down with a water/vinegar solution.  Then I added a thin layer of the Salad Bowl Finish using a cloth, focusing on the edges and the corners where I wanted chipping.  Next I painted two coats of Homestead House milk paint in Buttermilk Cream.

Once the paint was dry I could clearly see that the ‘control group’ or the sides of the frame were chipping A LOT.  The front of the frame didn’t look terribly chippy at all though.

chippy-1

But then I got out my fine sandpaper and lightly sanded and voila!  There were the chips right where I wanted them to be.  And they were indeed pretty much perfect.

chippy-2

Although the ‘control group’ area was chippy, it was not a controlled chippy.  In fact, the ‘control group’ was a little out of control.

You can also use this method with layers of different colored paints.  For example, paint a base coat of French Enamel blue, add some Salad Bowl Finish, then paint white on top of that.  Then you’ll see color under your chips rather than the wood.

For a little extra bit of fun on this project, I added a row of rub-on phrases all along the frame just under the mirror.

frame-words

They are tiny and you have to pay attention to notice them.  Embrace imperfection, discover yourself, look within, one of a kind, stand boldly.

chippy-mirror

The next time you are thinking it’s too hard to use milk paint and get just the right chippy finish, be fearless and try the Salad Bowl Finish!

be-fearless

stenciling with chalk.

After I finished the Eastlake dresser mirror frame turned chalkboard and hung it on my living room wall last month, I decided to treat the frame that I removed from that spot in the same way.

I’m sure you don’t remember it, so here’s a ‘before’ photo.

aqua-chalkboard-before-2

I removed this frame from a dresser eons ago.  I painted and sold the dresser, but hung onto this frame and used it as a guinea pig for milk paint.  I originally painted it in MMS Artissimo, then I painted it in MMS Kitchen Scale (shown above).  As much as I loved the Kitchen Scale, I didn’t think it would work well with a black or green chalkboard insert.  So after sending the frame over to Ken’s workshop to have a shelf added, I got out some Homestead House milk paint in Limestone and painted it again.

aqua-chalkboard-angle-1

One thing I’ll note about the Limestone, it looks very creamy once mixed.  You will feel like you are getting a cream not a white.  Once painted and dried though, it is a gorgeous warmish white.  I once again chose not to use a topcoat.  This piece won’t get a lot of handling once it’s hung on the wall so I feel like it won’t need a lot of protection.  I think if I added wax it would bring out the creaminess of the color more.

I really love painting over pieces that are already painted in milk paint because I almost always get some awesome chipping this way.  This piece was no exception.  And the Kitchen Scale is a great color to have peeking through the Limestone.

aqua-chalkboard-chipping

Initially I was planning to paint the chalkboard inset in the same green I used before (you can see that here).  But then I was surfing pinterest and I saw an aqua chalkboard.  Eureka!  My favorite color as a chalkboard!  Why didn’t I think of that?

Since I’ve had such great luck using milk paint as a chalkboard finish, I just pulled out some Homestead House milk paint in Laurentien.  I used two coats, and sanded lightly with fine sandpaper in between each coat to keep the board fairly smooth.  Once dry, I seasoned my chalkboard by rubbing chalk all over it and then wiping it away.

The last step was to add a design of some kind to the board.  I use several different techniques for writing on a chalk board.  Sometimes I free-hand like I did on Debbie’s washboard chalkboard.  Sometimes I print a design on paper, rub the back with chalk and then trace around it to transfer the design onto the board (like I did on Ken’s thank you gift).  But this time I used a stencil.  I had a new one that I ordered from Etsy a while back but hadn’t had a chance to use yet, so I pulled that out.

Using a stencil can be a little tricky, after all they are not designed for use with chalk, so I thought I’d share a couple of tips.  For the fine lines of a stencil, you’ll need to use sharpened chalk, and lots of it.  You can only do a few lines before sharpening again … and again … and again.

I use an old lip pencil sharpener, and once the chalk gets short I can no longer sharpen it successfully.  So I end up with a pile of shorties.  As I said, you will go through a lot of chalk so lucky it’s cheap.

The next tip is essential.  Place your stencil over the chalkboard and use the sharp point of the chalk to fill in the stencil.  Don’t try to capture every detail at this point.  Just get the broad strokes.  Once you have them, remove the stencil and then go back in with more sharpened chalk and add the details free-hand.

In the photo above I have already done that with the upper part of the design, but the last line shows how it looked before I filled in free-hand.  If you have a sort of ‘outline’ of the design, it’s easy to go back in and connect the dots, so to speak.

aqua-chalkboard-design-2

The addition of the little shelf at the bottom of the frame makes this piece perfect for displaying a collection of ironstone pitchers or some other non-collectible.

ironstone-pitchers-2

I hung this chalkboard on the wall in my dining room, just to get some photos of it.  I think this next photo gives a little better indication of its size.

aqua-chalkboard-on-wall

It is 39″ wide by 46″ tall, so it’s really quite large.  It’s not going to stay in this spot though, I have other plans for this wall.  This charming chalkboard is for sale.  Be sure to check out my ‘available for local sale’ tab if you are local and are interested.

But I’m curious, what do you think of the aqua chalkboard?  Too pale?  Or just right?

a showdown between milk paint and Fusion paint.

Did you know that the Canadian paint company that manufactures Miss Mustard Seed milk paint, Homestead House Paint Co., also makes Fusion paint?  Not only that, but they also have a full line of milk paint that is not packaged with the Miss Mustard Seed branding.  It is manufactured with the same ingredients and is pretty much the same exact stuff, except it comes in different colors (you check out those colors here).  As it turns out, a lot of the Fusion paint colors started out as Homestead House milk paint colors.

Recently the Homestead House people offered to send me some samples of their milk paint to play around with.  I asked them to send me some of their Midnight Blue milk paint specifically so that I could compare it with the Midnight Blue Fusion paint.  And thus, this blog post was born.  A show down between milk paint and Fusion paint.  Which one is better?

milk-paint-title

Before I move on with the detailed comparison, I’m going to give you the answer to that question.  It’s sort of like reading the last page of the book first, but who doesn’t do that every now and then?  And the answer is: ‘neither’, or ‘both’, or ‘it depends on what you like’.

So let’s compare, shall we?

I happened to have a pair of chairs that I snagged curbside for free last spring at the White Bear Lake Trash to Treasure day.

chairs-before

Painting one with Fusion paint and one with Homestead House milk paint is a great way to compare the qualities of these two types of paint side by side and in the same color.

midnight-blue-fusion-paint

Right off the bat we have a big difference between the two products.  The Fusion paint is ready to go right out of the jar, the milk paint powder has to be mixed with water.  I’ve spoken with some painters who don’t like having to mix milk paint themselves, but I kind of enjoy it in a ‘making mud pies’ sort of way.  It feels a little like a science experiment to me.  Mix powder and water and it makes paint, kinda cool, right?  For the Midnight Blue I used a little more water than powder since it’s a nice dark color.  With lighter colors I go with more of a one to one ratio of water to paint.  I mixed my paint before starting to prep my chairs to give it some time for the color pigments to dissolve and blend well.

midnight-blue-milk-paint

To keep a level playing field for this experiment, I did the same amount of prep on both chairs.  Very little.  I removed the seats and then I didn’t bother with sanding them, I just wiped them down with a damp cloth.  This is not the recommended procedure for either paint.  The recommended prep work is to sand lightly to give your surface more paint gripping power, then wipe down.  I skipped the sanding because I wanted to encourage chipping on the milk painted chair, and also because I was feeling a little lazy.

I started with the Fusion chair.  Painting with Fusion is fairly straightforward.  Just dip your brush and paint it on.  Here it is after the first coat of paint.  You’ll have to excuse the purple-ish look, it was a bright sunny day when I took these photos and there was a little too much reflection coming from the wet paint.  As you’ll see later, this is really a navy blue.

fusion-paint-coat-1

I almost could have gotten away with just one coat of the Fusion paint except for a few spots that didn’t quite have enough coverage.

While that dried I painted the milk paint chair (ditto the above regarding the purplish look, too much glare).  Right away I noticed the difference in applying the two kinds of paint.  The Fusion paint feels heavier on the brush and takes just a little more effort to brush on.  The milk paint is very light and almost watery by comparison.  This makes it really easy to paint on.  But it also tends to get a little drippy.  It’s easy to just keep an eye out for drips and wipe them away with a pass of the brush though.

milk-paint-coat-1

Once I had the first coat of paint on the milk paint chair, I went back to add a quick second coat to the Fusion chair.  Unfortunately it wasn’t quite yet dry.  It does take just a bit longer for the Fusion to dry.  This is another quality that I love about milk paint, it dries very quickly often allowing me to complete painting projects requiring two coats of paint in one evening after work.

Since the Fusion chair wasn’t quite dry yet, I took a quick break and dug out some fabric for recovering the chair seats.  I cut the fabric to fit and ran a quick hot iron over it to smooth out any creases.  In the time it took to do that, the paint was dry and it was time for a second coat on each chair.

I’ve learned that it is much easier to distress Fusion paint shortly after applying it.  The longer you wait, the more the paint cures and the more durable it becomes.  This is great for long term durability, but can be frustrating if you want to purposely distress your piece and you didn’t get to it right away.

So as soon as the paint was dry, I used a sanding block to lightly distress areas on the Fusion chair that would normally show some wear and tear over time such as the edges.  I did not sand the flat surfaces at all.  I then used a very small amount of wax on a cloth to darken up any spots of fresh wood that were revealed by the sanding.  This not only protects that bare wood, but it darkens it up and makes it look more naturally distressed instead of looking freshly sanded.  It just took a quick minute to do, I didn’t thoroughly wax the whole chair by any means.

fusion-distressed

Next I turned to the milk paint chair.  I was really happy to see that it had some spots where the paint was already flaking up.  I wanted to see some chipping and in my opinion this is where milk paint really shines.  I ran some sand paper over the entire chair (including flat surfaces) and did get some paint off, but I wanted more chipping so I used one of my favorite secret tips, masking tape.  Imagine using masking tape to de-lint your black dress pants, it’s the same idea.  Press the tape onto the surface and then pull it off.  Voila!  Chipping!

Once done with that I ran my shop-vac over the chair to remove any remaining dust or paint chips.

And now we’ve come to the moment in time where I admit that there is one more step required for the milk paint chair that is not necessary with Fusion paint.  A top coat.

I opted to use hemp oil as my top coat.  It’s a little easier to apply than wax and I like the way it darkens up the Midnight Blue a bit more than wax would.

milk-paint-distressed

At this point I think the difference in the final look between the two paints is pretty obvious.

The milk paint finish looks more genuinely aged.  I know this chippy look doesn’t appeal to everyone, but personally I love it.  For me, nothing compares to the chippy look you can get with milk paint.  But as I think I’ve pointed out, it’s just a tad more work to use milk paint rather than Fusion paint.

milk-paint-chair

Is it worth the extra work?  I think that depends on the piece.  Some pieces really come alive with a chippy milk paint finish, while others are better off with a more solid Fusion finish.

Another thing to consider is that the Fusion finish is more durable and washable than a milk paint finish.  If you’re painting kitchen cabinets, you’re definitely better off with Fusion paint.

fusion-paint-chair

So, which one is better?  Neither.  Both.  Depends on what you like.  For me personally I prefer the chippy milk paint finish.  When I’m painting pieces to keep for myself I almost always choose milk paint.

How about you, do you have a preference?

oil can photo holders.

I’m fond of old oil cans, is that weird?

I picked up a couple of them at garage sales this summer.

oil-cans-before

Although they were OK as is, I kept thinking about this fantastic bright blue oil can that I purchased a couple of years ago.

blue-oil-can

And I decided to try and replicate that colorful look.

I scrubbed them with dish soap first to cut any oily residue.  Then I painted them with Annie Sloan’s Florence chalk paint.  Once the paint was dry, I waxed them with a dark wax and then I added some Tim Holtz rub-ons.

oil-cans-painted

Are you wondering how well the chalk paint is going to stick to an oily metal surface?  I wouldn’t count on it for an item that is going to be handled a lot, but for something that’s going to be decorative, and mainly just sit on a shelf, the adherence is sufficient.  You can see that my rub-on’s did pull off some of the paint.

Using a couple of small clips, I turned my oil cans into photo holders.

oil-can-photo-holders

Easy peasy project, the next time you see some old oil cans make sure you grab them and try this!

a little rusty bull.

You may have noticed the bull/steer/cow/whatever-you-want-to-call-it in my pile of goodies from the MacGrove garage sales.

bull before

He’s actually flat on the back side and intended for hanging on the wall.  He looks like he might be made out of metal, but he isn’t.  He’s really just made out of that polyresin sort of material and then painted to look like metal.  But I wasn’t very fond of the faux finish he came with, so I decided to give him a different faux finish.

modern masters

I’d first heard of these Modern Masters metal effects paints when my friend Sue used the ‘rust’ kit on a galvanized olive basket that she gave me for my birthday.  Then my reader, Victoria, also mentioned that her husband uses these products and swears by them.  I was intrigued.  I had to hunt around a little to find it, but I eventually found these small kits at Hobby Lobby.  I could have ordered them online as well, but I like instant gratification.  Plus I used a 40% off coupon at Hobby Lobby.

I started by painting my bull with the primer.

bull with primer

That was easy enough.  I’d say I used about half of the 2 oz. bottle of primer on this bull.

Once that dried I added a coat of the Oxidizing Iron Paint.  And let me warn you, that stuff is stinky!  I don’t think I’d want to be using that one indoors.

bull-painted

The first coat went on rather spotty and since the instructions called for two coats, I added a second coat.

Once that was dry, I spritzed it with the ‘rust activator’ which came with a pump spray nozzle for application.  After about 10 minutes, I spritzed it a second time.

Then I sat back and waited for the magic to happen.

rusty-bull

And I got a little rusty bull.

rusty-bull-face

Here’s how he looks hanging on the wall.

bull-on-the-wall

I haven’t yet decided the fate of the rusty bull.  I may keep him for a future new look in my kitchen.  Then again, I’m not entirely sure that this look is ‘me’.  I’ll have to make up my mind before October 8.

ken’s workshop.

You all have met my handyman neighbor Ken.

Ken

Ken is the guy that does all of my furniture repairs.  He’s also built custom pieces for me, like the shelves in my pantry.

pantry

He actually even built the shelves in my living room for the people who owned my house before Mr. Q and I bought it 28 years ago.

living room 1

Ken likes projects.  He prefers them to be small because he likes that feeling of completion he gets when a project is finished, and he doesn’t like that feeling of something hanging over his head that isn’t done yet.  I can relate to that myself.  That’s partly why I love painting furniture.  You can finish a piece in a weekend, it doesn’t drag on for weeks and weeks.

I feel like it’s my duty as a good neighbor to continually provide Ken with lots of small projects to keep him feeling useful.  If he’s not working on projects for me, then he’s working on something for his wife Arlene or for nnK across the street.  Really, the poor man.  He has three women giving him to-do lists!

I have to laugh because Ken has really gotten the hang of my whole blogging thing.  He knows that I like to get a ‘before’ photo of every piece, and he’s starting to remind me to get ‘in progress’ photos too.  So a while back when he was working on the Little Speckled Frog dresser for me he phoned me and asked if I’d like to pop over and get some photos while he had the top off.  Heck yeah.

Here is the top of the dresser and its drawers set aside in Ken’s basement workshop.

kw 1
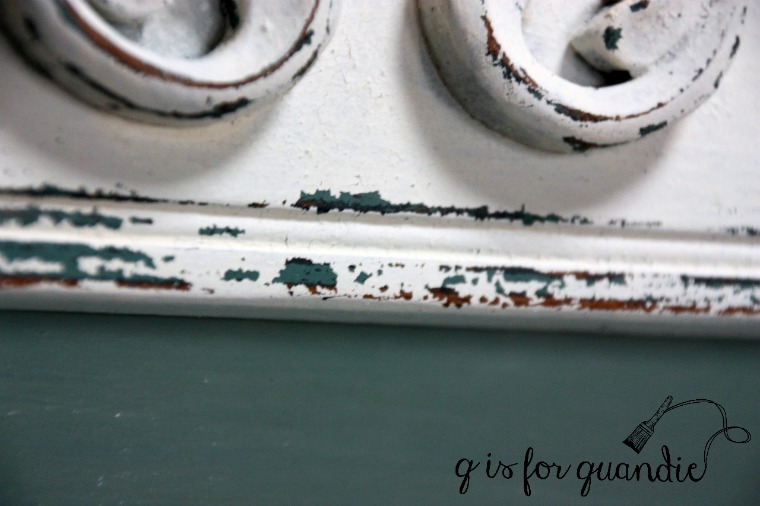
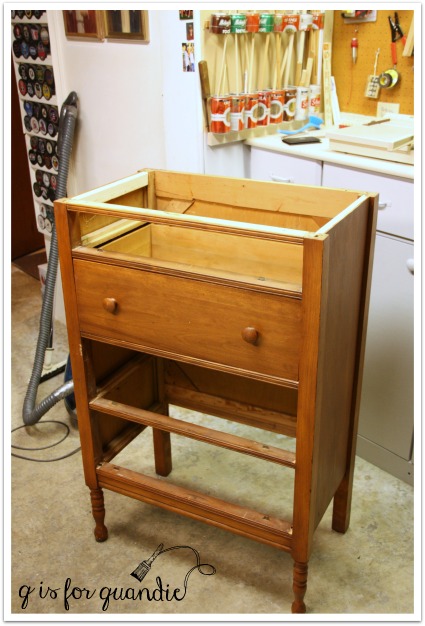
The problem with this dresser was that it was what I like to call a bit wonky.  I judge wonky-ness by putting my hands on the top of the dresser and trying to wiggle it side to side.  It shouldn’t wiggle or have any give.  But this one did.  When a dresser is wonky, I send it over to Ken and he shores it up.

In this case, he took the top off and added some additional structural support along the sides just under the top and just inside the side of the dresser.

kw 2

Here that is from another angle.

kw 3

He did this on both sides of the dresser.

kw 4

Then he re-glued the top back on.

He also had to build some of the bottom sides of the drawers back up.  You’ll often see this in old dressers, the sides wear away over time from gliding on those runners.  Once they get worn down, the drawers no longer open and close smoothly because they sort of fall down in the back.

kw 5

So Ken cut away the portion that was worn down and fit a new piece of wood into that spot (you are looking at the side of an upside down drawer in the above photo).

One of the drawers also needed an entirely new bottom.

kw 6

Are you noticing anything while looking at these repair photos?  Like how neat and orderly Ken’s workshop is?  Every tool has a place it belongs.

Some of his storage ideas are quite creative.  Just check out this method of storing dowel rods.

kw 7
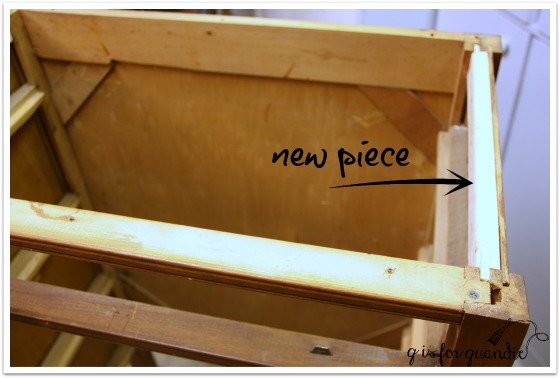
Each can is labeled with the dowel size.

kw 8Gold Medal soda?  Does anyone remember that brand?  I believe it was local to Minnesota.

Additional cans have been cut down and mounted above to keep the dowels in place.

kw 9
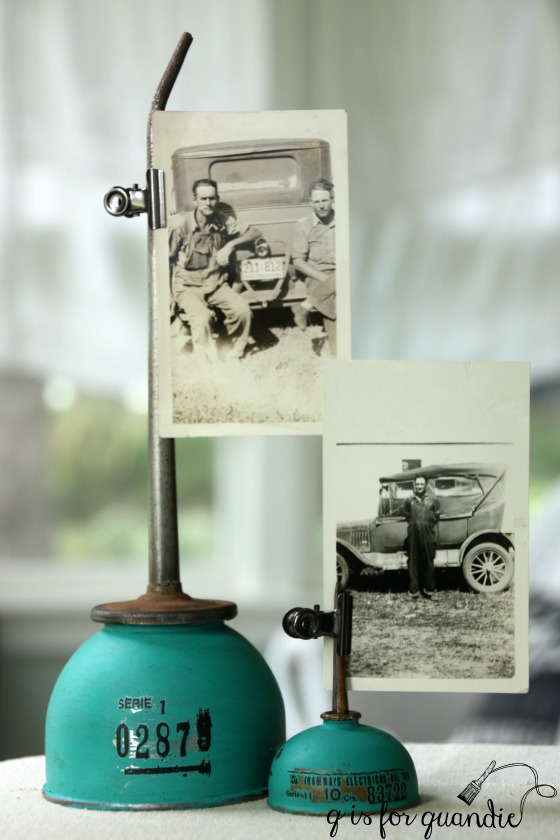
It’s ingenious, right?  Plus it’s environmentally sound because he just used old cans that would have been thrown away, not to mention it’s pretty thrifty.  Ken was recycling before it was cool.

Ken’s storage system for screws, nut, bolts and other hardware is similarly clever.

kw 10

He’s taken old cans that various products like paint thinner came in, cut the sides off and turned them into little drawers.

kw 11He custom built the wood cabinet with cubby holes of the precisely right size for them.

Here’s one last clever idea from Ken’s workshop.  He’s made some ‘cushions’ for his vice.  They look like this …

kw vice 1

There are two of them, and Ken cut the rectangle shaped notch so that they fit into his vice like this …

kw vice 2

The purpose of these is to protect whatever item he is holding with the vice.  For example, a drawer.

kw vice 3

In this way the drawer doesn’t get dented or dinged up from the metal vice that is holding it firmly in place.

Pretty clever, right?

Ken has all kinds of tricks up his sleeve.  I’m trying my best to learn some of them so that I can eventually repair my own pieces, but I’m not sure I’ll ever get there.

But in the meantime, Ken did an awesome job on the Little Speckled Frog dresser and it’s sturdy as can be now.  Hopefully it will find a new home soon.

frog dresser 2

I hope you enjoyed Little Speckled Frog week.  I’ve got tons of projects in the hopper for next week because I’ll be taking a little stay-cation.  I have the full week off from the day job and I plan to devote some time to getting some things crossed off my to-do list.  So be sure to stay tuned!

how to paint stripes; or measure twice, stripe once.

I just added a new category to my blog.  By the way, did you know that q is for quandie is categorized?  If you are reading this blog on the website (as opposed to on Facebook, or via email if you are a follower) just look over to the right.  Just under where it says “stuff.” you can bring up a pull-down menu of my categories.  Want to see just my posts about travel?  or gardening?  or my house?  Just click on the appropriate category and posts about that subject will come up.

So, like I said, I just added a new category called ‘how to’.  At this point some of you might be thinking “well duh, there is a ton of ‘how to’ info on this blog already!” and that is true.  I just decided at this point that I might as well organize that info a little so you have an easy way to refer back to these posts.

how to paint stripes

You might think that painting stripes on furniture is fairly easy.  And you wouldn’t be totally wrong.  It is easy, if you keep a few simple tips in mind.  I’ve done a few striped pieces in my day, and as is par for the course, I learned by making mistakes.

One of my earliest striped pieces was this one.

stripes 2

If you’ll be attempting to stripe a piece like this, you want to make sure you account for that area between the two upper drawers.  The first time I painted this one, I had the drawers out of the dresser.  I wasn’t even thinking about that space.  So yes, the stripes on the upper right drawer did not line up!  Learned that one the hard way.

Once I got to this next one, I had that lesson down pat.

stripes 4

When you have a desk with a center drawer, you want to be sure to center your stripes on that middle drawer and then work your way outward.

striped desk

Can you tell that I’m a fan of striped furniture?

Green stripe 1

So, let’s get to those tips.

To begin with paint your entire piece in your base color.  When choosing which paint to use, keep in mind that you’ll be using tape for your stripes.  If you use milk paint, chances are you will see exactly where your tape was when you pull it off.  Yep, learned that the hard way as well.  It’s not a good look, and for that reason I use either chalk paint or Fusion paint for stripe jobs.

Again because of the tape, I like to give my base coat at least 24 hours to dry well before continuing.

Next, gather your supplies.  You’ll need painting tape, a measuring tape, your stripe paint color, and coffee (that last one might not apply to everyone, but it’s a must for me).  You’ll also need a pencil, which I neglected to include in my photo.

striping tools 
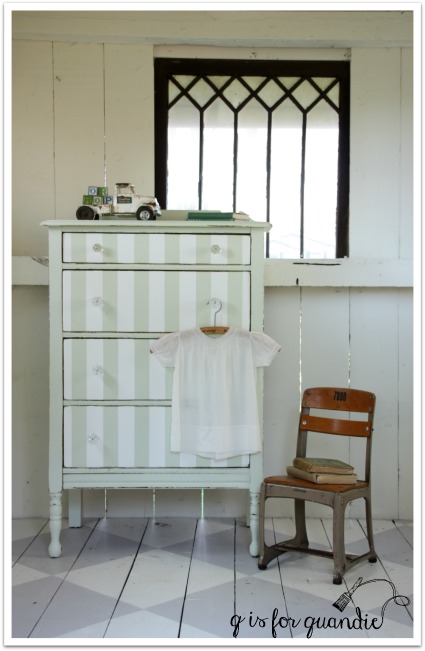
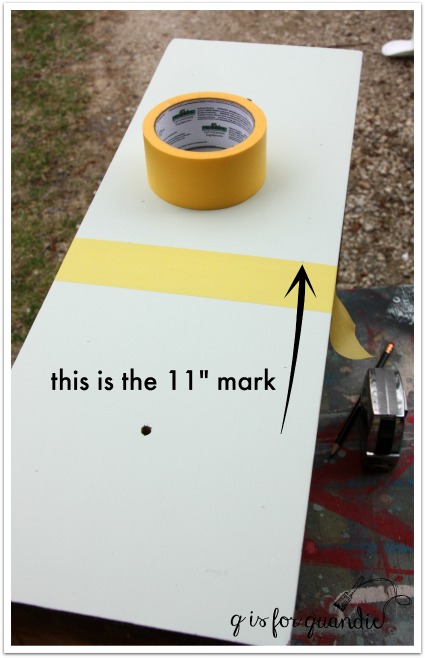
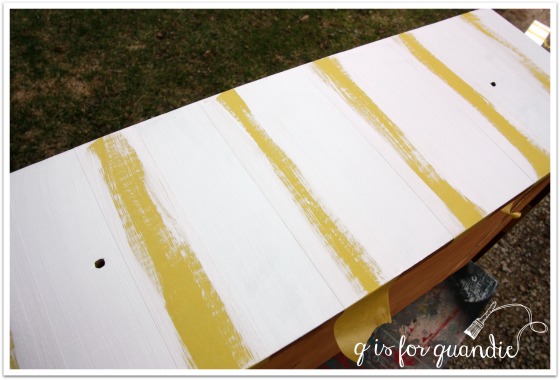
I like the delicate surface frog tape for taping over fresh paint (see, it even says that on the label!).

First find the middle of your drawer.  Always, always, always start in the middle and center your first stripe then work out to each side from there.

With the little speckled frog dresser my job was made exceedingly easy because the drawers were exactly 24″ wide.  Putting the middle at precisely 12″.  Easy, peasy.

stripe middleNow, here’s a little secret.  The wide frog tape is 1.88″ wide (why, oh why, did they do that?), so I put 2.12″ between each stripe.  Why?  Because I can’t wrap my head around the math involved in 1.88″ wide and what that equals on the measuring tape (what would that even be?  can any of you tell me?).  Instead I make my marks every 4″.  And I have found that visually the stripes do not look like they are different widths.

So, what does that mean?  It means I find the middle, in this case at 12″.  Then I measure 1″ to the left of center (because my center stripe will be my base color and will be 2″ wide) and make a mark.  In this case, that was at 11″.  I make a faint pencil mark near the top of the drawer and another near the bottom of the drawer.  Then I use those two marks and line up the right side of my tape with them.

beginning tape

Important tip, don’t measure your next line from the tape.  Remember, it’s only 1.88″ wide and will throw off your measurements.  Work your way left from the center making marks at every 4″from your initial mark.  On my drawer that meant I had the initial mark at 11″, then marks at 7″ and 3″ from the left side of the drawer.  Now, for the other side, remember your center strip is 2″ wide, 1″ to each side of center.  From there make marks every 4″ (in my case at 13″, 17″ and 21″).  You’ll now be lining up the left side of your tape with the marks. This sounds a little more complicated than it really is.  And once you have your measurements, you can use them on every drawer if you are doing a piece like this one with stacked drawers.

taped drawers

Once your tape is all in place, be sure to press firmly along all of the edges to prevent your paint from bleeding under the tape.  I have heard that first painting another coat of your base coat to “seal” the edges works great for this as well, but I’ve never tried that.  I find that the Frog tape does a pretty good job without adding that extra step.

painted stripes

Normally I would paint a drawer with a horizontal motion, but you don’t want to do that here.  Use brush strokes that are parallel to your tape to avoid pushing paint under your tape.  I used two quick coats of Fusion’s Picket Fence on my project allowing about an hour of drying time between coats.

I remove the tape immediately after finishing the second coat, before the paint is dry.  I like to get that tape back off as soon as I can to avoid damaging the base coat.

And voila, striped drawers!

striped drawers

Load them back into your dresser, and you have something like this.

frog dresser angle

So, have I inspired any of you to try some stripes?