verbena bonariensis.

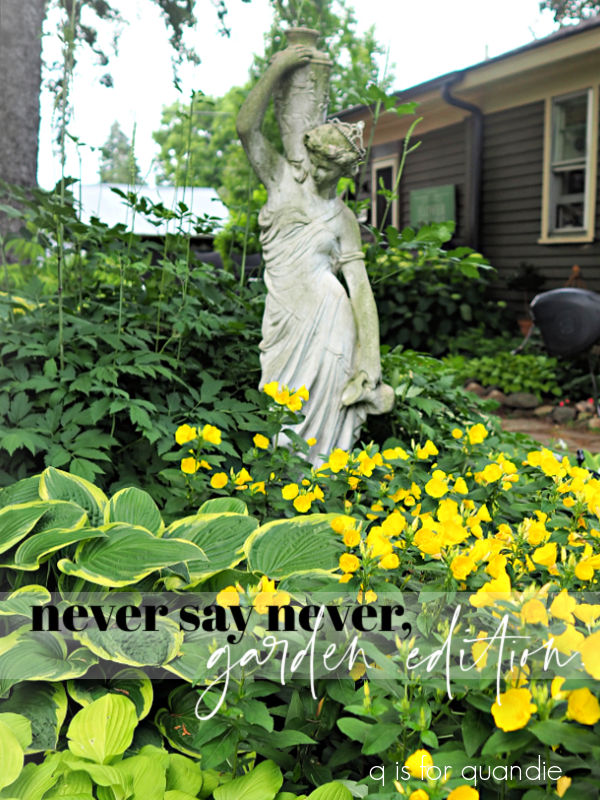
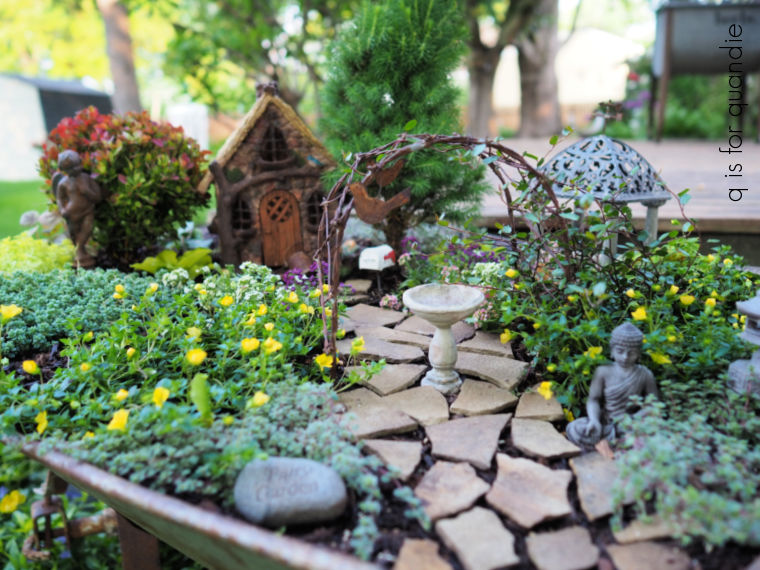
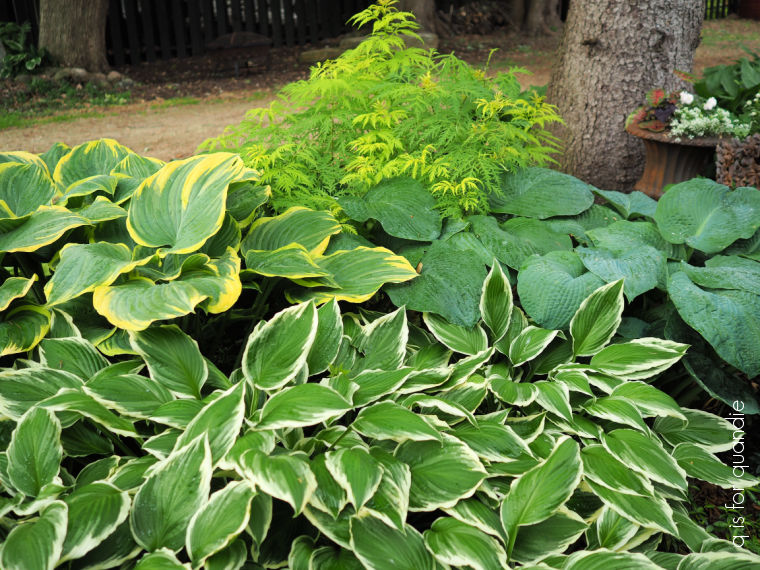
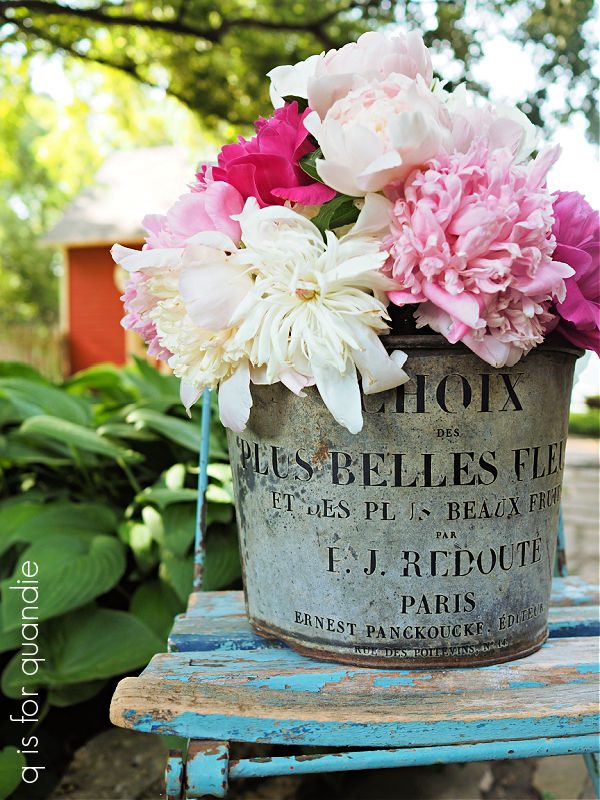
Good morning from the garden.

I’ve been a fan of the British gardening show Gardener’s World for many years, do any of you watch it?

I’d often notice tall, wispy sprays of purple flowers in the gardens they feature and I’d always wondered what they were.  Eventually I figured out that they were verbena bonariensis.

I badly wanted some verbena bonariensis in my own garden, but never could seem to find it here in Minnesota.  It got to the point where my neighbor, nnK, got tired of hearing me say the words ‘verbena bonariensis’ every time we visited a garden center (so of course I said it even more).

Every time I saw some of them on our trip to Europe in 2023, I took a photo and texted it to her saying “look, they have verbena bonariensis in Amsterdam!”  and “look, they have verbena bonariensis in Norway!”

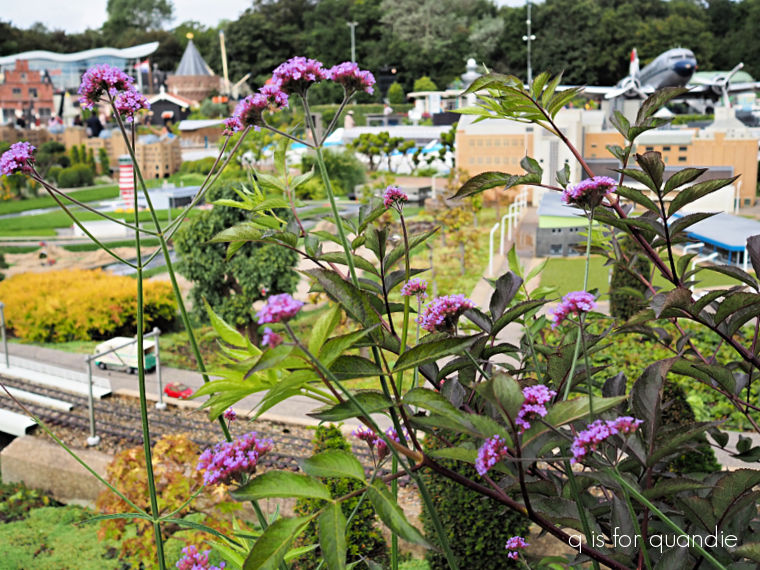
I spotted them at Madurodam in the Netherlands …

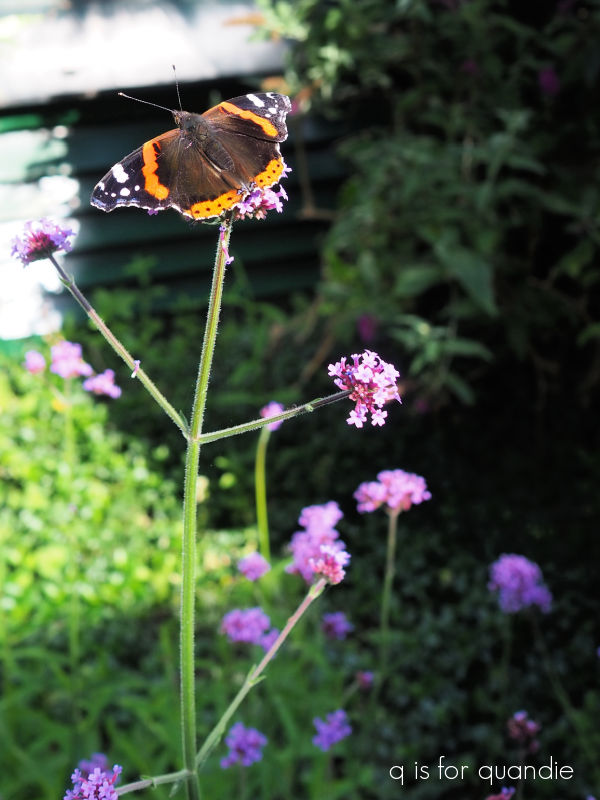
and at Zaanse Schans near Amsterdam.

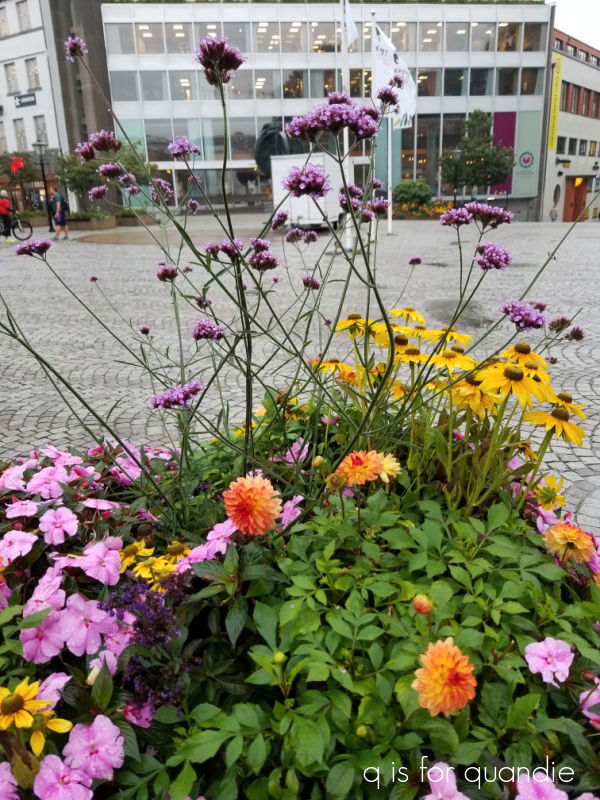
I also spotted them in Stavanger, Norway.

But I still wasn’t able to find them at any of our garden centers here.

Then, lo and behold, nnK and I were at a garden center out near her parents house in Wisconsin last summer and what did I spot?  Verbena bonariensis!  They had it.

I purchased a couple of them and put them in my garden near the carriage house.  They need 6 – 8 hours of sun to bloom well, and they didn’t quite get it in that spot.  They performed OK, but they weren’t spectacular.

However, as you may know, my neighbor Ken had a huge shade tree removed from his backyard late last summer.  As a result, I now have one section of garden that gets full sun.  So I was on the hunt for more verbena bonariensis this year so that I could try them in that spot.

I did find it at my local Bachman’s where one plant was $14.95!  Thank goodness I didn’t buy it there, because when nnK went back to that nursery in Wisconsin where I found them last year, they had them for $2.95 each.  So I had her pick up six of them for me.

Now, I will point out that I’m pretty sure the version at Bachman’s was the Proven Winners Meteor Shower, and I imagine that price is because of the Proven Winners branding.

I believe the plants nnK found were probably grown in house from seed.  When nnK was purchasing them the nursery owner mentioned wishing that more gardeners in our area knew about this plant.  It looks so unassuming and really rather unattractive on the shelf at the nursery, so they don’t sell particularly well.

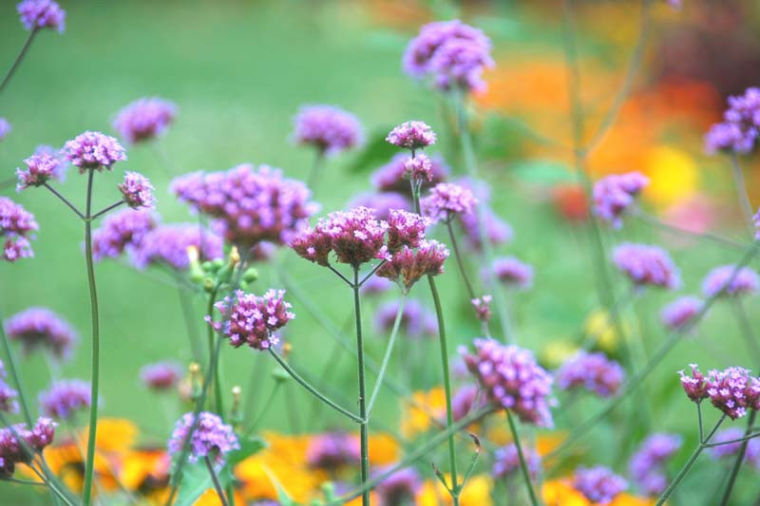
But here we are in early July and mine are finally starting to bloom and look like I hoped they would.

Unfortunately, I found it nearly impossible to capture them in photos.

Let me try to describe them for you.  They grow quite tall, I would say that mine are at least 4′ to 5′ tall now.  They aren’t especially attractive looking plants at the base, but they are perfect for the back of the border where they can be seen poking just their flower stalks above everybody else in the garden.

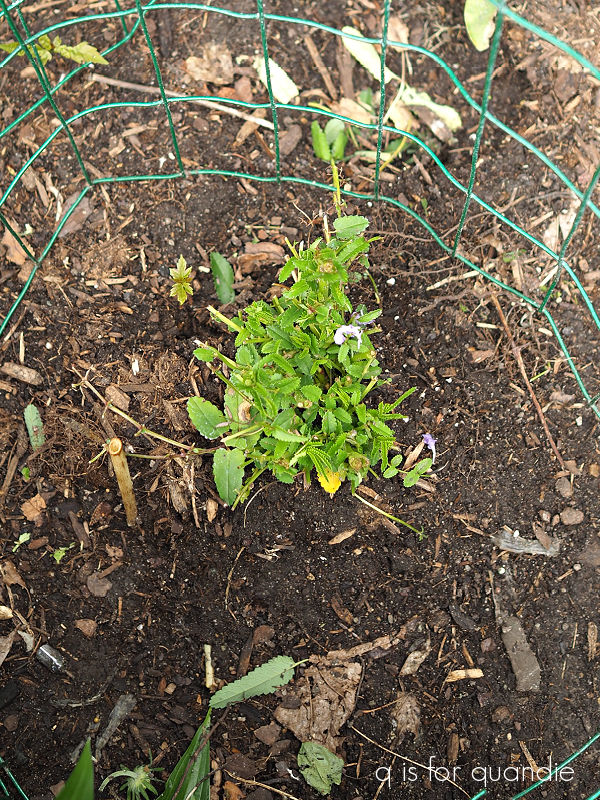
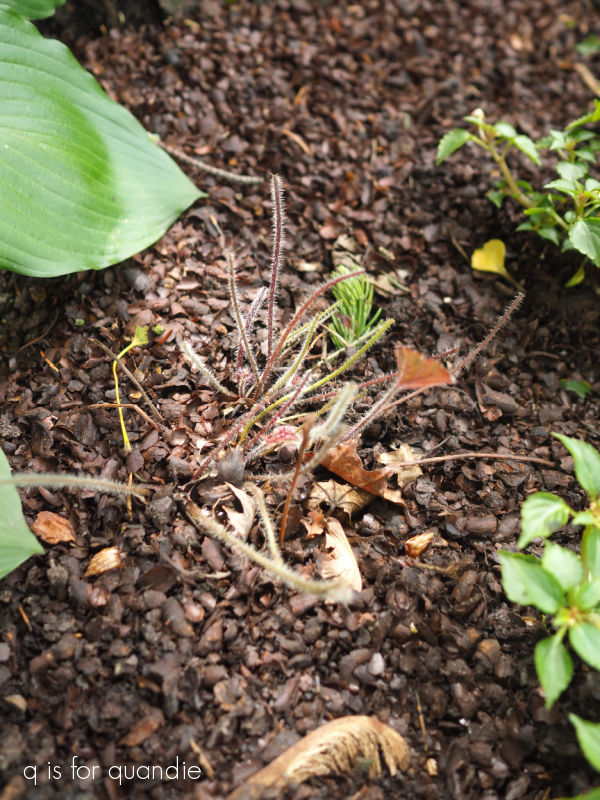
They do re-seed freely, and at first I thought that was a bit of a myth, but last week I realized I did have some seedlings where I planted the two plants last year.  They are about 3″ tall so far, so I don’t think that I could rely solely on re-seeding to have more verbena bonariensis next year.  I’ll be lucky if those seedling start to look good by the end of August.

But I sure do hope I can continue to find verbena bonariensis at the garden center in the coming years because I definitely have a place for them in my garden.  How about you?  Have you ever grown it?  Or, have you not even heard of it before?  Leave a comment and let me know.

never say never, garden edition.

Good morning from the garden!

One thing I’ve learned over the years is that I should never say never.  I once said that I would never use the Dixie Belle Secret Path color because it was too purple.

But then I did use it, and I loved it.

I also once said that I would never use the metallic gold transfers from I.O.D., but then I kept working with them and realized that they were much more versatile than I originally thought.

I also once said that I didn’t like yellow flowers and would never add them to my gardens.

I even went so far as to try and remove these yellow irises about 20 years ago.

But they were stubborn, and they came back.  And continued to multiply.

Now I rather like that pop of yellow over by the carriage house.

I have to admit, when my friend Jodie brought me some of the Evening Primrose from her garden I wasn’t sure I really wanted it.  But I put it in my shade garden, probably secretly thinking it wouldn’t do well there anyway because they like full sun.

But au contraire, they are flourishing.

When they are blooming (late June to early July) they look spectacular in the shade garden.

FYI, my shade garden does get late afternoon to evening sun, probably about 2 to 3 hours per day.

Next up is the Corydalis.

I purchased this plant at a garage sale, back when I used to do that.  As a sidebar, I no longer recommend buying garage sale plants unless you are absolutely sure the seller does not have jumping worms.  As I’ve mentioned here, I now have a raging case of jumping worms and it’s definitely possible they came from a garage sale purchase.  They could also have come in a batch of mulch that wasn’t properly heat treated.

Anyway, I purchased that Corydalis over a decade ago.  It blooms nearly all summer, and will grow in full to part shade.  However, be forewarned, it re-seeds itself all over the place.  I’m constantly pulling out Corydalis babies.  So if that’s the sort of thing that bugs you, don’t plant it.

I even added a pop of yellow to my fairy garden a couple of years ago with Golddust Mecardonia from Proven Winners.

Those little yellow flowers were perfectly scaled for a miniature garden.

Then there are the daffodils.  I’ll be honest, I really prefer tulips in pretty shades of pink when it comes to spring bulbs.

But I’ve given up on them since they seem to draw deer all the way over to my very suburban location to eat them in the spring.

Deer don’t like daffodils though, so here they are.

And I’ll admit, that bright pop of yellow in early spring is kind of a showstopper.

That being said, I did choose to plant some all white daffodils under the hydrangea hedge last fall.

So maybe I’m not quite a full-on yellow convert just yet, although I did put some yellow snap dragons in the garden this year.  I’m still waiting for them to bloom though.  I’ll have to wait until they get going before deciding whether or not I’ll plant them again in the future.

How about you?  Do you like yellow in the garden?  And if so, what are your favorite yellow flowers?  Leave a comment and let me know.

those wascally wabbits.

Good morning from the garden!

I think I’ve tempted fate.

Over the years I’ve voluntarily added a number of adorable rabbits to my garden.  This first one was a Goodwill find.

Unbelievable, right?  It’s rare to find such a nice concrete garden ornament at a thrift store.  And in fact, Goodwill had two of them that day and I bought them both.  I kept one, and sold one on.  I’ve yet to find another score as good as this one at a Goodwill.

I also have a 2nd concrete rabbit in my garden, and he was a garage sale find.

Isn’t he sweet?

I like to place both of the rabbits as though they are poking their heads up through the greenery in the garden.

I’ve also recently added another rabbit to the garden.

You could say that this was a Carriage House Sale find.  My friend Sue brought it to our sale and I snatched it up.  There was just something about it that really appealed to me.

I’ve hung him up on the outside of the potting shed above an old rake.

As much as I love these sweet faux rabbits, the real ones are starting to get on my nerves.

As you may remember, we lost our beloved cat Lucy a few months back.  It turns out that she was doing a pretty good job of keeping rabbits out of my garden (she was an indoor/outdoor cat).  In the end I think it was simply her very presence that kept them away, she certainly wasn’t up for chasing any rabbits in her later years.

Now that she’s gone, the rabbits seem to be celebrating by dining on any tender new plants that I put in.

So far I’ve found six plants that have been munched including a brand new sanguisorba that I recently planted (I put that green mesh around it after the fact, and as a temporary measure).

And here’s what’s left of one of my heucherella plants, but several more of this variety were also chomped on.

Apparently the cocoa bean mulch does nothing to deter rabbits.  As many of you have reminded me, cocoa bean mulch is toxic to dogs.  I should point out that many other things in my garden are toxic to dogs as well including Lily of the Valley, hydrangeas, daffodils and alliums.  So if you are a dog owner, you should always research anything you’re adding to your garden.  And you should also keep a close eye on your pets, especially if they are prone to chewing on things.

One way to deal with my rabbit problem would be to use a rabbit repellant like Liquid Fence.   I haven’t resorted to that quite yet because I hear that those sorts of products are really stinky, and I don’t necessarily want a stinky garden.  That being said, I may have to give one a try if my next solution doesn’t work out.

Which brings me to these wire mesh cloches that I purchased from Amazon.

I’m not sure I like the shiny black finish on them, although the color does sort of help them fade away in the garden.  I may give them another look down the road … perhaps a rusty finish using Dixie Belle’s Patina Paint?  We’ll see.  But for now I have to get them out in the garden a.s.a.p. to get those plants protected.

I purchased a set of six, so I guess that means I can save just six plants.  Right now the plants I’m covering are all short enough to fit under the cloches, and the heucherella will stay shorter.  But these cloches come apart, so if you have a taller plant you can remove that top section to allow the plant to pop through.

I’m wondering if once I cover these plants, will the rabbits just move on to other plants in my garden?  Only time will tell.

In the meantime, the plants are already bouncing back under their protective cloches.  Here is that sanguisorba after just a couple of days of protection.

Clearly I’m going to have to do some experimenting to see what works and what doesn’t going forward, but for now I’m happy with my rabbit proof cloches.  They seem to be keeping those wascally wabbits at bay.  I’ll be sure to report back at the end of summer on how they worked out.

gardening in miniature.

Good morning from the garden!

Although I just started my dollhouse reno last winter, I’ve been working in miniature in the garden for years now.

My fairy garden started out in a cracked birdbath.

That worked beautifully since the crack allowed for drainage.  We would take the bowl section of the birdbath off its pedestal and bury it in a big pile of leaves up against the house for the winter which worked well to protect the plants.

But then one spring we pulled it out to find it had fully cracked in two.  In addition, my sister had given me a cute little fairy house for Christmas, so my miniature garden really needed to expand.

So I moved it into an old rickety wheelbarrow a few years back.  There were some spots where it was rusted through, also providing good drainage for a fairy garden.

Although I piled about 12″ of leaves over it, and then covered it with burlap this past winter, I still lost the bulk of the plants.  Apparently last winter was hard on miniature gardens as well as the full sized ones.

Only three things survived, the tall Alberta Spruce ‘tree’, a Primo Arborvitae and a creeping sedum.  Everything else bit the dust, including the mini Japanese maple (I knew that one would be risky), a 2 year old creeping thyme, and all of my miniature hostas.

Oh well, that gives me the opportunity to try new plants.

That being said, I have found that ever since Covid it has been more difficult to find miniature plants.  I asked about it at one of the nurseries that used to carry lots of mini’s and they said their miniatures grower had decided to close up shop permanently during Covid.  I do wonder if most of the local nurseries all got their mini’s from the same grower.

So I feel like it was my lucky day a couple of weeks ago when I happened to come across a yard sale just a few blocks away from me where the proprietor was selling miniature hostas.

Hostas are classified as miniature if they stay less than 8″ tall when full size.  Of course, that would translate to 8′ tall in 1:12 scale, which would be rather large for a garden.  But you can keep them smaller by regularly dividing them.

And actually, it’s lucky that I have regularly divided my Feather Boa hosta, planting the extra chunks in the ground.  The ones in the fairy garden have died off the past two winters, but I’ve been able to replace them with divisions from the ones that are doing really well in the ground.

One mini hosta wasn’t enough for me though, so I purchased three new mini hostas for my fairy garden at the yard sale.

No. 1 is a Tears of Joy.

This one is only supposed to grow to 4″ tall, so it should be perfect for the fairy garden.  I have to admit that it’s a bit odd looking.  Well … let’s call it unique looking instead, OK?  I think it will look better once it fills in a bit.

Next up, a Pandora’s Box.

This one gets 4″ – 6″ tall and I’ve planted it just in front of a Golden Lemon Thyme.  Isn’t that variegation lovely?

And finally, I also grabbed a Frosted Mouse Ears.

This one can get up to 7″ tall, so we’ll have to see whether or not it looks believable in the fairy garden going forward.

It’s planted right in front of the Primo Arborvitae that survived from last year.  I moved it from next to the arbor to beside the fairy house this spring though.  I love how easy it is to transplant a tree in miniature, lol.  No heavy lifting required.

Although this variety, Thuja occidentalis Primo, can get up to 4′ tall, it grows slowly and should work well in the fairy garden for quite a few years. It’s also cold hardy down to -30°, which explains why it survived the winter in a wheelbarrow.

I added a Myrtle topiary to the fairy garden this year as well.

It’s only hardy down to 32° though, so I will have to pot it up and bring it in the house for the winter.  I just hope I remember to do that before our first frost.

Ultimately I also found an online source for fairy garden plants called Two Green Thumbs.  I ordered two plants and a few other miniatures.

The plants are a Dusseldorf Seathrift (Armeria maritime ‘Dusseldorf’) …

and a variegated English boxwood (Buxus sempervirens ‘Variegata’).

I’ll be giving him a bit of a prune to shape him up, but I thought it would be wise to let him settle in a bit first and get over the shock of transplanting.  Plus, we are under a heat advisory with temps in the upper 90’s, so not weather for pruning.  Seems somewhat ironic seeing as I had to turn the heat on last week when we didn’t even make it out of the 50’s one day.  Welcome to Minnesota.

I also purchased those three little faux ‘rocks’ that you see in the photo above just below the boxwood, a small birdbath statue …

and a sweet little bistro set.

This set is actually intended for the dollhouse porch rather than the fairy garden though, and it will be getting some sort of makeover.  I’m not sure what yet, but plain white feel a bit boring for me doesn’t it?

Back to that yard sale with the miniature hostas, I also purchased a pair of little watering cans there.

But of course I couldn’t leave them simply plain like that, I had to ‘quandie-fy’ them.

I painted one of the watering cans in Dixie Belle’s Drop Cloth and the other in their Holy Guacamole.  Then I added some knob transfers from re.design with prima.  If you aren’t familiar, the knob transfers are meant to fit on those round wooden knobs that would go on a dresser or a cupboard door.

But I have found that they work beautifully for miniatures.  For example, I used them on my dollhouse dining chairs.

A couple of them worked perfectly for these watering cans too.

I can’t really pick a favorite.  I like the Drop Cloth version (above), but I really like the Holy Guacamole version as well.

But that’s OK, I have a home for both.  The green one will go in my fairy garden, and the white one will go on the porch of my dollhouse.  More on that in a future post.

I’m curious, do you have any favorite plants that work well as a miniature?  And which watering can is your favorite, green or white?  Leave a comment and let me know.

no more whining.

Good morning from the garden!

Recently I came to the realization that I need to quit whining about my garden and its jumping worms, pathetic lilac hedge and all the plants that died over the winter.

I’ll admit that I was worried earlier this spring.  Especially when we came back from our trip out east to find the garden bone dry, with plants that were very slow to break dormancy, and weeds everywhere.

But as it turns out, it was the freakish hot and dry weather while we were gone that was the problem, not the jumping worms.

Flash forward a month and add in some much cooler weather, a fair amount of rain, a few plant replacements and a bit of weeding and things are looking really good right now.

If you aren’t familiar with my gardening style, I like to call it ‘jam packed’.

I prefer not to leave any space for the weeds to take hold.

I know not everyone likes this look, and I also know that it can lead to problems with increased insect pressure and plants that get crowded out.  But it’s still my preferred style.

Most everything in my shade garden is doing well, and this is the spot where I found the most worms last year.

As I mentioned recently, the Forget-Me-Nots (low ground cover with blue flowers in front left) are having their best year ever.  Clearly they aren’t being impacted by those pesky worms.

Neither are the hostas.

Although I did lose a few hostas over the winter, and there are another several that are coming up very slowly, the rest are looking larger than ever and super healthy.

FYI, that plant in the background that looks sort of like a Japanese maple (seen from both sides in the above two photos) is actually a Morden Golden Glow Elderberry.  Laura of Garden Answer recommended elderberry as a good substitute for Japanese maples when you live in a cold climate.  Visitors to my garden often do think it’s a Japanese maple.  Some elderberries can grow to 10′ tall, but this variety is more compact and only grows to 4′ to 5′ tall and wide.  Also, since I have this in full shade, it will likely remain somewhat smaller.

My Lakeside Dragonfly hosta is looking especially nice right now.

I am trying a few different things to mitigate worm damage in this bed.  First, I fed everything this spring using Espoma’s Plant Tone.  It’s an organic, all purpose plant food and I simply sprinkled it on top of the soil early this spring before the plants were up.  For best results you are supposed to work it in to the top 4″ of soil, but in existing beds like mine you can just sprinkle it onto the soil around the dripline of plants and then water it in.

Second, I’m mulching this area using cocoa bean shells.

There is some anecdotal evidence that jumping worms don’t like cocoa bean mulch.  The pros to cocoa bean mulch; it has a nice dark color and it makes your garden smell like a chocolate factory.  The cons; it’s expensive and it will get mildewy in wet weather (which is definitely what we are having this week).

Finally, I’m hand pulling worms when I find them.  And yes, that’s as gross as it sounds.  The recommended disposal involves sealing them in an airtight container, setting it in the sun for a bit and then tossing it.  So I’ve been stocking up on empty mayo jars, sour cream containers, etc all winter (with the help of nnK and her mom Judy).

Hopefully one or all of these extras will help my garden stay happy this summer.

You may remember that I mentioned in an earlier post that most of my lamium didn’t survive the winter.  That was a bit of a bummer, but it gave me the opportunity to fill in some bare spots with annuals this year.  So I added some bright pops of color with some impatiens.

I know that a lot of the popular gardener influencers consider impatiens to be passé, but then I’ve never been one of the cool kids anyway.

But wait, now there is one small patch of that lamium coming back!

I’m so happy to see it since I’ve been scouring the nurseries trying to find more to put in and haven’t had any luck.  Sure, they have lots of other varieties of lamium, but I can’t find this fabulous chartreuse variety.  I had two different chartreuse lamiums in my garden, the Lamium maculatum ‘Lemon Frost’ which has a more pronounced white center (and so far none of that is coming back).

And I believe my older plants were Lamium maculatum ‘Aureum’.

As you can see in the photo below, I had lots of it last year.

I plan to baby that little patch that is coming back, and hopefully I can start to divide it and spread it around again soon.

With that I’m going to head out into the garden now to pull some weeds.  But hey, if you have any tips on controlling jumping worms, please be sure to leave a comment!  And even if you don’t have any tips, let me know how your garden is looking so far this season.

the versailles of brandywine.

Continuing on with my posts about our trip to the Brandywine Valley back in May, today I’m sharing our visit to the Nemours Estate.

This is yet another property that was once owned by a duPont.  The main house was built in 1910 and has 77 rooms.  There are 200 acres of gardens and those near the house were modeled after Versailles.

The Long Walk runs between the house and the reflecting pool and it features the symmetry associated with formal French style gardens.

There are fountains and statues including this guy in gold.

He reminded both Mr. Q and me of our visit to Peterhof in St. Petersburg, Russia which is sometimes referred to as the Russian Versailles, so that makes sense.

We chatted with one of the Nemours gardeners who explained that this is a French style of tree pruning called pollarding …

It certainly creates an interesting look, although I’m not sure I like it.  Those trees look like I did in kindergarten when my mom cut my bangs right before school pictures.  Not a good look.

There is a Parterre Garden that was prettiest when viewed from the 2nd floor of the house (I assume that was intentional).

This next spot was probably my favorite in this garden.

I think that tells you that I’m not really a fan of formal French style gardens, I prefer something a little less grand.

Now, French style interiors on the other hand …

shades of pink or pale blue and lots of gold.  So pretty!

The French had it going on when it came to painting furniture.  Check out this piano.

That could be some serious inspiration for adding some embellishments in gold to a painted piece.

It was interesting to learn that the plaster ceiling in the Reception Hall was originally painted to look like wood, but later painted in the French style.  They’ve left a section to show that original wood look, which must have made the room much darker.

All of that fanciness aside, I think my favorite rooms were the kitchen, pantry and bathrooms.

Those copper pots are just gorgeous.

I don’t know what it is about these utilitarian rooms that appeals to me so much.  I’m certainly not normally a fan of housework.

Maybe it’s just that in a sense they feel much more obtainable to me.  I have pretty ironstone platters on display in my own home for example.

I love the floor to ceiling tile in the bathrooms, and I really like the sink below too.

Although the Nemours Estate was not my favorite of the duPont properties that we toured on our trip (I preferred both Longwood and Winterthur), I definitely think it’s worth adding to your itinerary if you ever find yourself in the Brandywine Valley.

And after touring the estate you can stop off at the Charcoal Pit, ‘home of Delaware’s best burgers and shakes since 1956’, for a late lunch.

Although we didn’t try the burgers, we did have some amazing shakes.  Mr. Q also had the Rueben Dog …

but I stuck with a basic chili dog.

OK, hot dogs for lunch was a stark contrast to a morning spent viewing the opulent grandeur of the Nemours Estate, but those were some tasty dogs!

grandma’s peonies.

Good morning from the garden!

I think right now, early June, is my favorite time in the garden.  Everything looks fresh and new.  The fern bed is lush and green.

  There isn’t any insect or storm damage on the hostas.

  Nothing is suffering from drought.  And best of all, the peonies are blooming!

Most of my peonies are planted out back behind the carriage house in my cutting garden.

I put them there so that I wouldn’t feel bad about cutting them and bringing them inside.  They aren’t there to look pretty in a garden, they are there to harvest for bouquets.

This year has been the perfect peony season because the weather has been relatively cool, our highs have been in the 70’s, and even just the 60’s on a few days.  This cool weather definitely helps the blooms last much longer.

I can’t tell you how often we’ve gotten hot spells just in time for the peonies to open, and then they last just a few days.

But this year they are sticking around a bit longer, they even last longer in a vase indoors since we’ve been getting down into the 50’s at night and we have turned our heat off.  The house stays nice and cool all day.

Did you know that peony plants are remarkably long lived?  I’m not talking about the blooms, but about the plants themselves.  They can live for 100 years or more, and once established they basically thrive on neglect.  I can vouch for the neglect part since I don’t really do much of anything for those peonies behind the carriage house.  I really even only weed that bed once or twice a season.

I also now have proof of that of sorts.

Yesterday my sister and I went to the Nokomis neighborhood garage sales in Minneapolis.  We like to go to that one because both of our parents grew up in that neighborhood.  We always make a point of driving by their old houses.

This year we got lucky and the people who live in my mom’s parent’s old house were out and about.  My sister, who definitely isn’t shy, rolled down her window and said hello, explaining that we weren’t weird stalkers or anything, just making our annual pilgrimage to grandma’s house.

Turned out that the current owners are the very people that purchased the house from our grandparents over 45 years ago!  They even remembered their names.  I mentioned how happy my grandmother would be to see that they had continued on having a beautiful garden (I’m pretty sure I inherited my gardening skills from that grandmother).

They invited us to take a tour of the gardens, and even to come inside to see the house.

As I was admiring one of the peonies in the garden, the new home owner said “Oh, that one was here when we bought the house”.

That means it was planted by my grandma!  And I’m sure she would have planted it long before they sold the house.  I believe they’d lived in the house for more than 50 years themselves, so this peony could be nearly 100 years old.

How fantastic is that?  And how special to see that my grandma’s peonies are still happily blooming away in her garden.

Now I wonder how long the peonies out behind the carriage house will be there.  Hopefully at least 100 years or more too!

a visit to winterthur.

Remember that time I went to Charleston in April to see the azaleas in bloom?  And then there was a huge storm the night we arrived that knocked the blooms off most of them?

Well, who would have expected that a trip to Delaware in May would make up for it?

I have to admit, it never even occurred to me that Delaware would be full of azaleas, but welcome to Winterthur.

Winterthur is the creation of Henry Francis du Pont.  It includes a massive 175 room house that he built to house his ginormous collection of American decorative arts (over 90,000 items).  There’s no way this guy could pretend to be a non-collector 😉

Not only did he collect American decorative arts, he also collected plants including azaleas.

And as you can see, they were in their full glory while we were there.

The ticket for Winterthur includes a 30 minute tram tour of the gardens, so we took advantage of that to get the lay of the land.  Afterwards we headed back to explore a few of the areas that I wanted to see up close starting with the Azalea Woods.

They were beautiful and definitely made up for the lack of blooms in Charleston.

The Peony Garden was our next stop.  The flowers were just beginning to open, but this single variety was in full glory.

The Quarry Garden was filled with blooming primroses.

It makes me want to add more of these to my own garden, currently I have just one small plant.

Unfortunately they were doing some restoration work in this garden while we were there so we couldn’t get any closer.  We had to settle for looking down on it from above.

The Enchanted Woods were a later addition to Winterthur.

This area was added about 20 years ago to encourage more families with children to visit.

I think I preferred the authenticity of the reflecting pool.

Next up was exploring the rest of the area around the house, if you can call a 175-room building ‘a house’.

I was fascinated by this rain water tank, at least I’m guessing that’s what this is.

As you can see, the downspout goes directly into that box so I assume it’s meant for storing rain water.  And just check out the concrete lions that are holding up the box.  No decorative detail was spared on this functional item.

We also took a self-guided tour inside the house where you can see just a handful of the 175 rooms.

Several of the rooms were decorated with hand-painted wallpaper.

And there were lots of spaces that were simply designed to display collections (because let’s face it, we can’t really call these non-collections can we?).

This room was just for candlesticks.

To be fair, I guess one could say that my own pantry is also mainly just a space for displaying collections 😉

As if the house and gardens weren’t enough, there is also a museum at Winterthur.  It’s a small museum, but by the time we got there we were getting pretty worn out so it was lucky there weren’t too many exhibits to see.

I really enjoyed the one called “On Tour: Lafayette, America’s Revolutionary Rock Star“.

I have to admit that I didn’t really know much about Lafayette prior to this trip.  Of course, I’d heard the name, and I knew he fought in the Revolutionary War, but that was about it.  Check out the link above to learn just a little bit about him and his ‘farewell tour’.

There were also a couple of exhibits in the museum that I found very relatable such as the exhibit about the Dominy’s, a family of skilled woodworkers that made furniture among other things.

This display pointed out all of the details that went into creating this piece of furniture.

There was also an interesting exhibit about furniture restoration.  This 17th century cupboard had been significantly altered over time.

The bottom section had been removed to reduce its height so that it would fit in a smaller room.  It has now been restored to its original design.

This next piece was once thought to be two separate pieces that had been ‘married’ together, so the two pieces had been separated.

It was only later that the conservators determined that no, these two pieces did belong together.

Another exhibit explored the use of toxic pigments in decorative items such as books, wallpaper and fabrics.

Arsenic was used to create the vibrant green on the items shown above.

In case you haven’t already figured it out, I will warn you that it takes the better part of an entire day to visit Winterthur and see everything there is to see.  We never did find the collection of soup tureens that I wanted to see, but in the end we were too worn out to look for them.  Luckily there is a cafe with grab-and-go sandwiches and salads, so we were able to get some sustenance before tackling the museum exhibits.

I highly recommend a visit though, I think Winterthur gives Longwood Gardens a run for their money as my favorite place we visited during our recent trip.  If you ever are in the Brandywine Valley area be sure to visit both of these!

rolling with the punches.

Good morning from the garden!

Are you ever plagued by indecision?  Afraid of making the wrong choice, or just unable to make up your mind?

Well, I’ve gone almost 6 years without being able to decide what tree to put in our front yard, or really even whether or not I wanted to plant a tree again.

Let’s recap.

When we moved into our house 35 years ago or so, there were two trees in the front yard.  A maple to the right, and a black walnut to the left.  My sister was visiting the summer that the maple came down.  We were sitting on the front enclosed porch watching a storm roll in when it came crashing down.  Lesson learned; when the warning sirens go off, take shelter in the basement or at least an interior room.

The tree missed our house, but it was a close one.

Back then we ended up also removing the black walnut (it was not a great tree, dropping those huge walnuts all over the yard) when we had the fallen maple cleaned up.

I replaced that maple with a 2nd maple, and the walnut with a flowering pear tree.  Here is a photo taken in autumn when the maple had its fall color.

I loved that tree.

Flash forward to 2019.  The maple was looking really good and finally serving its purpose of providing some shelter from both street noise and from the street light directly across from our bedroom windows.

Then another storm took out maple no. 2.

Ugh!

Once again, I chose to have the pear tree taken down when the maple got cleaned up.  It had gotten rather misshapen next to the maple and it didn’t look good on its own.  You can sort of see that it was mostly bare on the right side of it in the photo above.

Then came five years of being unable to decide what to do next.  I really wanted to plant a Princeton Gold Maple.

I love that bright lime green color.

But did I really want to put yet another maple in that spot?

I thought about doing a Honey Locust instead.  It has a similar golden color, plus the added benefit of tiny leaves that don’t really need to be raked up in the fall.  But I just couldn’t pull the trigger on it.

I finally decided that I would just take a chance on another maple, so I started looking around for the Princeton Gold.  I found one at Abrahamson’s Nursery two years ago, but the price tag was $250.  Yikes!  That seemed a bit much for a tree.

So once again, I put off making a decision.

However, the other day I headed over to Fleet Farm to see what they had in their plant section and lo and behold, there was my Princeton Gold Maple … and only $149.  I bought it on the spot, even though that meant putting the top down on my VW Bug convertible and very carefully driving home with a tree sticking up out of my car.

  Will it be three time’s the charm, or three strikes and you’re out?  I guess time will tell.  But at least I’ve made a choice!

In other garden news, I’ve started filling in the some of the bare spots in my garden that were the result of winter kill.

I lost three brunnera next to the potting shed, and I’ve replaced them with Heucherella ‘Pink Revolution’.

I lost my ‘Rozanne’ perennial geranium, or Cranesbill, under the ‘Limelight’ hydrangeas, and I liked those so much that I replaced them with more of the same.  Last year these bloomed all summer and up until the first freeze for me.

Then I addressed the large dead spot next to the front porch.  I started by replacing the ‘Sun King’ Japanese Spikenard.

Then I added three ‘White Diamonds’ fern leaf bleeding hearts.

They have a lovely blue green foliage and white flowers.  Fern leaf bleeding hearts like partial shade, and this spot is what I would consider full shade.  But I have another fern leaf bleeding heart in this area and it has done really well in this amount of shade.  It’s one of the first things to bloom in spring and then it keeps blooming all summer.

I’m hoping the white ones do as well.

I also added in some ‘Unique Ruby Red’ astilbe just behind the fern leaf bleeding heart.

Up until this year I had a white astilbe in this spot that was loving its life.  So hopefully this replacement will thrive, and hopefully we won’t have another killer winter for a few years.

Last up, I replaced the hostas that didn’t come back with some freebies from my neighbor nnK’s mom’s garden.  Judy was kind enough to tell me that I could divide any of her hostas and help myself to the divisions.

I started with this pretty little one with rounded leaves.

And I also chose this one that is a little bit larger and had pointed leaves and a bit more variegation.

So, how about some progression shots?

Here is how this space looked last summer.

So fab!

And then nearly every one of those plants died over the winter with the exception of the ‘Stiletto’ hosta that you can’t actually see in the photo above because it’s behind a larger hosta.

Here’s how this space looked a week or two ago.

So sad!

I just don’t know what happened here.  As I’ve mentioned before, I do have jumping worms in my garden.  So it’s possible this is jumping worm damage.  However, this spot wasn’t particularly loaded with the worms last summer.  I definitely had other spots in the garden that were worse, and they are doing fine this spring.  Thank god all of my gardens don’t look this bad!

And here is how it looks now.

By the way, all of those extra pops of pink are impatiens.  I decided to fill in with some annuals this year since the perennials are not going to fill out for at least a couple of years.

You may also have noticed that I am using cocoa bean shells as mulch here.  I read that there is anecdotal evidence that jumping worms don’t like them, so I’m giving them a try.  I’ll report back at the end of the summer with any results I notice.

In the meantime, today’s gardening lesson?  You have to be able to roll with the punches.  You just never know when Mother Nature is going to take you down.  You just have to dust yourself off and start over again sometimes, right?

vintage garden style.

I recently picked up a copy of Better Homes & Garden’s Vintage Garden Style magazine at the supermarket.

This is one of those special publication re-print sort of magazines, ‘back by popular demand’.  Which tells me that people still love vintage garden stuff as much as I do.

As I’ve been getting ready for the Carriage House Sale (which starts tonight!), I realized that ‘Vintage Garden Market’ is definitely the theme of our sale.

We have quite a few items from the various categories featured in the magazine starting with watering cans.

This first one is a no-brainer.  Of course we have vintage watering cans …

and some that are maybe not so vintage.

Next up, vintage enamelware.

Yep,  we’ve got this too.

The article in the magazine on collecting (or non-collecting in my case) vintage garden books really struck a chord with me.

There were so many lovely books featured.  Now I’m tempted to be on the lookout for vintage garden books myself.

And Sue brought a few for the sale.

We’ve got a few newer garden books too!

There was also a feature in the magazine on filling unique vintage items with succulents.

We have quite a few wooden totes like the one shown above that you could fill, plus any number of other vintage pieces that would be perfect as succulent planters.

For example, I’ve decided to sell on my antique newspaper roller that I used to plant with succulents myself.

I loved the look of the succulents in rusty iron urns shown in the magazine …

And I just happen to have a very similar faux rusty urn for sale …

along with a bunch of other rusty pieces of salvage for the garden like these old iron headboards.

I also am selling this rusty lady …

Remember when I purchased her in bright white?

Doesn’t she look so much better rusty?

FYI, I use the Dixie Belle Iron Patina Paint with the Green Spray to achieve that rusty look.

There’s another fun article in the magazine about giving an old structure a new life as a potting shed.

While I don’t actually have an old shed for sale, I do have one in my back garden and if you come to the sale you are welcome to pop your head in and check it out.

I recently recovered the seat of my wicker chair with some gorgeous vintage bark cloth that I purchased at my friend Lisa’s sale (one of these days I really have to share her sale with you).

Not that I didn’t love the bark cloth that was previously on the chair, but I needed to scavenge that for a chair that I am including in my sale.

The florals on it were perfect with the Miss Mustard Seed Apron Strings milk paint color on the chair.

By the way, there are three different shades of pink in that photo from three different brands.  The chair is in the Apron Strings (read about that original makeover here), the French flower bucket is in Dixie Belle’s Apricot (read about that project here), and the oval lidded tin on top of the box is painted in Fusion’s Little Piggy (read about that paint job here).

We’ve got a slightly bigger selection of pink/floral items this year.  I feel like the floral trend is coming back around, what do you think?

Although this next article doesn’t specifically pertain to items at our sale, I still thought it was worth a mention.

It features 7 tips about shopping at a vintage market and the photos are all from the Oronoco Gold Rush held at the end of August about an hour south of the Twin Cities.  I’m sure that most of my local readers have been, right?

I suppose some of the tips might apply to my sale, especially tip no. 6.  Love it?  Buy It Now!  Because if you don’t grab it quick, someone else will.

As I mentioned, the sale starts tonight from 5 pm to 8 pm.  We’ll also be open tomorrow morning from 9 am until the noon whistle sounds in North St. Paul.

We are accepting Venmo and Cash only.

Hope to see you local readers there!