how chippy is too chippy?

Thanks so much to everyone who took the time to leave a comment regarding the question of drawer pulls last week.  Pressed brass drawer pulls, should they stay or should they go now?  If they go there will be trouble, if they stay it will be double … is anyone else singing along?  For those of you not old enough, that song is by The Clash and was written in 1981.  I’m pretty sure it wasn’t about drawer pulls though.

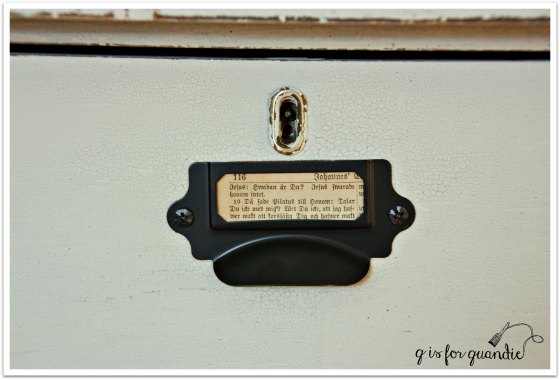
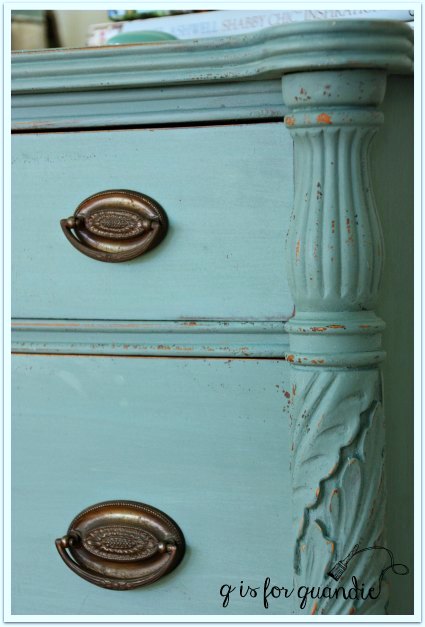
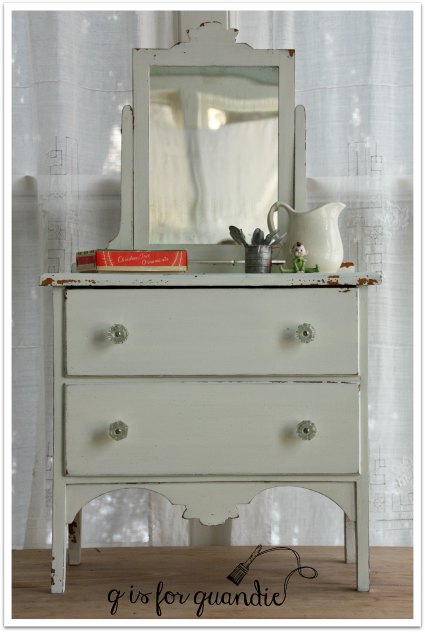
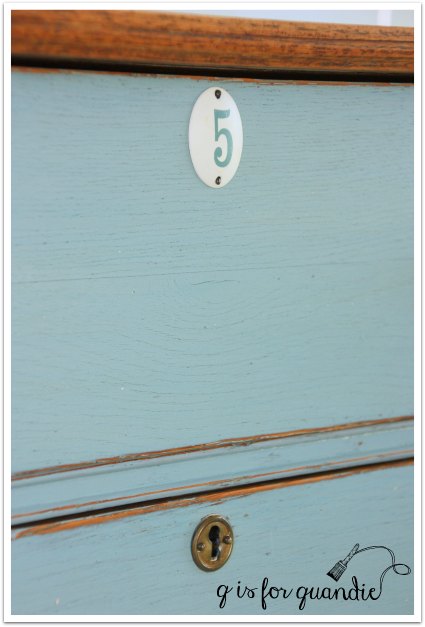
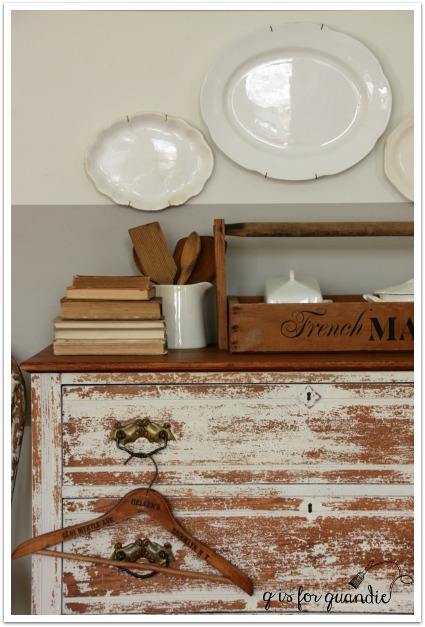
Well, to clear up any mystery, here are the actual drawer pulls in question.

chippy title

And I’m guessing that some of you might be tempted to think that was a ‘before’ picture, but no, it’s not.  Thus leading to today’s question.  How chippy is too chippy?

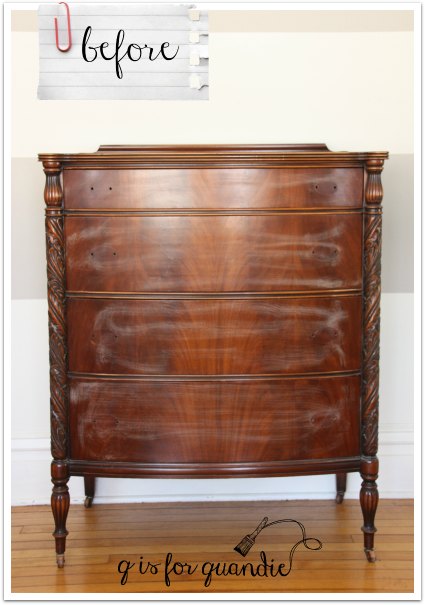
Let’s start at the beginning though, shall we?

chippy before

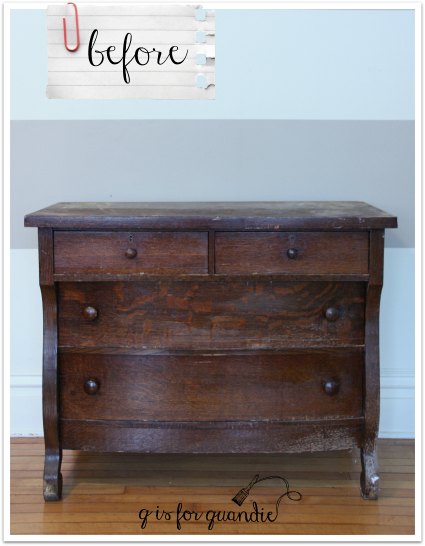
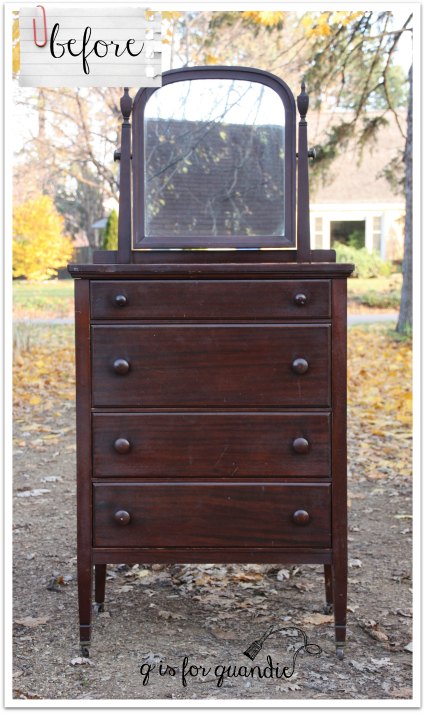
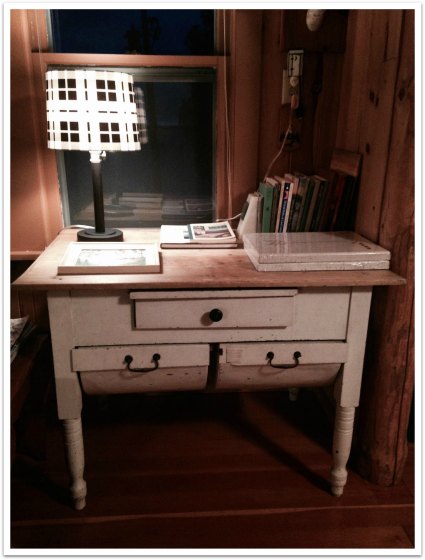
A week or two ago I found three dressers in one day on craigslist.  Two were even right here in my own hometown, which was pretty awesome.  It was also Mr. Q’s day off, so he was free to run around picking them up.  In the end, we only purchased two of them.  The third was a little overpriced and the seller wasn’t budging on the asking price, so Mr. Q passed on it.  This dresser is the first one he purchased that day.

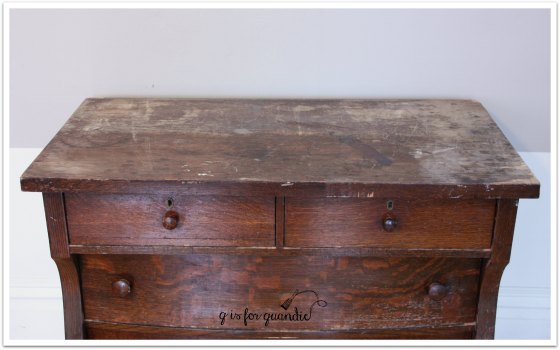
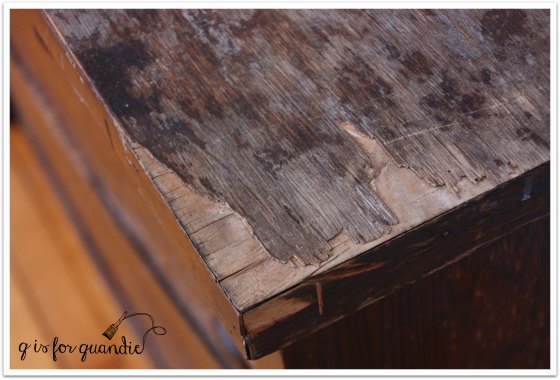
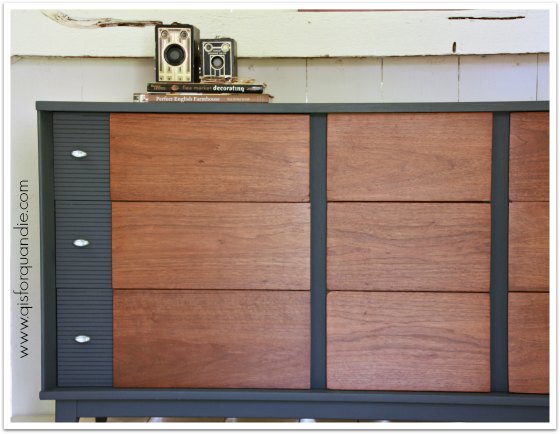
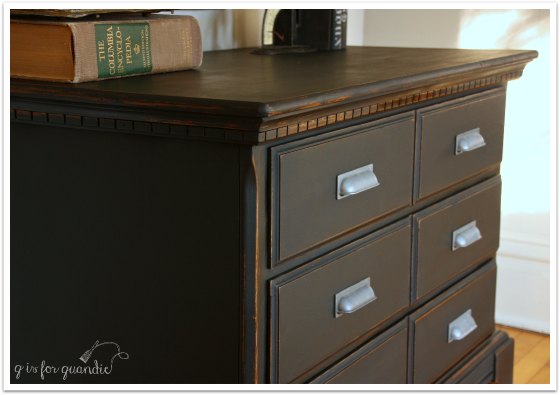
As you can see, it had that ugly orange-y/reddish stain.  I am not a fan.  Job no. 1 was to strip the top and then wax it.  Easy enough.

chippy top

Turned out beautifully.

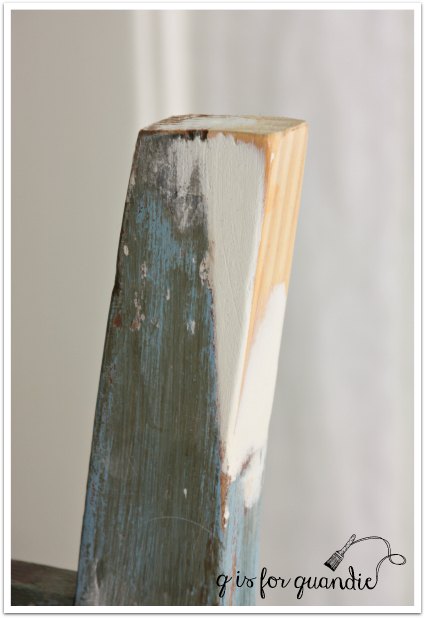
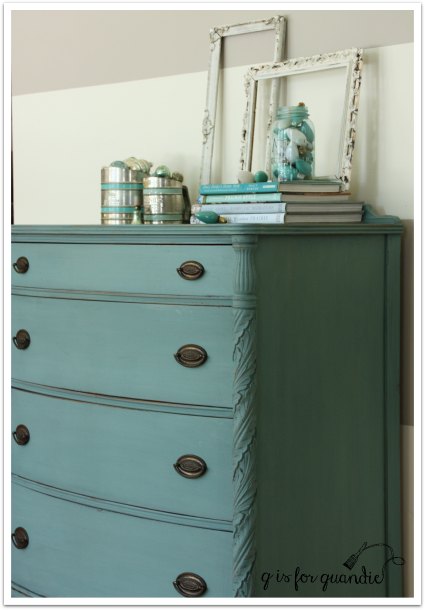
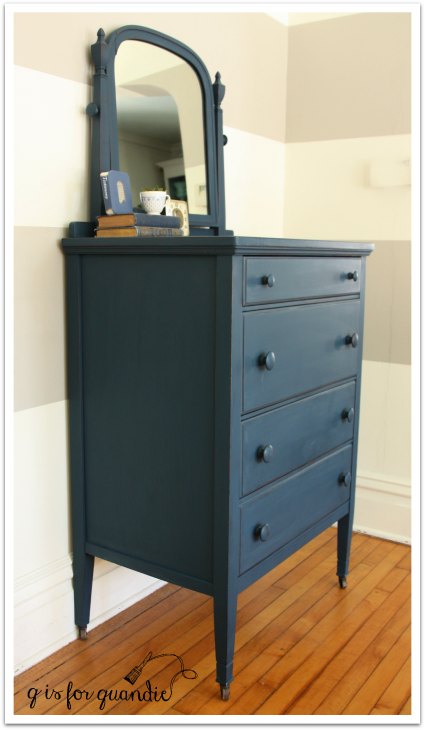
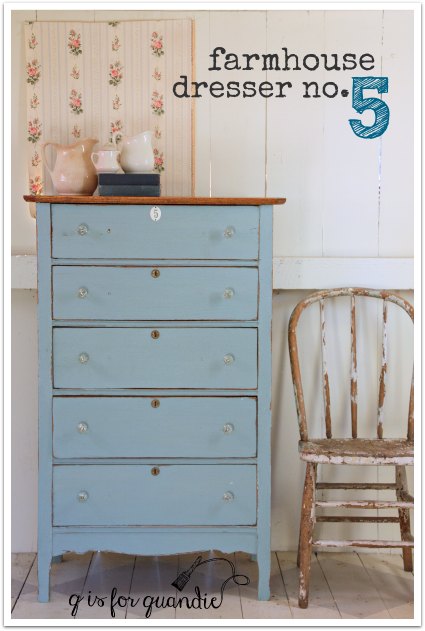
Next step was to paint the body in Miss Mustard Seed milk paint.  Those of you who follow Miss Mustard Seed have probably been reading about the new color she has coming out, Farmhouse White.  I was so wishing I had that color for this dresser!  But no, I am just impatiently waiting for it like most everyone else.  Meanwhile, since I’d had such good luck with the Marzipan and leaving it unwaxed (on the book page dresser), I chose to go with that color again.  I was aiming for a chippy, vintage farmhouse look, so I opted not to pre-sand.  I did wipe the dresser down with some TSP substitute though.

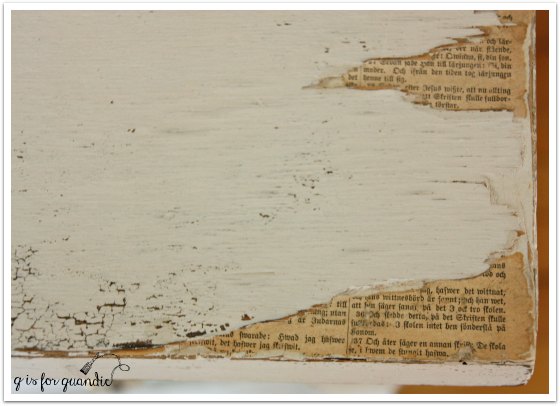
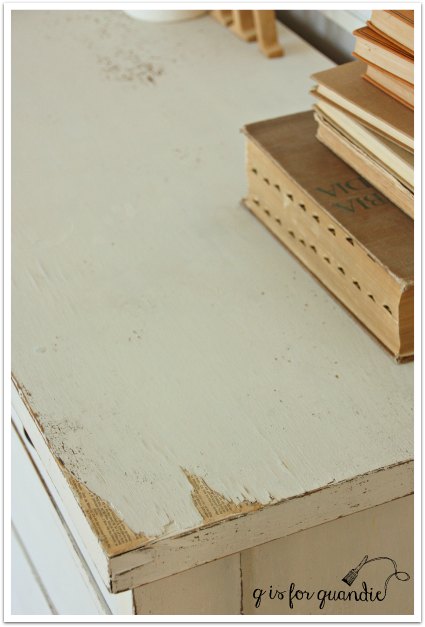
I have to say, even after having painted, let’s see, maybe close to 100 pieces of furniture in milk paint, I still often can’t predict the end result.  I suspected I would get some chipping.  I wanted plenty of chipping.  What I got was A LOT of chipping.

chippy dresser 1

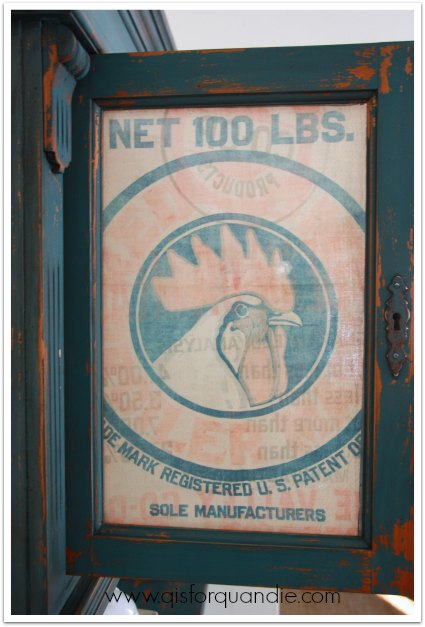
Personally, my heart still skips a little beat whenever I see an awesomely chippy piece of furniture.  One of my own favorite pieces is this chippy cupboard that resides out in my photo cottage.

studio cabinet inside lower

Recently I saw a very similar cupboard (much taller, but the doors were missing) for sale at my local Bachman’s and the price tag said $1,000 (Maplewood location in case any of you locals want to rush out and buy it).  No lie.

So when I saw how chippy this dresser turned out, I thought it was pretty fab.  My sister wasn’t so sure.

chippy corner

I could have opted to sand this all down to the wood and start over.  I have done that before and in general once you do the sanding necessary to take all of the paint off, the next coats of paint tend to adhere pretty well (not always, but generally).

But I was kind of loving the chippy.

chippy angle

When my friend Meggan dropped by to pick me up for some thrifting, she voted a resounding yes on the chippy as well!  So how about you?  Chippy yes or chippy no?

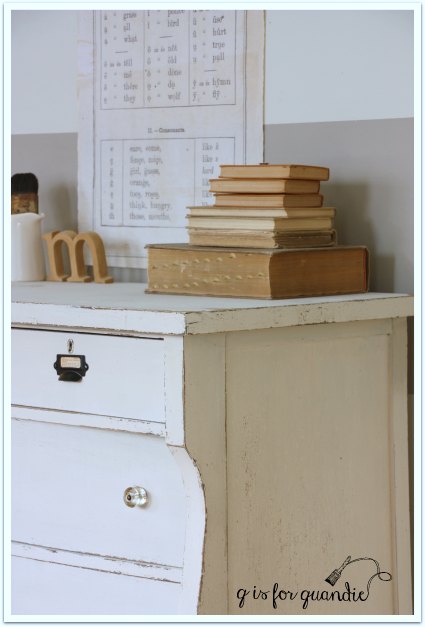
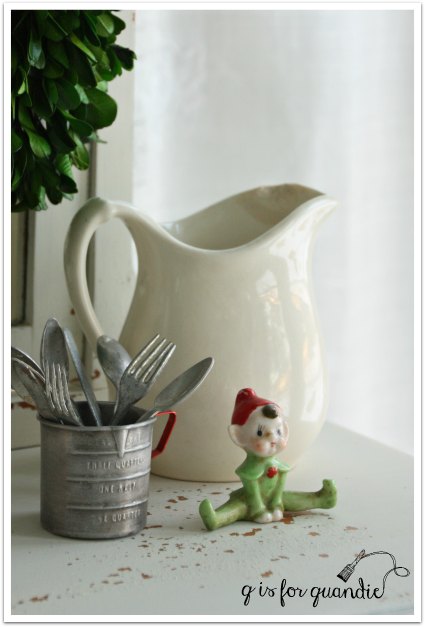
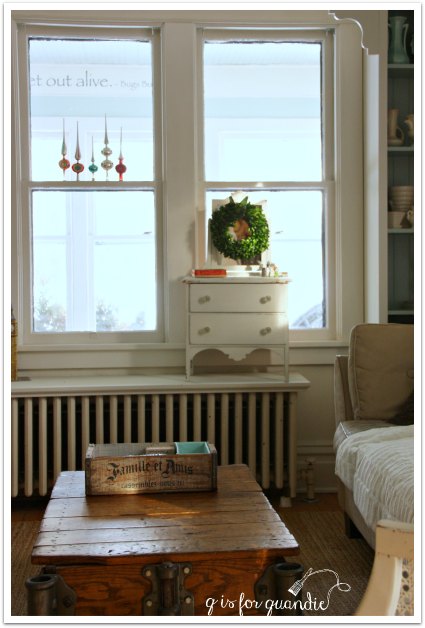
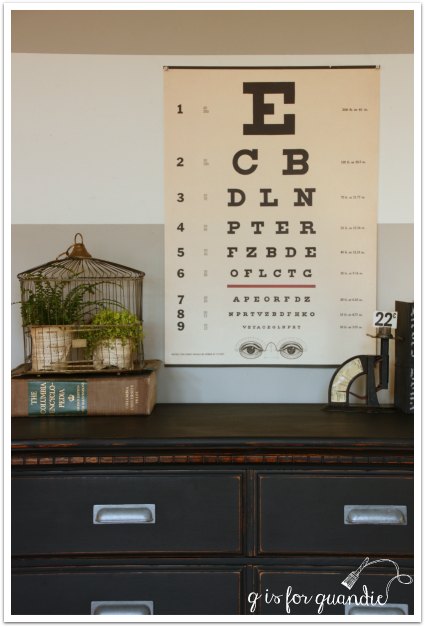
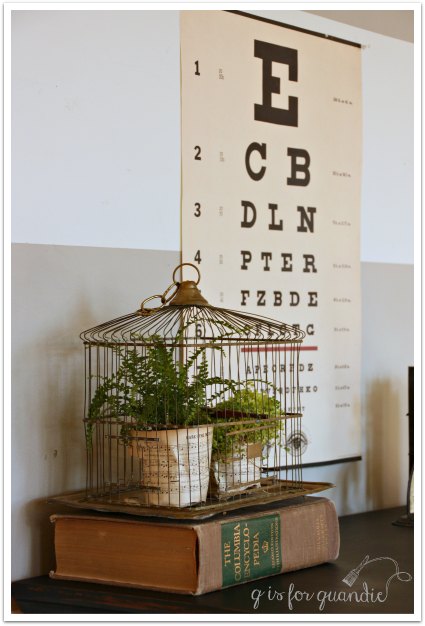
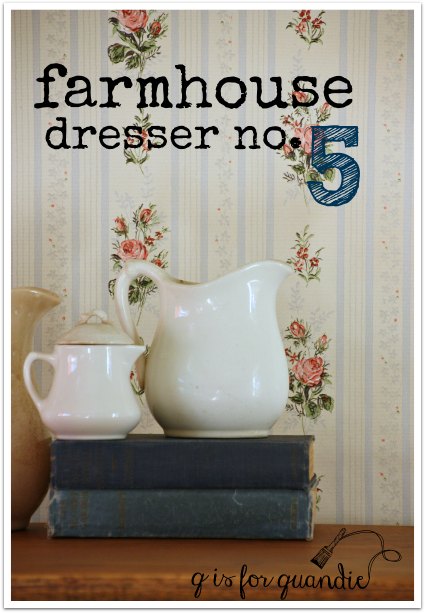
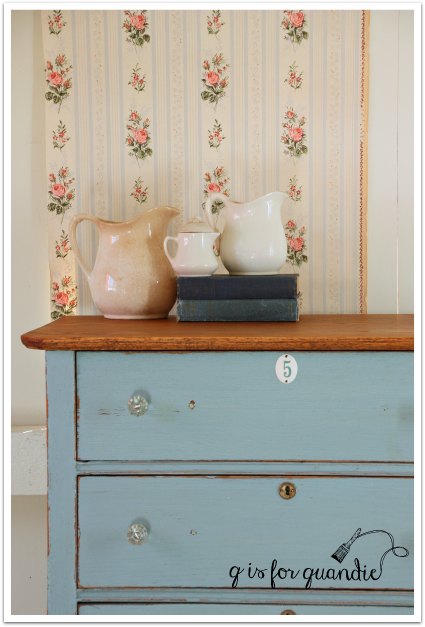
Lots of ironstone seemed like the right choice for staging this dresser.

chippy staging 3

chippy staging 1

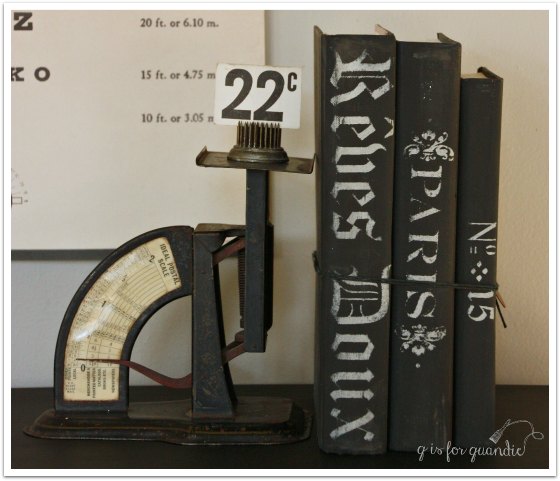
Along with some old books and wooden utensils.

chippy staging 2

As for the drawer pulls, there were a couple of comments left on my last post about them that really made sense to me.  Kim made a comment about creating the look I want with the dresser and then deciding on the hardware.  And Nikkii’s comment about choosing a style really clicked with me.  I realized that this dresser was going to be vintage farmhouse all the way!

chippy drawer pulls

I think the existing pressed brass drawer pulls totally work with the chippy, vintage farmhouse vibe of this dresser.  I hope you agree!

chippy farmhouse dresser

This dresser is available for sale by the way.  If you are local and interested, feel free to leave a comment and I will be happy to email you with the details.

feeling blue?

Feeling blue?  I know I am.  Color-wise anyway!

feeling blue title

Who remembers these little chairs that I picked up at a lunch time garage sale last summer?

lunchtime finds

I’ll admit I wasn’t too keen on purchasing them, but my co-workers Sue & Cathy were with me and they talked me into them.

They were in pretty rough shape.  I painted the one that didn’t need any repairs right away in Miss Mustard Seed’s Artissimo, maybe you remember it?

blue chair on the wall 2

Then I hit a bit of a wall because the other two chairs were pretty wobbly.  One of my good customers has expressed an interest in having these and she has a passle of darling little children.  I didn’t want the chairs to fall apart underneath them!  I knew I had to shore them up, but I kept putting it off.  Then the other day I pulled them out thinking they would make the perfect winter project.  Easy enough to work on in the house.  As it turned out, they needed more repairs than I realized.  One was even missing a crossbar at the bottom.  These kind of repairs are ‘Ken territory’.  So I called him up and asked if he had time to work on them.

Here’s what I love about Ken.  I sent these home with him and he didn’t just do a band-aid kind of repair job.  Oh no.  He completely took them apart and then glued them back together bit by bit.  He also replaced the missing cross bar …

feeling blue repairs 1

And he repaired a leg that had a chunk broken off at the bottom.

feeling blue repairs 2

I really hadn’t even noticed this problem, but Ken saw it and fixed it because when he does a job he does it right.  Do you think that is beginning to be a lost art?

Thank to Ken, the chairs are now structurally sound.  All I had to do was add the ‘pretty’.

feeling blue 1

My plan from the start was to paint each one in a different shade of blue from Miss Mustard Seed’s milk paint line.  In addition to the Artissimo, I also painted one in Flow Blue

feeling blue flow blue

and one in French Enamel

feeling blue french enamel

 I knew that I was going to see bits of the original blue of these chairs peeking through my new paint, so I thought varying shades of blue would work well.

feeling blue flow blue seat

feeling blue phone

Seeing these chairs all together gives you a good idea of the differences between these Miss Mustard blues.

from left:  French Enamel, Artissimo, Flow Blue

So Nikkii, if you’re reading, the chairs are ready!  And if Nikkii has changed her mind, I’ll let the rest of you know if these are then available.  But I’m betting she’s going to want them because they are just so darn cute.

feeling blue truck

the book page dresser.

I sent Mr. Q off to pick up another dresser from craigslist a while back.  Sometimes Mr. Q isn’t quite as particular about condition as I am.  He gets all chatty with the seller and he doesn’t really scrutinize the furniture.  He also has a tendency to overestimate my abilities to save a piece of furniture … or maybe he doesn’t.  Here is the dresser in question.  It doesn’t look too bad in this photo unless you’re really looking closely.

book page before full

Here’s a photo of the top …

book page top before

Now you’re starting to get the picture.  Check out this close up though …

book page veneer damage close up

Yikes, right?!

Originally I had been hoping to strip and stain the top and paint the body, but obviously that wasn’t going to work.  My next plan was to patch the veneer using wood filler and then paint, but then I remembered a really cool idea I saw on pinterest of using old book pages to fill in missing veneer.  This piece was perfect for that!

I sanded the piece lightly, wiped it down and then painted it with three coats of Miss Mustard Seed’s Marzipan.  Covering a dark stain with a white tends to require at least three coats.

book page from side

Once it was dry I mixed a little water with some Elmer’s glue (homemade Mod Podge) and I used a small brush to paint the glue in all of the spots of chipped veneer.  Then I pressed my book pages onto those spots and painted another layer of the glue mixture over the top.  I used my finger to really press the paper into the areas where the veneer was gone.  I didn’t worry about trimming the paper yet.  Once the glue was dry, I used a very light touch to sand around the edges of the area which removed the paper just where I wanted it to.  Lastly I used a small brush to add some Miss Mustard Seed Tough Coat Sealer over the paper for durability.

book page close up

I found it a little hard to capture the look of this in photos, but it really is a cool effect.

book page from top

Once the book pages were in place I sanded the rest of the dresser and then vacuumed off the dust.

I got some awesome chipping/distressing on this piece, which I was hoping for.  Rather than fight the ‘beat up’ nature of this piece, I wanted to play it up.

book page top 2

For those of you who follow Miss Mustard Seed herself, you may have noticed that lately she has been forgoing a top coat on a lot of her pieces.  If you’ve ever painted with MMS milk paint, you know that the top coat deepens the color.  With wax added the color darkens it a bit, with the hemp oil it darkens even more.  So I know exactly where Marian is coming from when you have a piece all painted up and you love the color just as it is.  You don’t want to change it.

book page corner 2

Well, I was kind of loving the Marzipan as is.  I added a little bit of wax to a corner on the side and saw that it really brought out more of an almond color and I didn’t love that.  I debated.  Not adding a top coat means this piece is not water proof or washable.  But since the book pages aren’t really ‘washable’ either, I felt like I could get away without a top coat on this piece.  Also, since this dresser is very distressed anyway, adding a little more distressing over time isn’t going to take away from the look of the piece.  So in the end I just wiped the dresser down with a damp paper towel and didn’t add any sort of top coat.

You might have noticed that this dresser came with wood knobs.  I could have just painted them and put them back on, but I came up with another idea that played off my book page theme.  I purchased these label holder cup pulls from D. Lawless Hardware.  They are dirt cheap at 60 cents each.  Yep, you read that right, 60 cents (the screws have to be purchased separately).

book page pulls

They aren’t super functional.  I wouldn’t use them on a bigger/heavier drawer, but for the two smaller top drawers on this dresser they will be sufficient.  And don’t they look fab with the same vintage book pages inserted?

book page pulls 2

So, there you have it.  From uber shabby to rather chic.

book page dresser title

I think this piece would work really nicely as a sideboard in a smaller dining room, or as a perch for your widescreen TV.  It would also be perfect in a larger foyer for storing hats, scarves and gloves.  Or of course, you could always use it in a bedroom.  And it just so happens that this dresser is available!  Feel free to leave a comment if you are interested!

book page dresser collage

Sharing at the Making Broken Beautiful party.

fave five from 2015.

Happy New Year!

Will you be heading out to a festive party for New Year’s?  Sipping champagne and toasting the start of 2016?  Sharing a moment with someone special at midnight?

happy new year

I love the fresh start that comes with a new year.  This year I am determined to live healthier.  Eat more fruits and veggies and skip fewer workouts.  I also like to set a ‘skill improvement goal’ of sorts for myself every year.  In 2014 my goal was to improve my stripping and staining abilities.

MCM dresser painted in Fusion paint in Ash

Check!

My goal for 2015 was to improve my reupholstering skills.  Hmmm.  Not so much of a ‘check’.  I managed a few chairs that were fairly basic.

chair pair completed

My friend Sue actually did the sewing of the seat cushion slip covers, I simply reupholstered the arms.

chair arm

Hardly much at all, yet it took me forever to accomplish.

And I never did get around to upholstering that settee that I picked up.  It’s still on my to-do list.

settee before

And that brings us to 2016.  My goal this year is to improve my photography skills.  Currently my ability to take a good photo hinges upon perfect lighting conditions.  I need to learn how to get good photos even when conditions aren’t perfect.  To assist me in this endeavor, Mr. Q has gifted me with a new tripod and a remote shutter release for my camera.  I also plan to take some online classes.

I also plan to bring back more “quandie quickies” for 2016.  In other words, quick makeovers that can be accomplished in less than an hour.  I’ve been piling up some goodies that are scheduled for a quick makeover, like these wooden divided bowls (trays?) …

wood trays before

and this green metal box.

green box before

How about you, do you have goals for the New Year?

But wait!  Before we officially move forward into 2016, let’s take a moment to reflect back on 2015.  I’ve picked out my fave five pieces from last year.

I painted this vanity back in January.  It was inspired by a piece of furniture I saw in Nina Hartmann’s book, among vintage & friends.  I loved the touches of black and how perfectly chippy this piece was.

vanity painted in MMS milk paint

I used Miss Mustard Seed milk paint in Grain Sack (the greyish white) and Typewriter (the black) on this piece.  I recovered the bench with linen that I stenciled.

vintage vanity bench

I also painted this next piece way back in January.  It’s my Rooster Cupboard!  This is the only one of my favorites that I kept for myself.  It works perfectly in my Q Branch as storage for crafting supplies.

chippy farmhouse cabinet 2

I still smile a little inside every time I catch a glimpse of that rooster on the grain sack lining the glass doors and I love the pop of the Miss Mustard Seed Flow Blue milk paint.

rooster feed sack

I must have been having a great run of pieces last winter because my next fave is from February.  It’s the Paris bed.  I painted this gorgeous bed for a customer.  She wanted a creamy white, which ended up being the perfect choice for this piece.

Bed painted white.

To me this piece was the perfect example of a chalk paint project.  I painted the bed in Cece Caldwell’s Vintage White and used her Aging Cream dark wax to highlight the details.

paris bed headboard detail

My next favorite sort of flew under the radar I think.  It’s the union jack school desk that I painted back in April.  I used Fusion paint on this one which worked beautifully on the shiny surface of the desk top, as well as inside the metal cubby hole.

vintage desk painted with Union Jack

I really loved the way this turned out.  I thought it would be perfect as a small bedside table.  I considered keeping it for my guest room, but in the end I brought it to Eye Candy ReFind.  Then it didn’t sell.  And didn’t sell.  And didn’t sell.  I started to think that I really would be keeping it, but it finally sold at the end of November.  It was just waiting for the right person to come along!

us smooth top

My final fave is the green French farmhouse dresser that I painted in July.  I absolutely love this In a Pickle green milk paint from Sweet Pickins.  I think the brightness of the color provides a fresh, modern take on the chippy vintage farmhouse style.

french farmhouse title

This is another piece that just hasn’t managed to sell.  I suspect that I need to find a courageous buyer who isn’t afraid of adding a pop of brilliant color to a space.  I can totally see this piece in a mostly white room, or how about in a room paired with some Rachel Ashwell shabby chic florals?

french farmhouse corner

Check out my fab furniture tab and pick out your favorite for 2015!  I’d love to know what it was.

new years postcard

In the meantime, I will raise my glass and toast to a happy and healthy New Year!  I know 2016 is going to be amazing.

another one bites the dust.

Recently my friend Terri was helping family clean out her aunt and uncle’s house.  They have both passed away, and no one in the family wanted some of the items in the house.  Luckily Terri thought of me!  She sent over a dresser, a mid-century bureau and a small table plus a few other odds and ends.

This dresser was first up for a makeover.

kitchen scale before

Once again, I took the ‘before’ photo after Mr. Q did some prep work for me.  He removed the drawer pulls and gave everything a light sanding.  You can see pretty clearly in the photo just how light of a sanding it got.  Since I was planning to paint this piece in milk paint, I decided to sand a little more before painting.  But really, it just involved another pass by hand with a fine grit paper.  I just didn’t want to get too much chipping.

I’ll be honest with you guys, this dresser really didn’t have any damage or anything.  I just thought it was kind of ugly.  I wasn’t a fan of that ‘flame’ going up the center of the drawers and I felt like the side detail was just a bit too gaudy with that shiny finish.

I debated between Miss Mustard’s Marzipan (an almond white) and Kitchen Scale for this one.  I had both packages in my hand.  Then I stood there looking at the dresser.  Marzipan?  Kitchen Scale?  Marzipan would have been lovely.  But in the end, Kitchen Scale won.

kitchen scale 1

I think the paint really toned down the look of those carved side pieces.

kitchen scale angle

I used my trick with the tape to get some more chips out of this one.  It didn’t chip much at all on its own (probably thanks to that extra sanding I did).

kitchen scale chippy

But with a little encouragement from some tape, it turned out perfect!

I had grandiose plans for posting lots of furniture makeovers staged with Christmas decorations during the month of December, yet somehow I’ve only managed two.  And here we are with Christmas a mere 48 hours away.  Hmmmm.  So much for that plan.  Where did the month of December go?

Well, here’s one last hurrah!  I’ve staged this one with some aqua light bulbs …

aqua bulbs

and some of my most precious vintage aqua ornaments.

aqua ornaments

I have to tell you though, some vintage ornaments were harmed during the filming of this dresser makeover!  After taking this next photo, I turned my back for just a minute and I heard ‘tink, tink, tink, tink, crash!’

aqua ornaments 2

Sure enough, that round ornament next to the bell shaped one rolled right off the dresser and crashed to the floor.  Tragically, this was one of my favorites!  Doesn’t that just figure?  I shared it on the blog last year, I just loved its space theme.

fave blues

Drat!  I’m going to miss that one!  That will teach me to just play around with these all willy nilly.  I tend to break a handful of my ornaments every year, and so another one bites the dust.

This dresser is a big one by the way.  It’s 37″ wide and 45″ tall.  It could hold a lot of big warm sweaters for winter!

kitchen scale corner

What do you think?

kitchen scale dresser collage

If you need a place to store your sweaters (and are local in the Twin Cities) drop me a comment for more details because this dresser is available!

it never hurts to ask.

Last summer my number one craigslist spotter (a.k.a. nnK) forwarded me a craigslist ad for a garage sale that was in our neck of the woods.  It was accompanied by just one photo.  This one.

tiny dresser

Do you see what I see?

Yep, a tiny dresser!  You know I simply can’t resist miniature furniture of any kind.  Ironically, nnK hadn’t even noticed the small dresser, just that there seemed to be a lot of furniture and it was close by.

Unfortunately, the sale started on a Thursday at 9 a.m.  I have to be at work at the day job on Thursdays at 9 a.m.  Argh.  We ‘day job’ people miss a lot of the bargains this way.

So I said to myself “you know what?  it never hurts to ask!  maybe they would be willing to hold it for me, or better yet, let me come over Wednesday evening and pick it up.” and I sent them an email.  I even offered them a little extra cash.

And guess what?!  They were happy to let me come over early for it.  They were the sweetest older couple.  Their children and grandchildren had played with this little dresser, but now they were all grown up and none of them wanted it.  The sellers really wanted it to go to a good home.  I assured them that I would take good care of it.  I’ll admit, I didn’t exactly mention that I would be painting it.  You know how that is, right?  Some people are just simply anti-paint.  I always listen for clues, you can usually tell if you’re dealing with anti-painters.  But this little dresser really wasn’t made out of a beautiful grained wood (I believe it’s probably maple).  It didn’t have a beautiful time-worn patina or anything like that.

Sadly, I could have sworn that I took some ‘before’ photos of this one (other than the craigslist ad photo above), but dang if I can find them now.  Argh.  So that brings us right to the ‘after’.

mini dresser full

I did my usual prep, light sanding and a wipe down with TSP substitue.  I wanted two layers of color on this one, so I began with two coats of Miss Mustard Seed’s Layla’s Mint.  Next I added two more coats of MMS Linen.  In hindsight, the Mint was a waste of time.  It barely shows on some of the edges.  Also, the contrast between the Mint and the Linen isn’t strong enough for the little Mint that does show to even be noticed.

But I can hardly be upset about that because I totally love how it turned out!  I got some fabulous chipping.

mini dresser chippy

I replaced some ugly yellow floral 70’s porcelain knobs with vintage glass knobs.  In fact, these are the knobs that came off farmhouse dresser no. 5.  I’m happy to have put them to good use!

I thought that it would be fun to stage all of my furniture pieces for Christmas during the month of December.  For this one I used a boxwood wreath that I just purchased at Target.  It’s the 11″ wreath from the Smith & Hawkin line.  It was on sale for $17.99.  It was Rhonda’s comment on my mirror post that inspired me to use the small wreath on this piece, wasn’t it a great idea?!  Thanks for that Rhonda!

mini dresser staging

I added a little box of vintage mini-ornaments.

mini dresser ornaments

And my favorite tiny Christmas elf.

mini dresser elf

Here’s a photo without the wreath just to give you a better look at the mirror.

mini dresser without wreath

This little dresser is a bit bigger than my usual mini dressers at 35″ tall.  For the moment I’ve put it in my living room, but I don’t plan to keep this one.  It’s just a tad too big for me.

mini dresser in living room

So it is for sale.  Although I won’t be too sad if no one buys it and I just have to keep it after all.

the prize winner.

Sometimes it’s a bit wild how things just come together.  I believe some might call it serendipity.  In this case, I painted a dresser last Friday in one of my new Little Billy Goat colors called Prize Winner.

little billy goat paint 2

 It wasn’t until I started writing the blog post about it that I realized I would also be announcing the prize winner from my Thanksgiving giveaway in the same post!  Now, I’d like to be able to say that I very cleverly planned this little play on words with my paint color choice, but no.  It didn’t even occur to me until I started writing.

Well, with no further delay, the winner of the giveaway is Sarah M.  I’ve already contacted Sarah and she’s super excited about winning!

prize winner staging

And now for the prize winner dresser!

It started out looking like this when Mr. Q purchased it via craigslist.

prize winner before

I was particularly drawn to the little finials on the harp that holds the mirror in place, and also to the fact that the seller included a photo of the label in his ad.

prize winner label

That little detail in his ad really caught my eye.  I love a good vintage label.

To me this dresser has a little yin and yang going on.  A feminine mirror with a slightly curved top on a masculine tall dresser with straight lines and no fuss.  I decided it would be lovely painted in a rich, dark blue.  I debated using Miss Mustard Seed’s Artissimo or Annie Sloan’s Aubusson, but then I remembered my new Little Billy Goat paint in Prize Winner.

prize winner title

After doing as much furniture painting as I’ve done, I’ve learned to not fight against the existing color on a piece of furniture.  The finish on this dresser was quite dark, so trying to paint it in a pale shade would have likely required several coats of paint.  I got away with just one coat of Prize Winner, with just a quick 2nd coat on only the top to touch up a couple of spots.  Yep, that is just one coat of paint on the fronts of those drawers.  I finished with Miss Mustard Seed clear wax.

Mr. Q did all of the prep work on this one and he really struggled with the knobs.  They all had some sort of glue holding them on in addition to the screw.  I suspect people do this sort of thing because they want those knobs to be FIRMLY attached.  They aren’t thinking ahead to some far flung future date when someone wants to take them off again.  In the end we had to get Ken’s help drilling out one of the screws altogether because it just wouldn’t budge.

prize winner close up

Once the knobs were all off, I really wasn’t planning to put them back on again.  I was going to use some pretty clear glass knobs.  But the holes for these knobs were really large.  The glass knobs had too much wiggle room.  I consulted with Ken on this and he suggested we glue dowel sticks in all the holes, and re-drill.  A great idea, and it would have been the proper fix, but it would have been seriously putzy.  I vetoed that idea and put the original wood knobs back on!

prize winner angle

I have to say, this color is really gorgeous.  I tend to have a hard time capturing these dark blues in photos, but these photos come fairly close.  The color might be just a tad darker in person.

Isn’t this little cup I used to stage this dresser lovely?

prize winner cup

I’m pretty sure I paid about a quarter or so for it at a garage sale.  I just thought the design was so pretty.  For a long time I used this little cup to measure out plaster of paris when making my own chalk paint.  Now it’s filled with moss and I just keep it in a window sill.

Since so many of you mentioned how much you enjoy the ‘before and after’ pics, I’m going to try to be sure and include them from now on (promises, promises, but I’ll do my best).

prize winner before and after

This dresser is available.  If you are local (Twin Cities) feel free to leave me a comment if you are interested.

a farmhouse fix.

First, this is just a quick post to say thank you so much for all of your kind comments yesterday!  What an awesome day.  I really enjoyed hearing from each one of you.  Remember, you have until Sunday to get your comment in if you want to participate in the drawing.  So if you didn’t get one in yet, you still have time.

fixed title

Second, I just wanted to share the fix for farmhouse dresser no. 5.

You remember, from the other day …

farmhouse dresser

I had issues with the non-hardening filler that I used to fill some old drawer pull holes.  It resisted the milk paint and ended up looking like this …

farmhouse problem

Although I badly wanted to go along with some of you who said it was fine as is, in the end the spots really bugged me, which is what the majority of you said as well.

And some of you had some really great ideas for fixes.  I loved the idea of adding vintage wallpaper or floral napkins to the drawer fronts.  I thought the idea of re-filling the holes and adding some vertical stripes of paint to camouflage them was awesome too.

But in the end, I decided different hardware was the easiest fix for me.  Also, the spacing of the holes was just right for some glass drawer pulls from D Lawless Hardware.

fixed farmhouse close up

Unfortunately, this fix was expensive at $38.90 for 10 glass drawer pulls.  It was a costly lesson about non-hardening filler and milk paint not mixing.  At least the rest of you don’t have to learn it the hard way like I did.

fixed farmhouse 1

And although I think I preferred the look of the single knob over the look of a pull, I do think these pulls fit this dresser.  I feel better about not leaving the poorly filled holes as they were too.  So thanks to everyone who left a comment on that post with either an opinion or an idea for a fix.  All were much appreciated!

If anyone needs a fabulous chippy farmhouse style dresser with glass drawer pulls, leave a comment.  This one is available!


a pottery barn wanna be.

Last week my no. 1 craigslist spotter (that would be nnK) spotted this dresser.

pb before

Pardon the bad ‘before’ shot.  I forgot to take one until just moments before I started painting.  As you can see, my operations have moved indoors for winter!

The drawer pulls have been removed for sanding, so you can’t see how fab they are.  But the drawers pulls were what pulled me in (get it? pull? ha!).  This isn’t my usual style, but the price was also a no-brainer at $25.  Add to it the fact that this dresser had never been used!  Instead it had been stored somewhere with stuff on top of it, so the top was in very bad shape.  Lots of deep scratches.  But the rest of the dresser was in very good condition.

pb staging

nnK sent me the ad for this piece within about an hour of it being posted, and Mr. Q went and picked it up about an hour later.  Items that are a bargain like this go fast on craigslist, at least here in the Twin Cities.  So, if you are wondering how I find these things, the answer is 1) with help and 2) by moving quickly.

Those drawer pulls gave me an immediate ‘pottery barn’ vibe, so the obvious color choice was black.

Here’s an example of a similar pottery barn dresser.  This one is part of a set that includes a bed.  If you get the queen size bed, the set is $3,569 … and that is a sale price!

branford-dresser-o

Wowza!  Who are these people that are spending thousands of dollars on furniture?  All I know for sure is that I am not one of them!

Here is my pottery barn wanna be …

pb title

I asked Mr. Q to help with the prep on this one.  The top needed quite a bit of sanding due to the scratches, and it was getting pretty cold out in the carriage house.  So, Mr. Q sucked it up and sanded it for me.

Then we brought it inside and I quickly painted it with just one coat of Cece Caldwell’s Beckley Coal.  I chose chalk paint over milk paint for this one because I didn’t want a chippy look.  I probably wouldn’t have gotten much chipping since the previous finish was pretty dull and also because Mr. Q had sanded quite thoroughly, but I had some Beckley Coal on hand so I went with it.

pb angle

After sanding to distress the edges, I add a coat of MMS hemp oil.

This dresser was fun to stage for photos!

pb staging angle

I used a fab old birdcage that I purchased recently.  I plan to use it for a Christmas decoration, but for now I added some sheet music wrapped plants and used it in today’s photo shoot.

pb cage

I used some of my painted books …

pb books

 and I used my vintage postal scale …

pb postal scale

If have to say, if you’ve been thinking about trying your own hand at furniture painting, this is one of the easiest looks to copy.

pb wanna be

But if you don’t want to do the painting yourself, this dresser is available!

farmhouse dresser no. 5

farmhouse title

Ladies and Gentlemen this is farmhouse dresser no. 5!

Any Lou Bega fans out there?  Am I the only one?

A little bit of Quandie in my life …

OK, moving on.  Mr. Q and I picked this dresser up one dark night a few weeks ago.  It was conveniently located just a couple of miles away.

farmhouse dresser before

The gentleman that I purchased it from said they had used it “up at the cabin” (a true Minnesotan thing).  I suspect there are many fabulous pieces of vintage furniture tucked away in cabins all over Northern Minnesota.  In fact, a small sidebar, after I posted my recent possum belly table makeover, my friend Meggan texted me and said “look what was shoved in the corner by the fridge” in the cabin her family had just purchased.

meggan's table

Isn’t that crazy?  Another possum belly table.  Meggan’s table is in much better shape than mine was and even has the original metal possum belly drawers!

By the way, I shared Meggan’s house on the blog a while back, if you missed it you can find it here.  I bet her new cabin (which, by the way, is on its own private island!) is going to be fabulous as well!

Anyway, back to this dresser.  It definitely has a certain rustic charm.  Initially I was planning to strip the top and paint the body white.  Every once in a while I like to go back to basics.  I actually mixed up the MMS Ironstone milk paint and painted one coat.  Then, I stepped back and looked at the dresser and decided white just wasn’t going to cut it.  So I added some French Enamel (blue), nope, too blue.  Then I added some Luckett’s Green.  Hmmm … too dark still, so I added some Eulalie’s Sky.  Well, you get the idea.  I mixed a bunch of different colors and ended up here …

farmhouse dresser 5 title

This dresser had all but one of its original brass key hole escutcheons.  I had a couple of spare escutcheons lying around and I was just going to replace the missing one, but then I came across these little metal numbers that I forgot I had.  The color was perfect.

farmhouse dresser number

And thus, farmhouse dresser no. 5 was born!

When I pulled open one of the drawers, I thought for a moment that I might try to salvage the lining paper …

farmhouse dresser inside before

Unfortunately it was in pretty rough shape, and for this dresser to truly be functional I knew its new owner would prefer a fresh and clean surface inside the drawers.  After ripping out the contact paper liner, I found that the insides of the drawers had been painted already.  Some were pink and some were a very dingy white.  I gave them all a fresh coat of Fusion in Lily Pond.

farmhouse dresser inside after

You know I like to use Fusion on interiors because I don’t have to top coat it with anything.  Once cured, it is fully washable.  Also, this is just one coat and it covered beautifully.

The dresser came with glass knobs, but originally it probably had brass drawer pulls.  There were still two holes in each drawer.  Once again, I am having issues with my choice of fill material.  Remember I switched to a different brand and it resulted in purple paint?  Well, of course I knew not to use that again, so this time I tried a Minwax wood putty.  Here is the description of this product:

Minwax Wood Putty® is designed to fill minor surface imperfections in wood that has already been stained and finished. Unlike Minwax Stainable Wood Filler, it never hardens. It requires no sanding and no finishing, and comes in a variety of pre-mixed colors to perfectly match Minwax Wood Finish stains. Ideal for bare, stained or finished woodwork, paneling, molding, trim and doors.

Easy to use – no sanding or finishing required!

Yeah, well, I missed one small detail.  See it there at the end of the second sentence?  Yeah, it never hardens.  But you know me, I like to learn things the hard (pardon the pun) way.  Naturally the milk paint did not adhere to the wood putty.  That last sentence should have read no sanding or finishing “possible!” instead of “required!”

farmhouse problem

Dang.  And of course it’s the two holes on the top drawers that are the worst.  It couldn’t have just been the bottom drawers.

To add insult to injury, I didn’t notice this problem until after I sanded the dresser, which was several days after I painted it.  And remember that custom color that I mixed?  Yeah, I had used up every drop on the dresser.  I had no more paint.

My choices at this point are 1)  dig out the wood putty, refill with wood filler, and repaint the entire dresser (or at least all of the drawer fronts).  Or 2) leave it alone and assume there are people out there who don’t mind these sorts of imperfections.  I know that I don’t.  It’s not like I was aiming for a flawless finish.  I was aiming for a chippy, vintage, “I have some history” sort of look.  I am OK with this dresser looking like it spent the last 85 years up north in someone’s cabin.

farmhouse corner close up

Would I have preferred that this didn’t happen?  Yes.  Do I want to do all that work to fix it?  No.

But seriously, what do you think?  Would you be OK with the dresser as is?

farmhouse dresser

 Seriously, I want to know.  Would this bug you, or would you just ignore a minor imperfection such as this and embrace the shabby charm?