the owl pull dresser.

Do any of you remember the black Eastlake dresser that was in the spot where I now have the Belgian bench?

Dresser with owl pulls

I call it the owl pull dresser because of these fantastic drawer pulls.

owl pull

I painted it many moons ago, before I had a blog.  I wrote a blog post about it back in December 2013 where I shared the unconventional method I used to achieve this finish.  It was one of those situations where a mistake ended up paying off.

Basically after deciding to paint the dresser black, I got out the black spray paint.  In my original blog post I mentioned ‘satin’ spray paint, but thinking back I’m pretty sure it was flat black spray primer.  I spray painted the whole thing and then let it dry for about 30 minutes.  My original plan was to spray prime it black, then paint it with black latex.  However, once it was dry to the touch, I realized that I’d gotten really good coverage with the spray and maybe I could skip a step and not bother with ‘real paint’.  I thought I could wax it to add a bit of sheen to the flat primer and then call it good.

Not a bad plan, or so I thought.

Back in those days I was using Johnson’s paste wax.  Here is how Johnson’s describes their product: “Cleans and polishes floors and furniture, restoring, revitalizing and leaving a shine.”  Specifically take note of the word “cleans”.  The Johnson’s paste wax contains deodorized naptha which is a solvent, otherwise known as white mineral spirits.  I’m no chemist, and I could be totally wrong, but I think that might be the cause of what happened next.

As I started to work the paste wax over the painted surface, the primer started to soften up and combine with the wax.  I was basically wiping it right off with my cloth.  Yikes!

But wait a minute … hey … it looked kind of cool.

owl pull closeup

So I kept going.  I just worked the wax enough to remove some paint until I had a look that I liked.  Then I stopped.  This was a very messy process.  I went through a few rags that had to be tossed and my hands were totally blackened by the end (I know, I should have worn gloves!)  I then left the dresser alone for several hours before going back and buffing with a clean, dry cloth.

Here we are three (or maybe it’s four) years later and it still looks great.  I don’t know if I could recreate this finish in the same way twice though!

owl pull dresser

Did I mention that the mirror glass was missing when I purchased this dresser?  My original plan was to just remove the mirror frame and call it good.  But it is such an amazing frame, right?  It adds a lot of presence to the piece.  So I turned it into a chalkboard instead.

owl pull chalkboard

To stage it up for some fresh photos, I added a huge ironstone bowl (thanks again for that Skip) and my grandmother’s 1909 class photo.

class photo

My grandma, Carrie Moe, is the 2nd from the left in the front row (dark dress).  Sadly there are a couple of scratch marks over her face, and yes, they look intentional.  I don’t know if she scratched over her own face or if one of her siblings did it to annoy her (that sort of behavior might run in the family).  A few of the children are holding Norwegian flags.  My grandma was born in South Dakota but I’m guessing that the area where her family farmed mainly consisted of Norwegian immigrants.  You know, I’ve always assumed this was a class photo but now that I look more closely there are an awful lot of men in the photo (and no women).  That can’t be right.  I wonder what the group really represents.  Do any of you have any ideas?

At this point you might be wondering why I’m blogging about the owl pull dresser again today.  Well, it needs to find a new home now that it has been replaced by the bench.

bench long shot

So just in case any of my local readers needs a gorgeous black dresser, I thought I’d post it here.

For us this dresser was the perfect piece for next to our back door.  I kept hats, scarves and gloves in the upper drawers, and shoes in the lower drawers.  The hankie drawers were perfect for sunglasses and car keys.  It would also be awesome in a dining room filled with table linens and the good china.  It would also be fun to use as a coffee station don’t you think? You could easily put your Keurig between the hankie drawers, there is space to run the electrical cord through under the chalkboard.  Fill the hankie drawers with your K cups.  Perfect!  Of course, one could just use it in a bedroom too.

If interested, please be sure to check the ‘available for local sale’ tab for current information.

the bed bench from belgium.

Do you remember the bench that I picked up at a garage sale last May?  Also scouted by my friend Meggan, I might add.

find of the day 2

The sellers said that it was made out of a bed that their parents brought over from Belgium.  Although it was gorgeous ‘as is’, the finish on the bench seat was ruined.  It looked as though someone kept house plants on it, lots of water damage.  I could have opted to strip and re-stain that bench seat, and I might have gone that route if I wasn’t going to keep it.  But I did some measuring and I discovered that it would fit perfectly into the spot just inside my back door.  Which is exactly where we need something to sit on when putting on our shoes.  As much as I love the warm look of a beautiful wood piece in a room with white walls and ceilings, my room has red barn wood walls, dark wood floors and a wood plank ceiling.  That’s a lotta wood, none of which I plan to paint anytime soon.  This bench would be kind of lost among all of that wood.  Also, you might remember that I am on a mission to lighten up that room with white furniture.

So, I decided to paint it.

belgian bench angle

I held my breath the entire time just hoping that I would be doing it justice.

I used my own mix of Miss Mustard Seed whites to create Farmhouse White.  I found the recipe on The Ironstone Nest blog.  It’s equal parts Ironstone, Linen and Grain Sack.  It would have made more sense to just buy Farmhouse White, but I had plenty of the other three colors in my paint stash already so why spend more money?

The only thing I did to prep my piece was to go over it with a damp cloth and some TSP substitute.  I didn’t sand it at all.  I wanted plenty of chippy-ness.  I was willing to take the chance that all of the paint would just chip off, in which case I would have had to start over.  But I also didn’t want to totally eliminate any possibility of chipping altogether, which sometimes happens when I pre-sand.

I also painted a small test patch on the back of the bench before I started.  I wasn’t sure whether or not I would get bleed-thru on this piece and I wanted to know that before I was committed to the white paint.  But it was fine.  I started painting at the top, but when I got down to the bench seat, guess what?  Yep, it was a bleeder after all, but just the seat.  I’m assuming the seat was added when the bed was made into a bench and therefore it had a different finish than the rest of the piece.

After just a couple of swipes of Farmhouse White on the seat, it was obvious that I needed to do something about the bleed-thru.  Out came my secret weapon, Shabby Chic Clear Primer.

clear primer

I gave the seat just one coat of the Clear Primer.  Once dry, I painted over it with my homemade Farmhouse White and no bleed-thru.  Problem solved.  However, take note that the seat did not chip like the rest of the piece.  The Clear Primer will give the paint a great surface to stick to, thus eliminating chipping.

I ended up doing three coats of Farmhouse White on the bench to get good coverage.  I did two coats one day, then came back the next day and added the 3rd.  Normally when you’re going to get chipping on a piece you’ll see the paint lifting before you get to coat number 2 or 3.  With this piece I only saw two little spots of lifting paint.  I was a little bummed at that point, thinking I wasn’t going to get the chippy-ness I wanted.

bench pillow

It wasn’t until I started sanding that this chippy-ness in all of its glory showed up.

bench detail

The sides of this bench have some lovely details, don’t you think?

bench side view

I am so happy with how my bench turned out!

belgian bench titleCan you see my little photo bomber in the picture above?  Behind the left side of the bench?

That’s Lucy, my cat.  She absolutely insisted on being included in these photos.

Lucy

I would call her away between shots, and then she would just meander right back over there.

Anyway, this fab bench has found a new home in my dining room.

bench long shot

I think it works beautifully mixed in with all of that dark wood.

bench in room

You may remember that I started a dining room makeover last summer.  Here we are a year later and I still haven’t finished it!  Somehow my own projects always come last.  Here’s what I’ve done so far.

Replaced my black waterfall buffet with a Welsh cupboard full of ironstone …

hutch after 2

Replaced brown leather Parson’s chairs with painted cane back chairs with feed sack seats …

chair seats

Painted the cedar dining table that Mr. Q made …

dining-table-after

Swapped out some IKEA hanging lights for this …

dining light closeup

And now I have the bench.

Still on the to-do list, strip wallpaper (there is wallpaper behind that bench), replace the window (we’ve theoretically got that in the works) and come up with something fabulous for the giant blank wall.  Hopefully I’ll get the rest of it done before another year comes and goes.  I know I’m not the only one who takes this long with a makeover project though, right?  And I have to say, I think the bench was worth the wait.

a thrift store desk.

My friend Meggan is a master thrifter.  I’m not sure what qualifications are required for that title, but whatever they are, she has ’em.  A while back she texted me from the thrift shop with a heads up on a sweet desk.  It had been marked down and she could tell it had potential.  Luckily Mr. Q was available that day, so I sent him right over to nab it.

old pickup before

Its biggest problem was that it was GRUNGY!  Someone had treated this poor thing like crap.  It was also missing a couple of handles as you can see.  That’s OK, I didn’t love them anyway.  But otherwise it was structurally sound and the drawers open and close as smooth as silk.

Oddly enough, each drawer had 3 holes for hardware …

old pickup 3 holes

… which leads me to believe that the original hardware had been swapped out at some point anyway.

I started by stripping the top of the desk and while that was percolating, I filled two holes on each drawer just leaving the center hole.  To accomplish that I always put a piece of painters tape over the back of the hole so that I don’t loose any filler out the back, then I fill with wood filler.  In this case I used Elmer’s Wood Filler in Mahogany.  I let the first load of fill dry, then went back and topped off each hole.  Once dry again, I sanded to make it smooth.

Remember last Friday when I mentioned that my sister said she preferred stained and poly’ed over rustic and waxed?  Well, she was looking at the Dragonfly dresser and this desk side by side when she said that.

old pickup top

You can’t blame her for preferring this look, it is gorgeous.  This is Dark Walnut gel stain topped with a matte finish wipe on poly.

I seem to paint a lot of desks black.  I’m not sure why that is except that they always turn out so fantastic.  There is just something about pairing black paint with a wood top on a desk that appeals to me.  This time I used Little Billy Goat’s Old Pickup (which is the name of their black).  Here’s a funny side story.  Whenever I try a new brand and/or color of paint, I always go to pinterest first to see if I can find any finished pieces in that brand and color.  So I entered “Little Billy Goat Old Pickup” into the search field on pinterest, and here is what I got.

little billy goat

Bwa ha ha, kinda literal, huh?

What I did not get was any sort of photo of furniture painted in this paint.  I want to change that, so could y’all please pin some of these next few photos for me?

Desk painted in Little Billy Goat's Old Pickup

I want to mention that this is just one coat of paint.  I’ve talked before about how the Little Billy Goat paint goes on thick if you don’t water it down a little.  Sometimes it works great to just leave it thick and get away with one coat.

desk painted in Little Billy Goat's Old Pickup

Next thing I want to mention is that this paint distresses extremely easily.  I just use fine sandpaper for my distressing, but you can also use a damp paper towel which will take the paint right off.  Keeping that in mind, you definitely have to top coat this paint with either wax or a sealer of some kind.

This time around I used a new black wax that Little Billy Goat will be adding to their product line up soon.  I don’t have all of the details about this product yet, so I was just kind of winging it.  I applied lightly with a rag, waited a couple of minutes and then buffed with a clean old sock.  It went on quite easily.  I felt like it didn’t require nearly as much elbow grease as some of the other waxes on the market.

old pickup

  The black wax sort of reminded me of shoe polish in appearance.

black wax

I will warn you though, it does have that chemical-ish smell that I’m not too fond of.  This is one that I would reserve for use in my outdoor workshop, or a well ventilated room.

That being said, I loved the results of the black wax over the black paint.  It gave me a deep, rich black color.

old pickup corner

The level of sheen is contingent upon how much you want to buff it.  I’d say I stopped at a mid-point.  If I had kept buffing I could have gone shinier, but for me this sheen is perfect.  I will definitely continue using this black wax on my future black pieces.

There was no getting out of lining the drawers on this one.  As I mentioned earlier, the previous owner had not taken good care of it.  Which was too bad because some of the drawers were in good shape and the wood bottoms were lovely, but others were a mess.  So I lined all of them.

old pickup lined drawer

old pickup lined drawers

When it came time to put some knobs back on, I checked my stash and I had 4 of these Hobby Lobby knobs that were a perfect fit.

old pickup knobs

Luckily I was able to find 4 more at my local store since I needed 8 of them.

I’m beginning to realize that I should be picking up single chairs when I see them at garage sales so that I have some to pair up with desks.  I don’t have a chair to go with this desk. I used my super chippy farmhouse chair for staging some of the photos, but it’s not quite the right partner for the desk.

old pickup desk 2

Note to self:  buy chairs!

Note to you:  buy desk (that’s not very subliminal is it?)!

the dragonfly.

It has been a busy, busy week here!  Two home tours on two different blogs and now to cap it off, a furniture makeover.  All to be followed by some serious napping time this weekend I think.

I’d forgotten just how long ago I picked up this pretty little dresser until I dug out the ‘before’ photos.

dragonfly before

Hmmmm.  No leaves on the trees, brown grass and last year’s hydrangea blossoms still on the bush.  This had to have been April, if not earlier.

I’m not sure my ‘before’ photo captured it, but this dresser had a really ugly finish on it.  It looked like one of those ‘antiquing’ finishes.  You remember ‘antiquing’ from the 70’s, right?  It was weird.  All I know is that it had to go.

I followed my usual m.o.  I stripped the top and then waxed it.  I used Miss Mustard Seed furniture wax instead of a tinted wax.  I love the pale wood top, and I’m happy with leaving all of its imperfections as is.  My sister took a look at it and declared that she prefers when I stain and poly the tops.  That’s OK.  There are lots of different opinions out there, I’m just hoping that there are potential customers out there who like the rustic patina of this top as much as I do.

dragonfly top

Next I painted the body in the Real Milk Paint Co. milk paint that Reclaiming Beautiful is now carrying.  This time I chose a color called Dragonfly.  Just for fun I snapped a ‘behind the scenes’ photo for you guys while the paint was still drying.

behind the scenes

This is my preferred method of painting lower pieces like this one.  I find it difficult to sit on the floor for too long, or to bend over for too long, so I hoist the furniture up onto the horses and this way I can reach everything with ease.  It also makes it so much easier to paint the feet.  Sometimes I stand while painting and sometimes I use my painting stool.  It is far easier to sand and wax things at this height also.  And yes, I did finish this one with a coat of Miss Mustard Seed’s furniture wax.

Here is the finished dresser.

dragonfly 1

I am officially in love with this color and with the perfectly distressed finish I got using the Real Milk Paint Co. paint.

The Dragonfly is a gorgeous rich blue green.

Dragonfly corner

By the way, those are my Endless Summer hydrangeas and that is the sum total of blossoms that were on it this year.  So sad.  And yes, the pink and the blue came from just the one bush.  I know that supposedly the acidity in the soil determines the color, but it seems odd to me that one bush has differing levels of acidity in different branches.  What do you think?

hydrangeas

Anyway, I got plenty of chipping on this piece, which I think works perfectly with the age and style of it.

dragonfly close up

I discarded the knobs that came on the dresser.  I’m quite sure they weren’t original to the piece, they had a sort of tacky 70’s vibe.  These gorgeous glass knobs from D Lawless are much better suited.

dragonfly 3

I’ll be sharing a more in-depth tutorial on using the Real Milk Paint Co. paint on the Reclaiming Beautiful blog in a week or two.  It’s going to include a giveaway of some of the products I used.  However, the giveaway will only be open to those who can pick up the prize in person at their shop in Stillwater, so you locals might want to keep an eye out for that.  I apologize non-local readers, first you had to suffer through not being able to go to the barn sale, and now you miss out on a giveaway.  I’ll try to make it up to you down the road somehow.  But for you locals, if you don’t already follow me on the Reclaiming Beautiful blog, you should pop over there and do so (by clicking here).  If you follow by email you’ll get an email every time I post something new.  I promise you won’t be inundated with numerous emails since I only post over there 2 or 3 times a month and that way you’ll be sure not to miss the post.

Meanwhile, this lovely dresser is available to the first person that wants to snap it up.  For more details, check out my ‘available for local sale’ page (click on it just below my logo at the top of this page).

the peacock.

This dresser came to me from my friend Cecelia.

peacock before

When Mr. Q picked it up, the top was separated from the bottom.  That was probably one of the easier fixes that Ken has had to deal with for me.  One of these days I have to write a blog post about the cool little tool that he uses for reattaching tops like this.  Next time he does that I’ll have to try and get some photos of the tool and the process.

The strange thing about this dresser is how discolored that middle drawer is, it really kind of jumps out at you.  I really don’t know what would cause this phenomenon.  If any of you have any ideas, I’m all ears.  IMHO, this ‘flaw’ made it a good candidate for a paint job and I love using milk paint on these old pieces. The shop in Stillwater where I occasionally sell my pieces, Reclaiming Beautiful, just started carrying a line of milk paint from The Real Milk Paint Co.

peacock paint

I picked out Peacock based on the sample sticks they have in the shop.  For me the hardest part of using a new brand of paint is getting to know the colors.  You can look at photos of the colors online all day long, and somehow the color always looks different in person.  The plus for me with Miss Mustard Seed milk paint is that I know exactly what all of her colors look like in real life.

But I also have to admit that I’m getting a little bored with the MMS colors.  It’s time for a change.

So after stripping and waxing the top of this dresser (with Cece Caldwell’s Aging Cream), I mixed up some Peacock.  It mixed up pretty much exactly like the MMS milk paint that I’m used to.  The only slight difference I’ll note is that it foamed up a little more than I’m used to.  The Real Milk Paint Co has a product called Anti-Foaming Agent that I’m going to try next time.  But I didn’t run into any trouble with the foaminess, I just let the paint settle a bit before I started working with it.

peacock close up

This color is deep, rich blue green that almost looks black in low light.  It leans a little more towards green on my piece than on others I’ve seen it used on.  I wonder if that is because there was a lot of red to the wood underneath.  Milk paint can be a little more transparent than other paints, so the color you are painting over can make a difference.

I also used hemp oil as my topcoat and that really changed up the color.  It brought out a lot more green, and darkened it up quite a bit as is typical of hemp oil.  By the way, the Real Milk Paint Co has a hemp oil in their line, but I used MMS hemp oil because I already had it on hand.

peacock corner close up

The hardware on this dresser is just stunning, isn’t it?

peacock hardware

You can also see the green of the color a little better in that last photo.

I was hoping for more chippiness, but it eluded me once again.  Next time I’m going to try another product from this line called Chippy Paste.  Have any of you heard or it, or used it?  I’ll be sure to let you all know what I think of it when I try it.

peacock 1

I used an old copy of Moby Dick in staging this piece.

books

The colors on it worked perfectly with the Peacock.

moby dick

Funny though, it wasn’t until I was editing the photos for this post that I noticed the sea horse motif on the cover.  See it? Isn’t that cool?

Have any of you tried the Real Milk Paint Co milk paint?  If so, let me know what you thought of it.  I’ll be trying out a few more of their colors soon.

As usual, please check my ‘available for local sale’ page for more details if you’re interested in purchasing this dresser.

hooray for the red, white and blue.

hooray for rwb

Happy 4th of July!

And to all of my readers from other countries, happy Monday!

I’m probably sitting on a beach at the Jersey shore right now, but I scheduled this post in advance so you all wouldn’t miss me too much 😉

Earlier this summer I picked up a few kid-sized chairs at various garage sales.  I love painting these little chairs.  You can see others I’ve painted {here}, {here}, {here} and {here}.

Yep, I’ve painted lots of them and since I didn’t want to repeat myself I had to really give some thought to what I wanted to do with them.  I definitely wanted to go with milk paint for a chippy, aged look.  On the first chair, I started with Miss Mustard Seed’s Flow Blue.  I added an off-centered grain sack stripe in white using a stencil and some white acrylic craft paint.

bue chair

For the second chair I pulled out Miss Mustard Seed’s Tricycle.  I didn’t want these chairs to match, but I wanted them to coordinate.  Red seemed like a good choice.  Once I had the chair painted, I gave some thought to what sort of embellishment to add.  I didn’t want to do the same stripe as the first chair.  So, I went with a Swiss flag look.

red chair

I used frog tape and just taped off the cross and painted it with Fusion’s Limestone.

Then, since I seemed to be on a roll with the blue and red, and since the 4th of July was coming up, I decided to paint the third chair in Miss Mustard’s Farmhouse White.  I also added a simple little stencil to the seat.

white chair

Which gave me a trio of chairs in red, white and blue!

rwb angle

Perfect for a 4th of July blog post.

rwb chairs seats

I love the idea of hanging the chairs in a row on the wall to act as shelves.

rwb on wall

You could keep your vintage American Government book on them.

american gov

Wouldn’t this book be fun to use as a 4th of July table decoration?

I took the chairs, the books, and even the little sailboat off to Reclaiming Beautiful a week or so ago.  Hopefully they will find new homes from there!

the furniture moratorium.

Recently I’ve been telling friends and family that I have placed a moratorium on bringing home any more furniture.  I don’t have a lot of space for storing pieces, so I have to be sending just as many out the door as I’m bringing in the door.  And somewhere along the line the balance got thrown off.  So for the last month or so I have been trying not to bring in any new pieces to work on until I get some of the ones that I already have finished.

But then I found an awesome desk at a garage sale for just $15.  How do you pass that up?

And then there was a bedroom set that my friend Meggan’s husband’s co-worker (or something like that) was selling.  Meggan had texted me about it a while back and I made an offer at the time.  Then I basically forgot about it.  So when they accepted my offer a few weeks later I felt like I should ignore the moratorium and bring the set home.  I figured I could squeeze them in somewhere.  So last week Mr. Q and I drove out to pick them up. The set includes a tall dresser, a dressing table and a full size bed.

I decided to start with the tall dresser.

mf before

There was nothing terribly wrong with this dresser, it just needed to be lightened up.

So I got out my Little Billy Goat paint in Momma’s Fridge, which is a lovely pale aqua blue.

momma's fridge

I took just two coats to get good coverage.  I like to water the paint down a little for the second coat because it goes on a little more smoothly.

momma's fridge 1

Once the paint was dry, I added a stencil to the top of the dresser to give it a little extra personality using white acrylic craft paint.

mf stencil

I finished with a coat of Miss Mustard Seed furniture wax.  Just so you know, you must seal Little Billy Goat’s paint with a top coat of some kind.  Otherwise water will take the paint off.  This is handy for distressing with a wet paper towel, but not so handy for daily use, so always seal pieces painted with Little Billy Goat.

momma's fridge close up

The hardware that came with this dresser is so pretty.  I just added a little more gold to them using a Little Billy Goat Goat Stick in Gold Leaf.

gold leaf goat stick

If you haven’t tried one of these, they are really so easy to use.  Keep in mind that they are self-sealing, so you have to peel off the waxy coating, or rub the stick on paper until it comes off, each time you use it.  It’s really pretty slick and so much more user friendly than the rub ‘n buff (which I find dries out in the tube, and then you have to toss half of it away).  Here was my process for these drawer pulls; first I rubbed off the waxy coating on the stick, then I ran the stick lightly around the pull itself.  I didn’t press hard or cover the whole thing, I just wanted to get some of it on there.  Then I went back in with a q-tip and blended it.  Think of it like blending your eye shadow.

gold hardware

I added the hardware back onto the dresser, and it was done.

momma's fridge long shot

A super easy makeover.

Please check my ‘available for local sale’ tab to see if this piece is still available.

Please note that Little Billy Goat has supplied me with paint and goat sticks, but all opinions are my own and I am not compensated for this post.  If you would like to try Little Billy Goat paint and you are local, you can find it at Reclaiming Beautiful in Stillwater.  You can also find Little Billy Goat products online at piperclassics.com.

a chippy green table.

green with crate

A while back when my friend Donna dropped off a load of free furniture for me she included this sweet little table.

green table before

Aren’t those square feet fab?  I love the subtle detail on this piece.  It was in good shape too.  I just thought it would be even better painted.

So I painted it in my favorite shade of green milk paint, In a Pickle from Sweet Pickins.

I got lots of awesome chipping.

green table chippy

Just for fun, I tried a number of different locations for a photo shoot.

First the driveway …

green table in driveway

Although that bright back-lighting might work for certain shots, like this one …

green table driveway close up

I don’t think it showed off the table to its best advantage.

Next I tried the garden …

green table in garden

The lighting seems good.  No harsh shadows.  But does the green table get a little lost with all of the green behind it?

The white walls of the photo cottage seem to show this table off well.

green table 1

green table close up

Which background do you like best?

And if anyone local needs a sweet green table, check out my ‘available for local sale’ page for details because this table is for sale.

a spoon carved dresser.

In case you were wondering, the dining set that I posted on Friday did go home with the customer who had dibs on it.  I know the darker top caused her a little hesitation, but in the end she decided she couldn’t pass on it and she bought it.  I hope it looks good in her dining room and that she is happy with the purchase!

Now that I’ve sent a table, 3 leaves and 8 chairs home with her, I have space in my workshop to work on some other pieces.  I started with this beautiful spoon carved dresser.

spoon carved title

Sadly, I neglected to take a ‘before’ shot, but you wouldn’t have seen much except a typical antique spoon carved dresser.  In fact, it looked quite good on the outside.  That was part of the problem with this one.  You see, nnK’s parents purchased this dresser at auction for me.  They were at the auction for other items, but when they saw this piece come up and realized how low the price was, they decided to bid on it because it looked to be in quite good shape from the outside.

 However, what they didn’t realize was that it was in very rough shape on the inside.  The bottoms were falling out of the drawers.  The joints were all coming unglued.  The drawer glides were all worn down.  And so on, and so on.  This dresser was very close to becoming Humpty Dumpty no. 2 (to read the story of H.D. no. 1 click here, here and here).

So I sent this one off to Ken’s workshop without even taking the time to get a ‘before’ photo.

spoon carve corner

Ken performed his usual miracles and patched it up beautifully.  The drawers now have all new bottoms, they open and close easily and the dresser is very stable.  I can’t say how lucky I am to have Ken to make these repairs for me often enough.  I truly couldn’t do this work without his help.

Once Ken was done with the hard part, I just had to tackle the fun stuff.  I stripped the top which took 4 passes with the stripper and it’s still not perfect.  Luckily I was not aiming for perfection.  I don’t know what kind of poly was all over this thing, but it was thick.

spoon carved top

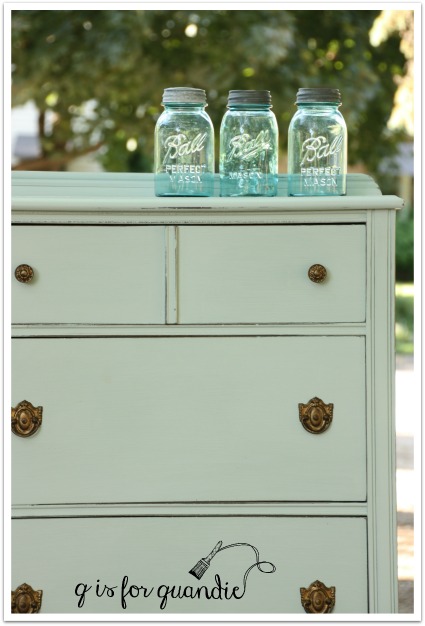
I sanded it down and just added a couple coats of Miss Mustard Seed furniture wax.

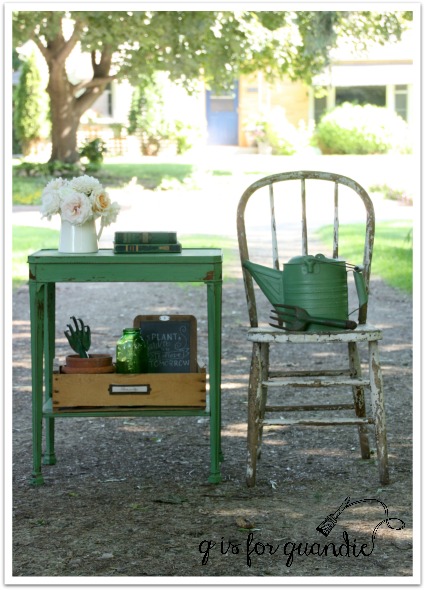
I then decided I wanted to paint this one in MMS milk paint in Marzipan.  Let me first explain that I often joke about having a lifetime supply of milk paint.  When my friend Lori closed down her Round Barn Potting Co shop last year, I bought out a huge chunk of her milk paint inventory.  I figured I’d have about enough milk paint to last two years.  Here it is a year or so later and I have gone through about half of the paint, so I wasn’t far off the mark.  But I don’t have multiple bags of every color, and I haven’t done a great job of paying attention to what I do have on hand.  So when I pulled out that bag of Marzipan I wasn’t really thinking about whether or not there was enough left to do the entire dresser.  I assumed I could just open another bag if I ran out.

Turns out I didn’t have another bag of Marzipan, and I didn’t have enough paint in my cup to do a 2nd coat, let alone a 3rd.  Drat!

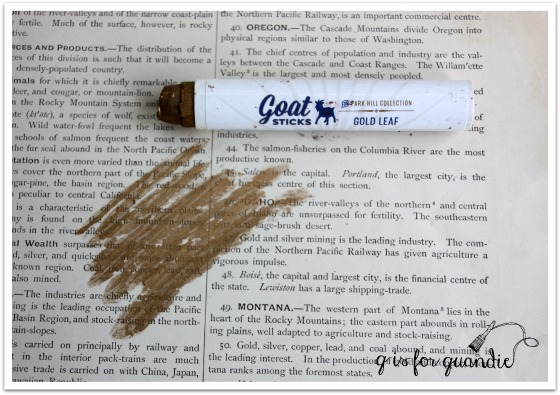
So I decided to stretch what I had left by adding some Linen.  Here’s a great photo showing the differences between the MMS whites …

mms whites

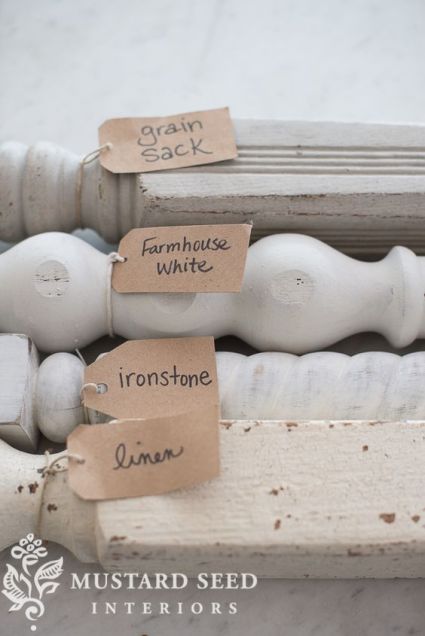
Marzipan is an almond color.  Linen is the creamiest/warmest of the MMS whites.  And I have lots of Linen on hand.  But duh, I didn’t actually grab the bag of Linen, I grabbed Ironstone, the brightest white of the bunch.  I added a spoonful into my paint cup without even noticing.  Double drat!

That lightened up the Marzipan quite a bit!  So, then I decided to go ahead and add a little Linen too.  Why not?!

spoon carved dresser

But all was not lost, I ended up with a lovely shade of white.  I couldn’t recreate it if I tried though.

By the way, for those of you who also paint with milk paint, here’s a tip.  If you’ve already painted one coat of a color and you don’t have enough left for another full coat, be sure to mix more paint before even starting the 2nd coat.  Your second batch may be a slightly different color, even if it came from the same bag as your first.  So always make sure you have enough paint left to cover the entire piece.  Obviously in my case my 2nd coat of paint was definitely a different color than the first.  I ended up doing a total of 3 coats on this dresser for good coverage.

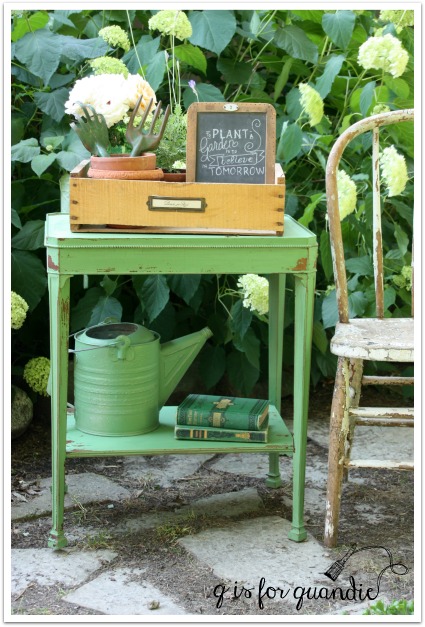
Next I used a small brush to paint the spoon carved flowers with straight-up Ironstone.

spoon carved drawers

I wanted it to be a subtle difference, just enough to make them pop.

I gotta say, I love the result.

spoon carved angle

I did not use a top coat.  Miss Mustard herself has been forgoing a top coat lately, so I followed her lead.  I love the look of the paint without a top coat.  I don’t know that I would leave the top of a dresser unprotected in this way, but for the sides I think it’s OK.  Although this probably won’t work well in a home with small children who leave hand-prints on things.

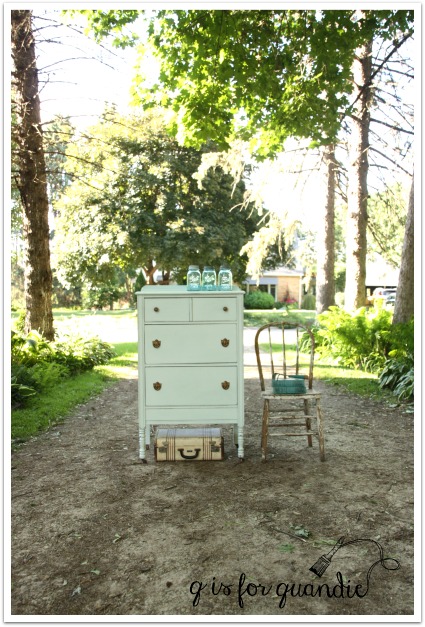
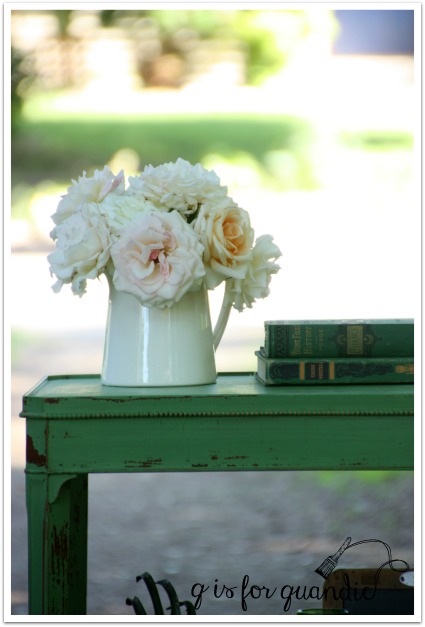
So, not only is Ken an amazing neighbor who fixes furniture for me, but his wife is pretty fabulous too.  She saw me outside taking photos of this piece and she came over to ask if I’d like any roses from her garden to use in my photo shoot.  Who would say no to that?

arlene's roses

Arlene grows roses in just about every color under the sun, but I specifically wanted just the pale flowers with barely a hint of color.

arlene's roses 2

Aren’t they lovely?

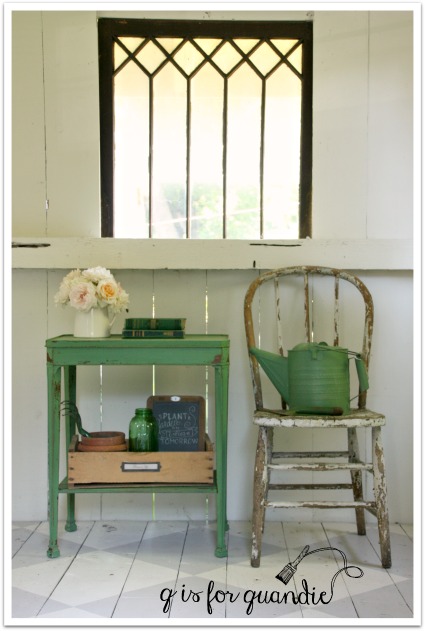
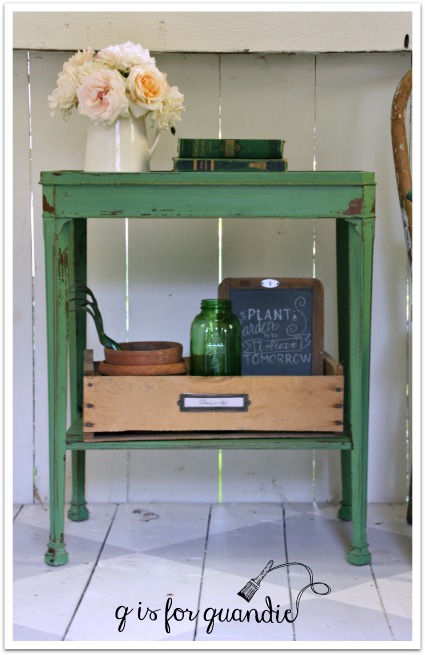
Be sure to check back later in the week when I share some of the stuff my sister and I brought home from the Nokomis sales.  And in the meantime, if you’re in the market for a gorgeous spoon carved dresser check out my ‘available for local sale’ tab for details.

dining al fresco.

I absolutely love to dine outdoors, how about you?

dining al fresco

Some of my favorite travel memories revolve around restaurants with gorgeous patios such at the Indian Jewel in Prague which is situated in a courtyard that has been around since medieval times.  I also fondly remember dining at a sidewalk cafe in Copenhagen alongside the canal in Nyhavn.  All of the chairs had little wool throws on them so that you could wrap up as it got chilly when the sun went down.  Our server easily switched between English at our table, German at the table next to us and French at another which impressed me to no end.

Mr. Q and I try to dine on our own deck whenever we can.  Of course, this being Minnesota, there are only about five months out of the year when this is possible.  I did take a cue from the Danes and I have a wool throw for each chair, so that helps extend the season.

dining al fresco 2

I’m always drawn to those photos on pinterest or in magazines that show a dining room table set up outdoors.  They always look so romantic.  Check out my ‘dining al fresco’ pinboard {here}.

But the reality for me is that whenever I try to plan something like that the weather doesn’t cooperate.  Last Friday I had some people over for dinner.  I had pictured a gorgeous evening on the deck, but instead we ended up inside.  Not only was it in the 90’s and awfully humid, but that weather led to the possibility for severe thunderstorms.  Somehow high winds and lightening kill the romance of outside dining.

dining al fresco 3

It’s far easier to set up a dining table outside strictly for a photo shoot.  You can just wait for a lovely sunny day and get everything set up just right.

french market tote with ironstone

It helps if you just happen to have a freshly refinished dining room set that you want to share.

dining al fresco 4

This is the completed dining set that I mentioned earlier in the week.  I’ve only pictured it with 4 chairs, but there are 8.  You saw most of them on Monday.

chairs after 1

There are also 3 leaves.  So it can be expanded when necessary.  Mr. Q and I tried adding the leaves last night just to be sure everything worked well.  That table gets to be quite long with those leaves added!  The 8 chairs will be just right.

The client who purchased the Inglenook sideboard from me has dibs on this set.  She’s coming to see it tonight.  She’s worried that the darker wood top on this table won’t work with the lighter wood top on the sideboard.  The table top looks darker in these photos than it does in person though, so I’m hoping she likes it.

dining set 4

If it turns out that she doesn’t think it will work, this set will be looking for a new home.  I’ll be sure to add it to my ‘available for local sale’ page if it becomes available.  Stay tuned!

Meanwhile, my sister and I are headed out to our favorite Minneapolis neighborhood tomorrow for their annual garage sales.  The Nokomis neighborhood is where both of our parents were born and raised.  Hope I find some fun stuff to share with you next week!

Linking up with Friday’s Furniture Fix.