the church sale desk.

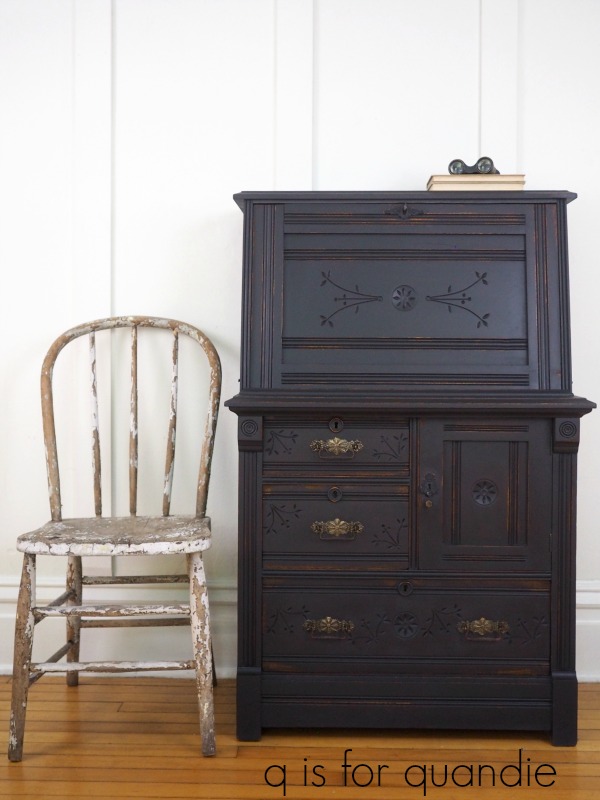
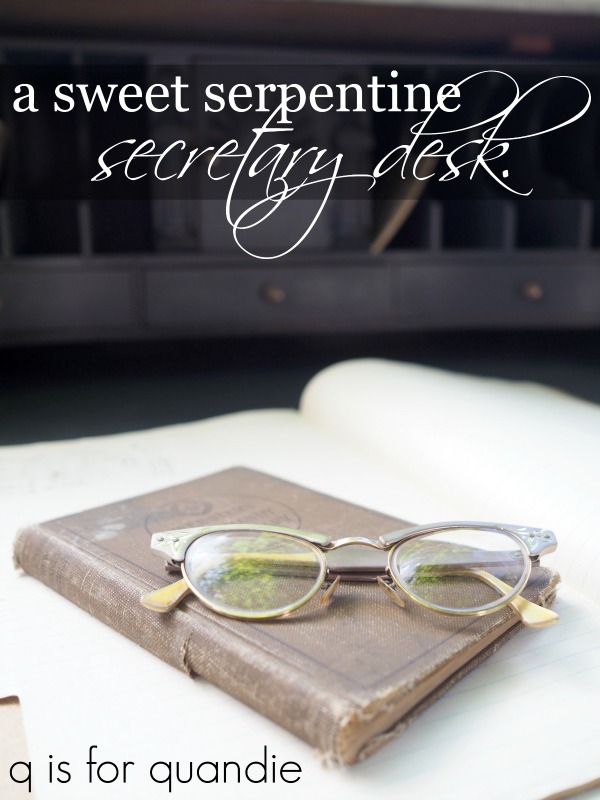
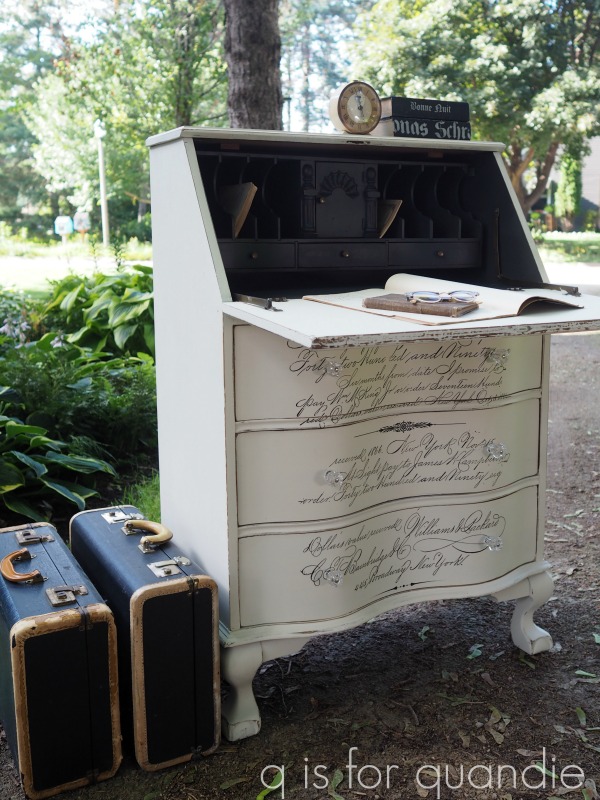
A while back one of my local readers, Jackie, contacted me and asked if I wanted a spoon carved secretary desk that she found at a local church sale.  The price made the desk too hard for her to pass up, I believe it was $20, so she snatched it up and then offered it to me.

You guys met Jackie back when I toured her scented gardens (part 1 and part 2).

As you can see by the ‘before’ photo, I brought this desk home before my gardens even filled out last spring.  I don’t know why it kept getting shoved to the bottom of the pile over the summer, but for some reason it did.  Now that September is here, and I’m done with my magic wand decorating project, I’m trying my best to get all of the larger pieces in my workshop painted before the snow falls.  Wish me luck on that.

There were a couple of issues with this desk.  For one thing, someone had added wooden knobs instead of the original pulls.  I’m sure I’m going to offend someone here, but one of my pet peeves is when people put knobs in the two holes that originally accommodated a drawer pull, thus giving the drawer two side by side knobs (top two drawers).  IMHO, that just looks wrong.

They had also added a knob to the pull down section of the desk where the original key hole was.  This desk would have originally been opened only with a key.

Let’s start with the inside of the desk though.  Somehow I managed to miss getting a ‘before’ photo of it.  But basically Ken had to add a new chain to hold the drop down leaf, and then I used the RustOleum chalk spray paint in Charcoal to paint it.

Obviously there was no way I was getting inside all of those little cubby holes with a brush, and unlike the last secretary desk I painted, this time the insert was not removable.  So I simply painted it in place.

Once the paint dried I added a small section from Prima Marketing’s Beautiful Home transfer on the fronts of the little drawers.  This is a white transfer that’s perfect for using over dark paint.  Once the transfer was applied, I sanded over it lightly with 220 grit paper and then used a clear wax to seal it.

I lined these drawers with some scrapbook paper that I have stockpiled.

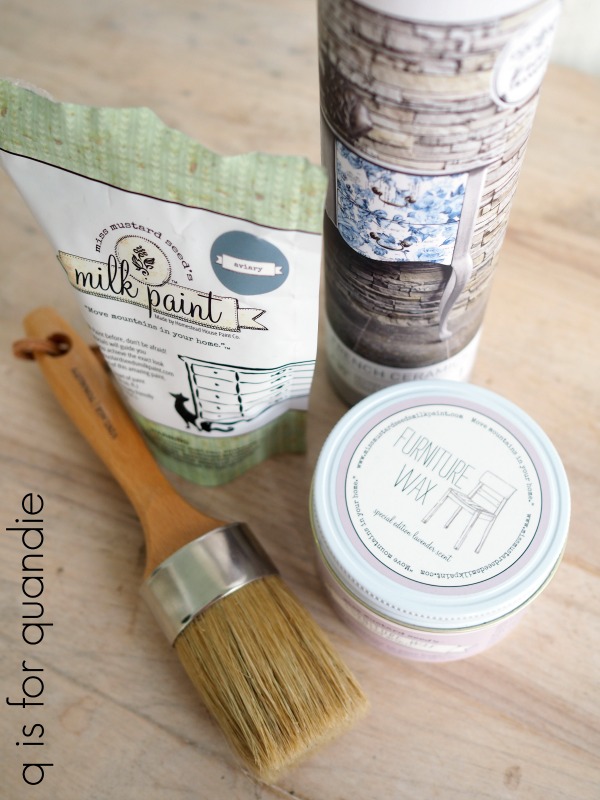
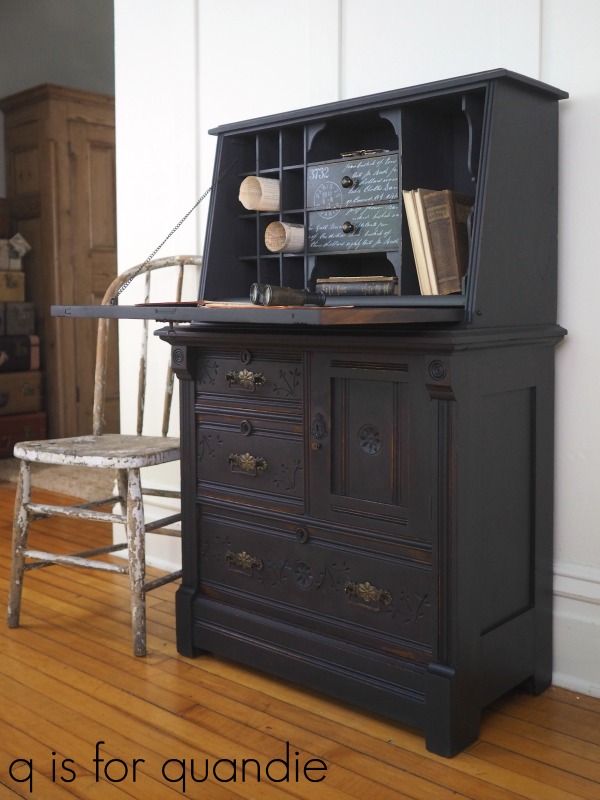
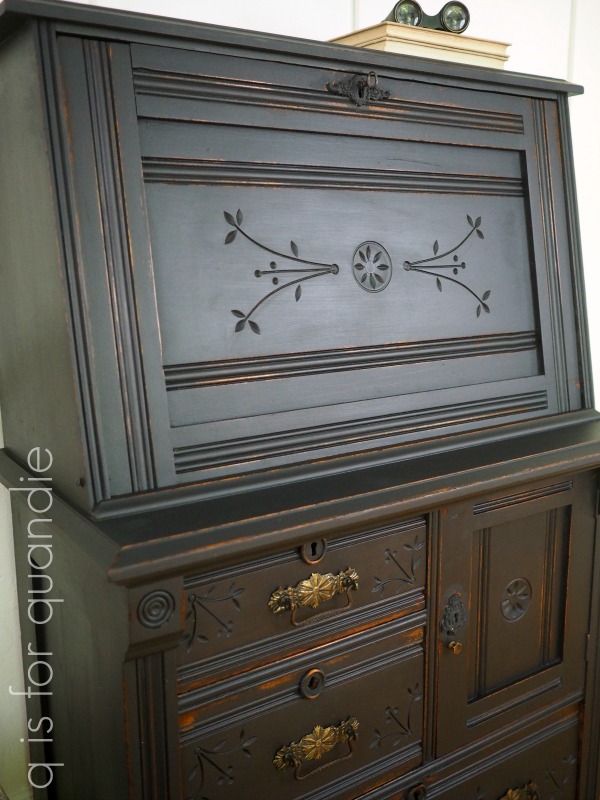
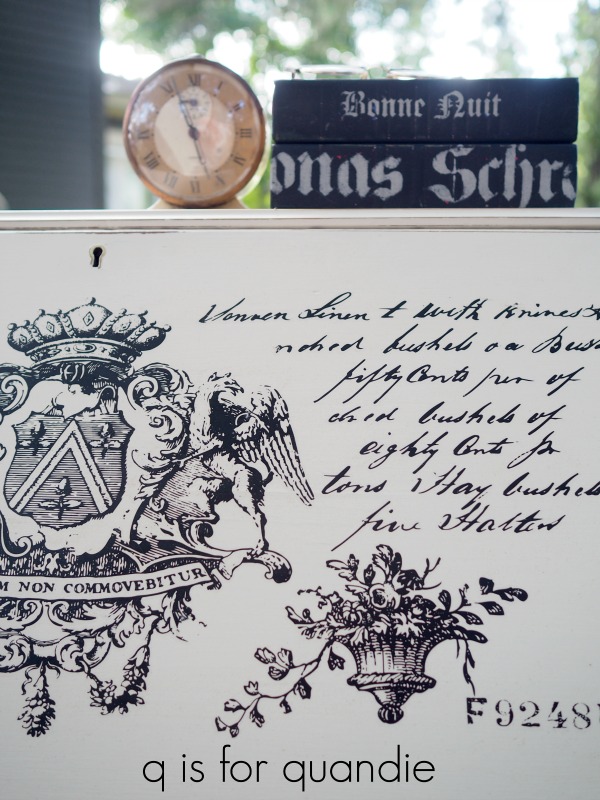
I painted the outside of the desk in Dixie Belle’s Midnight Sky.

I chose to wet distress this piece instead of using sandpaper.  First of all, Dixie Belle paint is really easy to wet distress.  Second, I think this results in more of ‘worn off over time look’ than sanding does.  If you’ve never tried it, you should give it a go on your next project.  Simply use a damp cloth to rub away some of the paint around the edges.

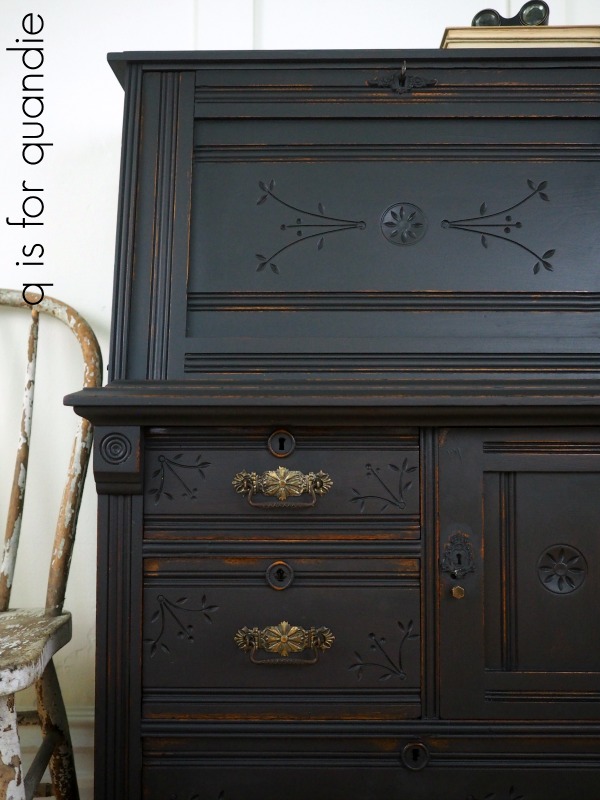
I have so many things I want to mention about the outside of the desk that I don’t know where to start, so let’s just start with those drawer pulls.   I just happened to have four matching antique pulls on hand.  What are the odds?  Trust me, not that great.  I usually just have a mishmash of mismatched hardware.  But this time it totally worked out, they even fit in the existing holes, so no more double knobs.

You might have noticed that the middle drawer on the bottom and the door were originally missing the trim around the keyholes (take a look back at that ‘before’ photo to see what I mean).  I basically stole the trim from around the keyhole on the drop leaf to use on that middle drawer, thus giving all of the drawers that same round trim.  By ‘stole’ I mean I carefully pried it off the drop leaf and then glued it onto that drawer instead.

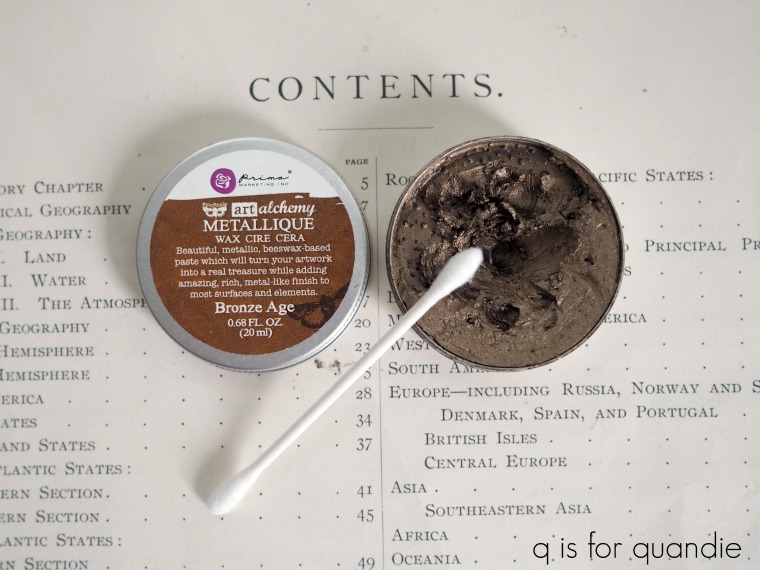
Then I made new keyhole escutcheons for both the drop leaf and the door using one of Prima Marketing’s new molds called Grandeur Keyholes.

I used Prima’s Modeling Material to make the molds.  If you want to learn more about using the molds and the modeling material, check out my previous post on that.

I learned another valuable lesson about the molds while working on this piece.  As I’ve already mentioned in previous posts, the molds will shrink as they dry.  Now I’ve also learned that if you glue a mold on and paint over it before the mold is dry it will reveal some unpainted wood as it shrinks.  See that outline of unpainted wood around the keyhole?  That’s what I’m talking about.

Not a huge deal, but from now on I’ll wait for the mold to be completely dry and hardened before painting.

Still, isn’t this a completely fabulous way to make up for missing keyhole escutcheons?!  I love it!  I chose to downplay my molded keyholes by painting them to match the piece, but you could apply some metallic wax to make them stand out more which would also look great.

You may have noticed that I now have a key in that drop down leaf too.  Don’t be fooled, this is not a functioning key for that lock.  Instead, Ken came up with a way of permanently affixing the key so that it can be used like a ‘knob’ to open the drop leaf.

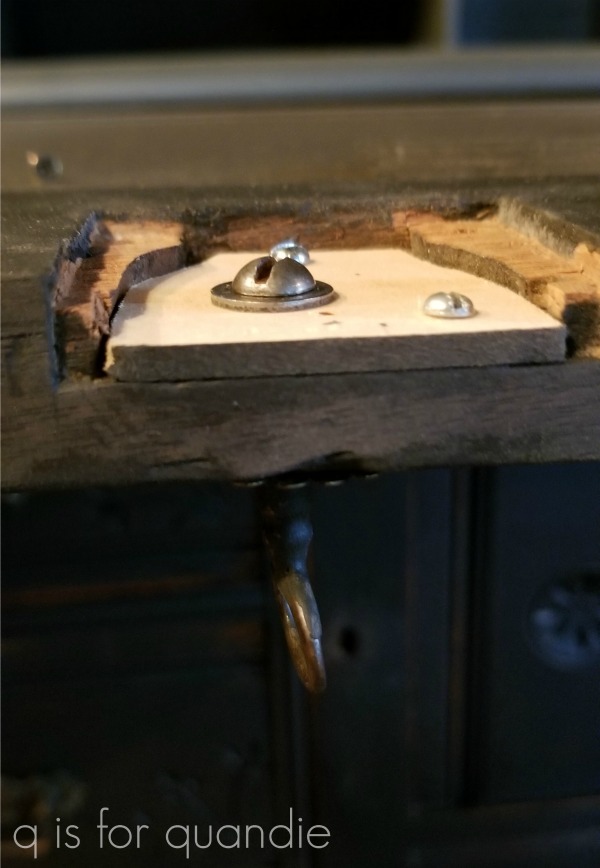
I was going to attempt to describe how he managed it, but honestly it’s over my head.  Suffice to say that somehow he made it so that the key has a threaded end now and is screwed on from behind.  Then he made a little trap door to cover that up from the back (which ends up being the top of the drop leaf when it’s open).

I filled around it with Dixie Belle Mud.  Once dry, I sanded it smooth and painted over it.

Now you’d barely know it was there.

Once again I used Big Mama’s Butta as a finish over the Midnight Sky paint.

I really like the look of this product over the black paint.

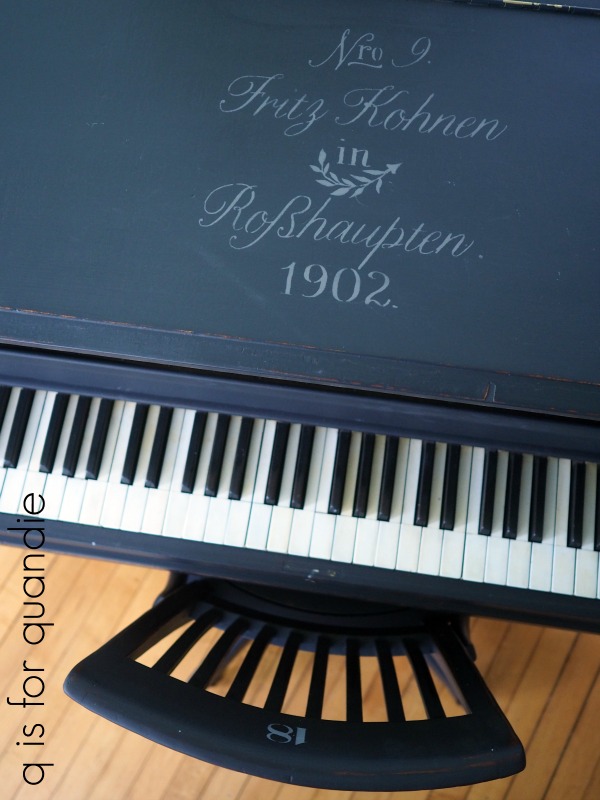
You may remember that in my post about my piano room makeover I mentioned that one reason I kept my faux board and batten so tall was so that I could crop out the dark gray upper wall in my staged furniture photos.

As you can see, it worked like a charm for this piece.

I feel like I was able to restore some of this desk’s former glory, what do you think?

As always, many thanks to Dixie Belle for providing the paint and the Big Mama’s Butta, and to Prima Marketing for providing the transfer, the molds and the modeling material for this project.

If you’re wondering where to purchase the Prima Marketing products check out their ‘where to buy’ page.

If you’re wondering where to buy the Dixie Belle products, you can shop with them directly online or find a retailer near you.

And finally, if you happen to be local (Twin Cities, MN) and in need of a secretary desk, check out my ‘available for local sale’ page for more details.

chair no. 18

I’m so excited to share my piano room makeover with you guys, but I’m holding out until Wednesday in order to stick to my regularly scheduled room tour series, and because I haven’t quite finished writing that post yet.

But I am going to share just a small portion of the project with you today, the chair that I have paired with my piano.

This chair is obviously not one that came with the piano.  I don’t remember precisely, but I’m sure I bought it at a garage sale.  I love it’s sort of vintage industrial vibe.  You may remember that back when I painted the piano I was on the fence about what to do with the chair.  Initially I was going to leave it unpainted, but I really didn’t like how the wood tone looked with the black piano.  I was reluctant to paint it in a matching black because I thought that would be too matchy-matchy.

Obviously having a seat that matches your piano isn’t really a bad thing, but I wanted to have something unexpected and more unique than your typical matching piano bench.

I’ve been keeping an eye out for an alternative seating option for this spot, but haven’t found one yet.  I was really thinking I’d end up painting this one white and calling it good.  It wasn’t until I had the entire room finished that I decided that black was the right choice after all.

This couldn’t have been a quicker, easier makeover.  I simply sanded the chair very quickly (not thoroughly at all) and then wiped it down with a damp rag.

I used my cheater method to paint the cane seat of the chair.  In other words, I spray painted the cane with matte black primer.  Then, while I was at it, I did the same with the slats on the back.

Once the primer was dry I went over those bits with my final paint.  It doesn’t matter if I didn’t quite get every spot because the black primer makes that fairly unnoticeable.  It’s so much easier to make sure I get into all of the nooks and crannies with spray paint first, especially on that cane.

Next I painted the rest of the wood parts of the chair with Dixie Belle’s Midnight Sky, the same color I used on the piano.  I just did one coat.

Since I planned on distressing the chair anyway, I didn’t need perfect coverage.  Plus the black paint over the dark wood covered quite well.

Because I was keeping this chair, I wanted to add a little touch of whimsy with a stenciled number.

What can I say, I love a good number.

I added the same stenciled number to the back of the chair too since the chair is seen from both sides.

I used a new product from Dixie Belle to topcoat this chair.  It’s called Big Mama’s Butta and it’s available in two scents, Orange Grove and Suzanne’s Garden.  Plus you can get it in an unscented version.  It contains all natural hemp seed oil, coconut oil, beeswax, carnauba wax and essential oils.

I would describe this product as a wax meets hemp oil sort of combination.  It has a consistency similar to vaseline, although not quite as soft.  It goes on much more easily than wax, but also leaves more of a greasy feel behind.  Sort of like … well … butta!

Not to worry though, that greasiness goes away as it dries.  Just be sure to wipe away any excess product after applying it.

I’m using the Orange Grove version and I love the smell.  I have heard some say it’s too overpowering, but I don’t think so.  The scent does dissipate over time as well.

Even though I went matchy-matchy with the color, I do think this vintage office chair is a bit unexpected when paired with a piano.  So in the end, I’m quite happy with it and don’t feel like I need to keep searching for an alternative after all.

Thanks to Dixie Belle for providing me with the Midnight Sky paint and the Big Mama’s Butta that I used on this project.  If you’re wondering where to purchase Dixie Belle products you can find their website here.

Be sure to check back on Wednesday to see the full reveal of my piano room makeover!

the midas touch.

I purchased this mid mod piece at a garage sale earlier this season.

It had been lingering out in the workshop all summer because it’s so huge.  I felt worn out just looking at it.  Plus the top is laminate, so I knew that would require some extra steps.  So I procrastinated a bit.

But much like painting my baby grand piano, I am now wondering what in the world I was waiting for.

In fact, this is the perfect sort of project for a working gal like me.  Each step only took about an hour or so and then needed dry time in between.  Perfect for fitting in after work each evening.  By Friday you suddenly realize that you’ve finished the piece and it didn’t take long at all.

I started by removing the drawer pulls and sanding everything a little more thoroughly than usual.  Then I cleaned the entire piece using TSP substitute.  I was extra diligent with these two steps because I wanted to make sure I would get good adhesion with my paint.  Next I added a coat of Fusion’s Ultra Grip to the laminate top of the piece.  The directions on the Ultra Grip say to let it dry for 12 hours for best results, and since I wanted the best result, that’s what I did.

While that was drying, I painted the drawer fronts and the base of the piece with Fusion’s Park Bench.

The next evening I added a 2nd coat of green on the bottom and the first coat of Park Bench to the top.  I then let that dry for 24 hours before adding a 2nd coat to the top the next evening.

Again, I wanted to allow for maximum durability of the paint over that laminate.  It’s always a good idea to do two light coats of paint rather than one heavy coat, and to make sure the first coat is totally dry before adding the 2nd.

Next I washed the drawer pulls using Dawn dishwashing soap.  Once they were dry I ‘golded’ them up a bit using Prima Marketing re.design’s Decor Wax in Eternal.

To apply the wax to pieces like this I just put on some latex gloves and rub the wax on with my finger.  Somehow I just can’t seem to stop the theme to Goldfinger from running through my head while I’m doing this.  Goldfinger.  He’s the man, the man with the Midas touch.

I like to give the wax a couple of hours to harden and then I buff the pulls lightly with a soft cloth to bring out a little more shine.

The paint totally updates the look of this credenza.  I think it simplifies some of the detail that is going on with those raised panels on the drawer fronts and makes them look less ‘busy’.

You’ll remember the pair of quail I purchased at the Mac-Grove sales last weekend, here they are again with their new paint job.  They tie in nicely with the gold hardware.

I think they look a bit more fresh and updated now.  I used the same RustOleum spray paint in gold that I used on my living room lamp and the hardware on the cobalt blue dresser.  I seem to be getting a ton of use out of that one can of spray paint.

In the past these Park Bench green pieces have sold really well for me so I’m keeping my fingers crossed that this trend continues.

Thank you to Prima Marketing for providing the Decor wax and to Fusion for providing the Ultra Grip.

If you’re wondering where to purchase the Decor Wax, check out Prima’s ‘where to buy’ page.

If you’re wondering where to buy the Fusion products, check out their ‘where to buy’ page.

And finally, if you happen to be local (Twin Cities, MN) and in need of a fabulous green credenza, check out my ‘available for local sale’ page to see if this one is still available.

mid mod trash to treasure.

Today’s piece is a true trash to treasure story.

A couple of weeks ago Mr. Q and I were headed out for our daily walk in a nearby park when I spotted some furniture at the curb with a ‘free’ sign.  Most of the pieces were trashed beyond my level of repair, but this dresser had potential.

Now, you might be thinking ‘jeesh Quandie, could you take a straight photo already!’, but FYI, this is a straight photo.  It’s the dresser that’s crooked.  The front leg on the left is about 2″ shorter than the rest.  At some point a portion of it either broke off or just rotted away, I’m not sure which.

You could also possibly be thinking ‘egads, that thing is kinda hideous’, which is a fair assessment I think.  But just wait until you see how it turned out.

Naturally my handyman/neighbor Ken made quick work of that repair.  So quick in fact that I never even got photos for you.  But he basically cut the bad leg off a bit higher than the damage, cut a new bottom half of the leg, and then attached it using a dowel pin to make sure it was stable.  I then used a little Dixie Belle Mud to fill the seams.  Once painted, unless you know it has been repaired, I don’t think you would even notice.

Once the leg was repaired I simply sanded and cleaned the piece and then painted it in Dixie Belle’s Bunker Hill Blue.

This deep, rich blue is really difficult to capture well in photos.  It’s one of those chameleon sort of colors that changes depending on the light, sometimes just looking like navy blue and other times looking more cobalt.  Nonetheless, it’s perfect for a mid-mod piece, don’t you think?

Once the paint was dry I added clear wax over the top and used Buffy (my Black & Decker car buffer) to give it a little sheen.

I thought the drawer pulls on this piece were fairly unique.

There is a cut out piece of veneer-like material behind the pull that was originally black.  I pulled those out when I removed the pulls and painted them all in the same RustOleum Mirror Finish gold spray paint that I used on the lamp in my living room.

I love how the gold pops with the rich cobalt blue.

I’m not usually one for lining drawers, but these were pretty stained and unattractive so they needed to be either lined or painted.  I just happened to have some blue gingham paper on hand, and enough to line all four drawers so I went with it.

By the way, the modern painting I’m using in my photos belongs to nnK and normally hangs in her living room.  But I found it at a garage sale in Minneapolis several years ago and passed it on to her.  It has the perfect colors in it for her house.

Wouldn’t this piece be amazing in a downtown loft?

Or perfect for a boy’s room.  Or an adult’s room for that matter.  In fact, it would be perfect for providing a pop of gorgeous, deep blue to any room!

As always, thank you to Dixie Belle for providing the Bunker Hill Blue paint, the Mud filler, and the clear wax that I used for this project.

If you’re wondering where to buy the Dixie Belle products, you can shop with them directly online or find a retailer near you.

And if you happen to be local (Twin Cities, MN) and in need of a brilliant blue mid mod dresser, check out my ‘available for local sale’ page for more details.

a sweet serpentine secretary desk.

As a reminder, here is the pretty little secretary desk that I shared with you guys on Monday.  I picked this up at an ‘epic’ garage sale while out driving around in Wisconsin.

Just check out that curvy serpentine front and those fabulous claw feet.  Ignore the not so great hardware and the incredibly beat up finish.

You’ll also have to ignore the Blue Cross/Blue Shield information sticker inside, plus the bent and disconnected hinge.  Not to mention all of that dust.

I knew that behind those flaws was a gorgeous piece of furniture.

I started work on this piece by removing the inside piece.

Did you know that sometimes these just come right out?  Unfortunately that’s not true of all secretary desks.  Plus someone had added a couple of screws to this one to hold it in place, but once I removed those it slid right out.  It couldn’t be any more convenient for painting.

Once I had it out I removed the sticker, then the little knobs.  I cleaned it up and then sprayed it with Rustoleum Chalked spray paint in Charcoal.  With all of those slats it would have been a bear to paint with a brush.  After sanding some edges to distress, I sealed the spray paint with the Rustoleum spray matte clear sealer as well.  Finally I put the original knobs back on again.

Much improved.

Next I sanded and cleaned the outside of the desk.  As I was cleaning it, the water was turning decidedly orange-ish in color.  That was a good indication that this piece was going to be a bleeder and since I was going to paint the outside in Dixie Belle’s Drop Cloth (a creamy white), I needed to find out for sure.

So I painted just one of the drawers as a test.  Yep, definitely a bleeder.  In other words, the orange-y colored stain on this piece was bleeding through my creamy white paint.  I’m sure many of you are familiar with this phenomenon, but in case you aren’t, when this happens you have to seal your piece with a stain blocking sealer before you can proceed with painting.  It doesn’t matter how many coats of paint you put over bleeding stain, that stuff will just continue to bleed thru.

So I brought out the Dixie Bell BOSS.

This product comes in both a clear version and a white version.  I think the clear version is more versatile since I don’t always want to see white under my paint color when I distress the edges, although the white version would have worked fine for this particular piece.

I painted the outside of the desk with just one coat of the BOSS and then I let it dry for 24 hours.  I’ve learned in the past that extra drying time can make a big difference with this product, so I now always let it dry for at least 24 hours.

And here is the difference using the BOSS made.

Ha!  Yep, I wasn’t kidding when I said this one was a bleeder!  The top drawer is my test drawer without the BOSS.  The bottom one is another drawer with one coat of BOSS followed by two coats of Drop Cloth.  That’s some pretty good blocking power.

Now, you do have some other options for sealing a bleeder.  You can use shellac.  But that stuff is smelly and it’s a pain to clean your brush afterwards.  You can use spray shellac and sometimes I do pull that out for spot treatments, but you can only use that outside (unless you want to gas your family).  You also can use a stain blocking primer from your local DIY store, but I have yet to see those available in a clear version.

So, BOSS gets my vote.  It has very little odor and you can clean up with soapy water.

Once I had the rest of the piece painted with two coats of Drop Cloth I had to wait for the next step.  I knew I had the perfect transfer coming from Prima Marketing, but it wasn’t here yet.  I’m not very good at waiting … tick tock, tick tock … but this one was definitely worth the wait!

Now, I have to say, I don’t know why Prima chose to call this one Parisian Letter because there is only one small line of French on it, and it’s a the very bottom and didn’t fit on my desk.  Obviously there’s also a little Latin on that crest, but otherwise all of the writing on this one is in English.

But that doesn’t make it any less gorgeous.

Most of the writing seems to have something to do with the quantities and prices of things, and a lot of it isn’t terribly legible.  But that isn’t the point, the point is to look pretty not to impart a message of any kind.

I’m not sure if you noticed, but I changed out the drawer pulls.  I really wasn’t loving the original hardware, plus it’s always my preference to let the transfer be the star of the show.  Clear glass knobs from D Lawless sort of fade away, but yet also look appropriate to the piece.

This sweet serpentine secretary desk would be perfect to use bedside instead of a nightstand.  You could keep all of your reading material inside.  It would even be quite simple to set up some sort of charging station inside by cutting a hole in the back to allow cords to go through.

Of course, you could just use it as a desk.  My handyman Ken repaired and reinforced the hinges that support the desk top so it is perfectly functional.  Of course I wouldn’t put something super heavy on it, but it would easily hold a lap top.

But it would also be a great spot for dropping your keys and mail in the foyer.  You could fill the drawers with hats, scarves and gloves.

So many possibilities!

As always, many thanks to Dixie Belle for providing the BOSS sealer, the paint and the clear wax, and to Prima Marketing for providing the transfer for this project.

If you’re wondering where to purchase the Prima Marketing transfers check out their ‘where to buy’ page.

If you’re wondering where to buy the Dixie Belle Drop Cloth, you can shop with them directly online or find a retailer near you.

And finally, if you happen to be local (Twin Cities, MN) and in need of a sweet serpentine secretary desk, check out my ‘available for local sale’ page for more details.

surely not everybody was kung fu fighting.

A couple of weeks back my sister, niece and I decided to take a ‘Sunday drive’ on a beautiful, sunny Saturday.  We didn’t have a specific destination in mind.  It was a gorgeous day and I am lucky enough to drive a VW Beetle convertible, so we headed out with the top down.

We decided to cross over the new Stillwater bridge into Wisconsin first because my niece had yet to cross over it.

This bridge was finished in 2017 and was quite the controversy.  People had very strong opinions about whether or not (and where, and how) it should be built, and thus it took years and years for it to happen.  However, the old Stillwater lift bridge was built in 1931 and was definitely on its last legs.  After the tragedy of the 35W bridge collapse, I was certainly a little leery of driving over that creaky old bridge!

You can barely see the old lift bridge off in the distance in this photo taken from the new bridge …

The old bridge is in the more historical downtown part of Stillwater, which is where Mr. Q and I went for drinks on our anniversary back in June.

The new bridge is in the more commercial part of town, so the modern aesthetic makes a little more sense here.

We still had to decide which way to head after crossing over?  North?  or South?

My niece came up with a plan for letting fate decide.  If the next car we saw had a Minnesota license plate we were going to head north, and if it was a Wisconsin plate we were going south.  I’m not sure what we would have done if it was neither!  But it was a Wisconsin plate, so we headed south.

We hadn’t gone far when I spotted a bright pink sign that said “Epic Sale!”  Well, if it’s epic you pretty much have to stop, right?

And that’s where I found this piece …

Clearly it was meant to be and the universe was guiding me towards this particular desk 😉

I am almost done with this piece now, but I’m waiting for a particular Prima Marketing transfer to arrive to finish it up, so I’ll be sharing that later this week.  For today, I’ll just finish my Sunday drive on a Saturday story.

After stopping at the sale (and texting Mr. Q to come and pick up the desk I purchased), we headed into Hudson, WI for lunch at the Smiling Moose where I had the St. Croix Chicken Salad which was absolutely delicious.

Next we decided to check out Willow River State Park.

I’ve lived in the Twin Cities for over 30 years and had never made the hike to the falls on Willow River.

You’ve all seen those photos of people frolicking in the Dunn’s River Falls in Jamaica right …

I’ve always wanted to do that, it looks so refreshing.

Well little did I know that I could have been doing that right here in my own backyard all along.

After hiking down a fairly steep trail (which we were dreading having to climb back up again) we came to the falls.  And there were already a few other people there.  Ha!  Yep, apparently everybody else in the Twin Cities already knew about this place.

Unfortunately we hadn’t brought swimsuits or towels, so we didn’t go in the water this time.  But now we know about this not-so-hidden gem, so maybe we’ll make it back there for a swim next time.

After exploring more of the park and doing a lit bit more hiking, we returned to the car and decided to head back north towards home.  We were tooling along on a country road when we came across a sign that had us all laughing out loud.  I just had to stop the car and get a photo.

Surely not everybody was kung fu fighting.  After all, how could they be?  They were all swimming at Willow River Falls!

After that photo stop we came across a sign that said ‘Rustic Road’.

We had no idea what qualified as a Rustic Road, but we were intrigued and decided we really needed to check it out.  So we turned off and headed down Trout Brook Road.  I wish I’d taken the time to stop and get a few pictures, but I didn’t.  Suffice to say it was a lovely drive, perfect for a sunny afternoon in a convertible.

I have since googled it and found the website that explains Wisconsin’s Rustic Road program:

The Rustic Roads program was created over 40 years ago to provide hikers, bicyclists and motorists an opportunity to leisurely travel through the state’s scenic countryside. Today, there are 120 designated Rustic Roads spanning more than 724 miles through 59 counties. They are beautiful in every season.

What is a Rustic Road?

Every Rustic Road is unique, but all:

  • have outstanding natural features along its borders such as rugged terrain, native vegetation, native wildlife or include open areas with agricultural vistas.
  • are lightly traveled local access roads, serving the adjacent property owners and those wishing to travel by auto, bicycle, or hiking for purposes of recreational enjoyment.
  • are not scheduled nor anticipated for major improvements which would change their rustic characteristics.
  • are at least two miles long and often provide a completed closure or loop, or connect to major highways at both ends of the route.


Seriously, how cool is that?  You can bet there will be more Rustic Road travels in our future. I bet they are beautiful in the fall

or even in winter.

Do you have a Rustic Road program where you are?  Or have you traveled on some of Wisconsin’s Rustic Roads?  If so I’d love to hear about it in the comments.  And be sure to check back on Wednesday to continue the tour of my home, or on Friday to see what I’ve done with that fabulous secretary desk!

buffy, the furniture slayer.

Recently I shared the story of a pair of mid-mod pieces I picked up at a garage sale.  I painted the taller piece in my favorite millennial pink shade of paint …

Here is the matching low boy …

I decided to go in a completely different direction with this piece.

I started by stripping the drawer fronts.  I thought the veneer on them was quite pretty.  Even though there were some damaged spots, I thought I could minimize them with some stain-able filler.

Knowing what I know now, I’m not sure I’d make this same choice again.  Not because of the veneer damage, I do think I successfully downplayed that damage.  But there were a lot of steps involved in refinishing these drawers.   It took three passes with the stripper to get all of the shiny varnish off, then gluing and filling damaged veneer spots with filler, then sanding, then two coats of Minwax Wood Finish Penetrating Stain in Special Walnut, then two coats of Minwax water based matte Polycrylic  with a light sanding with 400 grit in between.

In other words, it took a lot more work (and drying time in between) than just painting.  This is just something to keep in mind if you are refinishing furniture to sell.

The drawer fronts are pretty now though.  It remains to be seen whether or not I can sell this piece for a good enough price to make the effort worthwhile.

In addition to refinishing the drawers, I painted the body of the piece in Dixie Belle’s Gravel Road.  That part was fairly simple.  Things went wrong a bit when I tried to top coat it with the Polycrylic.  My initial thought was that having the same sheen on the paint (ie. matte) as on the drawers fronts would be a good move.  However, the poly ended up looking really streaky over the dark grey.  I’m not sure if my technique was faulty, or possibly the matte finish of the poly doesn’t work well over the dark grey color.  Regardless, to fix the problem I painted back over it with the Gravel Road.  Then I top coated it with a product I am much more familiar with, Dixie Belle’s clear Best Dang Wax.  I probably should have just done that in the first place.

This gave me a good opportunity to try out my new buffer.

Mr. Q ordered this from Amazon for me and he decided we should name it Buffy.  I have to say, it does make quick work of buffing a waxed finish.  It’s also quite light and rather quiet for a power tool.  I have no idea how well Buffy will hold up over time, and how many of those pads I’ll go through, but for now I am loving her.

I really liked the style of the original hardware that came with this piece, but the brassy gold color wasn’t really working for me.  So I got out the Prima Marketing Art Alchemy Metallique wax in Bronze Age.

This stuff did a fantastic job of warming up the color of the hardware and it works so much better with the stain color on the drawer fronts.

After many trials and tribulations, this piece is finally done.  I know this style isn’t to everyone’s taste.  Well, to be quite honest, it’s not to my taste either.  But there is a market out there for these pieces so sometimes it’s fun to step outside of my comfort zone and work on something like this.

I’ve got a couple more mid-mod pieces waiting in the workshop too.  But I also have some pieces that are more ‘me’, so be sure to stay tuned.

As always, thank you to Dixie Belle for providing the paint and the wax for this project, and to Prima Marketing for providing the Metallique wax.

working for myself.

Every once in a blue moon I work on a piece that is meant for me.  It doesn’t happen all that often because usually my own projects get pushed to the bottom of the list.  Plus, my house is pretty much full, so if I bring in something new then I have to get rid of something else … usually something that I still kind of love, so I don’t do it very often.

But recently I decided to swap out the small farmhouse table on my front three-season porch.  Let’s first look at the table that I had there before …

FYI, I custom mixed the milk paint on the base.  It’s a lovely color, but not one that you can buy already mixed.

Having a small table in this particular spot is super functional for me.  I generally get great lighting here, even on gloomy days.  So this is where I take many of my close up photos of things, like this …

But it was bugging me that the top of this table was pretty stained, and it had black streaks in the wood.  I didn’t love seeing those flaws in my close ups.

Meanwhile, I had this 2nd small farmhouse table out in the photo cottage.

I tried to sell this table when I first painted it, which was way back in October 2015.  It never did sell, and somehow it was just abandoned out there.  While out there, a bird pooped on it.  Yep.  Gross, right?  Although I’ve been told that it’s good luck to have a bird crap on you, or does that not apply to tables?

I thought that the top was probably permanently stained from the dark bird droppings.  It became one of those out of sight, out of mind situations and the table just lingered out there.

But recently I decided enough was enough, I needed to deal with the table.  So I pulled it out and started by cleaning off those droppings.  Much to my surprise, they came right off and hadn’t left much of a stain at all.  So if you’re ever wondering just how durable a waxed wood surface is, well, there you go.  This table top had been waxed with Miss Mustard Seed wax almost four years ago and I was still able to clean that crap (literally) right off.

None the less, I decided that this would be a good time to sand the top down a little and add a fresh coat of wax.  This time I went with Fusion’s Liming Wax instead of the clear wax.  That really brightened it up.

I have to note here that this is one of my reasons for preferring a waxed (or hemp oiled) surface over a poly’d one.  It’s really quite an easy job to sand it quickly and apply a fresh coat of wax giving it a completely refreshed look.  I would say it took maybe about 20 minutes, and now it looks brand new.  Easy peasy.

After adding the wax I decided to try out my new toy, a car buffer.  Mr. Q purchased it for me to save me some elbow grease when doing large waxed surfaces.  It worked great, giving me just a little more sheen than I get when buffing by hand with very little effort at all.  Since I’ve only used it this one time so far, I’m really not ready to provide a recommendation or a proper review of it.  But I’ll keep using it and let you know how it goes.

I sort of captured the sheen of the wax in this next photo.

In the end, I loved the way the top looked so much that I decided I should keep this table and swap it for the other one on my porch.

Once I’d made that decision, I realized that the existing paint color, Miss Mustard Seed’s Shutter Grey, was not going to work on the porch.  But I could easily repaint the base in the color of my choice.  It didn’t take me long to decide on Miss Mustard Seed’s Linen.

I didn’t do any prep at all, other than cleaning it.  I knew that I would be rolling the dice when it came to chipping since I was painting over a waxed surface (I had waxed over the original milk paint as well as the top).  But the wax had been curing for almost 4 years, so I was betting it would be OK (a waxed surface is fully cured after 30 days).

Sure enough, I got just the right amount of chipping.  There are some spots where you can see the Shutter Grey color underneath, but there was no excessive chipping.

After I had the table sanded, I decided that again, since this was going to be for me, I was free to add my own personal style to it.  So I used just a small section from the old Prima Marketing Specimens transfer.

It was just enough to add a unique flavor to the table.

Finally, again, since this table was just for me and I could do as I liked, I did not add a topcoat to the painted part of the table.  Did you know that you don’t ‘have’ to use a topcoat with milk paint?  It will cure and harden over time to provide durability.  It won’t be super washable or water resistant though, so that’s something to keep in mind.  I’m OK with that though.  After all, I’ll probably want to re-paint it again in another four years anyway 😉

But for now, I absolutely LOVE how this one turned out.  As I was admiring the finished product, I said to Mr. Q, “I just love working for myself!”  Somehow it frees me up to make choices based solely on what will make me happy, not on what will sell, or be durable enough for the buyer, or how much something will cost and whether or not I can recoup that cost.

In this case I cut up a large transfer to use just a small piece of it on this table.  Sure, I’ll use the rest of it on something else, but I still probably wouldn’t have done this for a piece I was going to sell.

I don’t know, maybe I need to start treating more pieces as though I’m working for myself!

After taking these photos outside (because it was far too pretty of an evening not to do them outside), we moved the table into its new home on the front porch …

Yep, I have to admit, I really prefer this one over the previous one.

What do you think?

Thank you to Miss Mustard Seed’s Milk Paint for providing the Linen paint, Prima Marketing for providing the Seeds transfer and Fusion for providing the Liming Wax.

a six legged table.

First things first, congrats to Irene for winning the Prima Marketing Modeling Material and molds drawing.  Hope she has fun making up some molds!  Now, onward with today’s post …

A while back my hairdresser texted me to ask if I wanted a table that she was getting rid of.  The table reminded me quite a bit of the one that I use on my side of the bed as a night stand …

It’s the same general style, size and height.  These taller occasional tables are perfect next to a bed that has some height to it.   There isn’t any storage, but a little wicker box will do to hold lotion, tissues, etc.

So although I tend to shy away from smaller occasional tables these days, I knew from experience that this one could serve a practical purpose.  So I said yes.

Here is the ‘before’ …

Oh boy.  So dark it will need three coats of paint to go light, and all of those legs to paint!

More on that in a minute, but first, here’s a look at the ‘before’ condition of the top …

Pretty scratched up and discolored.  But I thought the wood grain pattern in the veneer itself was quite pretty.

So I started out by stripping the top.   Then I got a wild hair to try either white washing or lime waxing it to lighten it up, while still allowing the grain to show through.  But instead of either of those, when I reached into the supply cabinet I pulled out the Homestead House Stain and Finishing Oil in Driftwood which is a grey color.

After the first coat I really thought I’d made a mistake.  It was streaky and dull.  But the SFO (Stain and Finishing Oil) is meant to be applied in several light coats.  Each coat progressively adds a little more color, durability and sheen.  So I applied a second coat, which improved the look immensely.

But then I stopped after two coats because I liked the look, and I didn’t want to hide any more of that grain with a more opaque finish.  I could have added additional coats of the SFO in Natural at this point because it will add protection and sheen without adding color, but I didn’t have any of that on hand. So instead I added a topcoat of Miss Mustard Seed’s clear wax to give it a little more luster and protection.

Next up was painting the base of the table … but oh my, six legs!  That’s a lot of putzy painting with a brush.

I don’t own a paint sprayer.  Typically, spraying is just not for me.  I enjoy painting with a brush.  I know I would not enjoy the process of using a sprayer; taping things off, finding a way to contain the over spray, and most of all, cleaning the sprayer when you’re done.  Yep, that part is especially not for me.  I’ve been known to completely forget about the clean up step and throwing a paint brush away is bad enough.  Having to toss an expensive sprayer would really be a bummer.

But in the case of something like this piece, I’m not opposed to pulling out a can of spray paint to get the job done.

In this case I thought I’d try the Rust-Oleum Chalked ultra matte spray paint in Country Gray.

I taped off the top, and then sprayed three coats on the base of the table.

I pretty much used up the entire can on this one small table.  Spray paint is definitely not the most cost effective solution, but it can sometimes be the easiest.

I staged the photos with a chair and one of my stenciled faux grain sack pillows just to give it some scale.

I filled an old transferware tea pot with some coleus clippings and put it on top of a couple of books too.

One of my readers, Shelly, recommended the book on top, Country Brocante Style by Lucy Haywood.  So Mr. Q ordered it from amazon for me (gotta love that next day shipping).  Thanks for that recommendation Shelly, I love the book.  It fits my style to a t (or should I say a q?)

As for the table, I think it has a completely updated look now, don’t you?

Thanks to Homestead House for providing the Stain & Finishing Oil, and to Miss Mustard Seed’s Milk Paint for providing the clear furniture wax.

If any of you locals need a fabulous new bedside table, be sure to check my ‘available for local sale‘ page for more details.

uber chippy.

A while back I shared the chair that I recovered in anticipation of taking it to Reclaiming Beautiful (the shop where I sell on consignment in Stillwater, MN).  I had this chair in my own house for a couple of years so the seat needed fresh upholstery to make it shop-worthy, which was an easy spruce up … or so I thought.

I noticed while I was working on the chair that there were a few loose chips of paint here and there, so I just brushed those away and kept going.  After the chair was finished, I stored it in my non-climate controlled workshop in the carriage house for a few weeks before loading it up to go to the shop.

However, when I went to unload the chair from the van after arriving at the shop it was obvious that there were more than just a few loose chips.  It was shedding like gang busters.  I don’t know if it was the time spent in a damp workshop or what, but clearly it was in no shape to sell.  So I left it in the van and brought it back home to see what I could do with it.

I originally painted this chair back in October 2015 using Miss Mustard Seed’s milk paint in Linen.  I sealed it with clear wax.  It was slightly chippy from the beginning as you can see here …

I have found that any piece that starts out chippy tends to chip more over time if not sealed with something more durable than wax and/or hemp oil, like Miss Mustard Seed’s Tough Coat Sealer.  Especially if it’s a piece that is handled/used a lot.  But I’ve never had a piece get this chippy over time.

Plan A was to sand the chair down and re-paint it using the same MMS Linen (or maybe technically this is Plan B since the original plan was to simply re-cover the seat).  In case you are wondering, yes, you can definitely paint over a waxed surface that has cured for 3.5 years.  Normally this would just require a quick scuff sanding.

However, I used a power sander to knock off as much of that loose paint as possible.  And a lot of paint did come off.  But then, as I was looking at the chair, I realized that I kind of loved it looking uber chippy and distressed.  I know it’s not everyone’s cup of tea (Betty, you may want to look away), but I also know there are fellow chippy lovers out there too!

So rather than re-paint,  I cleaned away the dust and then sealed the chair using The Real Milk Paint Co’s Dead Flat Finishing Cream.  This should help it hold up over time, and prevent it from shedding paint chips all over the floor again.

Also, in case you are wondering, I opted for the Dead Flat Finishing Cream rather than Tough Coat Sealer because it is a thick paste that doesn’t drip.  I’m not the greatest at avoiding drips with more fluid sealers, especially on a piece like this with lots of legs and details where a more liquid product will pool and then drip.

My q tip of the day:  Know your own limitations.  Products that work well for others may not suit you, so experiment with things and find what works well for you!

Hopefully someone out there will love this chippy chair as much as I do.  Although I put it up in our bedroom to take these photos, it’s really not practical to have it in front of my closet door on a permanent basis.

So I’ll be taking this one back to Reclaiming Beautiful again, and this time it won’t be sitting in a pool of paint chips.

Unless one of my local readers wants to snatch it up first (in which case, be sure to check my available for local sale page for more details).

Meanwhile, I’ll be back here on Friday to tell you a little bit more about that pillow on the chair, so be sure to stay tuned!