
I’m so excited to share my piano room makeover with you guys, but I’m holding out until Wednesday in order to stick to my regularly scheduled room tour series, and because I haven’t quite finished writing that post yet.
But I am going to share just a small portion of the project with you today, the chair that I have paired with my piano.
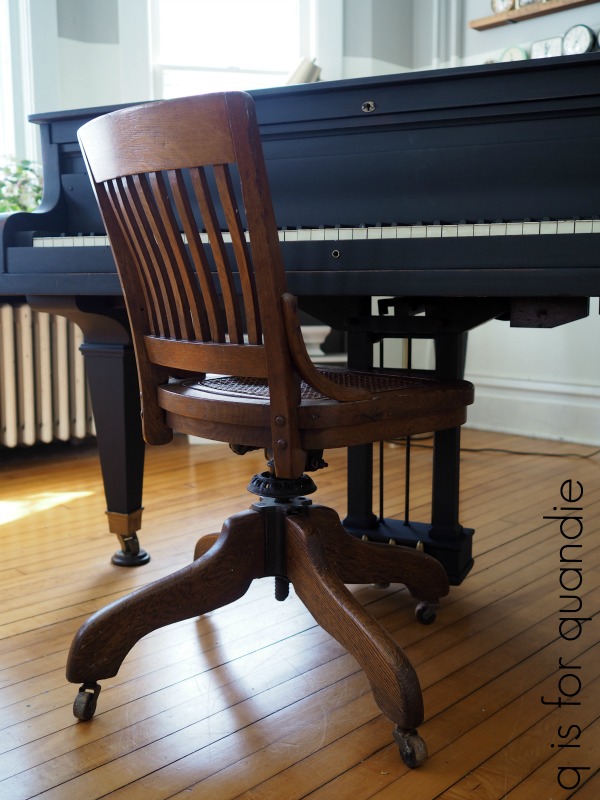
This chair is obviously not one that came with the piano. I don’t remember precisely, but I’m sure I bought it at a garage sale. I love it’s sort of vintage industrial vibe. You may remember that back when I painted the piano I was on the fence about what to do with the chair. Initially I was going to leave it unpainted, but I really didn’t like how the wood tone looked with the black piano. I was reluctant to paint it in a matching black because I thought that would be too matchy-matchy.
Obviously having a seat that matches your piano isn’t really a bad thing, but I wanted to have something unexpected and more unique than your typical matching piano bench.
I’ve been keeping an eye out for an alternative seating option for this spot, but haven’t found one yet. I was really thinking I’d end up painting this one white and calling it good. It wasn’t until I had the entire room finished that I decided that black was the right choice after all.

This couldn’t have been a quicker, easier makeover. I simply sanded the chair very quickly (not thoroughly at all) and then wiped it down with a damp rag.
I used my cheater method to paint the cane seat of the chair. In other words, I spray painted the cane with matte black primer. Then, while I was at it, I did the same with the slats on the back.
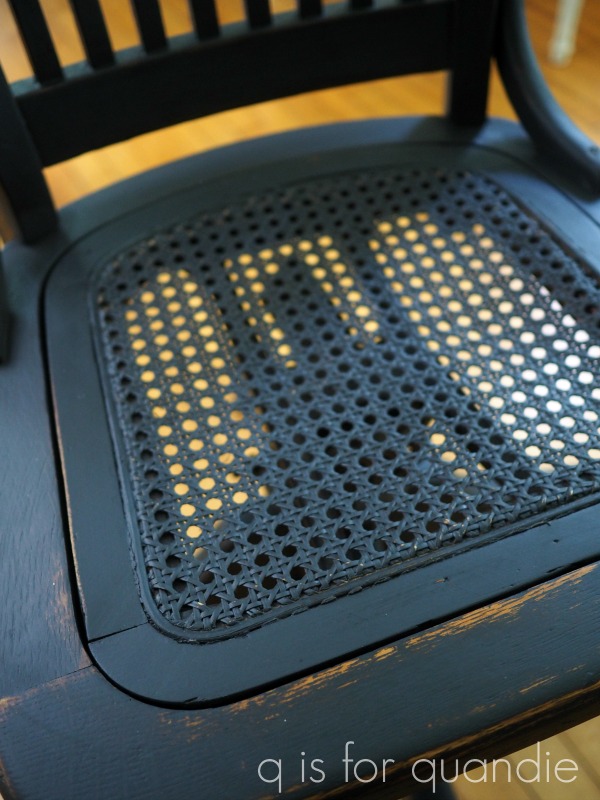
Once the primer was dry I went over those bits with my final paint. It doesn’t matter if I didn’t quite get every spot because the black primer makes that fairly unnoticeable. It’s so much easier to make sure I get into all of the nooks and crannies with spray paint first, especially on that cane.
Next I painted the rest of the wood parts of the chair with Dixie Belle’s Midnight Sky, the same color I used on the piano. I just did one coat.
Since I planned on distressing the chair anyway, I didn’t need perfect coverage. Plus the black paint over the dark wood covered quite well.
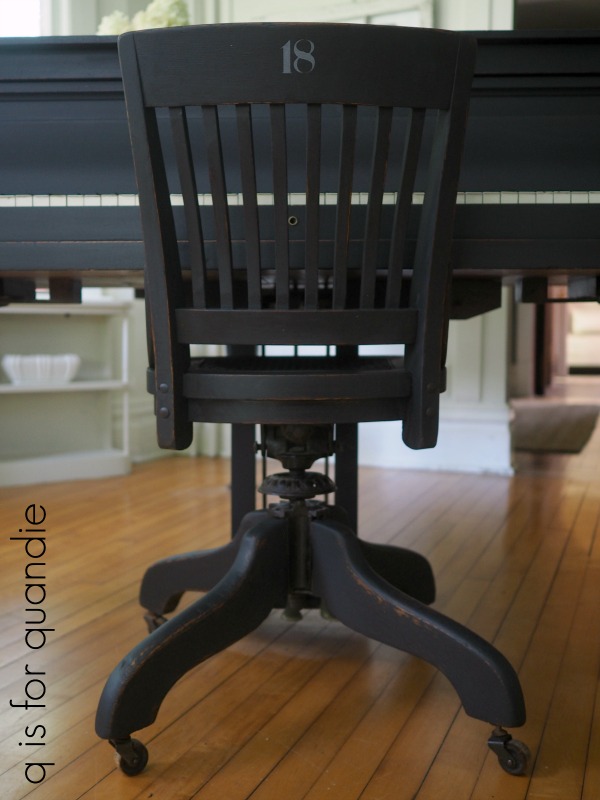
Because I was keeping this chair, I wanted to add a little touch of whimsy with a stenciled number.

What can I say, I love a good number.
I added the same stenciled number to the back of the chair too since the chair is seen from both sides.
I used a new product from Dixie Belle to topcoat this chair. It’s called Big Mama’s Butta and it’s available in two scents, Orange Grove and Suzanne’s Garden. Plus you can get it in an unscented version. It contains all natural hemp seed oil, coconut oil, beeswax, carnauba wax and essential oils.

I would describe this product as a wax meets hemp oil sort of combination. It has a consistency similar to vaseline, although not quite as soft. It goes on much more easily than wax, but also leaves more of a greasy feel behind. Sort of like … well … butta!

Not to worry though, that greasiness goes away as it dries. Just be sure to wipe away any excess product after applying it.
I’m using the Orange Grove version and I love the smell. I have heard some say it’s too overpowering, but I don’t think so. The scent does dissipate over time as well.
Even though I went matchy-matchy with the color, I do think this vintage office chair is a bit unexpected when paired with a piano. So in the end, I’m quite happy with it and don’t feel like I need to keep searching for an alternative after all.
Thanks to Dixie Belle for providing me with the Midnight Sky paint and the Big Mama’s Butta that I used on this project. If you’re wondering where to purchase Dixie Belle products you can find their website here.
Be sure to check back on Wednesday to see the full reveal of my piano room makeover!

Looks great! Although I liked the chair before, I love it painted black. Good Q-tip with the spray paint too.Looking forward to the Wednesday reveal!
LikeLike
I really love the way the room turned out! Looking forward to sharing it on Wednesday 🙂
LikeLike
This is so lovely. And timely for me lol. I have a desk that was my dads that I’ve been searching for the perfect black to paint it! And I think I may get some butta for the topcoat! Thanks for all your ideas and inspiration. Your blog is such a delight!
LikeLike
I really like the Midnight Sky which is a slightly lighter black than the Caviar. So my advice is to pick Caviar if you want a really deep, dark black and pick the Midnight Sky if you want a very slightly faded sort of look.
LikeLike
I love it – beautiful combination. And, I just simply love a piano room. Nice work.
LikeLike
Thanks Suzy!
LikeLike
Absolutely charming Linda! I love the use of words/graphics/#’s to make items a unique. Look forward to Wednesday’s post.
LikeLike
I really love adding words/numbers … I wonder if I’ll ever grow tired of that look?
LikeLike
I was wondering if you can Give me some advice? I waxed a buffett two weeks ago (clear) I want to do black wax over the pretty parts. Have I waited to long, do I need to reapply clear and then black? T I A.
Love the chair.
LikeLike
I would recommend just testing it in a small area and seeing how it goes. I wouldn’t necessarily think that you need to re-wax with clear first. The idea behind first putting down a coat of clear wax is so that the black wax is more ‘workable’ and doesn’t just get immediately absorbed by your paint (which can end up looking blotchy and uneven). Even if your first coat of wax is mostly cured by now, it should still allow you to work with the black wax. Nonetheless, I think if I were you I’d test that theory in a less noticeable spot before proceeding with the entire buffet!
LikeLike
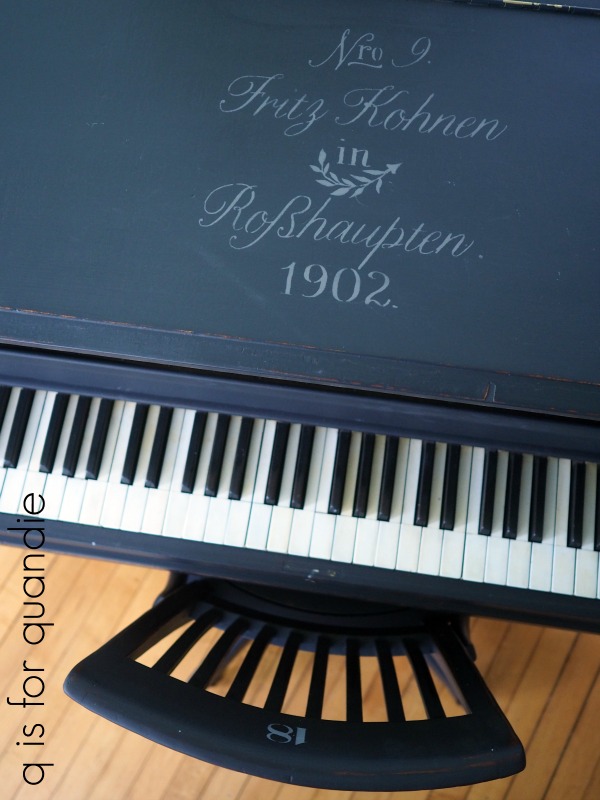
The slats on the chair look great with the black keys on the piano . So question….do you play that beautiful piano or is it a magnificent prop?
LikeLike
It’s an amazing laundry folding table. It’s also at the perfect height for wrapping presents. But sadly, no, I don’t play.
LikeLike
I always love your ideas Linda! Just curious, why #18? 🙂
LikeLike
Well, I’d like to say it has some sort of special meaning, but no. It’s just a number that I happened to have a stencil for!
LikeLike
Very pretty! I like the chair with it! Can’t wait till Wednesday, especially if Ken is involved! 😁
LikeLike
Ken worked really hard on this project!
LikeLike
I love the chair and the numbers give it the “Quandie,” look. Perfection!
LikeLike
The number does give it a little more personality, doesn’t it?
LikeLike