my new favorite neutral.

Remember the antique washstand that I brought home from the Nokomis neighborhood sale?

Well, I’ve been working on it for weeks!  Somehow it always seems like there is something else I need to focus on first.  But I’ve been chipping away at it, a little at a time, and it’s finally done.

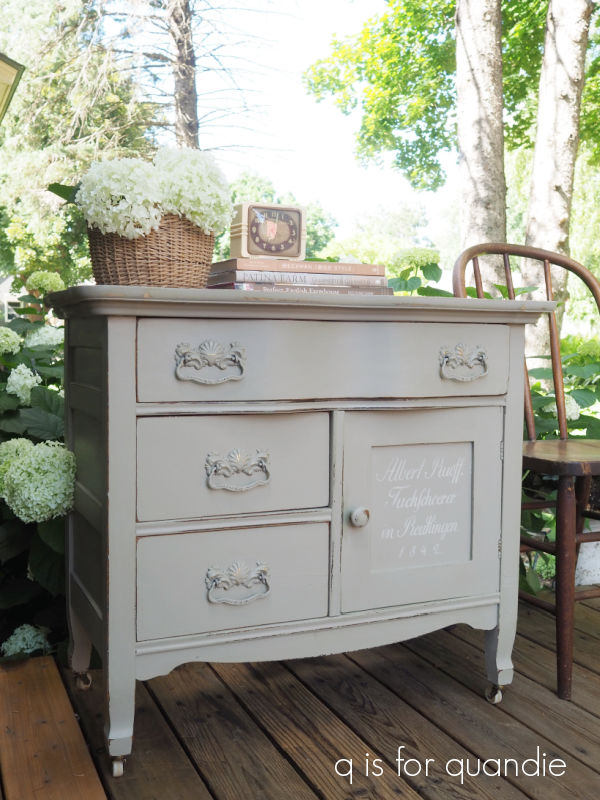
I started with a few repairs that involved gluing some joints.  I also had to thoroughly scrub this one inside and out because it was filthy.  Next I stripped the top.  It took a couple of applications of CitriStrip to get that dark stain off.  Once it was gone, I sanded the top smooth and then stained it with Varathane’s Sunbleached wood stain.

I’ve used this stain a few times on various pieces and always love the way it turns out.

If you’re a fan of the sun-bleached look of raw wood, but you don’t like how adding back a topcoat darkens the wood back up again, then you may want to try this stain.

After letting the stain dry for 24 hours, I added two coats of Dixie Belle’s flat clear coat over it to protect the top.

As much as I know that people are loving the raw wood look these days, and that top looked fabulous, I just couldn’t bring myself to tackle stripping the entire piece.  There is just so much elbow grease involved no matter how you do it.

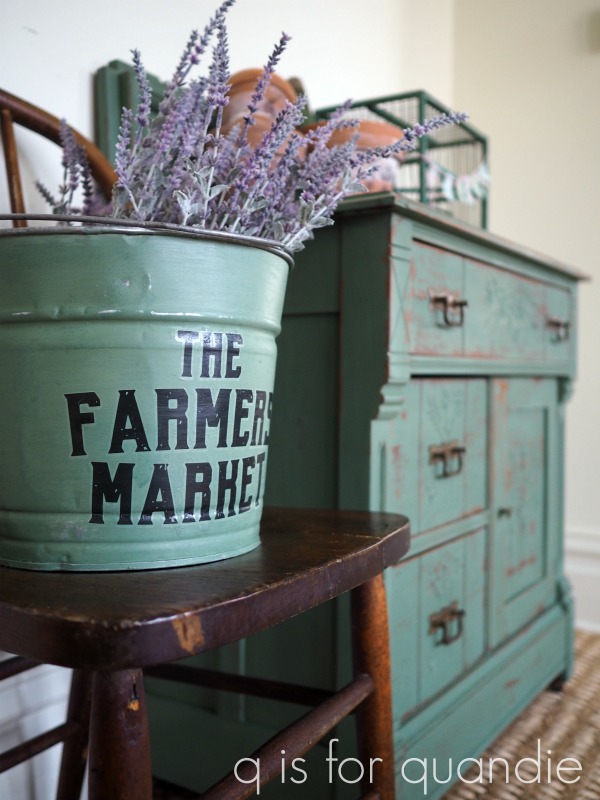
So instead I decided to ‘neutralize’ the base with some of Dixie Belle’s Dried Sage.

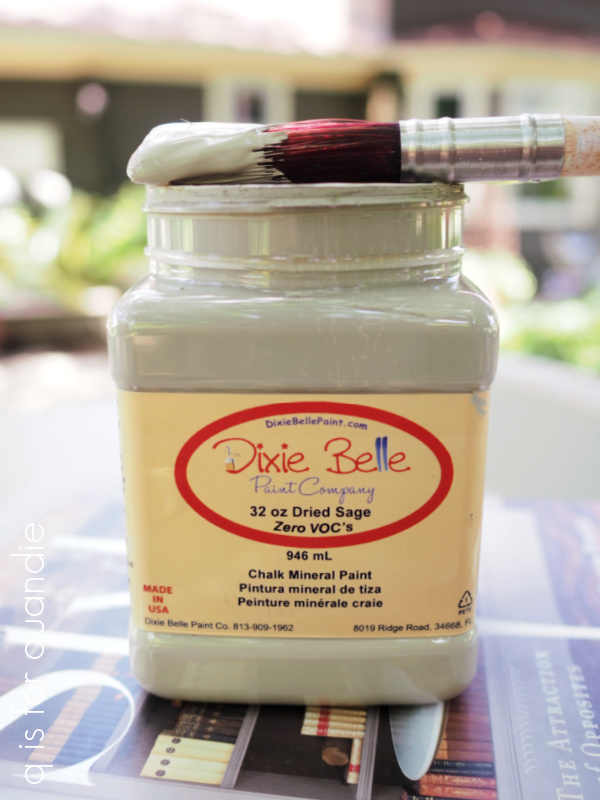
Step aside Drop Cloth, this color is slowly becoming my new favorite neutral.

Last year I used it on my potting shed floor (as I mentioned in Wednesday’s post), then I used it on Annie’s dresser

and then I used it on the Farmers Market bookcase

And of course I used it on the trunk on my front porch.

And now I’ve used it on this washstand.

I love that this color has a little more depth than the Drop Cloth (although, don’t worry, I do have another piece that I’m going to paint with Drop Cloth soon).

I opted to swap out the round knob that was on the door for a wooden one, which I also painted.  Then I also went ahead and painted the drawer pulls.

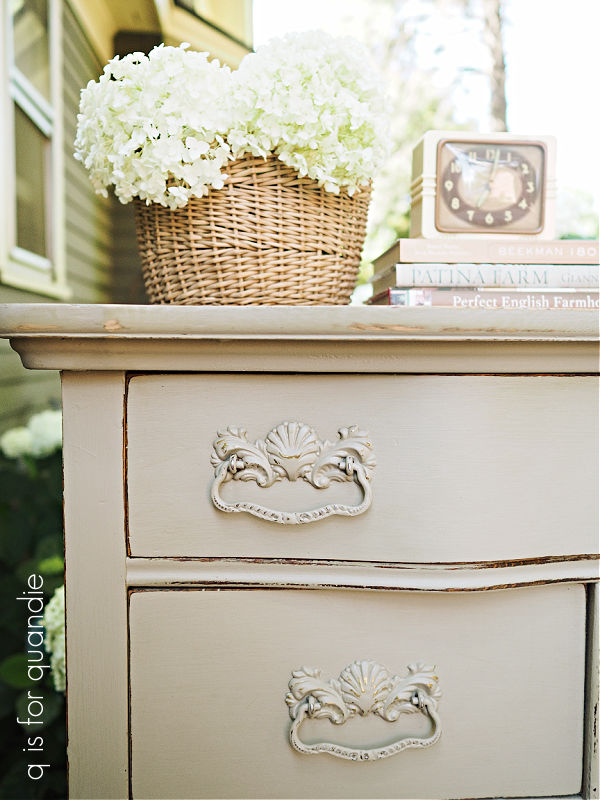
Since I was aiming for a more neutral sort of look, I wanted to blend those pulls in with the body a bit.

Next up I lined the two lower drawers, and the cupboard area, with some scrapbook paper.  Since scrapbook paper is 12″ x 12″, it works out great if your drawer/cupboard is that size or smaller.

I doesn’t work so well if your drawer is quite a bit wider, and also has a curvy front, though.  So instead of lining the top drawer, I freshened it up with a coat of Dixie Belle’s Big Mama’s Butta.

Finally, I couldn’t just leave this piece totally plain.  So I added a small stencil to the cupboard door.

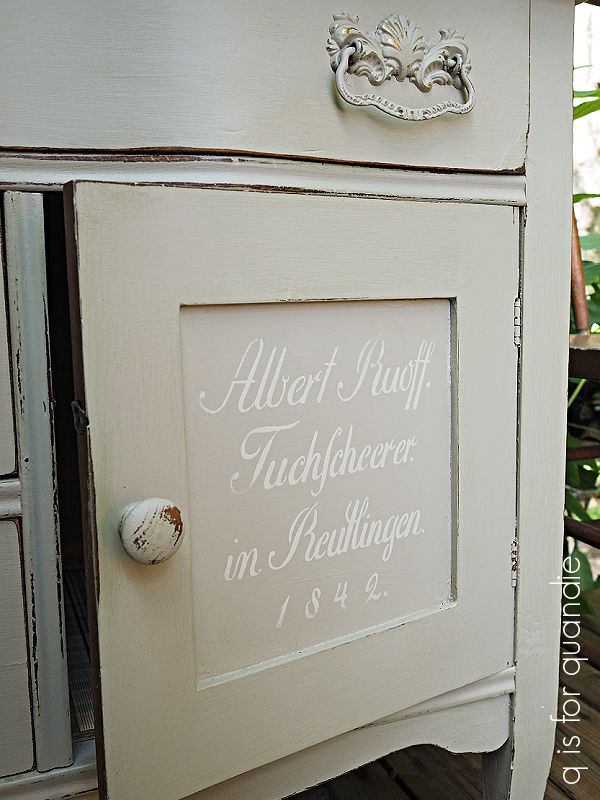
This is one of the small 8″ x 8″ German Grain Sack stencils from ellen j goods, and it fit the opening perfectly.

I have to tell you that I initially stenciled it using Drop Cloth, but found that was too much of a contrast.  I wanted a far more subtle look so I sanded that down, repainted the door, and then tried again using some more Dried Sage that I lighted up a tad with Drop Cloth.

Perfect!

I top-coated the painted areas of the washstand with Big Mama’s Butta from Dixie Belle.

I have to say, I definitely lightened this one up.

What do you think?  Do you prefer the lighter version?  Leave a comment and let me know.

This piece is for sale locally, so be sure to check out my ‘available for local sale‘ page if interested.


a summer porch refresh.

Last Friday I mentioned that we’ve been doing a lot of furniture shuffling around here lately.  So, while we were on a roll, I decided to give the front porch a refresh.

As much as I have loved the look of the wicker chaise lounge on the front porch (and I have to confess it has been out there for over 30 years!), I haven’t found it comfortable for a few years now.

I used to sit there and read in the evening, but my back just won’t tolerate that for long anymore.  So as a result, we never sit out there these days.

So when handyman Ken made another of his fabulous Adirondack chairs for me, I decided to use it in that spot.

They may not look it, but these chairs are super comfortable.

So as much as the chaise looked better out there, the Adirondack is the better choice if we actually want to use the space.  Yep, I’m going function over form for this one.

In case you’re wondering about the paint on the chair, it’s Rust-Oleum spray paint in Heirloom White.  These chairs can be rather tedious to paint (and trust me, I’ve painted many of them, many times), so I took a short cut with the spray paint.  Plus, the 2nd chair that was already out there was also already painted in Heirloom White.

After putting the new chair in place, it occurred to me that it was time for a makeover on the trunk that sits between the chairs.  Here’s how it started out …

I added that stencil way back in 2015 (you can read about that here), but I had grown tired of it.  Plus that original chippy white was just too bright of a white for me.  I like warmer shades of white like my favorite Dixie Belle Drop Cloth, or even the Heirloom White spray paint.

I did first consider painting it black, but I already have a couple of other touches of black out there that tie in to the floor such as the throw pillows that I purchased from H & M several years ago.

And the black cupboard.

Last week I said that I was going to sell it, but after this refresh I’ve decided it needs to stay.

I also considered painting the trunk with straight up Drop Cloth, but in the end I decided to darken it up just a tad so I mixed in a little bit of Dixie Belle’s Dried Sage.  You may remember that I lightened up the Dried Sage with some Drop Cloth when I used it on the checkered floor in my potting shed last summer.

As a sidebar, I am really loving the Dried Sage lately.  You’re going to see another piece painted in this color later this week.

But back to the trunk.

After painting it with my custom mixed color, I added a design from the I.O.D. Melange paint inlay to the front.

Isn’t that pretty?

After sealing the paint inlay with some matte spray sealer, I sanded the trunk well to bring back that chippy, worn look.  I followed that up with a topcoat of Dixie Belle’s Big Mama’s Butta.

I love how it turned out.

What do you think, was this an improvement for the trunk?  And how about the form over function question?

Would you have gone for adding a more comfortable chair that you’d actually use rather than a piece that you thought looked better?  Leave a comment and let me know.

As always, thank you to Dixie Belle Paint Co for providing the Dried Sage paint and Big Mama’s Butta used in this makeover.

it won’t hold water.

I purchased this galvanized bucket at my friend Lisa’s occasional sale.

I was mainly drawn to it because of its unique oval shape.

But I pretty much love old galvanized buckets in general, regardless of shape, and have several myself.

Back in the beginning, let’s call it b.f., ‘before transfers’, I used to stencil on them.

I still have one of those French Market buckets serving as the trashcan in our bathroom.

Sometimes they were painted first, and then stenciled.

And then I discovered transfers.

Most of the buckets I’ve kept have wordy transfers added to them, like this one …

I use them for flower arranging, or for containing a small Christmas tree.

However, it seems that when I leave them unpainted and just add words they don’t sell very quickly.  So perhaps it’s just me that likes them that way?

The painted ones, on the other hand, tend to fly off the shelves.  This one originally just had some wording and it never did sell, so I painted it and added a transfer and it sold quickly …

So I decided to go ahead and paint the oval bucket in Dixie Belle’s Drop Cloth.  Then, rather than adding a transfer, I thought it would be fun to try an I.O.D. paint inlay this time around.

I added a section from the Melange inlay that has three wildflowers in a row, at least I think they are wildflowers.

Wait a minute, upon review, no they are not wildflowers …

That one seems to be a hyacinth, so let’s go with just ‘flowers’.

Some previous owner of this bucket added drainage holes to the bottom so that it could be used as a planter.

So it definitely won’t hold water.

But I added several coats of spray sealer so that it could be potted up with plants and used outside or in.  Wouldn’t it look great filled with herbs?  Or even just simple geraniums?

I went ahead and filled it with whisk brooms for my photo shoot, because, well, why not?

You wouldn’t have to use it for plants.

I’ll be bringing this one into the shop, so we’ll just see how well it sells with a paint job.

What do you think?  Do you prefer the painted buckets over those with just words over the galvanized metal?  Leave a comment and let me know.

a summer garden tour.

Good morning from the garden!

I was so excited when I saw that the St. Anthony Park Garden Tour was taking place this year.  This tour is put together by the St. Anthony Park Garden Club and usually takes place every other year, however, like so many things, it was halted during Covid.  So it has been 4 years since the last tour.

St. Anthony Park is a neighborhood in St. Paul, Minnesota.  I’ve gone to their neighborhood garage sales many times over the years, and the last time I did that was back pre-Covid as well.

The neighborhood was developed in the late 19th century as a streetcar suburb (ie. you could commute to the city via streetcar) for the wealthier residents of Minneapolis/St. Paul (wikipedia).  It’s full of large 100 year old homes and each one is unique (unlike more modern developments).

Last weekend my sister, niece and our friend Annie all joined me for the tour.  There were 11 gardens in total, but I’m just going to share some of the highlights with you.

The first garden we visited was really colorful.

Isn’t that a pretty combination of sedum and heuchera?

The back yard slopes down into a ravine and is filled with flowering plants that are bursting with yellows, reds, oranges and purples.

There is also a little pond that is guarded by a very colorful frog.

In contrast to that fairly wild look, this next garden was somewhat formal and very tidy, and I absolutely loved the house itself.

I’m not normally a fan of the combination of grey and black, but it was certainly working on this place.

I also came away from this house with an awesome idea for making some supports for my peonies.

I spent a bit of time this spring searching for attractive peony cages that weren’t too expensive (since I have about 10 peonies), and I came up empty handed.  But these would be fairly simple to make.  They are just furring strips, 2″ x 2″ strips on each corner and 4 wooden finials.  My sister and I are going to attempt to make some of these for our gardens.

The next garden I want to share was the most difficult to get to because it involved heading up this staircase.

This is the path between the street and the house.  However, there is an alley behind the house and I’m betting that the homeowners barely ever use this staircase, especially not in the winter!

But these home owners definitely took advantage of their sloped location, because here’s what they also have out behind the house.

That stunning waterfall was worth the hike up that staircase.

I totally coveted the iron planters in this next garden.

I have to admit that I probably won’t ever have the real thing in my garden, but instead I’ll just stick with my faux rusty urn planters.

If you’re into a more modern look for your planters, the pair flaking this porch should be right up your alley.

And just take a moment to admire that porch, especially that twisted wrought iron railing on the steps.

One of the gardens had an interesting combination of ground covers planted in a small bed.

It certainly is a pretty combination of creeping jenny, sweet woodruff, ajuga, dianthus and I’m not sure what that plant with the silver foliage in the back is.  It almost felt like this was a spot where they were testing out different ground covers to see how they would do.  It was a fairly small area, and as you can see the plants have totally filled it out.  Now they are probably going to start fighting for space.

I wanted to be sure and share this clematis with you guys …

The home owner was fairly sure that this is a Betty Corning.  I just planted this variety in my own garden, and I am hoping it will be as prolific as the Roguchi that I planted last year.  If this one is any example, I think it will be spectacular.

I’ve saved my favorite garden for last.  First, lets just check out the house.

Aren’t those windows fabulous?  See what I mean about all of the houses in this neighborhood being totally unique?

But the real showstopper for me was the sloped front border which is divided in half by the sidewalk.  I chatted with the owner of this garden, Shawna, and she explained that the two sides are meant to be mirror images of each other.

They are filled with shade loving plants chosen for their beautiful foliage colors, textures and shapes.

Shawna also explained that she gardens year ’round, which is quite the feat in Minnesota.  She brings many of her rex begonias and other plants indoors for winter.  She also told me that her indoor plant real estate is limited, so she also just takes cuttings from many of her plants and propagates new plants for the next year that way.

You can certainly see why she wants to save them.

In addition to these beautiful plants, she also had some really lovely copper garden ornaments scattered here and there.

And isn’t that carpet of sedum alongside her dry creek bed just fantastic?  Let me get you a little closer to that …

We all really enjoyed the tour, it’s always inspiring to see what other gardeners are doing.  I’ve been keeping an eye out for other garden tour possibilities in my area, there used to be lots of them (again, pre-Covid) and so far I haven’t seen too many coming back.  If any of you locals know of any, please leave a comment and let me know!

But before I let you go, I want to share what I’m calling the ‘plant of the day’.

That honor goes to the Aralia cordata ‘Sun King‘.

Ironically, somehow I didn’t manage to get a decent photo of one, even though I would say that almost every garden we toured had one … well, more than one actually.  They were everywhere.  I borrowed this photo from the internet so that you can get a good look at this plant.

I had seen it more than once recently on gardening YouTube videos (sorry, can’t remember which ones exactly), so when I saw them in these gardens they really jumped out at me.

The ‘Sun King‘ was the 2020 perennial of the year, and I can see why.  It provides a vibrant pop of chartreuse in a shady garden.  It grows 4′ to 6’ tall and wide.  It dies back to the ground in winter, but is fast growing and fills out quickly in the spring.  It’s hardy in zones 3 to 9, so can easily handle my zone 4b.  It’s also deer resistant.

One of the gardeners I spoke with mentioned that the color is definitely brighter if it gets some sun, but it will grow in full shade.

So now I’m off to figure out the best spot in my garden for the one I found at Abrahamson’s Nurseries in St. Croix Falls (but if you locals are looking for one too, don’t count on them, my neighbor and I bought the last two that they had!).

Do you have garden tours where you are?  Leave a comment and let me know!