painting on paint.

I know others have a lot of success re-painting an already painted piece of furniture, but I really try to avoid it.  I don’t like stripping paint, I find it time consuming and messy.  I also don’t like painting over latex with milk paint.  It can be done, but it gets even more unpredictable than usual.  I’m also kind of picky about the color of an undercoat that is sure to show through whatever I put on top of it, at least on the distressed edges.  So, keeping all of those factors in mind, I usually pass on already painted pieces.

However, last winter after probably one too many cocktails in Las Vegas, I texted Mr. Q and sent him off to pick up a dresser/nightstand combo while I was off visiting my mom.  They were already painted white.  But I thought I could work with the white.

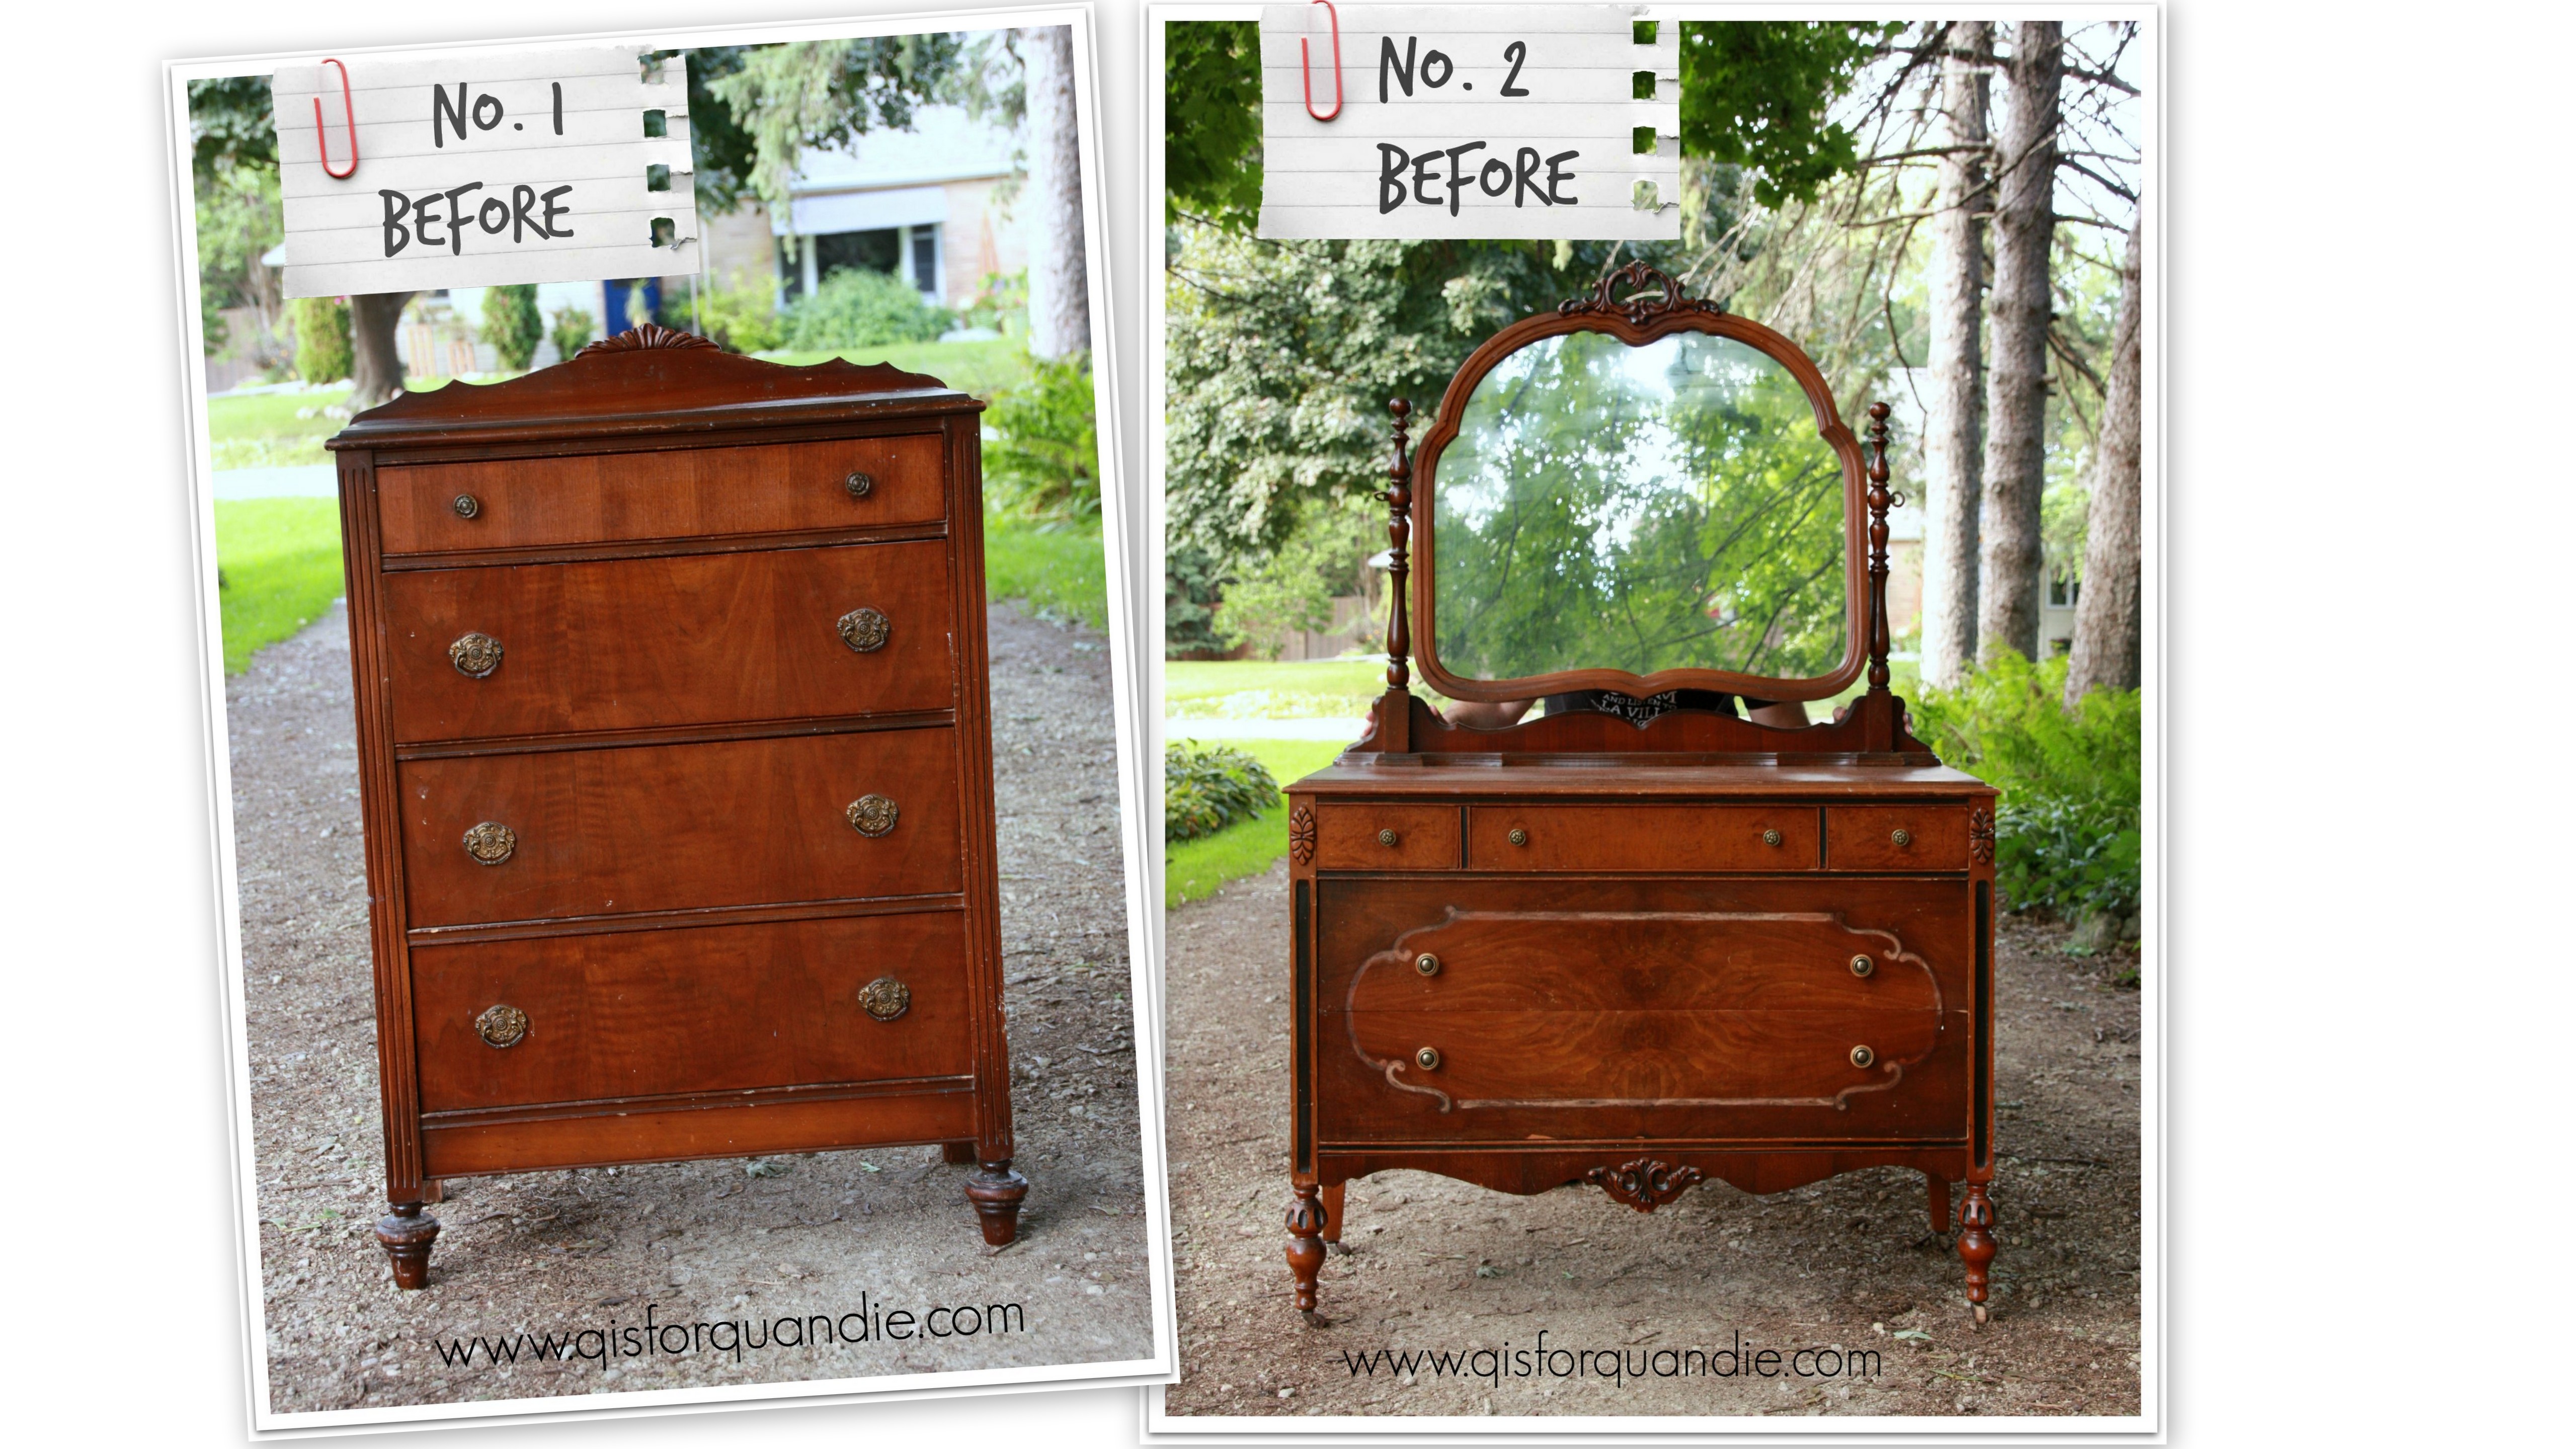
Here is what they looked like when I got them.

Paris dresser before

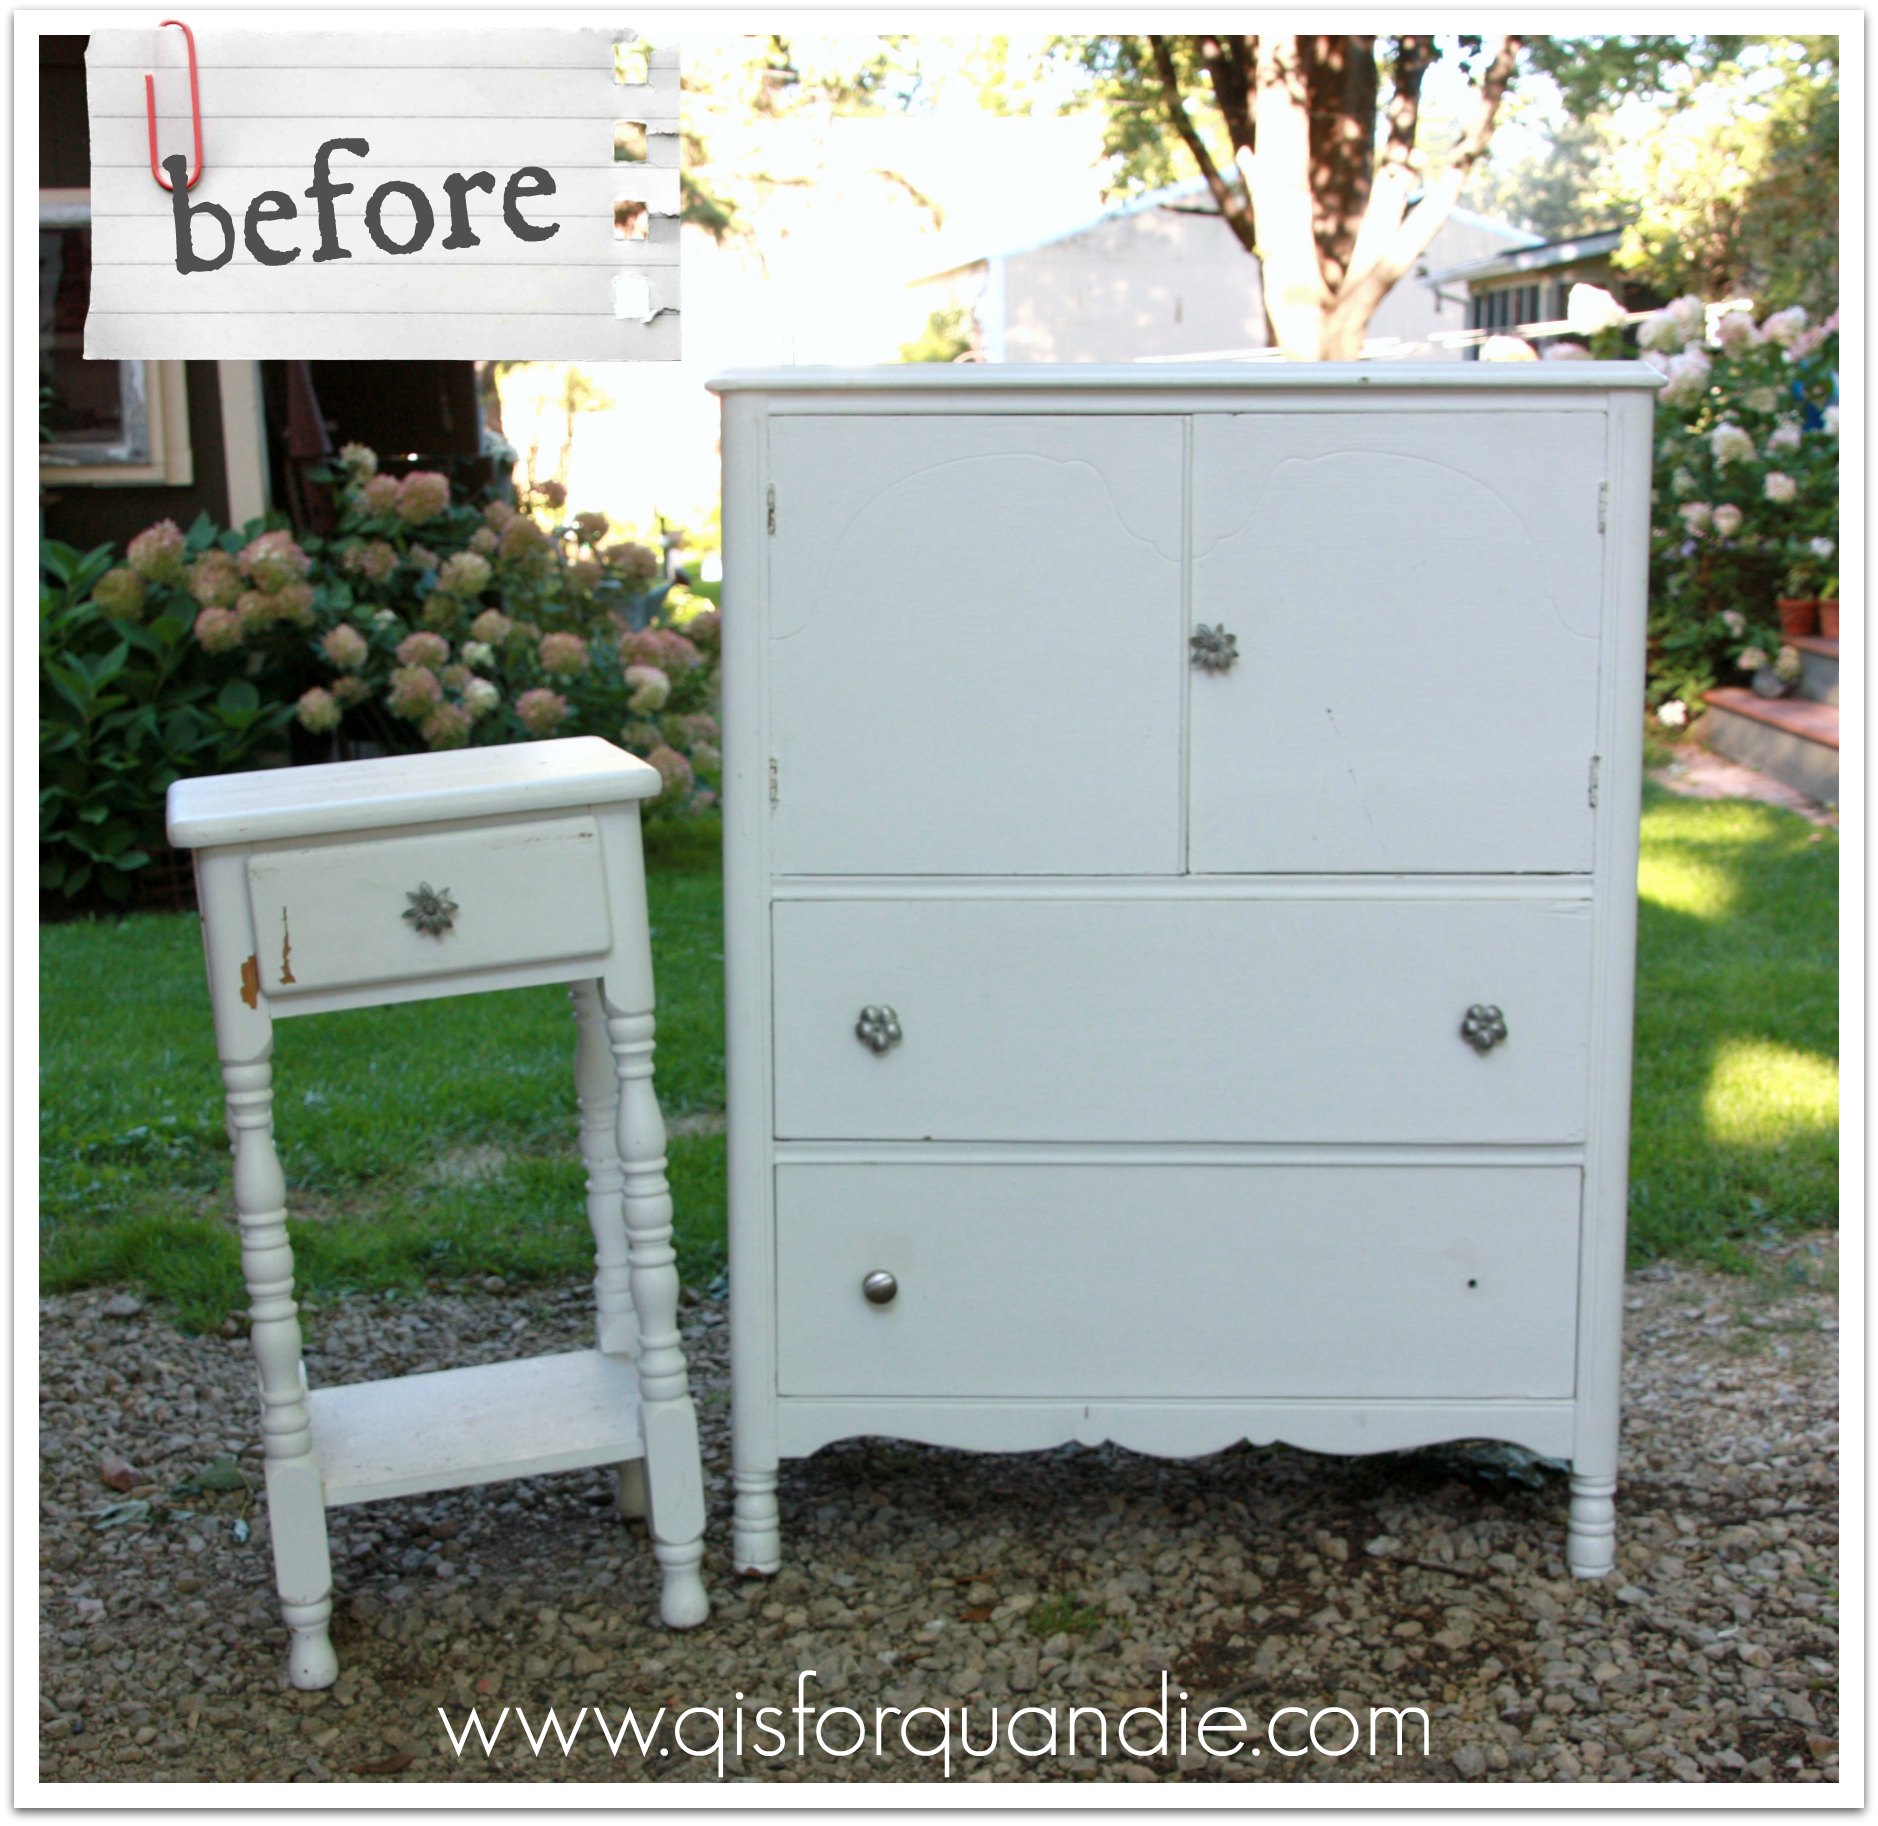
They came as a pair, so I was stuck with the chunky nightstand, even though it obviously doesn’t really match the dresser and it’s not something I would normally grab.  As for the dresser,  the hardware was all wrong, the existing white paint job was poorly done and, you can’t see it here, but there is a coat of garish green under the white.

Upon returning from Las Vegas I took a look at them, and then promptly stored them in nnK’s garage for several months and forgot all about them (sorry nnK).

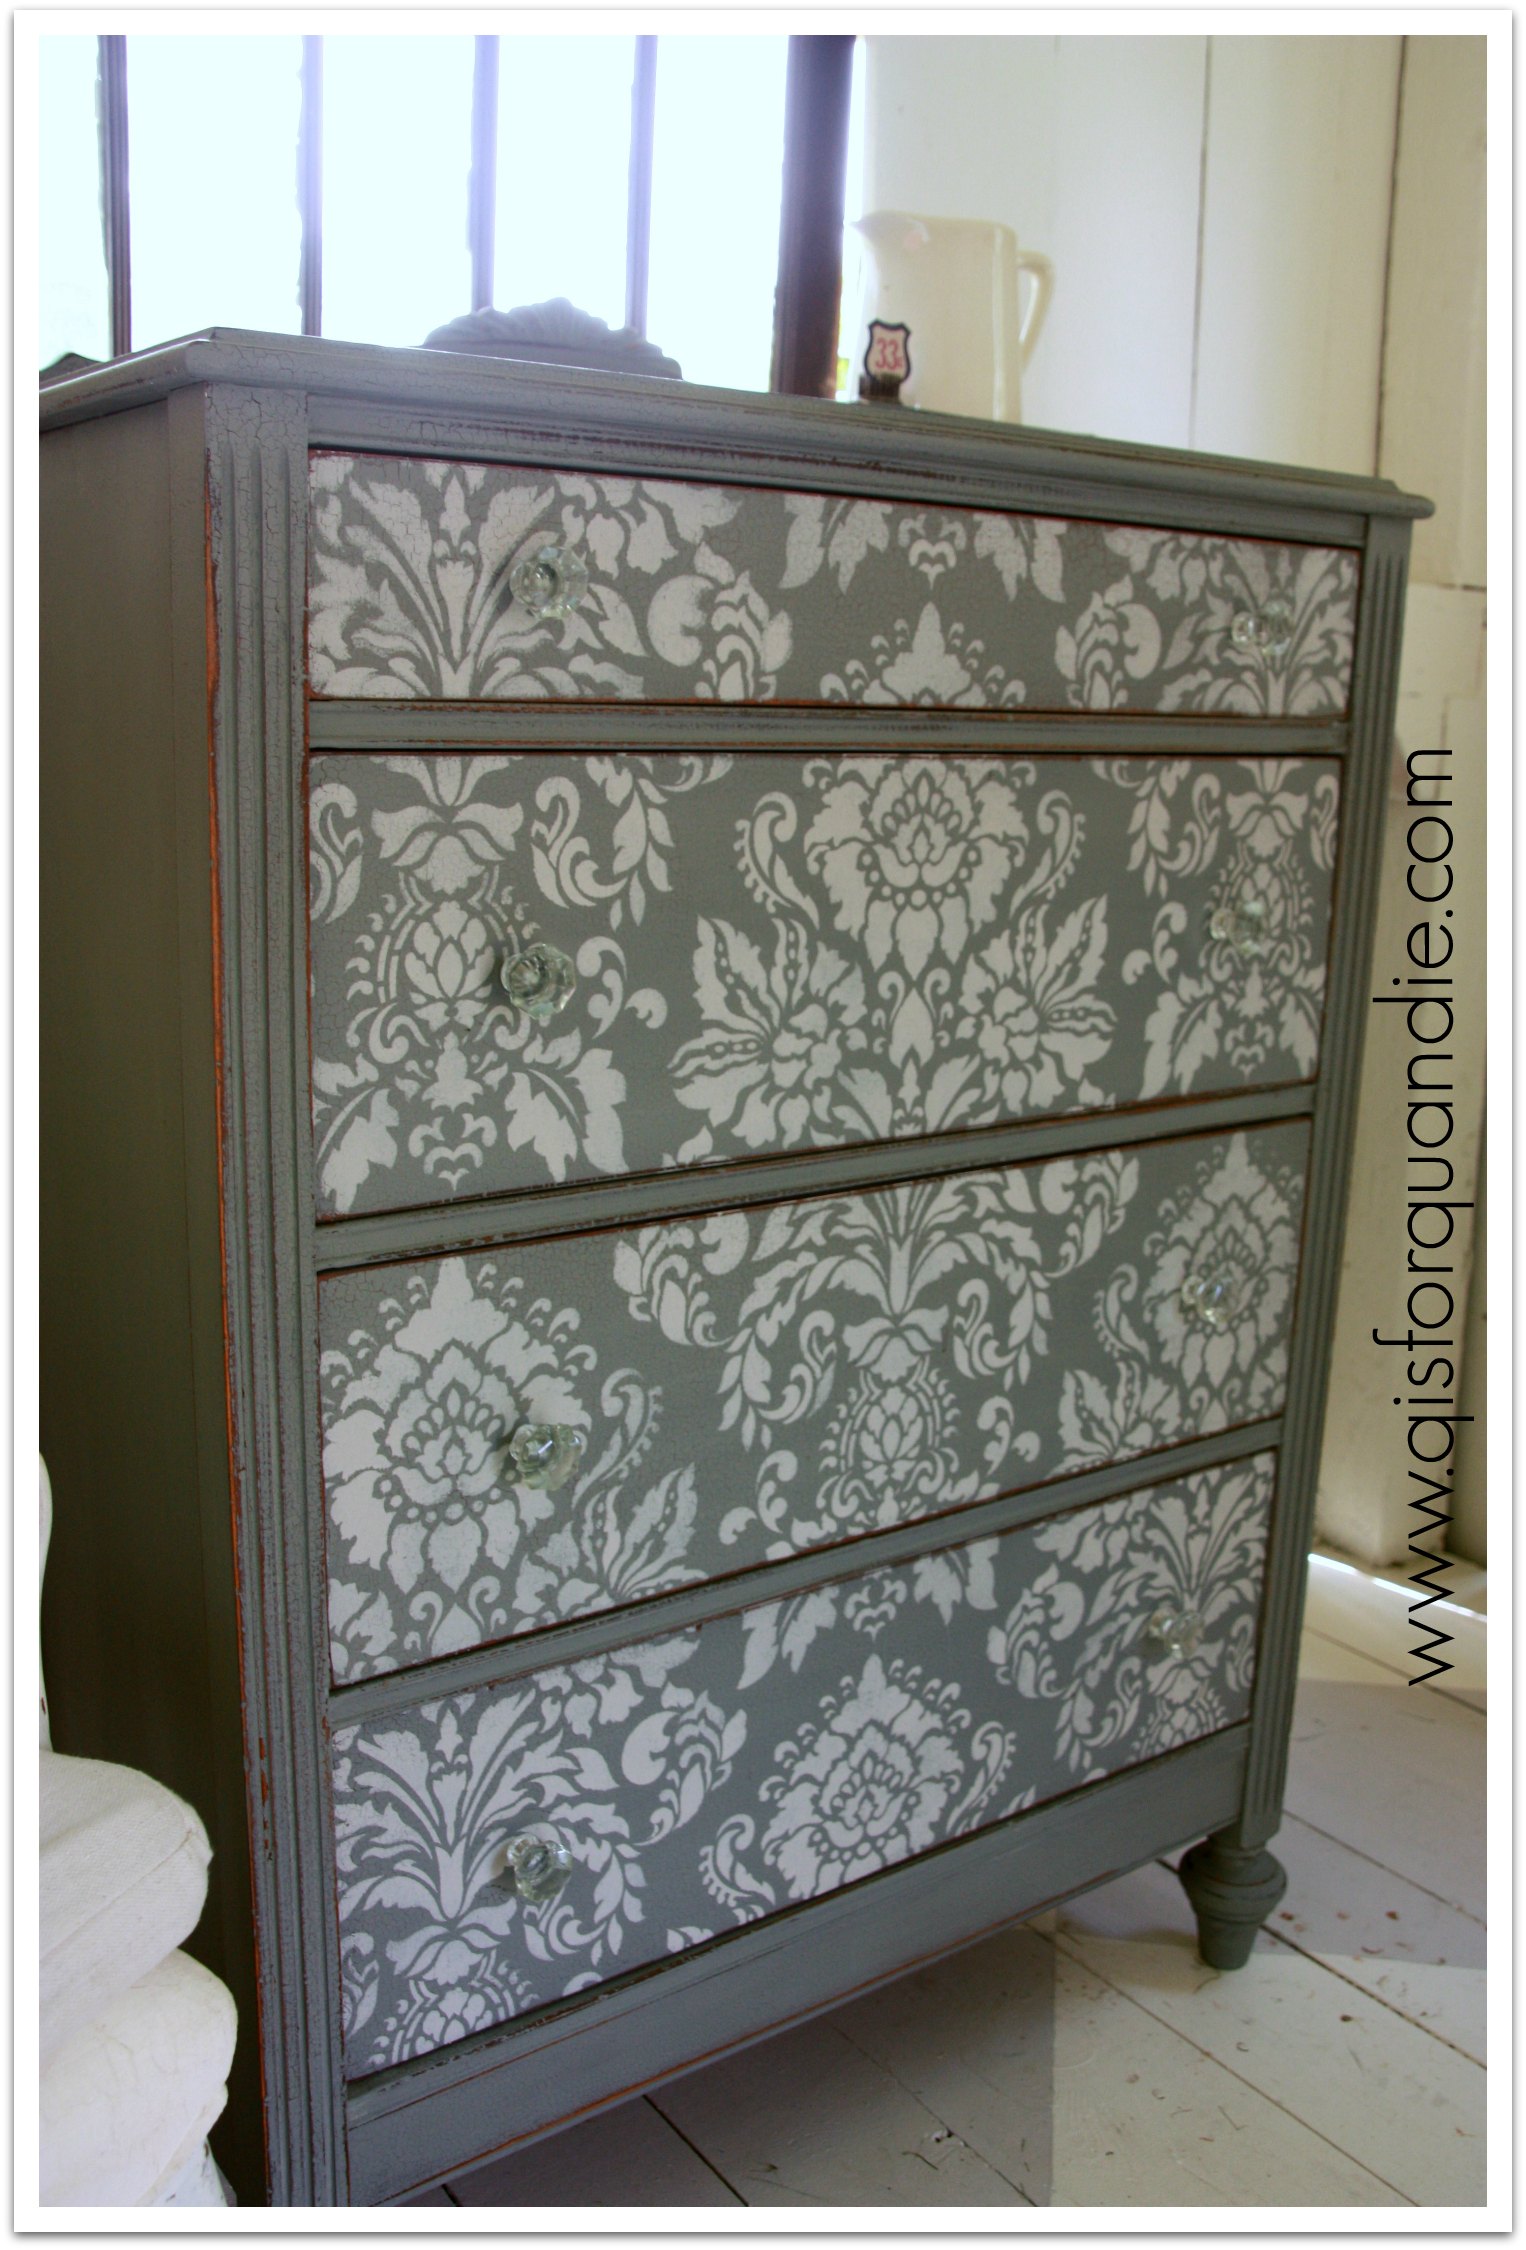
I brought them back over to my place earlier this summer though, and still couldn’t find the motivation to work on them.  Finally, I told myself that I had to get these done before my sale.  Nothing like a deadline to get my mojo going.  I decided to work with the white by freshening it up with a coat of American Paint Company’s mineral/chalk paint in Navajo White.  The next step was to add a stripe to the drawer fronts using Annie Sloan’s Louis Blue.

I started with the night stand.  I used yellow Frog tape (the one for delicate surfaces), taped off some stripes on the drawer front, painted the blue, and pulled off the tape.  Ack!  The tape pulled the paint off right down the to wood.  I am guessing this is because the original paint used on this piece was probably latex.  And it didn’t stick.  In the end, I just touched up the paint, added some Louis Blue to the top, added a vintage glass knob and called it good.

Striped nightstand

It has a sort of beachy vibe, don’t you think?

nightstand close up

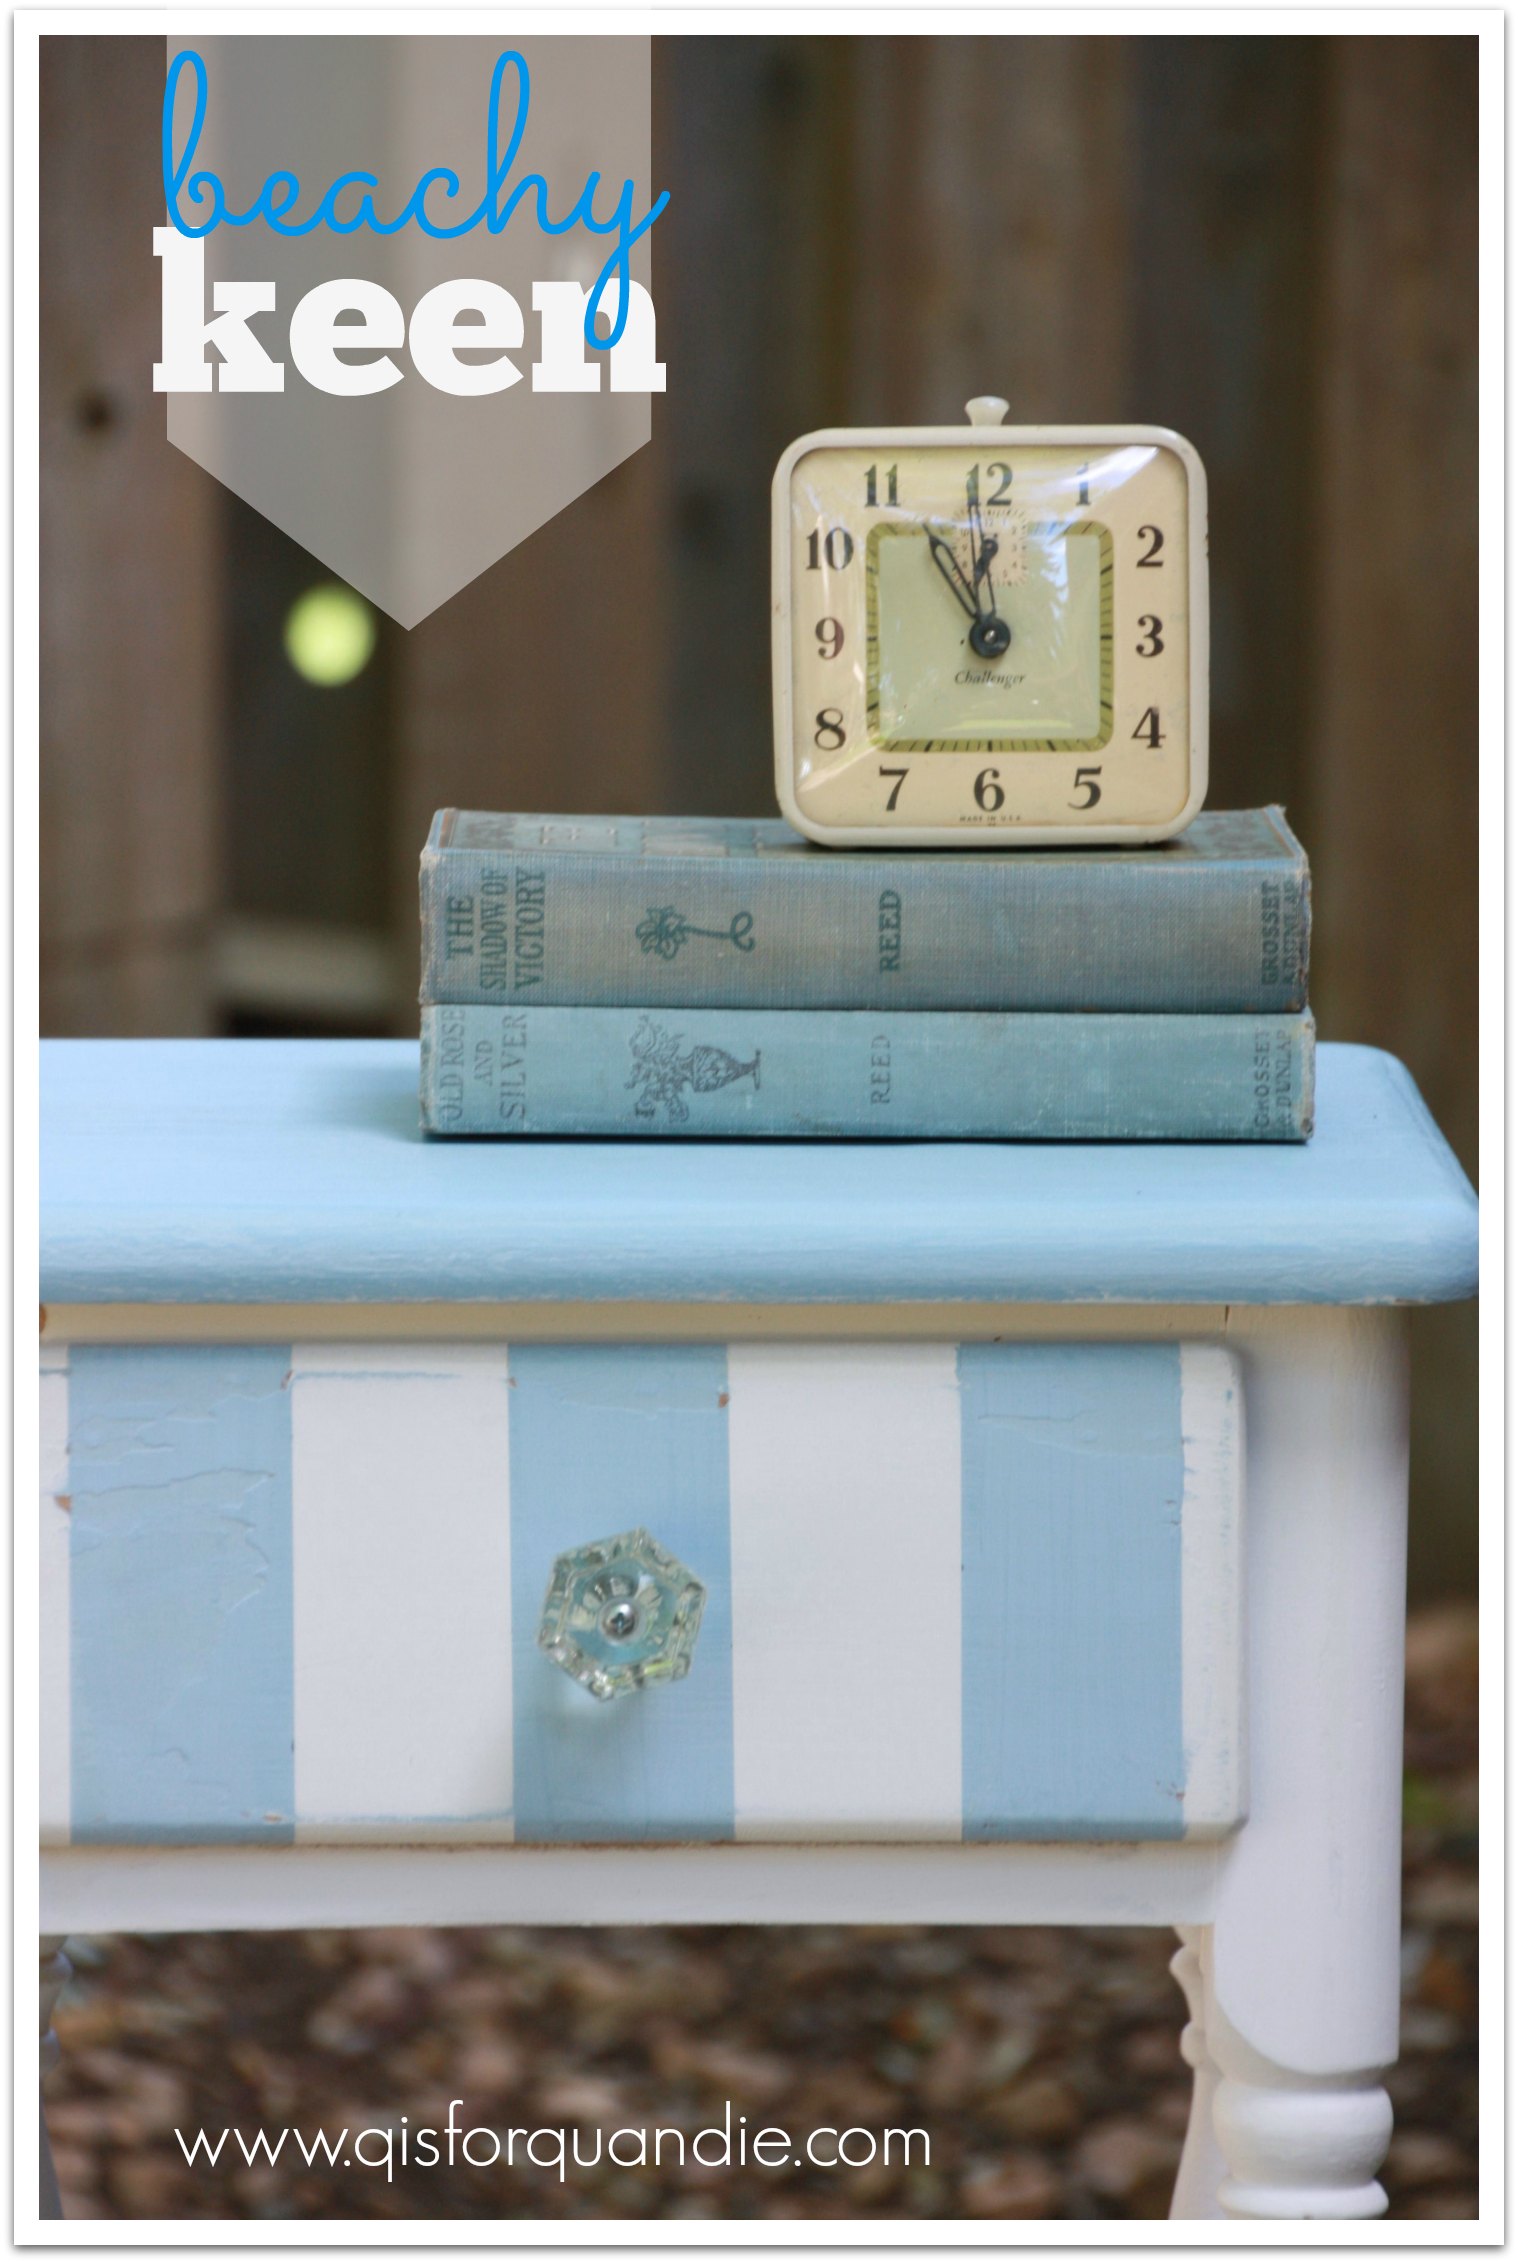
Definitely not my best work ever, but hopefully someone out there will want a beachy keen nightstand.

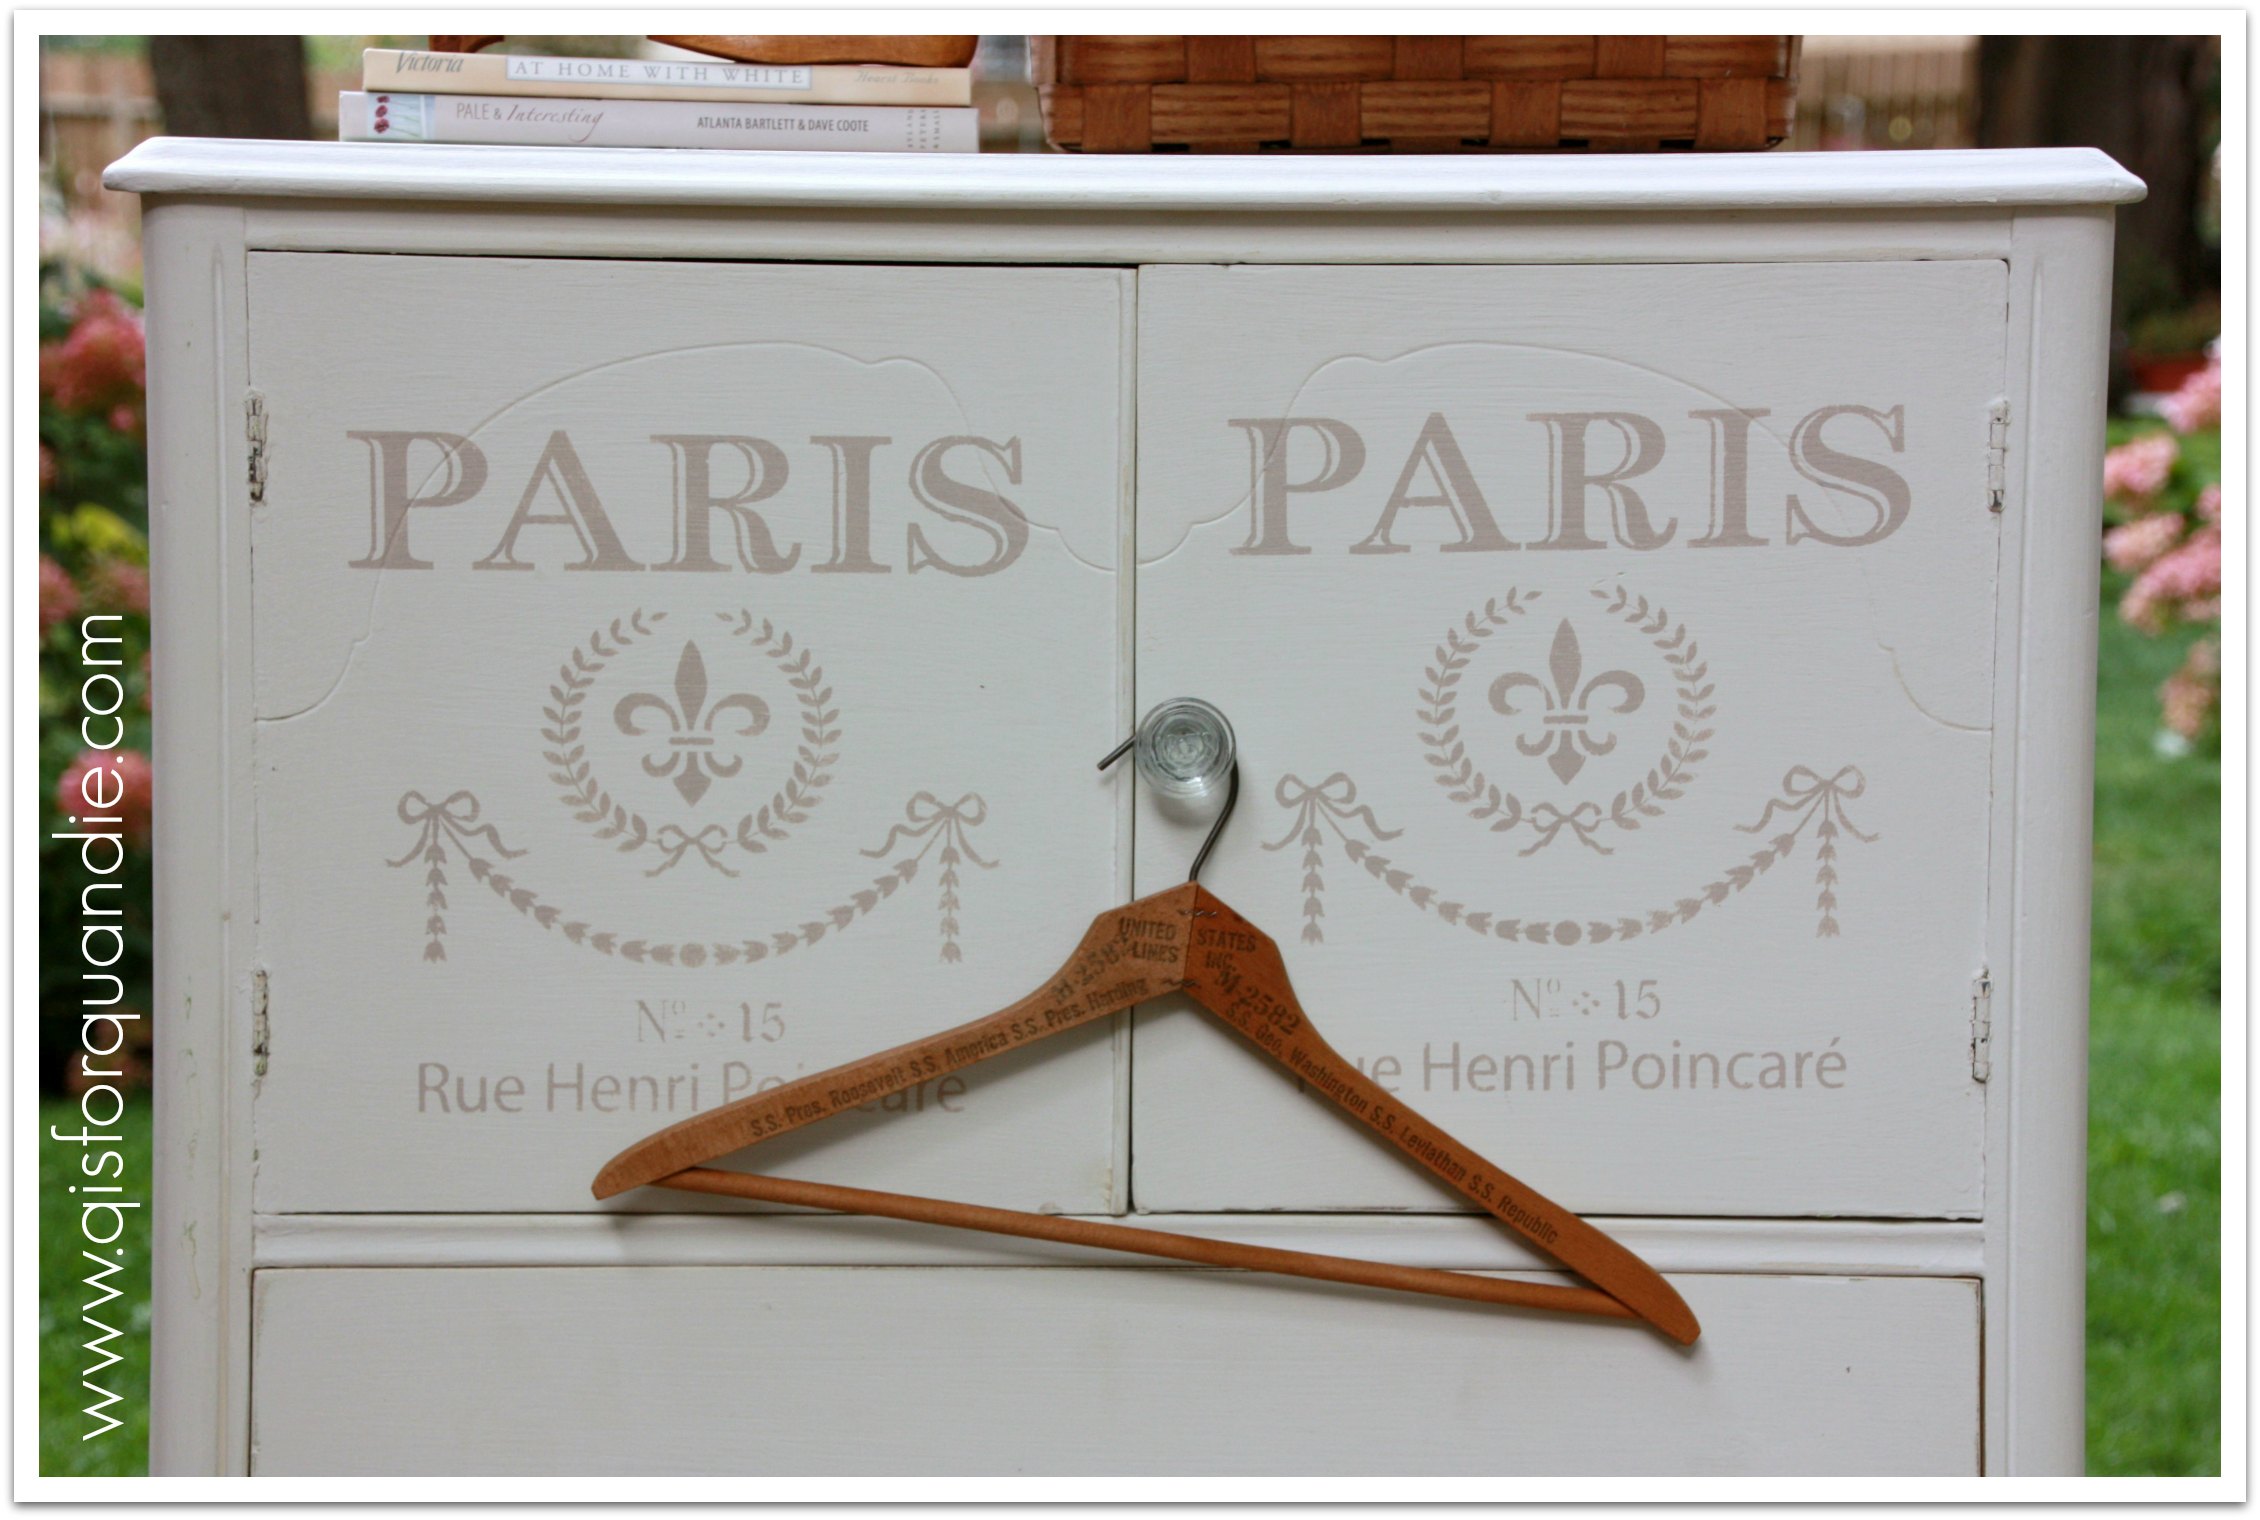
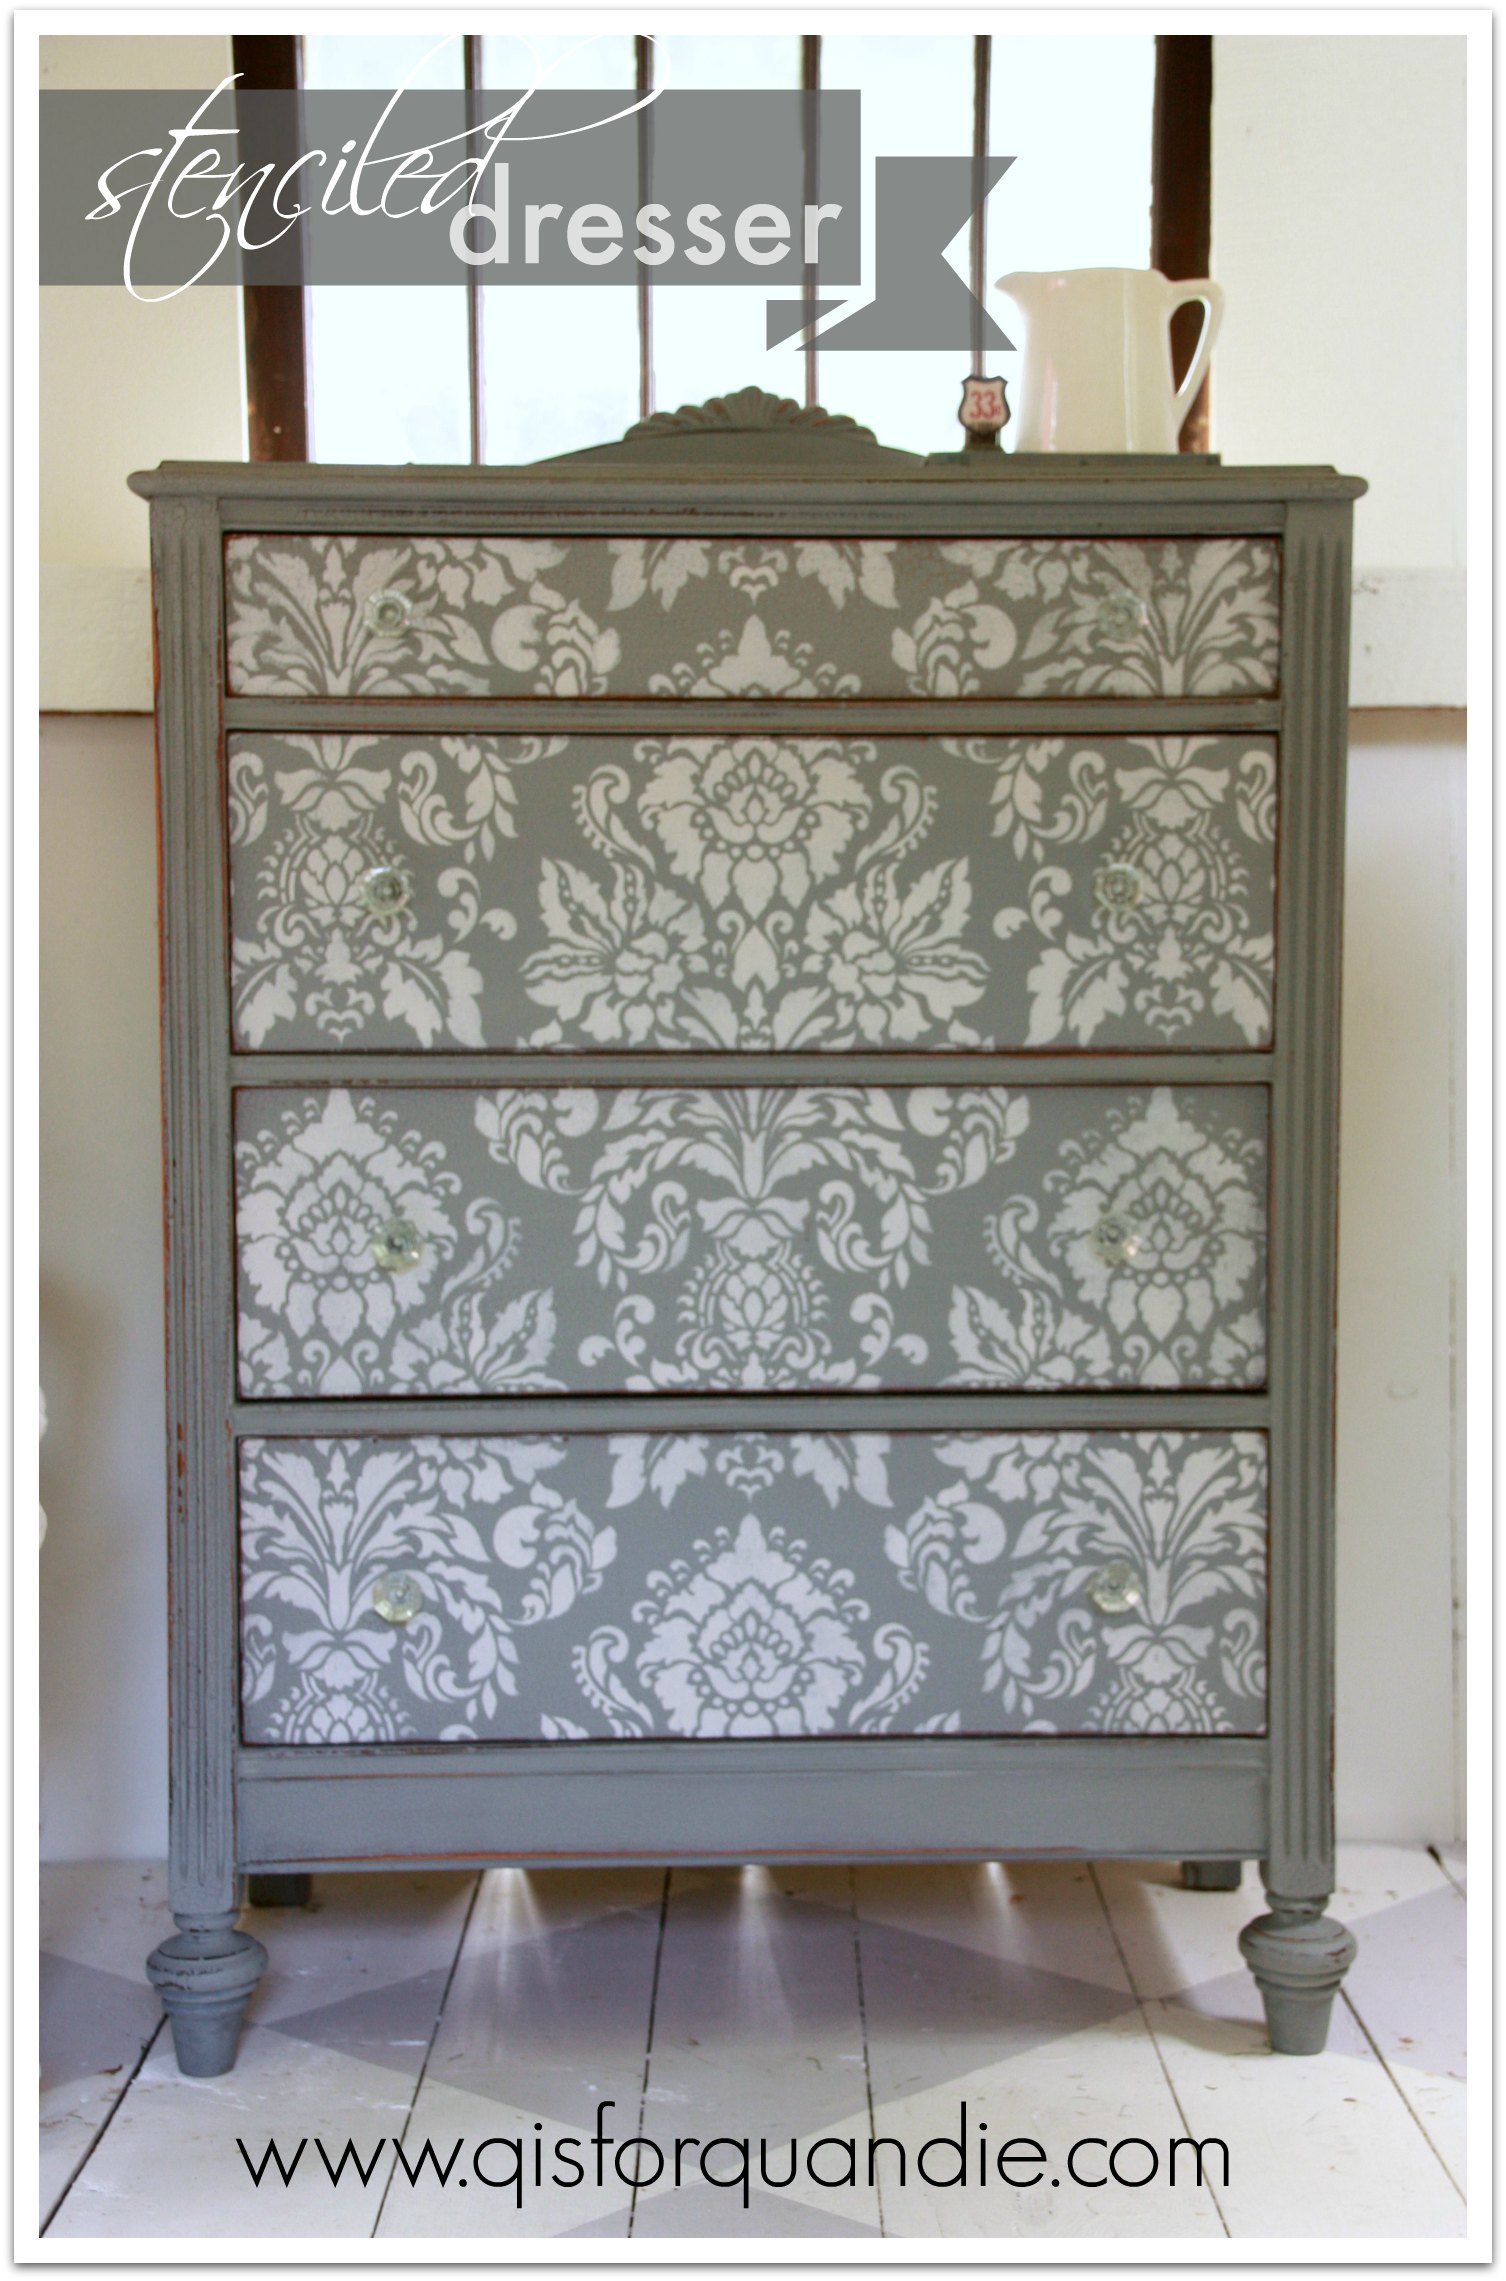
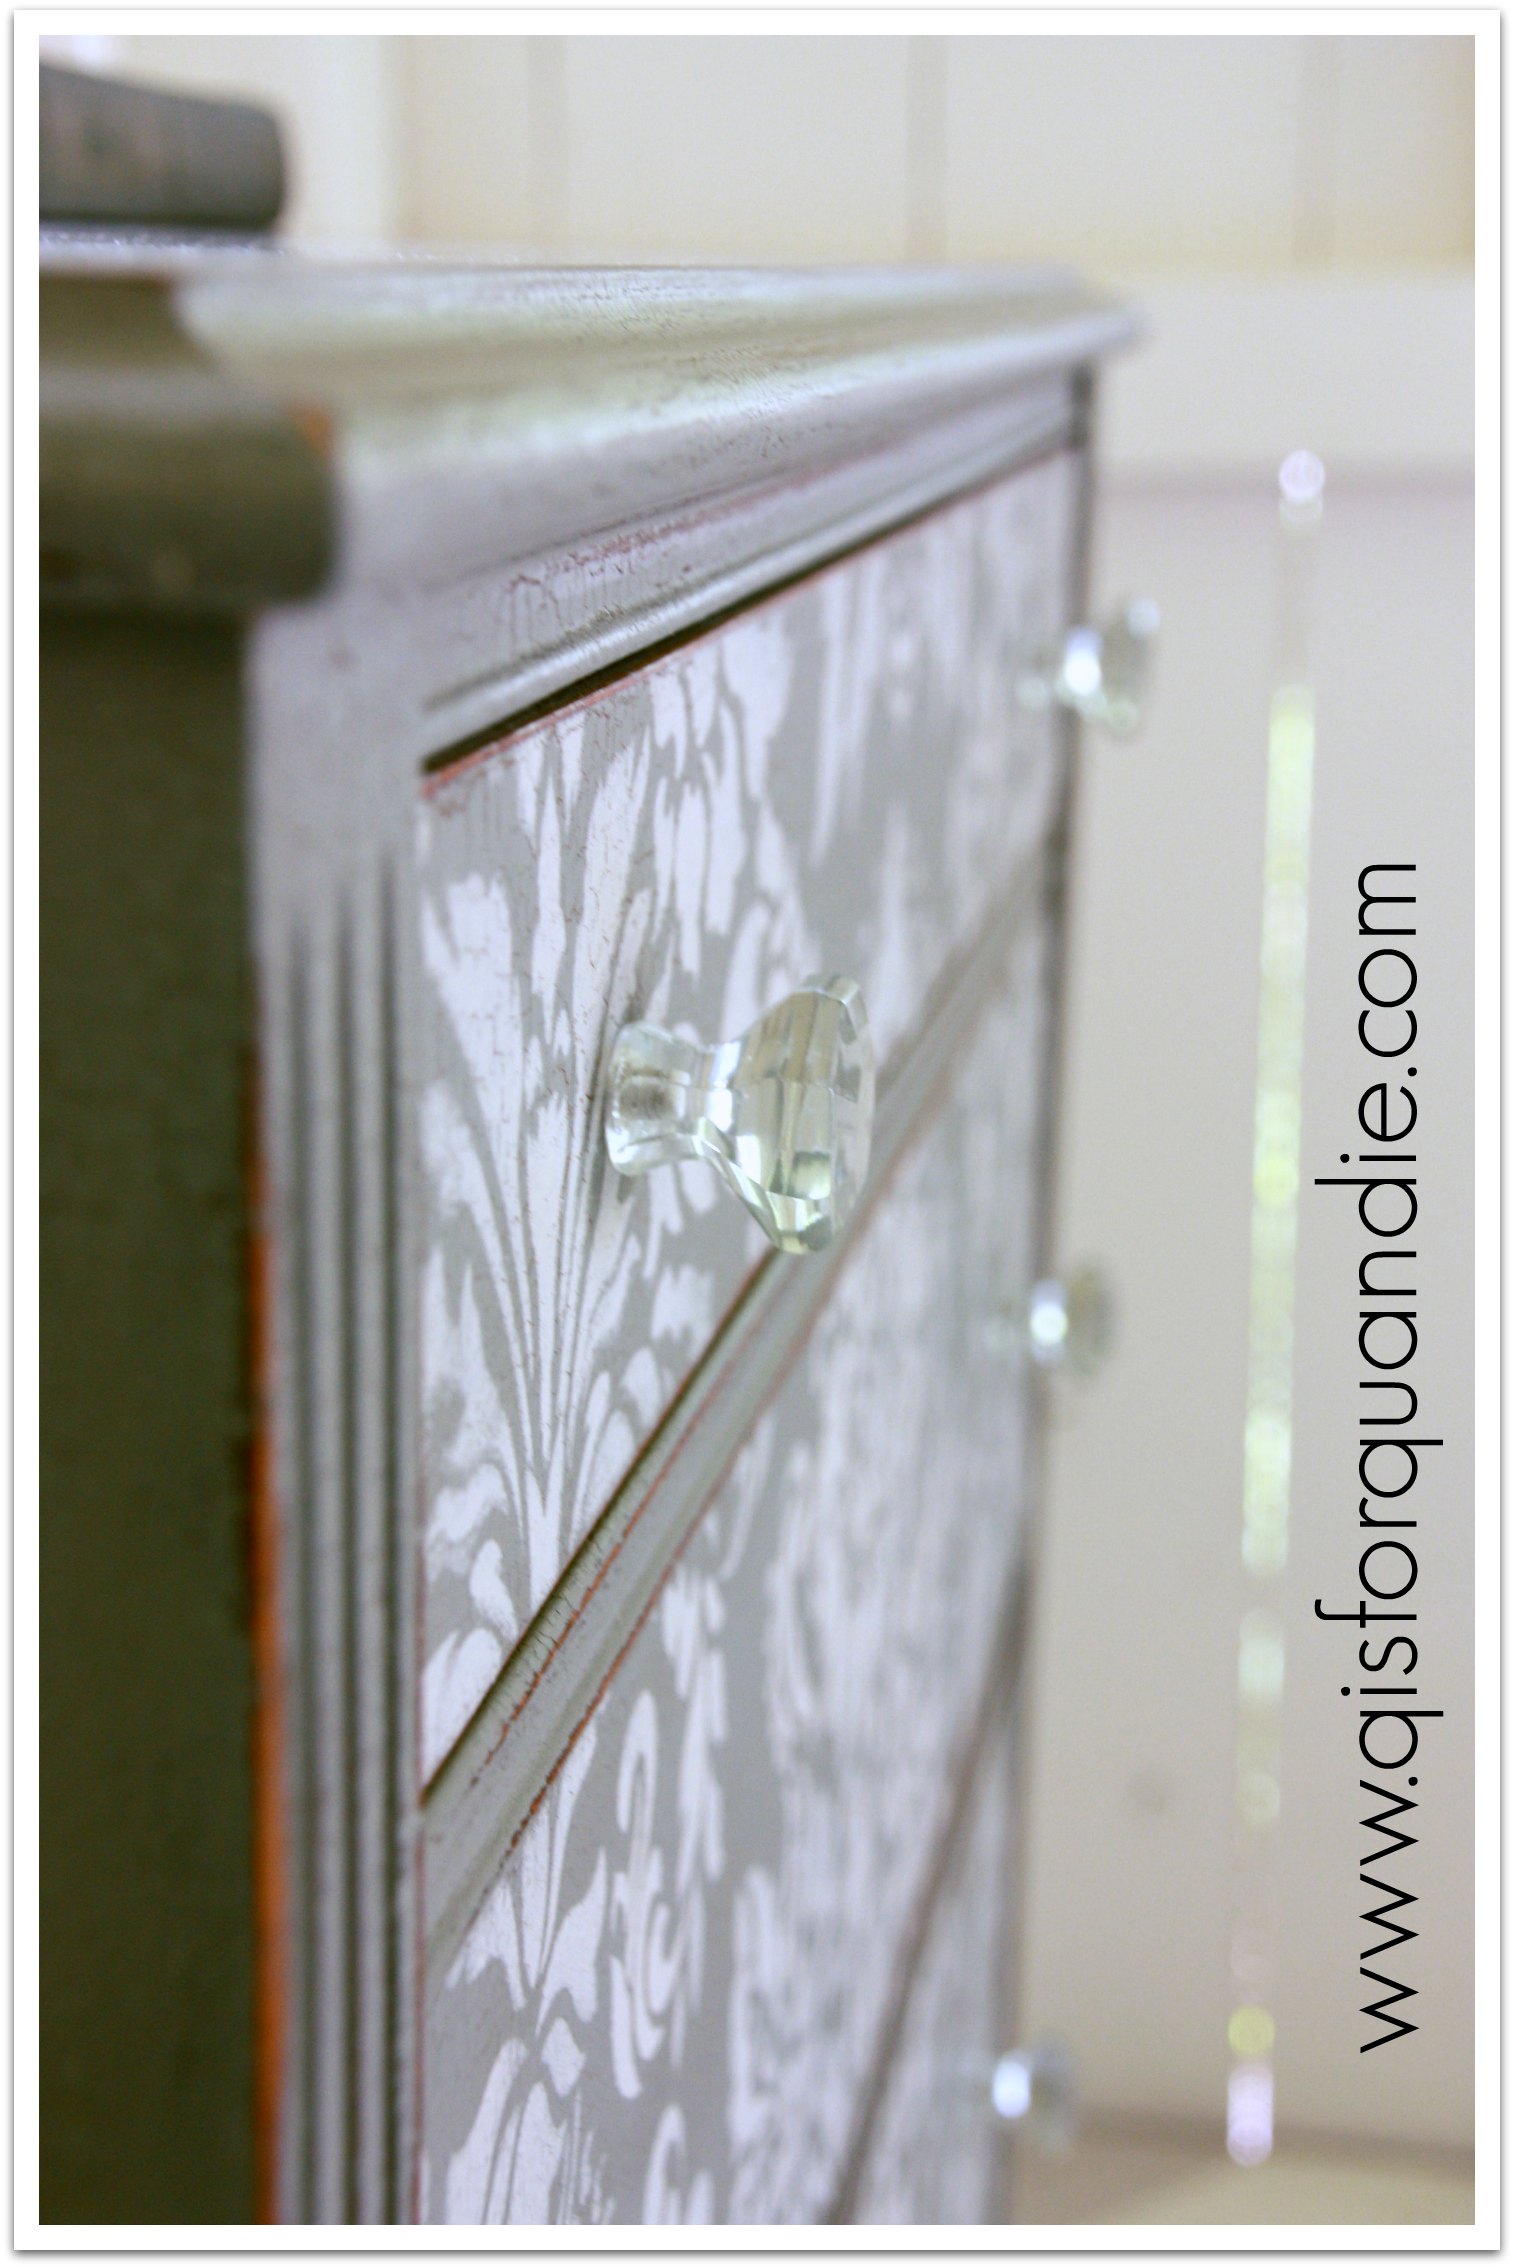
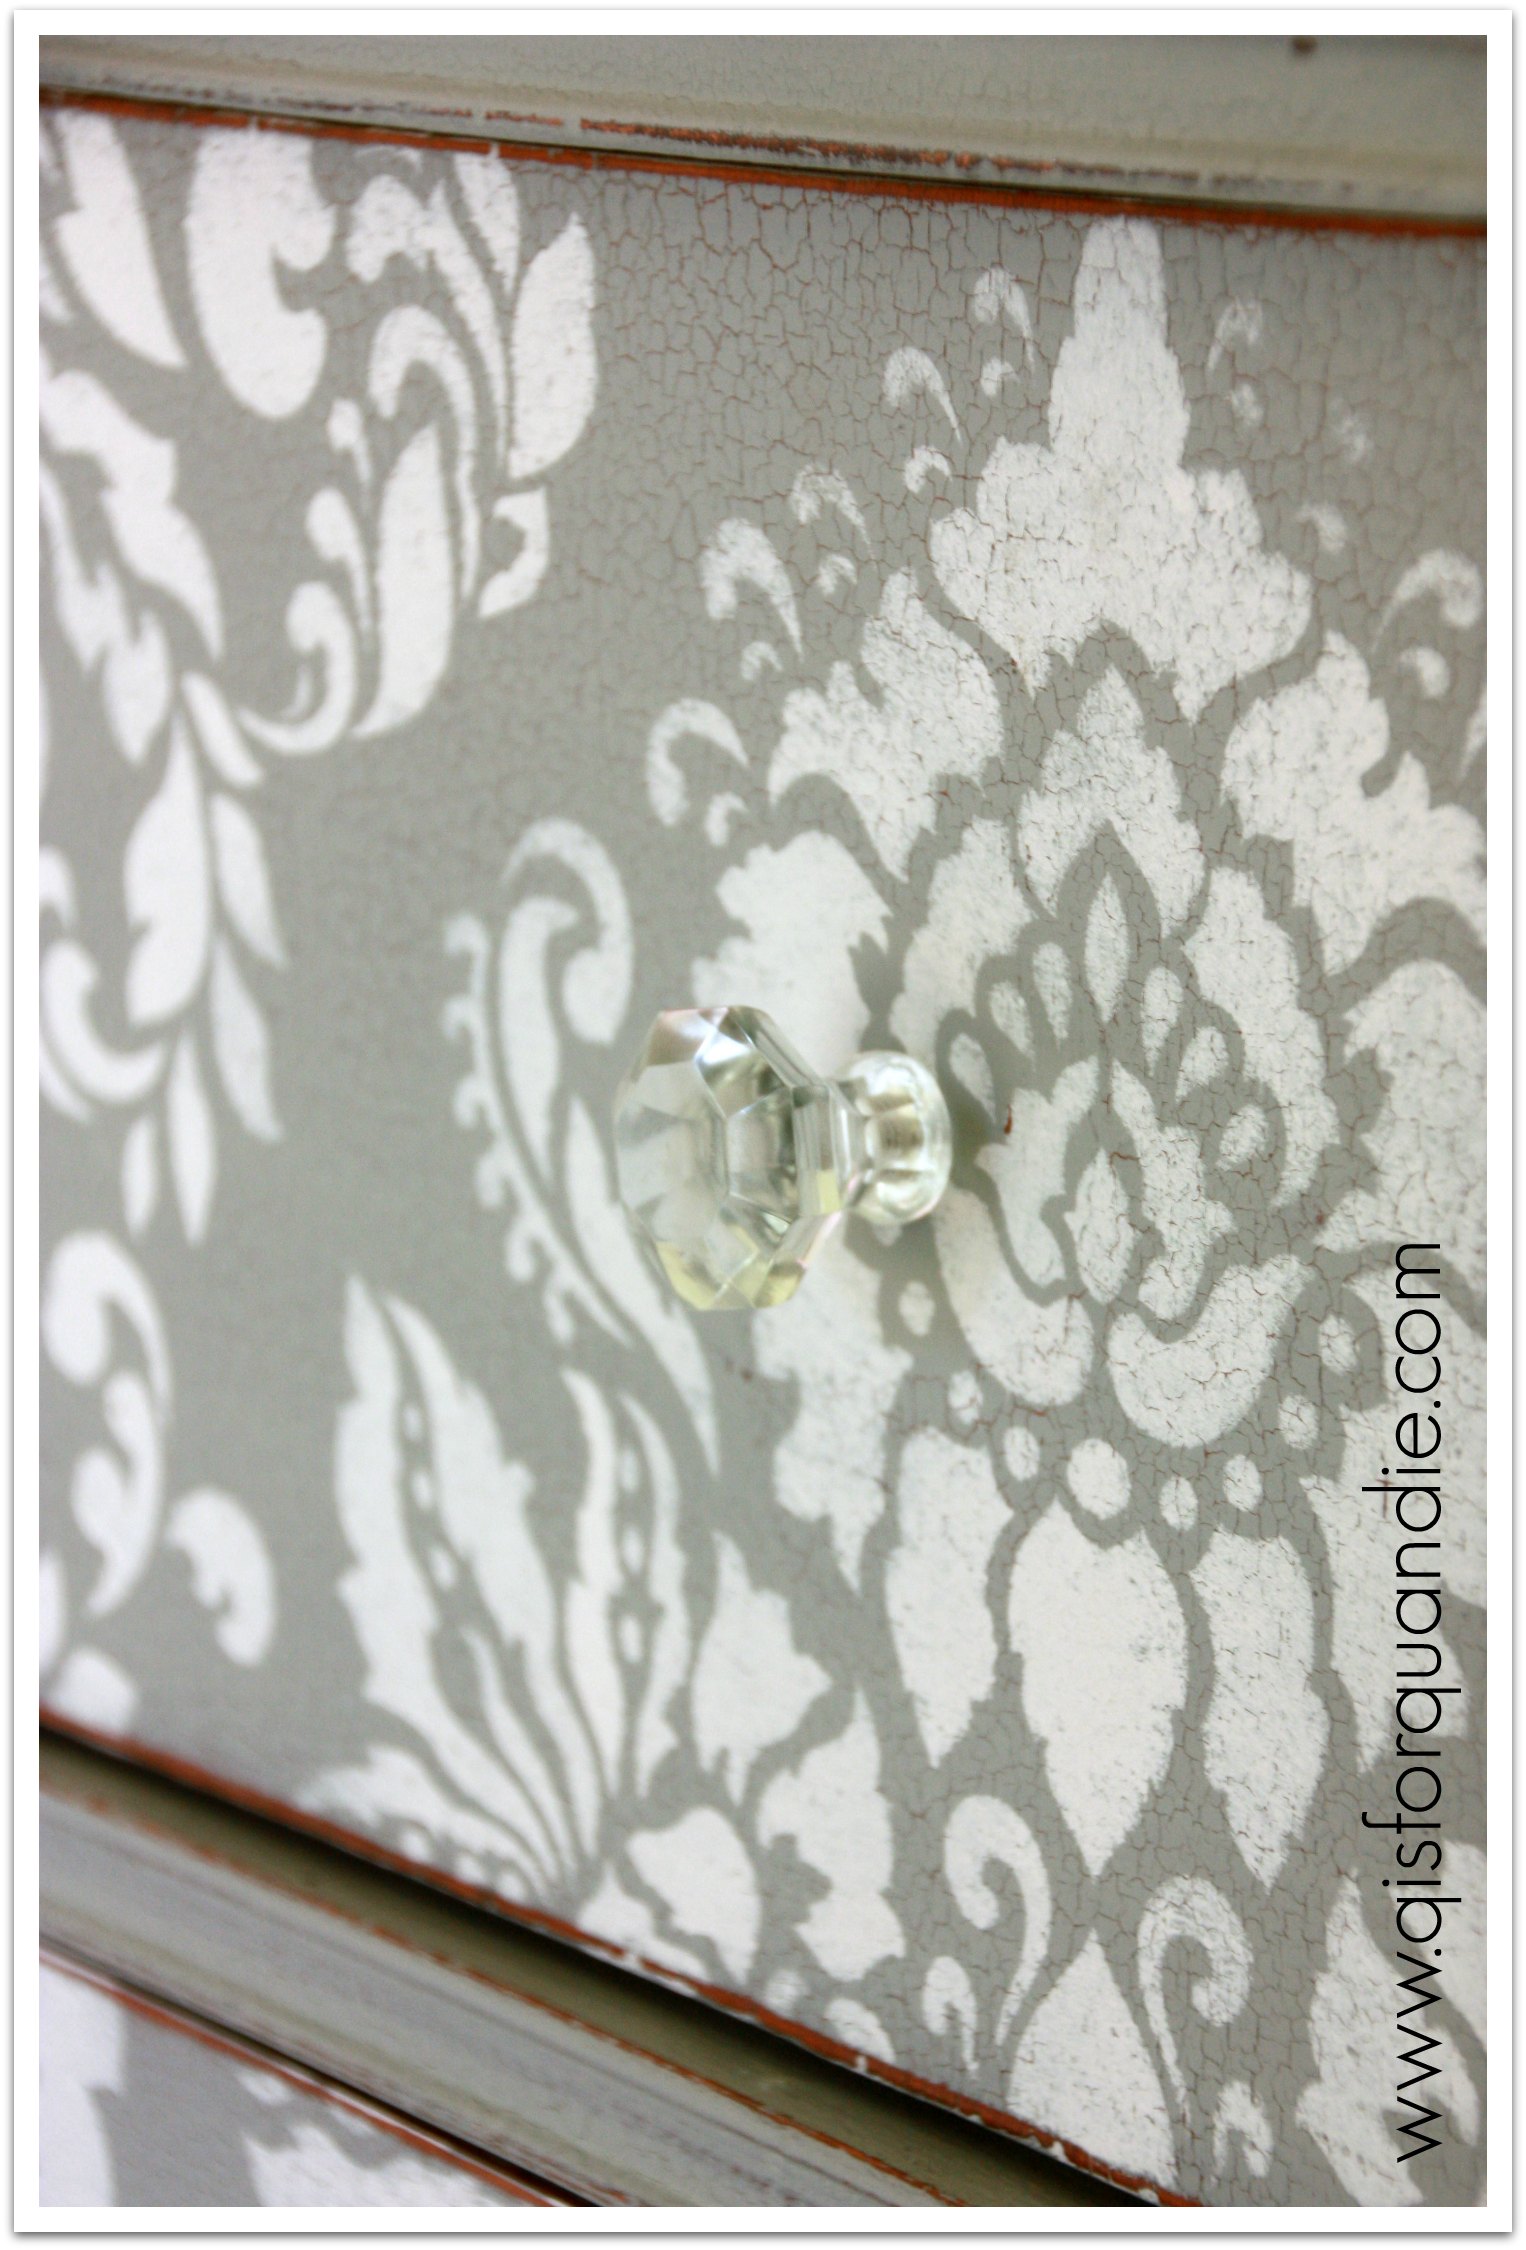
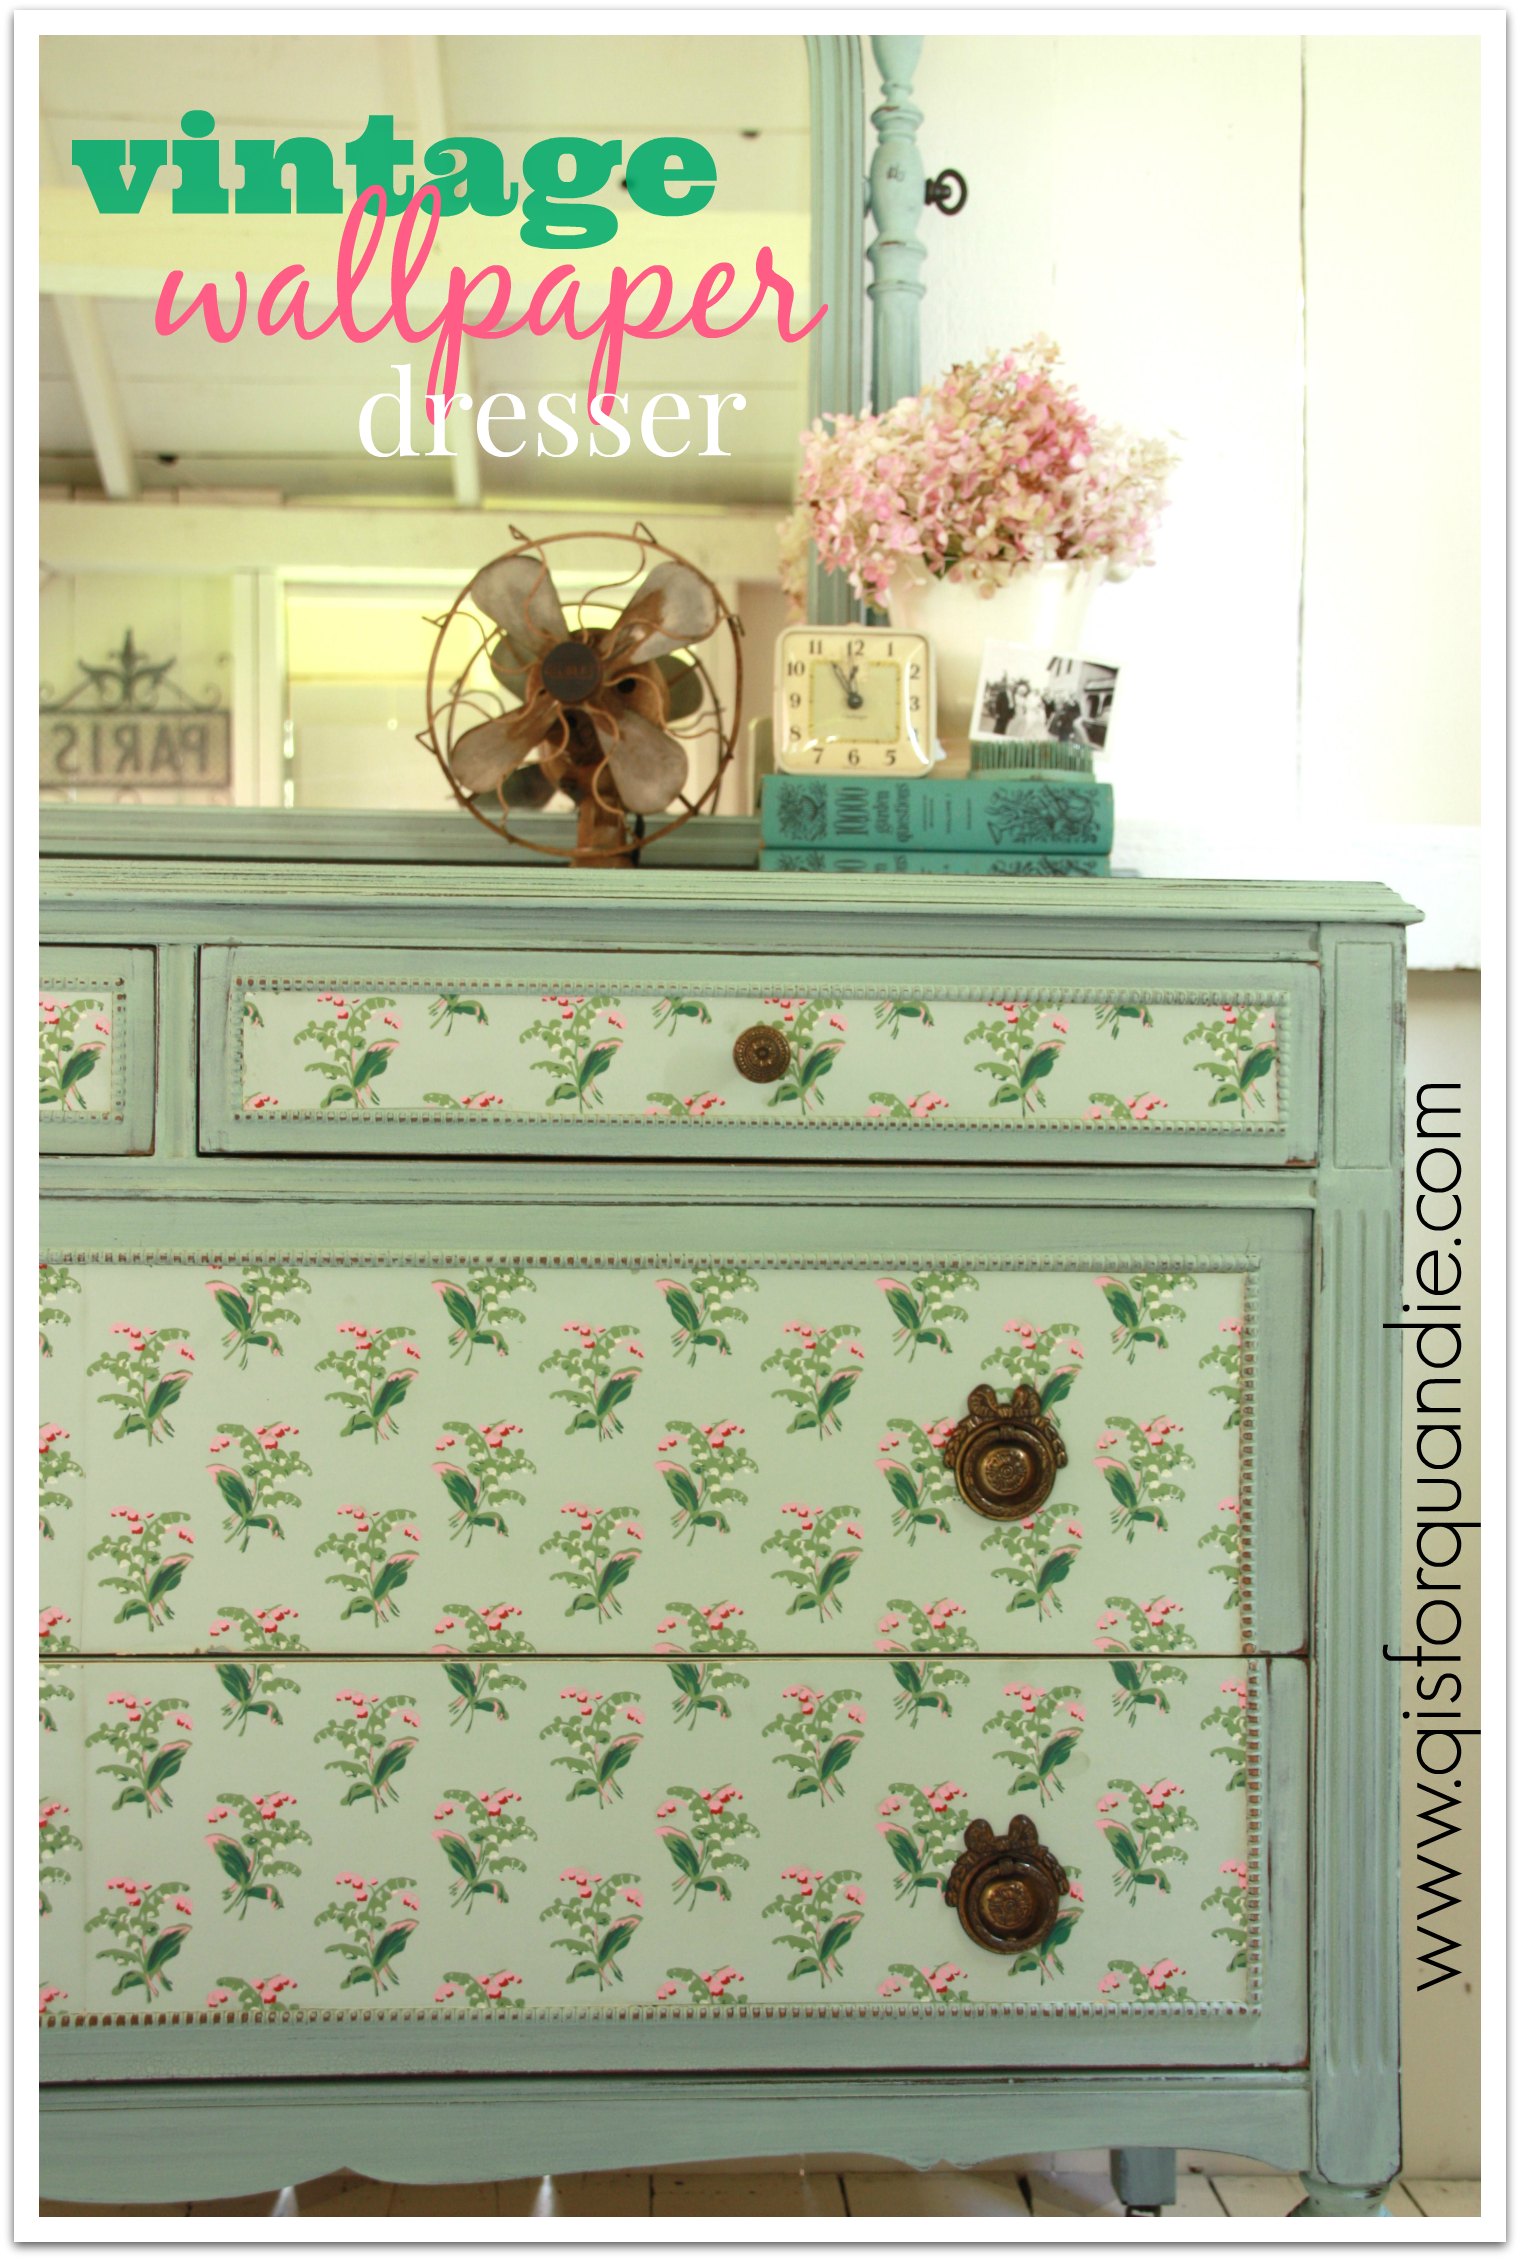
Meanwhile, there was no way I was going to try using tape on the dresser, so I went back to the drawing board.  It then occurred to me that I should get out my stencils.  Duh.  Why didn’t I think of this sooner?

And voila!  The finished dresser.

Dresser with Paris stencil

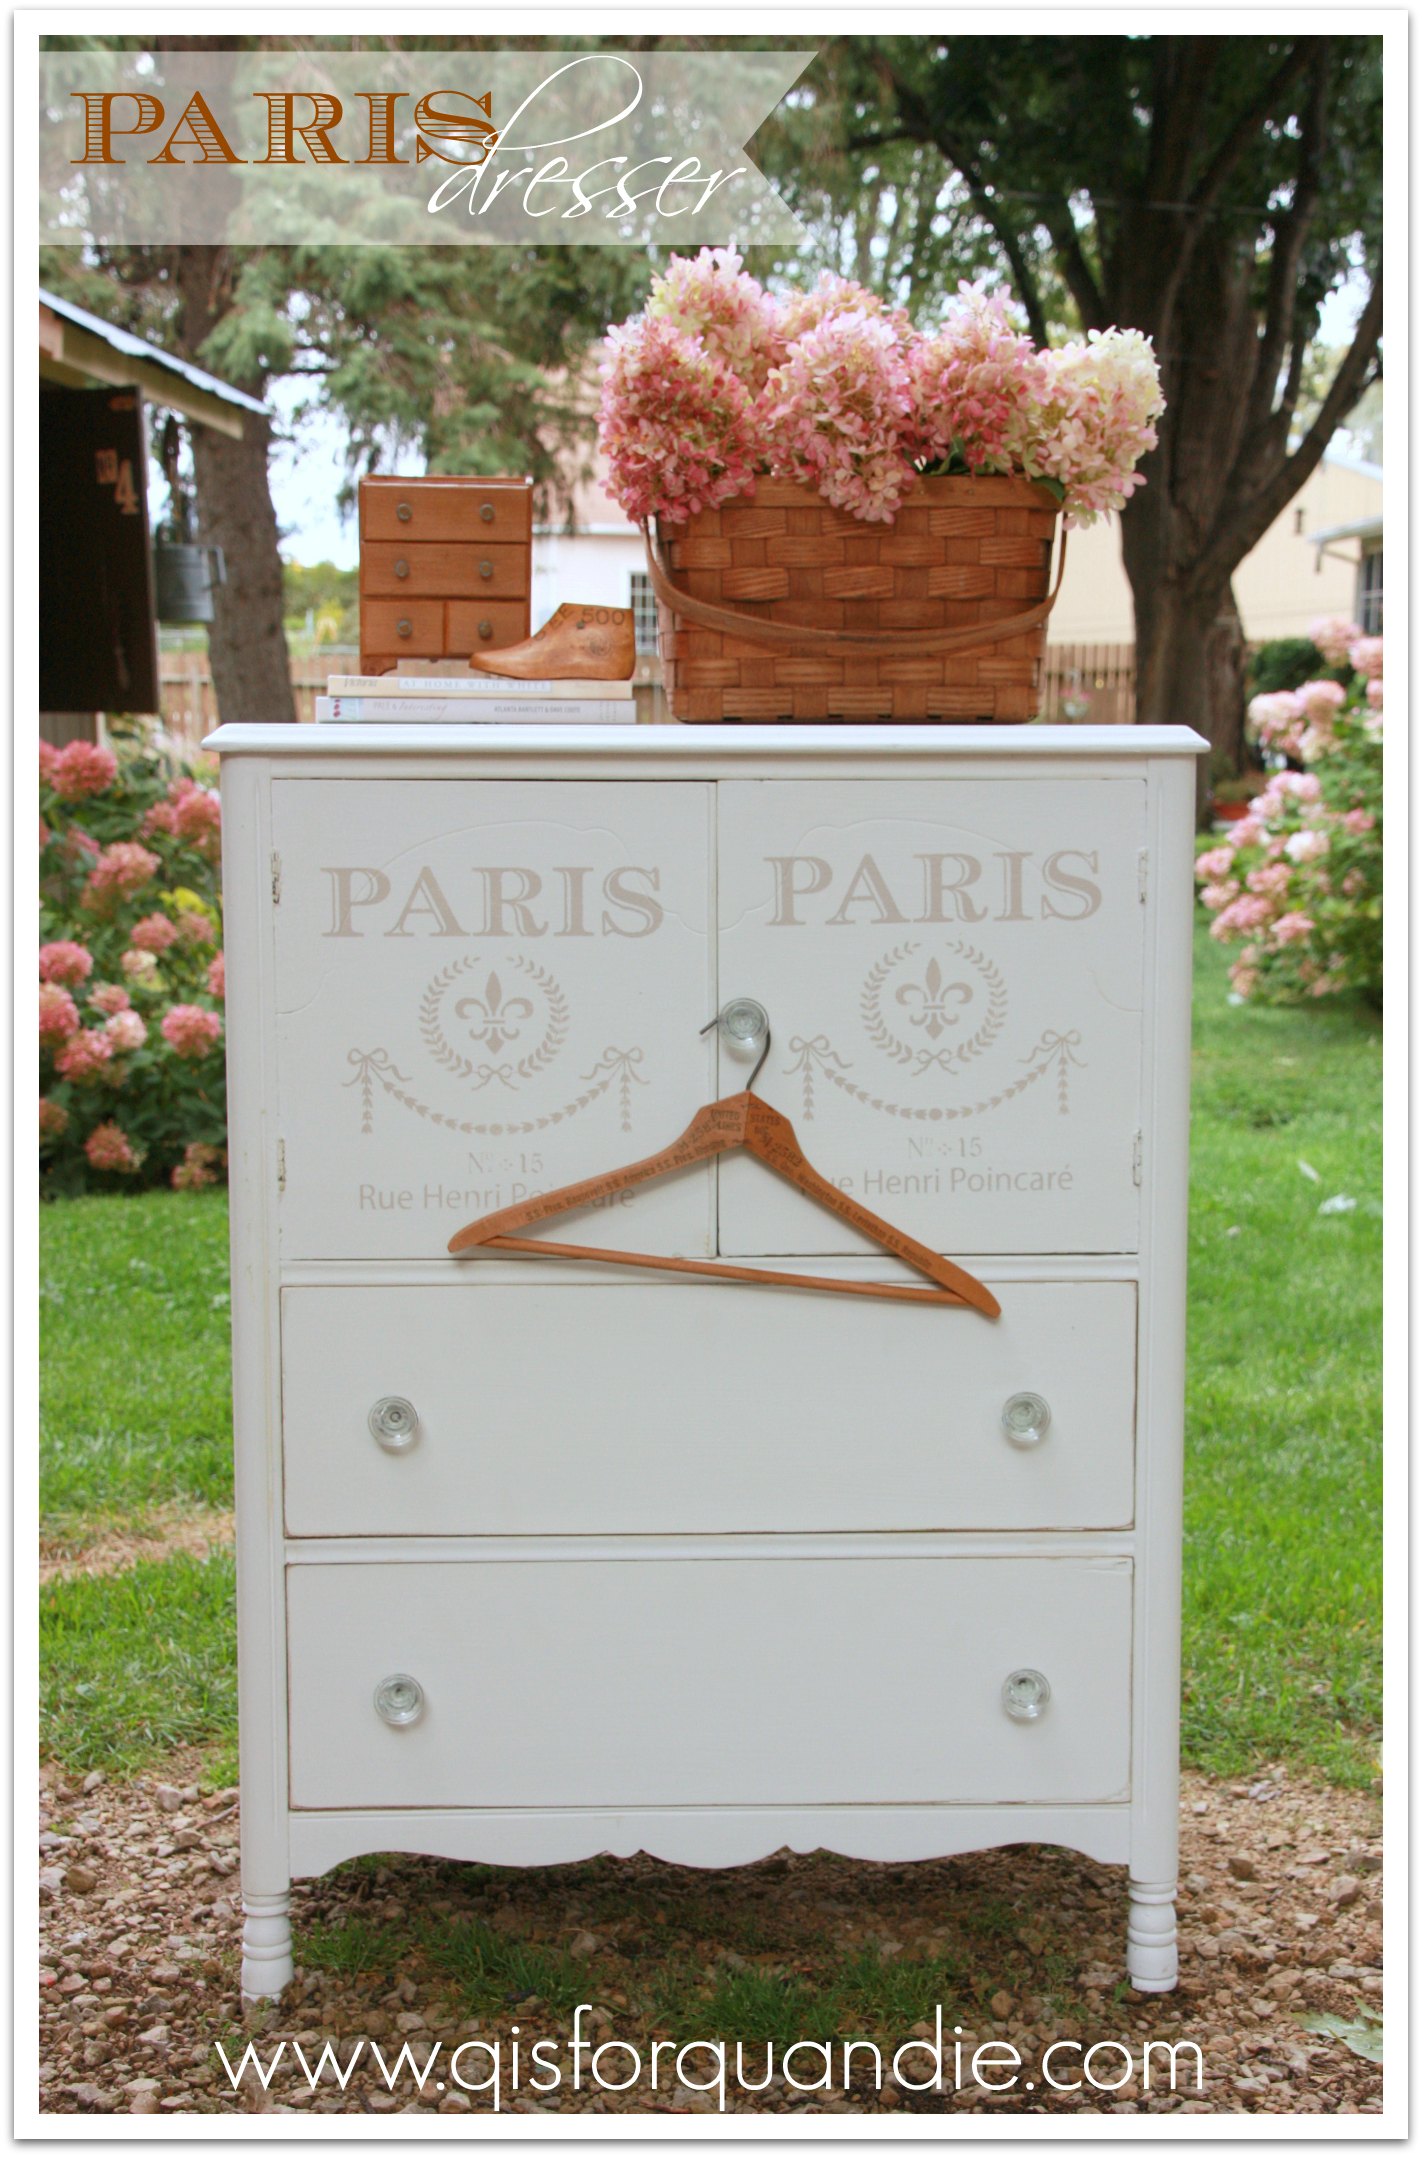
Seriously, isn’t it amazing what a fresh coat of chalk paint, some stenciling, and some new hardware can do for a dresser?

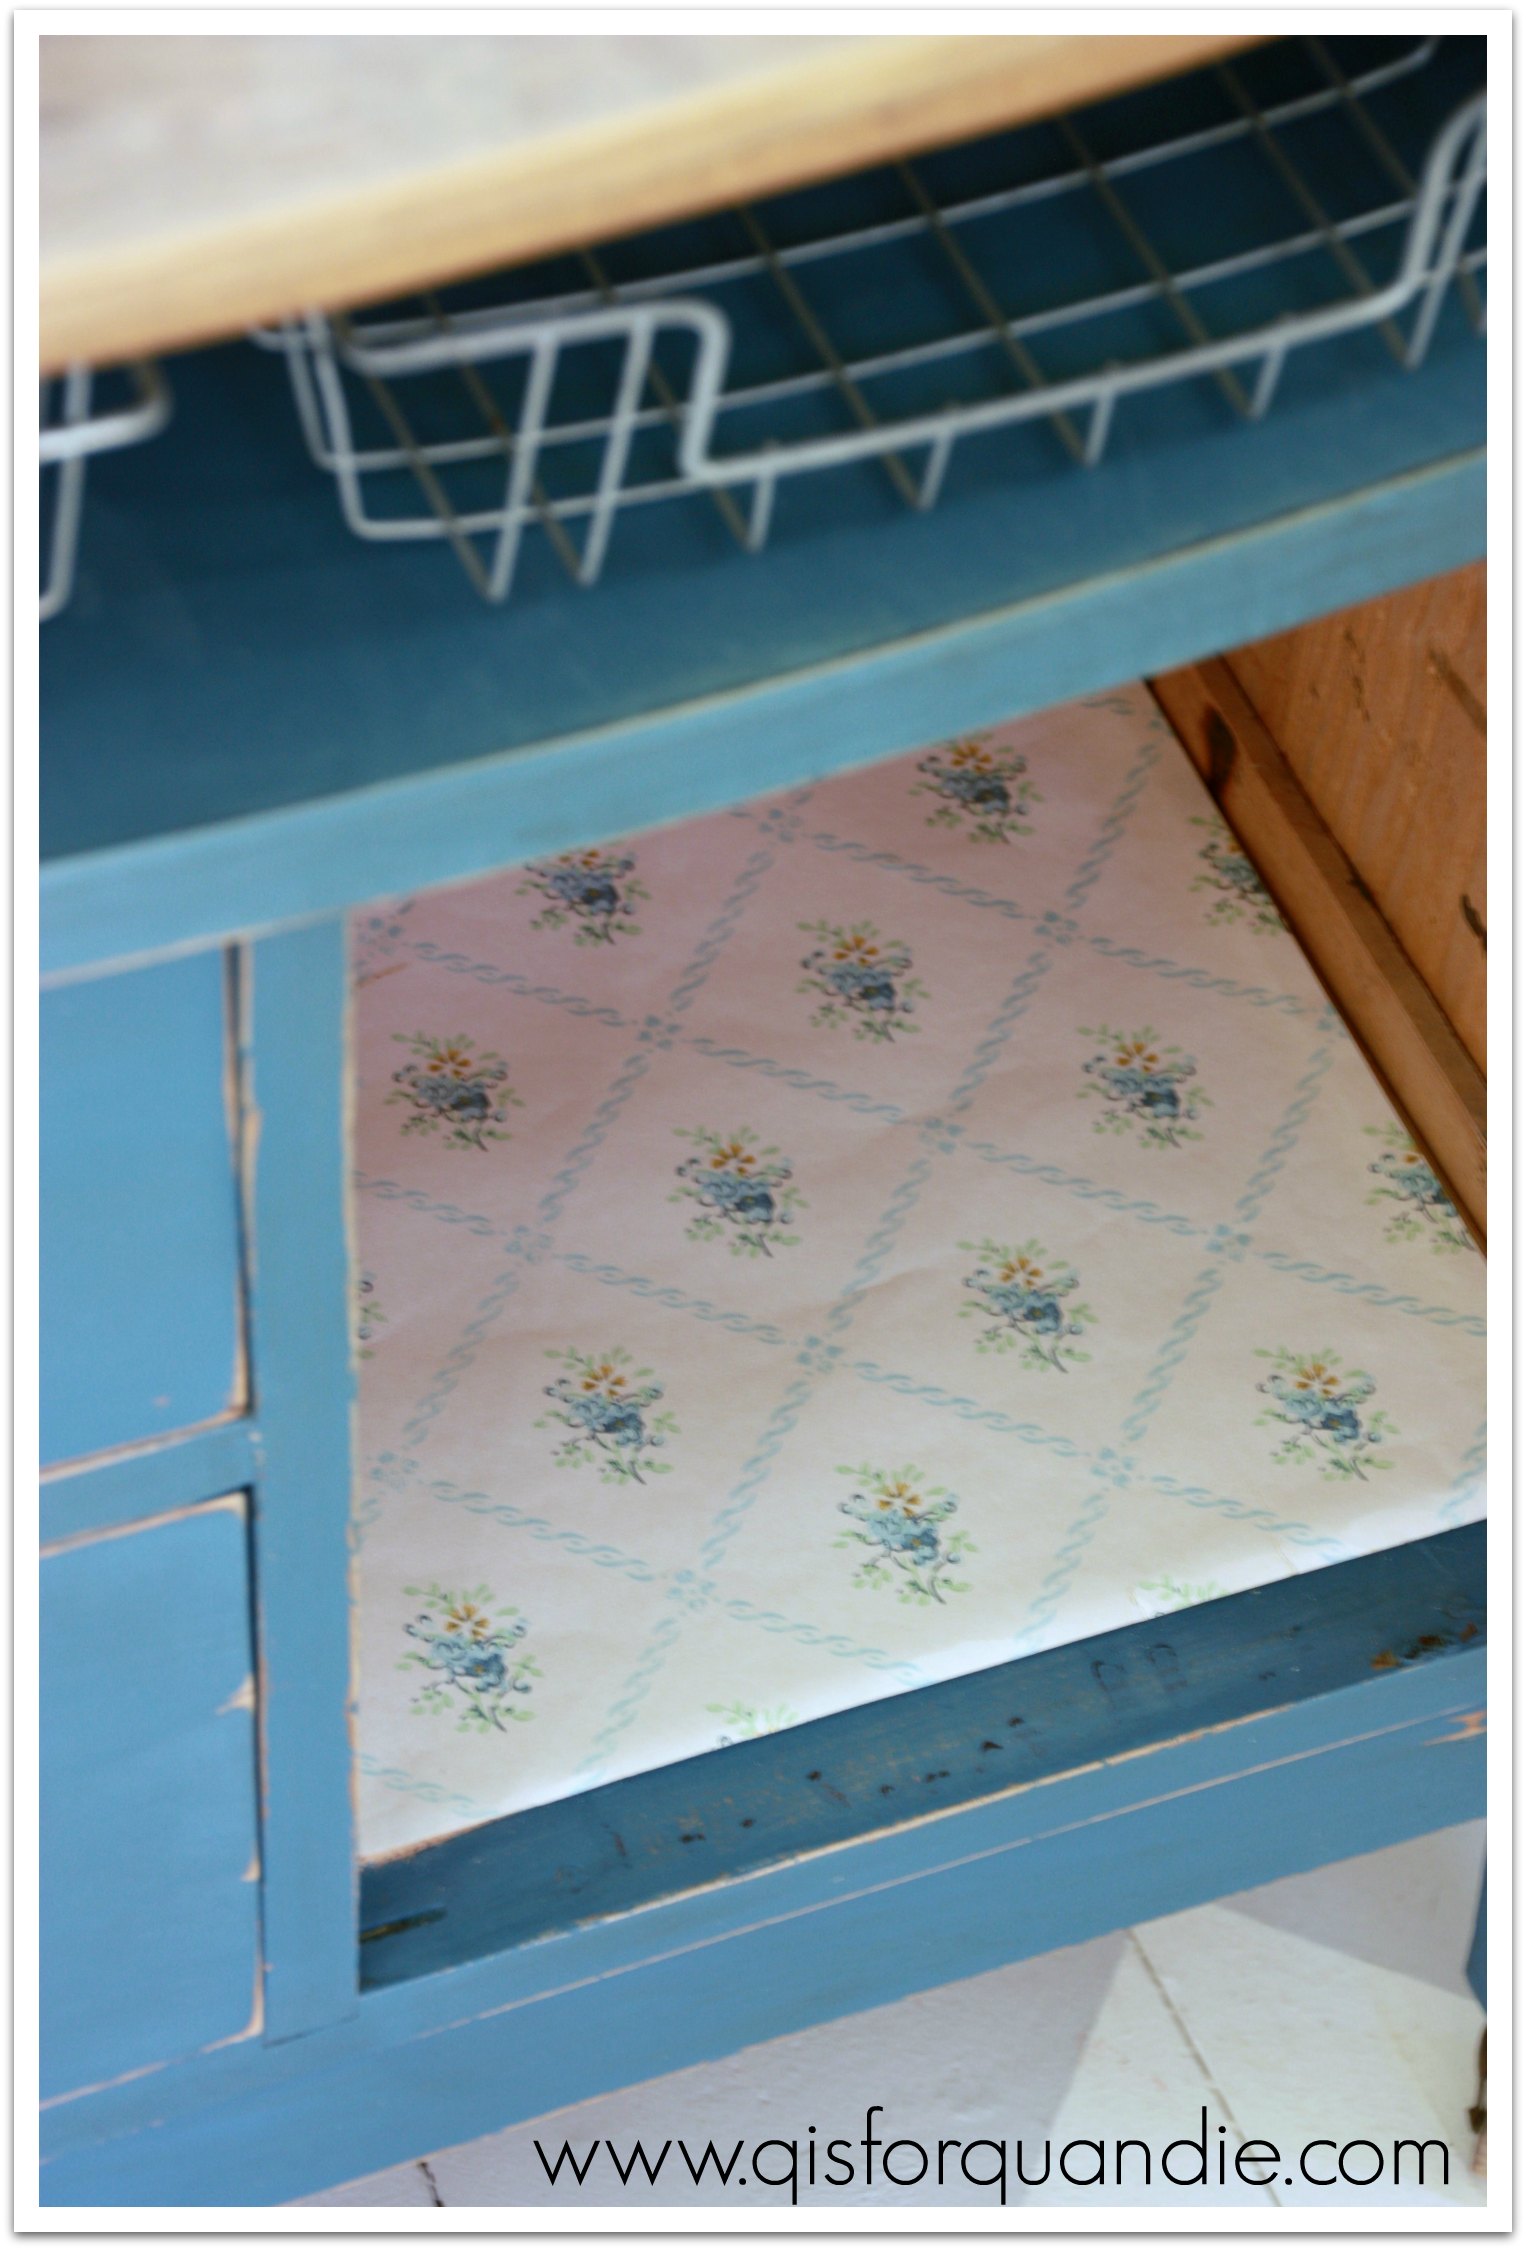
Here is a peek at the inside.

Paris interior

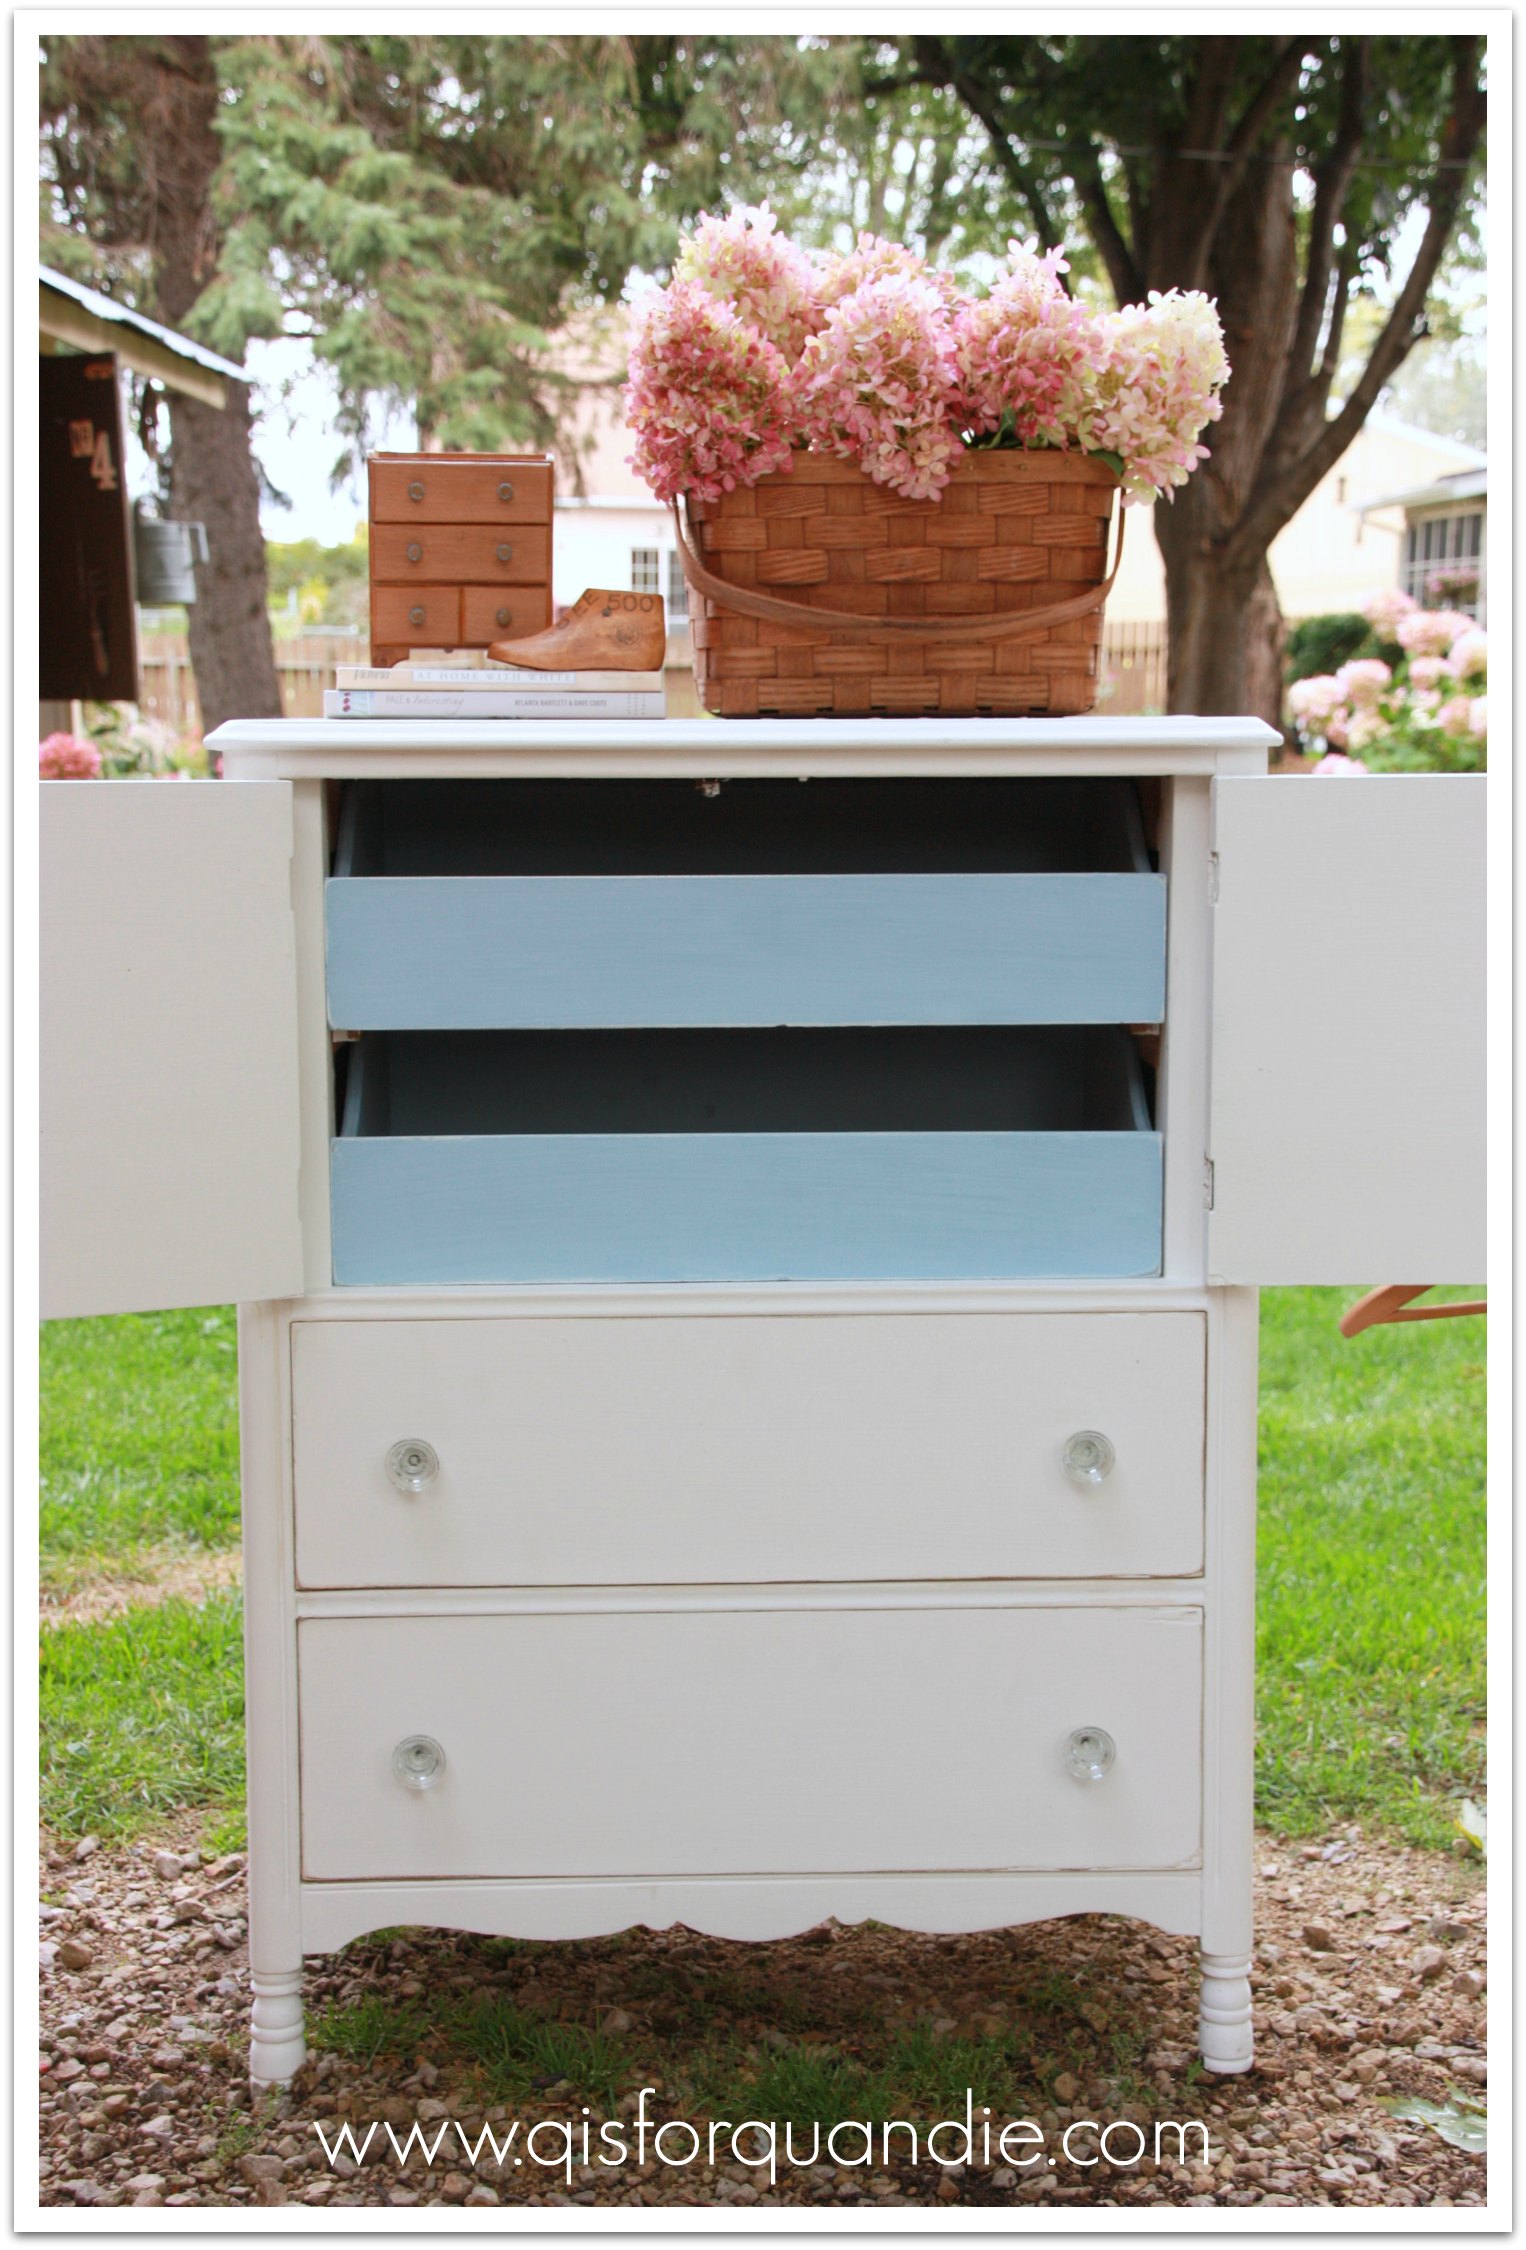
I’m thinking maybe I should have numbered those interior drawers.

Paris numbered drawers

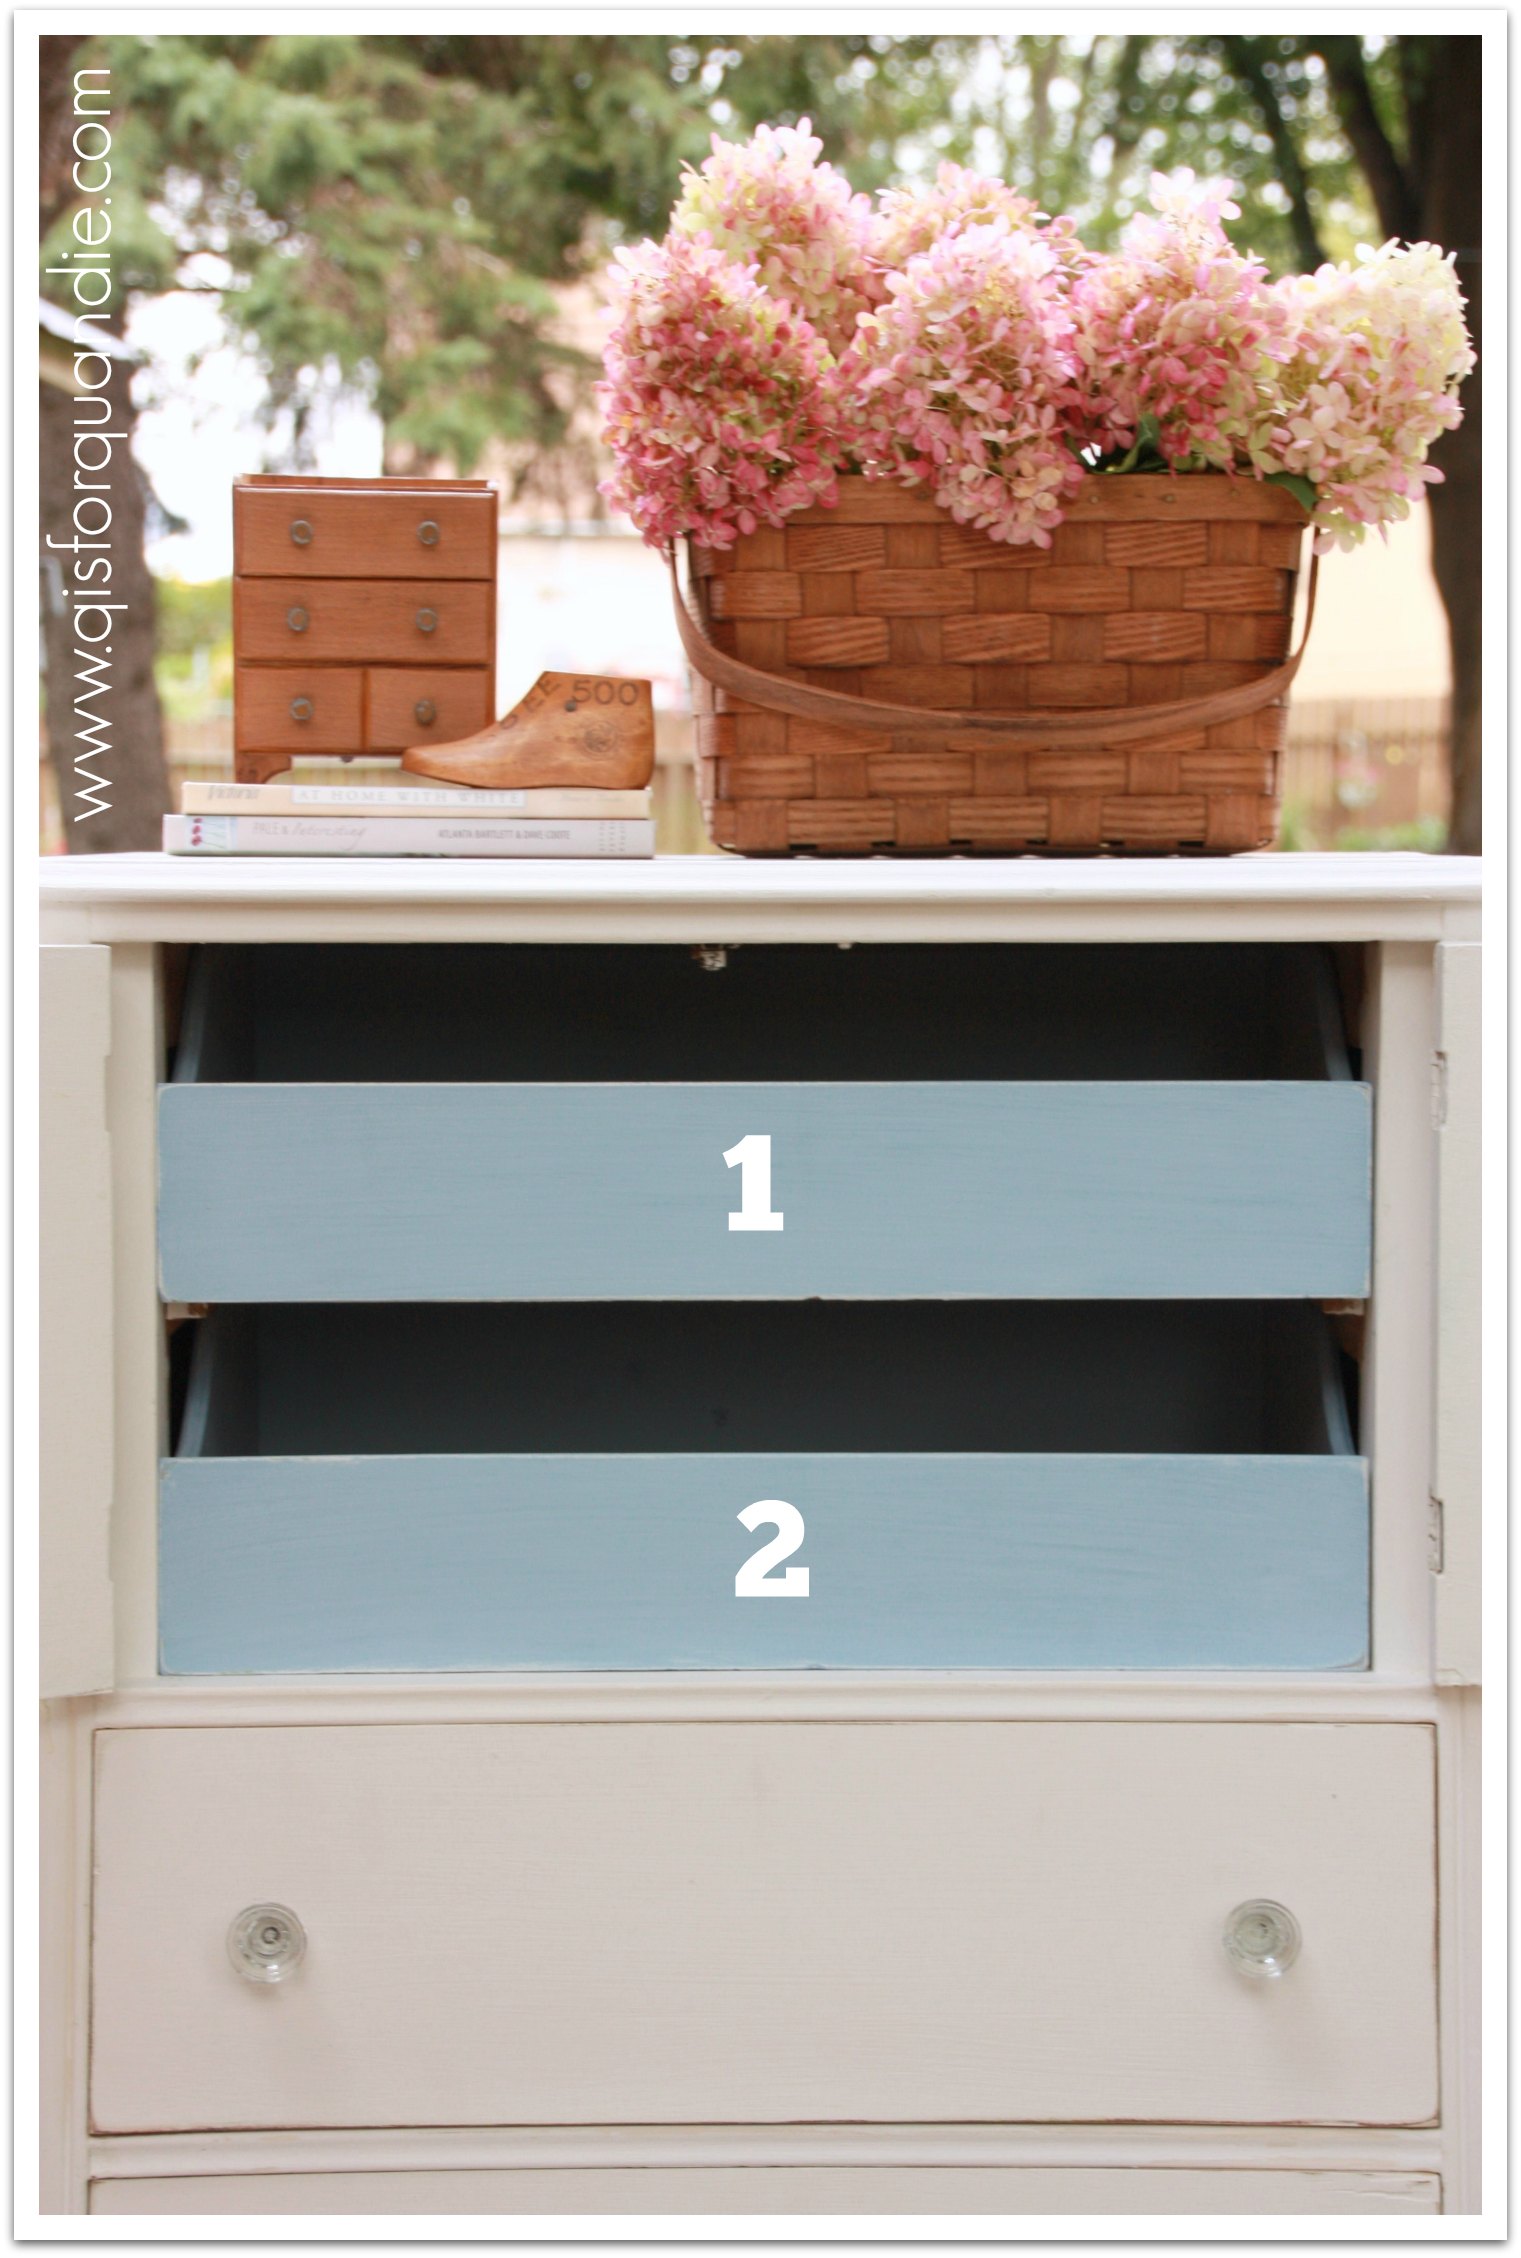
What do you think?  Should I add numbers?

Paris close up

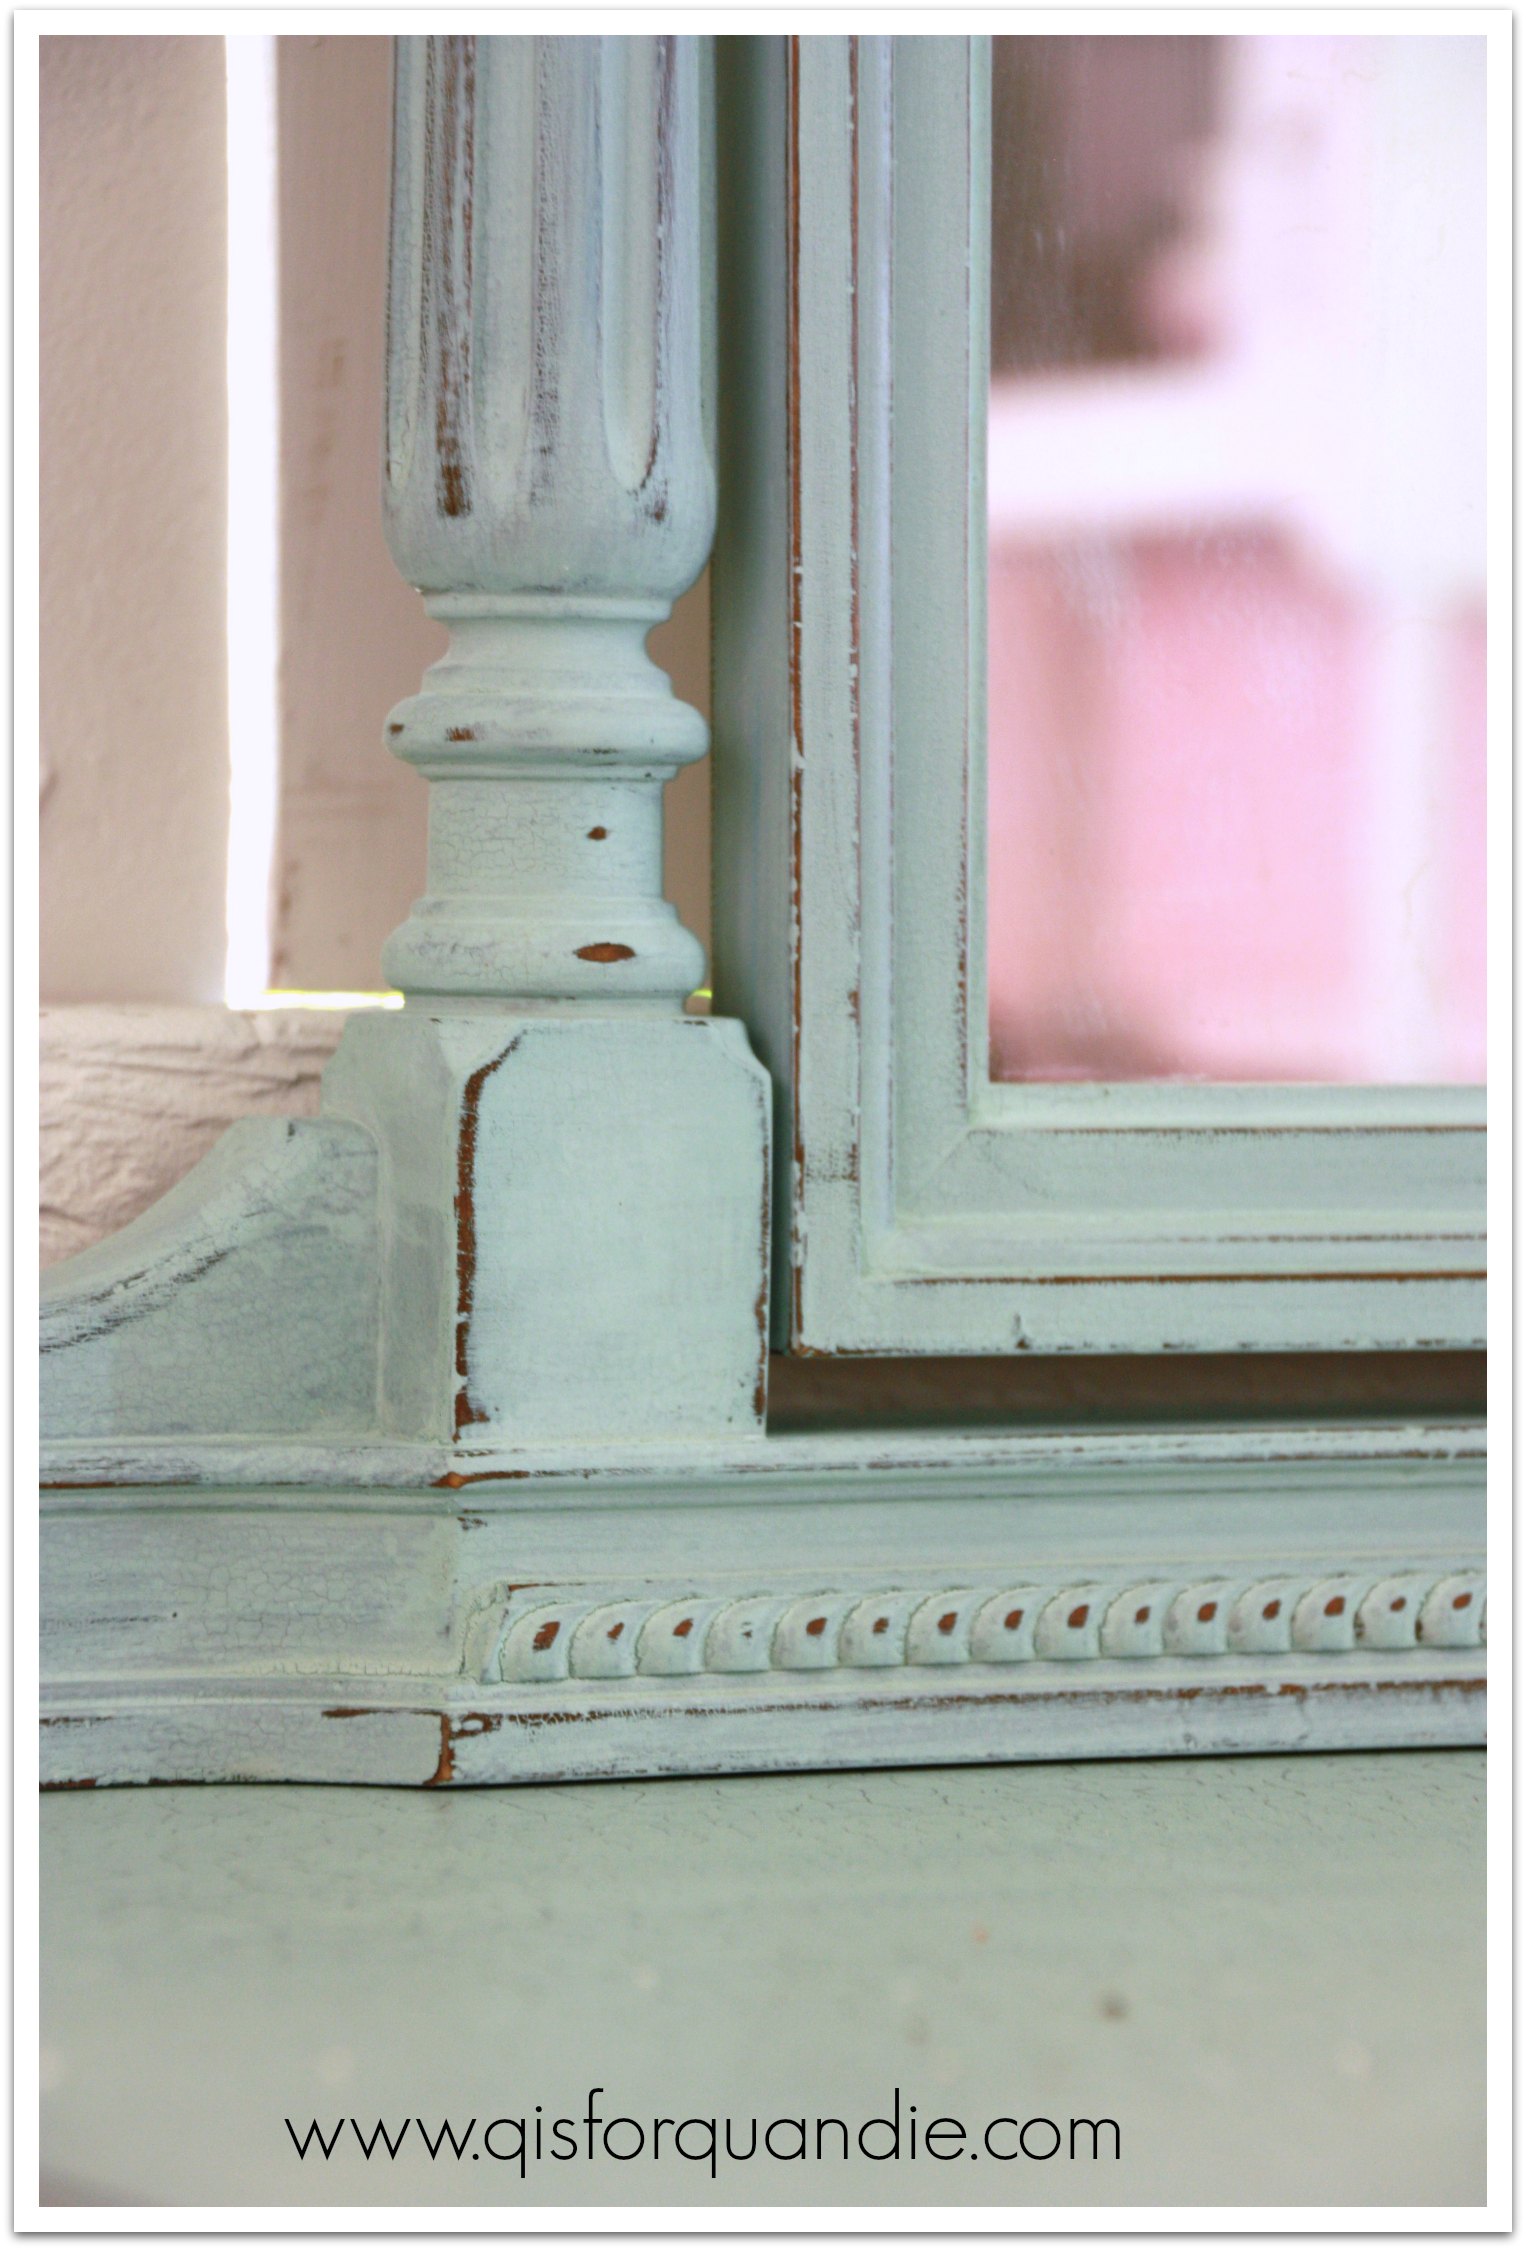
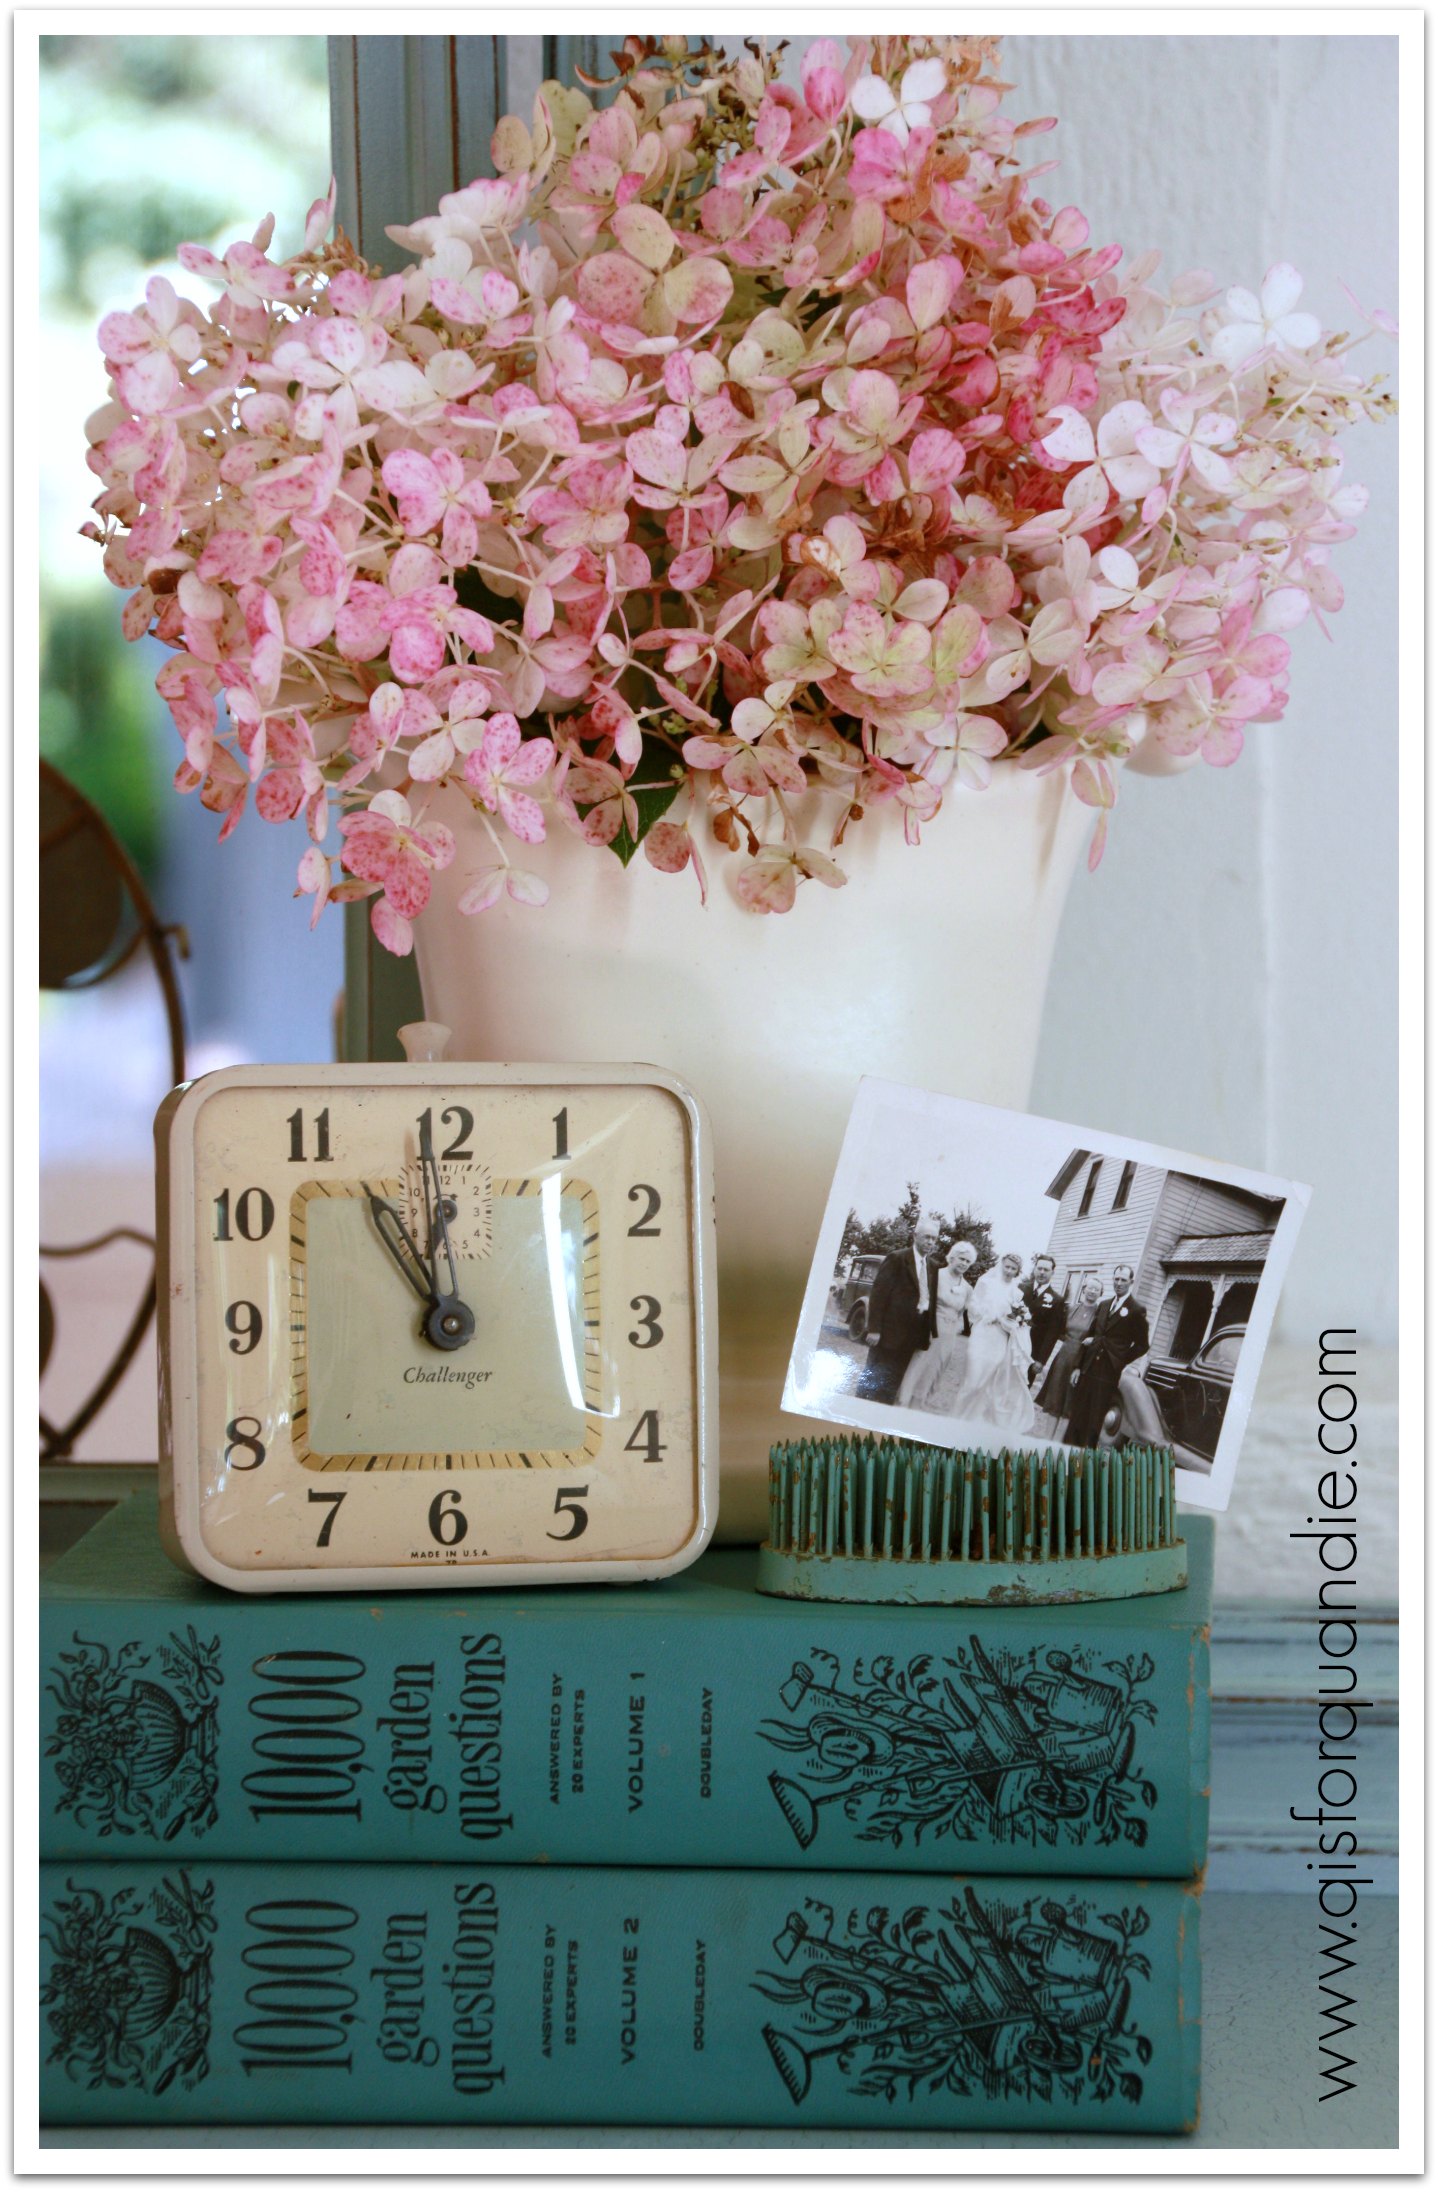
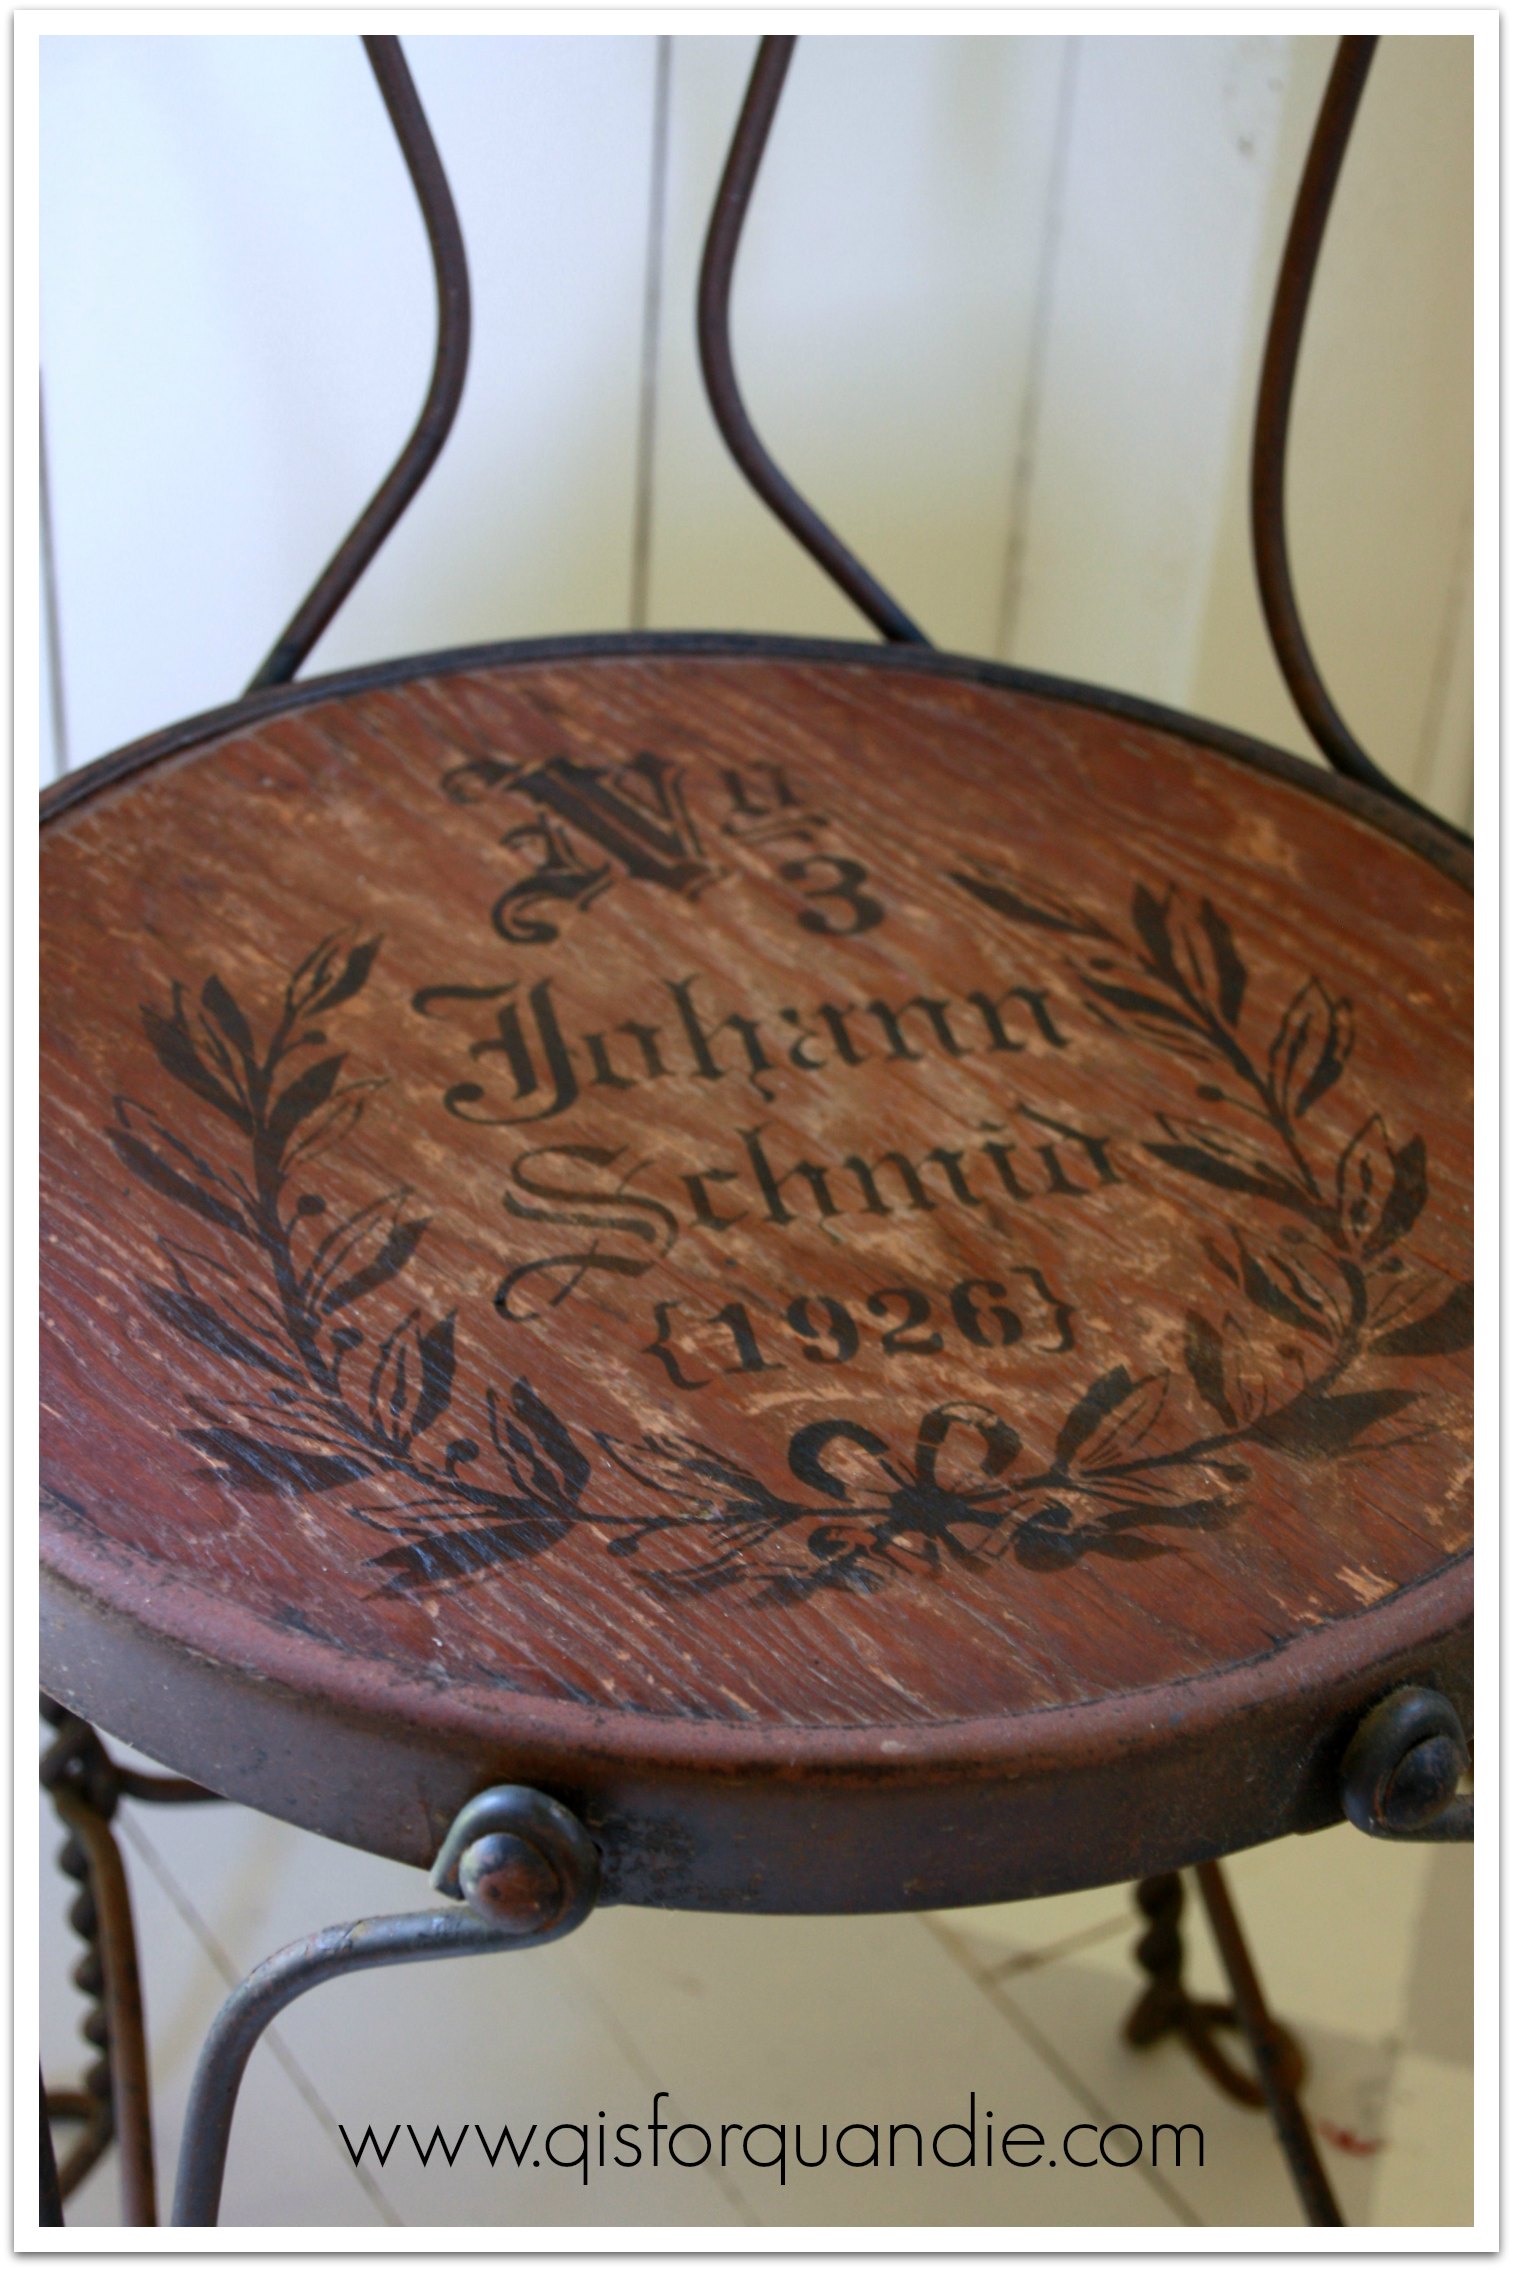
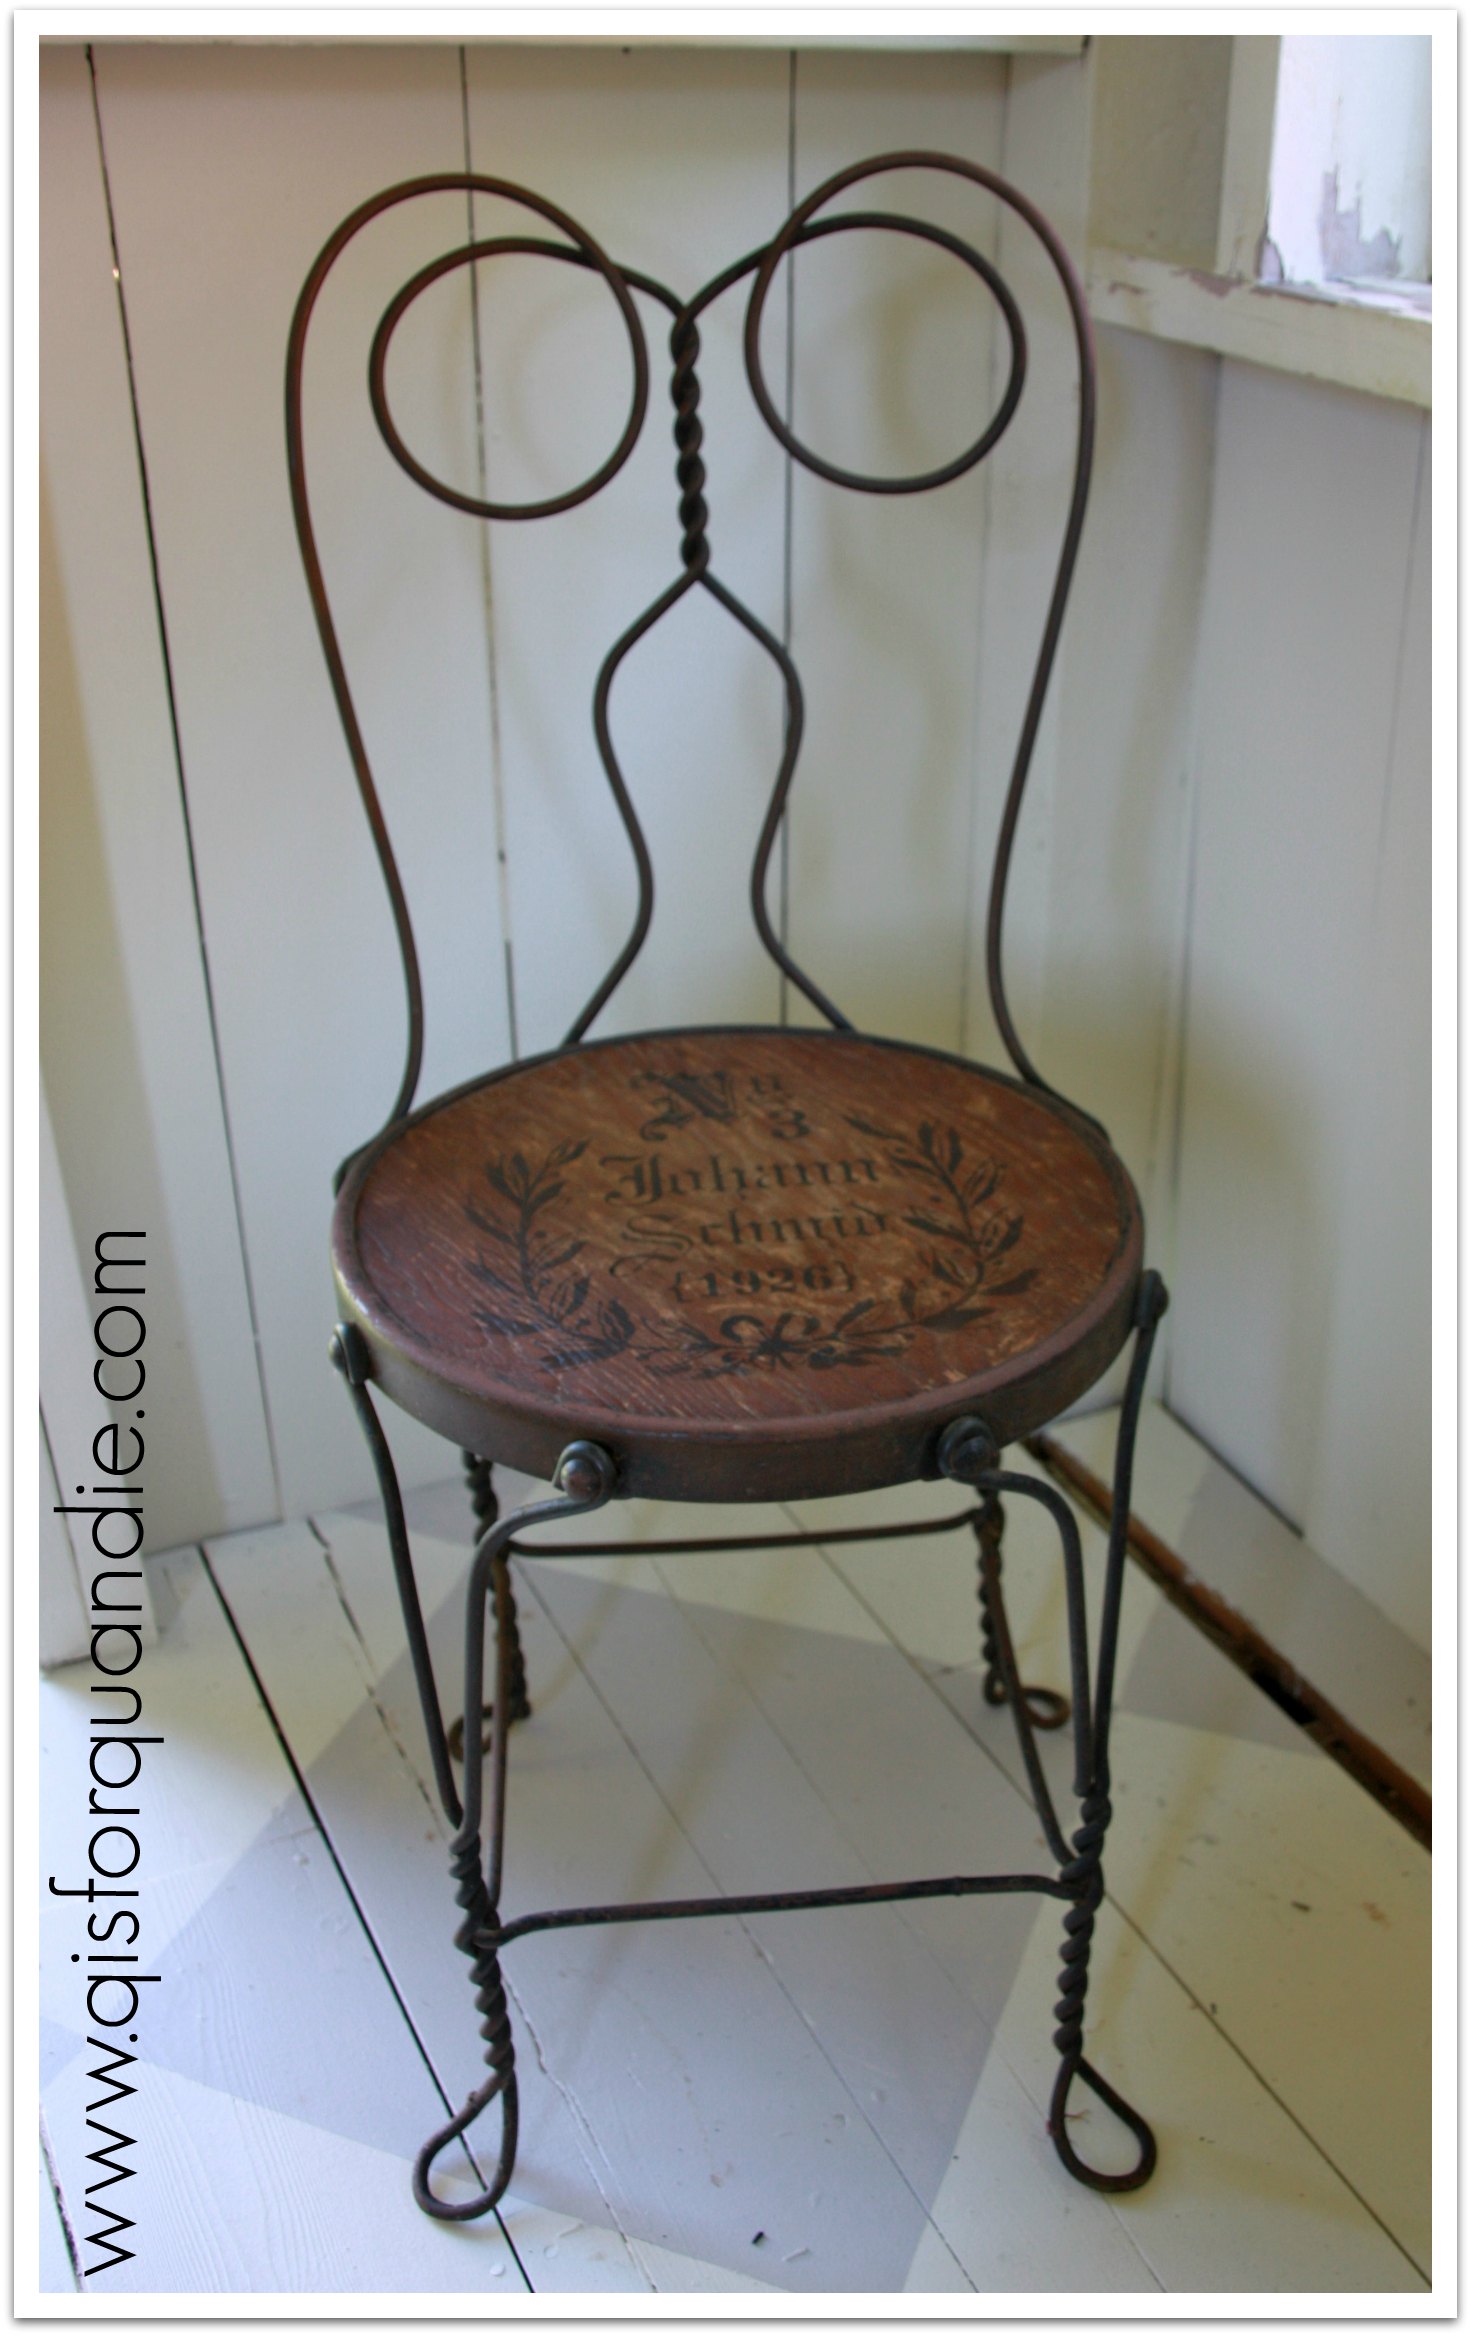
You may have caught a glimpse of this tiny dresser that I used for staging …

tiny dresser before

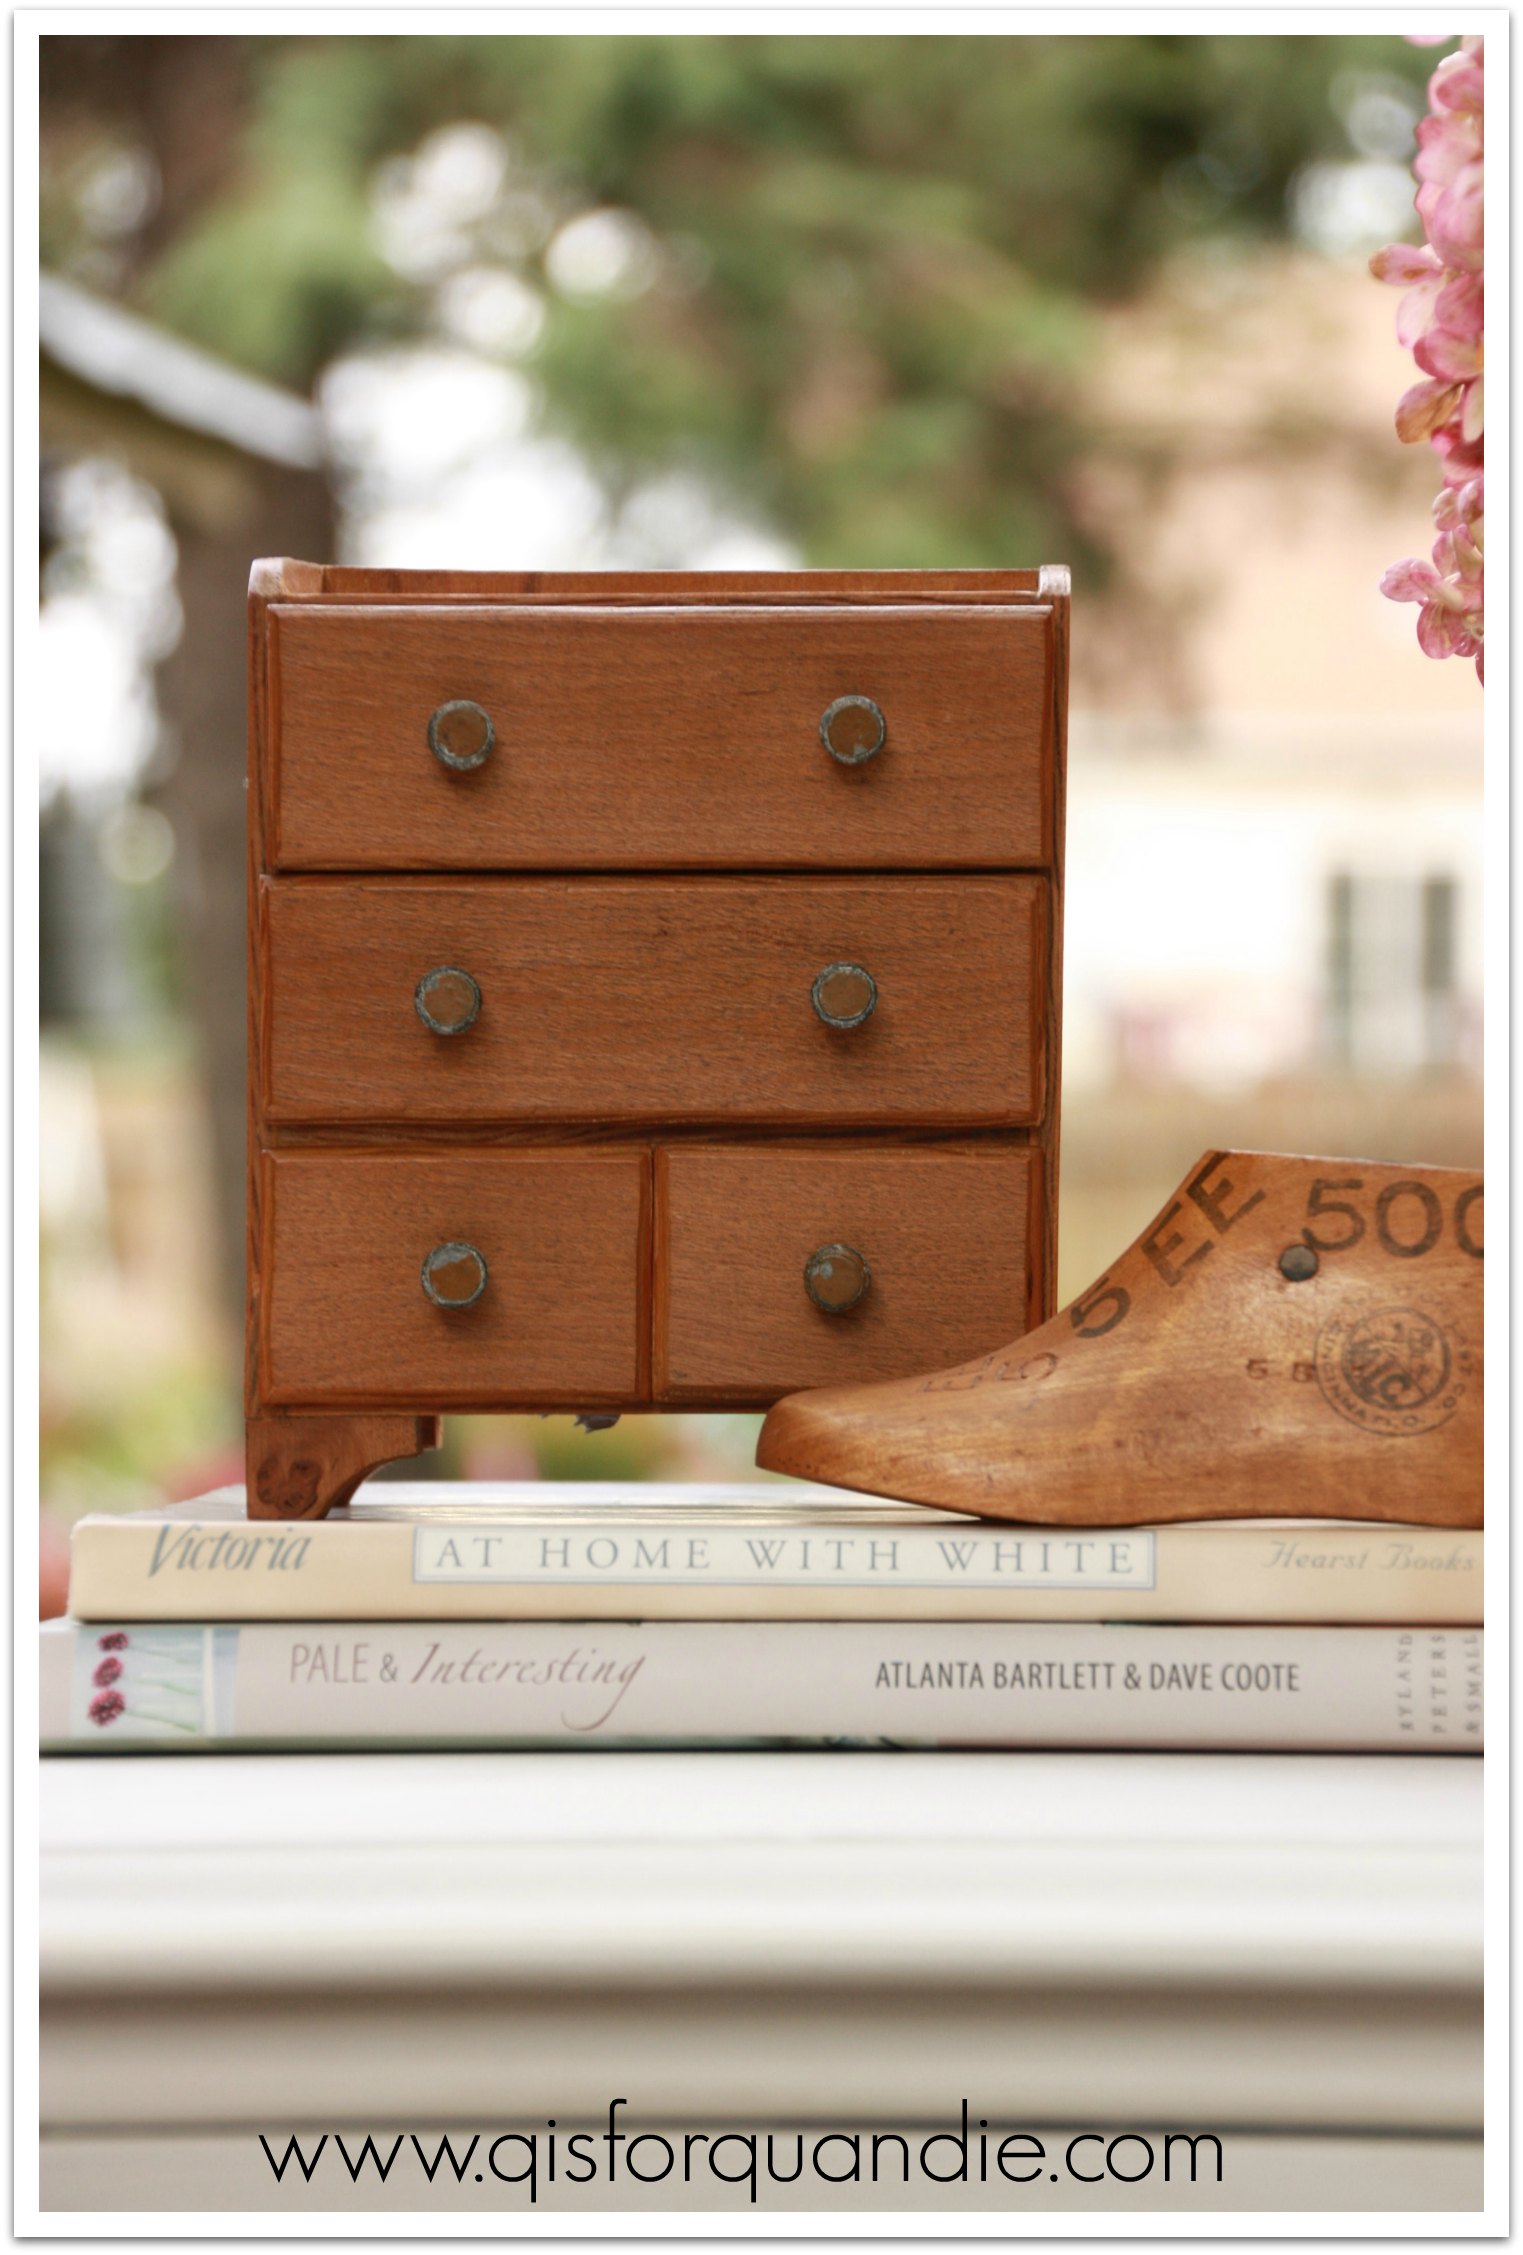
Yes, my addiction to tiny furniture continues.  I plan to paint this one too … but maybe after the Carriage House sale!

mac grove.

And the award for most fashionable garage sale goes to …. drumroll please … MacGrove!

MacGrove is a charming neighborhood in St. Paul that includes Macalester College and St. Thomas University.  Yesterday some of my garage sale pals and I spent the morning there for their neighborhood garage sale. It has a very collegiate vibe.  They used to hold their sale in August, but for some reason they moved it to September this year.  The most noticeable change was the quantity of students that were milling about near the schools.

Once again, we had picture perfect weather, and we found some great things.  We also came upon the most fabulous garage sale set up of the season.

mac grove lanterns

It was like a party!

mac grove party

And he had some very clever signage.

mac grove sign

“These lamps don’t get paid … but that doesn’t mean they don’t work!”

We all enjoyed the festive atmosphere.  Here is the crew, Sue, Jan & Cathy.

mac grove crew

I also found my best find of the season at this very same sale.  A fantastic vintage ice cream scale (who wants to weigh their ice cream?  not me!) in my color, aqua.

mac grove scale

I will be finding a prominent location in the pantry for this bad boy!

Unfortunately, I was so exhausted when I got home that most of my pictures of the rest of my finds turned out pretty awful.  But here is a picture of a fantastic book shelf that Sue spotted for me, and I quickly snatched up.

mac grove bookshelfWon’t this be a charmer once it is painted?  Those details down the side are just going to pop with a little paint.  I’m still contemplating what color I’ll use on it, but I know it will get milk paint.

Unfortunately, the pic is a little blurry and you can’t appreciate it properly, but the fabric that is folded on the shelf is vintage bark cloth with adorable farm scenes.  I just couldn’t pass it up.

Here, you can see the detail a little better in this photo of some vintage light sconces that I also picked up.

mac grove fixturesI did come home with a nice little pile of great finds.  Some will make their way into my own home, some will end up in my workshop to be revamped, and some will be headed to the Carriage House sale!

the fall window box.

Remember I told you I have a short attention span when it comes to gardening?  Yeah, I haven’t done a lick of gardening in weeks.  Fortunately, we are seeing signs of fall everywhere here in Minnesota, so it’s OK.  I can start tossing the summer annuals and throw in some fall updates and call it good.

First up, the front window box.  As you may remember, I tried something new this year, a monochromatic look of all white and green.  Here is how it looked when I planted it in May.

spring window box

 And here is how it looked by the end of August.

late summer window box 2

The Euphorbia ended up doing really well.  In the end though, the white impatiens were the star of the show.

Then, the impatiens all kacked.  I find that not many of my fellow gardeners are aware of this, but there is a virus that has been sweeping the nation and it attacks impatiens.  One moment they are full of blooms and looking gorgeous, and a mere week later they are nearly dead.  The flowers fall off first, then the leaves and you are left with nubbins of stems.  You will be tempted to believe that some kind of creature came and ate them, but no, it is a disease.  I hadn’t been planting impatiens for the last several years because of this, but last spring someone told me the virus had been ‘cured’.  This was bad info.  In reality, they have not found a cure.  According to my super scientific google research, the virus remains in your soil and will infect any impatiens you plant in that spot next year.  It also is airborne, infecting neighboring plants.  The double whammy of plant viruses, I guess.

Well, live and learn.  Next year, no more impatiens and I don’t think I’ll do the same monochromatic look.  It looked great close up, but from the street it lacked punch and without the impatiens, it just didn’t have much impact.

So, I yanked all of the remaining stems (bagging, sealing and tossing as recommended) and replaced them with white mums and some white pumpkins in keeping with my monochromatic look.  And here is how the window box looks for fall.

fall window box titleThe ferns, ivy and caladium are still going strong, so they stayed.  I added two white mums (flowers not quite open yet, and they better be white like the label says!), two white pumpkins, and some cut flowers from my Annabelle hydrangea.  My Annabelle’s turn a lovely chartreuse in the fall, do yours?

fall monochromatic window box

It’s an interesting twist on fall, not the traditional fall colors of yellows and oranges, but I love it.

full fall window box

I found the mums, kale and white pumpkins at Menards this week.  The mums were $3.98 each, the kale was $3.99, and the white pumpkins were $4.59 each.  So for about $33, and with the help of my prolific hydrangea bushes, I was able to give a both my large window box, and my two galvanized boiler pot planters a pop of new life for fall.

Hey, wait a minute, I don’t think I’ve ever shown you these.  Ken built them for me.  Both of the boiler pots came from garage sales and were super cheap because the bottoms were rusted out.  Ken added some wood slats, and then mounted them for me.  One on the Carriage House and one on the Photo Cottage.

fall boiler planter

I used the kale in this planter and added some Strawberry Vanilla hydrangea blooms, some Sedum flower heads, and some dried Astilbe flower heads.

Here is a better look at the arrangement.

boiler closeup

 I really enjoy being able to use stuff from my gardens in my window boxes for both fall and winter.  I’m hoping that these arrangements continue to look good for the next two months or so.  Or at least until the Carriage House sale.  Then sometime in early to mid-November I will switch them up again for winter.  I’ll be sure to share them with you again then!

turning a foot board into a chalkboard.

I picked up this foot board at a garage sale.  The seller was the man of the house who explained that his wife went off on a girl’s weekend and left him in charge of the garage sale!  He had no idea why they had just a foot board, but his wife had stripped it and then never finished whatever project she had planned for it.  So he was selling it.  Cheap.

foot board chalkboard beforeI made a snap decision to buy it because I loved the detail at the top, it was already stripped, I had plenty of room in the truck and I knew I could come up with some idea for it.

I was showing it to nnK, and she said “why don’t you turn it into another chalkboard?”  Duh.  Why didn’t I think of that?  Brilliant idea.

So that is what I did.  I painted the frame with a base coat of Sweetie Jane milk paint, followed by a top coat of MMSMP in Linen.  Then I painted the inset part with chalkboard paint.

chalkboard close up

I added a couple of vintage hooks, and an upside-down cup pull to hold the chalk.

chalkboard 1I love how it turned out.  But then, I am a big fan of chalkboards.  I have several of my own, and I have several for my Carriage House Sale.

foot board turned chalkboard

You will see this one at the sale, if you happen to be there!

aubusson.

Remember the whole ‘my computer died and I haven’t been able to retrieve my photos yet’ thing?  Yeah, well, I haven’t made that a priority.  With my sale coming up, I am mainly focusing on getting furniture done.  This is further exacerbated by the fact that fall is in the air here in Minnesota.  I know I only have another month or so before my summer workshop in the Carriage House is closed up for the winter.  I’ll have plenty of time after the snow flies to concentrate on indoor projects … like figuring out how to retrieve my photos from an external hard drive (snore.)  And cleaning.

Meanwhile though, that means I don’t have a ‘before’ picture of this project for you.  Let me try to paint a picture.  One afternoon my pal Cathy texted me and said “I have a piece of furniture for you, I’ll drop it off.”  She came by with a little washstand in her car and a tall tale about how she wrangled that thing into the back seat all by herself.  You see, she saw it at the curb with a “FREE” sign on it.  It was in a sad state of affairs.  It had the most hideous replacement hardware ever, one caster was missing, the veneer on the top drawer was totally buckled.

But, Cathy saw through all of that and she knew this little cupboard could be salvaged!  So she manhandled it into her car and brought it to me.  The furniture whisperer.

Aubusson cupboard

Where do I even start with this one?  First of all, the hardware that came with it went right into the trash.  This is practically unheard of for me, but seriously, this stuff was butt ugly.  Bad, bad, bad 70’s hardware.  I felt that it was my responsibility to protect humanity from ever having to lay eyes on such a hideous sight ever again.  Fortunately, I had these vintage glass pulls and knob on hand to use as replacements.  Ahhhhh, so much better.

Aubusson hardware

Once the hardware was gone, I made the decision that the top drawer was beyond salvage.  Or at least not worth the trouble.  Instead, I had Ken put a shelf in that spot.  He also cut a hole at the back for electrical cords, thus making this piece functional as a TV stand.

I actually kind of loved the wood top on this one.  It was pretty beat up, and the veneer is buckling on top too.  But I kind of dig the aged, beat up look.  I had to strip the top because it had some paint drips and splats on it from it’s previous life.  Once stripped, I gave it a quick sand and a coat of dark wax.

Aubusson top

Next came the paint.  I had picked up a quart of Annie Sloan’s Aubusson while my sister was here visiting.  I’ll be honest, when I first opened that can of paint I thought “what was I thinking?  why in the world did I buy this color?”  But I realized that I must have seen it on something in the store, and I must have loved it.  I decided to go for it.  Two coats of paint, followed by a coat of dark wax.

Sidebar.  When I say ‘dark wax’ I am referring to my own concocted mix of Johnson’s Paste Wax and Briwax in Dark Brown.  When I first purchased the Briwax, I didn’t realize how really, really dark it would be.  I toned it down by mixing it with clear paste wax.  I ended up loving this combo.  Plus it is a great way to stretch the more expensive Briwax with the really cheap Johnson’s (about $6 a can).  However, FYI, the Johnson’s is very stinky.  I never use it indoors.

Anyway, guess what?  I do love Aubusson.  It’s a nice, rich blue.

aubusson with chair
As a last final touch, I lined the bottom of the cupboard with some vintage wallpaper that matched perfectly.

Aubusson interior

 I think I will save this little cupboard for my upcoming Carriage House sale.  Hopefully someone there will want to give it a new home.

a two-fer.

You gotta love a two for one.  In this case, two dressers, one trip.  I saw the first dresser on craigslist and when Mr. Q and I went to pick it up, the buyer just happened to say “you know, I do have another dresser that I want to get rid of.”  I love when people say that.  Usually it’s a good thing … and in this case it definitely was.

Two for one 'before'

I honestly liked the 2nd dresser even better than the one I drove out for.  But I purchased both of them, naturally.

I started with dresser no. 1.  Mr. Q prepped it for me by removing the hardware, sanding it down and cleaning it.  Then I painted it with a custom mix of MMSMP 2 parts Trophy to 1 part Grain Sack.  Now, I could fib here and say I planned this color, but in reality this was the last bit of Trophy I had on hand with a little Grain Sack mixed in to make it stretch for the entire dresser.  In the end, I think it worked well for me.  The grey is gorgeous.

As I was digging through my stencils the other day, I came across this damask stencil.  I had forgotten all about it!  I just knew it would be perfect for an overall stencil on the drawer fronts of this dresser.  The pattern of the stencil almost mirrors the design on the backboard perfectly.

stenciled dresser

I used Martha Stewart craft paint in Lake Fog to do the stenciling.  It might just be my own opinion, but I think this sort of stencil looks best as an overall pattern filling in all of the space on the drawer fronts from edge to edge rather than just a centered pattern down the middle.  I feel the same way about the french poem stencil that I have.  In fact … I might just be bringing that one out of semi-retirement soon.

Once the stencil was complete and dry, I sanded everything lightly and finished with hemp oil.

stenciled dresser angle

I had planned to keep the original hardware, which is actually quite lovely.  But once I saw the results of the stenciling I knew that I needed some hardware that didn’t visually compete.  These clear knobs do the job perfectly.  They are nearly invisible in fact.  I’ll save the other hardware for another dresser.

stenciled dresser knobs

 In some of these close up photos, you can see that this was another crackled milk paint finish.  I am starting think my theory about humidity might be right.  It was quite humid when I painted this one.  Have any of you had any experience with MMSMP giving you more of a crackled finish when you paint in humid conditions?

stenciled dresser crackleThis dresser is more petite than it looks in pictures by itself.  I paired it up with my cane back chair to give you an idea of the size.

stenciled dresser with chair

This dresser would work well next to a tall bed as an alternative to a traditional nightstand.  Or wouldn’t it be lovely in a baby’s room?  There are so many options for a versatile dresser like this one.

So how about it?  Anyone out there need a lovely little stenciled dresser?  This one is for sale, if interested email me for the particulars.

Stenciled dresser before and after

Meanwhile, stay tuned to find out what I did with dresser no. 2!

fun with funiculars.

Have you ever ridden a funicular?  While researching our upcoming trip to Budapest, I found that they have a funicular that goes to the top of ‘Castle Hill’.

photo found here:  http://www.europeanbestdestinations.org/top/best-funiculars-in-europe/
photo found here: http://www.europeanbestdestinations.org/top/best-funiculars-in-europe/

Don’t know what a funicular is?

funicular noun : a railway going up and down a mountain that carries people in cars pulled by a moving cable.

This got me thinking about how many funiculars I have been on, and I started to realize the list was kind of fun.  So I thought I’d share them with you.  My first funicular ride was in Bergen, Norway.  My mom and I were there … gosh … over 20 years ago.  Bergan has the Fløibanen funicular.  Ride to the top and enjoy the views of Bergen!

photo from:  http://tripcrushblog.com/
photo from: http://tripcrushblog.com/

Have you ever been to Santorini?  If so, and if you arrive by sea, you know there are two options for getting up to the town proper on top of the cliff.  It’s either the funicular or a donkey ride.  When we were there with our friends Joe & Vonda, we knew we had to experience the donkey ride.  And it was definitely an experience.  Basically they plop you on a donkey, slap him on the rear and up you go!  You have to hope that you have a well behaved donkey.  Mine kept stopping for a rest.  Mr. Q’s was off and running and went way ahead of us all.  Vonda’s donkey kept trying to crash her into the wall.  Unfortunately, I am still in the process of recovering my old photos after my recent computer crash so I can’t share an actual picture of me on a donkey, but I found one on pinterest that looks practically the same.

Me and Mr. Q
Me and Mr. Q

Yep … practically identical doubles for me and Mr. Q.  Obviously, I jest.  Although Mr. Q’s legs are just as good as that guy’s.

Anyway, as fun as it was to ride the donkeys uphill, for the return trip (after enjoying baklava and coffee at a cafe overlooking the sea) we chose the funicular.  Going downhill on those donkeys seemed like a dicey proposition at best.

Prague also has a funicular that goes to the top of Petrin Hill.  When Mr. Q and I were in Prague, we hired a private guide through PragueWalker.  This might sound super ritzy, but it was actually very affordable.  Less than $150 for a 4 hour walking tour.  Our guide was very knowledgeable about her city, and we had her all to ourselves.  We could pick and choose what we wanted to see, and how long we wanted to spend at each location.  We were mainly on foot, but she also took us on the public tram to show us the ropes.  We rode the tram to the Ujezd stop where we boarded the funicular and rode to the top of the hill.  Once there, we visited Prague’s version of the Eiffel Tower.

photo from:  http://www.bohemia-apartments.com/blog/posts/a-trip-up-to-petrin-hill-in-prague/
photo from: http://www.bohemia-apartments.com/blog/posts/a-trip-up-to-petrin-hill-in-prague/

We so enjoyed having a private guide in Prague that we have decided to do it again in Budapest.  For $130 (total, not per person) we have booked a private guide with Travel Guide Hungary for a 4 hour walking tour of Budapest.  Since there are 4 of us in our group, that is a mere $32.50 (plus tip) per person.  Our guide will meet us in our hotel lobby and we will set off from there on foot.  It couldn’t possibly be any easier.

If you plan to travel to a foreign city, consider hiring a private guide.  At least look into the cost.  It definitely is cost prohibitive in some places, but quite affordable in others.  And if there is a funicular, make sure you take a ride on it!

pencil it in.

Just a quick public service announcement today.  The Fall Carriage House Sale will be held on Saturday, October 4 from 10 a.m. to 2 p.m.

IMG_5165

I can’t believe it is just 3 weeks away.  Yikes!  Time flies.  I better get busy!

Pencil it in!  Hope to see you there.

vintage wallpaper.

It’s official.  I’m addicted to vintage wallpaper.  There is just something about it.  The colors.  The texture.  The very vintage-ness of it.

vintage wallpaper title
As soon as I saw this dresser on craigslist, I knew it would be perfect for wallpapering.  I had a bit of this Lily of the Valley wallpaper left, so I painted the dresser using MMSMP in Eulalie’s Sky, which I knew would work well with the background color of the wallpaper.

vintage wallpaper dresser full
This dresser has the most charming hardware.

wallpaper dresser hardware

And some fab detail on the mirror base.

vintage wallpaper details

I staged the dresser with a vase full of Vanilla Strawberry hydrangea, an old family wedding photo, and my fab new clock.

wallpaper dresser stagingI don’t know who the wedding couple is in this photo, but the farmhouse behind them belonged to my great grandparents in Arlington, South Dakota.

Anyway, this lovely dresser has already gone up to the Round Barn in Andover.  Pricetag:  $298.  Stop in and see it in person, and take some time to look around at all of the other fabulous things that Lori has in her shop.  I swear, every time I go in there I find some fun little thing to bring home with me.  This time it was Maple Pumpkin Butter.  Yum!  I also stocked up on Miss Mustard Seed milk paint in Trophy, Grain Sack, Apron Strings and Linen.  Stay tuned to see what I paint next!

my new stencil.

A while back I got the nicest surprise.  Lisa from Maison de Stencils contacted me.  She had seen my bog and all of the things I have transformed using their stencils, and as a way of saying thanks, they offered me a discount on my next stencil purchase.  So, I wasted no time … well, maybe I wasted a little time surfing their website … but then I ordered a fab new stencil.

feedsack-german-replica-no-3-johann-schmid-12x12-stencil


I wasn’t sure what I would use it on, but I loved the old-world flavor of this one.

A couple of days ago I was going through some of the stuff I have been saving up for my upcoming sale, and I saw an old ice cream parlor style chair that one of my husband’s friends gave me.  I had originally been planning to upholster the seat, but I thought ‘hey, this might be the perfect size for that new stencil!’

And sure enough, it was!

stenciled chair 2

stenciled chair 3

Once I saw how gorgeous this stencil was on a chair, I dug around for some more stuff to stencil.  How about an old window screen?

stenciled screen

Fantastic!

An old cutting board?

stenciled cutting boardAwesome!

Suffice to say, I love the new stencil.  Many thanks to Maison de Stencils for the discount.  Now I just need to find the perfect piece of furniture for this one!