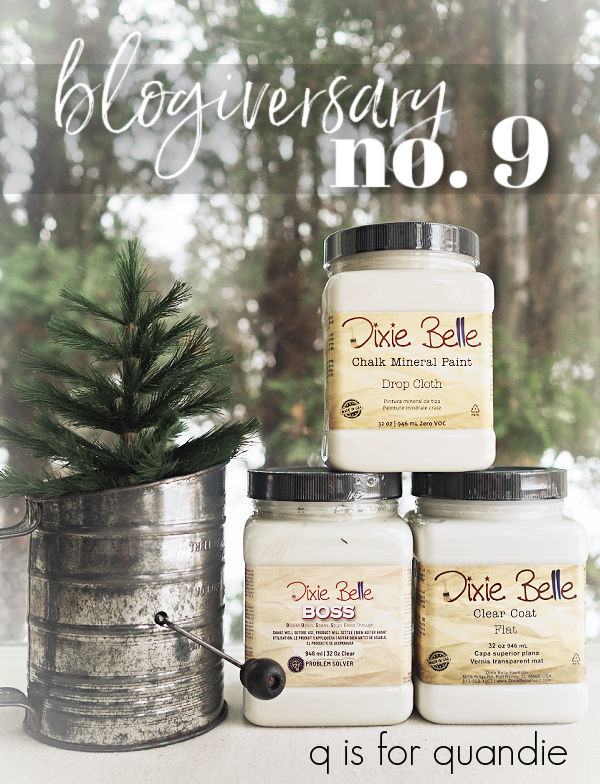
Before getting on with today’s post, I want to thank all of you who took the time to leave a comment on my blogiversary post last week (FYI, if you haven’t commented yet, there is still time to get in the giveaway, just go back and comment on that post). Your comments light up my life!
And speaking of lighting up one’ s life (insert eye roll here for the cheesy segue), you know what are a dime at dozen at thrift stores?
Lanterns!
Last year I was inspired by my friend Amy’s lantern filled Christmas tree …
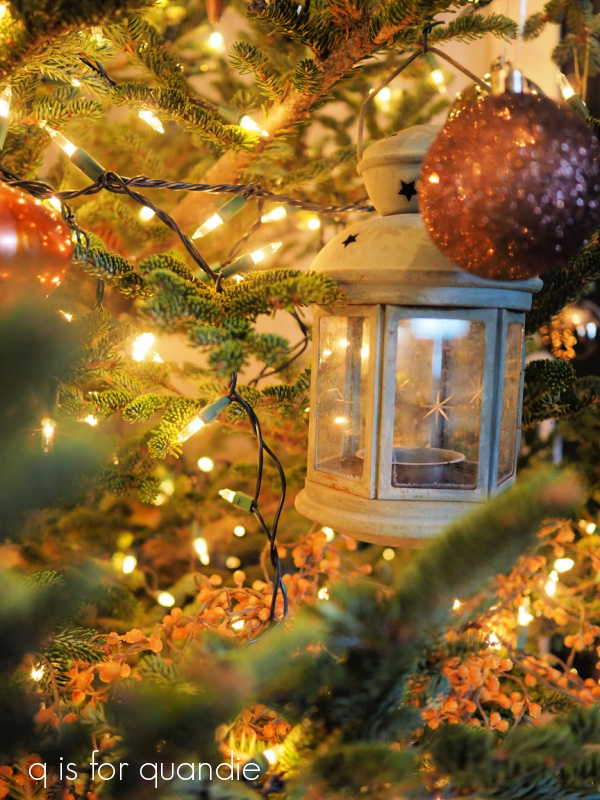
I decided to start accumulating lanterns myself after seeing Amy’s tree. My plan was to use them on my garden Christmas tree. There was one small hiccup. Last winter the tree blew over in a massive wind storm and it bent the metal base beyond repair. I was hoping to figure out some way to prop it up, but in the end it wasn’t salvageable.
I’d found quite a few lanterns over the past year at both thrift stores and garage sales, and now I had no tree to put them on.
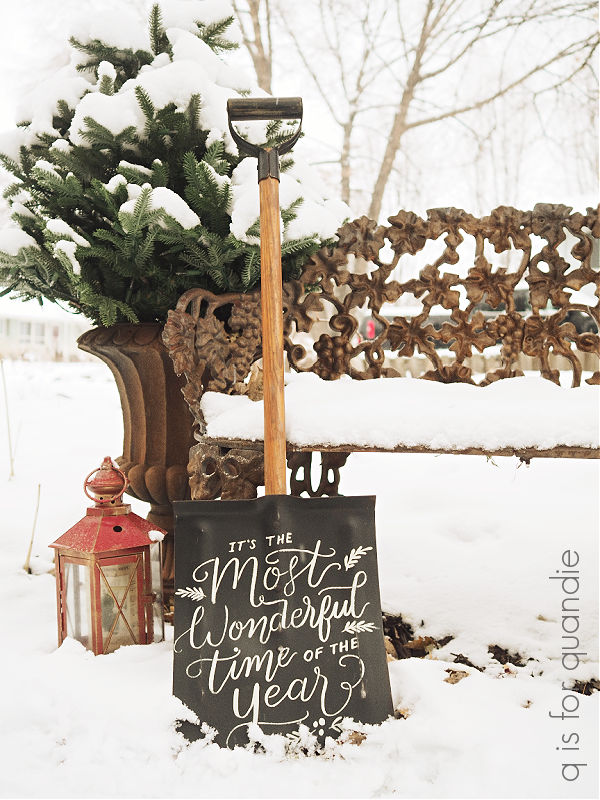
I found spots for a couple of them outdoors, but I’m waiting for a pretty snowfall to get some photos of my outdoor décor to share here on the blog. Fingers crossed that we’ll get some more snow before Christmas since the snow we had has all melted.
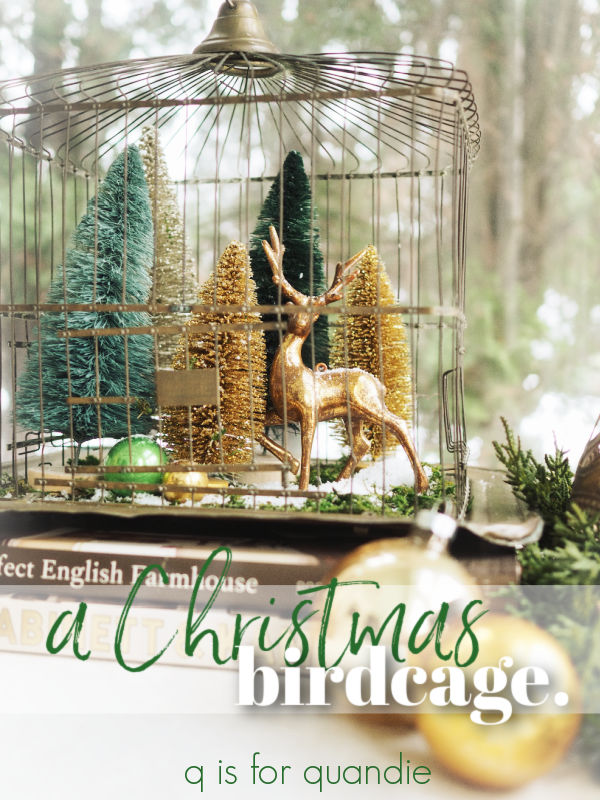
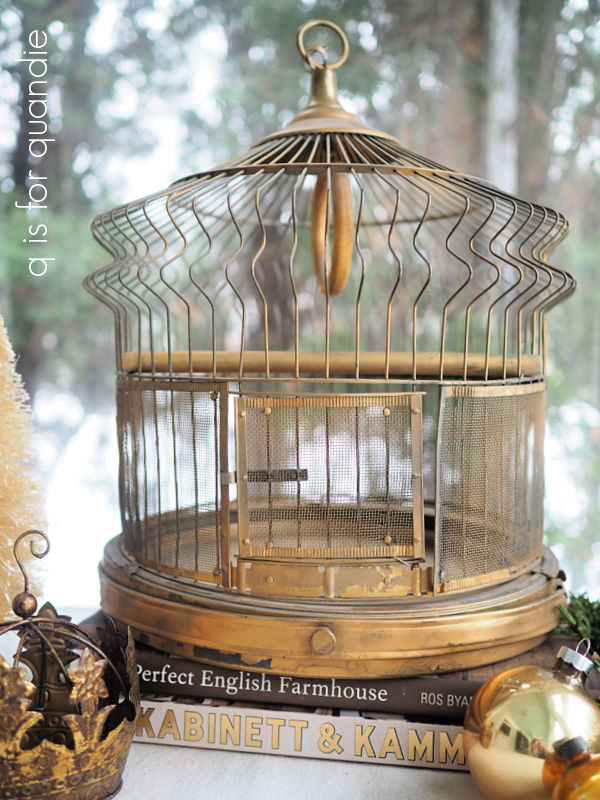
Meanwhile, I’d pulled out a tall, gold lantern to use outside. However, the gold wasn’t really working for me. So I got a wild idea to try painting it black. Once again, I wasn’t really planning to blog about this project. It was just going to be a simple project for myself, so I didn’t bother with a ‘before’ photo (when will I learn?!).
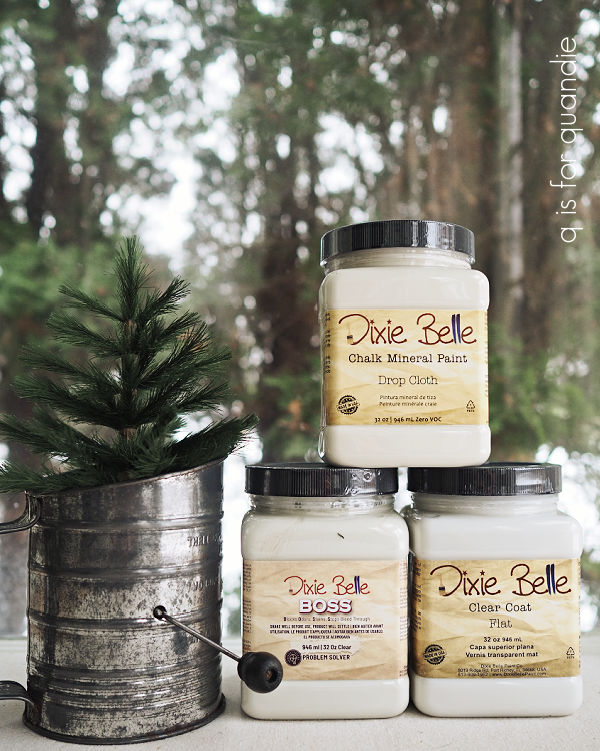
The glass wasn’t easily removable, so I wasn’t sure how well I’d be able to paint it with a brush. As it turned out, it was pretty easy. I just used a small artist’s brush, and gently painted over that filigree detail with a dry-ish brush and some of Dixie Belle’s Midnight Sky. I find that a chalk style paint like theirs is the best bet for sticking well to metal.
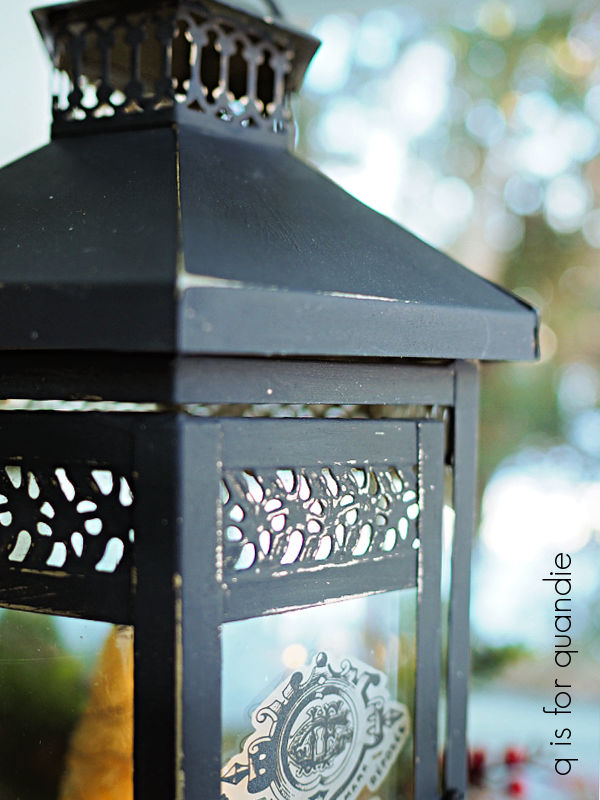
Once I had it all painted, I used a razor blade to remove any paint that had gotten on the glass. Then I sanded to distress the edges, revealing a little bit of that gold, and then added a top coat of clear wax.
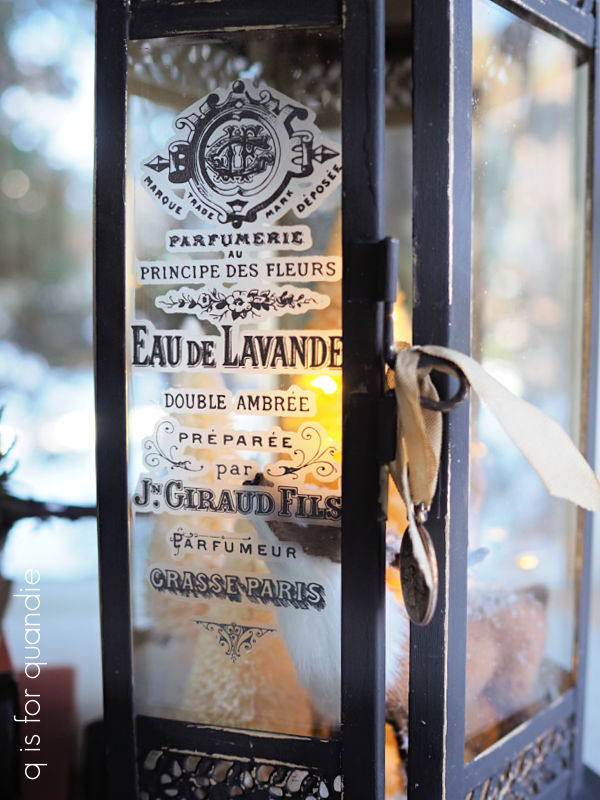
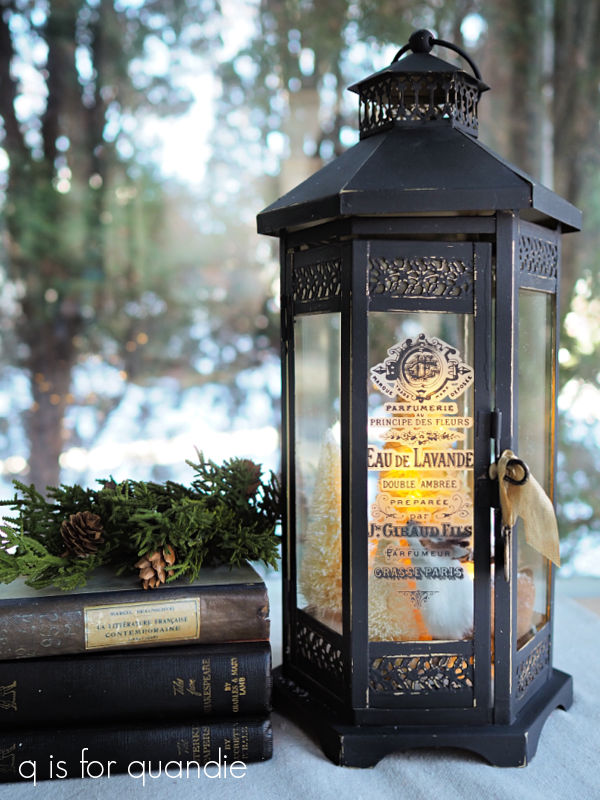
Next I added a portion of the Dixie Belle Vintage Post transfer to the glass door.
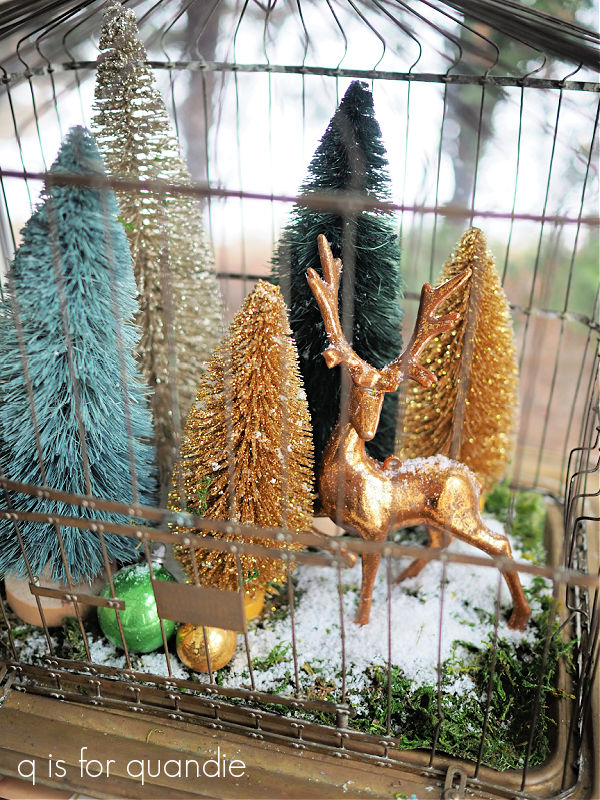
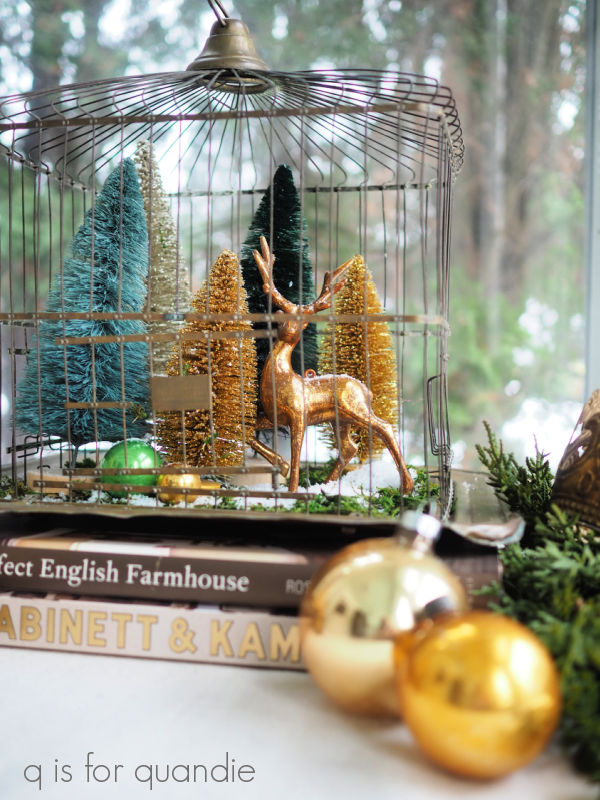
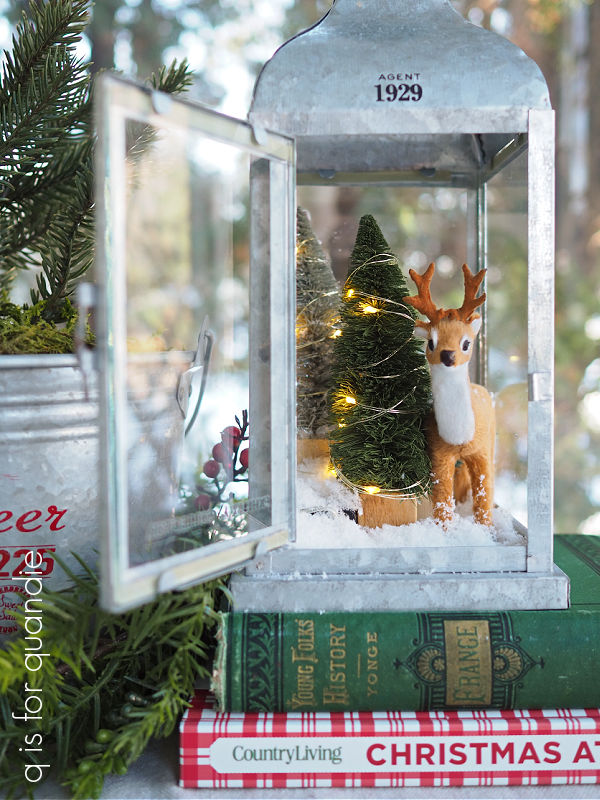
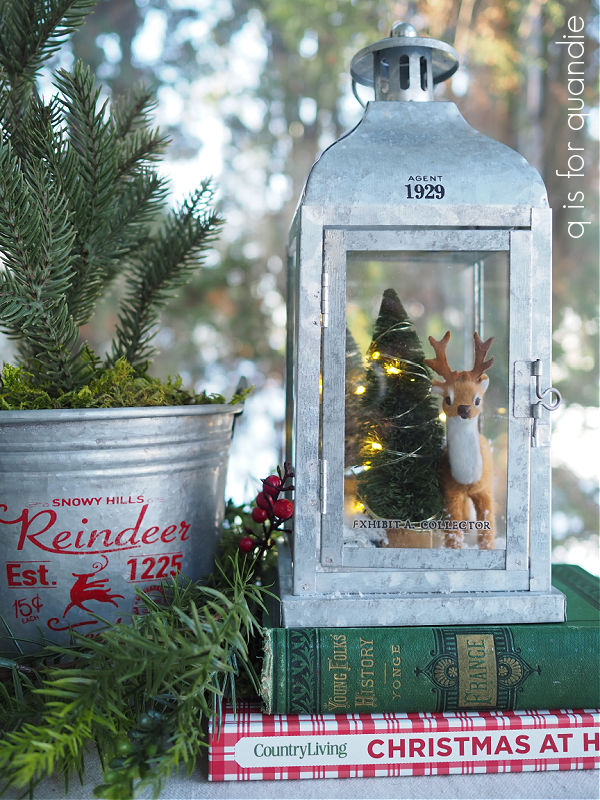
Then I decided to add a pretty little Christmas vignette inside. Only one small problem, I wanted to add a tiny deer but I didn’t have one. So when my sister asked if I wanted to make a trip out to Gerten’s (a local greenhouse/nursery) I thought that would be the perfect place to find one.

Sure enough, I found one. And he is adorable.
But he was $14.99! Yikes! Am I the only one who thinks that he was ridiculously overpriced? But I bought him anyway because I was there, and he was exactly what I wanted for my lantern.
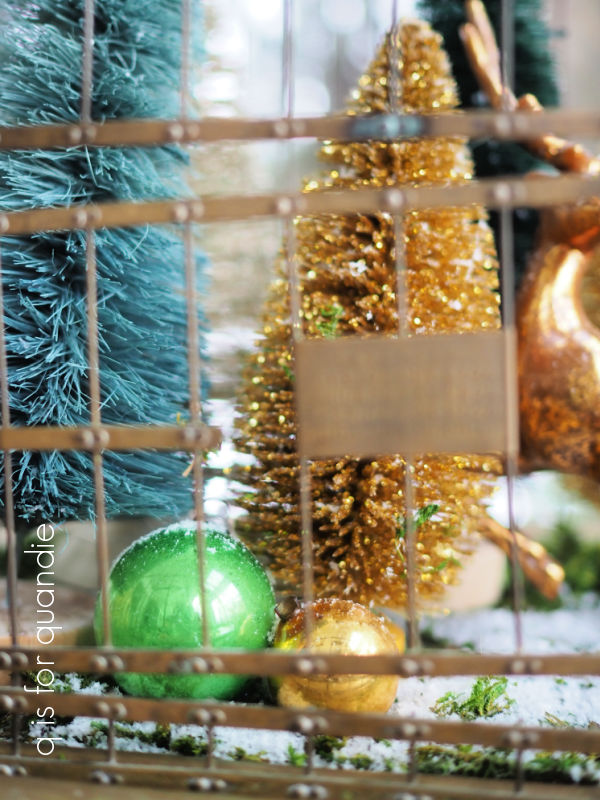
With the addition of some bottle brush trees, some battery operated fairy lights and a little fake snow, my lantern was complete.
A few days later I ended up in Target and just happened across some very similar deer ornaments for … wait for it … $3!! Jeesh!

I honestly think they are of an equivalent quality to the pricey deer.
So anyway, I purchased a few different deer ornaments at Target to dress up a few more of my lanterns. And this time I took a quick before photo.
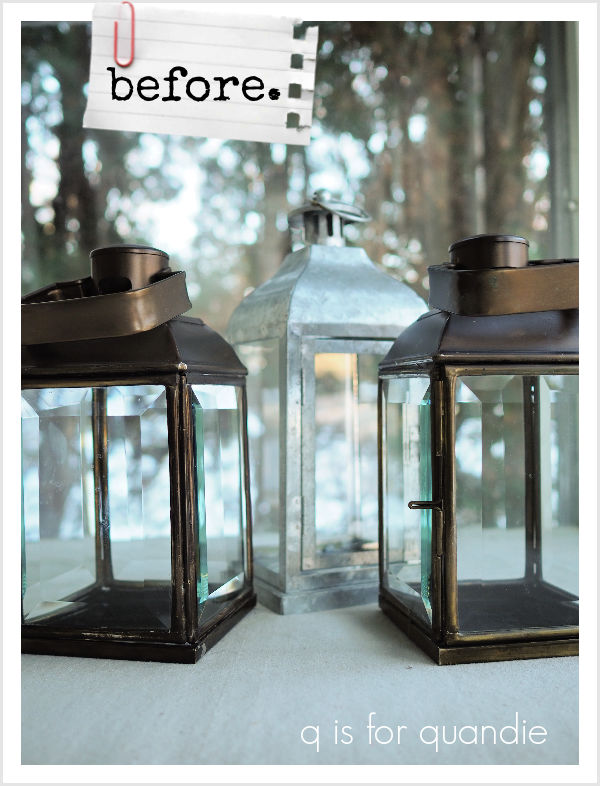
Once again, I added some transfers to the glass starting with the two bronze lanterns.

I used hot glue to hold my trees and deer in place.
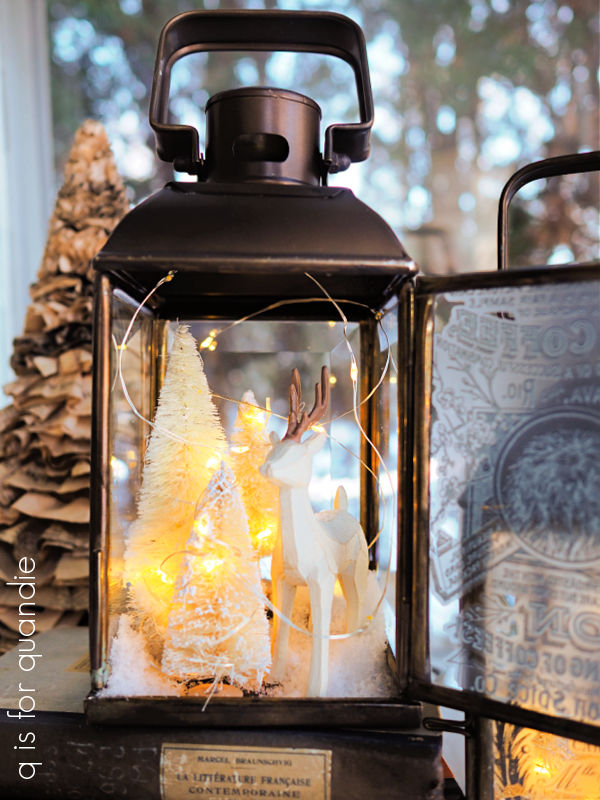
One has the more stylized wooden deer, and the other has a sweet furry deer.

I situated the battery pack for the lights so that you can easily reach in and turn them off and on.
After finishing up the two of these lanterns, I realized that you can’t really see the diorama well unless the doors are open.
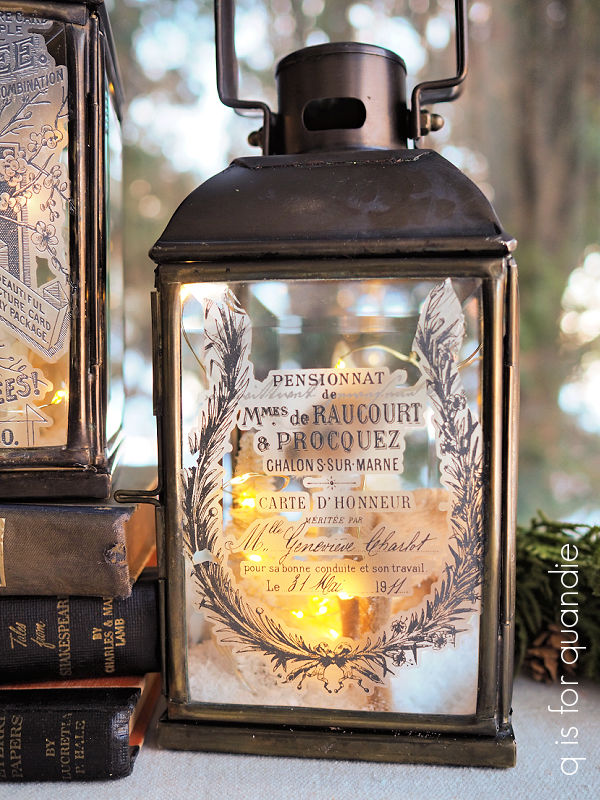
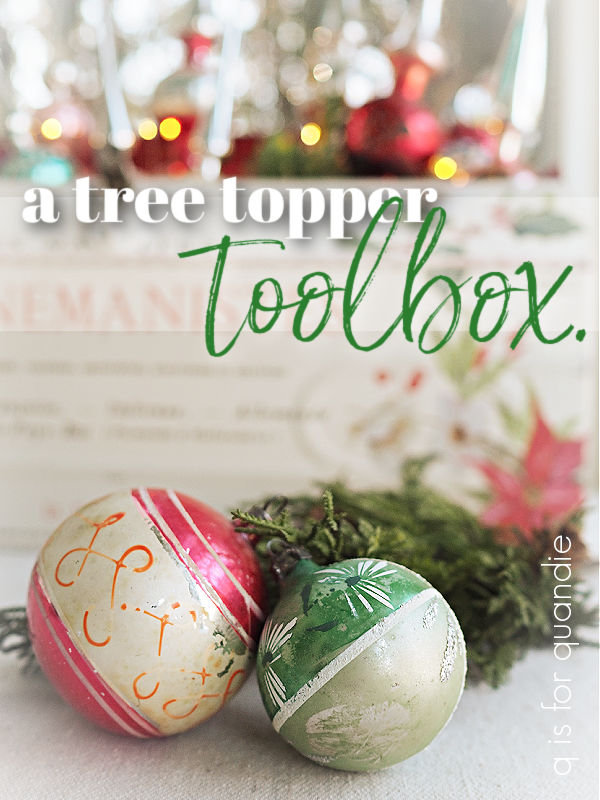
So for my final lantern, I decided to tone down the transfers. I just added some simple, small Tim Holtz transfers.

I switched up the bleached bottle brush trees for some in shades of green. You can find these for $3 each at Target as well.
In the end, I think this one might just be my favorite.
The only thing remaining is deciding what to do with these. Well, the black lantern is already spoken for. I might just keep the galvanized one. That leaves the two bronze ones and I’ll be attempting to sell them.
If any of you locals want to snatch one up, they are priced at $38 each. Let me know via email at qisforquandie@gmail.com if you’re interested. If they don’t go, I’ll be bringing them in to the shop … but that won’t happen until I get back from Mexico!
Wait! What did I just say? Oh yes, by the way, I’m in Puerto Vallarta for the week. My neighbor’s family invited me along on their family vacay. I’m probably sitting by the pool with a book in one hand, and a margarita in the other as you’re reading this. Poor Mr. Q has remained behind to hold down the fort.
I just have one more post lined up while I’m away this week, but if you miss me then I recommend going back and checking out the tour of Amy’s house from last year (part 1 and part 2). Her holiday décor is totally inspiring! And if that doesn’t keep you busy, maybe go back and check out some of my favorite Christmas projects from years past in this post.