all furniture wax is not created equal (and a giveaway!).

wax-title

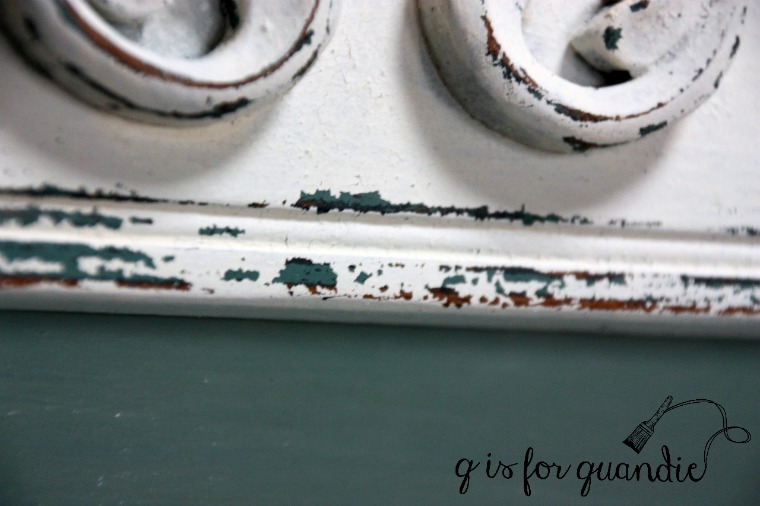
Back in the day when I first began painting furniture I was totally uneducated about the products I was using.  I started with latex paint, and then upped my game and began using milk paint and homemade chalk paint, both of which needed a topcoat of wax (or something).  At the time, I assumed all furniture wax was created equal.  I purchased some SC Johnson paste wax at my local hardware store and figured I was good to go.  And I spent a summer using that wax out in my carriage house workshop.  The wax had a nasty chemical smell sort of like paint thinner, but I figured all waxes had that smell.  When I wanted to experiment with an ‘antiquing wax’ I ordered some dark walnut Briwax online and mixed that with my SC Johnson wax.  It definitely did the trick and created the look I wanted, but if anything the Briwax was even stinkier than the SC Johnson.  That only confirmed my misguided notion that all waxes smelled bad.

Fast forward to winter.  Back then I usually took a break from painting furniture in the winter.  But I had an adorable little wash stand that I really wanted to paint.  I figured I could paint it indoors and then wax it on my enclosed front porch.  It was warm enough out there, but even with the door shut between the house and the porch, that stink made its way inside the house and it wasn’t pleasant.

So much for winter painting!

But then I discovered Miss Mustard Seed wax.  Eureka!  It has a scent to it, but it’s very mild, not a harsh chemical smell.  I could wax inside the house all day long and not feel like my house smelled like a workshop.

waxes

However, it definitely costs more than the cheapy stuff.

Since I’m a cheapskate, I was determined to find a cheaper choice.  As a result, I’ve tried many different brands of wax and guess what?  They didn’t really save me any money at all because I’d open up the can and realize I was back at stinky wax.  As it turns out, you get what you pay for.  Sometimes.  But other times even the more expensive ‘name brand’ waxes are just as stinky.

Initially my decision to ‘splurge’ on the Miss Mustard Seed wax was really just based on the lack of smell.  But recently it occurred to me that I do A LOT of painting.  I should really be thinking about what kinds of chemicals I am subjecting myself (not to mention the environment) to on such a frequent basis.  This really is about more than just dealing with an unpleasant odor, what about repeated exposure to unknown chemicals?  Just what exactly is causing that stink?

I tried to do some online research into the ingredients in various brands of wax, and guess what?  For a lot of the brands it’s really hard to find that info.  Apparently back in 2009 Senator Al Franken helped introduce a bill called the 2009 Household Product Labeling Act which would have required paint manufacturers to list all ingredients on their packaging, but it did not pass.  But honestly, even if the ingredients themselves were listed, would you know what they are?  I know I wouldn’t.

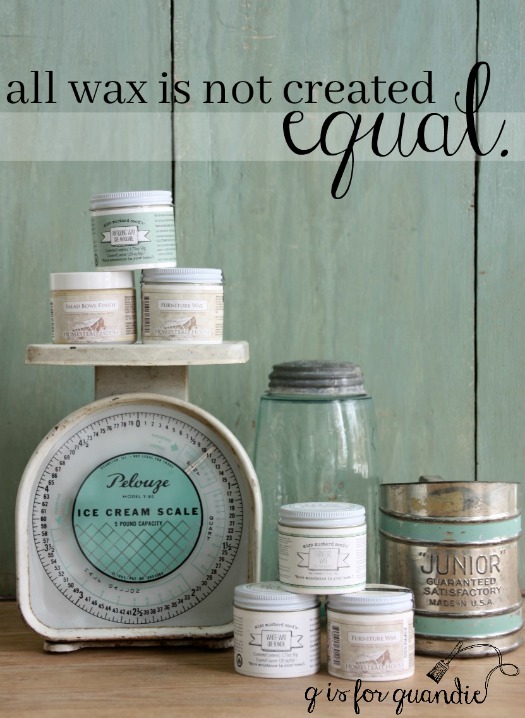
So I went straight to my source, Homestead House Paint Co, and asked the simple question “hey, how come your wax doesn’t stink?” and I got a nice email back from Loree Pringle with lots of info about beeswax and carnauba wax, and about how they need a solvent to allow them to be spread into a thin layer.  Then she put me in touch with Roger Clapham, the co-president of the company that manufactures their waxes.  He gave me a bunch of really science-y info about atoms in a chain and whether or not they hold hands (or something like that) that was way over my head.   But basically he explained that there are two kinds of solvents that can be used for this purpose, aromatic hydrocarbons and aliphatic hydrocarbons.  The aromatic hydrocarbons have that chemical smell like paint thinner, and include Toluene or Benzene.  And guess what?  Aromatic hydrocarbons are considered carcinogens.  Yeah, that means they have been shown to cause cancer.  Both the Miss Mustard Seed waxes and the Homestead House waxes contain no aromatic hydrocarbons.  Instead they use aliphatic hydrocarbons.

waxes-2

So I followed up with the next obvious question, why would any wax still contain aromatic hydrocarbons if they are so bad?  According to Roger, the aliphatic hydrocarbons are weaker solvents than aromatic hydrocarbons.  Products made with aromatic hydrocarbons require less of them to do the job and those products can be more durable and provide more shine.  For example, he does not believe the Homestead House wax is durable enough to hold up to foot traffic on my stairs (although I’m going to try it anyway one of these days).

As Roger says himself, he has a healthy respect for aromatic hydrocarbons and their usefulness as long as people understand what they are working with and take precautions.  If you still want to use one of those products, Roger gave me some safety tips:  Buy a mask specifically designed to protect against aromatic solvents (OSHA certified) and wear it while working with them (changing the filters as directed). Toxins can be absorbed through the skin, so wear rubber gloves.  Pay attention to air circulation, apply the finish outdoors or use a fan and open the window.  On the plus side, the danger is gone once the solvent has evaporated.  So a piece of furniture that has this type of wax on it is no longer hazardous at that point, once the smell is gone so is the hazard.

Since we can’t rely on a label to tell us what kind of solvent a wax product uses, I say rely on your nose.  Give your wax the old sniff test.  Does it smell like paint thinner?

If so, ask yourself if this is really something you want to be working with on a regular basis?  And are you using the proper precautions?

As for me, I’m not a fan of gloves and gas masks.  Working outdoors is only an option about six months out of the year here in Minnesota.  So I finally tossed all of those stinky waxes and am going to stick with the non-smelly stuff!

Now for the fun part!  Here is your chance to give the non-smelly stuff a try yourself.  When I told the people at Homestead House that I wanted to post about this subject, they graciously provided me with a truckload of free samples to giveaway.

truckload-of-waxes

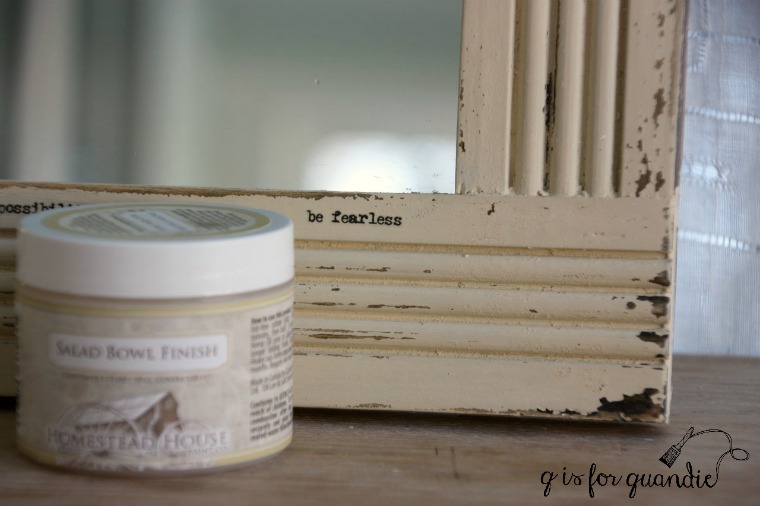
I have 8 small jars of wax and I thought I’d give them away in pairs, so 4 lucky winners will each get 2 jars of wax.  I have a variety of different waxes including Miss Mustard Seed White Wax, Antiquing Wax and Furniture Wax, Homestead House Furniture Wax in clear, Espresso and Black, and a couple jars of Salad Bowl Finish.  I will draw 4 names at random from the comments left on this blog post by Sunday, January 29 at midnight (central time), so all you need to do is leave a comment to get your name in the running to win.  Best of luck to you!

Note:  the Safety Data Sheet for SC Johnson paste wax lists Ethylbenzene and Naphthalene as ingredients (both aromatic hydrocarbons).  Briwax contains Toluene, however they do offer a Toluene free version of their product, but I was not using that version.

Also please note that I have not been paid by Homestead House for this post but they have provided me with free samples of their waxes and other products including Fusion paint, Homestead House milk paint and Miss Mustard Seed products.  In addition they provided me with the waxes that I am giving away with this post.

signs, signs, everywhere there’s signs.

I’ve got a thing for signs.  I have to work hard to keep it in check.  How many signs are too many?

I’m not sure about a general rule of thumb, but I’m trying to limit myself to no more than two signs per room.  That seems reasonable, right?

And what exactly counts as a sign?

Anything with words on it?  Do I have to count chalkboard signs too then?

These sorts of rules are fairly fluid in my house, and I figure I can always find a spot for just one more sign.

So a while back I purchased this Merry and Bright sign at the Goodwill.  The yellow door behind it in the photo was a garage sale find.  I’m still working on the door, but today we’re talking about the sign.

no-vacancy-sign-before

The sign wasn’t bad ‘as is’, my sister thought I would just keep it and put it up for the holidays.  But I wanted to turn it into something else.

I started by painting the entire thing in Fusion’s Coal Black.  I chose Fusion paint for this step because I wanted a paint that would adhere well, you’ll understand why in a minute.

I let the Fusion paint cure for about a week just to make sure it was a little bit cured.

Next I used my Cricut machine to cut the wording for my sign out of white vinyl.  I placed the letters on my sign using a chalk line to keep them straight.

Next I painted over the whole shebang with Miss Mustard Seed milk paint in French Enamel.

Interesting to note that the milk paint did not adhere to the vinyl at all.  It did adhere to the Fusion paint though.  This blue is my undercoat of color, so I vacuumed off the chipping paint and then added a little wax all around the outer frame of the sign.  I then added three coats of Homestead House milk paint in Limestone (vacuuming off the paint that chipped off the vinyl between every coat).

Once dry, I peeled off my vinyl letters revealing the black Fusion paint underneath.  Then I sanded the entire sign to distress it up.

I got some nice chipping (thanks to the wax) that revealed the base layer of blue paint.

sign-close-up

For now I’ve hung the sign over my Belgian bench.

no-vacancy-sign-1

I don’t plan for this to be its permanent home, but I’ll leave it there and enjoy it for bit.

the buttermilk cream dresser.

I was checking out one of my favorite blogs the other day, Ranger 911.  Vickie from Ranger 911 is a fellow Minnesotan although she is way up north.  I’ve always considered the Twin Cities to be in a ‘warmer’ climate than the truly hardy souls who live anywhere north of Duluth.  As I write this post it is currently 36 degrees in St. Paul, but only 32 degrees in Hibbing, MN.  See?  Way warmer!

But anyway, not only do Vickie and I live in the same state but we have another, more important thing in common.  Here’s a clue …

ranger-911-tiny-dresser

Here’s another clue …

ranger-911-tiny-dresser-2

Yep, we both love tiny dressers!  Be sure to visit her blog and look around because she has more!

But today’s post isn’t about tiny dressers.  It’s about gorgeous, vintage, pale yellow dressers.  Vickie recently posted about a makeover in her ‘bedroom no. 3’ and it included this gorgeous pale yellow dresser.

ranger-911-yellow-dresser

I love that subtle pop of pale yellow in her mostly white room.  And that shade of yellow is perfectly vintage isn’t it?  And check out that authentic chipping!  Vickie tells me that she purchased this dresser ‘as is’ at an estate sale and she thinks this finish is authentically vintage.

As I was drooling over it I remembered that Homestead House sent me some of their milk paint in Buttermilk Cream.  I knew it would be very nearly that same shade of yellow.  And although there is just something about an original old painted finish, you can get pretty close to that look with chippy milk paint.

 buttermilk-cream

And now that I am armed with my foolproof method for creating the perfect chippy finish, well, I knew this was going to be a slam dunk.

I happened to have a lovely vintage dresser on hand too.

hopkins-dresser-1-before

And sure enough, it was just that easy.  I followed the foolproof method and 3 coats of Buttermilk Cream later, voila!

buttermilk-cream-dresser-title

I used the Salad Bowl Finish around the edges of everything, but didn’t use it on the big flat expanses (the drawer fronts and the top) which gave me chipping just where I wanted it.

My original ‘vision’ for this dresser involved replacing the hardware with glass knobs, but the original hardware is so gorgeous and it was all there.  I had to keep it.

buttermilk-cream-hardware

It seemed apropos to stage my Buttermilk Cream dresser with a tiny dresser.

Thanks again for the inspiration Vickie!

buttermilk-cream-side-view

If anyone local is interested in purchasing this perfectly adorable vintage dresser, please check my ‘available for local sale’ tab to see if it is still available and other details.

what am I going to do with that?

You just never know what you might find at a garage sale.  I try to keep an open mind when I’m out hitting the sales.  If something has a vintage appeal (i.e. it looks good and old) I often buy it even if I have no idea what I’m going to do with it.  There is nothing more annoying that seeing a really cool project somewhere and then realizing I passed up the exact item needed at a garage sale two weeks ago.

Today’s project is definitely falls into the category of ‘what am I going to do with that?’, but I bought it anyway.

It’s an old newel post.

I paid $15 for it, which is a little high in garage sale money (which has way more value than typical money).  I felt a little sad when I saw it there because I knew that the sellers had callously ripped it out of their older home and probably replaced it with something new and with far less character.

I knew it deserved better.

I brought it home and put it in my carriage house where it got buried behind 50 other potential projects.  It sat and gathered dust for a couple of years.  Ha!  Maybe not really better treatment after all.

Then a few weeks ago I was surfing the blog world and I ended up on the Liz Marie Blog looking at her Cozy Farmhouse Winter Entryway (click that link to visit) and I spied a fabulous chippy black newel post.  And she just had it leaning up against the wall.  Duh!  So easy, and so fab!  And I knew just where I could find a newel post … sort of … somewhere out in the carriage house.

So I headed out there in sub-zero weather and started digging around.  I unearthed it from a pile of cast off remnants and hauled it in the house.

I started by cleaning it up, then sanding it, then cleaning it again, then adding a layer of Homestead House’s Salad Bowl Finish because I wanted some more of that perfect chipping.  This time I used a little more wax than I did on my original ‘perfect chipping experiment’ with the Buttermilk Cream mirror frame.  I wanted a really beat up chippy look similar to the inspiration photo.

Here’s how it looked after the wax.

Then I painted it with just one quick coat of Miss Mustard Seed milk paint in Typewriter.  Once dry, I sanded to distress and found that I got plenty of chipping.  I vacuumed up the dust and chips and then added a layer of Homestead House Black Wax.

post-3

And then in answer to the question ‘what am I going to do with that?’, I just leaned it in the corner of the piano room next to my Paris subway sign.

post-1

Easy peasy.

post-4

Chippy architectural salvage for $15, not bad right?

how to get the perfect chippy finish.

chippy-finish-title
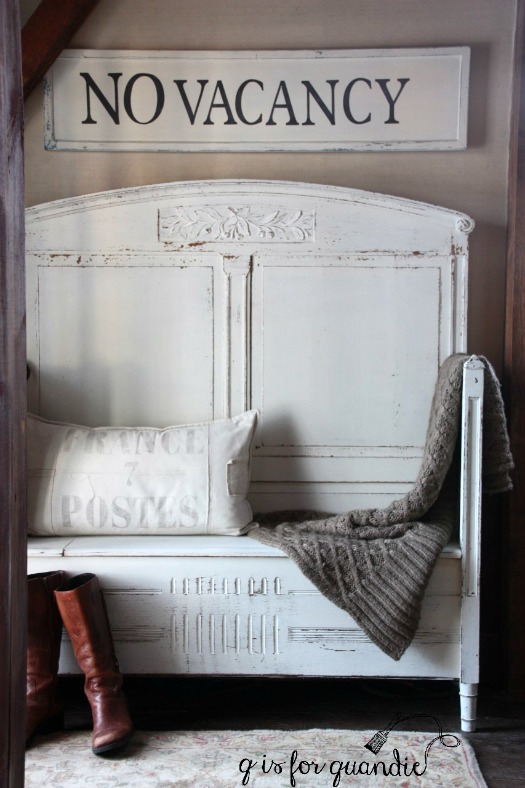
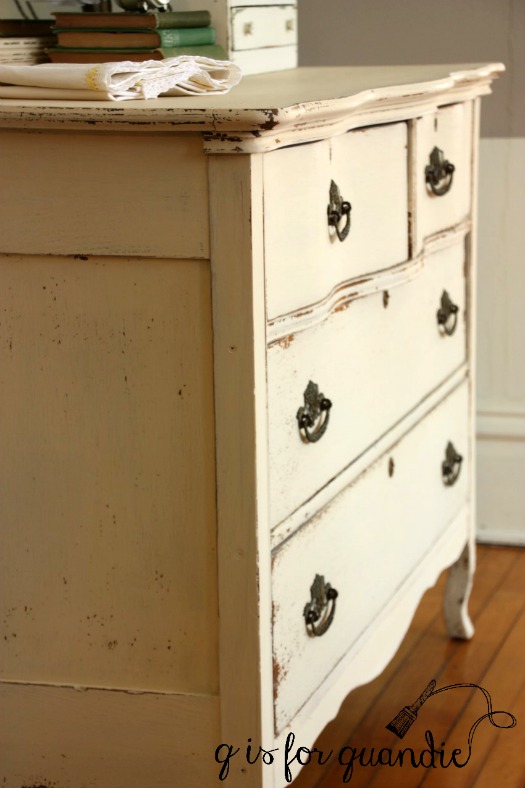
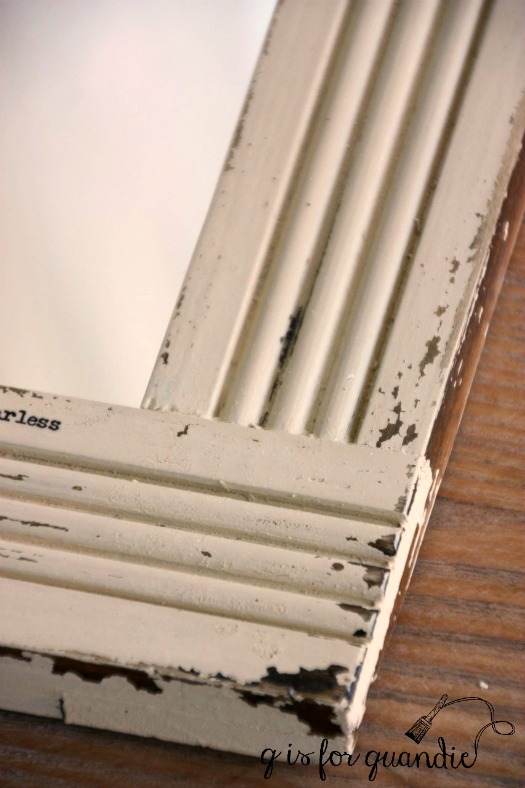
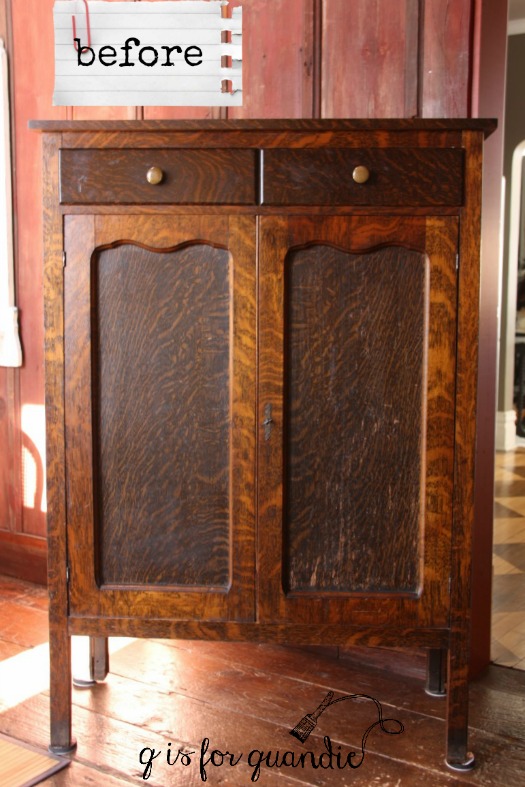
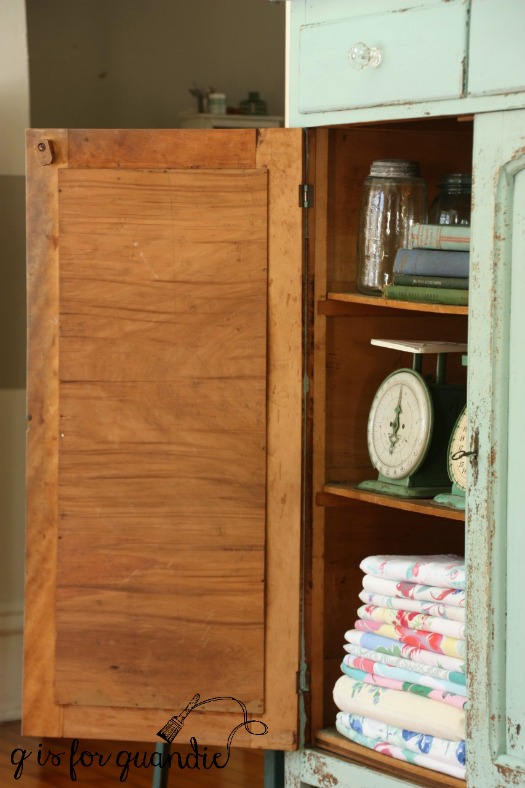
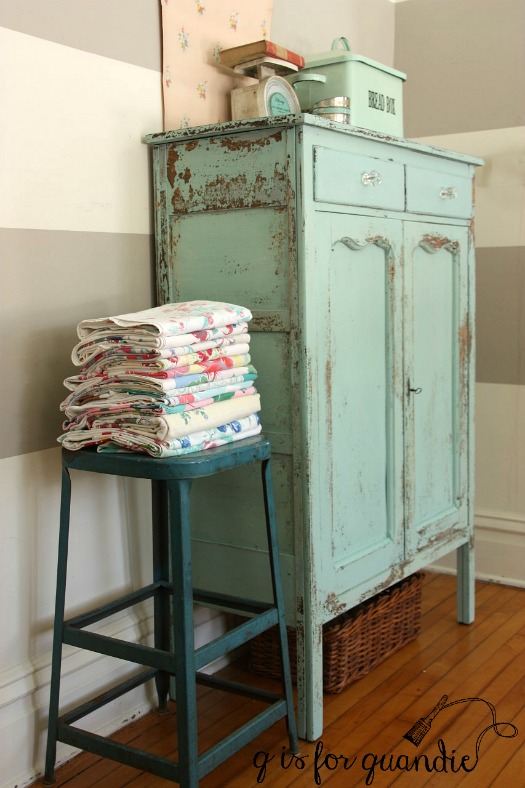
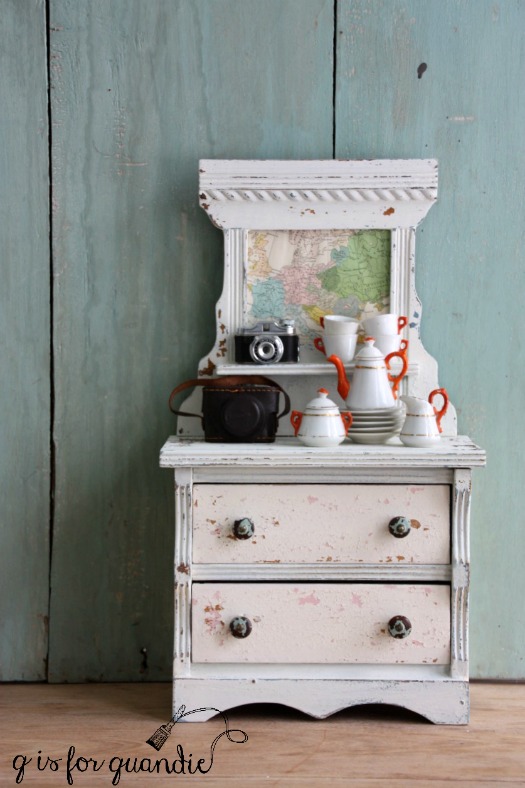
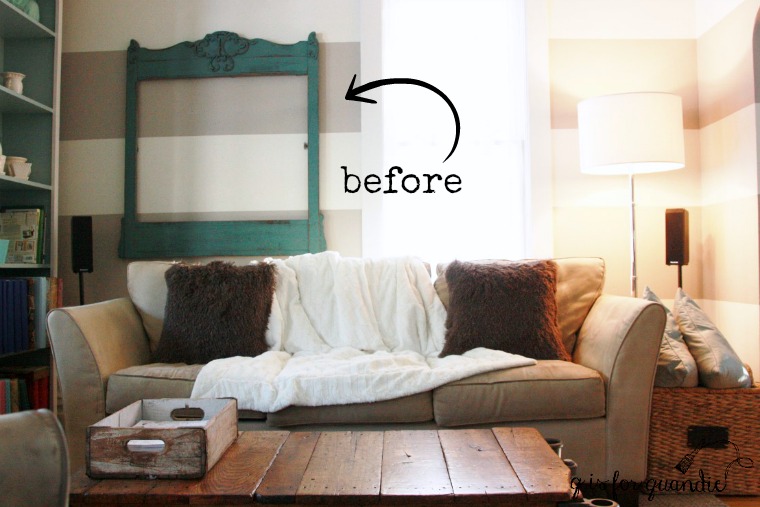
When I posted the farmhouse chippy cabinet on Monday, I mentioned that I ran out of paint and had to request more from Homestead House to complete my project.  When I sent in that request I included a photo of my original chippy mess and explained that I had it nearly under control, but had run out of paint!

When Jennylyn, the president of Homestead House, responded she suggested I try her foolproof method for perfect chipping on my next project and she offered to send me the product she was suggesting I try.  To be fair, she didn’t call it ‘foolproof’, I’m adding that adjective on my own.

salad-bowl-finish

But wait, what?!  Back up a minute.  There is a method?  And it doesn’t involve clicking your heels together 3 times, or crossing your fingers, or knocking on wood?  Sign me up!

Here is what Jennylyn told me to do.  First, prep the piece properly, then apply a very thin layer of Homestead House Salad Bowl Finish (you can also use Miss Mustard Seed 100% beeswax which is the same thing) to the areas you want to chip.  Then paint as usual.

Sounds pretty simple, right?

So I pulled out an old framed mirror that I had salvaged from a dresser to do a little experimenting with this method.  I remembered back to my high school science class and decided I need a ‘control group’ of sorts, so I used my old method on the outer sides of the frame and just sanded them lightly and wiped them with a damp cloth.  On the front of the frame I sanded a little more thoroughly, vacuumed away the dust, and scrubbed it down with a water/vinegar solution.  Then I added a thin layer of the Salad Bowl Finish using a cloth, focusing on the edges and the corners where I wanted chipping.  Next I painted two coats of Homestead House milk paint in Buttermilk Cream.

Once the paint was dry I could clearly see that the ‘control group’ or the sides of the frame were chipping A LOT.  The front of the frame didn’t look terribly chippy at all though.

chippy-1

But then I got out my fine sandpaper and lightly sanded and voila!  There were the chips right where I wanted them to be.  And they were indeed pretty much perfect.

chippy-2

Although the ‘control group’ area was chippy, it was not a controlled chippy.  In fact, the ‘control group’ was a little out of control.

You can also use this method with layers of different colored paints.  For example, paint a base coat of French Enamel blue, add some Salad Bowl Finish, then paint white on top of that.  Then you’ll see color under your chips rather than the wood.

For a little extra bit of fun on this project, I added a row of rub-on phrases all along the frame just under the mirror.

frame-words

They are tiny and you have to pay attention to notice them.  Embrace imperfection, discover yourself, look within, one of a kind, stand boldly.

chippy-mirror

The next time you are thinking it’s too hard to use milk paint and get just the right chippy finish, be fearless and try the Salad Bowl Finish!

be-fearless

another chippy farmhouse cupboard.

chippy-farmhouse-cupboard-title

I was surfing craigslist just before Christmas looking for a large cupboard.  I have an idea in my head for a piece for my q branch (a.k.a. my study).  It’s one of those ideas … you know, the ones where you can picture exactly what you want in your head but trying to find it is like searching for a needle in a haystack.  But every once in a while, I search for ‘cupboard’ or ‘cabinet’ on craigslist on the off chance I’ll find it and it will be less than $1,000.

I am still searching for that large cabinet, but luck was on my side on this particular day because I did find this …

farmhouse-cupboard-before

I call this a jelly cupboard.  I’m not sure if that is exactly right, but I’m going with it.

I almost never see these on craigslist.  When I do see them, they are usually priced way out of my budget.  This particular item had only been posted for about an hour and the price was not fantastic, but OK.  So I totally snatched it up!

Milk paint was a no-brainer for this piece.  I wanted a chippy (be careful what you wish for), been in the barn for 75 years, held all of the homemade jelly, farmhouse look.

I debated color.  Black would have been easy.  I could have probably gotten away with one coat, possibly needing two.  White might have been most marketable, everyone loves white, right?  But what I really wanted to go with was aqua.  You all know it’s my favorite.  And Homestead House had sent me that free sample of their Laurentien milk paint.  I just couldn’t resist.  I don’t plan to keep this cabinet, but my thinking was this:  if no one buys it, I will just have to find a spot for it.  Or repaint it white.

Well, as I hinted, be careful what you wish for when it comes to chippy.  I mixed up my paint and while the pigments were getting good and dissolved, I sanded the cabinet lightly and then wiped it down with a damp cloth.  I didn’t want to over-sand, because as I mentioned, I wanted a chippy look.

I painted on my first coat of paint and then went downstairs to check on my laundry.  Then I washed some dishes.  Then I walked back into the room where I paint and out of the corner of my eye I saw this …

Then I panicked.  I did not see this coming.  That paint is not sticking at all.

Then I reminded myself that I have been here before.  No need to panic.

I got out the sandpaper and as I suspected would happen, sanding took off nearly all of the paint.  OK, no problem.  I vacuumed away the dust, wiped it down and then added a coat of Miss Mustard Seeds’ Tough Coat Sealer.

Take that you chippy cupboard!

Once the sealer was dry, I added a fresh coat of paint.  As it dried, I noticed that it was still chipping quite a bit.  This cupboard really wanted to be chippy.  By this point it was getting late.  I decided to just go ahead and add another coat of paint and go to bed.  But as fate would have it, I ran out of paint with just one side left to finish.

The next day I sent an email off to Jennylyn at Homestead House and asked if they could please send me just one more package of Laurentien, stat.

I spent the next week looking at the cupboard ‘as is’.  Except for that one side that still needed another coat of paint, I realized that I really loved the way the cabinet looked.  My own rooster cupboard is just as chippy and judging by how often it gets pinned on pinterest, I think there are others out there who love that look too (not you Betty from Ontario, I know this is not your cup of tea).

When the paint arrived I mixed up a small batch and painted that last remaining side.

And now it looks like this …

chippy-farmhouse-cabinet-1

I left the inside of the cupboard alone.  Personally I like how rustic it is.

chippy-cupboard-3

cupboard-inside

And I love this little wooden latch that can be used to keep the left side door closed.

cupboard-latch

The cupboard will likely continue to chip a little over time.  Although I sanded and vacuumed and got as much off as I could, I didn’t seal it.  I have found with other super chippy pieces that they continue to chip unless you seal them with the Tough Coat Sealer.  But that’s OK with me.  I like pieces that wear over time.

chippy-cupboard-angle-2

I debated removing the door insets and replacing them with screening, which would be quite easy to do.  I think that would be a really awesome look for this piece.  Something similar to this photo from pinterest …

cupboard-with-screening

If I was keeping it I think I would definitely do that, but I’m not keeping this cupboard.  I am selling it (check my available for local sale tab to see if it is still available).  So … I thought I’d see if I get any takers with this look first.

And who knows?  If it doesn’t sell I can always go back to the drawing board and paint it white.

Amy made me do it.

A while back my friend Amy (whose lovely home I recently featured) took a quick phone pic in a shop and sent it to me …

amys-pic

I think you can see why.

It’s a wonder I didn’t hop in my car and head straight for the shop, but she was all the way in Carver (which is on the other side of the cities from me), and she wasn’t 100% sure exactly which shop it was.  Well, I’m sure she was sure while she was in it, but not later when she sent me the photo.

Anyway …

Seeing this collection of all white mini dressers made me fall in love with the idea of unifying my little non-collection this way.  See why I’m saying that Amy made me do it?!

So I got out the Homestead House milk paint in Limestone and went to town.

the-minis

The first mini in the line up was already white.  And it’s painted in Miss Mustard Seed’s Linen.  You can see that the Linen is just a tad warmer than the Limestone.

So I had a head start with this one.  I painted it way back in March 2015 and you can see that post here.  It was a two layer paint job with MMS Luckett’s Green under the Linen.

mini-3-close-up

The second piece in the line up, the tall hutch style piece, was one of the first pieces I ever painted in milk paint.  It was in MMS Eulalie’s Sky and you can see it here.  Such a pretty color, but I was ready for a change.

Unfortunately there was a slight mishap while painting it.  I broke the glass!  Ooops.

mini-1

Well, no worries, I just took out the glass and replaced it with screening.  I love the look of screening anyway.

It houses a small non-collection of flower frogs.

mini-with-frogs

I’ve repainted the final mini multiple times!  You can read about the first paint jobs here.  This one is a chippy little thing.  The first paint job chipped off almost entirely.  I really liked the second paint job in MMS French Enamel, but I’m even happier now with my uniform whites.

mini-3

It’s still pretty chippy as you can see.  It was missing the mirror when I bought it and I had some vintage wallpaper in that spot, but I switched it up for an old map.  But I’m kinda thinking maybe I should put a little chalkboard in that spot instead, what do you think?

And did you notice something else?  I now have a tiny mini camera!

mini-2-close-up

Isn’t it adorable?  My niece gave it to me for Christmas.  It even has a tiny leather case.

mini-lined-drawer

It seems to be a real camera, although I can’t imagine where you would get tiny film to fit inside.

I’m quite happy with my trio of white minis.

mini-white-dressers

So thanks for making me do it Amy!

stenciling with chalk.

After I finished the Eastlake dresser mirror frame turned chalkboard and hung it on my living room wall last month, I decided to treat the frame that I removed from that spot in the same way.

I’m sure you don’t remember it, so here’s a ‘before’ photo.

aqua-chalkboard-before-2

I removed this frame from a dresser eons ago.  I painted and sold the dresser, but hung onto this frame and used it as a guinea pig for milk paint.  I originally painted it in MMS Artissimo, then I painted it in MMS Kitchen Scale (shown above).  As much as I loved the Kitchen Scale, I didn’t think it would work well with a black or green chalkboard insert.  So after sending the frame over to Ken’s workshop to have a shelf added, I got out some Homestead House milk paint in Limestone and painted it again.

aqua-chalkboard-angle-1

One thing I’ll note about the Limestone, it looks very creamy once mixed.  You will feel like you are getting a cream not a white.  Once painted and dried though, it is a gorgeous warmish white.  I once again chose not to use a topcoat.  This piece won’t get a lot of handling once it’s hung on the wall so I feel like it won’t need a lot of protection.  I think if I added wax it would bring out the creaminess of the color more.

I really love painting over pieces that are already painted in milk paint because I almost always get some awesome chipping this way.  This piece was no exception.  And the Kitchen Scale is a great color to have peeking through the Limestone.

aqua-chalkboard-chipping

Initially I was planning to paint the chalkboard inset in the same green I used before (you can see that here).  But then I was surfing pinterest and I saw an aqua chalkboard.  Eureka!  My favorite color as a chalkboard!  Why didn’t I think of that?

Since I’ve had such great luck using milk paint as a chalkboard finish, I just pulled out some Homestead House milk paint in Laurentien.  I used two coats, and sanded lightly with fine sandpaper in between each coat to keep the board fairly smooth.  Once dry, I seasoned my chalkboard by rubbing chalk all over it and then wiping it away.

The last step was to add a design of some kind to the board.  I use several different techniques for writing on a chalk board.  Sometimes I free-hand like I did on Debbie’s washboard chalkboard.  Sometimes I print a design on paper, rub the back with chalk and then trace around it to transfer the design onto the board (like I did on Ken’s thank you gift).  But this time I used a stencil.  I had a new one that I ordered from Etsy a while back but hadn’t had a chance to use yet, so I pulled that out.

Using a stencil can be a little tricky, after all they are not designed for use with chalk, so I thought I’d share a couple of tips.  For the fine lines of a stencil, you’ll need to use sharpened chalk, and lots of it.  You can only do a few lines before sharpening again … and again … and again.

I use an old lip pencil sharpener, and once the chalk gets short I can no longer sharpen it successfully.  So I end up with a pile of shorties.  As I said, you will go through a lot of chalk so lucky it’s cheap.

The next tip is essential.  Place your stencil over the chalkboard and use the sharp point of the chalk to fill in the stencil.  Don’t try to capture every detail at this point.  Just get the broad strokes.  Once you have them, remove the stencil and then go back in with more sharpened chalk and add the details free-hand.

In the photo above I have already done that with the upper part of the design, but the last line shows how it looked before I filled in free-hand.  If you have a sort of ‘outline’ of the design, it’s easy to go back in and connect the dots, so to speak.

aqua-chalkboard-design-2

The addition of the little shelf at the bottom of the frame makes this piece perfect for displaying a collection of ironstone pitchers or some other non-collectible.

ironstone-pitchers-2

I hung this chalkboard on the wall in my dining room, just to get some photos of it.  I think this next photo gives a little better indication of its size.

aqua-chalkboard-on-wall

It is 39″ wide by 46″ tall, so it’s really quite large.  It’s not going to stay in this spot though, I have other plans for this wall.  This charming chalkboard is for sale.  Be sure to check out my ‘available for local sale’ tab if you are local and are interested.

But I’m curious, what do you think of the aqua chalkboard?  Too pale?  Or just right?

the bedford dresser.

I know it’s kind of silly, but I actually purchased this dresser because of its mirror.

hopkins-dresser-2-before

I wanted to try an idea I had for the mirror frame and you all saw the results back before Christmas, the farm fresh chalkboard.

farm-fresh-chalk-board-1

That still left the dresser.  It’s just a simple little Eastlake style chest of drawers.

I decided to strip the top and give it a rustic waxed finish, and then paint the rest.  Originally I was thinking white, but when I started to dig through my paint I remembered that Homestead House had sent me some of their milk paint in a color called Bedford.

bedford-3

I’d used their Fusion paint in the same color and I knew it was a lovely warm ‘greige’ so I decided it might just be perfect for this dresser.  Some of my photos wash this color out a bit, but this next one comes closest to representing the color well, although I still think the color a just a bit richer in person.

bedford-angle

I used Miss Mustard Seed’s Grain Sack to pop the carved details down either side of the drawers.

bedford-closeup-corner

You may not have noticed in the before photo, but this dresser was missing one complete handle and part of another.  The amazing thing is that I had two matching handles in my stash of misfit hardware.  What were the chances?

bedford-1

I hadn’t waxed the wood top before painting the dresser and once I had the Bedford paint on it I felt like the top had a reddish brown cast to it.  I didn’t love the way it was pairing up with the Bedford so I decided to try a tip I’d just read about in Miss Mustard Seed’s ‘lookbook two’.  Mixing waxes.

I mixed the Homestead House white and black waxes to create a grey wax.  It worked beautifully on the top of this dresser giving the wood a weathered look with a hint of grey.

bedford-grey-waxed-top

I love how it turned out, it has a sort of driftwood look.

bedford-grey-wax-top-2

This ended up being such a pretty, yet neutral, look.

bedford-dresser-4

What do you think?

bedford-dresser-title

I’m going to go with ‘definite improvement’.

This lovely dresser is for sale.  Be sure to check my ‘available for local sale’ tab for more info.


it’s about time.

It was definitely time for me to get my paint brushes back out and start painting some furniture.

its-about-time

Taking a break over the holidays left me refreshed and feeling excited about getting back into it.

I’m starting small with this antique spool table.

spool-table-before

It was pretty wonky, but I sent it over to Ken’s workshop and he shored it up.  When Ken shores up a piece of furniture, he likes to take it apart first and then put it back together using fresh glue.  When he was disassembling this one, he found this old nail holding the top on.

nail

I always get a kick out of it when Ken saves these sorts of finds and leaves them for me with little notes (sometimes he even types them up on an old portable typewriter).  He knows I am fascinated by these sorts of details.

I think the age of this square nail gives some indication of how old this little table is.  I’m calling it a ‘square nail’, but if you look closely it’s actually rectangular.  Truly square nails were used prior to 1800.  Rectangular nails were used from 1800 – 1880 (Chervenka).

I found a very similar table online that is dated 1840 – 1860 (and the price tag is $1,295, bwa, ha, ha, ha).  The expensive antique has some finer details than my table including some hand cut dovetails, but the style is very much the same.

Given all of that, I wanted to give this table a paint job that would feel original and of the right period for its age.  For me that means milk paint.

Milk paint has been around for thousands of years, even some early cave drawings were done with a form of milk paint; a mixture of milk, lime and natural pigments.  Oil paint was developed in the early 1400’s and became the more popular choice of paint in medieval times (Rodgers).  However, during the French Revolution (late 1700’s) some of the ingredients of oil paint became hard to find which led to a resurgence in the use of milk paint.  The various French recipes for milk paint then made their way to Colonial America and became very popular (Candee).  Had this table originally been painted, it likely would have been painted in milk paint.

Fortunately, we don’t have to make our own milk paint with a recipe these days, we can just buy the powder, mix it with water and get painting.

black-table-1

Just before Christmas the lovely people at Homestead House offered to have Santa put some of their new black wax in my Christmas stocking.  I asked them if Santa could throw in some of their Coal Black milk paint too because I had this project in mind.

Since this table was so dark to begin with, I knew I could get away with just one coat of black milk paint.  It could not have been easier to paint this table!  Once the paint was dry, I sanded lightly.  Then I used the painters tape trick to force some chippy spots.  Next I added a coat of black wax.

black-table-close-up

The Homestead House black wax is so creamy, it goes on quite easily.  And it has very little smell.  This is so important to me when I’m working inside my house during a Minnesota winter.  You can’t be opening up a window to air the place out when it’s below zero outside!

black-wax

I like to use a brush to apply wax when I’m working with spindly pieces (like the legs on this table).  It’s so much easier to get the wax into all of the crevices with a brush.  I have a brush devoted to black wax, another for clear wax and a third for white wax.  You can clean your wax brushes with soap and warm water, but I’m a bit lazy for that.  I’d rather just have three brushes!  I’ll admit I don’t wash them after each use, but I do clean them once or twice a year.

I apply the wax with the brush and then remove any excess using an old black t-shirt to avoid leaving any light colored fibers behind.  The black wax deepens the color of the black milk paint a bit.

black-table-3

I had to discard the knobs that came with the table.  They were metal and one of them was badly misshapen.  No loss really, they were pretty blah.  I replaced them with two of the knobs that I picked up at the thrift store a couple of weeks ago.

black-table-knobs

Along with a few vintage clocks, I used my painted books to stage the table.

black-books

Who remembers back when I painted these?  It was way back when my blog was practically brand new.  They are also painted in black milk paint (Miss Mustard Seed’s Typewriter).