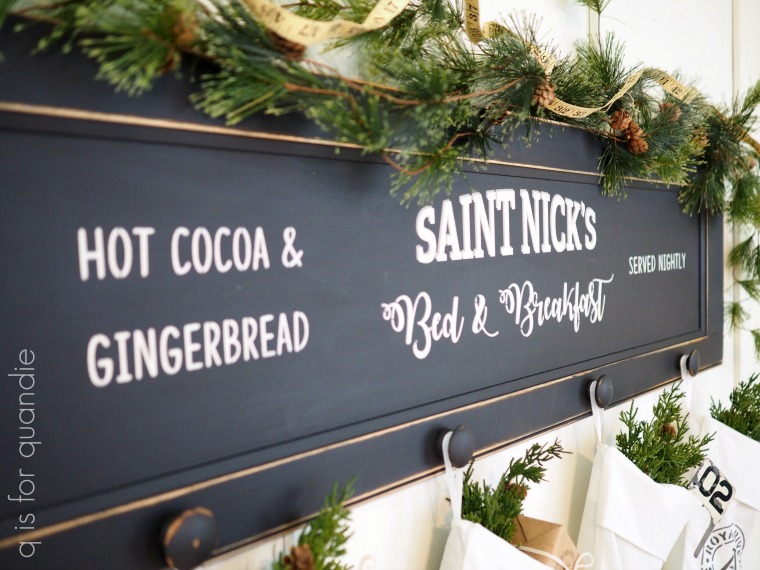
cupboard door signs.

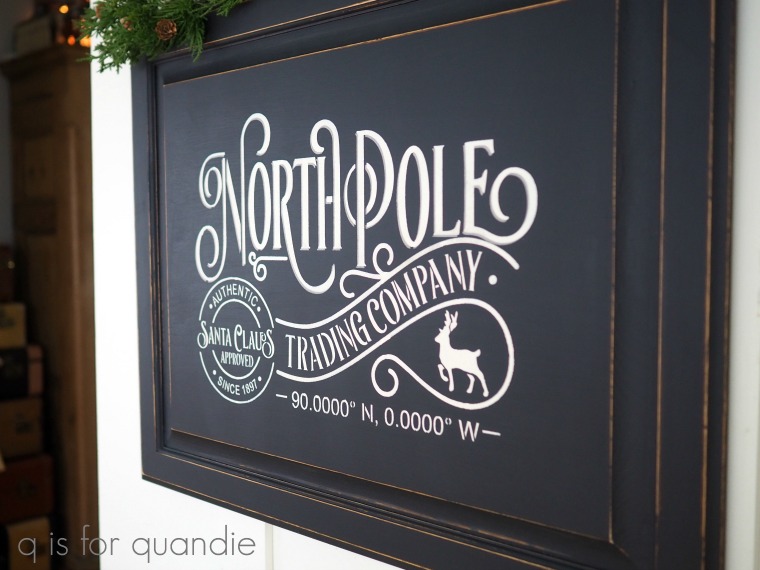
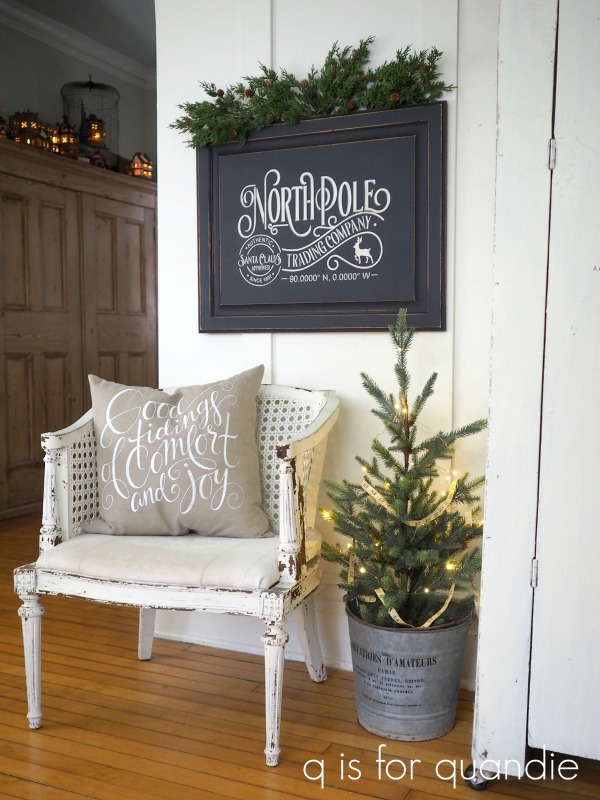
Way back in early summer I purchased some old cupboard doors to turn into signs.

They are long and narrow, so I wasn’t sure I’d use any of them for Christmas signs since none of my Christmas stencils were sized quite right for them.

But I had some time on my hands over the Thanksgiving weekend, so I decided to play around a bit and see what I could some up with.

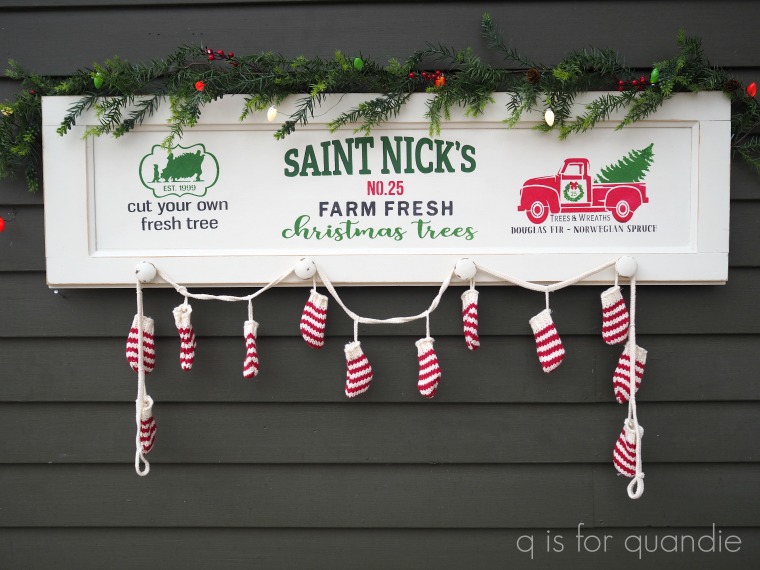
I started by painting one cupboard door in Dixie Belle’s Drop Cloth and the other in their Midnight Sky.  I thought it would be fun to do one in the more traditional red and green, and the other in black and white (which will work better with my own décor).

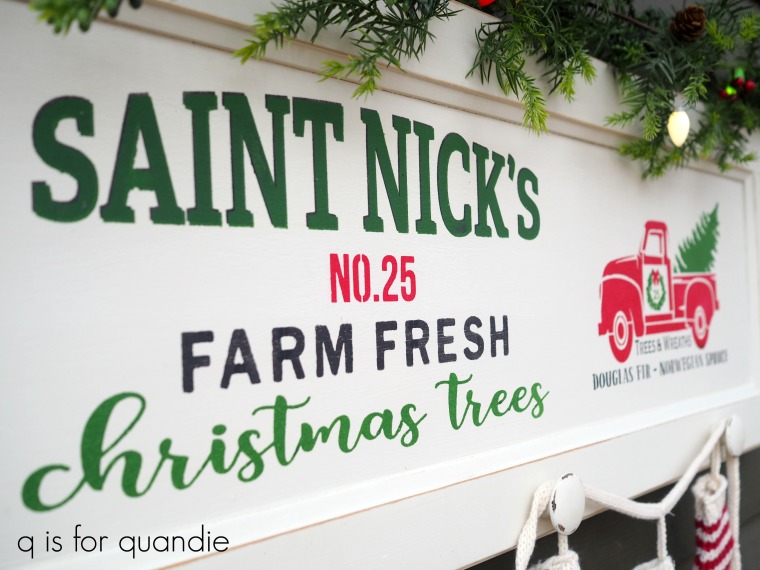
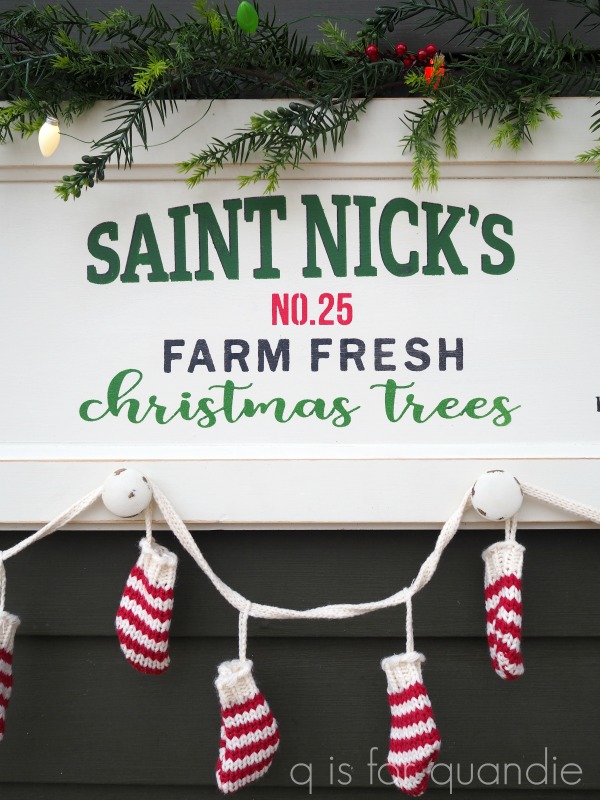
So, I pulled out all of my Christmas stencils and just added bits and pieces of several to create a design that worked on the long, narrow cupboard door.

There are three different stencils creating the wording in the middle section.

And some of you might remember the truck stencil.  I used it on quite a few things last year, but hadn’t yet used it this year.  I’ll admit, it’s a bit putzy to tape off all of the different segments to use different colors of paint (because it’s just a single stencil rather than a separate stencil for each layer of color).  But ultimately, it’s worth the effort.

Here’s the entire stencil on a pillow cover that I did last year …

By the way, all of the stencils I’ve used on both signs are from Maison de Stencils.

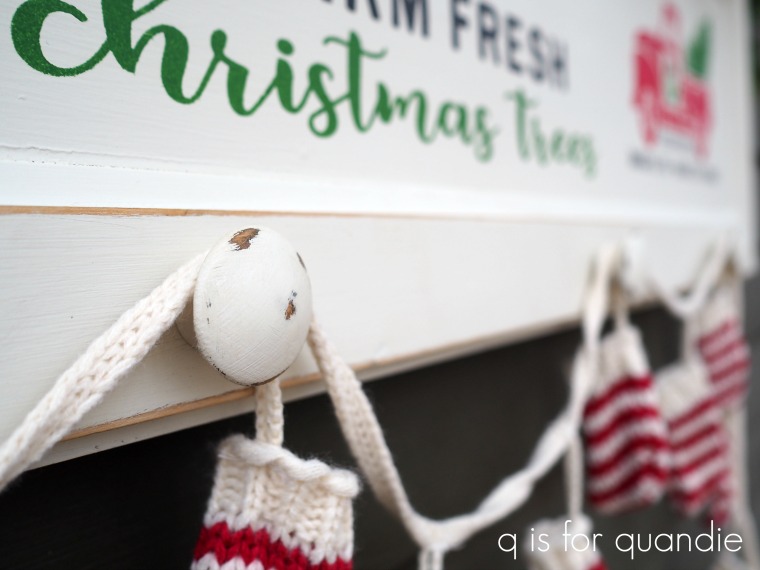
The cabinet doors came with some fabulous vintage black glass knobs.  I took them off and put them in my stash of knobs, and then I painted up some wooden knobs to use instead.  I added four of them along the bottom of the sign.

It would be adorable to hang a stocking from each of those knobs, but I didn’t have any that were the appropriate color and size so I just hung a cute little string of tiny knit stockings that I purchased a couple of years back.

But you could also put this up in the kitchen and then hang Christmas dish towels from it, or maybe a small basket full of evergreens, or some ironstone pitchers.  Or hang it in the foyer and hang scarves and hats from it.  Adding those knobs was easy to do and I feel like it adds so much potential functionality.

I kept the black sign a little bit more simple and monochromatic.

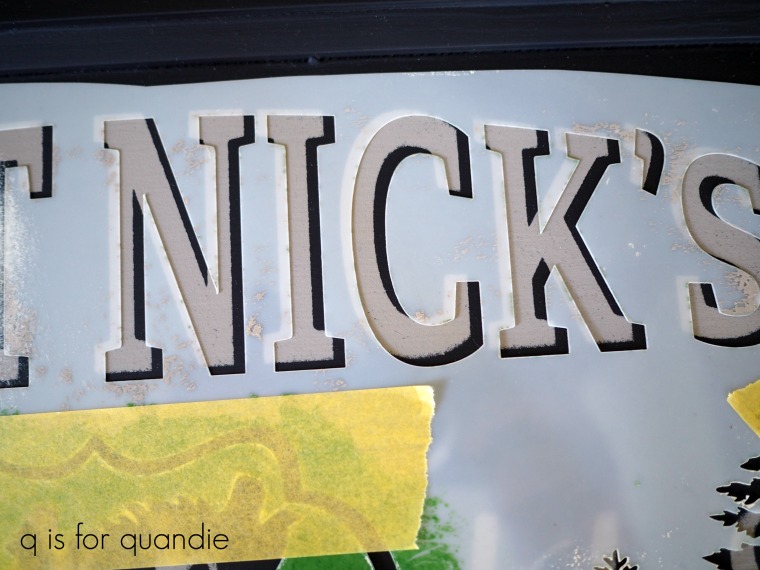
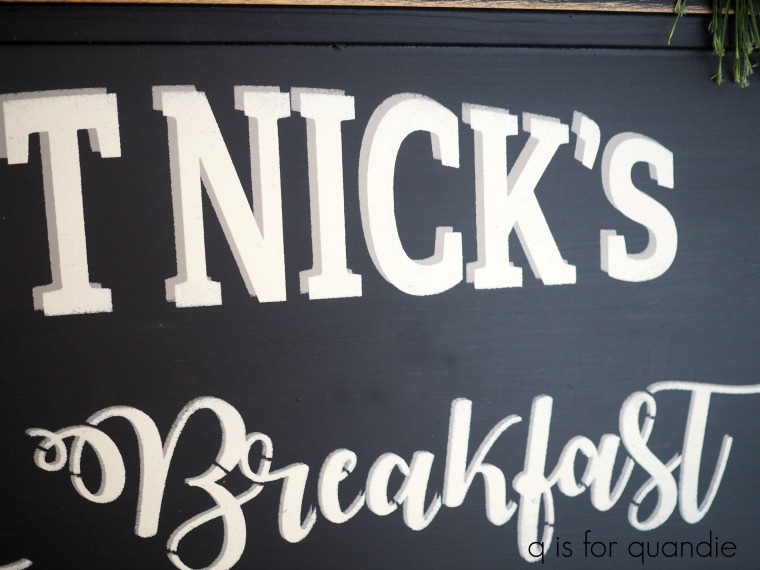
I did use a technique on the middle section that I haven’t done in a while, and that’s giving my stencil a ‘shadow’.  Doing this adds a lot of depth to your stencil and it’s really fairly easy.  You just stencil first in the color you want for your shadow, in my case I used Dixie Belle’s French Linen.  Then, once that paint is dry, place your stencil slightly off to the side and down a bit, like this …

And then stencil with your final color, in this case Dixie Belle’s Drop Cloth.

I love the way this turned out and it looks amazing in person, but it seems to be totally throwing off my camera’s ability to focus.  As a result, I had a really hard time getting a photo of the sign where it didn’t look blurry.  But trust me, it does not look blurry in person.

This time I did have some stockings to hang that were the appropriate color and style …

You’ll remember that I stenciled these a couple of weeks ago.

Originally I made this sign for myself, but in the end I decided to take it into the shop to see if it will sell.  I do have two more of these cupboard doors, so I can always make another for myself between now and Christmas if I decide I simply must have one.

I’ve pretty much run out of time on selling Christmas décor though.  I usually find that if I don’t have my Christmas stuff out before Thanksgiving there is a good chance it won’t sell.  So I took one last load of Christmas stuff to the shop this week and that will be it for this holiday season.  I’ll still be posting a few more holiday things here though.  For example, next week I’ll share some Christmas wrapping that I crafted for this year, so be sure to stay tuned!

In the meantime, if you haven’t yet left a comment on my blogiversary giveaway post, you still have until midnight tonight to be in the running to win the prize.  So be sure to click over to that post and leave a comment!

what was I thinking?

First, I’d like to thank everyone who left a comment on my blogiversary post on Wednesday.  You all left such thoughtful, gracious comments.  You really are too kind.  Sometimes it takes a post like that to remind me that people do get some value out of my blog whether it be in the form of inspiration, or the introduction to new products or ideas.

It also really made me happy to learn that many of you enjoy all of the various subjects I post about and you’re not all just here for the furniture makeovers.  That takes a little bit of the pressure off to always be working on furniture! I enjoy that, but I also like posting about gardening, garage sales, thrifting and especially traveling (fingers crossed we get to do some more of that in 2021).  I’m going to try to throw in another home tour or two in 2021 as well!

We enjoyed a very quiet Thanksgiving at our house yesterday.  Usually we go to the in-law’s house, but due to the COVID situation we decided it would be best to not share any germs with them.  Better safe than sorry, right?  I hope you are all staying safe too!

Today’s project is a piece I picked up earlier in the fall.  It’s the terribly rickety, worn out, piece of junk, step ladder shown below.

It had layers of paint, the most recent being a boring chocolate brown.

It was all kittywampus too.  It seemed as though someone must have cut the bottoms off the back legs because the ladder didn’t even sit level anymore.

At this point you must be wondering why in the world I picked it up, I know I am.  It should have been thrown on the trash heap, or at least the ‘free’ pile, but no, I actually paid for it.  I think something in the neighborhood of $2 or maybe it was $5.  Obviously not a lot of money, but still, what in the world was I thinking?

I called handyman Ken over for a consultation and the best solution we could come up with to level things out was to add a piece of wood along the bottom of the back legs.

That added enough extra length to the back legs to allow the step ladder to sit level and feel sturdy.

Back during our weekend-long second summer, I pulled this ladder out into the driveway and sanded the heck out of it with my orbital sander.  I went through several layers of paint, first the brown, then a bright hot pink, then a 50’s kitchen green.

I sanded both the wooden steps and seat, as well as the metal legs.  Then I spray painted the metal legs with a coat of Rustoleum Chalked spray paint in a color called Chiffon Cream.  I was a bit surprised at the color of the Chiffon Cream, it was actually more white looking than the Dixie Belle Drop Cloth that I typically use as my favorite warm white.  It certainly wasn’t a bright white, but I also wouldn’t have called it cream.

But really, my purpose with the spray paint was just to get in all the nooks and crannies and it’s easier to do that on a piece like this with spray paint.  Once that was dry, I painted over it with the Drop Cloth, and I just needed a quick coat over those metal legs, but I painted two coats over the wooden steps.

When the Drop Cloth dried, I sanded just enough to reveal some of those layers of color.

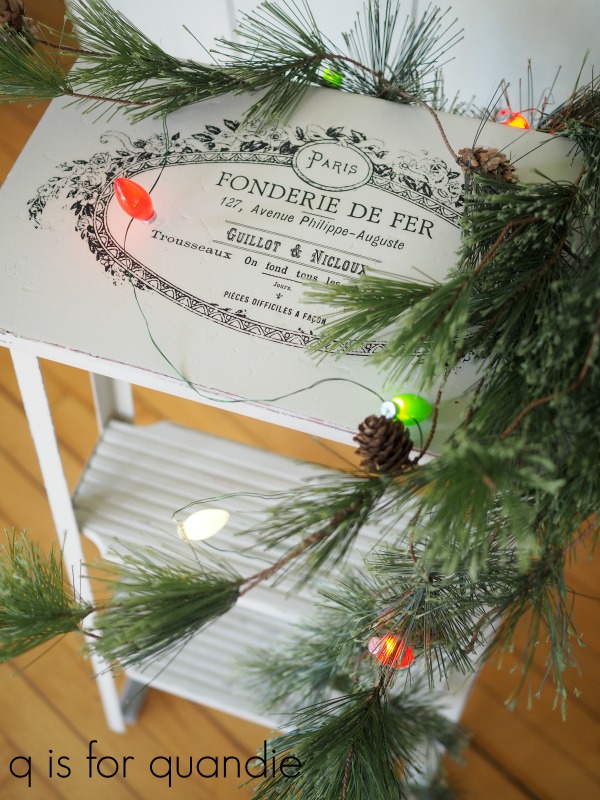
Next I added a piece from the Paris Valley transfer from re.design with prima to the top step.

It was the perfect fit.

This is the perfect little ladder to use when adding Christmas decorations to the tops of cupboards.

But actually, this ladder is also the perfect size to use as a small table next to your favorite reading chair.  It has just enough space for a few books and your favorite beverage.  It would also work pretty nicely as a plant stand.

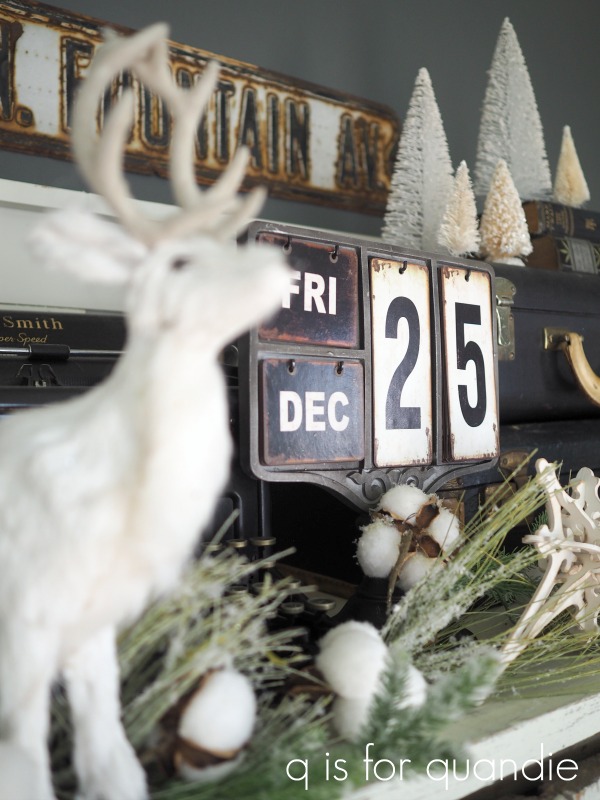
By the way, is it weird that I use a perpetual calendar as a Christmas decoration or do some of you do that too?

I’ve been doing that for a few years now.  I just know that I’d never keep up with changing the day and date every single day.  This is much more do-able for me.

I’m wondering how many people will be out and about shopping today.  Or will most people be mainly checking out the online bargains today?  I almost never shop on Black Friday, so staying home today won’t be unusual for me.  I like to spend the day after Thanksgiving putting up my Christmas decorations, watching old Christmas movies, eating leftovers (and we have lots of those this year) and just chilling out.  How about you?

So now I’m off to climb up on that ladder and add a little more Christmas cheer around here!

As always, thanks to Dixie Belle for providing the Drop Cloth paint and to re.design with prima for providing the transfer used on today’s project.

what’s in your stocking?

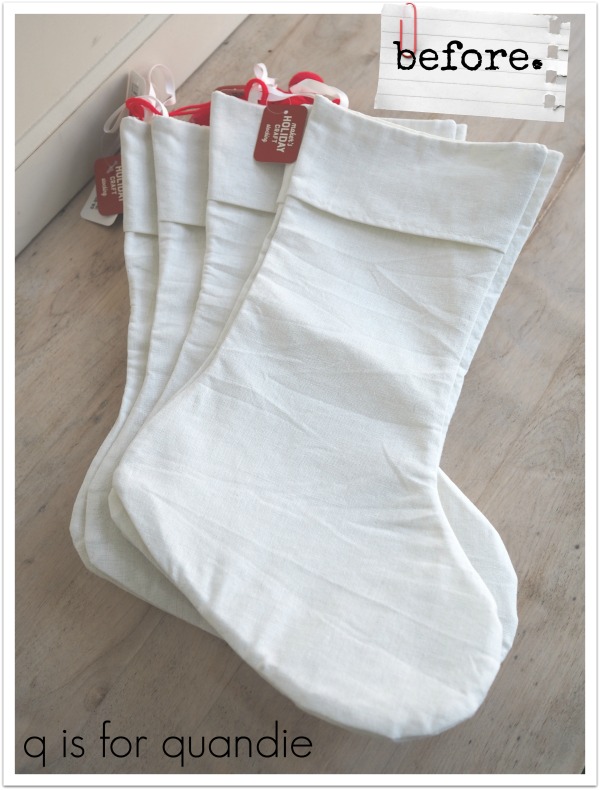
My sister picked up a bunch of plain white linen-ish Christmas stockings for me at an after Christmas sale last year … or maybe it was the year before … I’m not sure, they all start to blend together when you reach a certain age, am I right?

I’d really forgotten all about them until I was pulling out a few other holiday projects this year and there they were.

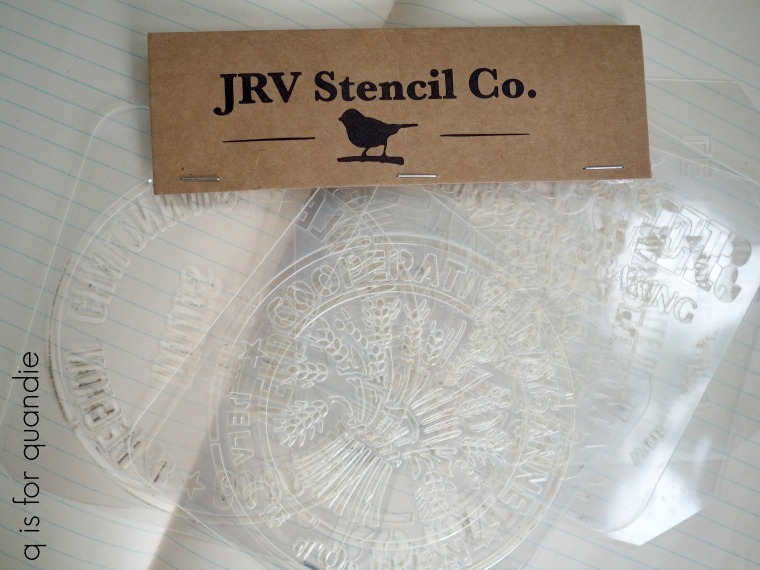
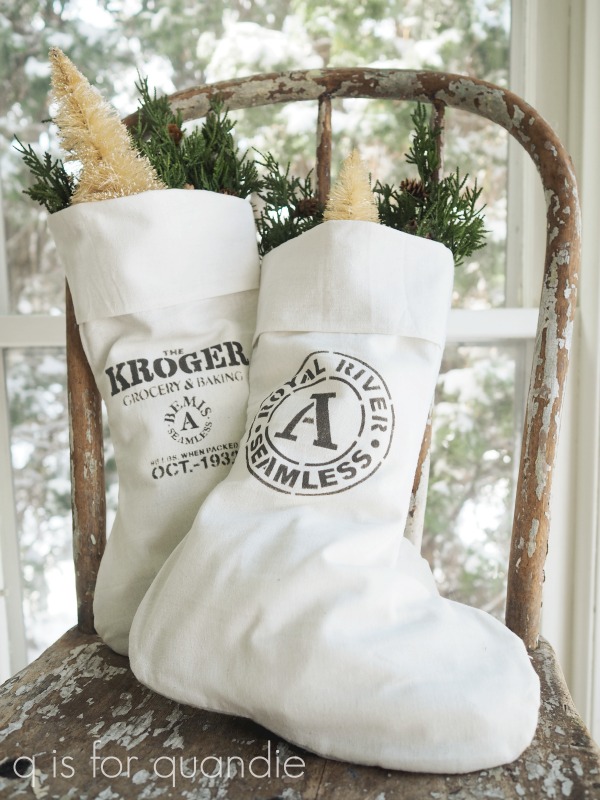
So I decided to change them up a bit and see if they would sell at the shop.  I started by removing the red yarn balls that hung from the top (you can’t really see them well in the ‘before’ photo) because I wanted a more neutral, monochromatic look.  Then I pulled out my mini-stencils from JRV Stencil Co.

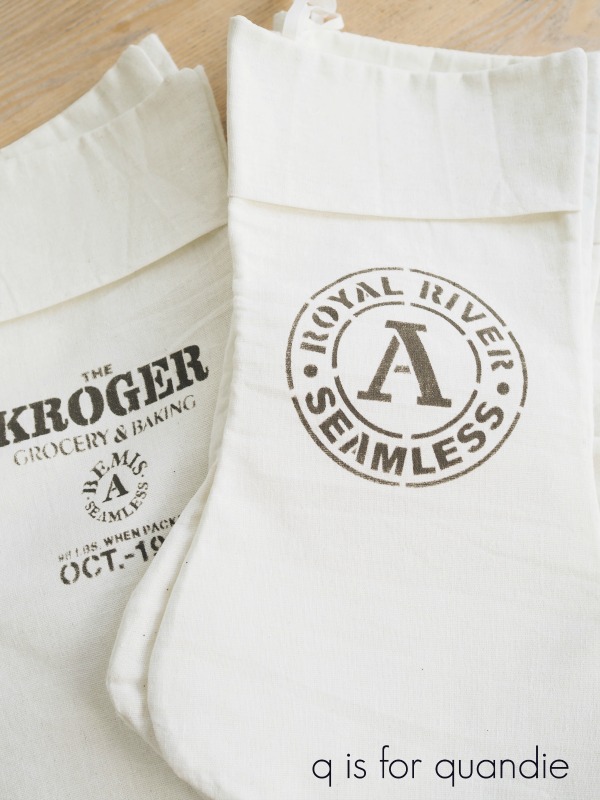
These were the perfect size to give these stockings a ‘grain sack’ style look.

Now, I have a confession to make.  Sometimes I get lazy, and this is one of those times.  I was going to put a grain sack stripe on each stocking, but I decided to skip it.  I have a grain sack stripe stencil (say that 10 times fast!), but it was just a tad too short for these.  That meant I would have had to tape all of the grain sack lines and that would have been time consuming.

So instead I just added the JRV stencils on their own.

I used Dixie Belle’s Gravel Road paint for all of the stenciling.

Whenever stenciling on fabric, you’ll get a more crisp result if you have a nice hard surface behind your fabric.  In addition, if you’re stenciling over something with two layers of fabric like these stockings, or a pillow cover for example, be sure to place a barrier between the two layers so that your paint doesn’t bleed through to the back layer.

For my stockings, I used an old chunk of wood that I also use to test paint colors on.

I just tucked it inside and that gave me a nice hard, flat surface for stenciling.

I also used that re.design with prima stencil brush shown above.  The 2″ diameter of this brush makes stenciling go much faster than using a smaller brush.  I did look around online to see if I could find this brush available for sale and I did find it for around $40.  That’s pretty steep unless you do a fair amount of stenciling.  But if you do, I’d say it’s definitely worth it.  Search for ‘redesign with prima 2″ round stencil brush’ if you’re looking for it.

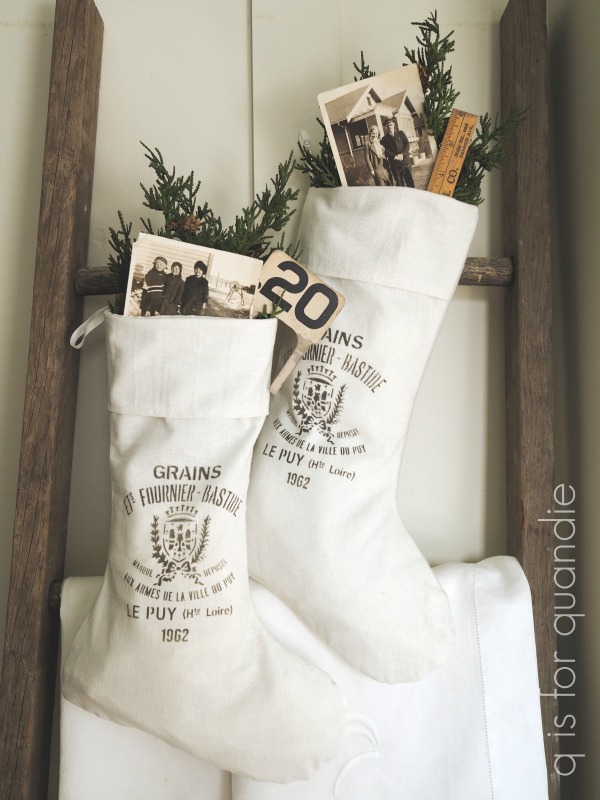
In my opinion, these particular stockings are a bit too small to be functional as actual Christmas stockings.  In other words, Santa could only fit a few small things inside and in general you want to encourage Santa to bring you a few bigger things, am I right?  But I think they are well suited as just decoration.

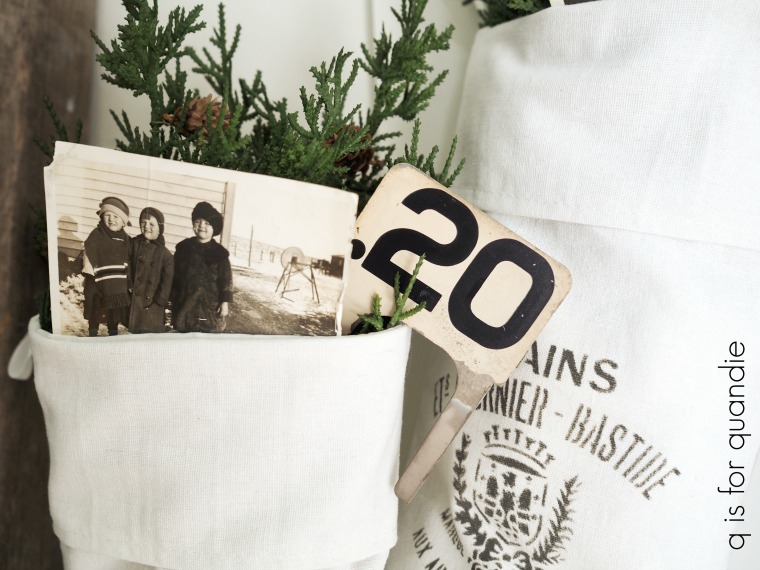
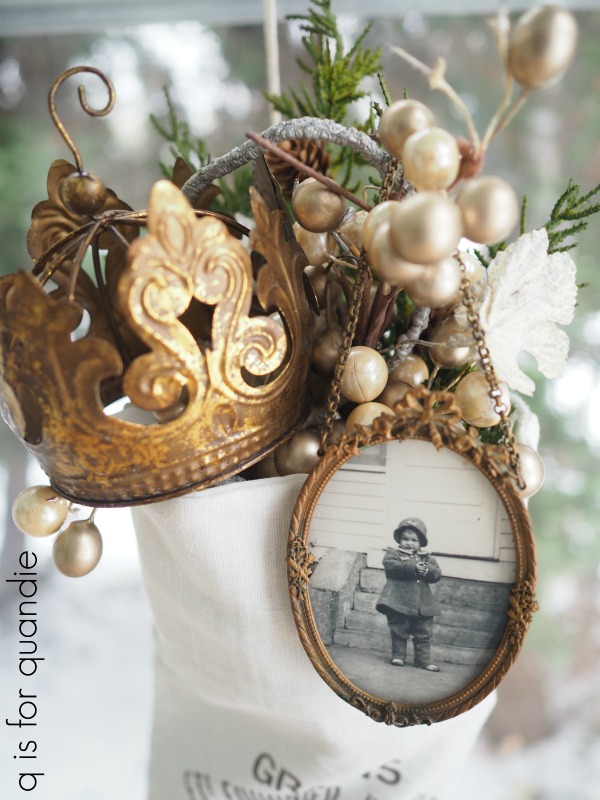
So I added some greens and some old photos to one pair and hung them on my old ladder.

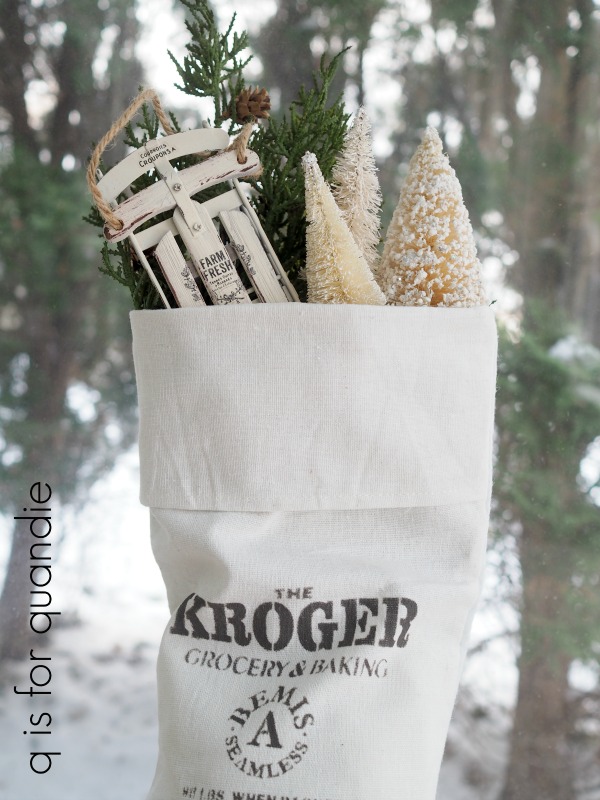
And this next pair contains greens and some bleached bottle brush trees.

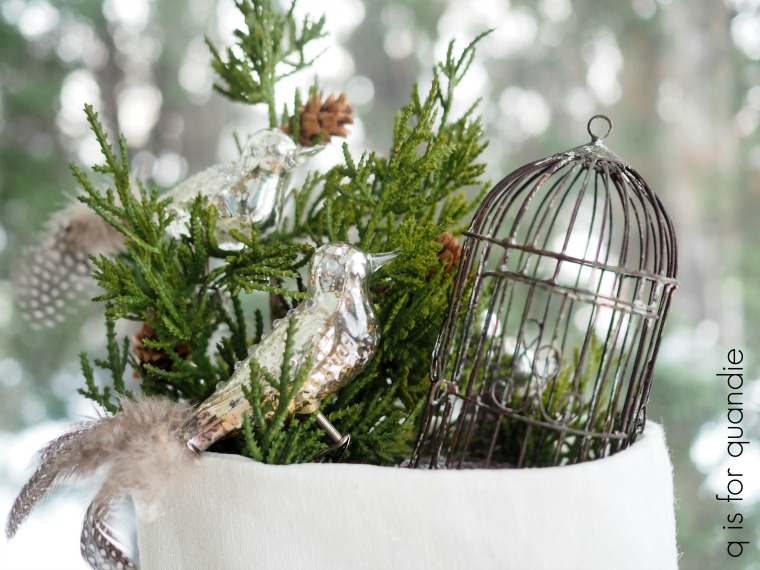
I had fun playing around with different ideas for filling the stockings.

The sky is the limit.

I can picture these all hung along a stairway railing, can’t you?

Gosh, now I’m tempted to keep them after all.  Maybe I’ll just keep a pair of them, but sell the rest.  I can’t keep all of the things, right?

So tell me, what’s in your stocking?

ironing board makeovers.

So, first up today, I have to report back to you on the bench makeover that I shared a week ago Monday.  It has already sold!  So, to recap, painted in the pale blue it sat for what, nine months, and didn’t sell.  I painted it white, and bam!  Sold within a week.  I listed it for the same price as the first version.  Both versions had a transfer on them.  I did paint the legs this time, whereas I left the legs bare the first time around.  But I really believe it was my choice of paint color the first time around that was the problem.
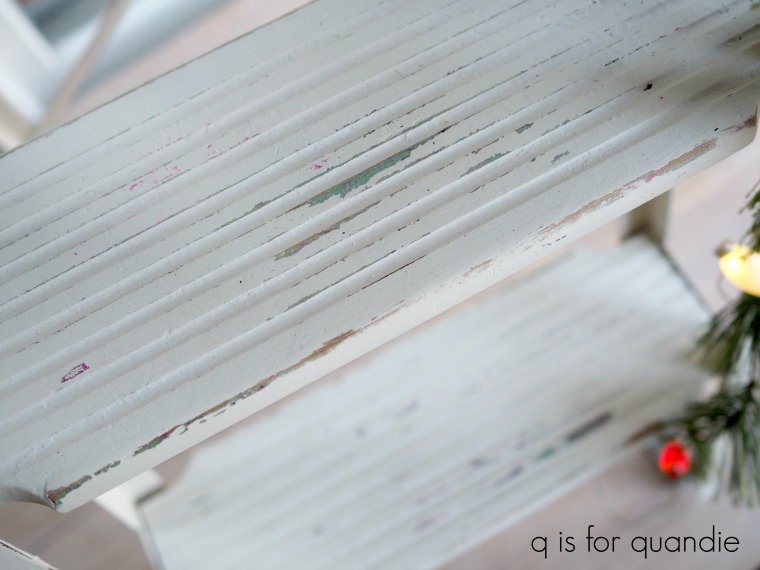
I often feel like painting everything in the same creamy white color gets boring for you guys here on the blog, but the thing is, that’s what sells.  And ultimately, I do need to be able to sell my pieces.  I can’t just store them in my dining room forever.  So if you’re ever wondering why I seem to paint so many things in Dixie Belle’s Drop Cloth, this is why.

Speaking of storing things that haven’t sold, remember a while back I brought home some painted ironing boards that didn’t sell at the shop?

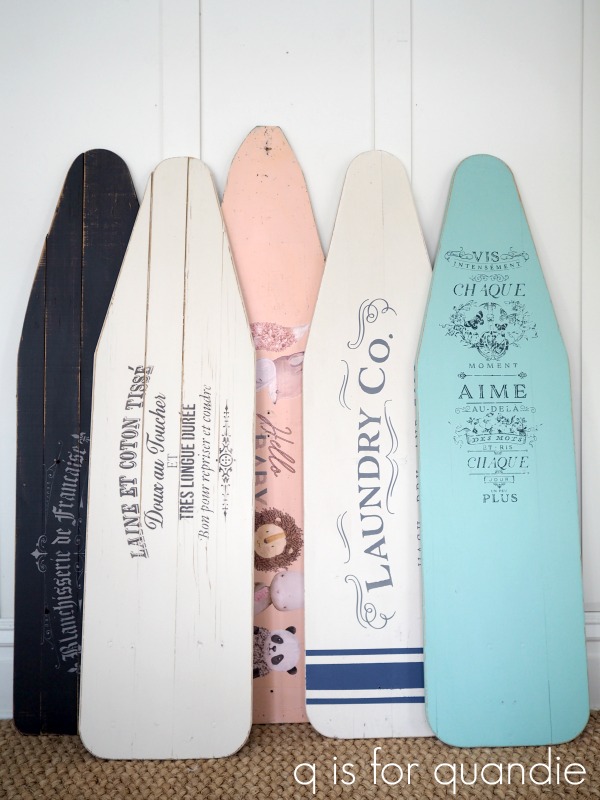
Just to refresh your memory, the white one on the left is the only one that sold while at the shop (yes, also painted in Drop Cloth), so I brought the other 4 all back home again.

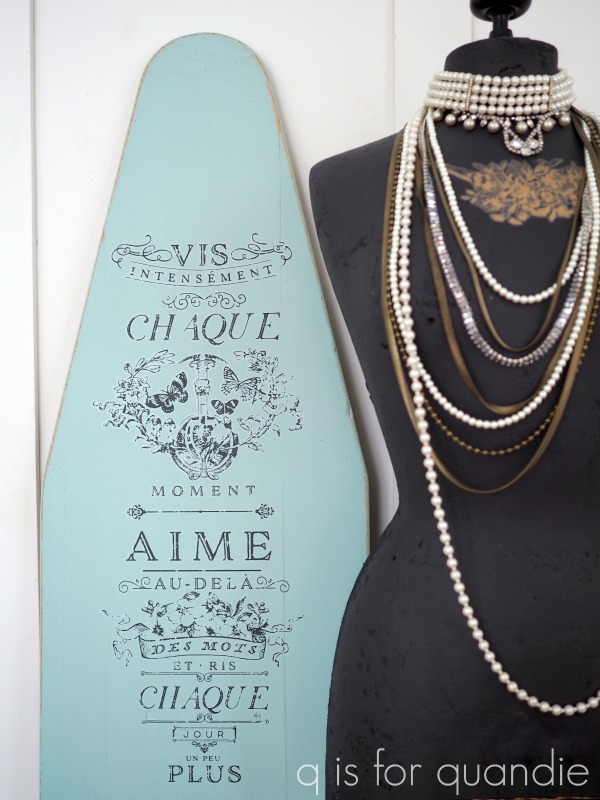
Then I listed them here on the blog, and I was able to sell the black one and the Laundry Co. one.  But I had no takers for the blue one …

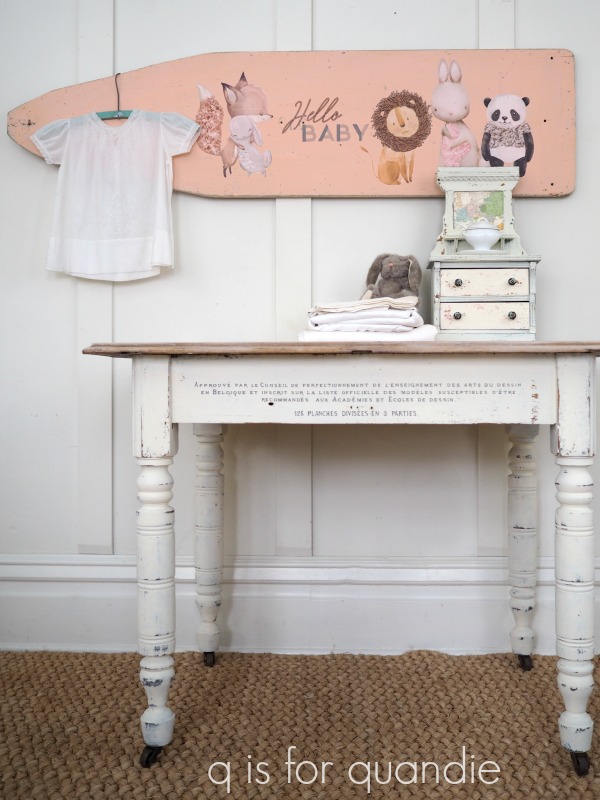
and the Apricot one …

I have to confess, I really didn’t like the Apricot one myself, so it didn’t surprise me that it didn’t sell.  That design was just a mistake from the start.  Who hangs an ironing board in a nursery?  Apparently no one.

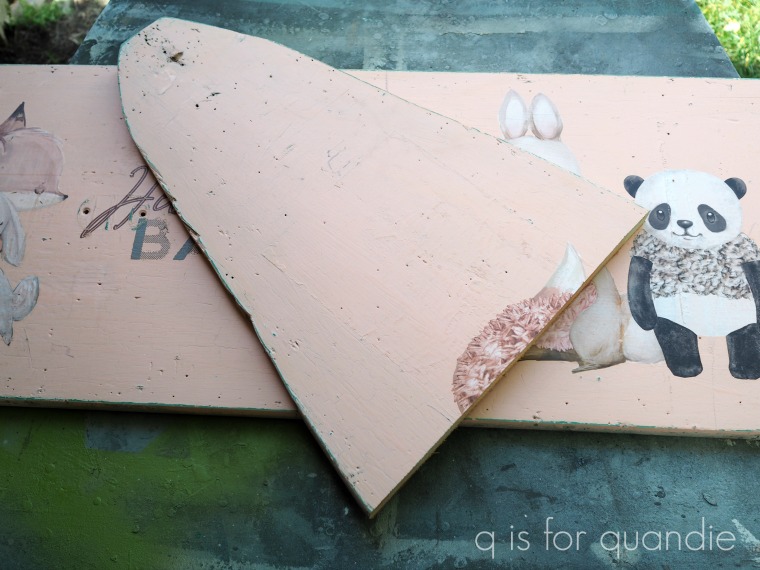
Anyway, I decided to salvage that board by cutting off the wonky end and turning the rectangle that was left into a sign.  So I sent it home with Ken and he cut off the end for me.

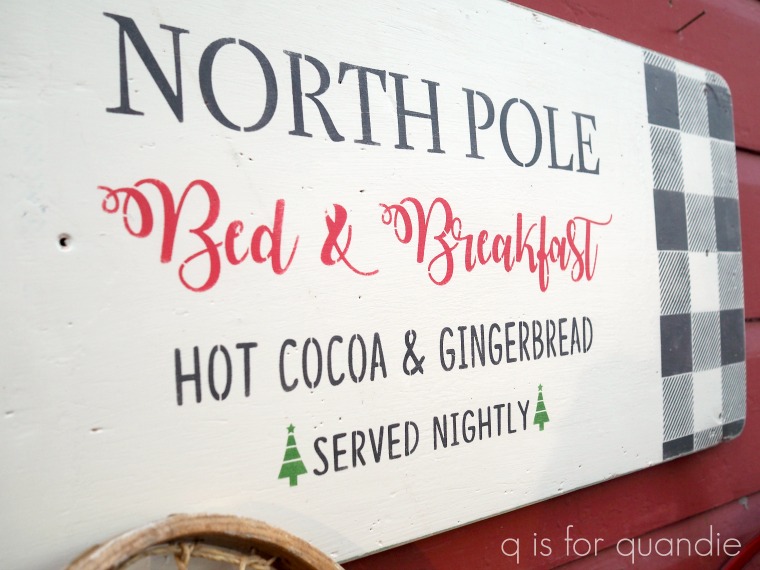
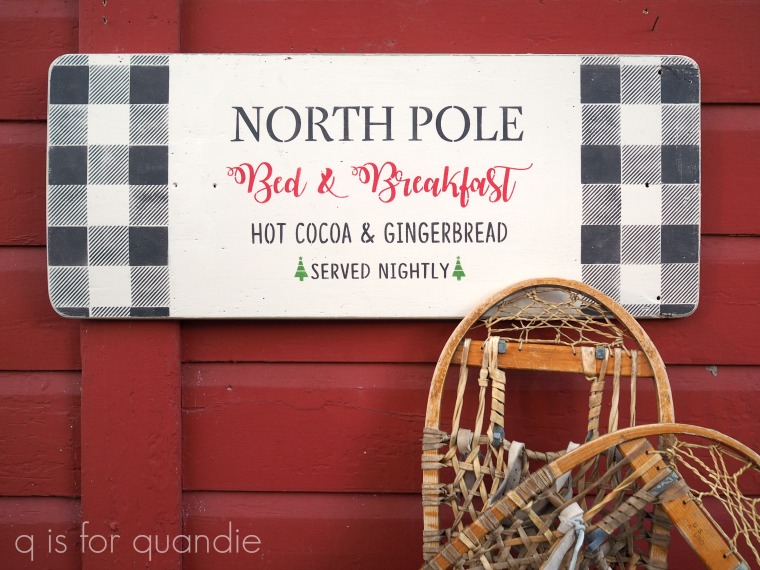
Next I sanded off the transfers.  That’s fairly easy to do with some 80 grit sandpaper and an orbital sander.  I gave it a fresh paint job, also in Dixie Belle’s Drop Cloth, and then I added some stencils from Maison de Stencils.

So now it’s a Christmas themed sign.  It’s not even recognizable, right?

Wouldn’t it be adorable hanging over the bed.

I think this was a great way to do something with an old wooden ironing board that just wasn’t going to sell.  I’m still working on an idea for that wonky triangle shaped end, I may just come up with a use for that too.
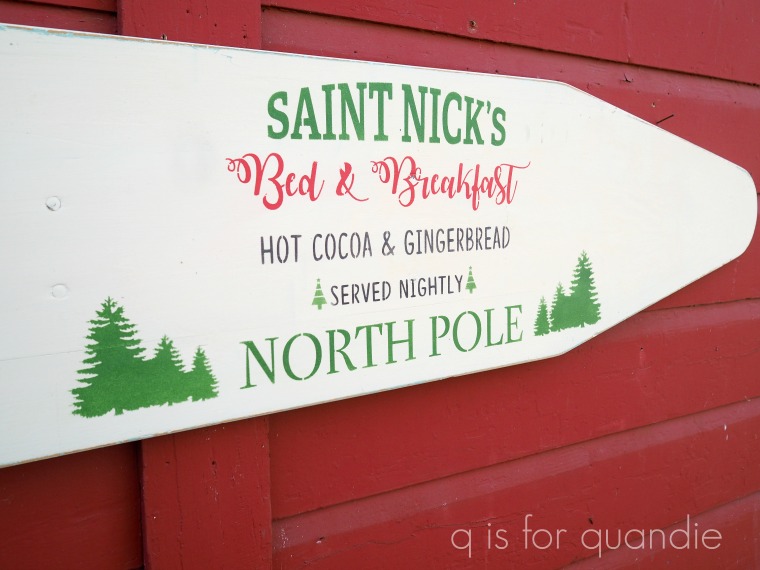
As for the blue one, I decided to leave the shape of that one alone.  But again, I sanded off the transfer, repainted it in Drop Cloth and added some stencils.

This one would also be fabulous hung above the bed, or really anywhere that you have space for it.

I took these signs, plus a couple more, into Reclaiming Beautiful a couple of weeks ago so it’s possible they have already sold but as of last Wednesday they were still there.  So if any of you locals are looking for something fun to do in the next few days, be sure to head in to Stillwater.  Keep in mind that Reclaiming Beautiful is only open on Thursday – Saturday.

And for the rest of you, if you have a piece that isn’t selling, maybe it’s time to consider a makeover.

thin ice.

Do we all feel a little bit like we are on thin ice these days?  Some days watching/listening to the news is just too much.  I’ve started taking a break from it all on the weekends.  From the time I leave work on Friday until I return on Monday, I avoid the news.

I work on my painting projects, I listen to music, we stream TV or movies, we have my sister and niece over for game nights, and we just generally try to forget about all of the chaos that seems to be happening in the world right now.

I have to face reality again every Monday when I go back to work, but for a couple of days each week I enjoy a little peace and quiet while I paint things.

Speaking of thin ice, I just love the look of vintage ice skates, how about you?

My friend Sue sold that pair shown above at one of our Carriage House sales back in the day.

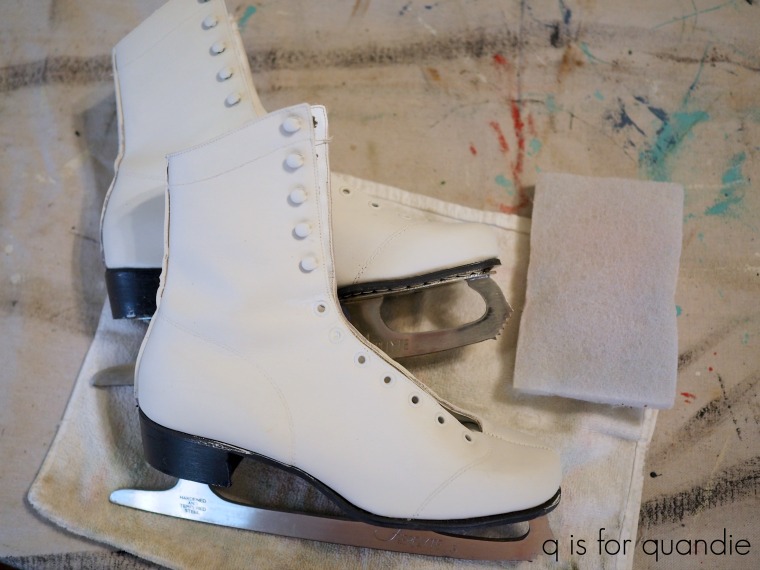
Unfortunately, I don’t often find really awesome vintage skates at garage sales, but I can usually pick up less attractive old skates for only a few dollars.  In fact, I think I paid $2 for this pair last summer.

They aren’t much to look at ‘as is’, but I knew I could dress them up.

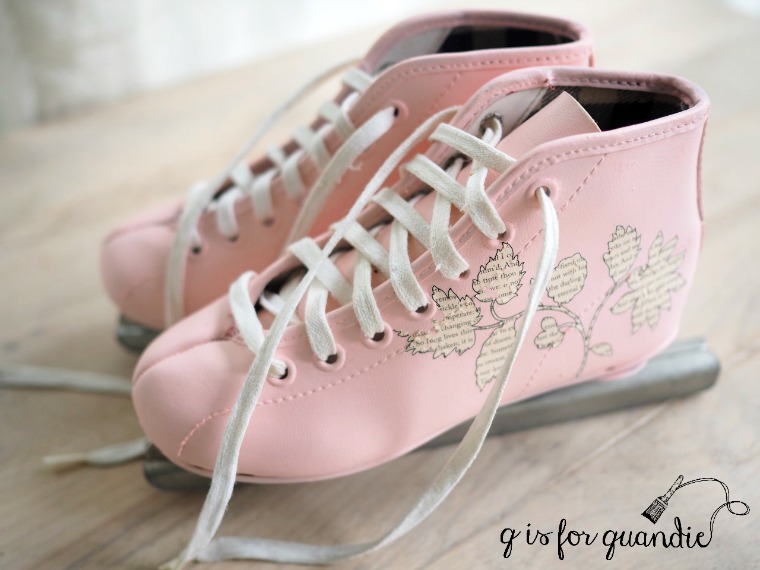
A few years ago I painted a similarly grungy pair of skates pink.

And last year, rather than painting, I just added a re.design with prima transfer to this pair of skates …

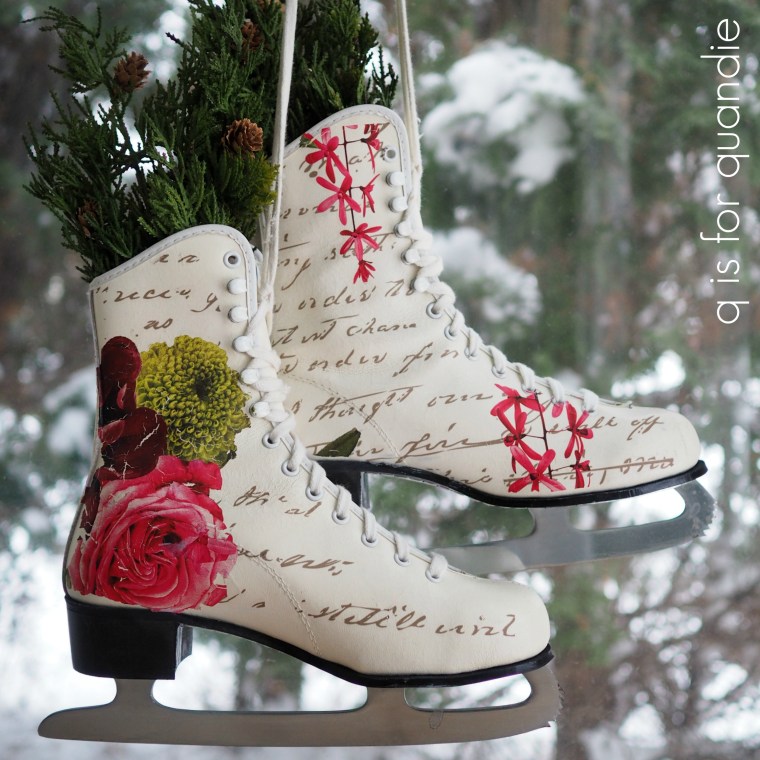
This time around I decided to do both, paint and transfer.

I started out by removing the laces and soaking them in some OxyClean.  While they were soaking, I painted the skates in Dixie Belle’s Drop Cloth.

I didn’t want to use sandpaper on them because I didn’t want to remove too much paint, but I did want to smooth out the surface so I used the Dixie Belle Finishing Pad to buff them, which worked perfectly.

I then wiped away any dust and applied some left over bits from prima’s Violet Hill transfer.

I definitely don’t aim for perfection when doing this.  I try to place the bits and pieces in a way that looks purposeful and follows the line of the ice skates.

Whenever you are applying a transfer to a non-flat surface, you are going to get cracks and other imperfections.  I know some people fret about those cracks, but let’s get real, we all have far more serious things to fret about these days.  Who cares about a few little cracks in your transfer here and there?

Once the transfer is in place, I waxed the skates using clear wax.  Then after rinsing and drying the laces, I re-laced them.

Of course, I intend these skates as decoration only.  I don’t think that the paint and/or transfer would hold up to actual ice skating use.

Then again, I’ve seen plenty of people out there painting and adding transfers to shoes, so if you’re an ice skater and you want to dress up your skates, give it a shot and let me know how it holds up.

But if you’re just looking for a creative way to decorate for winter, try dressing up some skates.  If you don’t happen to have any, check out your local thrift store.

winter returns.

I’m so glad that I took advantage of our ‘second summer’ last weekend and finished up my bench makeover.  I have it posted on Facebook Marketplace and Craigslist, so hopefully it will sell soon.

I also sold that large cupboard that I refinished back in September on Monday.

I was really happy to sell that one before winter set in.  It was rather large, and really heavy, so I was storing it out in the carriage house.  I really didn’t want it to sit out there all winter.

And as it turned out, we got it out the door just in time because winter returned with a vengeance on Tuesday.

Second summer is glorious, but it’s also fleeting.  Winter always returns.

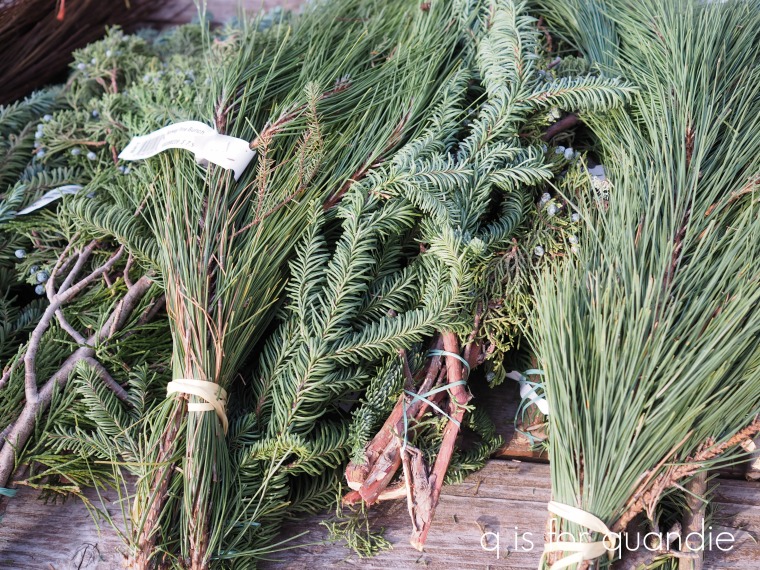
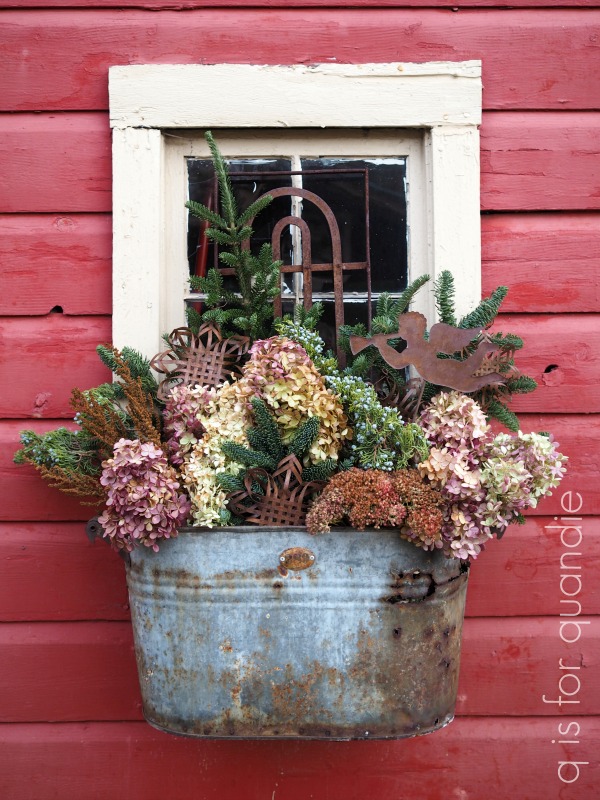
Another task that I was determined to take care of during our second summer weekend was filling all of my window boxes with evergreens.  The past several years I haven’t been able to get to this before the soil in the boxes froze rock solid, but this year luck was on my side.

Mr. Q and I popped over to our local Home Depot and we picked up a variety of evergreens.

No matter how many I buy, I still never have enough to fill all of my planters totally.  These really are just the background to which I add dried flowers harvested from my garden (or my neighbor’s garden).

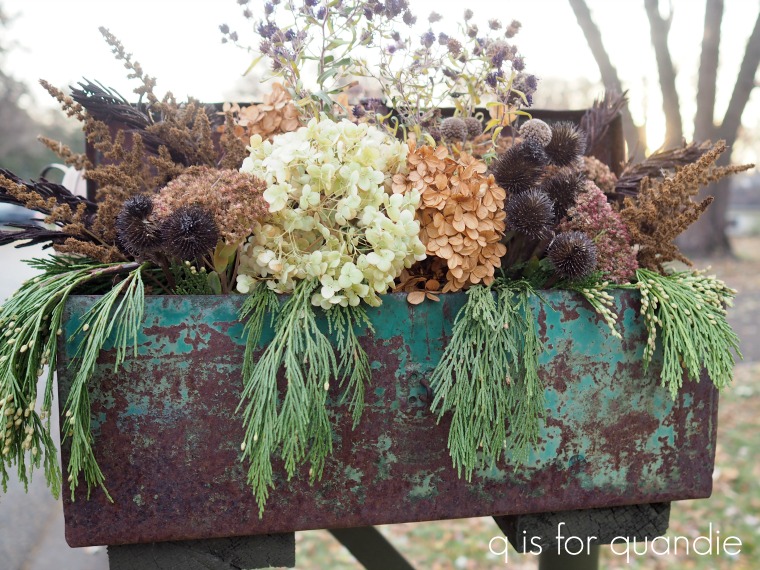
The window box on the side of my carriage house is always my favorite.

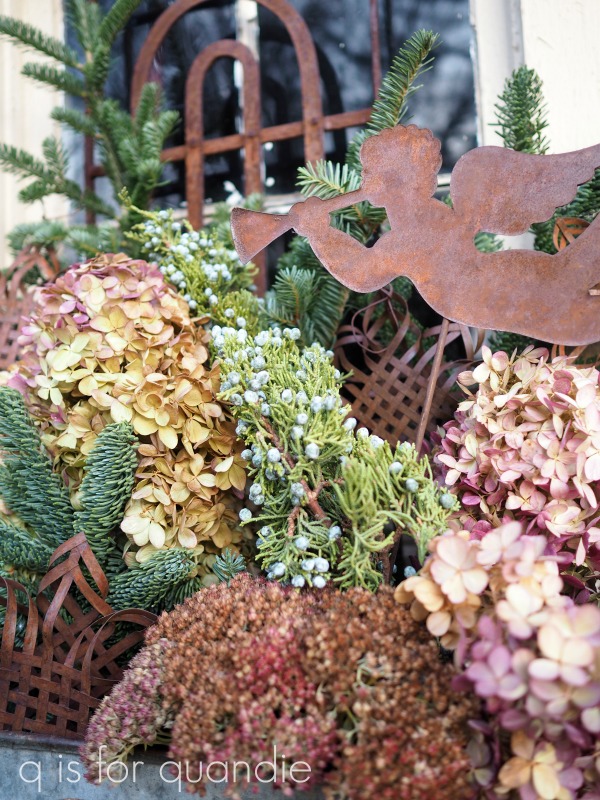
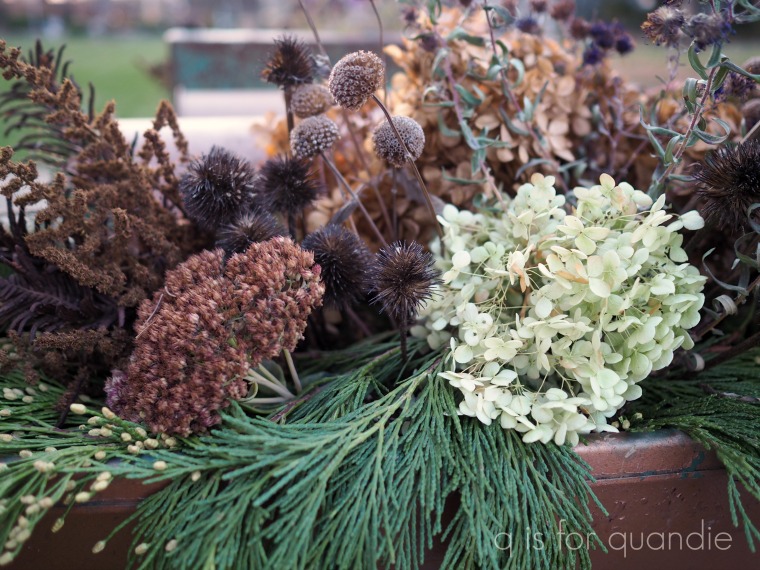
In addition to the greens, I added some dried flowers from my Vanilla Strawberry hydrangea.  The flowers on this one turn a deep shade of pink/purple as the season progresses.  You have to cut them and dry them before you get a really hard freeze though, because eventually they turn brown if left on the shrub.

I added a few other dried flowers (astilbe and sedum), plus a few rusty ornaments.

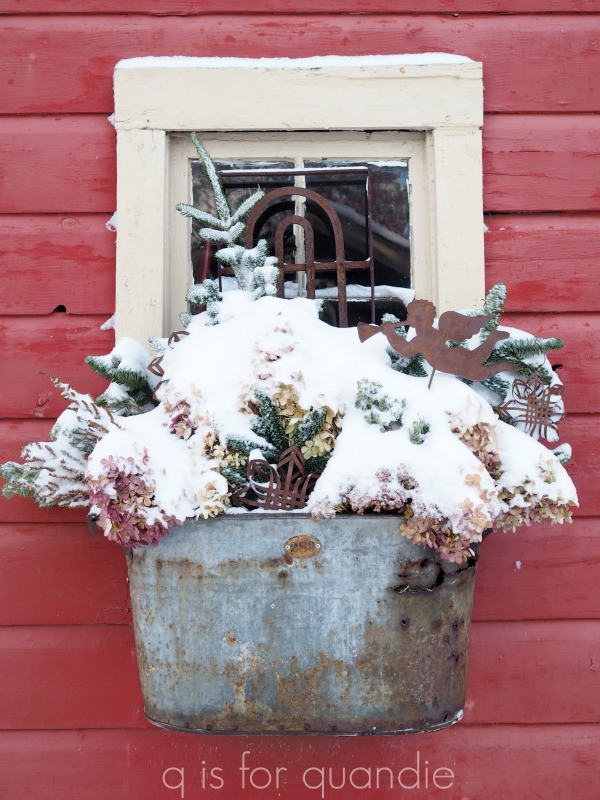
I took all of these photos before Tuesday’s snow.  I really thought I’d have a little more time to enjoy my work before it looked like this …

But that’s OK.  This snow will melt soon.

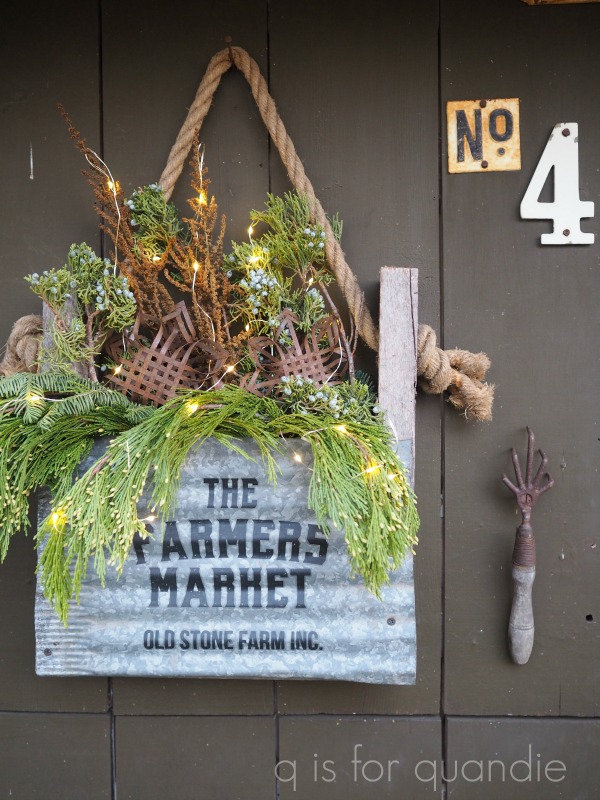
I also dressed up the Farmer’s Market basket that hangs on the photo cottage.

I added some battery operated lights to this one which is pretty at night.  This planter is a bit more sheltered from the elements by the overhanging roof on the cottage.

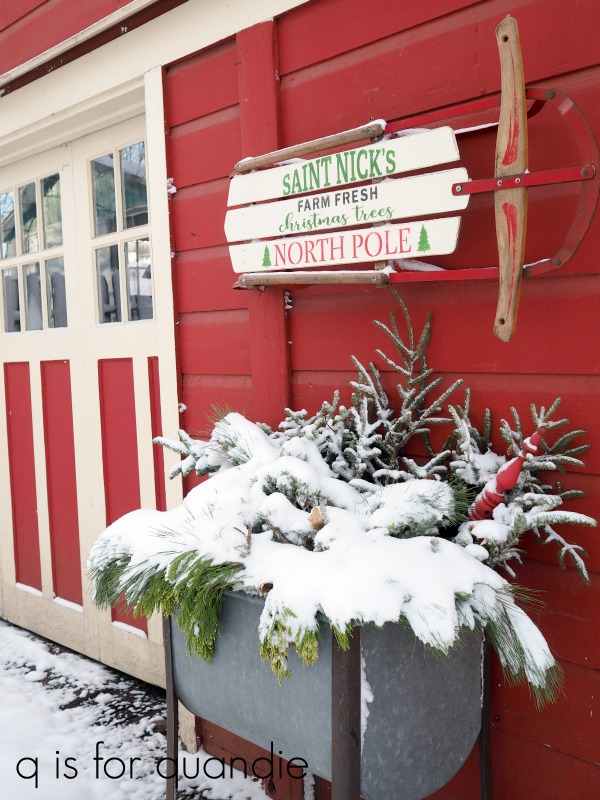
Next up was the galvanized laundry tub that sits in front of my carriage house.  This is where I hung my painted sled.

It’s looking quite festive with the addition of some snow!

We share a mailbox post with nnK (our neighbor across the street) and quite a few years ago we added some planters to either side of the mailboxes.  nnK fills them up in the summer, and I fill them for the winter.  Last year I swapped out the plastic planter box on my side for an old metal toolbox (I’m still working on finding a good one for her side).

I used quite a bit more dried flowers in these arrangements, and many of them came from nnK’s garden.

If you’re wondering how well these things stand up to a Minnesota winter, well, the truth is they definitely don’t look this good all the way to spring.  But they usually look good at least through Christmas.

Some of you who have followed me for a few years are probably wondering about the big daddy of them all, my front window box.

Well, silly me, I managed to forget to take any photos of it before the snow.  But here it is after …

It’s a little hard to see the details 😉

I have some twig lights in here though, and it looks amazing lit up at night both from inside the house and from the street.

How about you?  Do you fill up your outdoor planters for winter?  Got any tips to share on what works well for you?  Be sure to leave a comment and let me know.

st. nick’s tree farm.

Well, so much for second summer.  I enjoyed it while it lasted, and then enjoyed watching the snow come down last night.  Looks like I’ll be getting the parka back out again.

I apologize to all of you who are not local.  Rather than an in depth how-to, today’s post is really just a sales pitch.

For this box.

I purchased this box back when my friend Sue and I were hosting occasional sales out of my carriage house.

Now that we no longer have a sale, the box has been wasting away up in my carriage house storage.  When we hauled all of our summer things up there to store them for the winter, I realized the existing green paint made this box perfect for Christmas.

And it’s big enough that you could put a full size Christmas tree in it.

So I brought it out and cleaned it up.  Then I pulled out a couple of stencils and some Dixie Belle paint in Drop Cloth and added a little design to one side.

This is a combination of two different stencils from Maison de Stencils, this one and this one.  I put a quick coat of Dixie Belle’s flat clear coat over the whole side of the box and called it good.

I realized after taking my initial photos that the box looked deceivingly small in most of them, as though it’s just the size of a typical wooden fruit crate.

However, sitting as it is in the photo above, it is 14.5″ tall, 32.25″ wide and 23.25″ deep (front to back).  It’s big.  Plenty big enough to hold a tree.

I typically used it standing on its side during the sales to display items on top and inside.  Standing on its side the tall way, the box is 32.25″ tall, so a nice height for display.

I could also stand it on its side the other way and have it be 23.25″ tall.  Either way, it was quite versatile for display purposes and I loved the look of those slats of mismatched faded wood in the back.

That oversized jingle ball that I used as a prop really isn’t helping to show the size of the box at all, so I threw my Christmas tree farm truck on the top.

I’m not sure that’s helping either.  This is one of those cases where you’ll have to rely on the measurements.

By the way, Sue painted that truck aqua, added the Christmas tree label on the door, and gave it to me for my birthday one year (I told you she was good!).

Normally I would take something like this box in to Reclaiming Beautiful to sell, but this box is large enough to be a bit unwieldy.  So I decided to attempt to sell it on my own before dragging it down there.

So, if any of you locals are looking for an amazing, authentically aged wooden crate to put your tree in this year, this one is for sale for $45.  Email me at qisforquandie@gmail.com if interested.

too soon?

OK, OK, I know, it’s way too soon for Christmas.

But that snow we had a week or so ago really put me in the holiday spirit.  Then add on the fact that the shop wants to start putting out the holiday stuff this week, so I need to have things ready to go.  Plus it has been unseasonably cold here.  One morning last week I checked the temp to help decide which coat to wear to work and it was 18 degrees (that meant the parka, in case you’re wondering).  In October!

Anyway, all of that added up to me getting my holiday items ready to go before Halloween.

For the past several years I’ve been painting up sleds as Christmas decor.  Way back in the early days, my first few sleds were flops.  I tried to stencil over the existing finishes on the sleds and that didn’t work well at all.

The stencil designs that I used were too delicate, so you just couldn’t see them well enough.

When those didn’t sell, I realized I needed to paint the sleds first, then stencil with a contrasting paint color.

Ah, much better.  Although sometimes it still works to keep the original finish, especially when it’s a perfect chippy red like this sled that I stenciled last year.

You may remember that back in June I came across a stash of old sleds at a lunchtime garage sale.  I had resigned myself to not being able to find much at garage sales this year due to COVID (ie. no neighborhood sales), so it was a bonus to find 4 sleds all together at one sale.

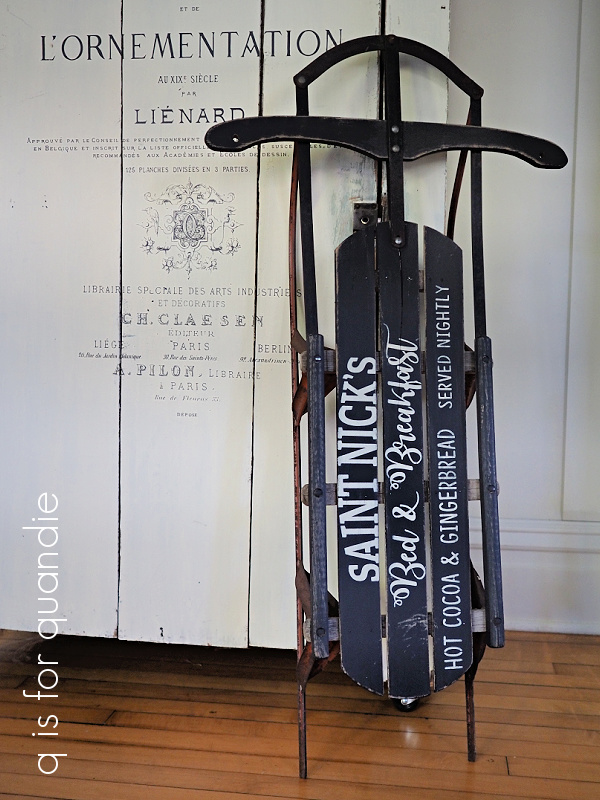
I started out with the two taller sleds with black metal runners.  These were actually newer looking and they had some stickers on them promoting Special Export beer.  I suppose they were giveaways at an event or something.

I removed the stickers using Goof Off, sanded down the wood and painted one in Dixie Belle’s Midnight Sky, and one in their Drop Cloth.

I followed my usual process of painting all of the wooden parts of the sled, front and back.  Then I added some stenciling.  I used an old favorite stencil on the white one (sorry, I’m not exactly sure where I purchased that one) and I used a new stencil I ordered this summer from Maison de Stencils on the black one.

After painting both of these, I realized that it was quite time consuming to paint all of the wood parts, front and back.  I decided to do a little experiment on one of the smaller sleds and just paint the front of the flat wood slats and then add a stencil.

Once I had it done, I realized it was perfectly fine this way.  In fact, I might even like it a bit better than the fully painted ones, and it was so much easier to accomplish.

However, I think this method of painting just part of the sled worked so well on the two smaller sleds because they were old and had nicely patina’d worn wood.  The two taller sleds with newer wood might not have looked as good with partial paint jobs.

By the way, if you’re looking for this exact stencil design on Maison de Stencils website, you won’t find it.  I pieced together parts from three different stencils to create that look (this one, this one and this one).  It’s difficult to find a stencil that works perfectly ‘as is’ on a sled.  You have to get creative to fit things to those narrow slats.

I just painted the wide slats on the 2nd smaller sled as well.

The stenciling on this sled is all from one stencil (it’s this one).

If you’re wondering about paint colors, I used all Dixie Belle paints on these including for the stenciling, and the colors I used are Honky Tonk Red, Evergreen, Drop Cloth and Midnight Sky.

Last year I kept the red, chippy sled for myself and hung it on my photo cottage.  But now I’ve kinda fallen in love with the Saint Nick’s sled and it looks perfect hanging on the carriage house, so I’m going to keep that one instead.

But the rest, include the chippy red one, will be going to Reclaiming Beautiful on Wednesday.

That is, unless one of you local readers wants to snatch one up before then.

I’ve listed the sleds, plus quite a few other Christmas things on my available for local sale page. Be sure to take a look and see if there is anything you are interested in.

If so, you can email me at qisforquandie@gmail.com to call dibs up until Wednesday morning.  First come, first served.  After that, I’m bringing most of the stuff to the shop.


better not pout.

Today I’m sharing the gift that I put together for my Secret Santa recipient at work.  Since we’ve exchanged our gifts by now, it’s safe to go public with this one.

I started out with another crusty old toolbox that my picker found for me.

When they start out this crusty, plus are an unappealing color like … hmmm … what can I call that color that is blog appropriate? … I like to give them new life with paint.

In this case I also decided it was a good idea to seal it (after washing it thoroughly of course).

This time I used the Dixie Belle BOSS as a sealer.  I gave it one coat inside and out and let it dry 24 hours before painting.  I probably could have gotten away with painting sooner this time, but the BOSS is most effective if given a day to dry.  Better safe than sorry, right?

Next I painted the entire outside of the box in two coats of Dixie Belle’s Drop Cloth.  Once that was dry, I taped off a red cross and then painted that plus the inside of the box in Honky Tonk Red.

I sanded the edges to distress and then added one of the newest re.design with prima transfers.

I bet you guys are going to love this new set of transfers as much as I do.  This one is called Classic Vintage Labels and contains a collection of 27 ‘labels’.  These are going to be perfect for use on clay pots, galvanized watering cans, glass jars … the possibilities are endless.

I decided to use a more durable top coat than wax on the inside of the box so that it would hold up to potential liquid spills (based on the contents, which you’ll see in a minute), so I pulled out Dixie Belle’s Clear Coat Flat.  I applied it using a new to me tool, their blue sponge.  To use, simply dip the sponge in the clear coat and wipe it on.  It worked really well for this project.

My red and white color scheme had a double meaning.  First, I wanted the box to look like a first aid kit (sort of an ‘open in case of emergency’ vibe) and second, it also has a peppermint theme.

I’ve included all of the ingredients for making Peppermint Patties.  In case you aren’t familiar, that’s basically hot chocolate with peppermint schnapps.

I threw in this pair of vintage shot glasses that I found at an estate sale …

Plus this cute mug from Hobby Lobby …

You might think I was super creative when I thought to add some broken candy cane stir sticks to my photos, but that wasn’t quite how it happened.  Actually, as I was setting up for my photo shoot I dropped the mug with the sticks inside.  Fortunately the mug survived the fall, but every single one of the candy canes broke.

Luckily I just happened to have a second package of them so my photo shoot was salvaged and I decided to put the broken sticks to use as props for my photos.

Hopefully my Secret Santa recipient loved her gift!

I know I really enjoyed putting it all together!

Thank you to Dixie Belle Paint Co and re.design with prima marketing for providing the products used in this project.

projects that didn’t make the cut.

A very merry Christmas to those of you who celebrate Christmas!

I wasn’t planning on having a blog post today.  In fact, I was actually planning to take a bit of a blogging break from Christmas through New Years.  But as it turns out, instead of running out of blog posts over the holiday season, I had too many.  I was so absorbed in my 12 days of giveaways that I never found time to blog about some of the projects I finished.

In addition, this year most of my friends and family have decided to move the Christmas celebrations to after the holiday.  Last night was just a quiet dinner at our house with my sister and my niece.  Today we have a family brunch with Mr. Q’s side.  But over the next week we have three more dinner parties and another brunch.  So, aside from the brunch, I actually have a little down time today so I thought I’d go ahead and post something.  Plus, I wanted to make a last ditch effort to share some of my holiday projects that didn’t make the cut.  So, get yourself a beverage and kick back, because this is going to be a long post.

First up is this pair of ice skates that I picked up at an estate sale.

I added sections from the re.design with prima transfer called Royal Burgundy to dress them up.  I posted these on some Facebook groups and on Instagram and several people asked if I sealed them.  I did not.  These are old skates, not skates someone would actually wear anymore.  At least I assume so.  I don’t actually ice skate, but I’m guessing that modern technology has vastly improved the ice skate since these were made.  So I meant these to be used for decor only, and therefore they don’t really need to be sealed in any way.

Next up is this vintage pink dust pan.

My picker found this for me a while back and as soon as I saw it I wanted to turn it into a holiday decoration.  The rusty, chippy pink finish works perfectly with vintage pink Christmas ornaments and some evergreens lightly dusted with snow.

Another project I worked on, and took lots of pictures of, but never really shared here was the galvanized bin in front of my carriage house.  When I put it together, it looked like this …

But it wasn’t long until it looked more like this …

Hmmm.  Most of the contents were completely buried in snow, but it still looks really pretty lit up at night.  One of the items I included in my arrangement was this …

I wanted to add a pop of color and I didn’t have a branch with red berries or anything like that, so I grabbed this … hmmm … do these things have a name?  This is one of the arms that would have held the mirror on a dresser.  I have a few of these lying around since I tend to take mirrors off dressers and not put them back on.

Anyway, I painted it in Dixie Belle’s Honky Tonk Red, sanded to distress and then waxed it.  Wax is not a durable enough top coat for outdoor use on a regular basis, but I don’t really care if the paint job on this doesn’t hold up beyond the holidays.

Another post I was planning to share, but never found time for, was the new way I found of displaying my non-collection of vintage glass tree toppers.  First, I was going to show how I store them in my vintage suitcases.

In the past I’ve displayed them in the window.

But they were literally held in place with some Stick-Um Candle Adhesive wax which wasn’t terribly secure.  I realized I was living dangerously and it was only a matter of time before one fell off (or, gasp, even several at a time).  So I needed to come up with a better plan.

I did a bunch of searching on Pinterest and found several ideas, but none that I loved.  It occurred to me that putting them over some kind of pointy stick that was somehow secured to something would be the best option.  So I decided to go with wooden skewers and floral foam.

I secured the foam in my wooden tote, added some silver platters and some greenery, then poked the skewers into the foam and placed my toppers over them.

It was easy to get the toppers to sit at just the exact angle I wanted them to.

I put the wooden tote back on the window ledge in my dining room.

After the holidays are over, the toppers will go back into their suitcases along with the floral foam and the skewers.  Easy, peasy storage.

I’m still not done with the rejects folks.  Next up are these sled ornaments.  Here’s the ‘before’ …

I purchased these after Christmas a couple of years ago for just a dollar each.  They looked pretty cheap and tacky, but I knew I could dress them up.

I painted them with Dixie Belle’s Drop Cloth, then I added various segments from some of the re.design with prima knob transfers.

I had initially planned to share these on the re.design with prima Facebook page as part of their 12 days of ornaments, but I was overcome with self-doubt.  I just didn’t think they could compete with the amazing ornaments that others were sharing.

To be honest, I often feel like my more simple, not so embellished, creations pale in comparison to other projects out there being shared.  I have to remind myself that I’m not the only one who loves a more simple, clean look.  Right?

Plus, it’s not a competition.  At least I hope it isn’t 😉

This brings me to my last reject for today, our Christmas tree.

You’ve normally seen it in the past filled with my huge non-collection (I swear I’m not a collector, remember?) of vintage ornaments (and there are those toppers in the window too).

In the past I haven’t had a great spot for the tree, and I also didn’t have a lot of room for a large tree.  So I have a slender, silver tree and I placed it in the corner of the piano room (above), and I also tried tucking it beside the pine cupboard in the q branch one year.

But now that I’ve changed up my living room, I’ve opened up some space in one corner that seemed like the perfect spot for a Christmas tree.

Unfortunately, my slim silver tree looks completely lost in this corner.

I have to confess, I am totally envying all of those big, full, flocked trees that everyone seems to have this year except for me.  I’m still debating whether or not I’m going to hit the after Christmas sales to look for a new tree.

But in the meantime, this year I decided to change it up and keep my tree monochromatic.  I also decided to play around a bit with some less than traditional ornaments starting with the brass horns that I purchased at a garage sale last summer.

I borrowed this idea from my friend Amy who creates the most amazing Christmas trees.  I simply tucked them in place throughout the tree.

Another unique addition was this old framed black & white photo of my mom.

Quite a few of my vintage ornaments made it onto the tree as long as they were silver or gold.

The sleds were added as well.

Well, that’s a wrap on the holiday season.  I hope you enjoyed seeing the projects that didn’t make the cut today.  Once my social calendar slows down a bit, I hope to get back to painting more furniture.  First I have to find some though, so I’m off to Facebook Marketplace to see what I can find!

Thank you to Dixie Belle Paint Co and re.design with prima marketing for providing the products used for some of these projects.