perfectly sweet armoire.

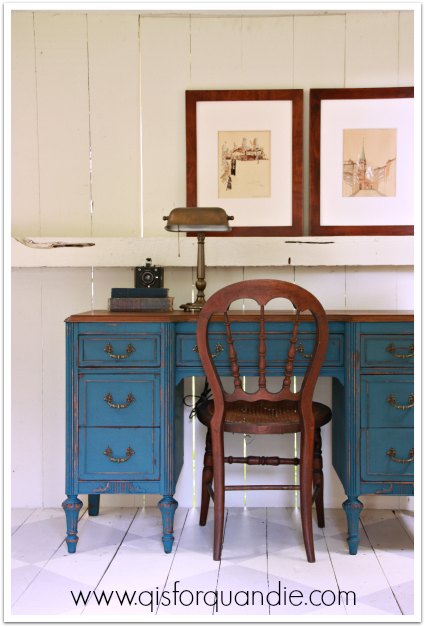
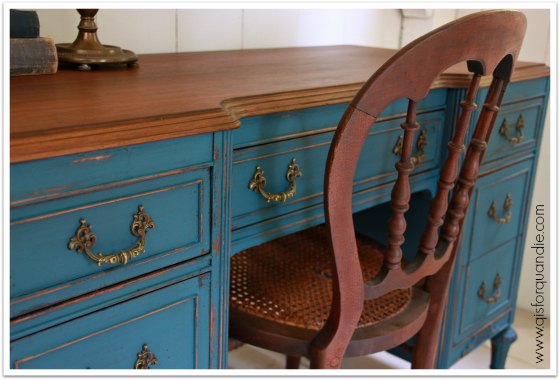
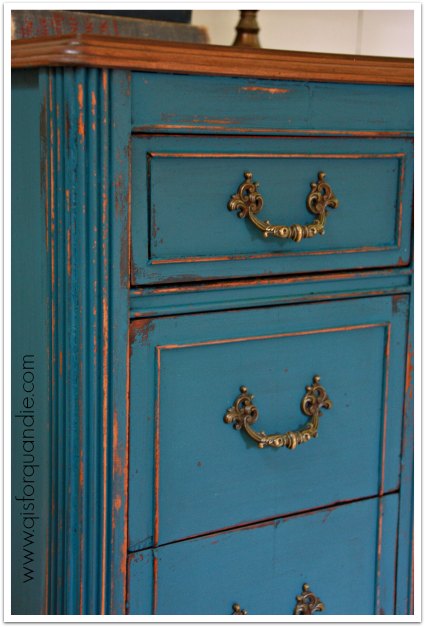
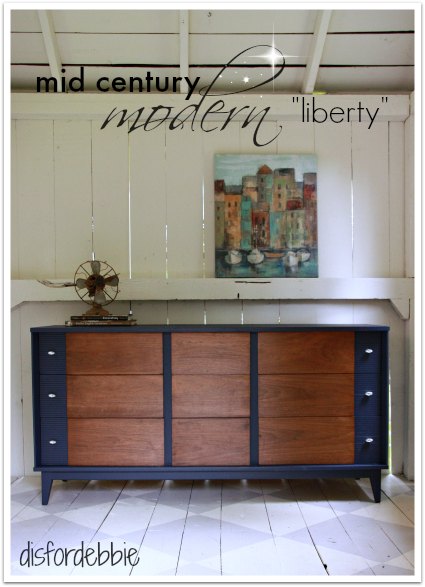
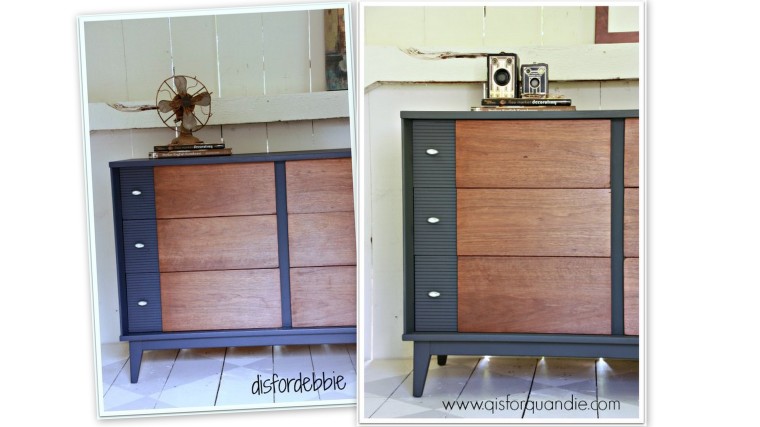
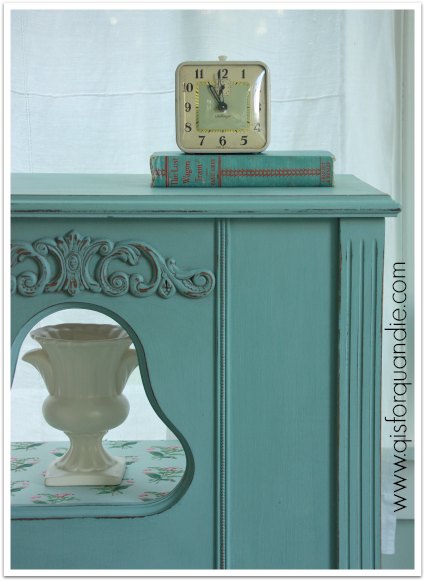
I’ve been using a lot of blue lately, both in my own home and in pieces I paint to sell.  I love blue, and blue is hot right now.  But there is still a warm place in my heart for green.

armoire staging

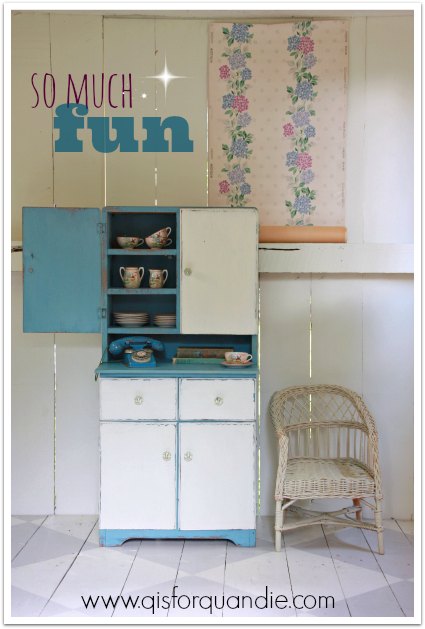
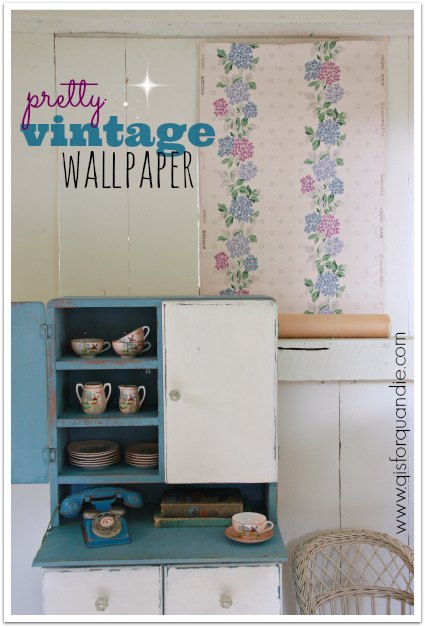
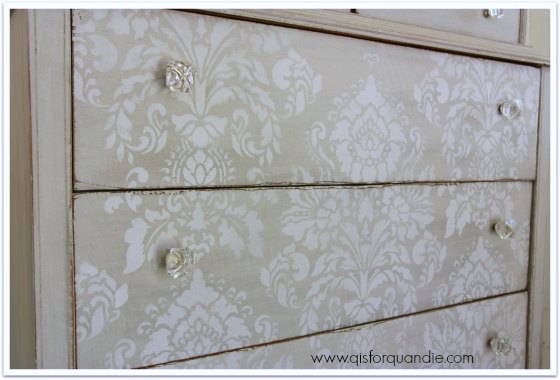
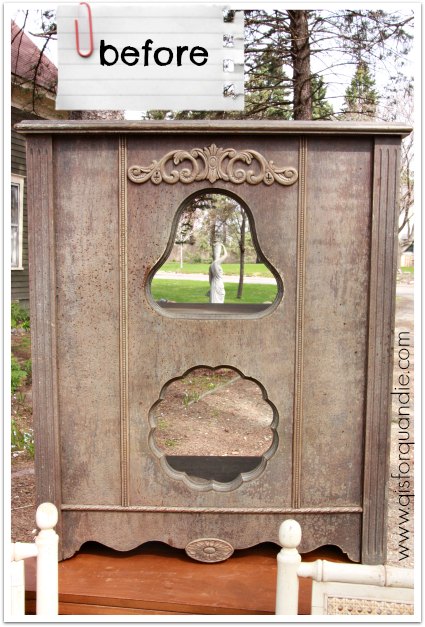
When Mr. Q brought home this charming pint sized armoire, I knew I wanted to put some vintage wallpaper on the door.

armoire before

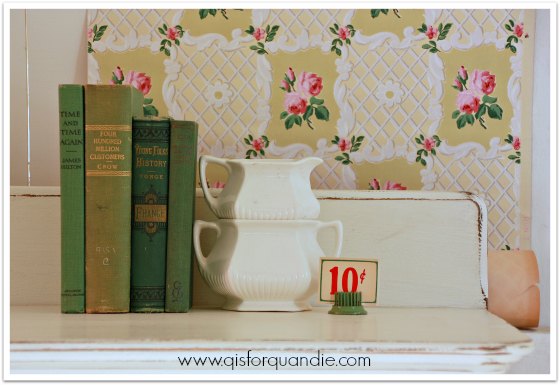
I didn’t have a piece that was large enough, so that is what prompted me to place an order from Hannah’s Treasures on Etsy recently.  I debated going with a more distinctly juvenile pattern, but in the end I thought I would do something just a little more versatile.  This armoire would be perfectly sweet for a baby girl’s nursery, but could also grow with her into her teens.

armoire 1

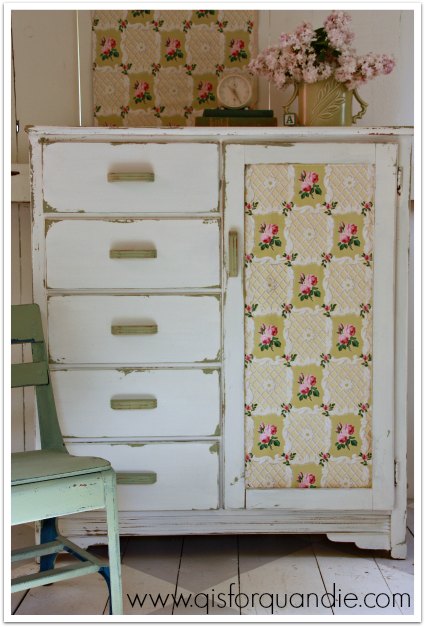
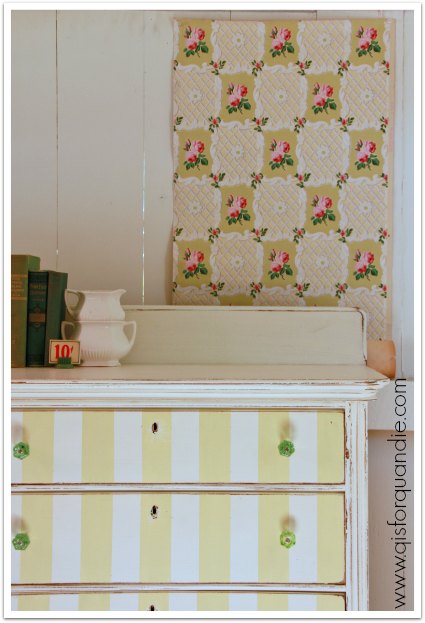
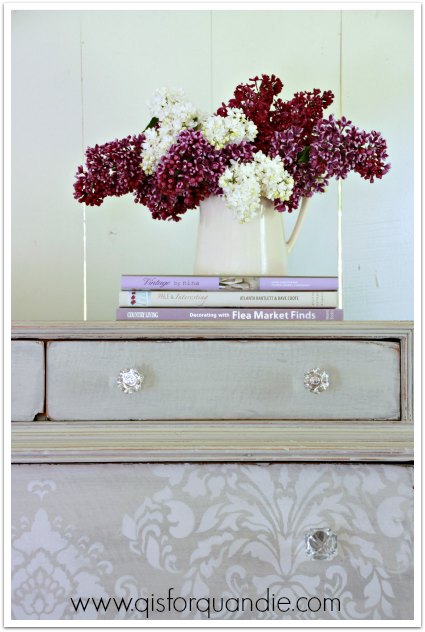
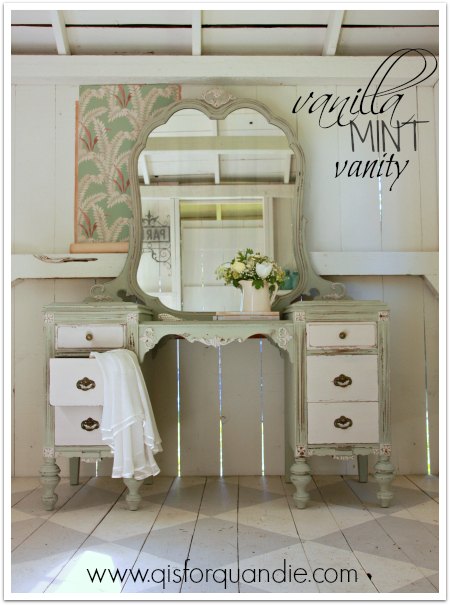
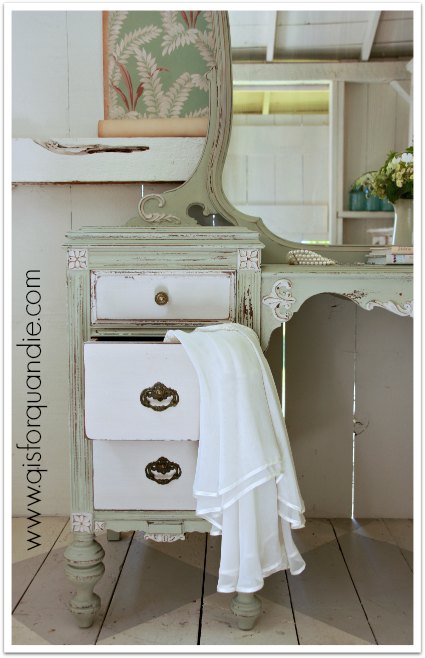
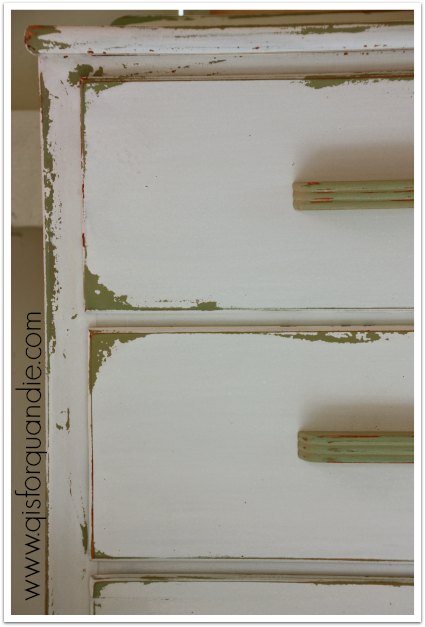
I added a two color paint job to match the wallpaper.  The entire armoire was first painted in MMS Luckett’s Green milk paint, and then all but the knobs got two coats of Linen.  This time I tried a Vaseline resist (adding a little Vaseline to spots you want to distress after painting the undercoat) and it worked fantastically well.

armoire closeup

When this piece first came to me, it needed to have the back and the bottom replaced.  It had gotten some water damage at some point.  So Ken replaced both.  Now the inside is practically all new, so I didn’t paint it.

armoire 3

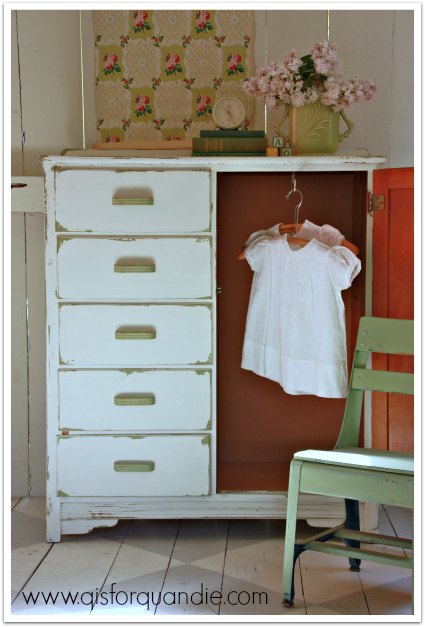
It has a sweet little slide out bar for hanging tiny clothes like these gorgeous handmade baby dresses.

baby dresses

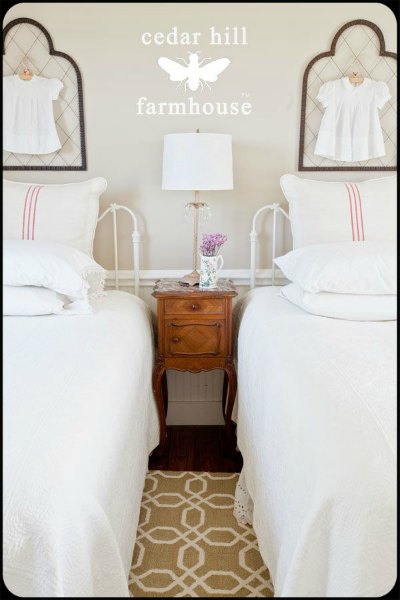
My Carriage House sale co-host, Sue, has a stash of these beautiful dresses and they will be for sale at the Carriage House sale ($10 each).  The hand stitching on these is a work of art.  I think they would be lovely hung on a wall in a child’s room, like this pin from Cedar Hill Farmhouse.

cedar hill farmhouse

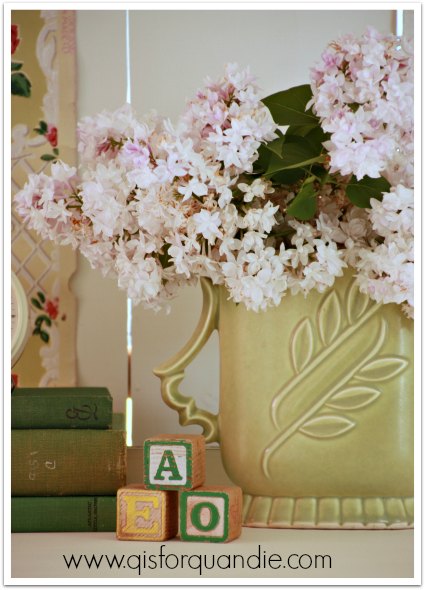
I also staged the armoire with the last of the lilacs.  They go so fast.  I wish they lasted longer.

armoire lilacs

What do you think?  Didn’t it turn out perfectly sweet?

perfectly sweet armoire painted in MMS milk paint.

This armoire is for sale at $245.  If you are interested in it, or in the baby dresses, leave a comment or email me at oakdalecarriagehouse@gmail.com.

And in case you are wondering how I managed to crank out all of these pieces lately, I have to mention that I took a couple of days off at the day job last week.  I’ve got just a couple more to finish up before the Carriage House sale, which takes place on Thursday, June 11 from 5 pm to 7 pm and Friday, June 12 from 9 am to 2 pm.

Linking up with Finding Silver Pennies.

bohemian rhapsody.

I’ve been seeing a lot of bohemian style out there lately, how about you?  Apartment Therapy has this to say about bohemian style:  A true Bohemian room should look like it’s been furnished over decades of globetrotting and a lifetime of creative scavenging and upcycling.  Follow the link to read their full article, but I’ll emphasis point no. 3, if you’re lucky enough to have actual furniture, it should be distressed.  Amen to that!

I was feeling decidedly bohemian when I decided to go with a distressed saturated blue on this desk.

Desk painted in MMS Flow Blue milk paint

But let’s start at the beginning, shall we?

Mr. Q and I picked this desk up a while back.  It was another craigslist buy.

desk before

It’s gorgeous, but up close it had some issues.  There is some trim missing on one of the drawers, and there are a few nicks and chips in the veneer.  There was even this big chunk of veneer missing on the side, and it appears as though someone attempted to sand the rough edges, doing a lot more damage in the process.

desk side patch

You get the idea, it is a lovely piece, but a good candidate for painting because of some damage.

The desk sat patiently waiting for inspiration to strike.  I had a couple of plans for it that got scrapped.  One involved leaving the drawer fronts in the original finish and just painting the body of the desk.  Another was to go black.  But then the idea of bright blue stuck.  To balance the bright blue color, I decided to leave the top unpainted.  I stripped it, then used Varathane’s Dark Walnut gel stain on it.  This desktop is a walnut veneer by the way.  I finished with a Wipe on Poly with a satin finish. The top is now really lovely.

Desk painted in MMS Flow Blue.

Isn’t the original hardware on this one pretty?  I didn’t do anything to it, just put it right back on.

As for the paint job, this is the same technique I used on my own Rooster cupboard.  I painted a base coat of MMS milk paint in Artissimo.  Then I added two coats of MMS Flow Blue.  This one is finished with hemp oil though (I used dark wax on my cupboard).

You can see some hints of the darker Artissimo in spots.

desk close up

One of the prettiest details on this desk is this little bit at the bottom.

desk details

And the legs are quite lovely as well.

So what do you think?  Bohemian, yea or nay?

bohemian rhapsody

 This desk is for sale for $225.  If interested, feel free to email me at oakdalecarriagehouse@gmail.com.

dueling bureaus.

A while back my number one craigslist spotter, nnK, forwarded an ad to me for two ‘bureaus’.  We’re pretty sure that these didn’t get snatched up more quickly because they were only called ‘bureaus’.  The ad said nothing about ‘dressers’, or ‘chest of drawers’, or ‘credenza’, or ‘midcentury modern’.  If any of those keywords had been used, I’m sure these would have been long gone.  But I don’t think there are too many people out there searching for ‘bureaus’ these days.

As happy as I was to get the opportunity to make these mine, some serious sweat equity went into acquiring them.  We had to call in the big guns.  Mr. Q’s friend Gene that is.  He is the guy we call when there is going to be some heavy lifting.  In this case, these two bureaus were in the attic of a typical 1940’s style bungalow.  In other words, up a very narrow staircase with a turn at the top.  Yikes!  The seller had been sure to tell me that I had to bring my own manpower to get them out of there, so I did.  Mr. Q and his friend were real troopers getting these babies into the truck!

MCM before 1

I only took a ‘before’ shot of one, but I have two and they are identical.  I’m fairly certain that the owner of these bought them new, tucked them up in the finished attic and has used them for storage for 50 years or so.  She mentioned that she had lived in the house since the 60’s.  They weren’t in terrible shape, but slightly beat up from years of use.  The finish was also very dried out.

MCM before close up 2

I had actually been hanging onto this pair until my sister got here.  Why?  I decided to play dueling bureaus with her (insert music here)!  Since she is living with me for two months until her new apartment is ready, I decided to put her to work as my apprentice.  Her first assignment was to work side by side with me, with each of us making over one of these.  I let her pick her own colors, and I picked mine.  I decided we should work in Fusion paint because it is the easiest to use, and no topcoat is required!

To begin with, we stripped the flat raised fronts of our drawers.  Once stripped, we sanded them lightly and then used Varathane’s Dark Walnut gel stain on them.  Once dry, we each added two coats of  Minwax Wipe on Poly in satin.  Then, after sanding the rest of the piece lightly, Debbie painted hers in Liberty and I painted mine in Ash.

Here is the Ash.

MCM ash title

 Doesn’t the wood just look so much richer in this darker stain?

And here is the Liberty.

MCM dresser painted in Fusion's "Liberty"

Now, I have to tell you, my sister has never done this before!  She’s never stripped or painted furniture.  Ever.  And she did this.  All by herself.  Granted, I showed her the ropes and gave her some tips along the way.  Still, if she can do it, so can you!  So if you are someone who has been reading my blog for a while and thinking about trying some furniture refinishing on your own, dive in!  As Nike says, just do it!

MCM collage

Debbie is very proud of her first furniture makeover ever!  She is well on her way to finishing her next project, her $10 table and benches, so stay tuned to see those soon.

debbie with MCM

all good things come to an end.

I hate to be the bearer of bad news, but for those of you who are local and haven’t already heard, Round Barn Potting Co. in Andover will be closing its doors at the end of June.  As they say, all good things come to an end.  As you may know, I have sold furniture (as well as other small things) there on consignment for several years.  I also taught a couple of Miss Mustard Seed milk paint workshops up there.  Lori (Round Barn’s owner) and I also partnered a booth at Junk Bonanza last year, and we attended Miss Mustard Seed retailer training together in Madison.

Round Barn Potting Co. has always been one of my favorite places to shop.  She has such a unique selection of both vintage and new merchandise.  And of course, I’ve been buying my milk paint there since she started to carry it.  It will be a sad day when Lori closes her doors for good.

Lori will be having 4 sales in June to sell off the entire contents of the shop.  On June 4th she’ll begin with 50% off everything in the place!

green books and wallpaper

Since everything in the store will be drastically reduced in the coming month, I needed to bring the last two pieces of furniture that I had up there home again.  The first piece is this striped dresser that I painted before I even started this blog.

cottage stripes title

This piece has such cottage style.  I can also easily see it in a cozy farmhouse bedroom under the eaves.

cottage stripes close up

I painted this with homemade chalk paint back in the days before I had tried the real thing, and long before I tried milk paint.  I replaced the hardware with some pretty green glass knobs.

cottage stripes close up

The second piece I brought home is this mirrored dresser with wallpapered drawer fronts.

vintage wallpaper dresser full

I did this one last fall.  It’s painted with MMS milk paint in Eulalie’s Sky.  I have to say that the wallpaper has held up remarkably well.

vintage wallpaper title

These pieces are still for sale, and if they don’t sell sooner, they will find a place at my Carriage House sale.

But meanwhile, I hope that if you are local you can find the time to head up to Andover to get in one last visit to the Round Barn before it closes.  They will be open every Thursday thru Saturday in June from 10 am to 5 pm.  Stop up and say farewell.  And maybe stock up on Miss Mustard Seed products while they last!

so much fun.

The other day one of my co-workers came to my office, pulled up a photo on her phone and said “would you by any chance want this?”

little cabinet before

Um, yes!  Definitely.  The price was right and I jumped on it.  In case you can’t tell from the photo, this little guy is about 44″ tall.  Meant for a child’s play house I think.

I suspect it was homemade by some dad or grandpa for a lucky little girl.  The wood on the back looks like it was scrap from the packaging for a refrigerator.

The wood on the front isn’t especially pretty, but I knew that some milk paint would give it some instant vintage charm.

I gave this piece a many layered paint job.  I started with a layer of MMS French Enamel, then added a layer of Luckett’s Green, then a layer of Linen on the doors and drawer fronts, and another layer of French Enamel on the body.  My intention was to add some faux age as though this little cupboard had been painted multiple times in its life.  And here is how it turned out.

little cabinet 1

Just imagine how much fun it would be to play with this little cabinet!  Now you can see why I was so excited to find that little vintage tea set at the Linden Hills sales.  I knew it would be perfect for this piece.

cupboard with china

vintage china close up

I lined the drawers with some October Afternoon paper with a rocket theme.  Not so girly, true, but still fun.

vintage toy phone

I recently ordered some more vintage wallpaper from Hannah’s Treasures on Etsy.  I just can’t help myself when it comes to this stuff.  I love using it in the background when staging my photos.  Please note, I am not compensated in any way by Hannah’s Treasures, I’m just sharing it because I love it.  Also, FYI, she ships it so quickly and safely.  This stuff is a bit delicate, after all it is 70 year old paper.  But it always arrives in good condition.  I ordered another pattern that I will be using on a piece of furniture coming up soon.

vintage wallpaper

As much as I love this little cupboard, I really can’t use it anywhere in my own home.  It is for sale at $95, dishes included (but not the fabulous phone)!

vintage cupboard

If no one snatches it up after seeing it here, it will likely be at the Carriage House sale!


damask stencil redux.

Mr. Q recently brought home another tall dresser from craigslist, and once again I neglected to take my own ‘before’ shot so I am using the photo that accompanied the ad.

tall dresser before

It wasn’t really terribly special, and the hardware was quite Ugly with a capital “U”.

I knew I could dress this one up with some stenciling though.  I decided to revisit an overall damask stencil like I did last year on this piece.

stenciled dresser

I wanted to keep it just a tad more subtle this time though.

I started by painting the dresser in one of the MMS European colors, Schloss.  It still had a rather streaky look after coat no. 2, so three coats were needed on this one.  It’s a bit lighter than the Trophy that I used last year, and really even a bit lighter than I expected it to be.  But that’s not a bad thing, I really like how pale it is.

Once the three coats of Schloss were on, I stenciled the damask pattern using a lighter grey acrylic craft paint, Martha Stewart’s Lake Fog.

damask dresser title

I sanded and then finished with a coat of MMS furniture wax.  One thing to keep in mind when using an acrylic paint on top of a milk paint, the clear wax will darken up the milk paint but not the acrylic paint.  Before the wax went on, it was almost hard to even see the damask pattern on the drawers.  The wax darkened up the milk paint background just enough to bring out the stencil.  I love the sort of faded quality I got this time.

damask angle

You can see that I used pretty cut glass knobs that add a little touch of sparkle but don’t compete with the stencil.

This dresser had a lot of damage to the veneer around all of the edges of the drawers.  I decided to just work with that and consider it part of the character.

damask close up

The Schloss is a very warm grey.

damask leg

My lilac blossoms opened just in time for the photo shoot!

lilacs

The combination of the purple flowers and this pale grey is gorgeous.

damask with lilacs

But this shade of grey would work equally well with blue, or in an all white room.

Stenciled dresser painted in MMS milk paint in Schloss

This dresser is for sale for $225, let me know if you are interested by leaving a comment or emailing me at oakdalecarriagehouse@gmail.com.  Sorry, this one is sold.

Linking up with Elizabeth & Co. and The Painted Drawer.

upcycled radio cabinet.

Remember the gutted, legless radio cabinet that I snagged at the White Bear Lake Trash to Treasure Day?

the freebies

It’s sitting on top of the sewing table at the back.  Here is a close up.

radio cabinet before

It is not made out of a pretty wood.  And the carved details look like they were added later to me.  The finish has an odd appearance.  All of which make it a great candidate for paint.

I just happened to have a few legs lying around, so I asked Ken to attach them for me.  I only had two of the prettier legs, so those went on the front, and two plain tapered legs were cut down to go on the back.

radio cabinet legs

The legs looked really out of place at first, but I knew that painting them would tie everything together.

I decided to dig out one of my old favorites for this piece, Annie Sloan chalk paint in Duck Egg.

radio cabinet close up

You just can’t go wrong with the Duck Egg.  I painted two coats, distressed with sand paper, and then added MMS furniture wax.

I added the last bit of my favorite vintage wallpaper to the shelves inside.

radio cabinet inside

I opted to leave the cabinet backless.  That way one could potentially pull it away from the wall to put larger items inside for display, such as folded up quilts, or a stack of larger books or magazines.  I think this piece would work great as a nightstand, or maybe in a foyer as a place to drop the mail and your keys.

Radio cabinet painted in Annie Sloan Duck Egg

Not bad for a freebie, right?  And I am passing on the savings and selling this piece for a mere $55.  Ooops, sorry you missed it, this one is sold.

vanilla mint vanity.

Remember the gorgeous set of furniture I picked up last year?  The dresser and bed were intended for a custom client who had been looking for just the right pieces for a while.

2014 early summer blog

The pieces came as part of a set that also included a vanity and the seller didn’t want to break them up so I purchased all three.  The vanity has been waiting patiently out in the carriage house for a makeover ever since and I finally got to it last weekend.

Here is the winter-y ‘before’.

vanity before

The vanity was in worse shape than the other two pieces.  If you look closely, you can see that the lowest round part of the leg on the far right of the photo was broken off.  There were actually 4 of these round sections broken off of the various feet.  Ken helped me glue them back on.  In addition, the veneer inside the knee hole was badly damaged on one side.  The drawer fronts also had quite a bit of veneer damage.  In other words, this piece was an excellent candidate for a paint job.

I took my inspiration for the color scheme from this beautiful nightstand that was painted by Dana at circadee.

circadee nightstand

Isn’t it gorgeous?  It’s painted in MMS milk paint in two of the new European colors, Layla’s Mint and Marzipan.  Fortunately, I had just stocked up on those two colors up at the Round Barn.

Here is my finished result.

vanity title

My Layla’s Mint looks a little more green than the inspiration piece, but I still love how it turned out.  I highlighted the details on the piece in Marzipan, which is sort of an almond color.

vanity mirror closeup

I got a lot of great chipping too.

vanity close up

MMS Layla's Mint and Marzipan

The hardware that came with this piece is lovely.  I debated adding some rub n’ buff in gold like Dana did on her nightstand, but in the end I just cleaned mine up and waxed them with the MMS furniture wax.  I took a side by side pic so you could see the difference a little clear wax makes.

vanity hardware

I always love keeping original hardware whenever possible.  It just works so much better than the new stuff.  Let me take a moment to tell you about escutcheon pins.  Are you familiar?  They are the little bitty nails that hold a drawer pull like this one in place and keep it from spinning around.  You can see the little hole for the escutcheon pin on this one at that little point just below that center detail.  See it?  Often times these pins are missing on old furniture.  You can then usually see damage around the drawer pull made by the pull spinning around.  You can see that on this dresser I brought home last winter.

riverside dresser before

See those circle shaped groves around the hardware?  People will try to tighten the screw to keep the pull from spinning, but really you need to just replace the pin.

But, back to our vanity.

Vanity painted in MMS Layla's Mint and Marzipan

I love the shape of the mirror on this one.  Very unique and lovely.

Vanity mirror

Wouldn’t this piece be absolutely lovely in your dressing room?  Not lucky enough to have a dressing room?  Then perhaps in your guest room, or maybe your daughter’s room?  This one is for sale.  Ooops, sorry  you missed it, this one is sold.

I’ll leave you with one last ‘before and after’.

2014 early summer blog1

french enamel dresser.

This dresser was another craigslist find spotted by nnK.  I really didn’t need to add to my stash of furniture to paint, but the look of this one really appealed to me.

blue sea before

Unfortunately, I once again forgot to get a ‘before’ picture of my own, so I am borrowing the picture the seller used in his craigslist ad (I hope he doesn’t mind).  This one wasn’t in terribly bad shape except for those drips of stain under the key holes.

I knew I wanted to strip the top, and I also wanted to keep the original drawer pulls.  That meant I needed to find a color that would work well with the wood tone, and with the brass pulls.  I also definitely wanted to go with milk paint on this one, it was calling out for a chippy finish to play up its age.  I also thought two layers of color would add to the whole effect.  So I dug out my stash of MMS milk paint to see what I had.

I started with a base coat of Shutter Gray.  If you’ve never used this color, I think its name can be a bit misleading.  If you are expecting a grey (especially after seeing the little color dot on the package), you might be surprised how blue it is.  I sanded the entire dresser by hand before I started painting (I also stripped the top first, always do this first, it’s a drippy process).  The finish was very dry, and since I wanted to get some chipping I didn’t do too much sanding.  I wiped the dresser down and then painted on a coat of the Shutter Gray.  Then I went and started some laundry.  When I came back to the dresser, I knew right away I was in trouble.  There was A LOT of chipping.  I went over it lightly with sanding block to knock off the loose paint, and this is what I ended up with.

blue sea chipping

Kind of a cool look, but not what I wanted.  Don’t panic if this happens to you, this can be easy to fix.  I just sanded it down much more thoroughly and added another coat of the Shutter Gray.  The second coat had much less chipping.  Here is how the same side of the dresser looks in the end after a 3rd coat of paint using my final color, French Enamel.

blue side

I did not use the bonding agent.  Just the extra sanding I did helped the paint adhere better.  I prefer doing this to using the bonding agent because you still get some chipping, just not an excessive amount.

Once the second coat of my base color, Shutter Gray, was dry, I used canning wax on the edges and around the key holes.  The idea was to get a resist there with my next color so the Shutter Gray would show through.  I followed up with just one coat of French Enamel.  The results were a little more subtle than I was hoping for.  Next time I’ll know to be more generous with the wax, or perhaps I’ll try Vaseline.

blue close up

I’d never used French Enamel before, although I’ve had this bag in my stash for ages.  Up until now I’d always passed it over in favor of some other color.  That was a mistake.  Now that I’ve actually used it, I know what I have been missing.  It’s gorgeous, a much more saturated blue than I was expecting.  I have to say, I had a really hard time capturing the true color in my photos.  I tried three different times of day to get the lighting just right.  I even tried setting a custom white balance on my camera, but I still got a million different variations of the color in my photos.  I really think this is a color that you just have to try for yourself and see in person.

french enamel dresser 2

I’m glad I kept the original hardware.  It has some great patina.

blue hardware

I staged it with flowers that were white and chartreuse.  Yes, those roses really are a pale green rather than white

blue staging

french enamel dresser 3

Does anyone need a vintage farmhouse dresser?  This one is for sale for $225.  Ooops, sorry you missed it, this one is sold.

the folding furniture with the permanent look.

A week or two ago one of my neighboring towns, White Bear Lake, hosted a Trash to Treasure Saturday.  They encouraged home owners to put anything they wanted to give away at the curb with a ‘free’ sign on it.  Then people were invited to drive around and load it up!

Well, you didn’t have to ask me and my friend Sue twice!  We were on it.  And we brought home a nice little haul of free stuff.

the freebies

This is what I got; two faux bamboo folding chairs with cane back seats, a gutted sewing machine table, a gutted radio cabinet with no legs, a tacky metal french flower bucket and a pair of vintage yellow Samsonites.  Total cash outlay = $0.

I’ve already given makeovers to the chairs.  But first, here is where we picked them up.

yellow chairs

Not terribly promising from a distance.  We almost drove right on by.  But the chairs caught my eye.  I grabbed two of them and was leaving the other two.  One was totally trashed and the other had some damage to the cane.  In the end Sue grabbed that one though, planning to do something about the cane.  I think it goes without saying that we passed on the old TV, plastic high chair and bad patio cushion.

Once I got the chairs home, the biggest task was removing the seriously tacky yellow vinyl from the seats.

yellow chair before

I’ve never seen so many staples!  I still have the blister I got pulling all of those out.  Next came a paint job.  I’ll admit I began with a brush and some Fusion paint, but in the end I threw in the towel and brought out the spray paint.  It was just too putzy to paint all of those spindles with a brush.

As for the seats, I cut some drop cloth fabric to fit and then painted on a faux grain sack stripe.

chair seat

This was made much easier by my newest find, super skinny tape!  I’d been looking for such a thing for a while and I finally found it at Menards (a local DIY store).

skinny tape

It’s made by Painter’s Mate and is .23″ wide.  Perfect for a faux grain sack stripe!

Aren’t these chairs a great combo of faux bamboo and cane?

chair back

And yes, you read that right earlier, these are folding chairs.  Stakmore, “the folding furniture with the permanent look.”

stakmore

folding chairs

I think they turned out smashing.  You could use them at a small dining table for two, at a desk, or even just keep them on hand as extra seating at parties.

chairs

They really aren’t trashy anymore!

I am selling these for $30 each if anyone is interested.