a chalk paint on vinyl update.

About this time last year I posted about a vinyl stool that I painted with chalk paint.  Remember that post?

stool title

At the time I promised to report back on how well the painted vinyl holds up over time, so here I am one year later checking back in with this chalk painted stool.

Here is how the painted stool looks today.

vinyl seat update

It has gotten a lot of use.  Not only do I sit on it while painting, but nnK (my neighbor across the street) likes to pop over to chat occasionally and when she does she often sits on this stool while I’m working.  She frequently comments on how well it has held up.

Keep in mind that I used this stool while painting, so it does have some paint drips on it now.  It also has gotten a little dirty.  So after taking the photo above I used a warm damp washcloth to scrub it clean, then I added a fresh coat of wax.

It’s good as new.

vinyl cleaned and waxed

I am nothing short of impressed at how well the chalk paint has held up on vinyl.  And nnK is so impressed that she brought me two similar stools to paint for her.  They both started out in this rather ugly color that she liked to call ‘baby poop brown’.

vinyl stool before

She wanted dark blue instead, so I went with the Little Billy Goat Prizewinner.  I cleaned the vinyl with TSP substitute, then painted two coats of Prizewinner.  Once dry, I waxed them with Miss Mustard Seed furniture wax.

Try to ignore that bit of pink reflection on the blue stool.  I should know better than to try and take photos anywhere near my red carriage house in the late afternoon.  The sunlight reflecting off the red always results in an unwanted pink glow.

blue stool

blue stools

So to recap, one year later, thumbs up on painting vinyl with chalk paint!

french wheat.

When we moved into our house nearly 30 years ago, the carriage house came with three built in workbenches.  Kind of overkill for us.  One of them sort of stuck out into the space in an awkward way.  Despite the fact that every winter I had to angle my car just so to fit it inside because of that one bench, a bench that I never used except as storage and display space for my sale, it never occurred to me that we could just rip it out.

Duh, right?

I can’t really explain it, but I tend to be guilty of this sort of blindness when it comes to the carriage house.  I just never think about the fact that I can alter it to suit my needs.

After the light bulb went off in my head about removing the bench, I had a second revelation.  I have ship lap behind that bench.  In fact that whole side of the carriage house has ship lap walls!

Huh?, you say.  How is it possible that she has ship lap and didn’t know it?  Must be the blonde hair, right?

Of course I knew what my walls looked like, but I’ve had these walls for nearly 30 years.  The ship lap revolution is fairly new, I’d never even heard of that term until I started watching Fixer Upper last year.  Apparently I had ship lap before Joanna Gaines made it cool.

Down came the work bench and up went some white paint.  And then it struck me that I had effectively removed a big chunk of shelving that had previously displayed quite a few of the ‘smalls’ at my sales, thus giving me a legitimate reason to do some craigslist surfing.  I needed a hutch of some kind to ‘replace’ the shelving for display, and preferably a piece that I could then sell leaving plenty of space in my carriage house for the car this winter.

It only took me a few minutes of searching before I found this amazing piece …

1902-hutch-before

It was located just a few miles away and the price was reasonable.  Really, I would have purchased this one even if I didn’t need a display piece for my sale.  In order to secure the purchase, I had to run over and buy it on my lunch hour then return later in the evening with Mr. Q and a truck to pick it up.

By the way, I have a little trick that I use when I do that.  Maybe you know this one already.  Here’s what you do, take a drawer with you after you pay for it.  I learned this tip from a friend who had a piece of furniture sold out from under her at a garage sale.  Even though she had paid for it, when she went back to pick it up later in the day it was gone.  If you take a drawer, it’s pretty hard for the seller to sell to someone else.

Anyway, I decided that Annie Sloan’s French Linen would be perfect for this hutch.  However, when I pulled out my can of paint I realized it was only about half full (or for you pessimists out there, it was half empty).  I knew I’d need more paint than that, so I improvised.  I pulled out a half can of Cece Caldwell’s Young Kansas Wheat and I mixed the two together to create a mostly full can of paint.

I tried to come up with a creative name for this color.  Young Kansas Linen?  French Kansas?  Young French Linen?  French Wheat?  Hmmm, that has a ring to it.  I googled French Wheat just to see if anything would come up only to discover that there are currently some serious problems with the wheat crops in France.  Who knew?  But I didn’t find any paint colors called French Wheat.

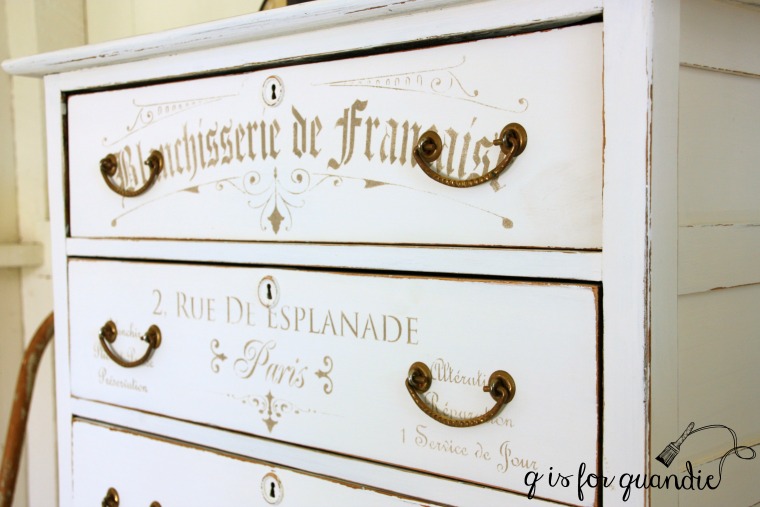
The color turned out lovely.  French Linen is a warm greige on its own and the Young Kansas Wheat is a warmer  beige-ier color.  Thus I give you French Wheat

french-wheat-hutch-1

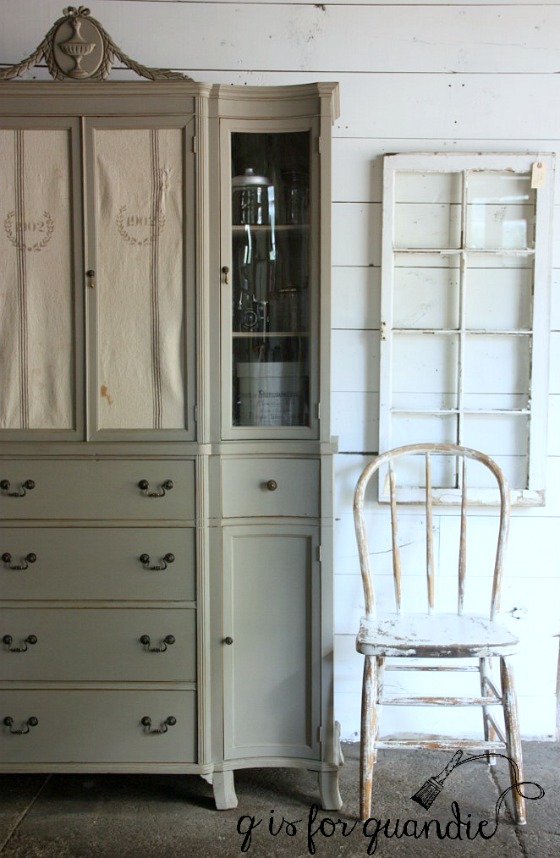
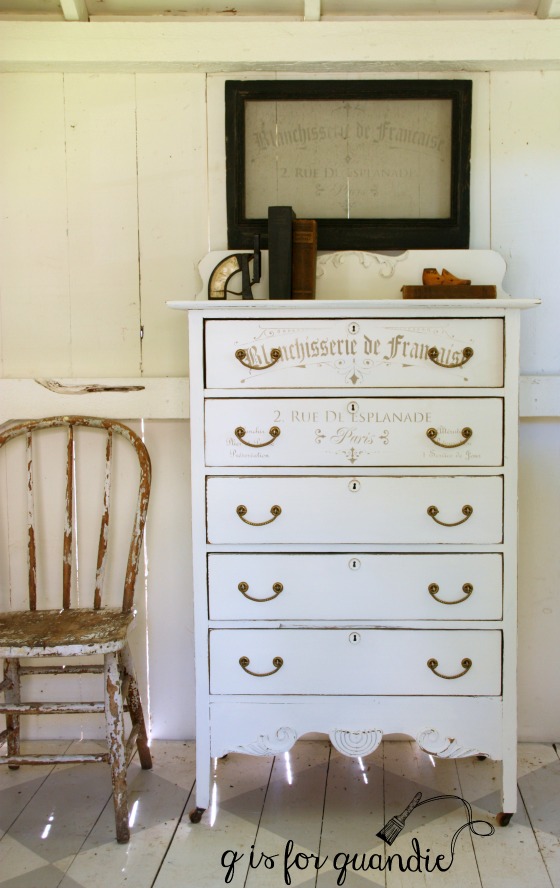
And there are those ship lap walls that are now white.  If I had better lighting in the carriage house, this might become my new photo staging area!

As it was, the lighting was a serious challenge and I’m not entirely happy with any of the photos I took.  But this is the best you’re going to get.  After moving this piece multiple times while working on it, I am totally not in the mood to try and move it somewhere with better lighting just for some photos.  It is seriously heavy and awkward to move.

french-wheat-hutch-angle

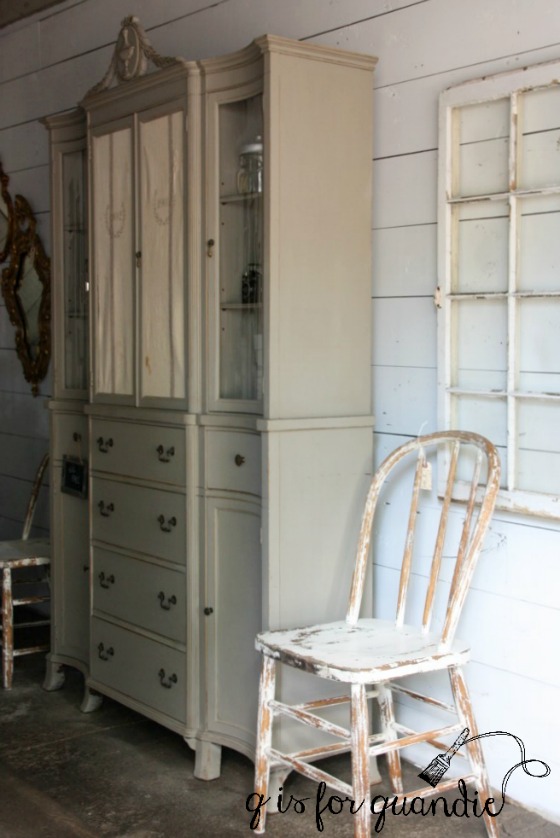
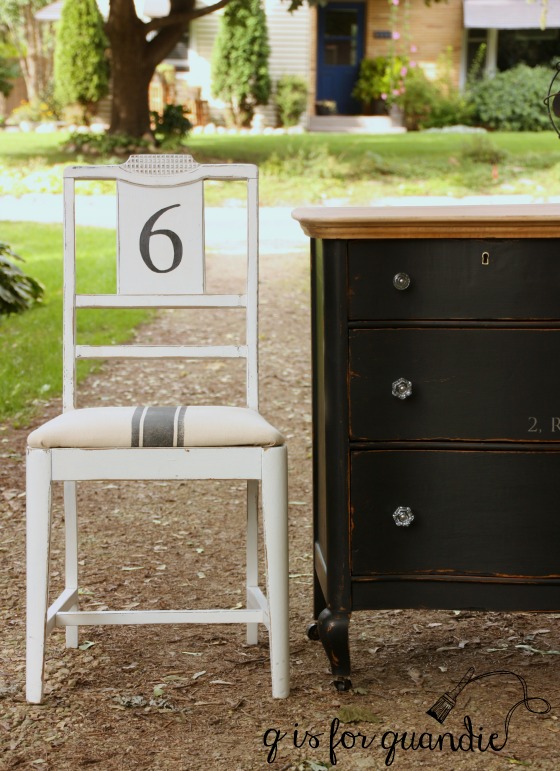
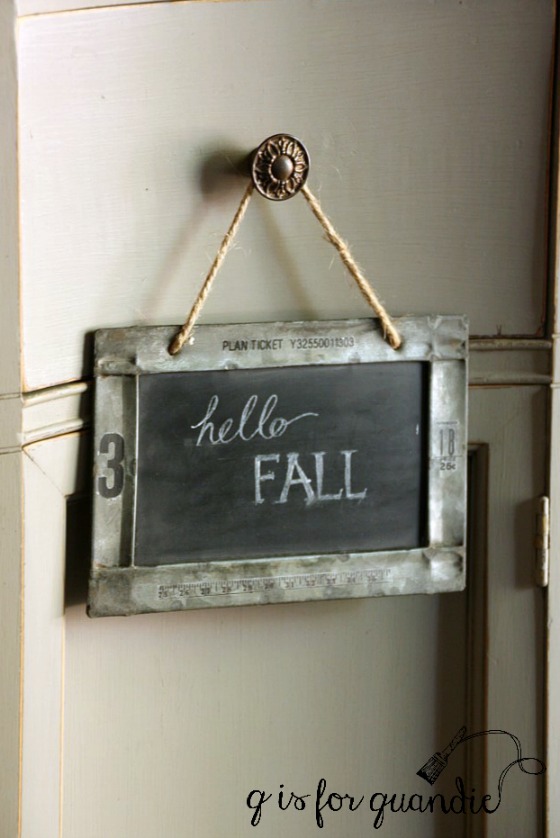
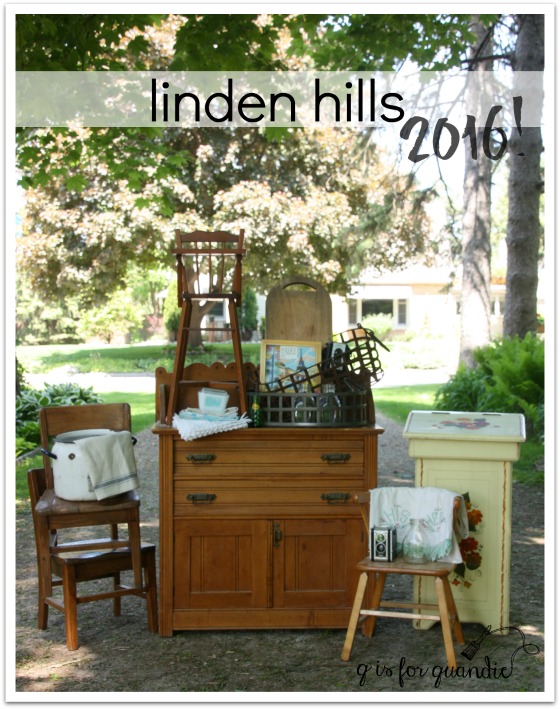
By the way, you are looking at the preliminary set up for the Carriage House sale here.  All of the items pictured are for sale; the chippy white chairs ($18) and windows, as well as this cute little chalkboard hanging from a knob.

french-wheat-chalkboard

Lucky thing I didn’t try to stretch my half can of French Linen, because I used every last drop of paint on this piece, so nearly a full quart sized can.  I did need two coats of paint to get good coverage.  And that was without painting the inside of the bottom section and the inside of the middle section.  These sorts of pieces can be deceiving.  There is a lot of painting when you’re doing the outside, plus the insides of two areas, plus shelves, plus the inside of the ‘secretary’ drawer.

Oh, didn’t I mention that this is technically a ‘secretary’ desk?  Yep, it is.

french-wheat-hutch-3

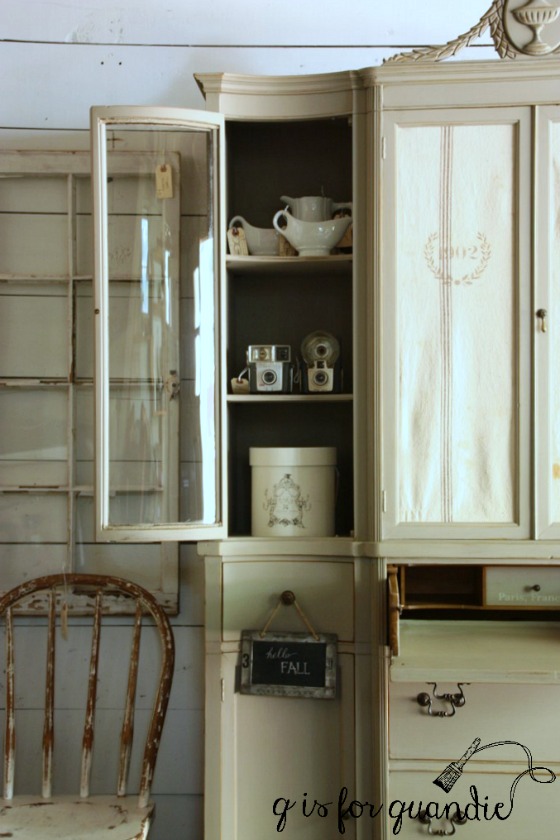
That upper middle drawer flips down and becomes the the writing surface and there is a little drawer and cubbyholes inside.

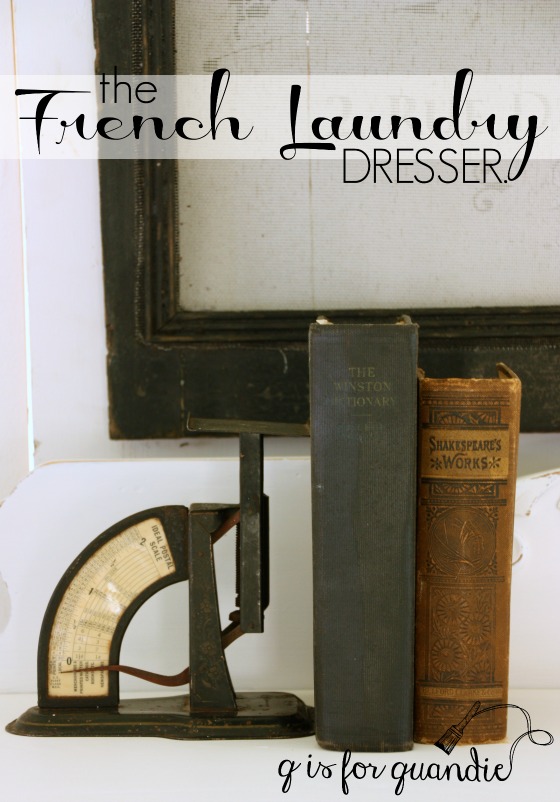
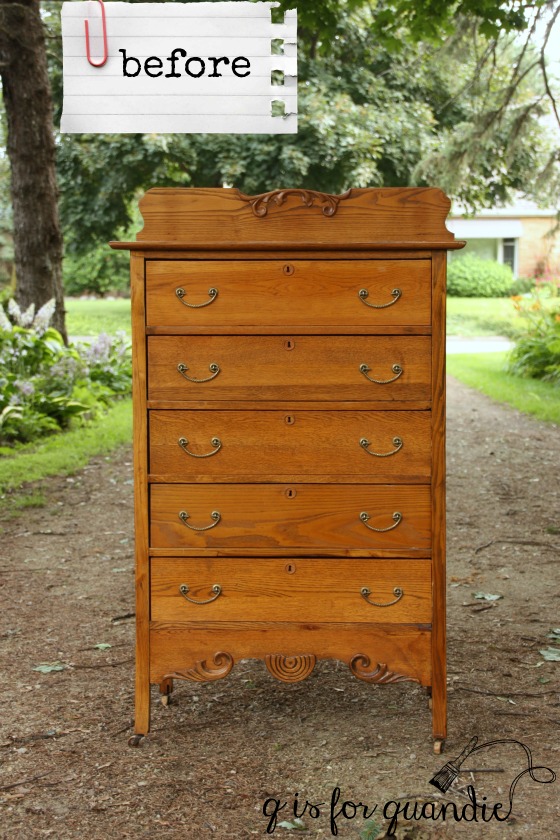
Let’s talk about the grain sack doors.  If you look back to the ‘before’ photo you can see that the two middle doors originally had a chicken-wire-ish metal mesh instead of glass.  It wasn’t terrible, but it also wasn’t great.  I tried painting it, but still didn’t much care for the look of it.  So instead I decided to go with grain sack inserts.

french-wheat-doors

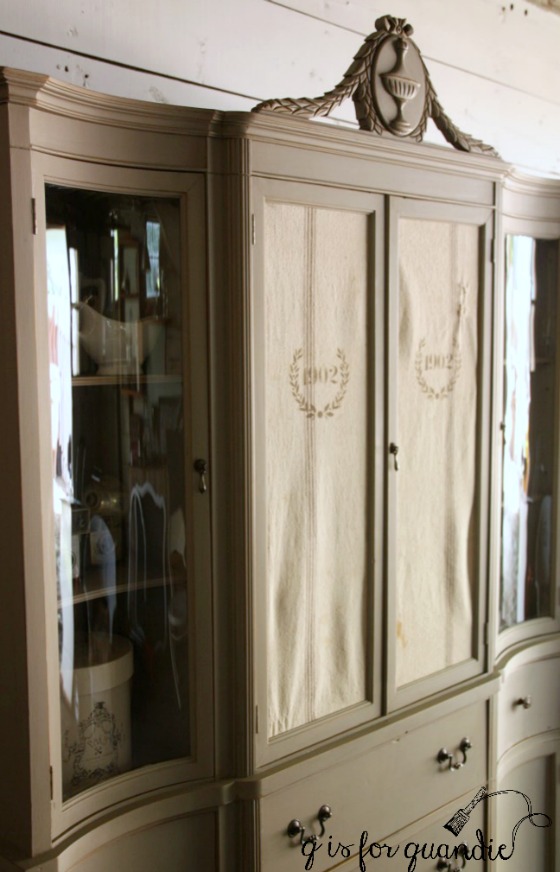
I am absolutely in love with this look.  I’ve done it a few times and I love it every time.

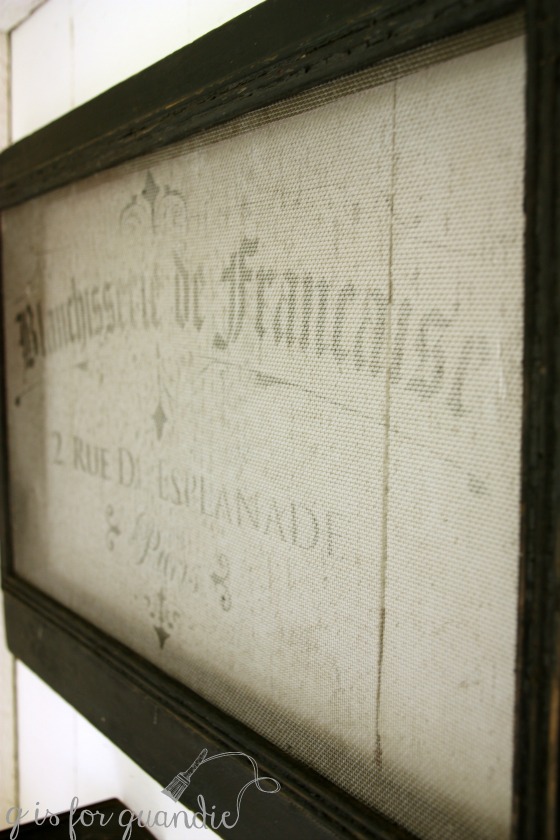
This time I used authentic grain sack, but still added the ‘1902’ stencil.  I think the mended spot is absolutely charming.

hutch-mended-grain-sack

If you aren’t a fan of things that show their age, you are probably reading the wrong blog … and I’m not necessarily referring to just the furniture.

I’m going to give up on trying to come up with a non-grainy, white balanced, clear photo of this hutch now and just leave you with this last picture …

french-wheat-hutch

And then remind you that you can see this French Wheat hutch in person at my upcoming Carriage House Sale if you live anywhere nearby.


the brook chair.

Fusion has new colors, Fusion has new colors!

I’m like a kid in a candy store with paint colors, and it’s even more fun when Fusion offers to send me some of their new colors to play around with.  Thank you Fusion!

They’ve arrived while I am in the thick of things prepping for my upcoming sale, but I couldn’t resist cracking one of them open and doing a quick makeover on this oak office chair that I picked up at the St. Anthony Park sales.

brook-chair-before

This chair was crying out for a make-over, but I almost didn’t buy it.  The car was pretty full, but I convinced my sister that I could cram it in and I went back for it.  I’m so glad that I did!  It’s super sturdy and it looks awesome with it’s new paint job.

brook-chair-1

This delicious color is called Brook and is part of the new Penny & Co. Collection.

penney-and-co

It took no time at all to paint two coats of paint on the chair and then distress the edges a little with sandpaper.

brook-facebook

Brook is the perfect color for my bedroom.

brook-chair-closeup

Although I originally planned to sell this chair, I think I’m gonna have to keep it for now.  Wouldn’t you agree?

If you’re a local, you can find Fusion paint at Salvaged with Style in Hudson.  They charge $19.95 for a pint and $5.95 for a sample sized jar.  They will be getting in the new colors by the end of next week or so.  I totally recommend checking them out!

short orders at all hours.

open-all-night

I tell you, there is nothing like an upcoming occasional sale to get me motivated to finish some pieces!

This is another one that has been cluttering up my workshop half finished for a good chunk of the summer.  I’ve mislead you with that first photo though, this is really just a little toy sized high chair.  I picked it up at the Linden Hills neighborhood sales back in May, you can see it sitting on top of the washstand in this photo …

linden hills 2016

I purposely bought it to showcase one of Fusion’s Tones for Tots colors, Little Teapot.

I painted one coat, and then it sat … and sat … and sat.  Finally last weekend I finished it up with a second coat of paint.

I can’t claim all of the credit on this one, my sister was over helping me get ready for my sale and she did the distressing.

high-chair-1

She did a great job, didn’t she?

Once it was all painted up, I wanted to add a little something to back rest so I pulled out my rub-on’s.  I thought I had some that were more kid-friendly but I couldn’t find any, then I realized that this Gerald’s Cafe rub-on from 7 Gypsies was kind of perfect.

high-chair-close-up
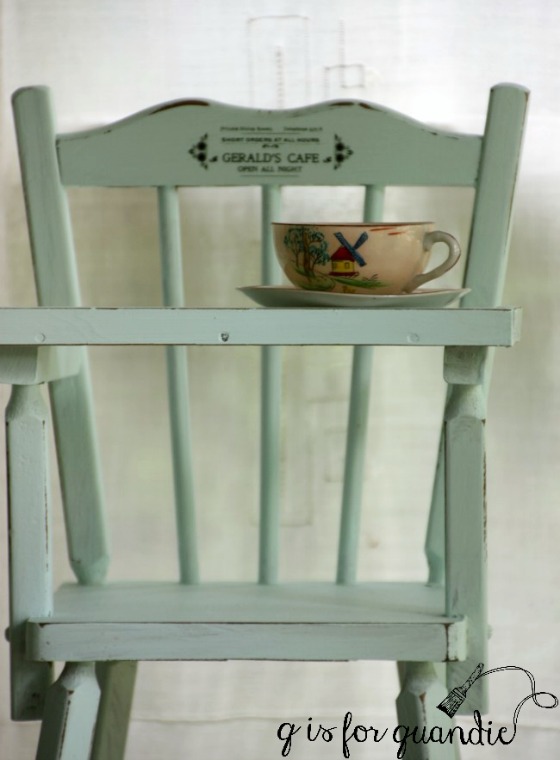
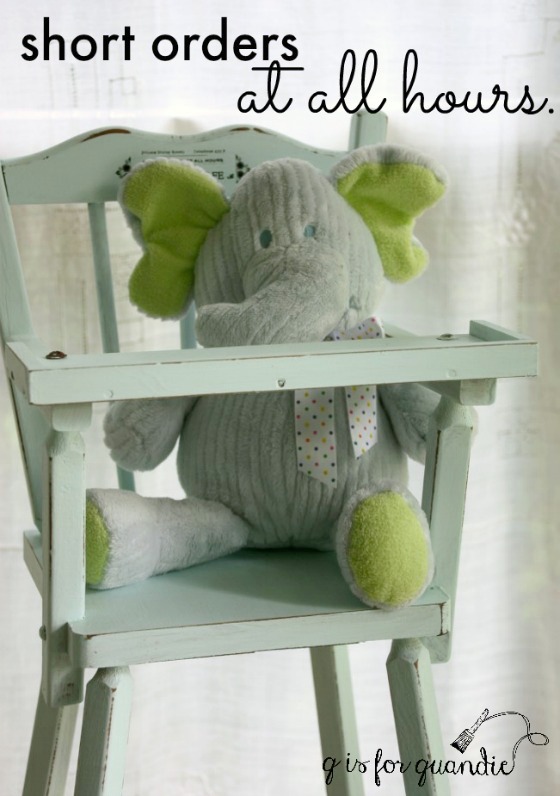
Now this sweet little high chair is the perfect spot for feeding Gerald the fuzzy elephant at all hours.

short-orders-title

Pretty adorable.

book page dresser no. 2

book-page-dresser-no-2

I brought this dresser home way, way, way back last winter.

book-page-before

At that time I was considering using it to demo the Rachel Ashwell paint that I was giving a test run.  But the RA people only sent me one color, and although I chose a very lovely pale blue, I didn’t feel like pale blue was right for this one.

So I tucked this dresser out of the way and went in another direction with the Rachel Ashwell paint.  Then come spring, I shoved it into a corner of the workshop and there it sat all summer.  The poor neglected thing.

I think I kept putting it off because it needed more work than average.

First, the legs needed to be re-glued.  I’m not sure if you can see what’s going on in this photo, but the front legs must have been made from two pieces of wood that were glued together, and they had come unglued.

book-page-leg-before

So I glued them back together again.

Next I attempted to re-glue this pretty trim back on the top drawer.

book-page-trim

 And that didn’t quite work.  The pieces were rather warped and wouldn’t lay flat, so in the end no amount of re-gluing would do the trick.  Denied.

Finally I wasn’t sure how I wanted to address the significant veneer issues on the top of this one.

book-page-veneer-problem

While you’re admiring that picture of the chipped veneer, also pay attention to all of that reddish looking staining.  Yep, I suspect that had I tried to paint this one a light color I would have ended up with bleed-thru.

You might be wondering at this point what exactly I was thinking when I purchased this dresser.  Trust me, I have been wondering the same.  I really overpaid for a piece with this many issues.  Live and learn.

So in order to save myself any further heartache over this piece, and in order to just get it done before my upcoming sale, I decided to paint it black to avoid stain bleed-thru issues, remove the decorative trim that wouldn’t stay glued and use my decoupaged book page method for the chipped veneer (I first used this method here).

book-page-half

If I’d had more time to futz with it, I think it would have been pretty painted a creamy white like the last book page dresser.  Maybe next time.

You may have noticed that I saved some gold details on those columns on either side of the dresser’s front.  The patina on that gold was really lovely, so I made sure to save it.

book-page-front

And I filled in the chipped veneer on the top with pages from an old Swedish bible.

book-page-decoupage

It was fun staging this piece simply with stacks of books including some of the books I painted and stenciled a couple of years ago.

books

And all in all, I think it turned out quite lovely.

book-page-dresser-no-2-full

If you are local and you’re coming to my sale on October 8, you can be the judge of that yourself!

the l.b.d.

black-dresser-title

Every girl should have at least one l.b.d. in her wardrobe.  They are so versatile.  I’d say the same can be said about this l.b.d, or little black dresser.

It can go anywhere, bedroom, foyer, dining room, kitchen, living room.

black-dresser-half

This particular l.b.d. came from my friend Sue’s sister.  I seem to have completely forgotten to take a before photo, but it’s your basic oak serpentine dresser.

I stripped the top and painted the rest in Little Billy Goat’s Old Pickup.  I waxed the body with black wax.  I really liked the contrast between the lighter top and the black paint, so I kept the top light by giving it a coat of clear wax followed by a coat of white wax.  So far nnK, Ken and Mr. Q have all made it clear (pardon the pun) that they are not on board with this decision, but I love it.  To me the wood top looks pickled or lime waxed.

black-dresser-top

I feel certain that there is going to be a buyer out there who loves this top as much as I do.

I believe at some point in its life someone hacked an inch or two off the feet of this piece.  It was obvious looking at the saw marks on the bottoms, and the dresser itself seemed a little stumpy.  So I added casters and that helped immensely.

 black-dresser-2

I used portions of two different stencils on the front.  I love the subtlety.  As usual, when I’m stenciling on black, I used acrylic paint in a dark grey shade.  It comes across as ‘white’ without being glaring.

black-dresser-angle

How do you like chair no. 6?  This chair used to be in my kitchen, but I replaced it with a blue chippy stool.  I’ve cleaned it up, re-glued its joints, recovered the seat and it’s in the pile for my upcoming sale.

chair-no-6

I have no idea why I chose to put a ‘6’ on the back.  I went through a number phase where lots of stuff got numbers added.  Six seemed like a good choice for this chair.

black-dresser-3

I have to say that if I had a need for a l.b.d. I would be keeping this one.  I absolutely love how it turned out.  But, alas, I already have a gorgeous l.b.d. in my guest room.  I really don’t need two.  This one is for sale.  Be sure to see my ‘available for local sale’ tab for more info.

mid mod mint.

One of the fun things about my little furniture restyling hobby is that friends and family tend to offer me their cast off furniture.  Often it’s either me or the Goodwill (or possibly the dumpster as my friend Terri mentioned with the Parisian table).

You’d think that ‘free’ pieces are always good, but that’s not necessarily the case.  In the past I’ve taken on free furniture and wound up spending far more time on a piece than it’s worth.  Time is the one commodity that I can not get more of so I tend to be a bit stingy with mine.

So way back last winter when my friend Nan asked me if I wanted this mid-century modern blonde dresser I hesitated a little.  It’s doesn’t look too bad from this angle …

mcm-mint-before

But here’s what the top and sides looked like …

mcm-wallpapered

Yikes!  Leopard print wallpaper!

I wasn’t sure how hard it was going to be to remove that stuff.  But I decided to take it home anyway.  And that lead to a lot of procrastination on my part.  Like about 9 months of procrastination.  It’s a big piece and it was taking up a huge chunk of floor space in my workshop, but yet it just sat there all summer.

I was determined to get it done during my recent stay-cation and yet even so, I put it off until the last two days.  It may not even have gotten done then, except I pulled the old Tom Sawyer ‘painting the fence’ trick.  You know that one, right?  You convince people that the work you’re doing is so much fun that they just have to join in.

Mr. Q and I pulled the dresser out into the yard and then I coerced my sister into helping me strip off that wallpaper.  Once she and I got started, nnK and Ken’s wife Arlene both came over.  Once they saw how much fun we were having, they were drawn in as well.  Soon all 4 of us were attacking that wallpaper.  We had it off in no time!  We found that just getting the paper wet and then using a scraper did the trick.  It came off in small pieces, but eventually we got it all off.

Once we had the wallpaper off, it was a simple job to sand the dresser down a bit and paint it.  Sort of.

mcm-mint-half

I started with the gorgeous mint color on the body of the dresser and the two outer columns of drawers.  This is Dixie Belle’s Mint Julep, by the way.

Then I ran into some trouble on that center column of drawers that I painted in Annie Sloans’ Old White.  The finish bled through the white.  A lot.  But, no worries, I added a coat of Rachel Ashwell Clear Primer and tried again.  That did the trick.

I thought it was a bit odd that the finish only bled through the white paint, and not the mint.  Sure enough, when I inspected more closely I found that there were just a couple of small bleed thru spots on the top of the dresser too, so I handled the top in the same way.  A coat of clear primer followed by another coat of Mint Julep.

mcm-mint-top

I finished with Annie Sloan clear wax.  I chose that brand of wax because once buffed it has a little more sheen than some of the others.  I like a little more shine on mid mod pieces.

Since my sister was still hanging out after we got the wallpaper off, she also helped me polish up the drawer pulls with some Brasso.  They cleaned up quite nicely.

mcm-mint-corner

I love being able to retain the original hardware on mid-century pieces especially.  They usually add so much character and this dresser was no exception.

mid-mod-mint

I think this piece would work beautifully in a nursery.  It’s a great height to function as a changing table, it has tons of storage and it can be transitioned into a dresser down the road.  Check out my ‘available for local sale’ tab for more info if you’re in the market for some mid mod mint.

The clean lines of mid-century pieces appeal to me more and more these days.  How about you?  Mid-century modern, yes or no?

the french laundry dresser.

french-laundry-title

My stay-cation week off from the day job went by really quickly, isn’t that always the case?  And I didn’t get nearly as many projects done as I’d hoped I would.  Of course.

But in addition to lots of little things, I did get a couple of bigger pieces of furniture finished including a lovely vintage dresser.  You may remember seeing the ‘before’ of this one a while back.

tall oak before

It had that orangey oak-y finish.  I have to say, this one had me a little stumped.  I kept looking at it out in my workshop and not feeling any inspiration.  Finally I decided I wanted to give it a farmhouse look, something old and chippy.  I mixed up some Miss Mustard Seed milk paint in Farmhouse White and I started painting.  The first coat didn’t cover well at all, but that’s to be expected with white milk paint.  The second coat wasn’t much better.  Not a good sign.  By the third coat, the coverage was still not up to my standards.  Plus, I wasn’t getting any chipping at all.  Argh!

I’ve learned that sometimes it’s better to just cut my losses, so that’s what I did.  I got out the Fusion paint instead.  I had a little bit of Limestone (a warm creamy white) left in a jar, so I supplemented it with some Casement (a brighter crisp white) just to be sure I’d have enough.  And then one coat did the trick.  Now to be fair, I’m sure I would have needed two coats if I didn’t already have a base of white milk paint.

Still … once painted I didn’t have to wax or add a top coat (my favorite thing about the Fusion paint).

french-laundry-close-up

After the paint dried, I added this gorgeous French Laundry stencil using acrylic craft paint in a nice greige sort of color.  I wanted to keep it subtle.

french-laundry-stencil

I think this is one of the prettiest stencils I have, and it added just the little bit of extra something that this dresser needed.

french-laundry-dresser

Did you notice the screen hanging above the dresser?

stenciled-screen

I’ve always been fond of a pop of black in an otherwise mostly white space.  I even have a pinterest board devoted to the idea (here).  I didn’t intend for the screen to go with this dresser (otherwise I wouldn’t have used them same stencil on both), but I wanted to add that pop of black to my photos of this piece.

french-laundry-2

I think perhaps this is how this dresser was meant to end up all along, don’t you agree?

a french desk.

french-desk-title

Remember my ‘find of the day’ from the MacGrove sales?

mac grove find

I love the delicate proportions of this pretty little desk.  Or at least I am calling it a desk.  It could be a console table, or a dressing table.

I had originally envisioned a refinished wood top with a chippy white base.  But after I’d stripped two layers of paint off the top, I realized that I didn’t like the ‘wood top look’ with the more French looking details on this piece.  So after all of that work, I sanded it down and painted the whole thing grey.  This is approximately a 50/50 mix of Miss Mustard Seed milk paint in Trophy and Schloss.

french-desk-close-up

And I ended up with no chipping at all.  Once again the ability to predict chippy-ness eludes me.  I knew I wouldn’t get any chipping on the freshly stripped top, but I thought for sure that painting over existing paint would result in some chipping.  Nope.

You can see that I added a bit of Little Billy Goat Gold Leaf goat stick to the details

french-desk-close-up-2

and also to the drawer pulls.  Aren’t these pretty?

gold-drawer-pulls

I’ve played on the classic Grecian urn motif on the hardware, the drawer front and the cross piece at the bottom by hanging my favorite gold framed mirror above it for my photos.

frecnh-desk

These two pieces pair up so nicely that I’ve decided to offer the mirror along with the desk.

mirror-detail

I never thought I would part with this mirror, but it seems like they belong together.

french-desk-angle

I almost hate to put a chair in front of this because I feel like it would cover up all of the pretty details.  Maybe it would be better as a console table in a foyer after all.

What do you think?

a Parisian table.

a parisian table

Remember way back to last year when my friend Terri gave me a bunch of stuff from her deceased uncle’s house?  They were cast off items that no one in the family wanted.

This small table was among the pile and it needed a little bit of repair.  A couple of the corner supports were missing and one of the supports at the bottom was broken where it attaches to the table leg.  Luckily I have my secret weapon, Ken.

He made short work of replacing those corners and repairing that cross piece.

Paris table before

Ken made these repairs in short order, but then I let the table sit for ages.

I finally pulled it out last spring and painted it with two coats of Miss Mustard Seed milk paint in Flow Blue.  It started to chip like mad, and I felt like the red stain was bleeding through just a bit on the top.  So I shoved the table aside and worked on other projects because I didn’t feel like dealing with it.  I’m sure I’m not the only one who does this, right?

Flash forward another several months to a week or so ago.  I pulled this table out of the back of the workshop and realized maybe it wasn’t all that bad.  I sanded it vigorously to remove any chipping paint.

This photo shows a good example of what milk paint will look like on unfinished wood (the repaired corner piece) v. over previously finished wood.

paris table close up

Then I decided to add a stencil to the top.

paris table top

I feel like the small amount of stain bleed-thru was totally negated by the heavy chipping and the addition of the stencil.

I finished the table with some Miss Mustard Seed furniture wax.

You may have caught a glimpse of the finished table last week when I posted the cane back chair.

paris table with chair

It’s a sweet little side table that can be easily moved around to wherever it is needed.

It’s being added to the pile for my upcoming occasional sale!

For those of you who are local, the date has been officially chosen and is Saturday, October 8.  It’s only a month away, yikes!  Lucky I’m taking a stay-cation from the day job this week to get some stuff done.