in a barbie world.

Is that Barbie movie being marketed like crazy or what?  You’d have to be living in a cave not to have noticed.  I haven’t seen the movie, mainly because I don’t go to the theatre anymore.  I’ll wait until I can stream it (and drink wine while still wearing painting clothes when watching).

I was definitely a Barbie girl growing up though.  Malibu Barbie was a favorite, I loved her tan and her long, straight hair that was so much prettier than my frizzy curls.

But Live Action Barbie definitely had my favorite outfit.

How many of you remember that one?  That outfit was awesome.

I have actually hung onto one of my Barbie’s outfits.

My grandmother knitted that for me.  It’s far more classy than the psychedelic number on Live Action Barbie.  That’s probably why it’s still in such good shape, Malibu Barbie rarely actually wore it.

But today’s post isn’t actually about Barbie, it’s a furniture makeover post.

Hallelujah, I have completed another piece of furniture!  Four more to go before the snow flies.

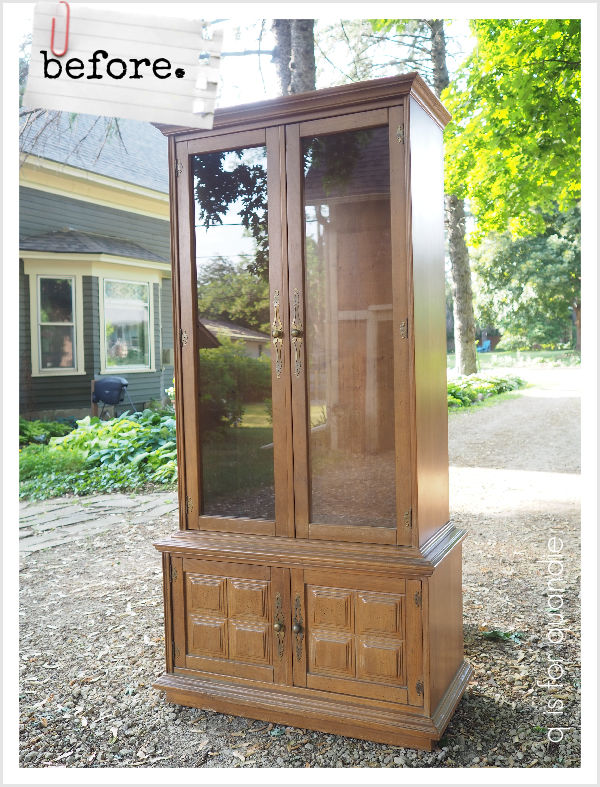
I picked up that hutch at a garage sale earlier this summer.  I thought it looked a bit outdated in that wood tone, with those aged brass knobs.  I knew it would be fun to give it a new lease on life.

Well, I’m not sure ‘fun’ is the right word.  These sorts of pieces can be so much work.  Especially if you’re opting to paint both the inside and the outside.  I started with removing those knobs and the decorative metal back plates behind them.  I then used some of Dixie Belle’s Mud to fill some tiny nail holes left behind by the back plates.  Then I cleaned the piece, followed by a light sanding overall, followed by a coat of Dixie Belle’s B.O.S.S. (again, an ounce of prevention for bleed-thru).

Then I got to work painting.  I painted the outside and the upper inside with Dixie Belle’s Drop Cloth.  Once dry I sanded lightly to distress.

I know that not everyone is a fan of distressing these days, but I still love the way it brings out the detail in something like this.  I also like that you’re not quite so worried about wear showing over time, because it’s meant to look a little worn.

And here’s where this hutch joins the Barbie world, I painted the inside of the lower portion in Dixie Belle’s Prickly Pear.

Wowza, now that is a pop of Barbie pink!

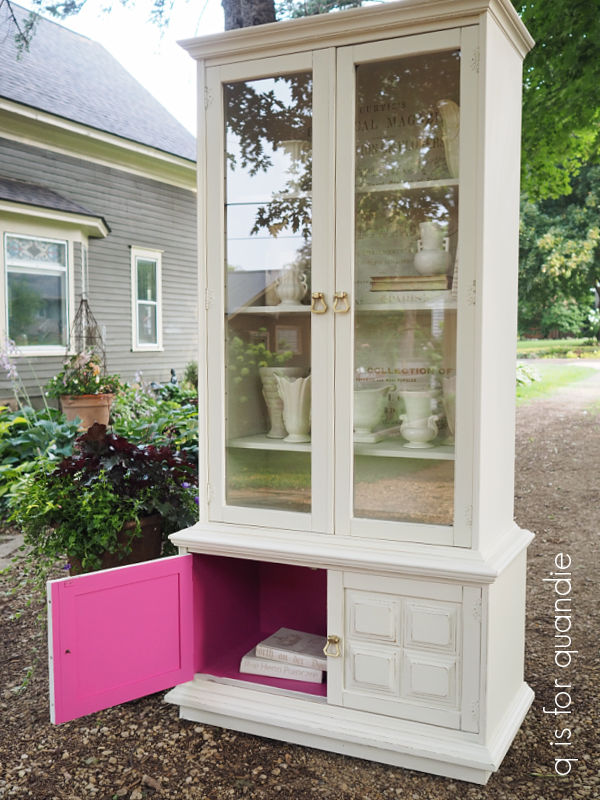
And why not have a vibrant pop of color inside?  No one will know it’s there unless they open the cabinet.

Sidebar note; our new fence is earning its keep in that photo (right side of above photo), it’s blocking the neighbor’s pickup truck from view.  It was worth every bit of blood, sweat and tears that went into putting it up.

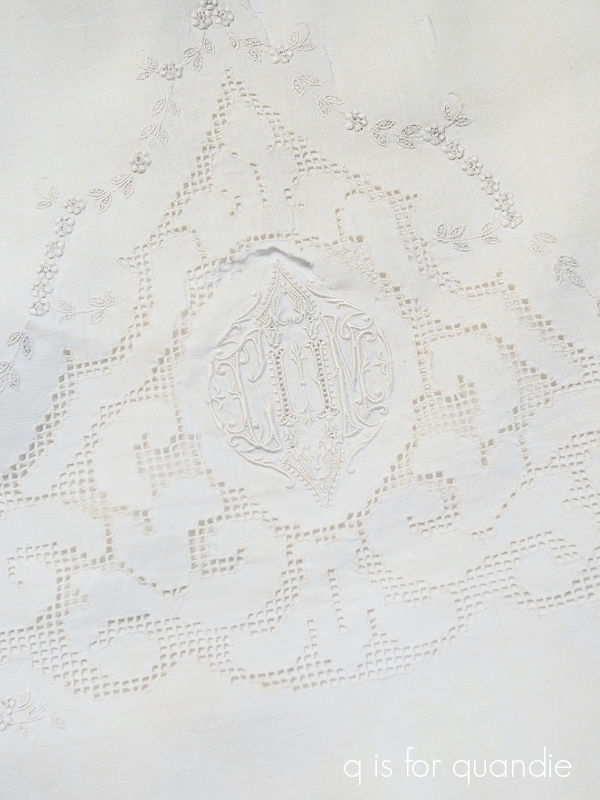
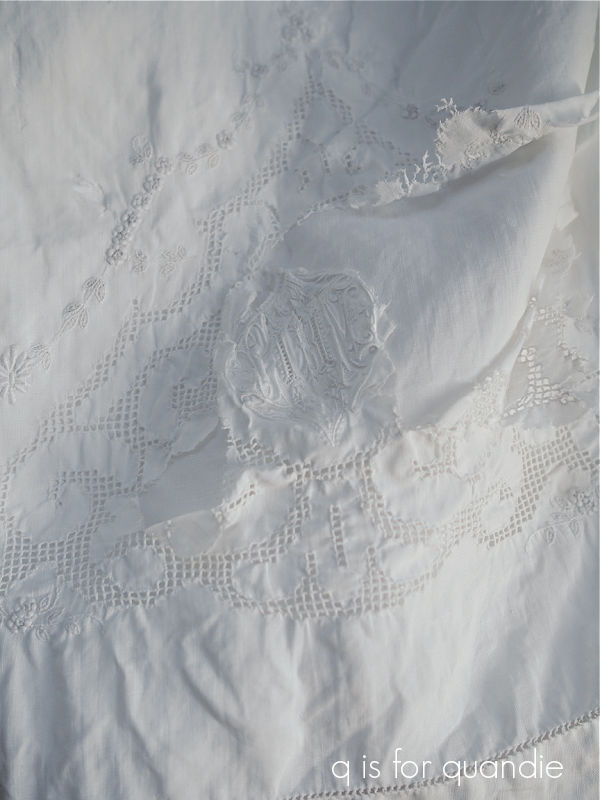
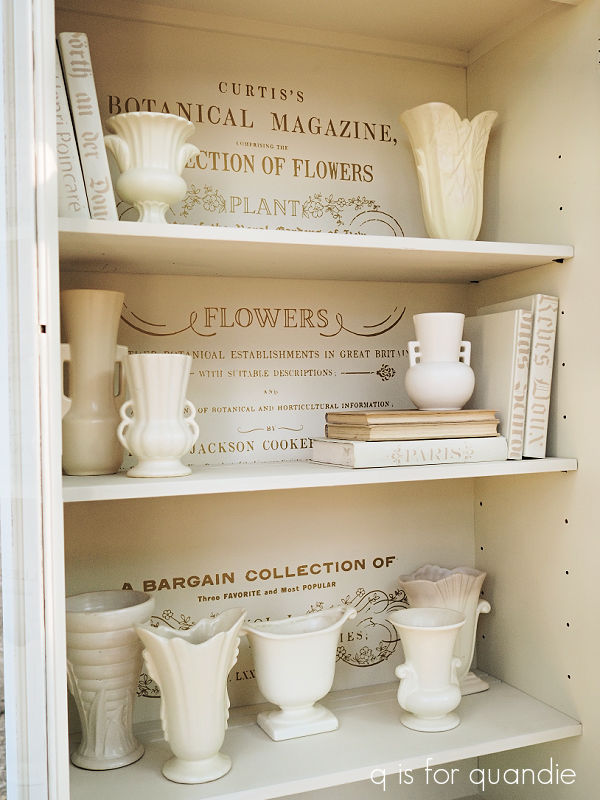
I added re.design with prima’s Flower Collector transfer in gold inside the top portion of the cabinet.

I like that it’s very subtle in the gold on white (it also comes in black), and I know most of it will get covered up if the cabinet is full of stuff, but as I’ve learned from my own glass fronted cabinet, you can artfully arrange things to allow that background to peek through.  Especially if you’re a fan of the ‘less is more’ approach.

As you may have noticed in that photo, the shelves in this piece are adjustable.

Once the transfer was in place, I added a topcoat of Dixie Belle’s flat clear coat over all of the Drop Cloth and over the transfer.  The Prickly Pear interior didn’t need a topcoat since it’s the Dixie Belle Silk paint with a built in primer and top coat.

Finally, I added replacement pulls from Hobby Lobby.

I wanted something a little more updated, and a lot more gold.  Although these pulls came in ‘gold’, they weren’t quite gold enough for me.  So I added some of Dixie Belle’s Gold Gilding Wax to them to brighten them up even a bit more.

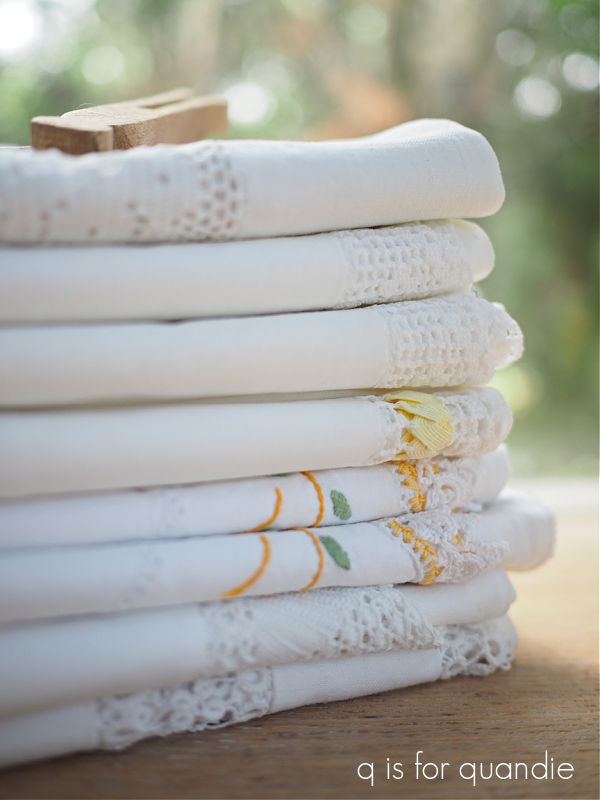
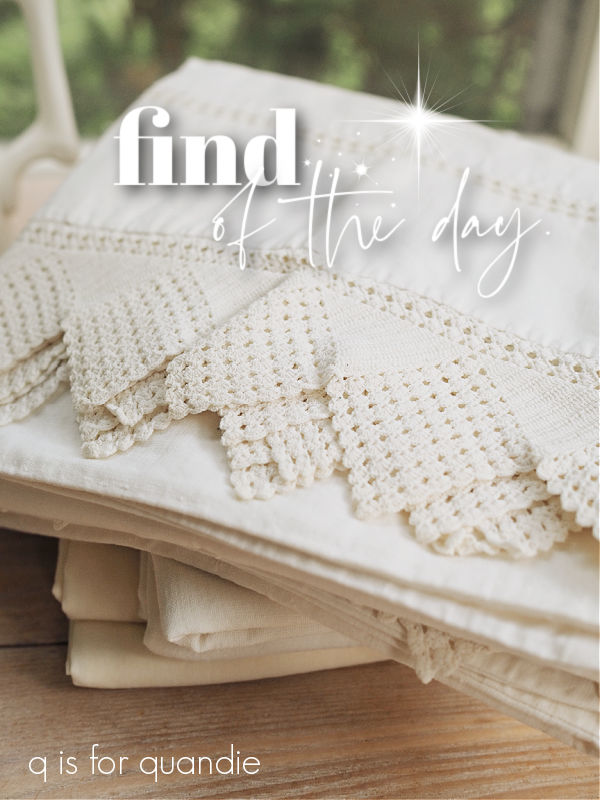
Although you could use this hutch in the traditional way, filled with china or knick knacks, I think there are so many other ways to put one of these to use.  You could use it as a linen closet, filling it with stacks of pretty towels.  You could use it as a small library, filled with books.  You could use it in the potting shed, filled with clay pots and other gardening items.  You could use it in your craft room, filled with all of your crafting supplies.  Or in the end, you could fill it up with one of your non-collections, like my matte white pottery!  The possibilities are endless.

What do you think of the transformation?

And I have to ask, do any of you have ‘I’m a Barbie girl, in a Barbie world’ stuck in your head now?  Or it is just me?

This hutch is for sale locally, check out my ‘available for local sale‘ page for more details.

Thank you to Dixie Belle Paint Co for providing their products used in this makeover.

more sweet boxes.

I’m back with the remaining two metal boxes that I promised from last week.

As a reminder, here is the stack of boxes that my friend, opK, gave me.

I shared the end result of the largest box on the bottom of the stack last Friday (and it is sold, fyi).

Now let’s look at the middle sized box.  I have no idea what this box was originally intended for.  It has built in dividers inside that would have worked for holding a screwdriver and screws, or maybe some other sort of hardware and/or tools.  Who knows?

I have to say that initially I wasn’t sure I even wanted to bother with it because of those dividers.  They sort of limit what you can keep in the box.  But then again, they also provide a way to keep some bits and bobs organized, don’t they?

Rather than trying to paint a coat of Dixie Belle’s B.O.S.S. inside those little cubbies, I opted to spray paint it.  I find that spray paint also does a pretty good job of blocking stains.  I didn’t have a color of spray paint that I liked though, so after the blue spray paint was dry, I brushed over it with a custom mix of Dixie Belle’s Silk paint.

I mixed up this color a while back for another project.  I was trying to match Annie Sloan’s Scandinavian Pink, and I think I did a fairly decent job.

The outside of the box did get an initial coat of B.O.S.S. followed by two coats of Dixie Belle’s Dried Sage.  Then I added a few random scraps of transfers from my stash.

The florals are from the I.O.D. Floral Anthology transfer, and the wording is from their Label Ephemera transfer.

I especially love the little blue and white daisies that I put on the front of the box.

I also really like the way that this one distressed.

I think it has a very authentically aged feel.

As for the smaller box, I did give that a coat of B.O.S.S. inside and out.  Then I painted the inside in one of the colors from Dixie Belle’s new Cottage Core Collection called Cottage Door.

Isn’t that a gorgeous warm coral pink?  I love it.

After adding the bee transfer from re.design with prima’s French Labels set …

I protected the interior with a coat of Dixie Belle’s flat clear coat.

Next I painted the outside of the box in my favorite Drop Cloth, and then added some florals that are also from I.O.D.’s Floral Anthology transfer.

I love the way the Cottage Door color works with the those Floral Anthology blooms.

As for the top of the box, I went with a scrap of wording from an old re.design with prima transfer called Paris Valley.

The little “No. 1483” on the lid is from a Tim Holtz transfer.

This box is really a little bit wonky.  You can shut the lid, and you can maneuver the little handles up over the top, but it does take a bit of finagling.

That being said, I think I’d be tempted to just leave it ajar.

Cuz it’s awfully cute.

So … boxes before and after …

Which one is your favorite?

the August slump.

Good morning from the garden!

Before I get into this morning’s post, I wanted to share some disappointing garden news.

Do any of you recall the beautiful row of trees on my neighbor’s property line that I shared last fall?

I’m talking about the brilliantly colored orange/red trees (I believe they are some kind of maple) in the background of that photo (not the yellow foreground tree).  There was a line of five or six of them all the way down the property line.  And they were simply stunning in the fall.  I mentioned how much I loved seeing their fall color in a post last year.

Well, yesterday we spent the day listening to chain saws and the occasional crash as each tree came down.  And now all but one of the trees are gone.  Such a bummer.

The property they were planted on is a double-wide lot, and it was sold recently.  Apparently the empty lot itself was split off and now someone is going to build on it.

Unfortunately, this is how things can go when you don’t own 20 acres or so immediately surrounding your property.  Neighboring home owners can remove trees at will, and lots can be split up and built on if there’s room.

The loss of those trees coincides with what I like to call the August slump.  I always start to lose steam in the garden about now.  By mid-August, lots of things are starting to look a bit tired out.  The peonies are getting powdery mildew, the lawn is dried out, the trailing verbena is getting leggy and those darn Japanese beetles are going full throttle.

I’ve been attempting to grow hollyhocks successfully for years, and this was the first year that I got one to actually bloom.

It looked great last month, but little did I know that Japanese beetles LOVE hollyhocks!

I have had to go out and knock dozens of beetles off the plant into a bucket of soapy water in the last couple of weeks.  I finally gave up the other day and just pulled out the entire plant.  I’ve decided the hollyhocks just aren’t going to work for me.

That has pretty much been my strategy for dealing with Japanese beetles, pull out the plants they love.  So far I’ve pulled Virginia creeper, roses, and a wild grapevine out of my garden, and now a hollyhock.  I’m just hoping they won’t go for my crab apple next.

I’m sure some of you have also experienced a garden slump now and then, and one way to motivate yourself to get back out there is to get inspired by others.  So as requested by a couple of you, here’s a list of some of my favorite garden vloggers on YouTube.

First up, of course, is Garden Answer.  Seeing as they have 1.78 million (yes, million!) subscribers, I’m guessing that many of you have already heard of this one.

Without a doubt, this is the vlog I watch the most.  Probably because they post a new video every day!  When you have 1.78 million viewers, and your vlog is the full time job of husband and wife, and several full or part-time employees, you can pump out enough content to post every day.

I really enjoy Laura’s vlogging style, and her gardening style.  I learn a lot about new varieties of plants from watching this vlog.  I also get ideas for plant combinations that might work for me.  I do admit that watching the massive, and very pricey, projects they undertake may not be everyone’s cup of tea.  They recently added a gorgeous pond to their property that would cost at least $80,000 or more (although it sounds like most of the parts and labor were gifted to them).  And I can’t even imagine how much their Hartley greenhouse cost.   Even some of their ‘smaller’ projects, like adding a row of gorgeous concrete urns that probably cost around $1,000 each are out of reach for most of us.

So if you can’t look past that sort of thing, this might not be the right garden vlog for you.

Instead I’d like to recommend the next garden vlog on my list, The Impatient Gardener.

Erin’s garden is much more realistic for most of us, as is her lifestyle.  She has a day job, she does all of her gardening herself on evenings and weekends with only occasional help from her husband, or as she likes to call him “Mr. Much More Patient”, and while she does get some promotional items free, most of her garden projects would be within the realm of possibility for the average person.  I also like that she is in Wisconsin in a zone 5b, not quite my own zone 4b, but not too far off.

That brings me to my next vlog, Wyse Guide.

Kaleb has taken over his grandparent’s farmhouse where he gardens right next to cornfields in Iowa.  In addition to gardening, he also includes baking, cooking and other lifestyle content on his vlog.  As you may know, I don’t really cook, but I’m tempted to try some of his simple recipes.

I also like that he gardens on what is a much more realistic level for most of us.  His garden style leans a little bit more modern (think succulents, agave, and native plantings) than mine, but he also focuses more on foliage than flowers, which I can relate to.

I would consider those my top three garden vlogs, but there are a couple of others that I watch on occasion starting with Gardening with Creekside.

Jenny and her husband own a garden center in North Carolina.  Probably the main reason I don’t watch her as much as some of the others is because she grows quite a few things that won’t grow in my zone.  That being said, she gives lots of practical advice.  I learned what a hori hori garden knife is from her, and now it’s one of my most used garden tools.

I also occasionally check in with The Southerner’s Northern Garden, mainly because he loves hydrangeas as much as I do.

I have to chuckle a little bit over this one because he calls his a ‘northern garden’, but he gardens in southwest Ohio in zone 6 … so not quite as northern as my own garden.

He recently moved to a new house and left behind his established garden, so he is starting over from scratch.  I think it will be interesting to watch his progress and see what he does with a blank slate.

So, if you feel like you’re in a bit of an August garden slump, check out a few of these vloggers and see if they can’t motivate you to get back out there.

And if you have some favorite gardening channels on YouTube, please share them in a comment.  I could use some more inspiration to help get me out of the August slump myself!

everything’s coming up roses.

Recently my friend, opK (that’s oar painting Karen) offered me a stack of metal boxes.

Before I got started making them pretty, I gave them all a good cleaning with some Dawn dish soap and the garden hose.  Then I let them dry in the sun, and followed that up with a coat of Dixie Belle’s B.O.S.S. inside and out.  I like to use the B.O.S.S. to reduce the chances that any rusty spots will seep through my paint job.

I decided to paint them all in different colors, which required the use of a lot of paint stir sticks and brushes.  At one point I had six different paint brushes going, lucky I have a lot of brushes.

I started with the largest box.  I painted the inside in Dixie Belle’s Silk Paint in Fiery Sky.

Then I painted the outside in DB’s Sawmill Gravy.  I’d used this combo on a toolbox once before and really liked it, so I thought I’d do it again.

I also already knew I wanted to use I.O.D.’s Redouté II transfer on the outside, so the Fiery Sky was going to be the perfect compliment.

In case you aren’t familiar, Pierre-Joseph Redouté was very famous for botanical paintings, especially those of roses.  I bet that back in the 90’s quite a few of us shabby chic lovers had a Redouté print or two hanging on the wall, I know I did.

I picked up this transfer recently at a brick and mortar shop that’s not terribly far from me called Liza Jane Designs (in Afton, MN).  I thought I’d share her info for any of my local readers who use I.O.D. products because she had a pretty much complete inventory of everything (which I think can be rare in a brick and mortar); transfers, paint inlays, molds, stamps and ink .

This particular transfer is an older release from 2021, but I’d never used it before.  It comes with 8 full pages of roses, so I’m sure I’ll get a number of projects out of it.

I added a small Tim Holtz number transfer to the latch on the front of the toolbox.

I love adding small details like that, and like the bee under the handle (from re.design with prima’s French Labels transfer, which has plenty of bees, FYI).

As per usual, I wrapped the roses around the sides of the toolbox too.

And speaking of wrapping, I’m just wrapping up the finishing touches on the other two boxes and I’ll be sharing those next week.  So be sure to stay tuned for that.

In the meantime, how do you like this rosy makeover?

This toolbox is available for sale locally (details can be found here).

Thank you Dixie Belle Paint Co. for providing the B.O.S.S., paint and flat clear coat used on this project.

far from faultless.

I suspect that not too many of us actually enjoy doing laundry, am I right?

Sorting, shoving things into the machines, realizing after washing that you left a kleenex in a pocket, drying, folding and then putting away.  Not exactly fun times.

But I have to admit that I actually do enjoy the process of laundering vintage linens.

They are so lovely to handle, and there’s something so satisfying about a crisp stack of freshly laundered and pressed white linens.

You may remember that I purchased a few vintage pillowcases at the Fridley garage sales earlier this summer.

After I took them out of the ziploc bags that they came in and inspected them a bit more closely, I found that they needed to be whitened up, and a couple of them also needed a bit of mending.  So I thought I’d share that process with you.

The first step for me is to soak them in some OxiClean, or in this case, a generic oxi-based cleaner from Target.

I usually soak them for at least a few hours, or even overnight.

Then, after removing them from their oxi bath, I wash them on the gentle setting in my washing machine.  Except for the more fragile ones, those just get rinsed by hand in the sink.

Next, I hang them on the line in the sun for a full day to get a little natural, non-chemical bleaching.

I have an ancient clothesline that is attached to the carriage house on one end with some serious looking hooks.

  It has probably been there forever, it was there when we moved in 34 years ago.  I wonder how many generations of laundry have been hung out to dry on that line?

Once they’ve had their day in the sun, I like to press old linens using starch.

I have a sneaking suspicion that very few people iron with starch anymore.  The last time I ran out I had a difficult time even finding it in the shops.  Comically enough, I came across two full cans of Faultless premium starch at an estate sale a while back for $1 each, so I snatched them up.  I’m fairly certain they’d never even been used.

You get a fabulously crisp result using starch.  In fact, I suspect that these vintage linens were originally meant to be starched.

I wish I could say that I press my linens outside in the garden on a pretty wooden ironing board while bluebirds sing in the trees nearby …

But that’s just for photo shoots.

I actually iron in my creepy, spidery, damp, very much non-blog worthy basement.  Maybe I need to rethink that?  Now I’m regretting all of the fabulous vintage wooden ironing boards that I’ve sold over the years.

The next time I see one I should snag it and then keep it handy in the carriage house, or maybe even the potting shed, for outdoor ironing.

Anyway, back to the starching.  This is usually the step where I find out that my vintage linens are far from faultless.  As I’m laying them out on the ironing board and pressing out each wrinkle, I find all of the flaws that I didn’t notice before.

I’ve mentioned a few times that I’m not much of a seamstress, despite my mom’s best efforts at teaching me to sew.  But I can manage a little simple mending with a needle and thread.

Does the fact that the needle packaging says “West Germany” give you an idea of how old those needles are?  I’m sure I purchased those at a garage/estate sale too.

This repair didn’t take much effort, and was easily accomplished while watching my favorite gardeners on YouTube.

My repair job isn’t quite faultless either, but it will do the job.

The amount of work that went into some of these pillowcases is quite amazing.

Sadly, some of them are just too far gone for my simple mending skills though.

Such is the case with the pillow case that I was using on the wicker chaise that used to be my front porch.

The work on this one is so beautiful, just check out the detailed embroidery on that monogram …

and that floral border.  And the cutwork is painstakingly detailed.

Living on the three-season porch for over a decade had really done a number on it though.  The fabric itself was deteriorating and basically shredding in some spots.

And unfortunately, even just a gentle soak weakened the fabric so much that when I hung it on the line it totally fell apart.

So sad.  I did get years of enjoyment out of it before this happened though, so I’ll console myself by remembering that.

If any of you locals are looking for some lovely vintage pillowcases, I took a few of these in to Reclaiming Beautiful in Stillwater last week.

I priced them low, ranging from $12/pair to $18/pair for the prettiest ones, so be sure to head down there soon!